

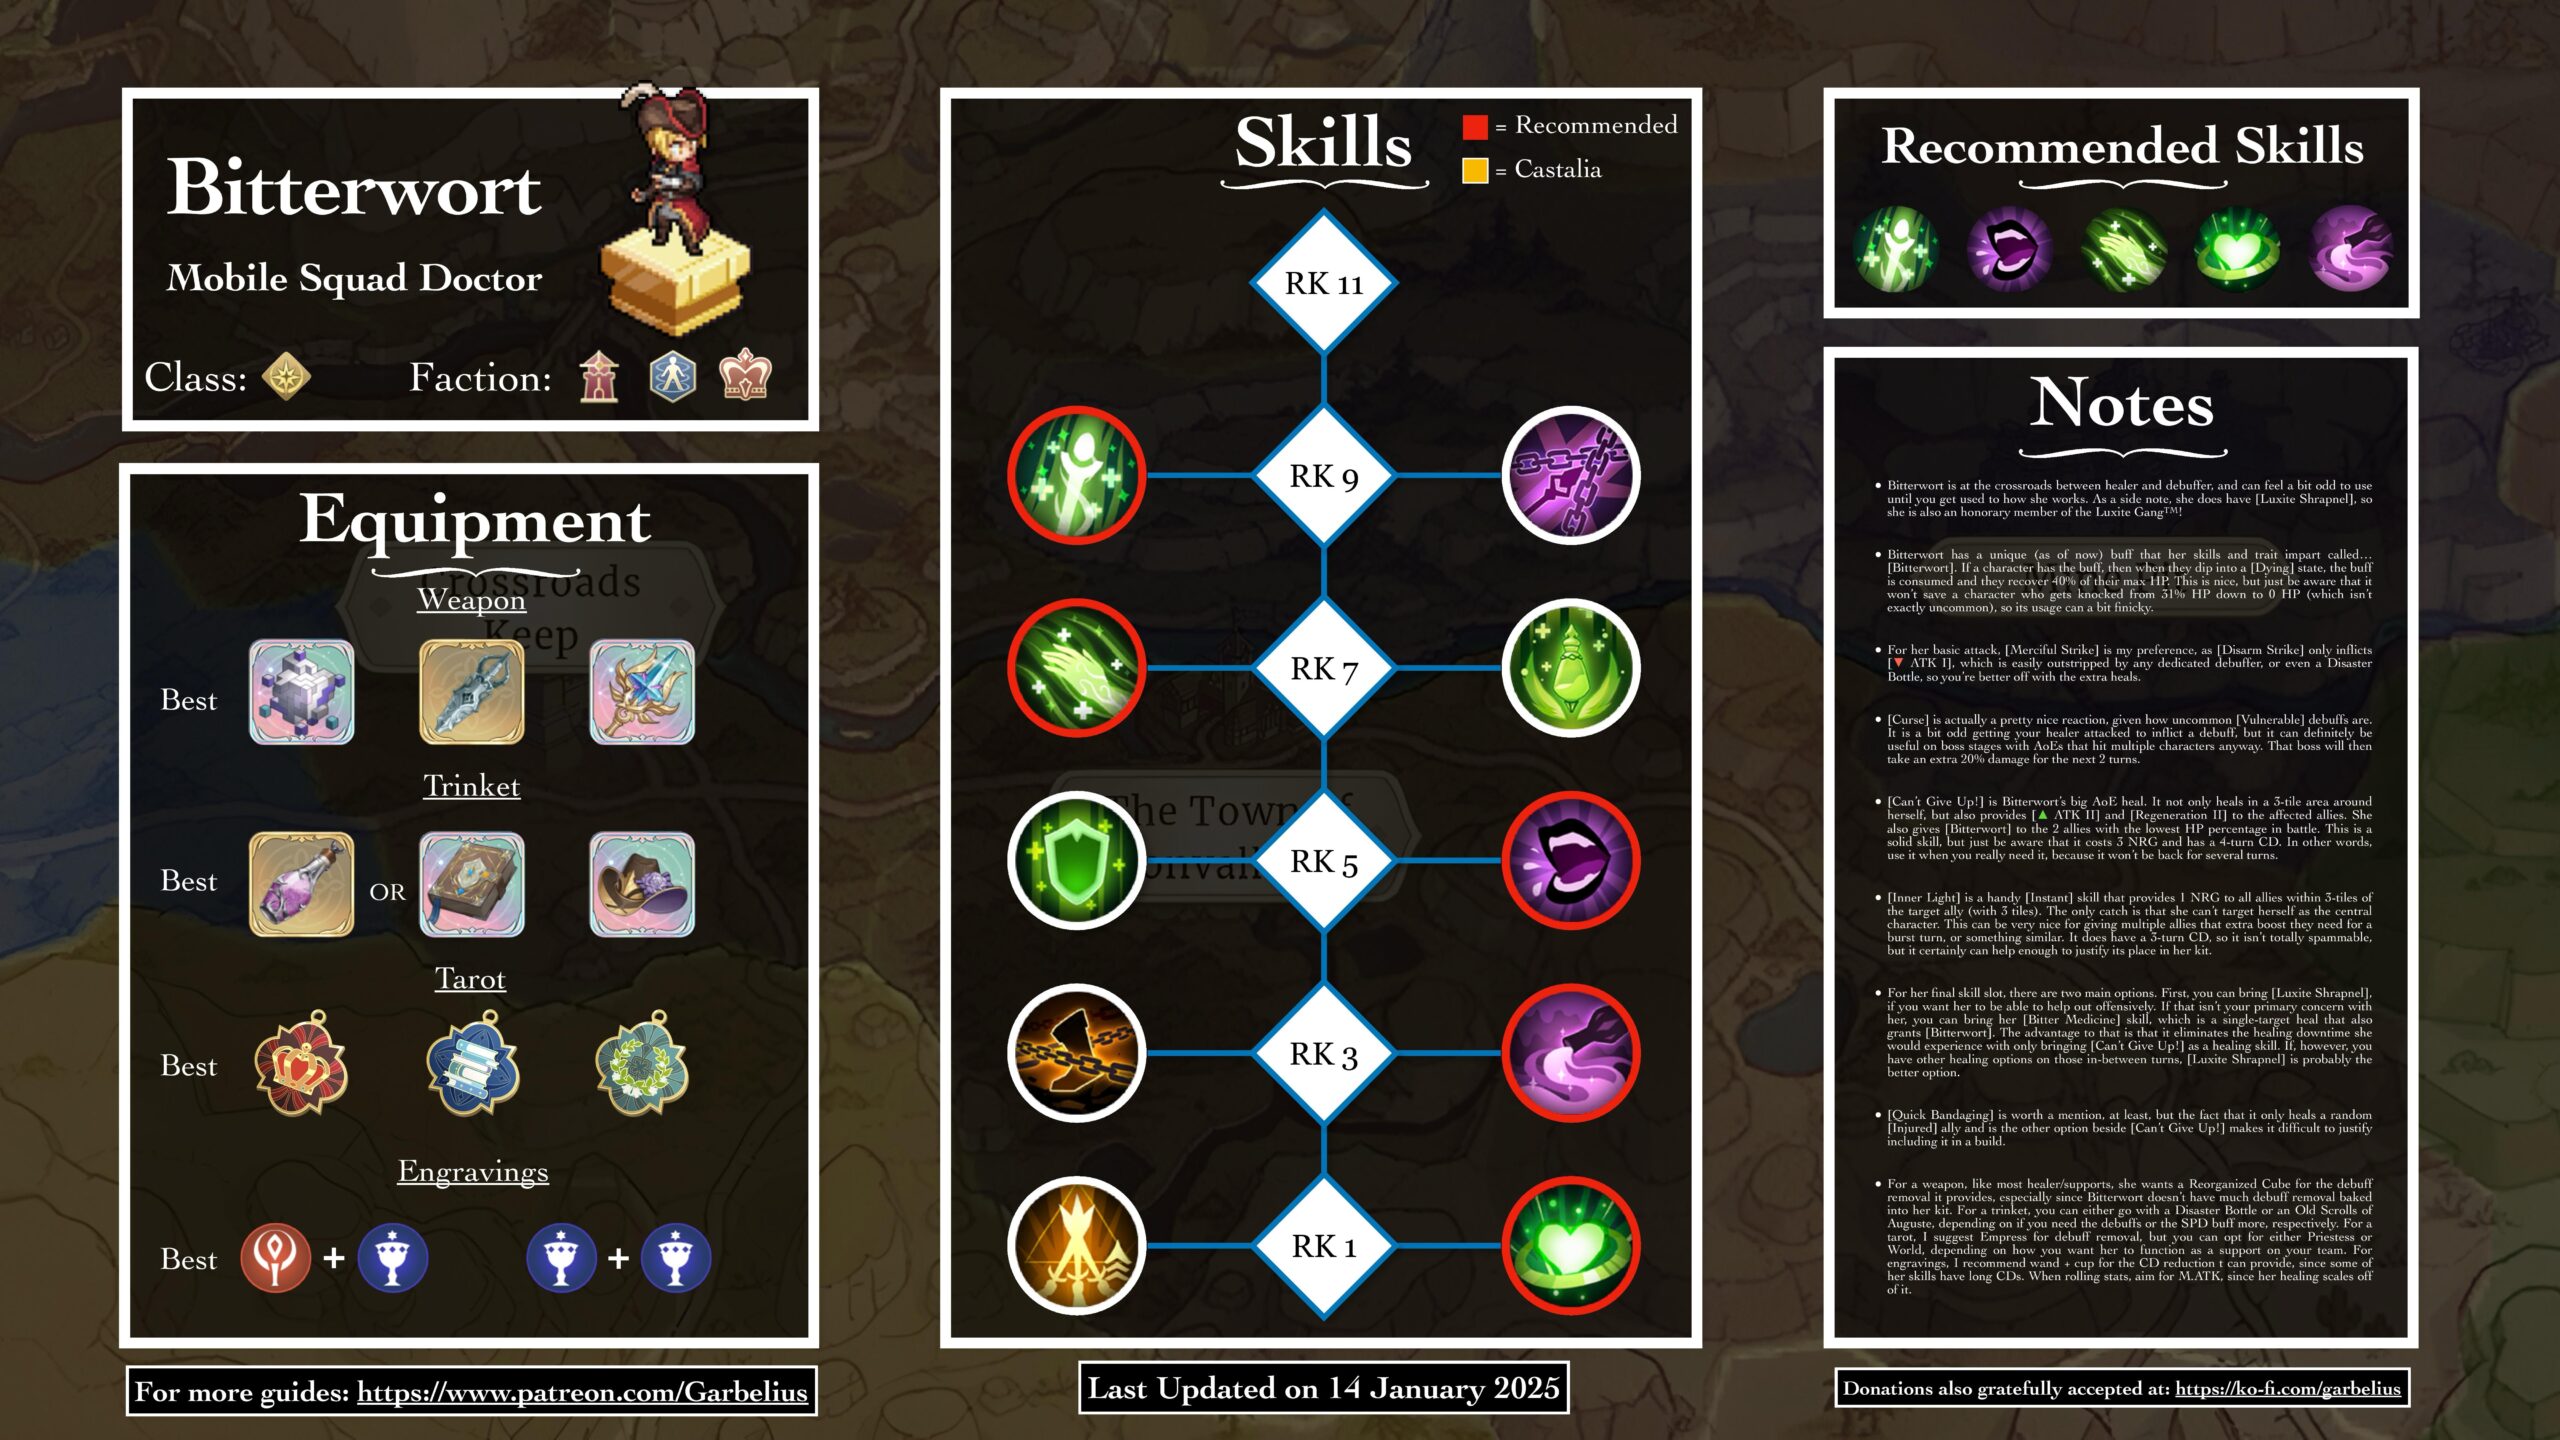
Notes
Bitterwort is at the crossroads between healer and debuffer, and can feel a bit odd to use until you get used to how she works. As a side note, she does have [Luxite Shrapnel], so she is also an honorary member of the Luxite Gang!
Bitterwort has a unique (as of now) buff that her skills and trait impart called... [Bitterwort]. If a character has this buff, then when they dip into a [Dying] state, this buff is consumed and they recover 40% of their max HP. This is nice, but just be aware that it won't save a character who gets knocked from 51% HP down to 0 HP (which isn't exactly uncommon), so its usage can a bit finicky.
For her basic attack, [Merciful Strike] is my preference, as [Disarm Strike] only inflicts [▼ ATK I], which is easily outstripped by any dedicated debuffer, or even a Disaster Bottle, so you're better off with the extra heals.
[Curse] is actually a pretty nice reaction, given how uncommon [Vulnerable] debuffs are. It is a bit odd getting your healer attacked to inflict a debuff, but it can definitely be useful on boss stages with AoEs that hit multiple characters anyway. That boss will then take an extra 20% damage for the next 2 turns.
[Can't Give Up!] is Bitterwort's big AoE heal. It not only heals in a 3-tile area around herself, but also provides [▲ ATK II] and [Regeneration II] to the affected allies. She also gives [Bitterwort] to the 2 allies with the lowest HP percentage in battle. This is a solid skill, but just be aware that it costs 5 NRG and has a 4-turn CD. In other words, use it when you really need it, because it won't be back for several turns.
[Inner Light] is a handy [Instant] skill that provides 1 NRG to all allies within 3-tiles of the target ally (with 3 tiles). The only catch is that she can't target herself as the central character. This can be very nice for giving multiple allies that extra boost they need for a huge turn, or something similar. It does have a 3-turn CD, so it isn't totally spammable, but it certainly can help enough to justify its place in her kit.
For her final skill slot, there are two main options. First, you can bring [Luxite Shrapnel] if you want her to be able to help out offensively. If that isn't your primary concern with her, you can bring her [Bitter Medicine] skill, which is a single-target heal that also grants [Bitterwort]. The advantage to that is that it eliminates the healing downtime she would experience with only bringing [Can't Give Up!] as a healing skill. If, however, you have other healing options on those in-between turns, [Luxite Shrapnel] is probably the better option.
[Quick Bandaging] is worth a mention, at least, but the fact that it only heals a random [Injured] ally and is the other option beside [Can't Give Up!] makes it difficult to justify including it in a build.
For a weapon, like most healer/supports, she wants a Reorganized Cube for the debuff removal it provides, especially since Bitterwort doesn't have much debuff removal baked into her kit. For a trinket, you can either go with a Disaster Bottle or an Old Scrolls of Auguste, depending on if you need the debuffs or the SPD buff more, respectively. For a tarot, I suggest Empress for debuff removal, but you can opt for either Priestess or World, depending on how you want her to function as a support on your team. For engravings, I recommend wand + cup for the CD reduction it can provide, since some of her skills have long CDs. When rolling stats, aim for M.Atk, since her healing scales off of it.