

Edit (1/22/25): Hey guys! Just wanted to update my Homa guide after using the absolute daylights out of her in the Waverun Tournament rank challenge event. Mostly the same skill recommendations as before (I changed RK 7), but some of the equipment recommendations have changed, and I’ve provided more detailed descriptions of everything in the Notes section!
Notes
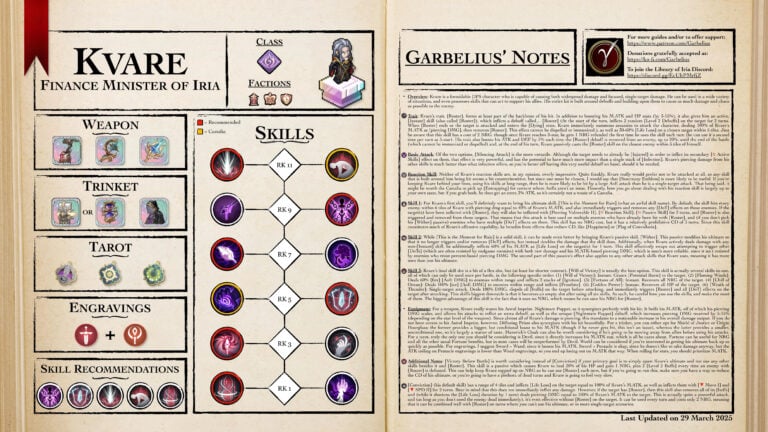
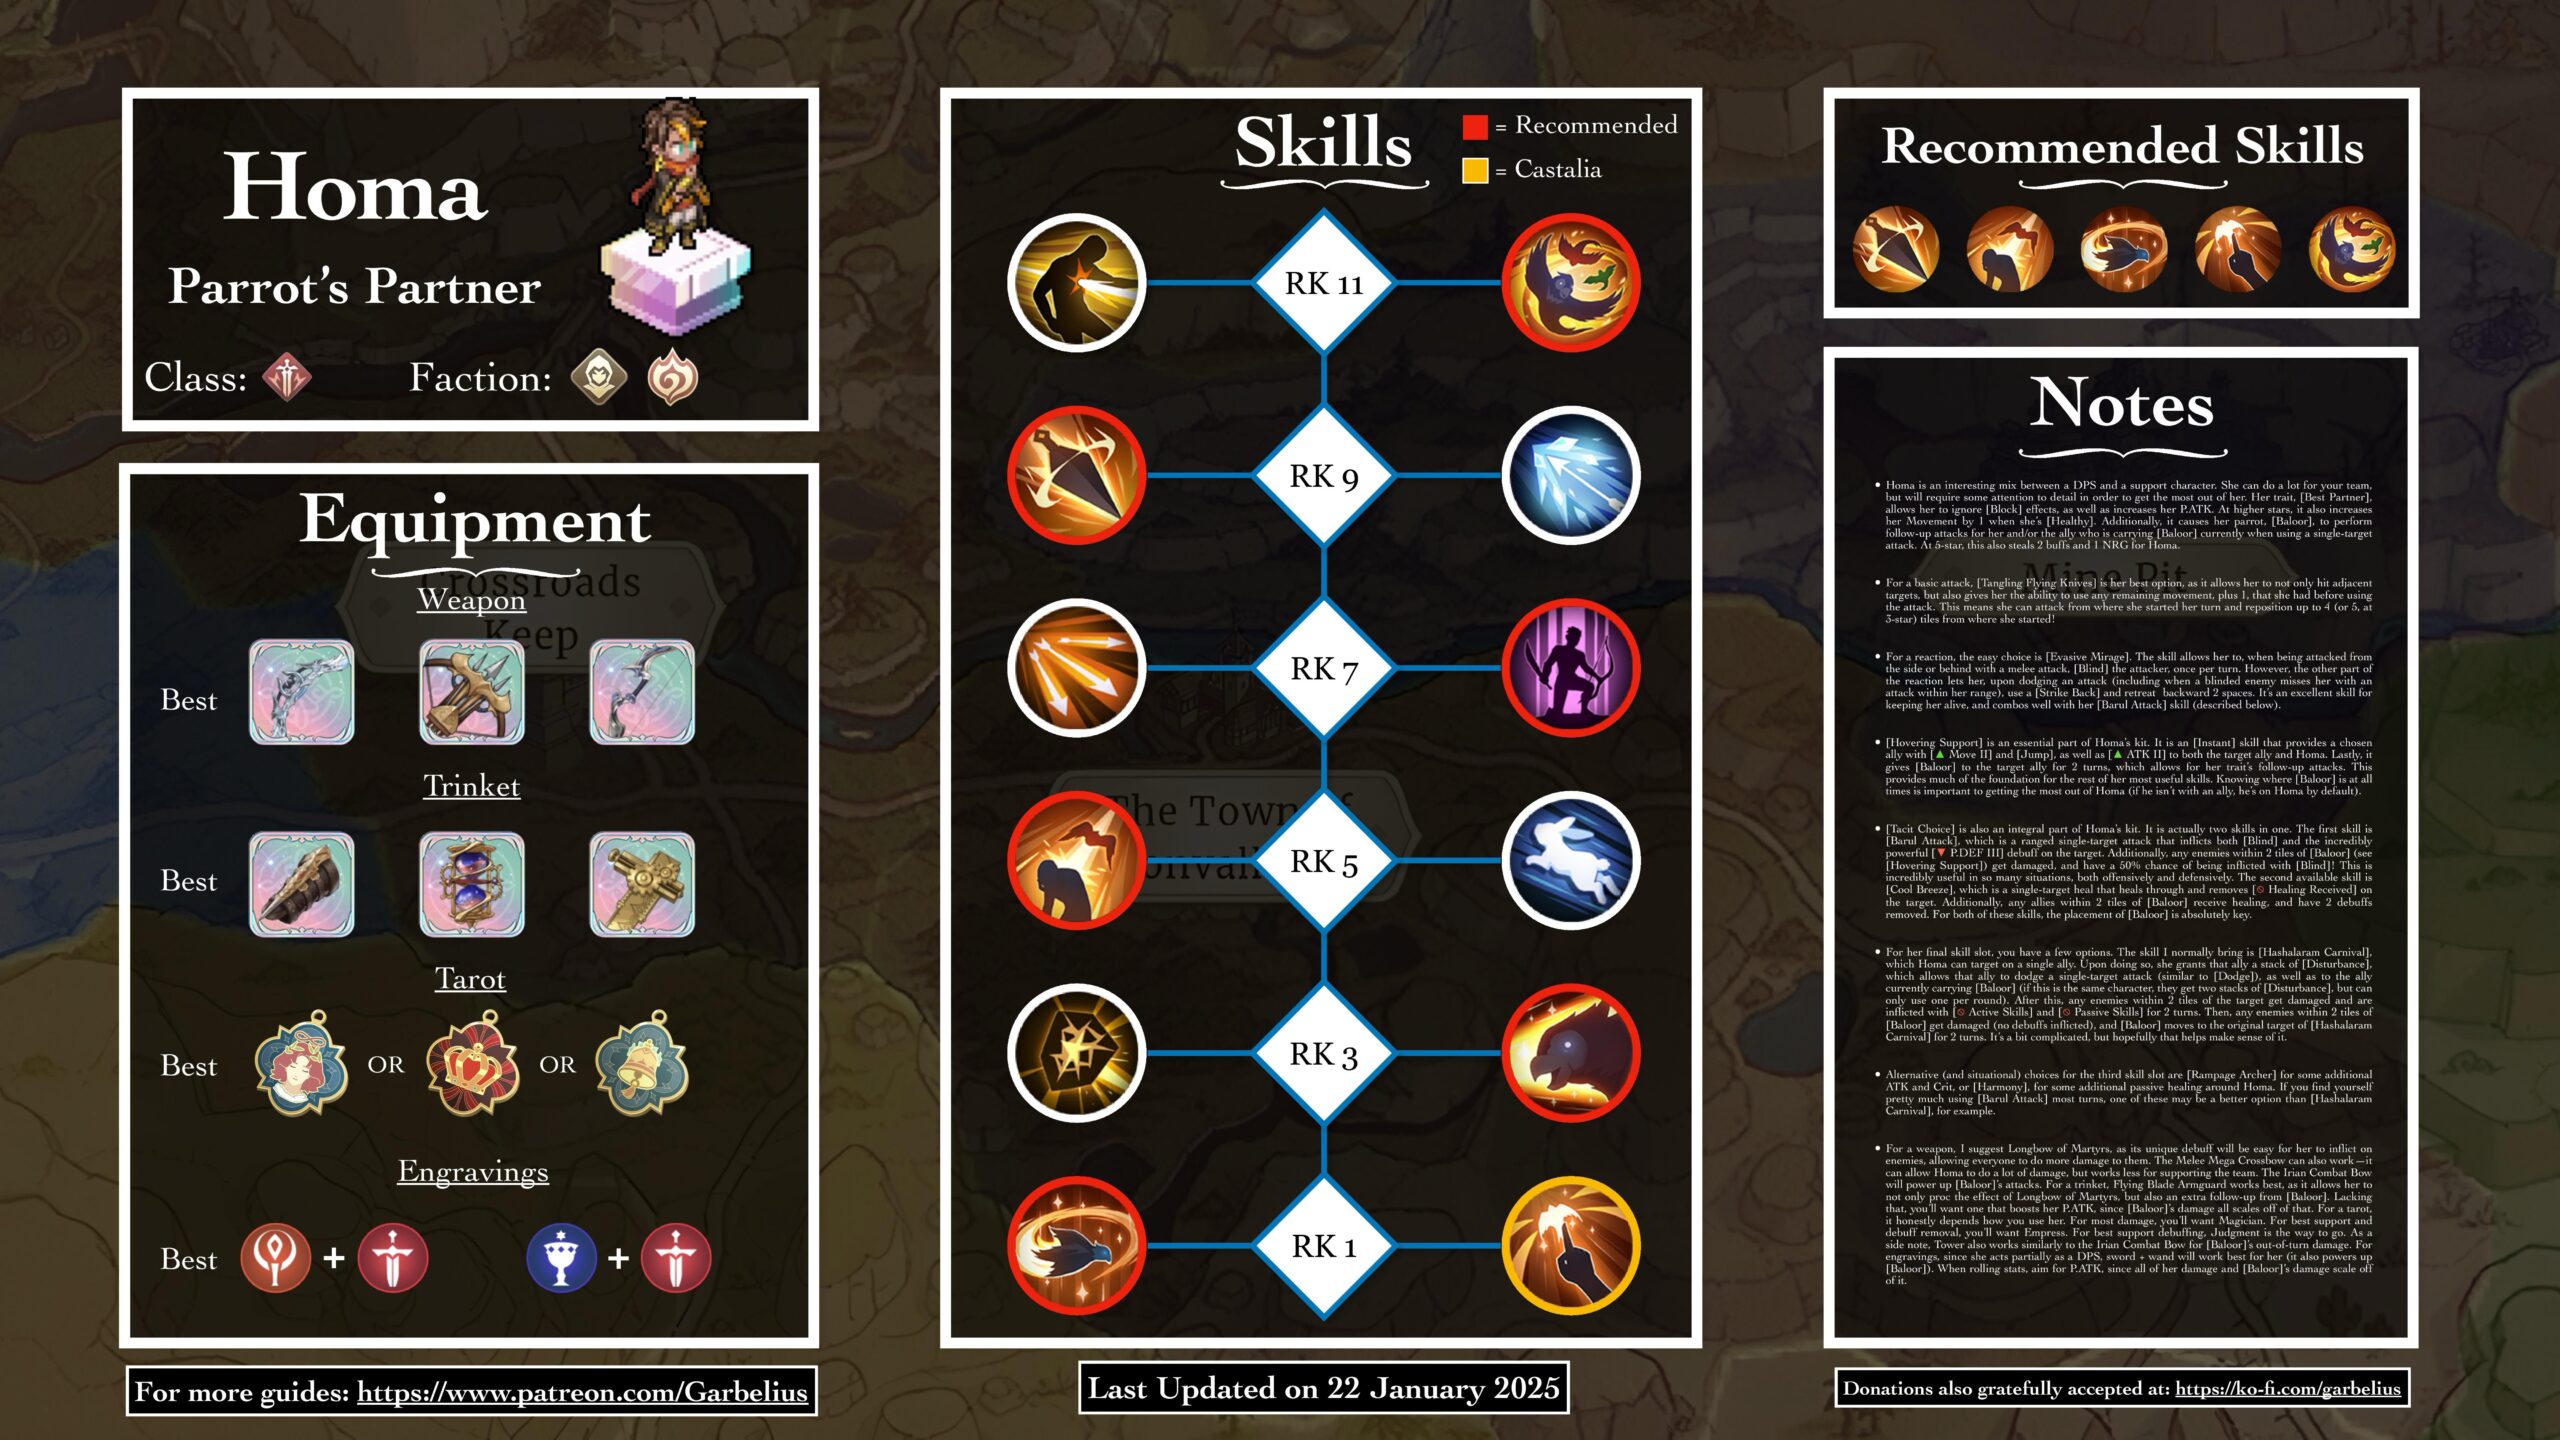
Homa is an interesting mix between a DPS and a support character. She can do a lot for your team, but will require some attention to detail in order to get the most out of her. Her trait, [Best Partner], allows her to ignore [Block] effects, as well as increases her P.ATK. At higher stars, it also increases her Movement by 1 when she’s [Healthy]. Additionally, it causes her parrot, [Baloor], to perform follow-up attacks for her and/or the ally who is carrying [Baloor] currently when using a single-target attack. At 5-star, this also steals 2 buffs and 1 NRG for Homa.
For a basic attack, [Tangling Flying Knives] is her best option, as it allows her to not only hit adjacent targets, but also gives her the ability to use any remaining movement, plus 1, that she had before using the attack. This means she can attack from where she started her turn and reposition up to 4 (or 5, at 3-star) tiles from where she started!
For a reaction, the easy choice is [Evasive Mirage]. The skill allows her to, when being attacked from the side or behind with a melee attack, [Blind] the attacker, once per turn. However, the other part of the reaction lets her, upon dodging an attack (including when a blinded enemy misses her with an attack within her range), use a [Strike Back] and retreat backward 2 spaces. It’s an excellent skill for keeping her alive, and combos well with her [Barul Attack] skill (described below).
[Hovering Support] is an essential part of Homa’s kit. It is an [Instant] skill that provides a chosen ally with [▲ Move II] and [Jump], as well as [▲ ATK II] to both the target ally and Homa. Lastly, it gives [Baloor] to the target ally for 2 turns, which allows for her trait’s follow-up attacks. This provides much of the foundation for the rest of her most useful skills. Knowing where [Baloor] is at all times is important to getting the most out of Homa (if he isn’t with an ally, he’s on Homa by default).
[Tacit Choice] is also an integral part of Homa’s kit. It is actually two skills in one. The first skill is [Barul Attack], which is a ranged single-target attack that inflicts both [Blind] and the incredibly powerful [▼ P.DEF III] debuff on the target. Additionally, any enemies within 2 tiles of [Baloor] (see [Hovering Support]) get damaged, and have a 50% chance of being inflicted with [Blind]! This is incredibly useful in so many situations, both offensively and defensively. The second available skill is [Cool Breeze], which is a single-target heal that heals through and removes [⦸ Healing Received] on the target. Additionally, any allies within 2 tiles of [Baloor] receive healing, and have 2 debuffs removed. For both of these skills, the placement of [Baloor] is absolutely key.
For her final skill slot, you have a few options. The skill I normally bring is [Hashalaram Carnival], which Homa can target on a single ally. Upon doing so, she grants that ally a stack of [Disturbance], which allows that ally to dodge a single-target attack (similar to [Dodge]), as well as to the ally currently carrying [Baloor] (if this is the same character, they get two stacks of [Disturbance], but can only use one per round). After this, any enemies within 2 tiles of the target get damaged and are inflicted with [⦸ Active Skills] and [⦸ Passive Skills] for 2 turns. Then, any enemies within 2 tiles of [Baloor] get damaged (no debuffs inflicted), and [Baloor] moves to the original target of [Hashalaram Carnival] for 2 turns. It’s a bit complicated, but hopefully that helps make sense of it.
Alternative (and situational) choices for the third skill slot are [Rampage Archer] for some additional ATK and Crit, or [Harmony], for some additional passive healing around Homa. If you find yourself pretty much using [Barul Attack] most turns, one of these may be a better option than [Hashalaram Carnival], for example.
For a weapon, I suggest Longbow of Martyrs, as its unique debuff will be easy for her to inflict on enemies, allowing everyone to do more damage to them. The Melee Mega Crossbow can also work—it can allow Homa to do a lot of damage, but works less for supporting the team. The Irian Combat Bow will power up [Baloor]’s attacks. For a trinket, Flying Blade Armguard works best, as it allows her to not only proc the effect of Longbow of Martyrs, but also an extra follow-up from [Baloor]. Lacking that, you’ll want one that boosts her P.ATK, since [Baloor]’s damage all scales off of that. For a tarot, it honestly depends how you use her. For most damage, you’ll want Magician. For best support and debuff removal, you’ll want Empress. For best support debuffing, Judgment is the way to go. As a side note, Tower also works similarly to the Irian Combat Bow for [Baloor]’s out-of-turn damage. For engravings, since she acts partially as a DPS, sword + wand will work best for her (it also powers up [Baloor]). When rolling stats, aim for P.ATK, since all of her damage and [Baloor]’s damage scale off of it.