Table of Contents
This guide is aimed at people who want to get into Zenless Zone Zero without prior knowledge of the game.
Whether this is your first Gacha or not, it will contain all the basics inside and outside the tutorial; more simplified and straightforward explanations with some examples.
The information from this guide is from my experience from 1.0 release.
If you see text in BOLD, it’s a key piece of information about that system that you must keep in mind and check the notes!
Disclaimer:
- This guide won’t contain any meta or gacha related information.
- This guide won’t contain story spoilers; basic lore is mentioned for context.
- This guide will only cover Hollow Zero and Shiyu Defense briefly.
Welcome to New Eridu!
What is Zenless Zone Zero?
It’s a gacha Action RPG and developed by Hoyoverse as their new IP. Compared to their previous IPs, it borrows elements from games like the Persona series, Visual novels and Fighting Games. It contains a fast-paced combat focused on assists, parrying and dodging as core mechanics and the grind is very similar to previous Hoyoverse games.
Combat
Core Mechanics
ZZZ’s combat is packed with 5 core mechanics: Energy, Decibels, Assists, Dodging and Daze. Anomalies will be covered separately.
- Energy: Used to perform the EX version of an agent’s skill. You obtain energy via Basic Attacks, Assists, Counters, Dodging, Bangboo skills or assists, or using other agents.
Note: Skills can be performed without Energy but their EX version makes most agents invulnerable and deal increased damage.
- Decibels: Allows any agent to use their Ultimate skill, a signature move with a cutscene, and it’s capped at 3000. You obtain decibels the same manner as Energy but Anomalies grant a bonus.
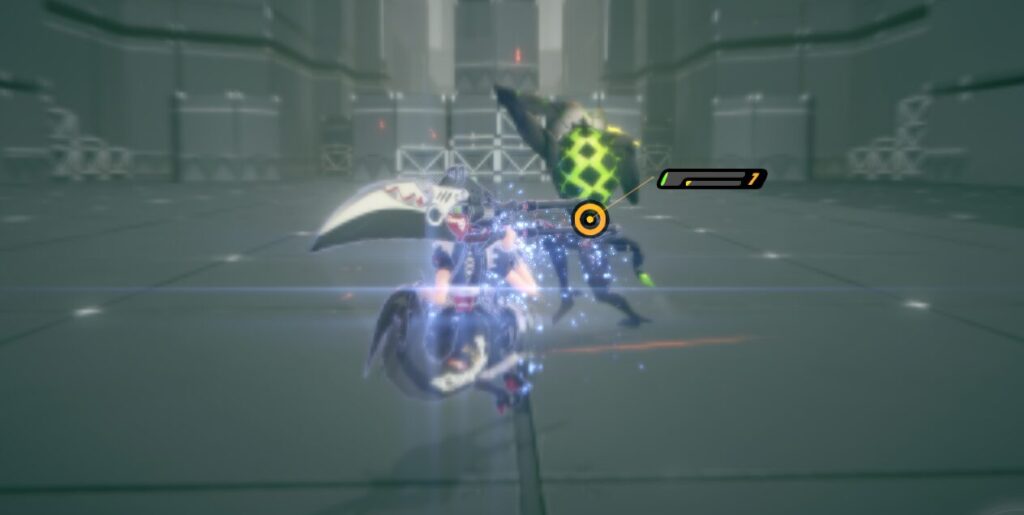
- Assists: You can perform Defensive Assists by timing your assist button when the enemy flashes orange. This will counter the enemy’s attack and create Daze and Energy as well as interrupt the enemy for a very brief duration if countered in its entirety. I’ll cover it in depth later.
- Dodging: By timing your dodge with any attack, you can perform a Perfect Dodge and following with an attack, performs a Dodge Counter. You can also perform Evasive Assists by timing your assist button when the enemy flashes red, briefly slowing time and enemies around you.
However, Evasive Assist and Dodge Counters are very similar in nature, their damage is completely different.
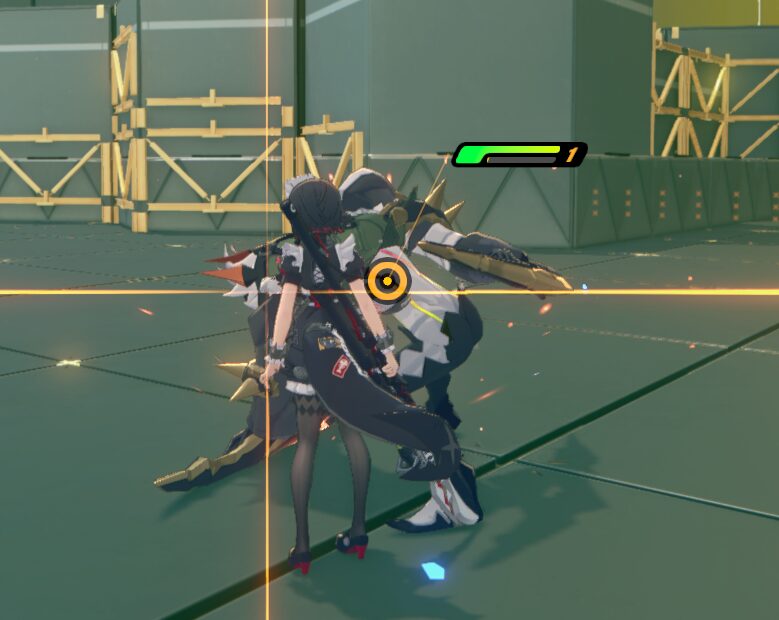
- Daze: It’s a gauge filled by any kind of attacks or counters the enemy receives and goes from 0 to 100. Every skill and attack from an agent has a daze multiplier and Stun agents specialize in this by having high multipliers.
Once it hits 100, it will start draining down to 0 while giving you a higher damage multiplier (starting at 150%) during this window, you can extend this window through Chain Attacks; the more agents you have, the more chains you can perform and extend this window.
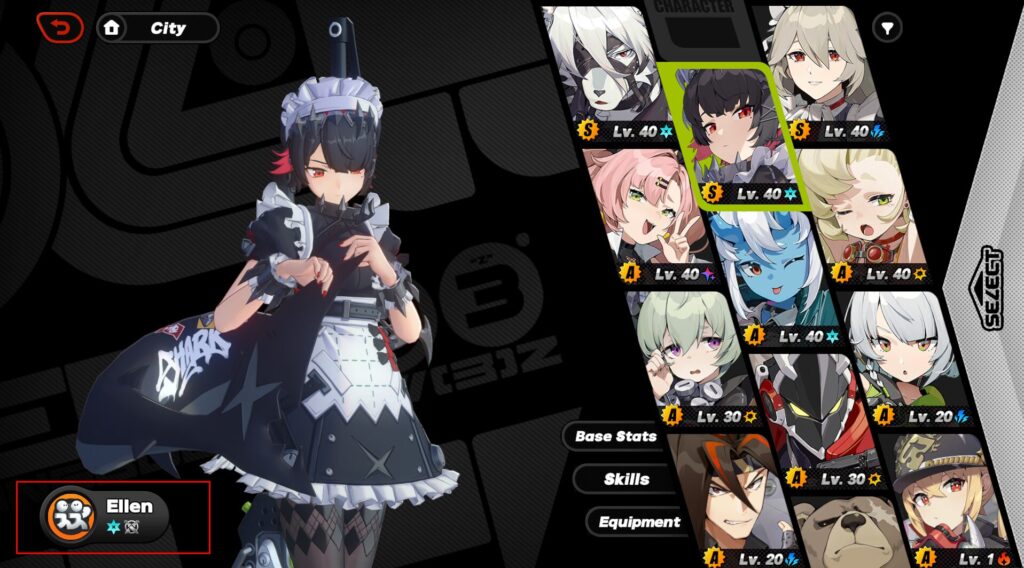
Characters, also called Agents, have 4 characteristics that define their approach for compositions: Attribute, Specialty, Attribute Anomaly and Range-type (Melee or Ranged, not mentioned in the game)
All characters deal Physical damage and Elemental Damage but some also deal pure-elemental damage in some manner.
Note: Agents can do more than just their specialty’s job based on their Core Passive and Skill.
As for Attributes there are:
- Physical
- Fire
- Ice
- Electric
- Ether
Specialty:
- Attacker: DPS-focused agents, their role is dealing massive damage at all times but mostly when the Daze gauge is full.
- Stun: Daze-focused agents, their role is filling up the Daze gauge as fast as possible and creating openings.
- Support: Buff- or Debuff-focused agents, their role is enabling other agents to deal more damage.
- Anomaly: Reaction-focused agents, their role is to create anomalies on the enemies faster than any other character, making an opening and dealing a substantial amount of damage.
- Defense: Tank-focused agents, their role is to take the damage for the other agents, having a high defensive base stats and using counter-attacks with high base daze multipliers while also granting defense buffs.
Anomalies:
- Physical
- Assault deals a burst of damage while interrupting the enemy regardless of their weakness.
- Flinch increases the Daze accumulated on the enemy for a period of time.
- Fire
- Burn deals a massive burst of damage while also continuously dealing damage over time.
- Ice
- Freeze causes the enemy to stay in place, interrupted, and applying Frostbite for a short duration.
- Shatter occurs right after a Freeze ends, dealing a burst of damage.
- Frostbite increases the Crit DMG of agents towards affected enemies.
- Electric
- Shock deals damage over time at irregular intervals while taking additional Electric DMG.
- Ether
- Corrupted enables Ether agents to deal increased damage on the target at irregular intervals.
- Disorder
- When inflicting 2 anomalies on an enemy (Freeze, then Assault), it overwrites the anomaly into a Disorder anomaly; which increases damage and Daze towards afflicted enemies. The 2nd anomaly also procs.
Note: When enemies suffer an anomaly of an element they’re weak to, their attacks are interrupted. Also Anomalies only seem to be triggered by Basic Attacks or a specific portion of some skills.
Range-type:
- Melee: They have Defensive Assists, creating more Decibels and causing more Daze damage.
- Ranged: They have an Evasive Assist, slowing time for a short duration and following up with a dash attack, similar to a normal Dodge Counter after performing a Perfect Dodge.
Enemies
There’s 3 sizes for enemies: Small, Medium and Bosses. Each type has their own behavior in terms of frequency of attacks, ways to counter (evasive or defensive) and moveset.
- All enemies have a Daze gauge and can be inflicted with anomalies.
- The major difference is not just the size but the quantity you can find on an encounter of up to 6 small enemies; 2 mediums with 1 small or 1 medium and 3 smalls or a single boss.
- Some bosses have two phases and a certain theme attached to them.
All enemies have 2 types of attacks where the player can counter via Dodge or Assist:
- Red Flashes are ranged to pseudo-melee attacks, you can either perform an Evasive Assist or Dodge Counter. Keep in mind that the enemy can attack multiple times after a red flash. Certain Melee characters can deflect these attacks and receive zero damage, some can’t.
I-frames (frames of invincibility) are also very important and there are plenty during a dash.

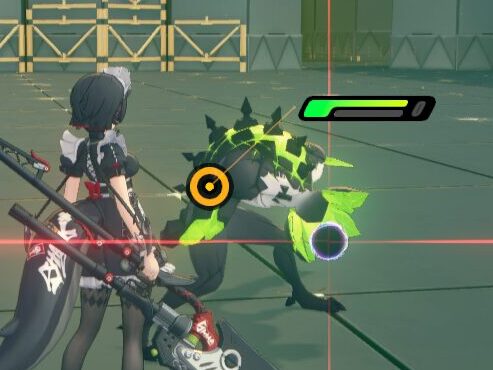
- Orange Flashes are melee attacks, which you can only counter via Defensive Assists by consuming Assist Points- however, there can be multiple attacks following an orange flash and each consumes a point. You can counter every single attack after the orange attack with the same character by timing your Follow-up before the enemy’s as you're pushed back.
Keep in mind that some enemies don’t flash when attacking and these are mostly ranged attacks that can be blocked by certain melee characters.
Note: When performing a Defensive Assist, your character is pushed away from the enemy. During this brief window, you can perform multiple counters when timed correctly- although not all characters are able to do this due to the speed of their animations or follow-up pattern.
Characters Systems
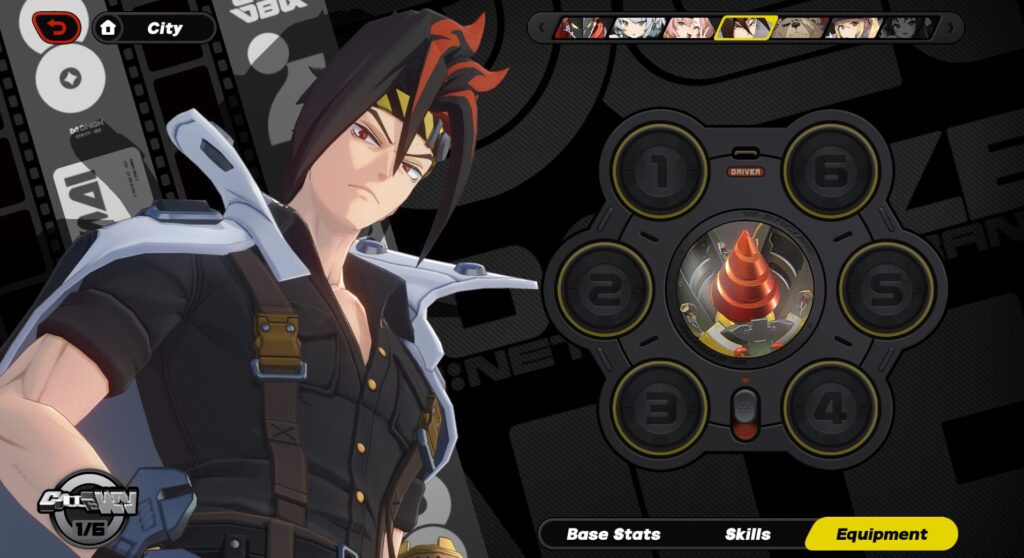
Characters are split into 3 core elements: Base Stats, Skills and Equipment.
Base Stats
Base Stats are pretty straight forward but I will highlight some of them due to their unique trait and keywording. For example: HP increases Health Points and HP Ratio increases the total Health Points by %.
- PEN - It ignores an amount of the enemy’s defense when attacking.
- PEN Ratio - It increases the amount of PEN by a %. Higher flat PEN means the bigger than change by the Ratio.
- AP (Anomaly Proficiency) - Increases the damage dealt when causing an Anomaly.
- AM (Anomaly Mastery) - Increases the speed at which the anomaly accumulates on the enemy.
Skills
Each character has 6 Skills, aside from the presentation, they each contain several abilities within each skill as related to them and their input. Top 2 rows are Core Skills and bottom row are your Basic Attack, Dodge Skills, Assist Skills, Special Skill and Chain Attack.
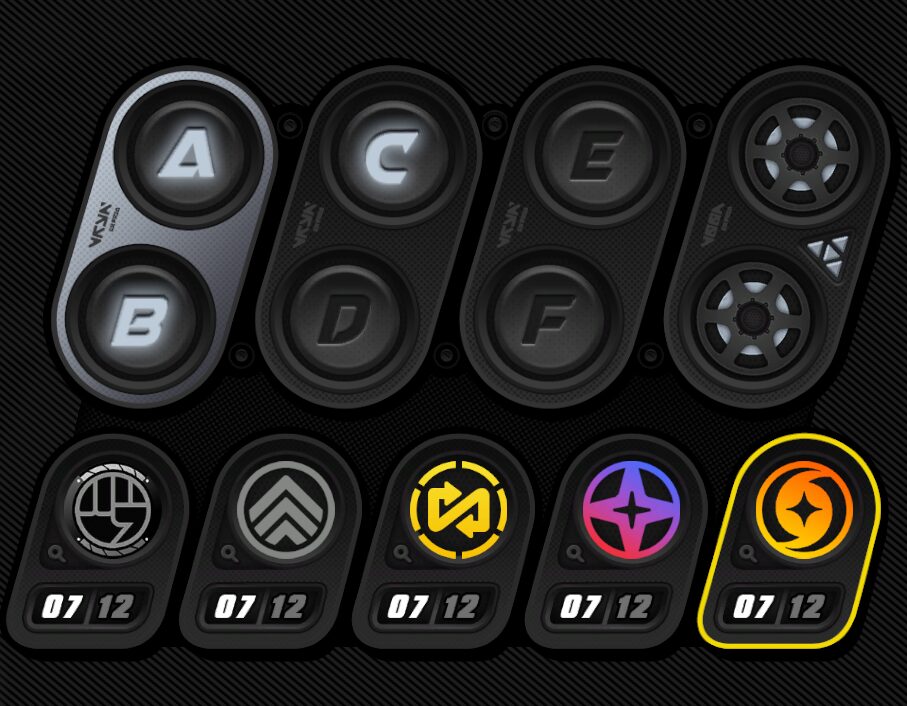
- Core Skills: Contains your Core Passive and an Additional Skill.
- Core Passive affects the main source of damage and defines the role of your character in the composition. When enhanced, it increases only the stats of your Core Passive, not your Additional Skill.
- Additional skill increases your damage or stats when performing certain actions in combat and meeting a criteria within your composition (same element or same faction).
- Basic Attack
- Most Basic Attacks have 1 or 2 versions, depending on your character, you can perform combos with the same button or a mix-up with other inputs.
- Most Basic Attacks have 1 or 2 versions, depending on your character, you can perform combos with the same button or a mix-up with other inputs.
- Dodge Skills
- Aside from the normal Dodge and Dodge Counter, it can contain other abilities that can be performed under certain conditions related to Dodging or Dashing.
- When hitting an enemy with a Dodge Counter, the enemy can be knocked back and interrupted.
- Assist Skills
- It contains all skills related to the Assist button such as Quick Assist, Defensive Assist and Assist Follow-up.
- Quick Assist is performed when a character is hit or knocked, quickly swapping to the next character and entering a Dash state.
- Defensive Assist is performed when the enemy does an orange flash and a key sound, pressing the Assist button will automatically counter the first attack and performing Follow-ups after a Defensive Assist can counter more attacks- However, if another Orange Flash occurs, you must use another Defensive Assist.
- Assist Follow-up is an attack performed when performing a Basic Attack right after a Defensive Assist, it can counter attacks after an Orange Flash- but this ability to counter depends on the character’s animation and speed.
- Special Skill
- Special Skills can be performed at any time, resetting your combo and dealing Elemental Damage- although you can only perform its stronger version and become invulnerable when performing the EX Version by accumulating a certain amount of Energy.
- EX Special Skills are a stronger version of the Special Skill that also grants Invulnerability during the animation, helping you commit to the skill and deal massive amounts of damage; especially when the enemy is stunned.
- EX Special Skills can have more than one input, by either pressing the skill button repeatedly or holding it. Of course, either of these two will require sufficient energy to fully perform.
- Chain Attack
- When the enemy’s Daze gauge reaches 100, a “Select Agent” menu will pop up and you’ll have 2.25 seconds to pick between two options depending on your team’s size. This ability is called Chain Attack and it generates Decibels, Energy, deals damage and the agent on the field is invulnerable during their animation.
- Chain Attacks also reset the Daze gauge drainage back to 100 every time a Chain Attack is performed up to 3 times.
- The options presented are based on your off-field agents and equipped bangboo, rotating through your equipped bangboo and agent, 2 agents, 3 agents or 3 agents and your Bangboo’s A skill. If you're playing with ONLY 1 agent, it will NOT trigger this chain attack.
- More Chain Attacks become available depending on the enemy-type:
- Small enemies grant 1 Chain Attack.
- Medium enemies grant 2 Chain Attacks- 3 if it's only 1 enemy in some cases.
- Bosses grant 3 Chain Attacks, the final Chain Attack includes Bangboo's A skill.
Note: The amount of Chain Attacks available is also affected by the amount of Agents in your squad. The list above is based on 3 agents in your squad.
- Ultimate Skill is your agent’s signature move, locking you into a cutscene and animation that makes your character invulnerable and dealing massive damage to the enemy or its surroundings. Some Ultimate Skills also work as an Assist move, allowing you to swap to the next character right after the animation.

If you’re new to a character, there is VR Training for each character teaching you all about their skill, rotation as well as their Move Set inside the pause menu (Esc for PC) while in combat.
Tips: Keep in mind that 90% of your Attacks and Skills can be animation canceled using your dodge or another skill. This can affect your damage. Most EX Special Skills grant you Invulnerability.
Use these i-frames to your advantage and commit.
Equipment
Agents’ equipment is divided into two sections: W-Engine and Drive Discs.
W-Engines
W-Engines are orbs that represent the agent’s weapon or characteristics in some way; merely as presentation. It's located in the center of their equipment among the Drive Discs.
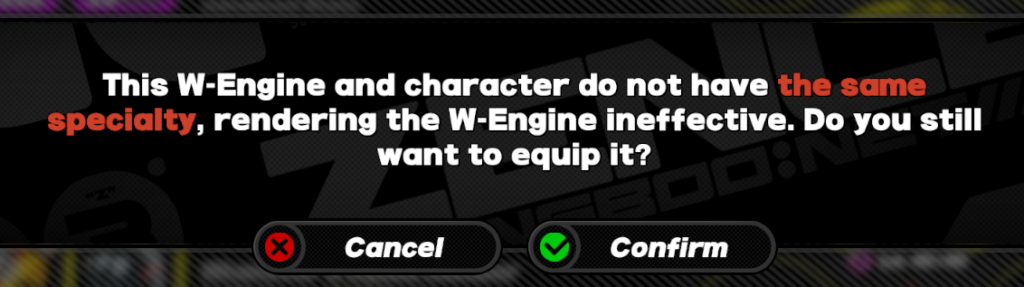
They go from B-Rank to S-rank and have 2 stats: Base Stats and Advanced Stats- as well as a W-Engine Effect which requires the agent’s specialty to match the engine’s condition. Once matched, this agent has access to the effect; otherwise only the advanced stats and base stats take effect.
B-rank Engines can be dismantled/recycled for materials and EXP.
A-rank Engines can be crafted using materials from the Combat Simulation, also used to increase the Engine’s level cap.
S-rank of certain characters can be obtained via the 24-Hour Store at the Signa Store tab, using Residual Signal as currency obtained from duplicate characters.
Note: Recycling any leveled W-Engine will refund you a portion of the EXP spent.
Drive Discs
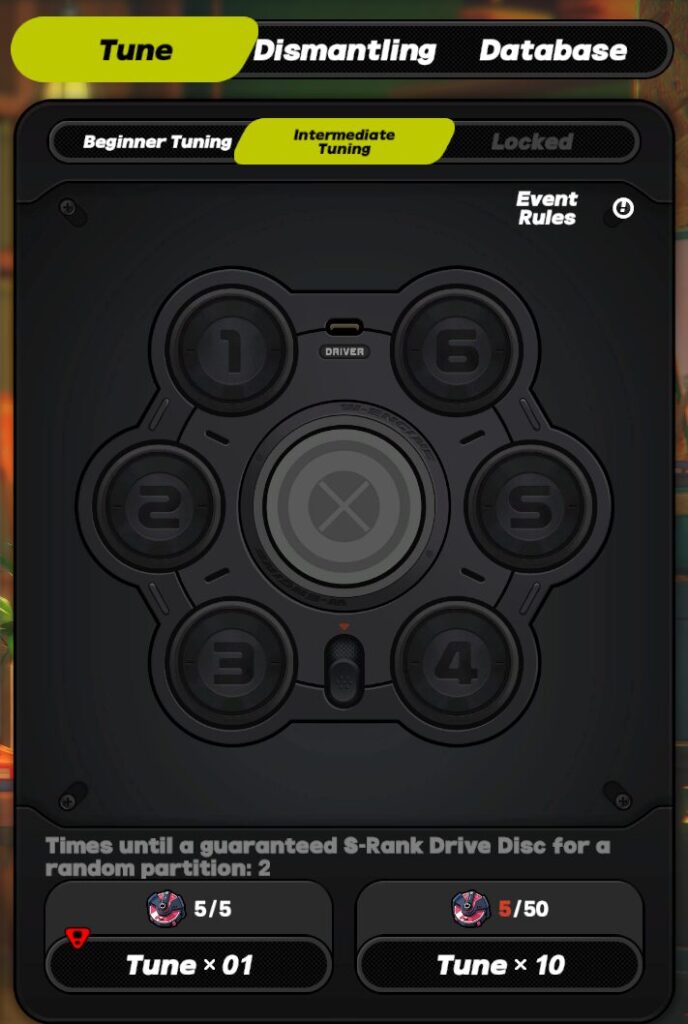
Drive Discs are collected from Routine Cleanups. They’re a key part of your gear that you unlock later in the game and go from B-Rank through S-Rank. Using materials, you can Tune/roll 1 or 10 times and target Drive Disc sets via the Track Settings.
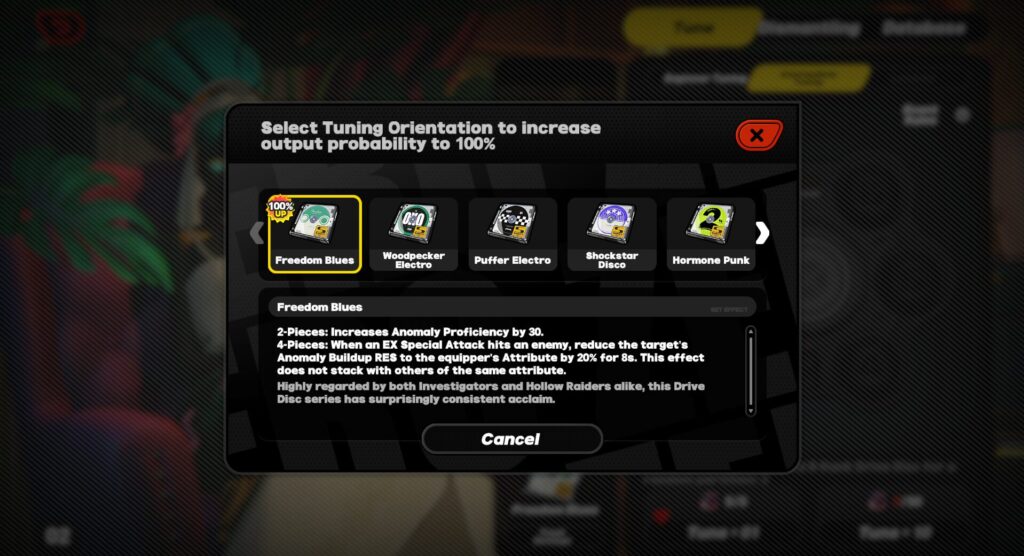
Similar to engines, you can dismantle them and reroll via Tuning on a specific set at a chance or 100% guarantee on a specific Rank- this reroll can grant you an upgraded version of said rank up to S-Rank every 5 rolls.
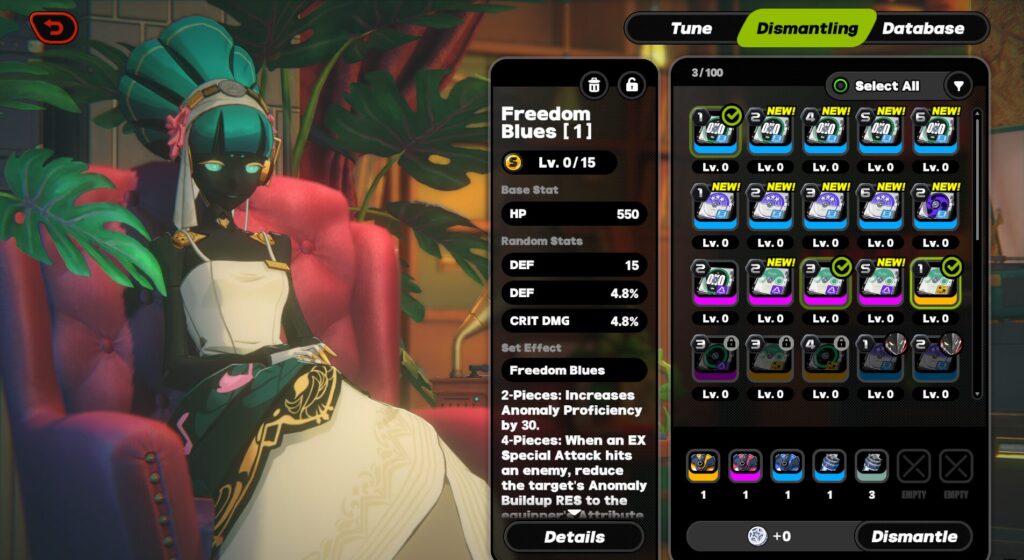
For example: If I roll 5 times in any Drive Disc Set on a B-rank, the 5th roll will be an A-rank. Same for rolling A-ranks, you’ll obtain an S-Rank on your 5th roll.
By recycling B-ranks, you can obtain materials to roll them for A-ranks. Same process for A-rank to roll them for S-ranks. This way you can effectively farm S-rank while not spending as much Battery Charge.
As for building a character, there’s 2 ways of building them, either 3 sets of 2 discs or 1 set of 4 and a 2nd set of 2 discs. Drive Discs only take effect when there’s at least 2 discs of the same set in any other regardless of their Partition.
Note: Recycling any leveled Drive Disc will refund you a portion of the EXP spent.
Partitions
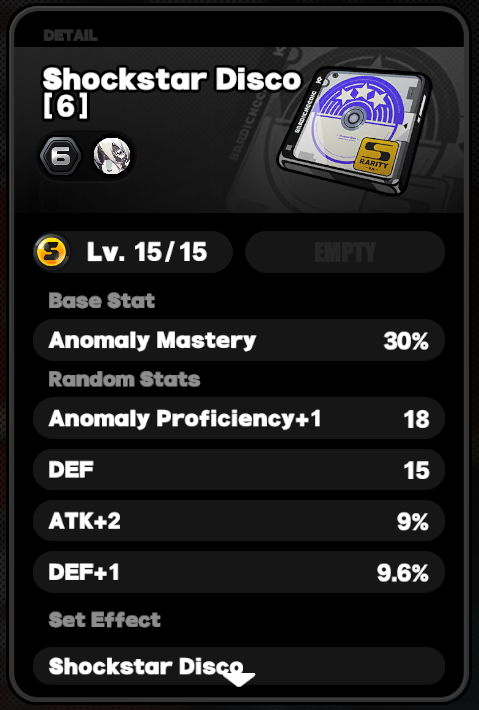
Partitions are individual Drive Discs numbered from 1 to 6. They don’t affect the set, they simply affect the slot where the disc belongs. Each Partition has a different main stat from 1 through 3 and a pool of main stats from 4 to 6.
- Flat HP.
- Flat ATK.
- Flat DEF.
- ATK%, DEF%, HP%, AM, Energy Regen% or Impact.
- ATK%, DEF%, HP%, Pen Ratio% or Element DMG%.
- ATK%, DEF%, HP%, AP, Crit Rate or Crit DMG.
Discs can be upgraded to increase their main stat based on the disc’s level. B-Ranks have a level cap of 9, A-Ranks 12 and S-Ranks 15.
Each disc starts with a certain number of sub-stats based on their Rank (B, A or S).
- B-Ranks 1 to 2 substats.
- A-Ranks 2 to 3 substats.
- S-Ranks 3 to 4 substats.
Keep in mind that all Ranks can have 4 sub-stats once the disc is fully upgraded.
The Sub-stats any Disc can obtain are within this pool of stats and you can only have 1 of each per Disc. For Example: If you have Crit Rate Main Stat, you can’t get it as a sub-stat and viceversa if it were to be a Sub-stat.
- HP
- HP Ratio (%)
- ATK
- ATK Ratio (%)
- DEF
- DEF Ratio (%)
- Anomaly Proficiency (AP)
- PEN
- PEN Ratio (%)
- Crit Rate %
- Crit DMG %
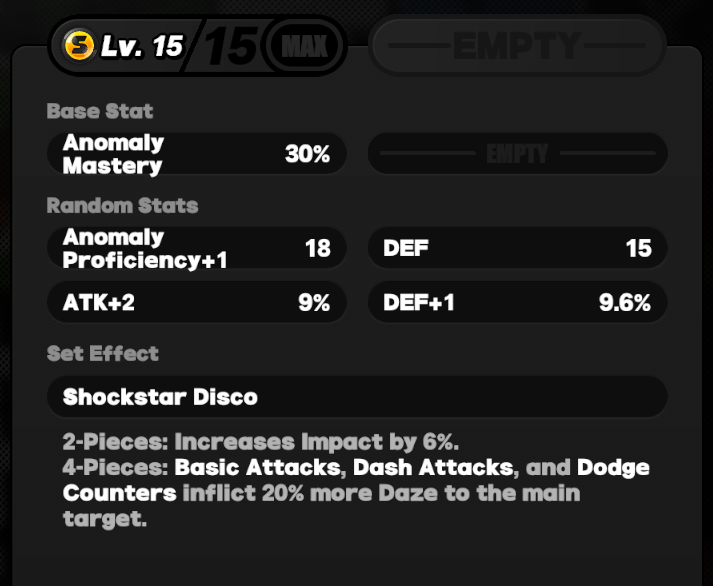
Sub stats don’t have a range of values like 3.8% up to 5%, instead they’re a set value which increases every 3 levels up to the Disc’s level cap from +3 to +5.
For example: B-Ranks can upgrade sub-stats 3 times. And they’ll be displayed a [Stat name]+[number]. Like Crit DMG+1.

The chance to obtain the same upgrade on a specific stat decreases based on the number of stats that haven’t been upgraded yet- so if you upgrade to +3 and get Crit DMG+1, the next upgrade at +6 is less likely to be Crit DMG. When neither of the stats is upgraded, all chances are distributed evenly.
(This information is based on previous Hoyoverse games)
Bangboos
These cute companions are basically small allies that hang around the battlefield and have 3 Skills: A, B and C-skill. Bangboos also have rarities that gear from S to B-rank.
- A-Skill is an Active skill that bangboos perform every now and then during combat.
- B-Skill is a Buff to A or C-skill only when certain conditions are met.
- C-Skill is their Chain Attack, only available when:
- If there’s 2 agents in the team, it’s on the first Chain Attack
- If there’s 3 agents in the team, it’s on the last Chain Attack
After performing a Bangboo’s Chain Attack on either occasion, you’ll automatically swap to the Agent that you could’ve picked during that Chain Attack window.
To upgrade Bangboos, you need materials that are purchasable at 141 Convenience Store. Their Leveling material comes from Hollow Zero and this material is also used as a currency at 141 Convenience Store. They’re farmable for free at Hollow Zero.
Note: You can buy as many materials as you want with unlimited stock.
Please spend them responsibly.
Exploration
This portion of the guide will be split into multiple parts, as Zenless Zone Zero is NOT an exploration-focused game; it’s very instanced based and manages exploration differently.
Video Store
You can open the video store after every reset, passively gaining Dennies. Every day, you select a promoter for your store and 3 movies from your inventory. There’s also 3 trending genres of movies so you can either pick for the same genre or cover all 3.
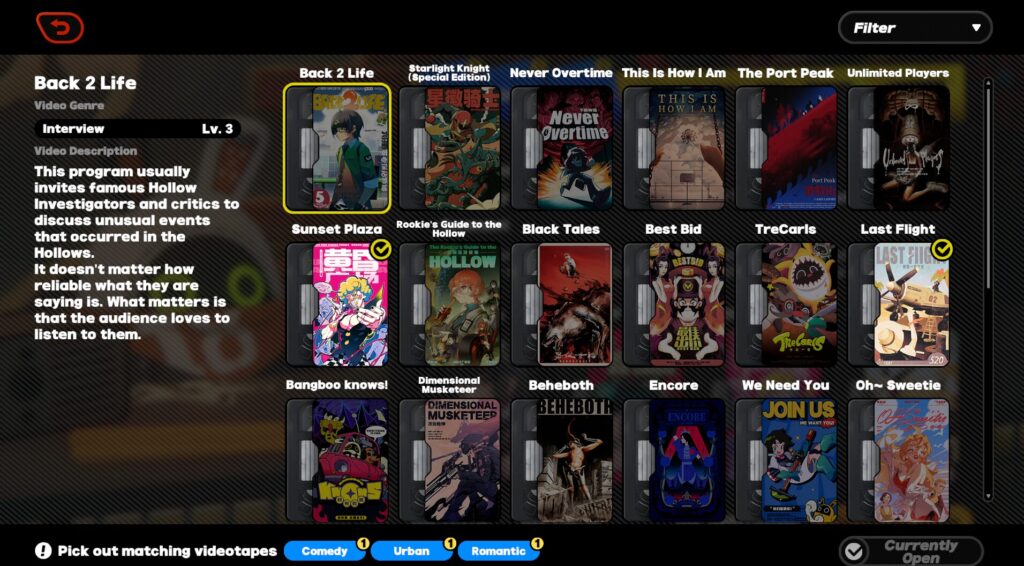
Once reset happens, you’ll obtain the generated Dennies and a reward based on your promoter; you can recruit characters as promoters at some point on your progress and they’ll generate skill materials related to their element. Each agent also has a different skill based on the amount of people that visit the store depending on the movies you picked for the day.
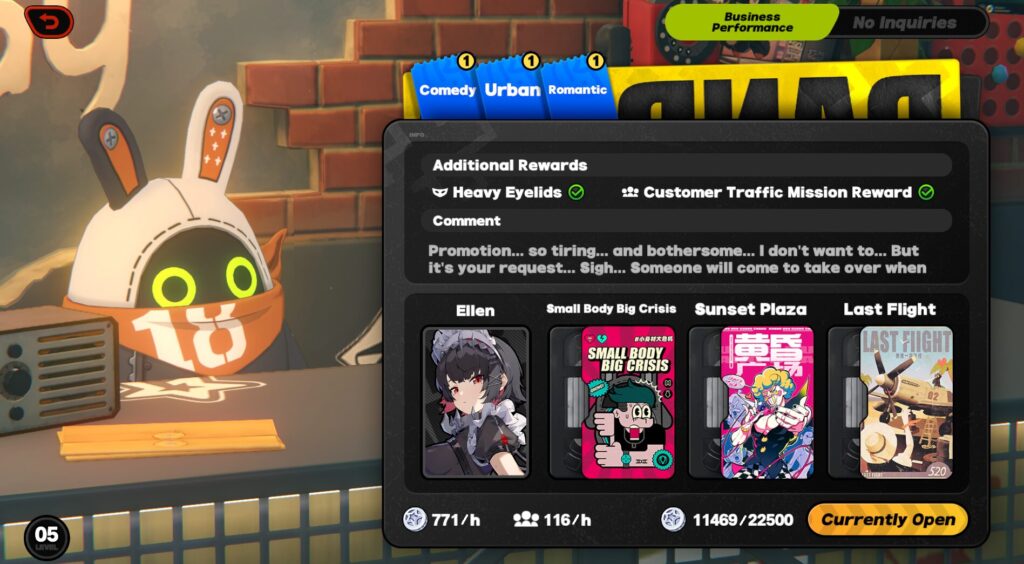
Keep in mind that every promoter has a mood, ranging from Happy to, perhaps, angry. Make sure to swap them around and give them a break!
Outside HDD
You can explore freely around certain closed areas of New Eridu like Sixth Street, Brant Construction Site, Lumina Square or Ballet Twins Road. These areas contain various NPCs walking around and some hold certain small tasks within the area or commissions inside HDD.
Note: Some commissions and areas are locked behind your Inter-knot level and Main Story progression.
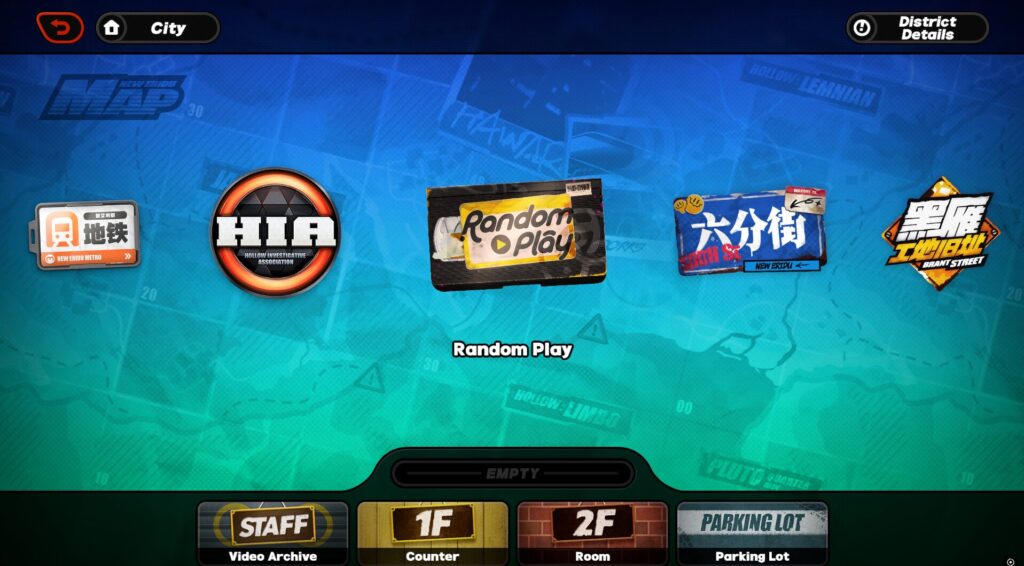
You can open the map and fast travel around the area quickly or go to other zones as well. The bar that currently says "Empty" is where Commissions and nearby Agents will appear.
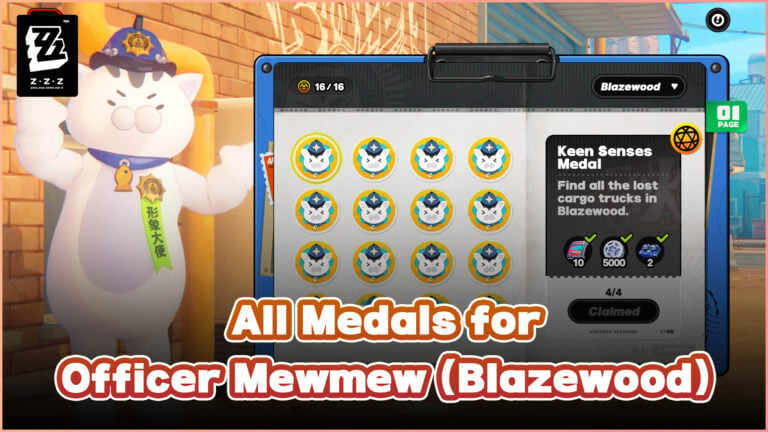
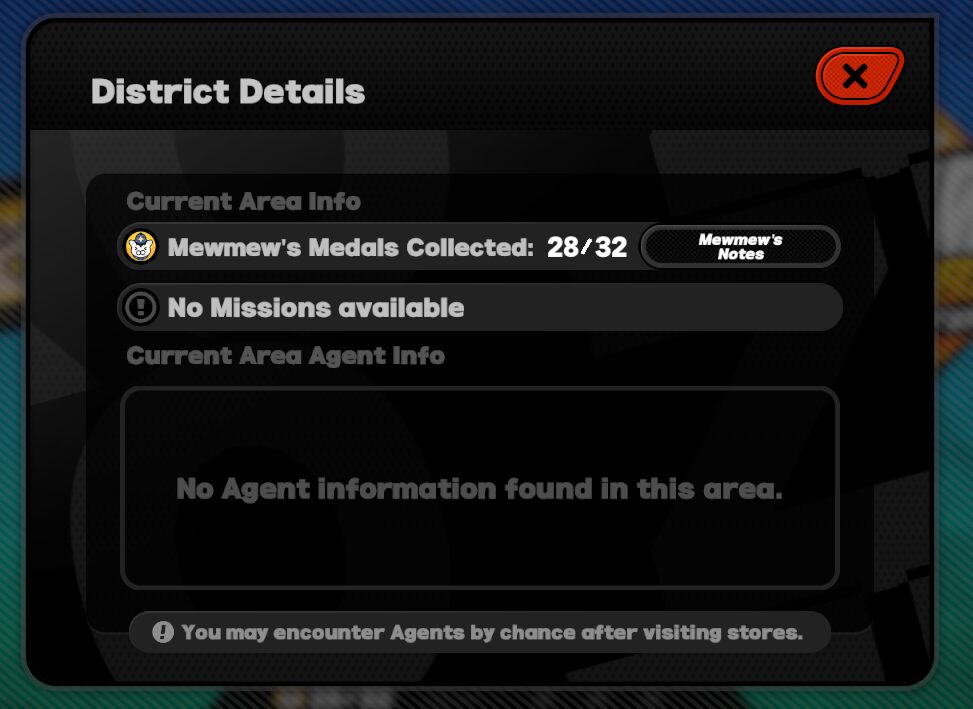
Some of the small tasks are related to a NPC called Officer Mewmew which grants rewards for every task you complete around each Zone or at later stages in the story; don’t worry you won’t miss out anything if you progress too fast or too slow.
You can gather commissions for inside and outside the HDD using your phone, checking Notifications or exploring around the districts. You can also open your map and check under the district’s icon and name or on the top right corner in “District Details” if there’s any commissions or characters in the area.
Time System
Zenless Zone Zero uses a Time System and has 4 stages: Morning, Afternoon, Evening and Midnight. Depending at which time you’re on, certain commissions and characters will become available to talk so check your map regularly.
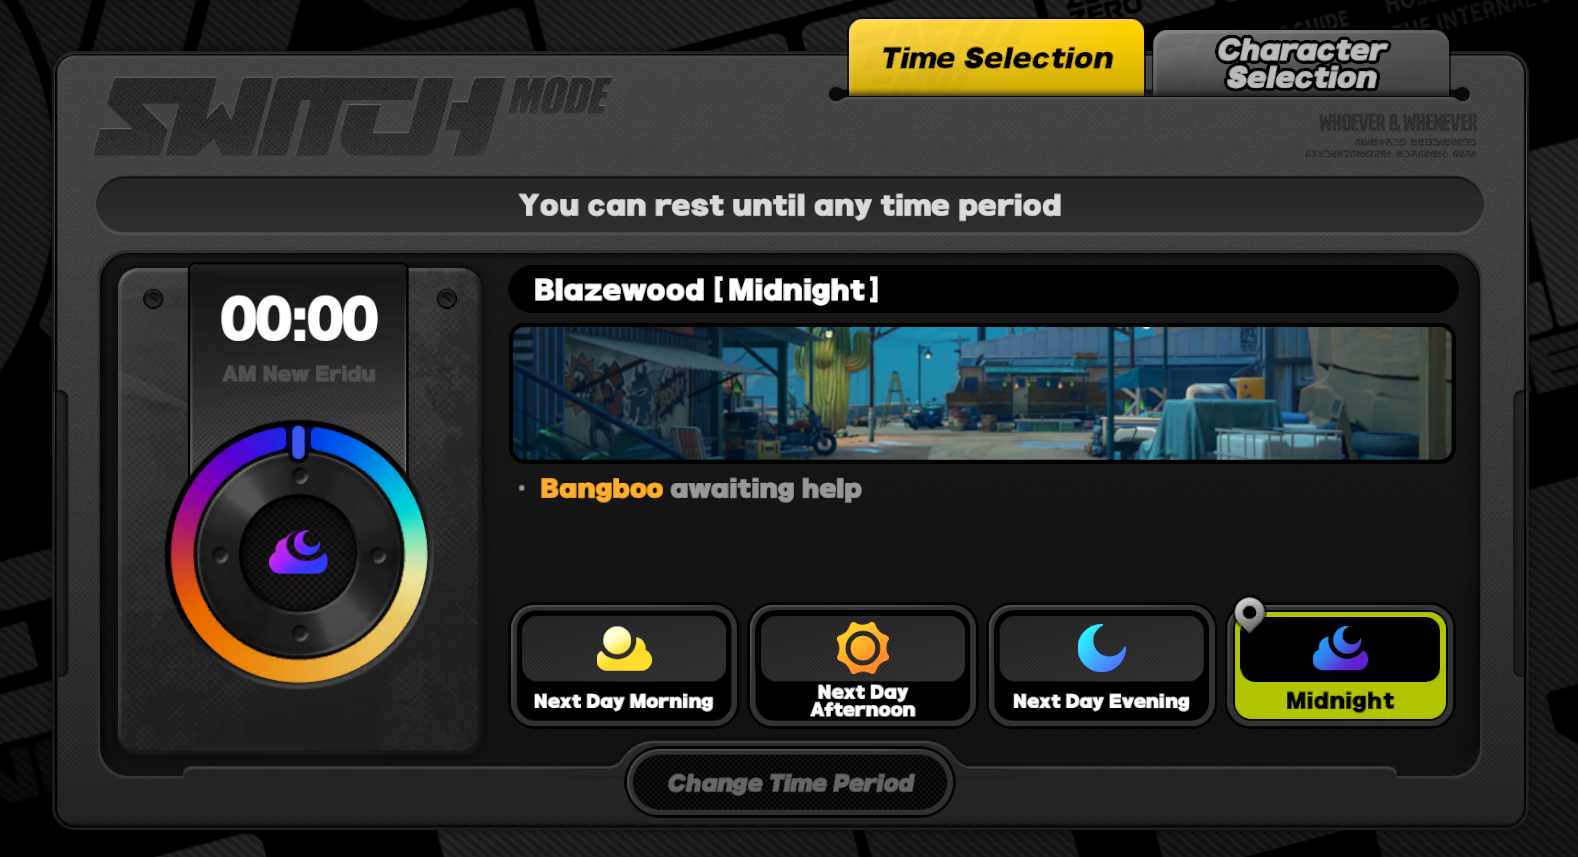
You can also Rest by clicking on the top right of your corner to skip to any time of the day.
Any missions or commissions done inside or outside the HDD will put you in the next time. For example: If you finish a commission by talking to a NPC in the Morning, you’ll progress to Afternoon Time.
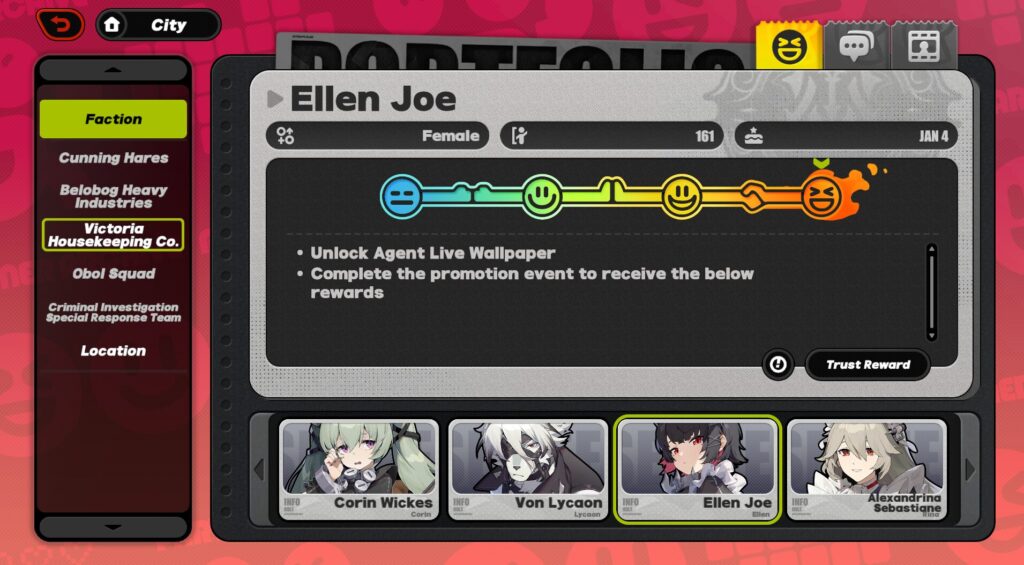
Trust System
This system becomes available after reaching Inter-knot Level 30 and the first part of Chapter 2 Interlude.
Sometimes, agents hang around New Eridu at different times of the day and you can interact with them; increasing or decreasing their Trust based on the dialogue options you pick.
Note: If you don’t interact with them and it’s already midnight, you can find them again tomorrow after going to bed.
Every day/reset, you get 3 invitations for 3 different Agents. You can invite agents to hangout at any time or specific times of the day.
After reaching a required amount of Trust, you’ll obtain a Trust commission from them at some point and you’ll see them hangout areas with a blue icon above their head. These commissions have both voiced and non-voiced dialogue:
- During Voiced dialogue, the dialogue options you pick don’t affect your trust towards them. You can revisit these dialogues in their Profile inside the Agent Menu.
- During Non-voiced dialogues outside of Trust commissions, the dialogue options you pick affect your trust.
Trust has 4 levels, starting at level 1, each level grants Polychromes and other rewards:
- Level 2 grants Skill chip materials of their element.
- Level 3 grants an Affinity token; they only take effect during Hollow Zero at the middle point of a level when resting in the center of a safe point (it’s a random event). They unlock an additional skill for said character that can change their rotation and increase their damage output.
- Level 4 grants a Dynamic Wallpaper of that character.
Note: You will only unlock the trust system for an agent if you own it. For Standard Banner characters, you must complete their Agent Story first.
Inside HDD
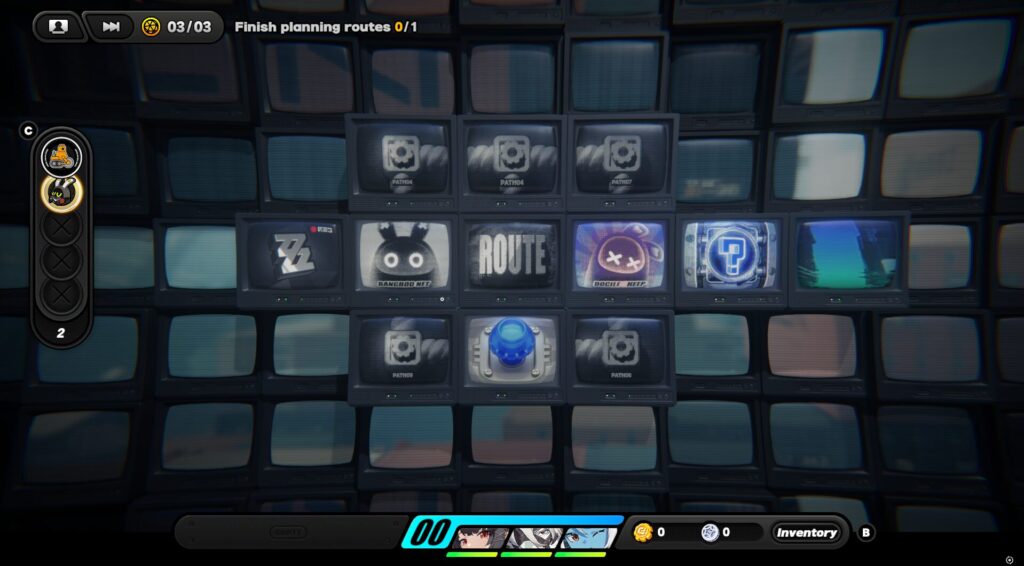
The HDD, also called Hollow Deep Dive, is used to access commissions inside Hollows. These Hollows are mazes within pocket dimensions where the proxy’s job is to guide their clients inside them and find the exit. To represent said lore, Zenless Zone Zero uses a grid system with TVs as a display to go from instance to instance of said maze.
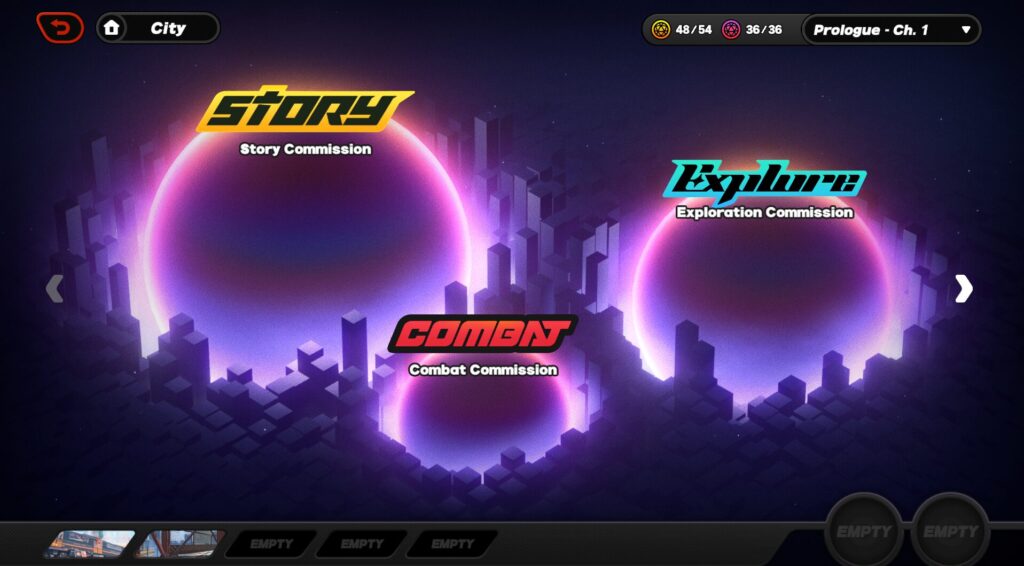
Story Commissions
This part of the HDD contains all of the commissions related to the Main Story. Once a chapter of the main story is completed, you can revisit the cutscenes at the Video Archive and attempt these commissions in Hard Mode. This mode behaves like a Combat Commissions where you only fight Etherals and grants rewards- but it won’t grant Inter-knot EXP.
Combat Commissions
These commissions are combat-focused, compared to the Story Commissions being a mix of puzzle and combat, you’ll be only fighting Ethereals and once done, the commission is over. It’s very short and straight-forward.
Exploration Commissions
Unlike Combat Commissions, these are more puzzle-oriented commissions using the TV grid system. Every exploration commission is different or has their own twist where you interact with elements exclusive to this mode and can be found later in Story Commissions.
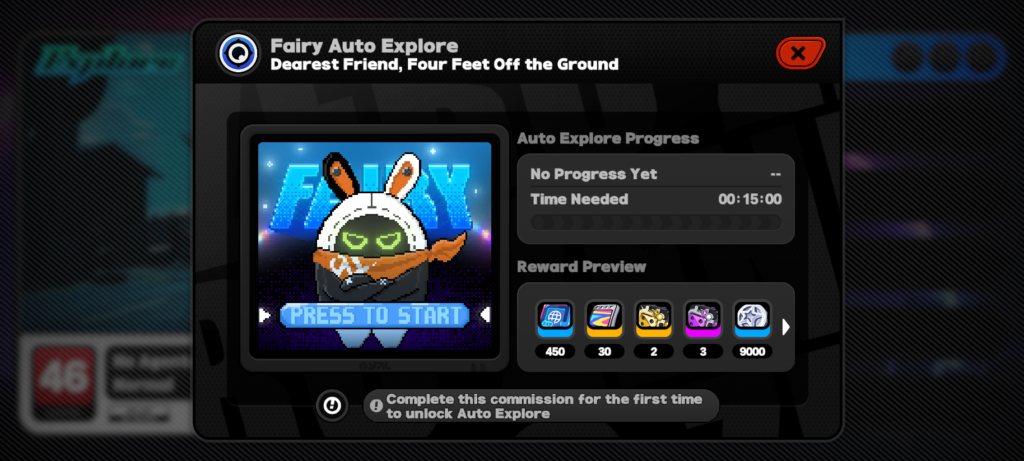
If Exploration Commissions aren't your thing, no worries, Fairy can auto-explore for you once you complete it for the first time. Keep in mind she can only do 1 commission at the time and, based on the commission, it carries a timer. Once done, you'll obtain any rewards you could've missed.
At Inter-knot Level 20, you’ll unlock a “Rally Commission” inside the Exploration Commission. This is a mix between Combat and Exploration where your characters can revive an unlimited amount of times and you explore various instanced zones that are connected into a large map and you play as if it’s a combat commission; a few of these rally commissions even have a story.
There’s also hidden chests with Polychromes around this map, usually up to 4 chests; and you must complete certain objectives for a few of them around the map without guidance.
Note: In a future update, you'll be able to claim all hidden rewards from exploration and rally commissions!
Battery Charge
This is ZZZ’s Stamina System and it regenerates 1 every 6 minutes and you can refresh up to 8 times a day. You can consume Ether Batteries to recover up to 60 Stamina. You can spend Stamina in chunks of 20 up to 100’s depending on the content you pick.

If your Battery is capped at 240, it will generate 1 Backup Battery every 18 minutes.
Here’s a list of content where you can spend Battery Charge:
- Combat Simulator
- Routine Cleanup
- Expert Challenge
Combat Simulator (20 to 100 Battery) - Requires Inter-knot Level 10
It has all of the materials needed to upgrade all the core components of your agents: Leveling, W-Engine, Skills and Drive Discs. Each of these 4 has their respective stage and within a selectable set of materials for specific agent specialties or elements using the card system, each card consuming 20 stamina for a set amount of materials and capped at 5 cards for up to 100 stamina at once.
Combat Simulator, unlike the other content that consumes stamina, has an unique card system. This card system can later be customized so you can select different cards with different drops so you can battle 2 waves of your selected cards and obtain the materials you want and while consuming the same amount of stamina you usually do.
Note: You can also make up to 5 decks in case you want to farm a specific profile of drops for an agent
Routine Cleanup (60 Battery) - Requires Inter-knot Level 20 (35 for S-ranks)
It contains all the sets of Drive Discs as well as their upgrade material to level them up. Each Stage has 2 sets of Drive Discs that drop at random and you’re guaranteed 2 of the highest attainable rank at the time.
For example: if you can only obtain A-Ranks, you’ll obtain 2 per run. Same for S-ranks.
Expert Challenge (40 Stamina) - Requires Inter-knot Level 20.
This content allows you to farm materials all agents require to level their Core Passive past B-level. Then past C-level, it will require materials from Notorious Hunts.
Notorious Hunts (Free, 3 times per week) - Requires Inter-knot Level 20.
This challenge, despite not consuming Battery, is very important and part of your weeklies and limited up to 3 times per week. By challenging these bosses, if you beat them under certain conditions, you can obtain additional rewards on top of the materials.
Once all attempts are depleted, you can try the No-Reward Mode which can still net you the challenge rewards but not the materials.
Disclaimer: The Inter-knot level requirement is the minimum level required. You need a certain Main Story progression to access some of these features.
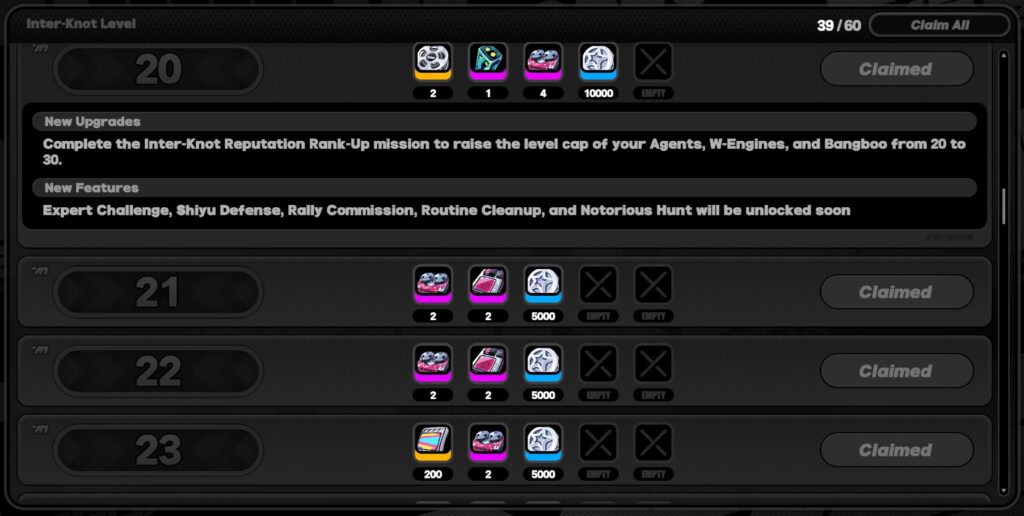
Inter-knot Level
This is your account’s level and it will unlock all sorts of content as you complete the main story, commissions, consume stamina and perform tasks all around New Eridu. Starts from 1 up to 60.
You can obtain all sorts of rewards for leveling up, Polychrome for gacha and Ether Batteries to recover 60 Battery charge.
Every 10 levels, you’ll unlock new features and push the level cap for your agents and all of their equipment, upgrades- as well as more and new drops from all the battery-consuming content.
Note: Keep in mind that some and even more features are not mentioned and require progress in the main story in order to become available.
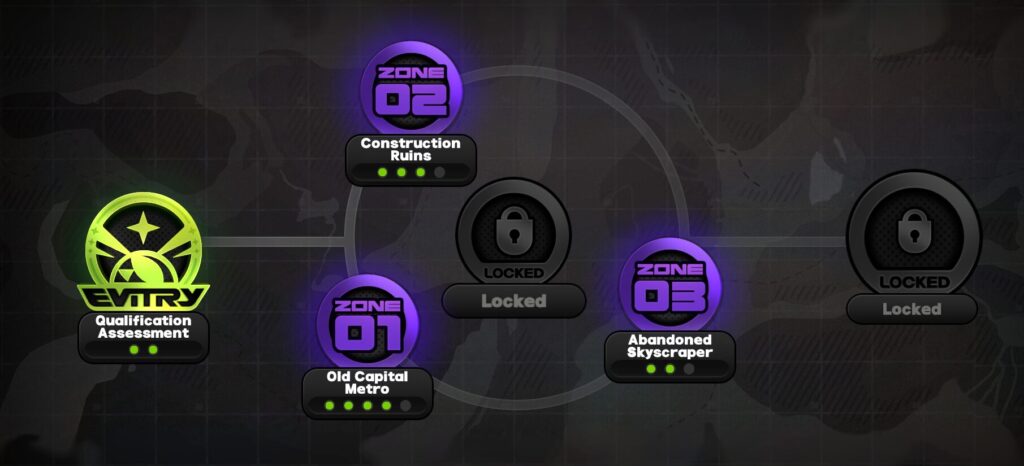
Hollow Zero
Hollow Zero is a rogue-lite gamemode with high replayability and requires Inter-knot Level 10.
It is a pseudo-procedural generated grid where you must traverse a hollow and obtain various buffs at random and complete challenges along the way through a stage. Each stage has 2 to 5 levels depending on the stage and each time, you have to go through more hollows to get to the end.
Before starting, you can pick from 1 to 6 agents and a bangboo from your roster. You will always start with your Leader Agent and selected Bangboo. Any additional party members will show up as you progress through the stage and reposition your team- You can also decline their request to join you.
Why Pseudo-procedural?
Because the structure of the hollow is the same every time on a specific stage and level but the TV Boxes are different with several effects on every run; pick the right path and proceed cautiously.
There’s a key NPC within every stage that tries to help you by offering a deal as you progress making your run easier- or even more difficult. There are high-risk high-reward elements to these deals.
Every step you take on a new TV Box within the Hollow Zero will increase a gauge on top of your agents called Pressure and goes from 0 to 100. Once filled to 100, you’ll receive a Corruption debuff, which can be cleansed on certain TV Boxes (at a price or free), and will give you a double-edge effect that can be both beneficial and detrimental to your run.
Once you reach the 5th Corruptions, you’ll stop receiving pressure in exchange for a major debuff that can dramatically affect your run by increasing the enemy’s damage, draining HP or outright removing abilities such as generating Daze from attack and heal.
Completing a run will reward you with 1 of 3 currencies which are permanent buffs you can buy from a grid system for all Hollow Zero related content. Once you buy a certain section of the grid, you can obtain an additional upgrade from that section and keep upgrading towards the right side of the grid.
As you clear every stage for the first time, you’re rewarded with License EXP which will grant you various rewards on each level.
You’re also assigned a Bounty for more rewards, its objectives can be rerolled up to 2 times per week.
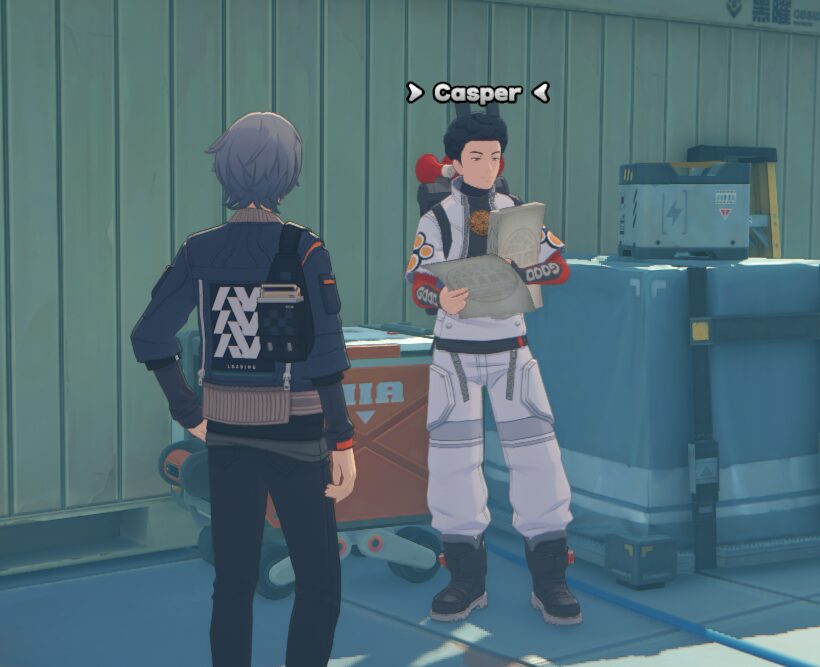
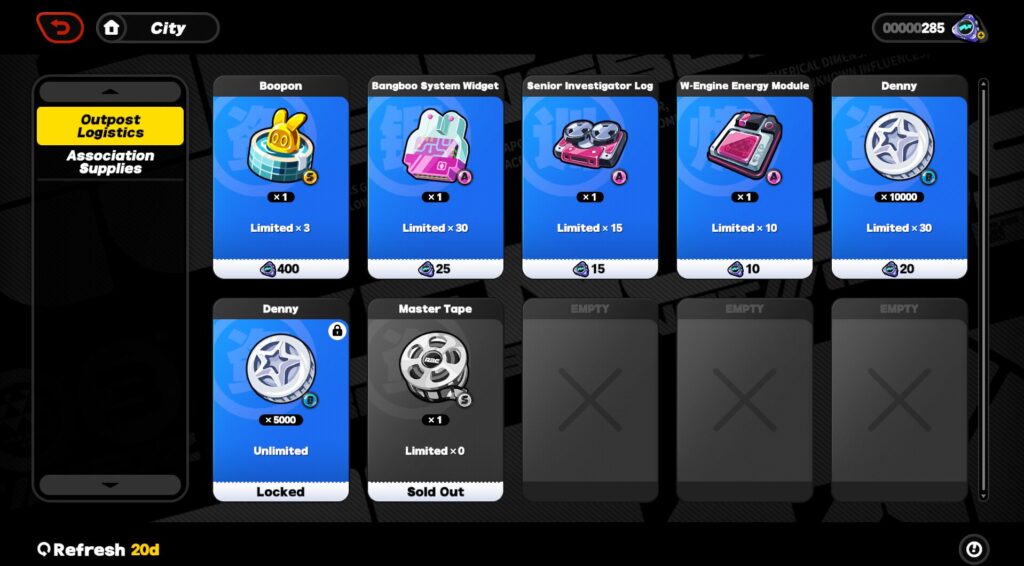
You also obtain Z-merits after completing the run and obtain S-ranks on each level of every stage. You can farm this currency and talk to Casper and obtain additional rewards that refresh every month!
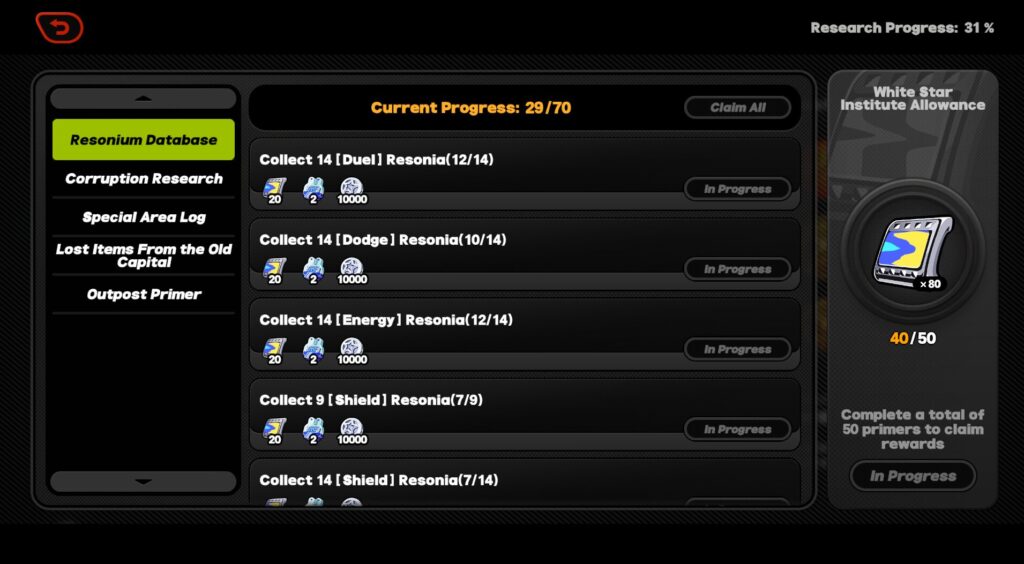
Also, as you obtain different Resonias, buffs, debuffs and visit new TV Boxes and gain new effects, they’ll become archived in your Research Log at Ray. Filling it will reward you with Polychromes for every achievement and certain milestones.
FAQ
- If you wipe your squad, you can restart the fight as many times as you need.
- Each stage is an individual run and after completing a level, you can pause before advancing to the next one.
- Certain zones and stages require a certain Inter-knot Level and Main Story Progression. Click on the stage or level to check the requirements.
- Casper’s shop does reset for Z-Merits
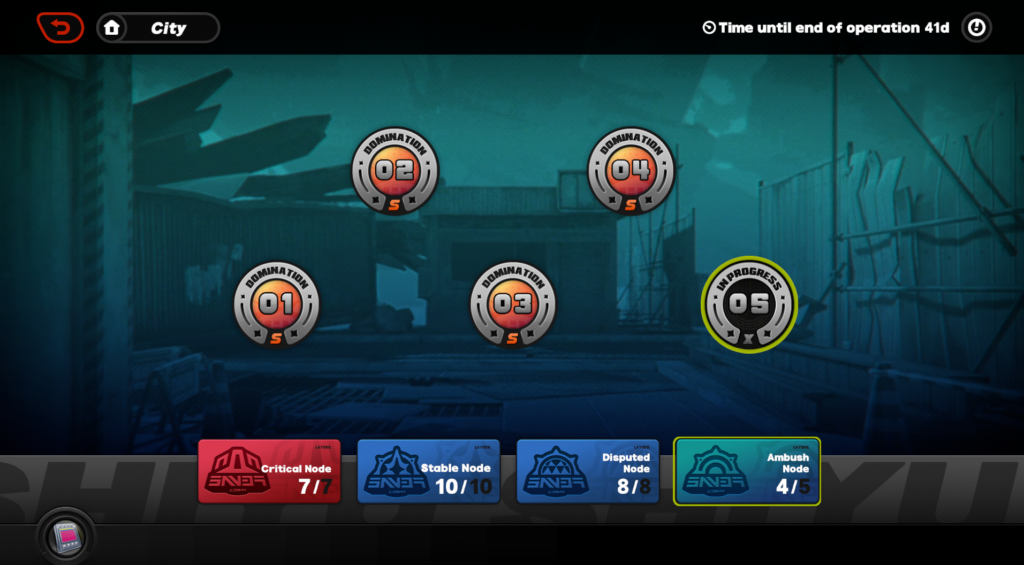
Shiyu Defense
Shiyu Defense is a challenge mode where you fight a wave of enemies and must defeat them all under a certain condition to obtain all the rewards. This mode requires you to have 1 or 2 teams (depending on the level and difficulty) fully built.
Once you complete all 10 stages from the Stable Node, you’ll unlock Critical Node and Ambush Node.
You'll unlock Disputed Node after Stable Node, a similar game mode with 8 stages which require your agents to not be defeated by the enemy.
Critical Node requires 2 teams and defeat all enemies under a certain amount of time to obtain all rewards.
Ambush Node requires 2 teams and defeat all enemies without any defeated agents to obtain all rewards.
FAQ
- All rewards are first-time clear rewards
- Stable Node does not reset.
- Disputed Node does not reset.
- Critical Node resets every 2 weeks.
- Ambush Node resets every patch.
- Casper’s shop does reset for Investigation Merits