Table of Contents
Key Points
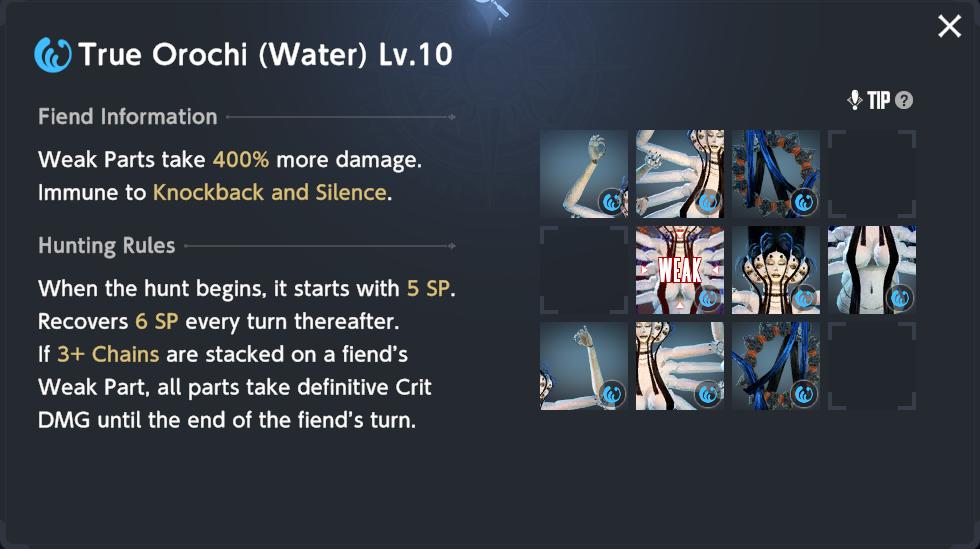
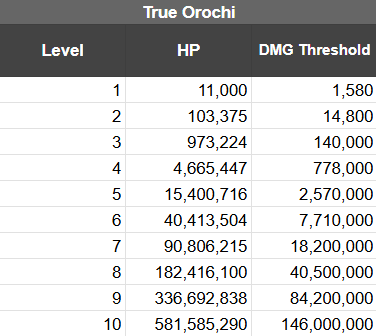
- Level 10 DMG Threshold: 146M.
- 0 DEF and MRES, 100 Water DMG, 50 Fire RES.
- 5 Initial SP, 6 SP gained per turn.
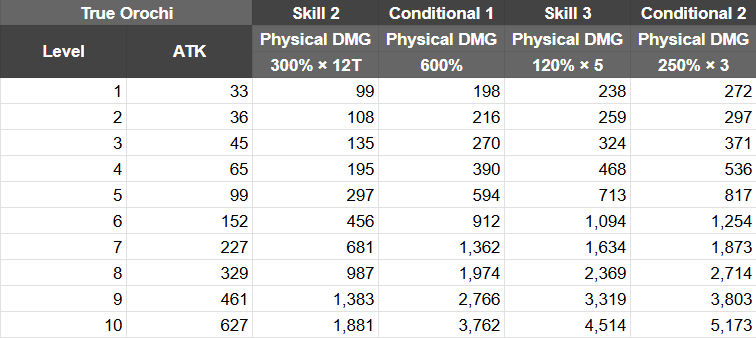
- Skill Sequence: S1 → S2 → C1 → S3 → C2 → S4.
- Bring DEF Gear and healing for the DoT.
- This hunt requires chain stackers to get rid of the fiend's barrier effect!
Skill Rundown
Heavy Despair
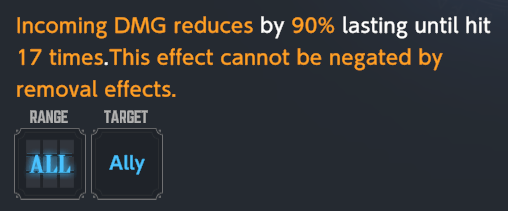
This effect is a huge wall to overcome. Your team will require units with a lot of hits in order to get rid of the barrier. Examples are units like Celia, Gray, and Dalvi.
Alternatively, you can use Hikage with her 12 chain skill to remove the barrier on the weak point.
Crushing Yoma Power
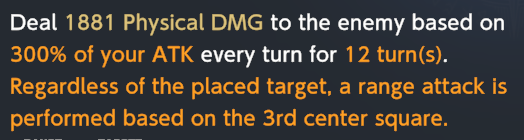
Have any chainer and wind DPS tank this hit, so they can receive buffs from S3 and C2.
Shed Skin
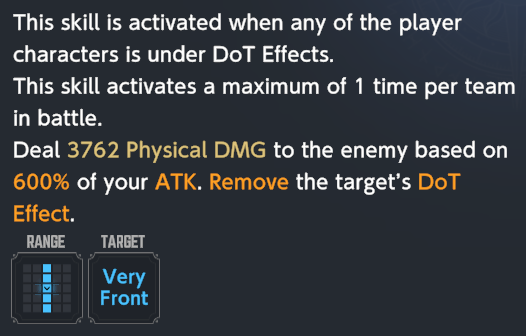
This skill will trigger right after S2 applies DoTs on your allies. Have one of your M/ATK buffers tank this hit, and not your chainers or DPS units, because they want to keep the DoT on them for S3 and C2.
Surging Yoma Power
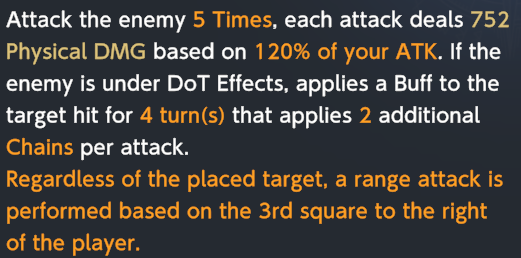
A huge buff to chain stackers, allowing Celia to chain for up to 28 on the nuke turn. So have them, and any other unit with a DoT applied take this hit.
Devour Pain
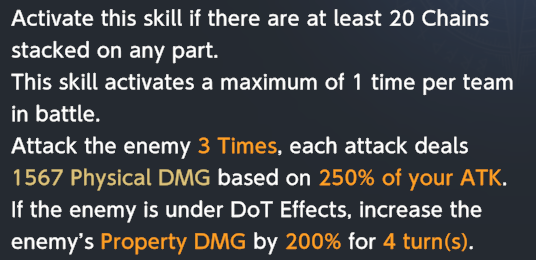
Have your wind DPS units (with DoTs on them) take this hit, to get a buff to their advantage DMG. Afterwards, nuke the fiend!
River's of Blood
A team wipe! Your next team then takes the stage as the Fiend loops back to S1 and refreshes its conditional skills.
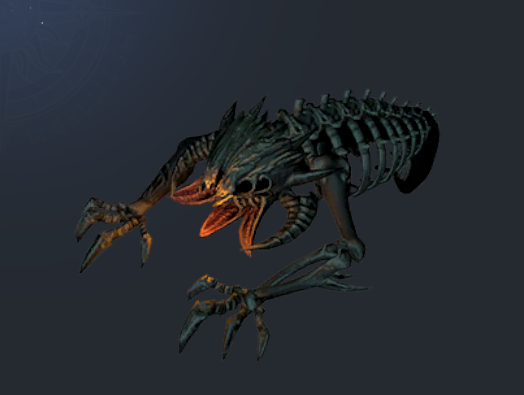
Hunting the Fiend
S1 → S2 → C1 → S3 → C2 → S4.


This fiend simply requires you to have a chain stacker for the barrier in S1. This can be solved either by Celia or Hikage, although the latter only works for the weak point. Vanguard Gray and Summer Dalvi can also provide some chains to make it easier to deplete while also providing damage.
Afterwards, have your chainers and wind units take the DoT from S2, have them dodge C1, then have them take S3 and C2 for buffs. The turns after S3 and C2 are both nuke turns.
DPS Review


Yomi (×12 AoE) — A great F2P option given how we're getting her to +5 for free. She has pretty good damage, and while she's pretty expensive, that isn't much of an issue in Fiend Hunt. However, her 3 turn cooldown means that she can't deal damage on both nuke turns, making her worse than other options
Hikage (×5 AoE) — Her AoE might not be impressive, but the fact that she has 12 hits (and very high damage) means that she'll hugely benefit from the +2 chain buff from this Fiend. She also has no damage downtime (at +4), so at that point she'll definitely out-damage Yomi.
Nebris (×7/×10 AoE) — Nebris's new costume makes her quite competitive now, giving her that much needed complete skill cycle, as well as a significant Crit DMG self buff. If you have both costumes at equal investment, then Laid-back Lifeguard is best saved for the second nuke turn, so start her rotation with Lifeguard after S1 (if you have Lifeguard +3, make sure to use her before any buffer so she gets that ATK buff).
Gray (×11 Vanguard/×7 DoT AoE) — Gray's damage won't be as impressive for the average player since the Fiend doesn't hit 1,000 ATK until level 12, but he's an option if you don't have anyone else.


Yozakura (×8 Skill/×5 Basic Attack AoE) — If you're using Yozakura, her skill will out-damage her enhanced basic attack due to the skill's AoE. Thus, you should be using the enhanced basic attack in the first nuke turn, and her skill in the second nuke turn.
Dalvi (×11 Summer/×7 Bright Moon AoE) — A decent choice since she has full uptime and a decent DoT. She can also provide chains to help break the Fiend's barrier effect.
Venaka (×9 AoE) — Venaka should be fine, but she's still missing a second skill, so just like Yomi, she'll have a bit of an issue since she can only deal damage in one of the nuke turns.