Table of Contents
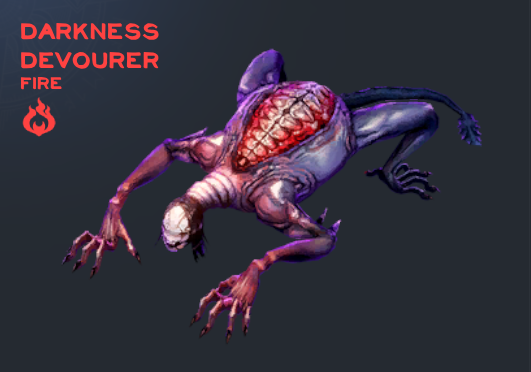
The Darkness Devourer is back... but it's full of flames? I guess fire devours darkness. Anyway, this fiend is a magic damaging enemy with a fixed DMG attack and a kill attack on its conditional. You will need to weather both in order to maximize your damage, so prepare accordingly!
Key Points
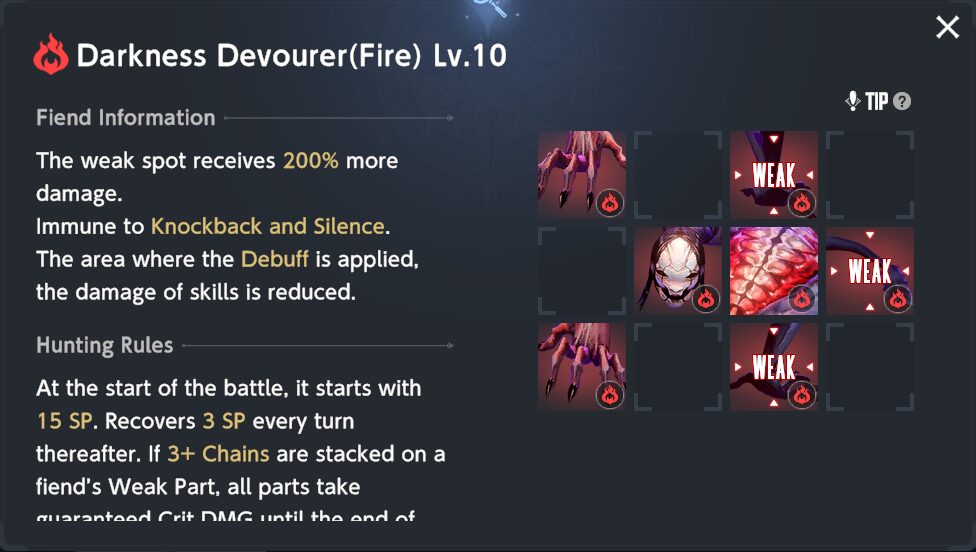
- Fiend Stats: 0 DEF & MRES, 50 Fire DMG, 25 Wind RES.
- 15 Initial SP, 3 SP gained per turn.
- Build MRES Gear.
- Weak spots take 200% more damage.
- Use an Energy Guard to tank S2.
- Be careful of when you use your skills with debuffs. Make sure not to use any until after S2, where you trigger C1.

Skill Rundown
S1 — Howl of Weakness


A simple attack that you have to tank. This ability isn't really threatening if you have 90 MRES on your units.
S2 — Hematemesis of Corruption


Use an energy guard (Anti-Dystopia Diana for example) before S2, then have your DPS units tank this skill so that they gain 100% advantage damage instead of 50%. Afterwards, trigger C1 for your nuke turn.
S3 — Gesture of Demon


Another unthreatening hit for 90 MRES units. Just position well so that it only drains 2 SP from you.
S4 — Echo of Death
A team wipe! Your next team then takes the stage as the Fiend loops back to S1 and resets its conditional skill.
C1 — Gesture of Ruin

Trigger: Use any stat reducing debuff on the Fiend.
Trigger this conditional skill right after S2, in order to stack all the amplifications the Fiend has. Be careful not to trigger this by accident, since this conditional is very easy to trigger.
This skill also kills one of your units, so use your buffer's skill right before C1, then sacrifice them here.
Hunting the Fiend
This Fiend is very straightforward, simply use the following skill sequence:
- S1 → S2 → C2 → S3 → S4
- Use your highest damaging skills right after C2.
Team Building
Example Composition:


Rafina (DPS) — This Fiend's weak spots were made for Rafina, who can easily hit all of them. On top of that, this Fiend does not debuff itself with vulnerability, so Game Club Rafina's debuff is fully effective! Schera is not nearly as effective, since she doesn't hit all three weak spots. Sylvia with SQ is good if you replace a buffer with Rigenette.
Diana — You also need Anti-Dystopia for this Hunt, otherwise you'll lose out on a bit of advantage DMG buff.
Teresse (Amplifier) — Lathel and Arines are also fine, but Teresse has the best buffs over the course of 4 turns, since crit rate is useless and you need to sacrifice a buffer to C1.
Celia (Amplifier/C1 Trigger) — Be careful not to use Celia's other skills too early. Ideally you have Bunny Celia +4 for this Hunt—If not, you'll need to adjust your rotations.
Lathel (Flex Slot) — A second buffer for hypercarry Rafina should be ideal, but you can alternatively use another physical DPS who takes advantage of Game Club Rafina's vulnerability (like Liatris), or another Water DPS. If you don't have Bunny Celia +4 or Code A Rafina, you may be forced to use this slot on a debuffer.
Rotations
Celia's optimal rotation should be Basic → Bunny → Descendant → Curse, but this requires Bunny Celia +4. If you don't have that, you'll need to use Rafina (or even your flex slot) to trigger C1.
Rafina's optimal rotation should be Basic → Game Club → Steel Engine, but if you either do not have enough dupes on Steel Engine, or you can't use Celia as your C1 trigger, then you can use Basic → Code Name A → Game Club
Closing Remarks
This Fiend Hunt is really straightforward, besides the nuance in triggering C1. With two teams, there shouldn't really be a problem beating level 10. Maid Lia will probably end up doing tons of damage again.