Table of Contents
Purple Luffy was crowned champion in two different regions for One Piece Card Game! Felipe Arze and Allen Lu took 1st place in the LATAM and Oceania finals respectively with this deck. In this deck guide, get to know their lists and accompany us through the strategy behind the deck and get ready for your next tournament!
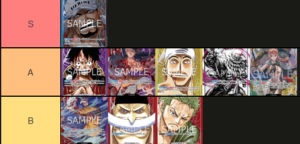
Trec and Djidone have already covered some deck guides of the important meta leaders in One Piece Card Game: Zoro, Enel, Zakazuki, and Edward Newgate - make sure to check them out also!
Deck Presentation
Deck Concept and Strategy
What better time to talk about PLuffy? A few days ago, Felipe Arze and Allen Lu won their respective Finals (LATAM and Oceania) with this deck. I put both lists because they are quite similar, allowing us to observe the strong and repeating points and the slight changes we will discuss in a little more depth later.
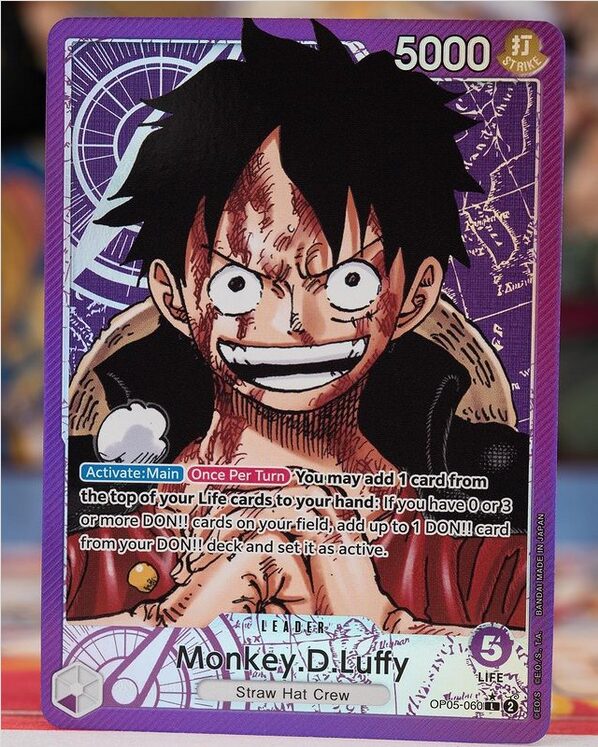
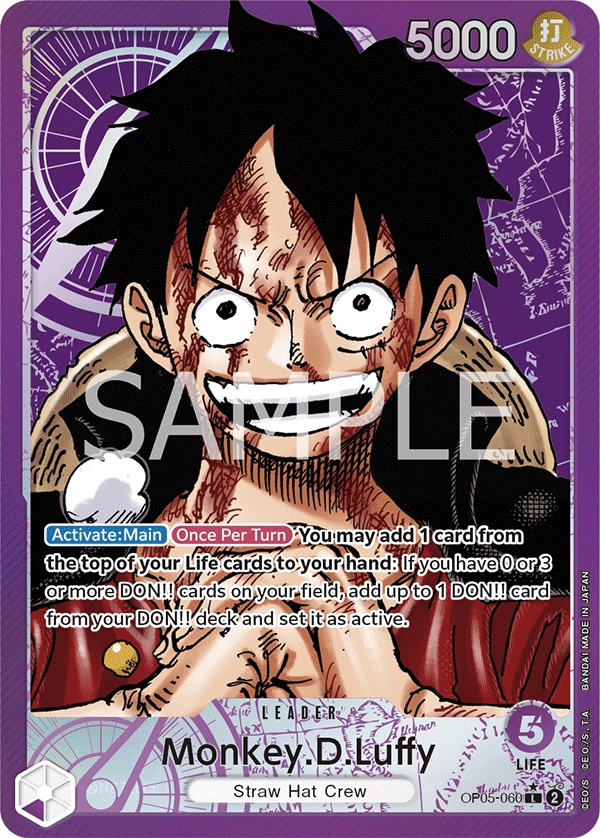
The first thing to highlight is the skill of the leader. This effect allows us to ramp a Don!! in exchange for adding one of our lives to our hand. The important point is that it's an active Donn!!, which makes a big difference compared to the effects of some other cards with similar effects but that ramp rested Don!!s.
This ability gives us a card advantage and quickly reaches 7 and 9, Don!! turns which gives this deck the ability to perform power plays before the opponent. The way this deck curves becomes quite oppressive for the opponent. Ensuring that this oppressive curve is presented consistently the deck is usually built with 4 copies of its most important cards making the deck easy to play overall since you're going to want to do the same thing almost every game.
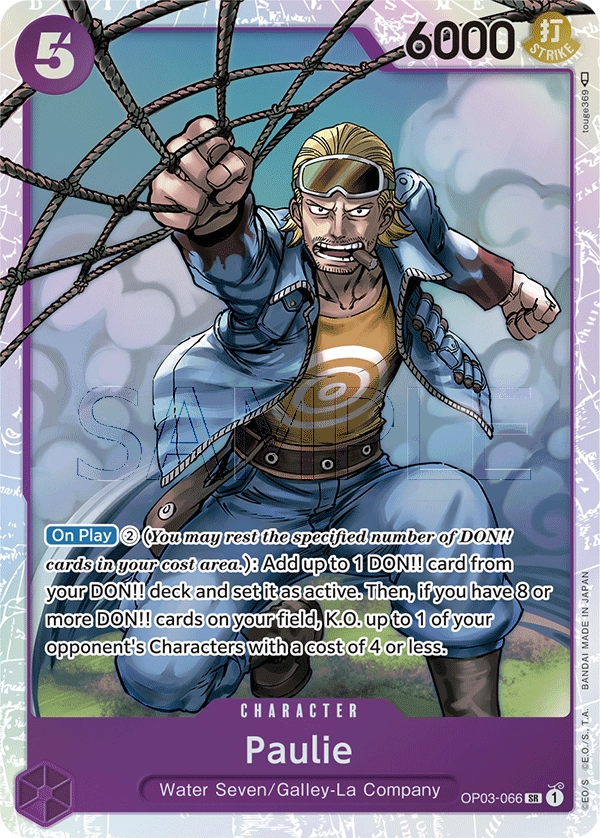
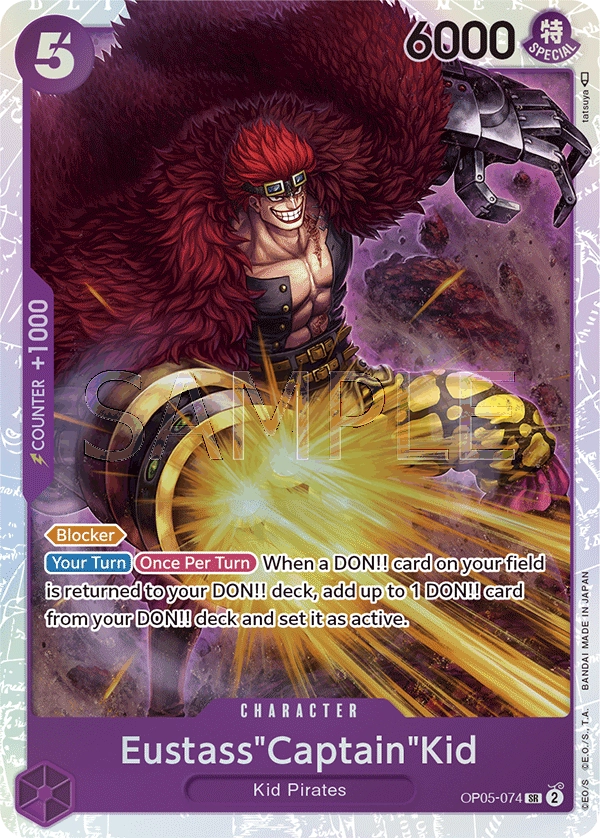
PLuffy usually starts playing from turn 2. Whether we play first or second, thanks to our leader ability we can play 4 or 5 cost cards during this turn. This is the reason for a large number of 4 and 5-cost cards such as Ulti and Trafalgar Law in the fours, and Paulie, Eustass"Captain"Kid, and Queen in the 5.
After these cards have allowed us to dominate the early game and transition into the mid-game, Kaido and Urashima will make sure to close out the game solidly before the opponent can react.
Four Cost Core
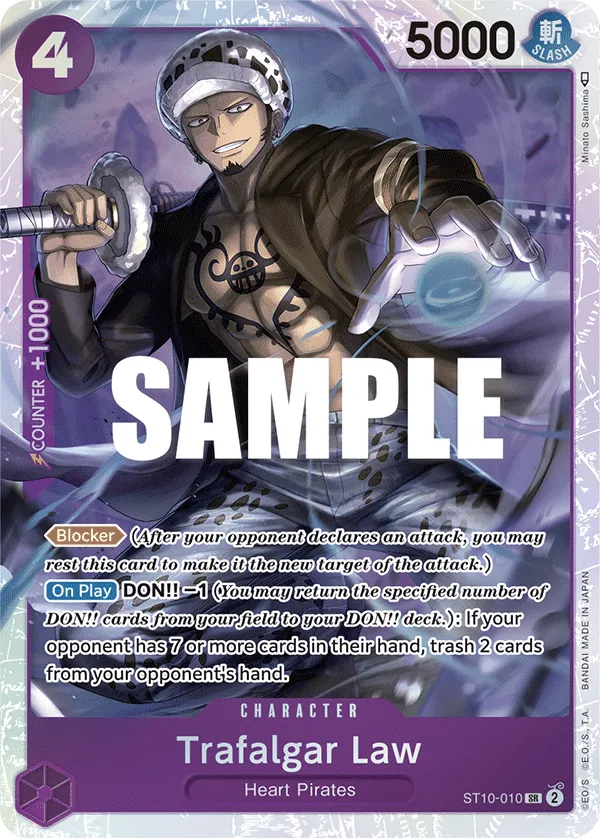
A vanilla 6K and the blocker Law. The important thing to clarify about Trafalgar Law is that you don't have to use the -1 ability every time even if your opponent has 7 cards. Commonly your opponent is going to counter this deck's first attack just to get out of the Law range of effect. Even if you have the chance, the main goal of this deck is to get 10 Don!! as fast as possible.
This is something achievable as soon as turn 4 if Law doesn't take one of our Don!! and the games became much easier from that point onwards.
Think about Law as a way to bait your opponent for countering the first hit + a way to stop hyper-aggressive decks like Roronoa Zoro or Trafalgar Law.
Combo
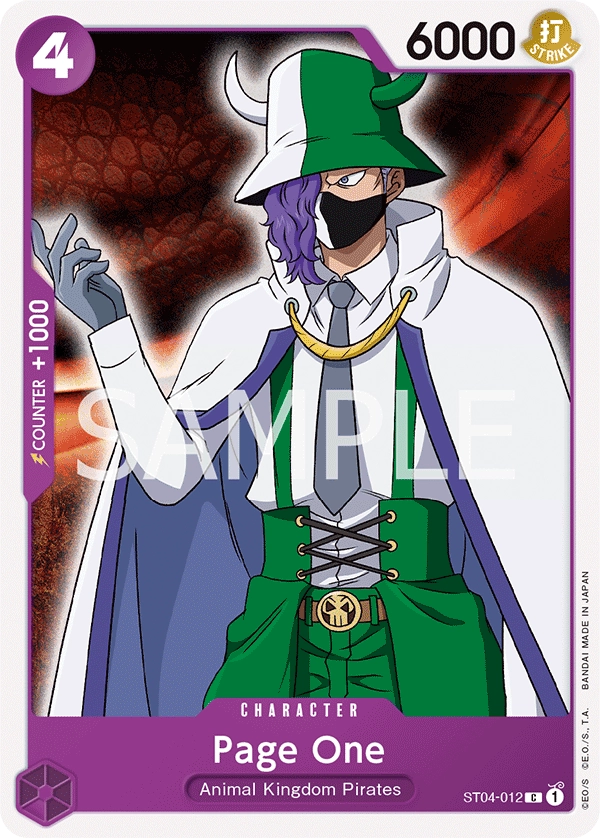
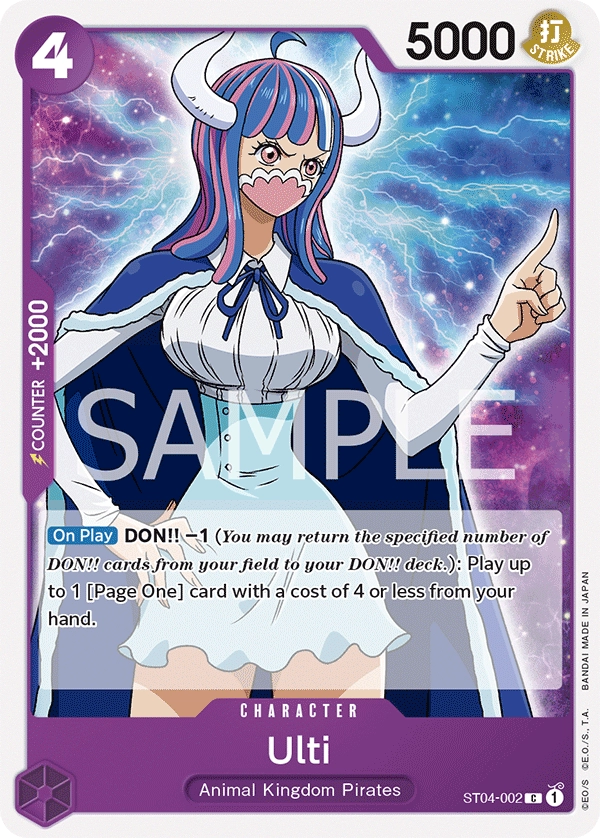
The combo of the deck. Even if these cards work amazingly together, is very important to understand that going for the combo every time is incorrect. Sakazuki can easily remove both cards in his second turn. Is because of this that in some situations playing just Page One is correct. Also, using the -1 Don!! ability early stop us from having Don!! advantage, which is the main reason we want to play this leader. Save the combo for when we are ahead and our opponent already used some resources tends to have better results.
2K Counters
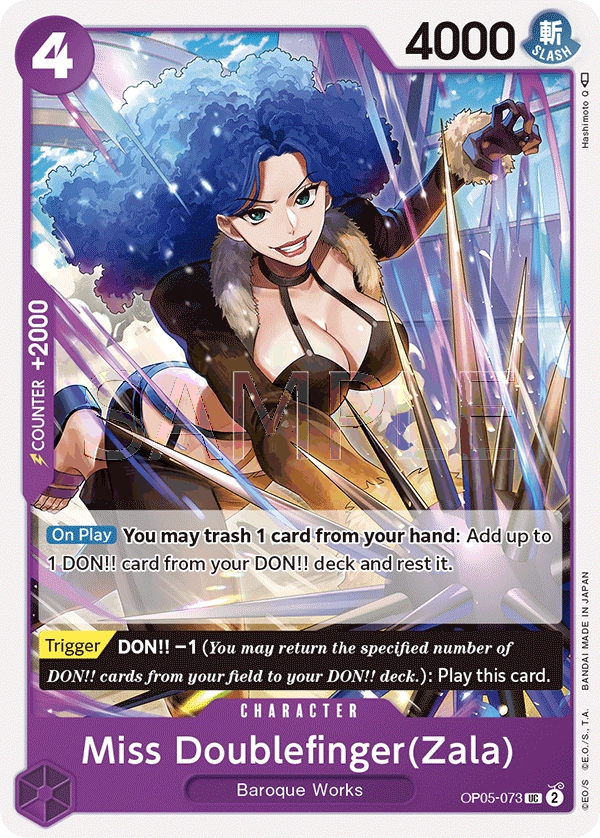
Miss Doublefinger is extremely important for the Sakazuki matchup. Besides being a 2K counter, it's an additional body. Getting this card by its trigger effect is fantastic. 4K power could be not that much, but most of the time is enough for attacking Brannew, Hina, Shura and many other low-power relevant staples.
Most of the time you will keep the 2K counter against Yellow but against the Sakazuki matchup it's 0K to play Miss Doublefinger when she triggers.
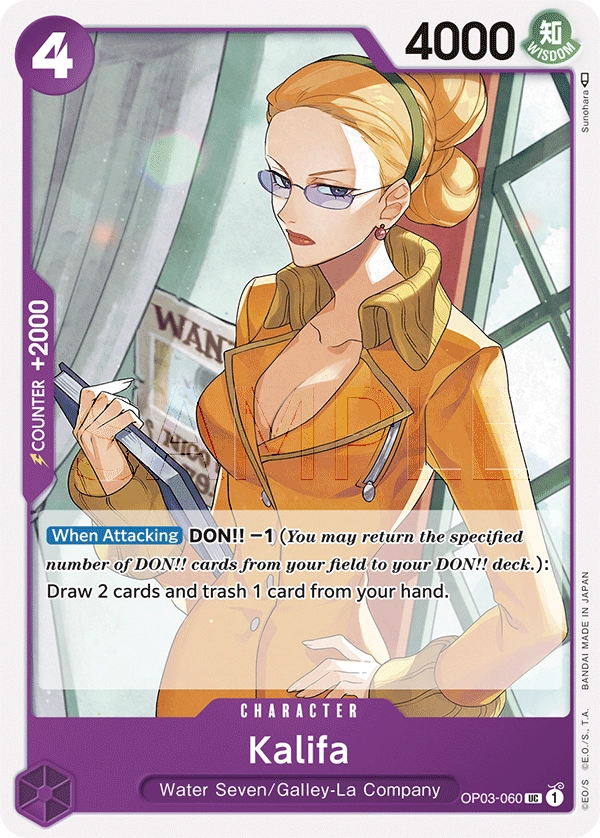
She has the same effect as Queen which is important because this deck doesn't have searchers like many other archetypes. Is because of this that when you play it you should try to play Eustass"Captain"Kid afterwards. After you play Kalifa, all opponents' attacks will mostly aim at Kalifa to stop you from drawing cards every turn. That's why protecting her is extremely important. Also, Kid minimizes the effect of -1 Don!!
Five Cost Core
The heart of this deck is the five cost cards. Certainly one would think that the main reason for quickly reaching 10 Don!! it would be to play huge characters. The reality is that in this case, the idea revolves around getting the greatest possible advantage from the five costs.
In Paulie's case, this is probably the best card in the deck. Yes, it is a strong statement, but being able to play it on a curve makes a huge difference between games where it is possible and those where it is not.
We could consider it a 7 cost for the cost of the ability. However, in this deck, we can pay this cost on turn 3. This would allow us to get rid of an enemy body, field a 6K, and also ramp a Don!! This makes the tempo change in the game tremendously significant.
Additionally, Paulie's ramping ability will allow us to reach 10 Don!! the subsequent turn if you have played it on a curve, which will allow you to play double cost five without problem (or a Kaido, but it would probably be the last option since we prefer to maintain the advantage of Don!! whenever possible).
Blockers
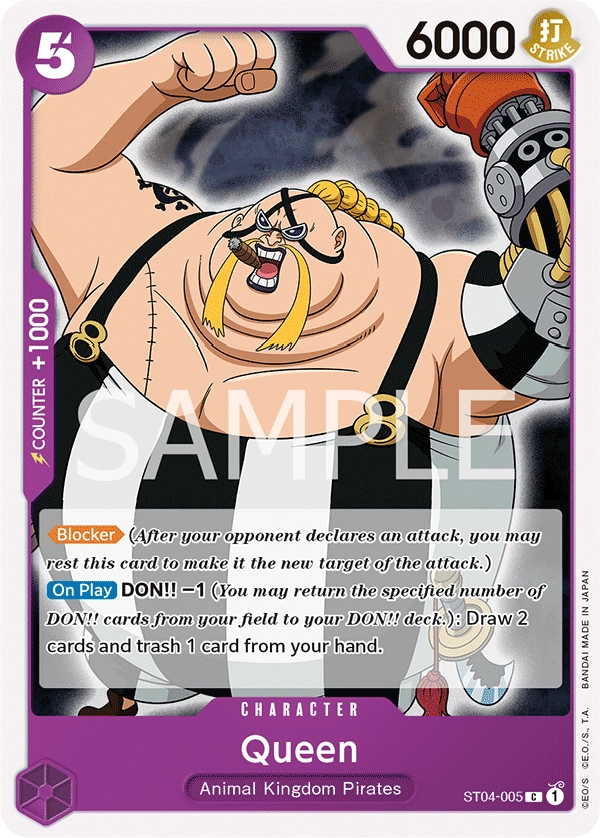
We've already talked a bit about how important cycling effects are in this deck due to the lack of searchers. Queen provides redundancy to Kalifa's effect and also functions as a 6K Blocker, which is quite useful when trying to keep opponents at bay.
For his part, Eustass"Captain"Kid gives us redundancy with the blocks which, as we have already mentioned, keeps Kalifa safe. Now, we can attack with Kid every turn and it will continue to perform its function. This is because, like Kalifa, the opponent will try to remove it quickly due to the powerfulness of its effect and will attack it the first opportunity they see it rested.
Disruption
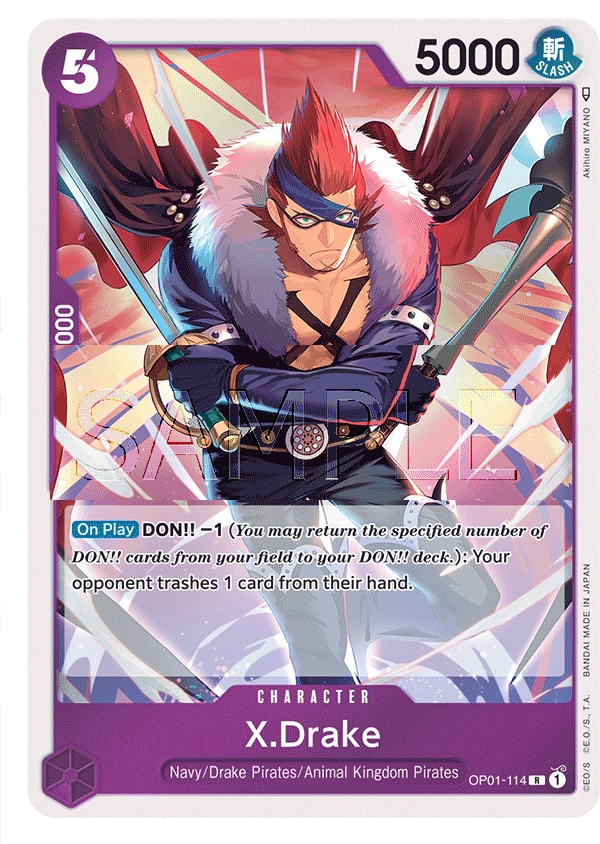
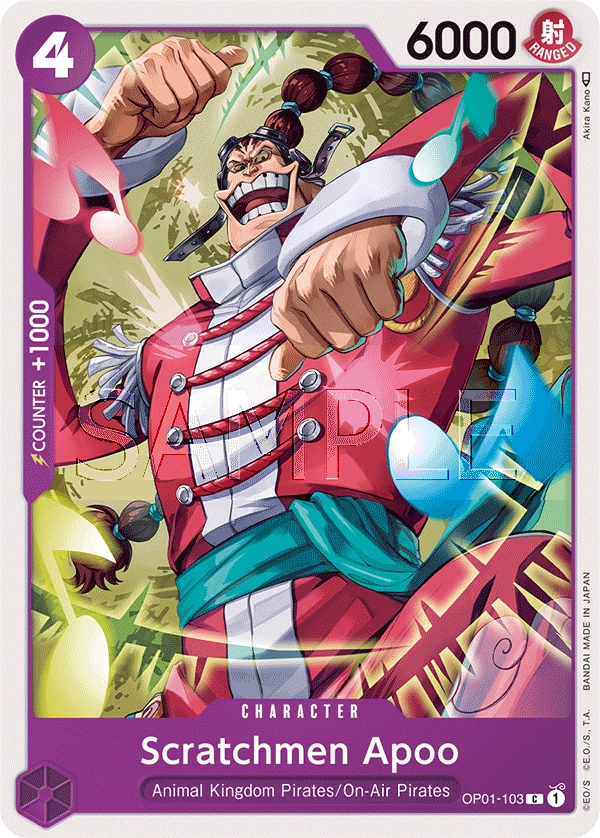
Drake isn't a card we typically want to play on curve, but depending on how we're planning our attacks, it's a possibility. This is because thanks to its effect we can force the opponent to discard a card, which often translates into forcing the opponent to lose resources and making their counters less effective. However, its best moment will be when we have Kid on the field, which will allow us to recover the Gift!! that we use to pay for the Drake effect.
It's a flexible spot, so it will be common to see a variation in the number of X.Drake in various competitive lists. Normally it will be between 2-4.
On Curve


This is undoubtedly the main difference between Felipe's and Allen's lists. The reality is that most competitive tournament lists usually carry Ms. All Sunday, however, the choice of Felipe makes a lot of sense when we stop to analyze it.
While playing Ms. All Sunday is not a mistake since it is practically a staple card of the purple color, the reality is that Magellan is extremely powerful against the strongest and most predominant decks in the current meta. It's so much so that Magellan is probably the only effect of -Don!! that we are going to want to play on a curve most of the time.
This makes me think that in reality both options are correct, but in the end, the decision will be meta-dependent.
This is so true that against Charlotte Katakuri or Enel, Magellan, it becomes practically an extra turn, plus it's very difficult for them to remove.
Big Bosses Core
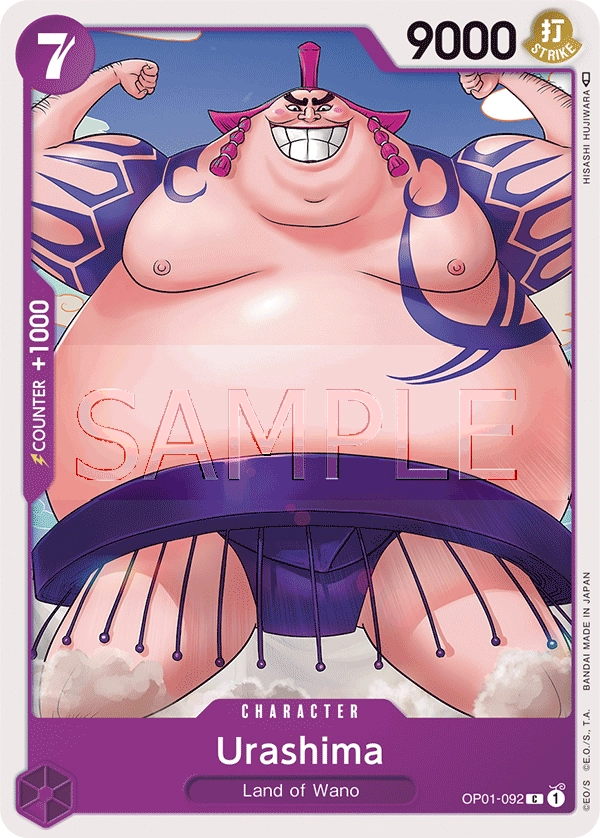
Urashima is a card that many Purple players start using for matches against Yellow. Many lists use Eustass"Captain"Kid instead of Urashima. 7C Kid is a great card, however, in this deck, the strategy highly values reaching 10 Don!! to develop our board, which makes Urashima a great choice for playing on a curve, making big swings, and putting a huge body on the field without losing the Don!! advantage.
It's important to say that Felipe said in an interview after his LATAM Finals win that if he would make a change to the list after the tournament that would be -2 Urashima +2 X.Drake
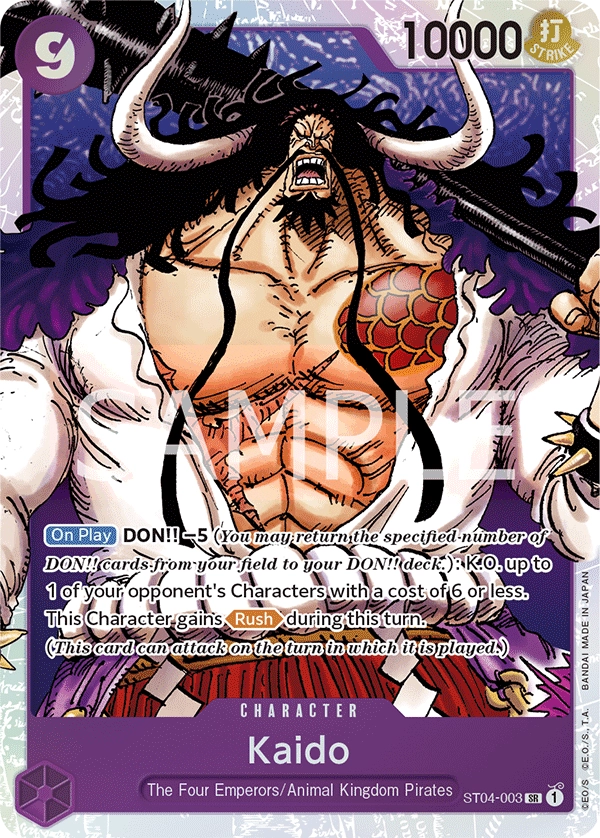
The most important thing to understand why Kaido is that, like other cards we have mentioned here, we normally won't want to play it on a curve.
The ideal strategy is to keep Kaido in hand as much as possible until his ability makes losing 5 Quirks justifiable. This means that when we go down we have an excellent target to eliminate in addition to Kaido's attack being enough to eliminate another valuable target or leave the opponent out of combat.
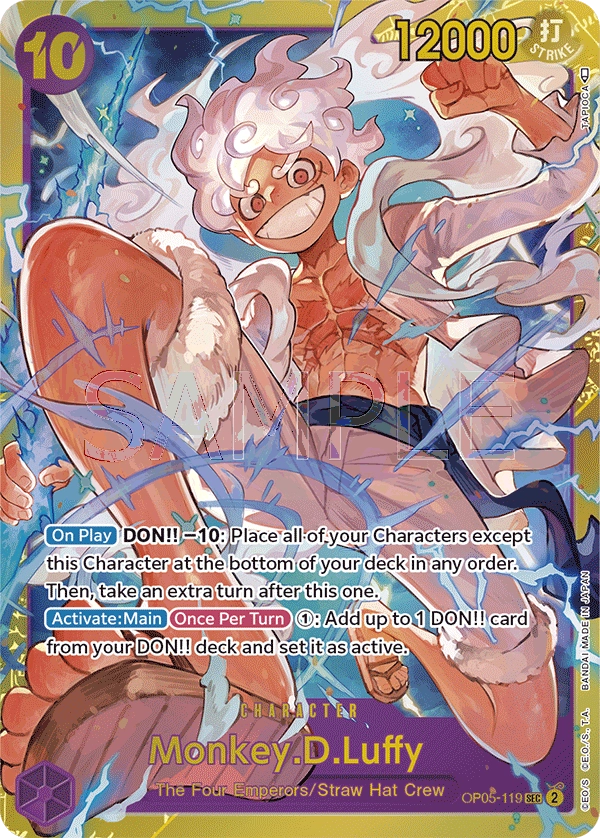
To finish with the characters, the 10 Luffy is probably a card that few expect or play around with. This means that in the case of Felipe, who decided to play a copy, he had moments where the lack of knowledge of this caused the opponent's calculations to go overboard and the game got out of control in favor of PLuffy.
This is particularly good against Sakazuki. Although Felipe's list is better prepared for the match against Yellow, having a tool against Sakazuki never hurts.
Events
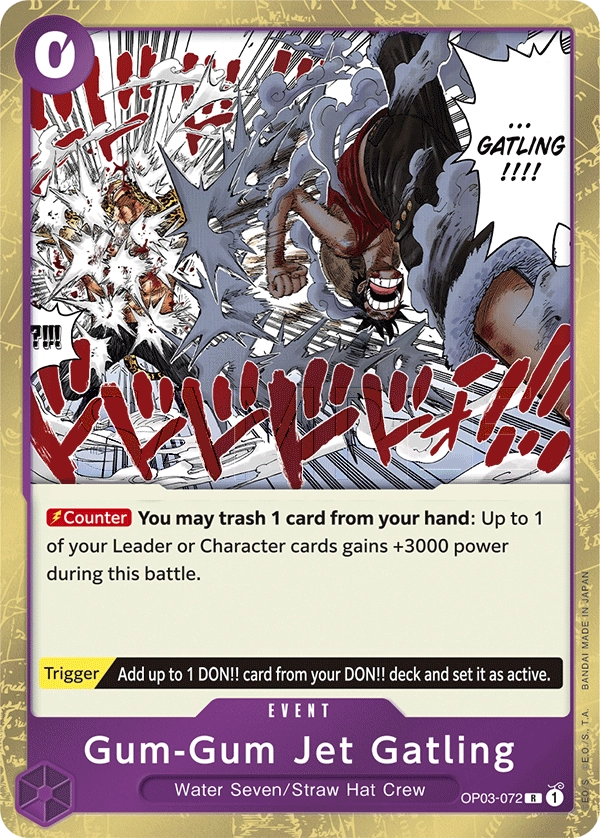
[/card]OP03-072-gum-gum-jet-gatling[/card] is an important event to play with this leader. Felipe plays 3 copies and Allen plays 2. I would dare to take 4. The reasoning is simple. The best thing we can do in this deck (and in general terms in any TCG/CGG) is to make effective use of our resources every turn. Have an event that allows us to defend ourselves without having to pay 1 Don!! It is widely advantageous.
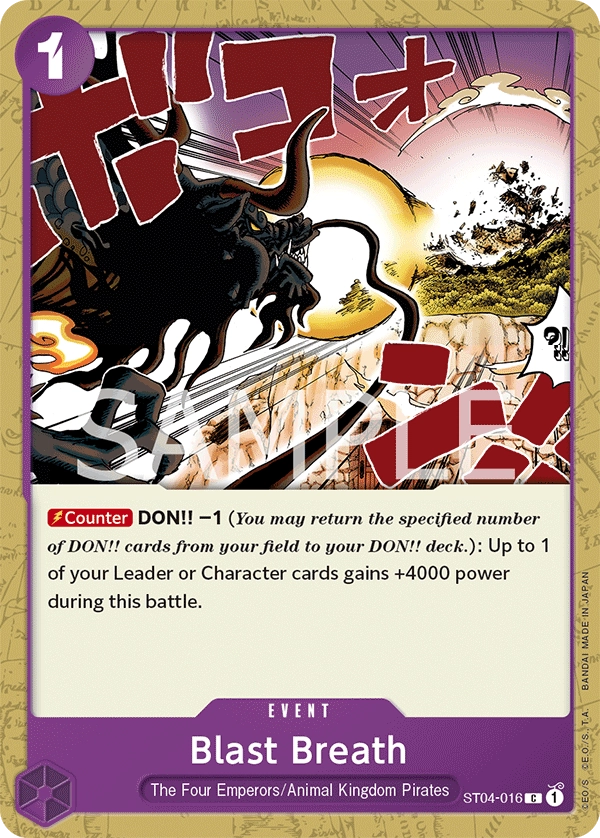
Now, that's not to say that Blast Breath is a bad event. Allen's list has 2 and won the Oceania finals, however, it is quite easy for the opponent to play around this event when seeing Don!! open on PLuffy's side.
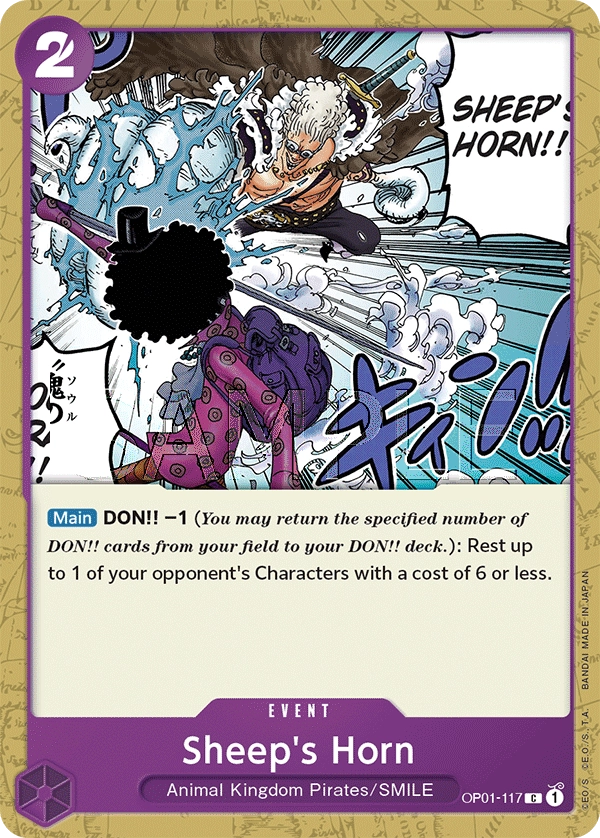
This results in the reason why Felipe carries a Sheep's Horn. It is a card that very few opponents expect and helps enormously to close out complicated games. This singleton along with the Luffy copy seems to me to be the correct way to play tournaments. It reminds me a lot of Magic and other card games in general where singletons in high-level competitive tournaments tend to be differential when it comes to the most complicated games.
Matchups
Sakazuki
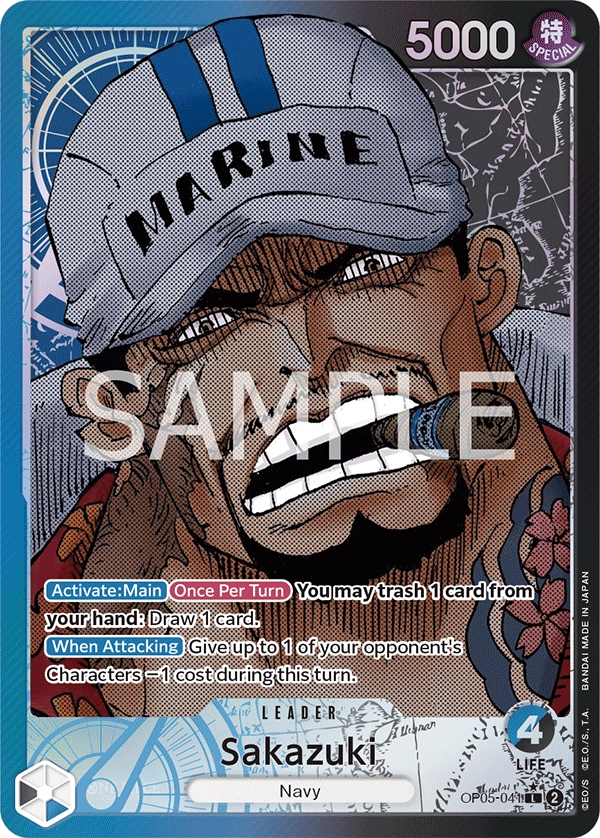
The most complicated match. This certainly doesn't mean it's impossible. There's a reason Felipe and Allen managed to win their Finals despite the sea of Sakazuki they faced on the way to being crowned champions.
The big advantage is that even though they have a lot of removals, PLuffy's curve is high enough that it takes a little more work for Sakazuki to eliminate our threats. Try to exert pressure with your high-cost characters, try to reach 10 Don!! before Sakazuki, no matter what, and poke as many times as possible.
Enel
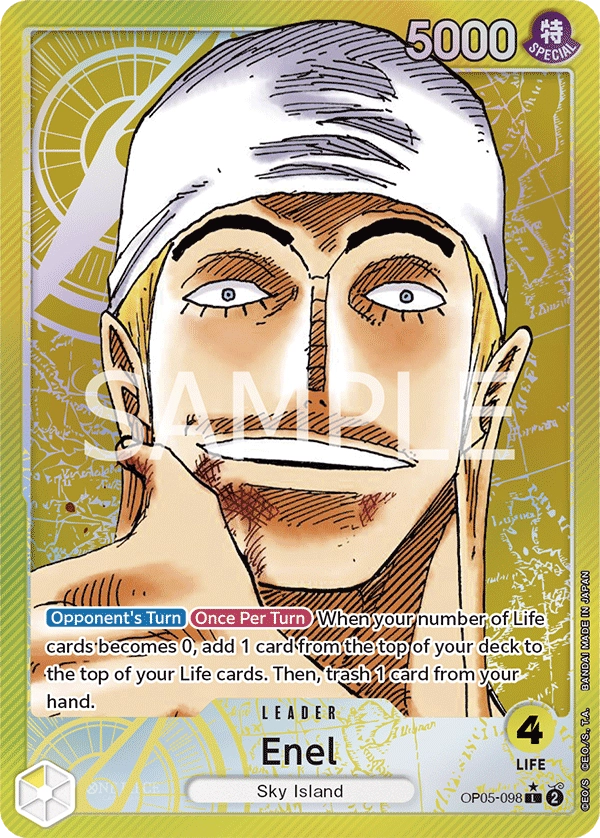
PLuffy is known for having a comfortable matchup against Enel. This does not mean that it is easy, however, if we ramp quickly, lowering two characters per turn should be our priority.
Doing so and playing wide makes it very difficult for Enel to keep up. This is always key when playing against Enel in general terms. Normally we will prefer more attacks to bigger attacks.
Purple Luffy
Learning to play mirror matches in any card game and with any archetype makes the difference between a slightly above-average player and players capable of making the top 8 in a big event.
In the case of PLuffy's mirror, the situation is in favor of whoever manages their Don!! better. This involves not only the cards played but also knowing when to ramp or not, as well as when to use -Don!! effects.
A central piece of advice would be to put down as soon as possible. The game usually goes in favor of whoever can have this character first on the field since they can use the abilities of -Don!! and recovering the resource thanks to Kid's effect will be the difference.
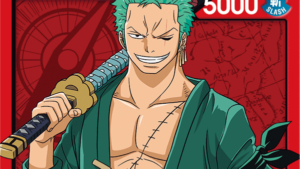
Zoro
This match is a curious situation. I know people who think that PLuffy has a favorable match against Zoro and nothing seems further from the truth.
While it is true that we have a good number of counters, we can still defend ourselves with the Dons!! rested, and PLuffy quickly scales to 10 Don!!, the vast majority of lists do not have turn 1 play. This is usually tremendously advantageous for Zoro who will be pressing hard from the first moment of the game.
It is true that if the game drags on a little we will have many blockers and counters as well as good removal in Paulie in the transition from early to mid-game. However, if Zoro's pressure is strong enough during the first 3 turns, we may not reach the late game in time.
This doesn't mean that we are lost or the match is impossible, but don't trust the saying that PLuffy has a favorable match. Play carefully and take advantage of Don!! whenever possible. It doesn't mean you ramp whenever possible. Lives are a resource, use them wisely.
Ending
PLuffy is certainly an archetype with favorable matches in the current meta and I think we will continue to see it throughout the OP05 and OP05.5. The interesting turning point will be to see what happens at the exit of OP06 since, although in Japan in OP06 PLuffy has been disappearing little by little, we must not forget that the Western meta usually has its particularities. Edward.Newgate and Roronoa Zoro as great examples. Time will give us the answer.