Table of Contents

The space station researcher, Grumpy, is conducting a mysterious test. This time, she has brought along her partner and has come to you, hoping for your assistance…
Gameplay Overview
Event Gameplay Duration:
➥ 2024/07/05 12:00:00 – 2024/07/29 03:59:00 (server time)
Eligibility:
➥ Trailblaze Level ≥ 21
Event Overview:
➥ After the event starts, a new challenge stage will be unlocked each day, for a total of 8 stages.
➥ Each challenge contains two difficulties: Dwarf Star and Supergiant Star. After completing the Dwarf Star stage, the Supergiant Star stage will be unlocked.
➥ Each challenge stage has a fixed stage mechanic to provide buffs to characters.
➥ In the Supergiant Star difficulty, defeating all 6 waves of enemies before the Cycle ends will result in the Perfect Win rating.
➥ During the event period, rewards can be claimed via Limited-Time Rewards upon achieving specific Objectives within the stages.
Stellar Shimmer Guide
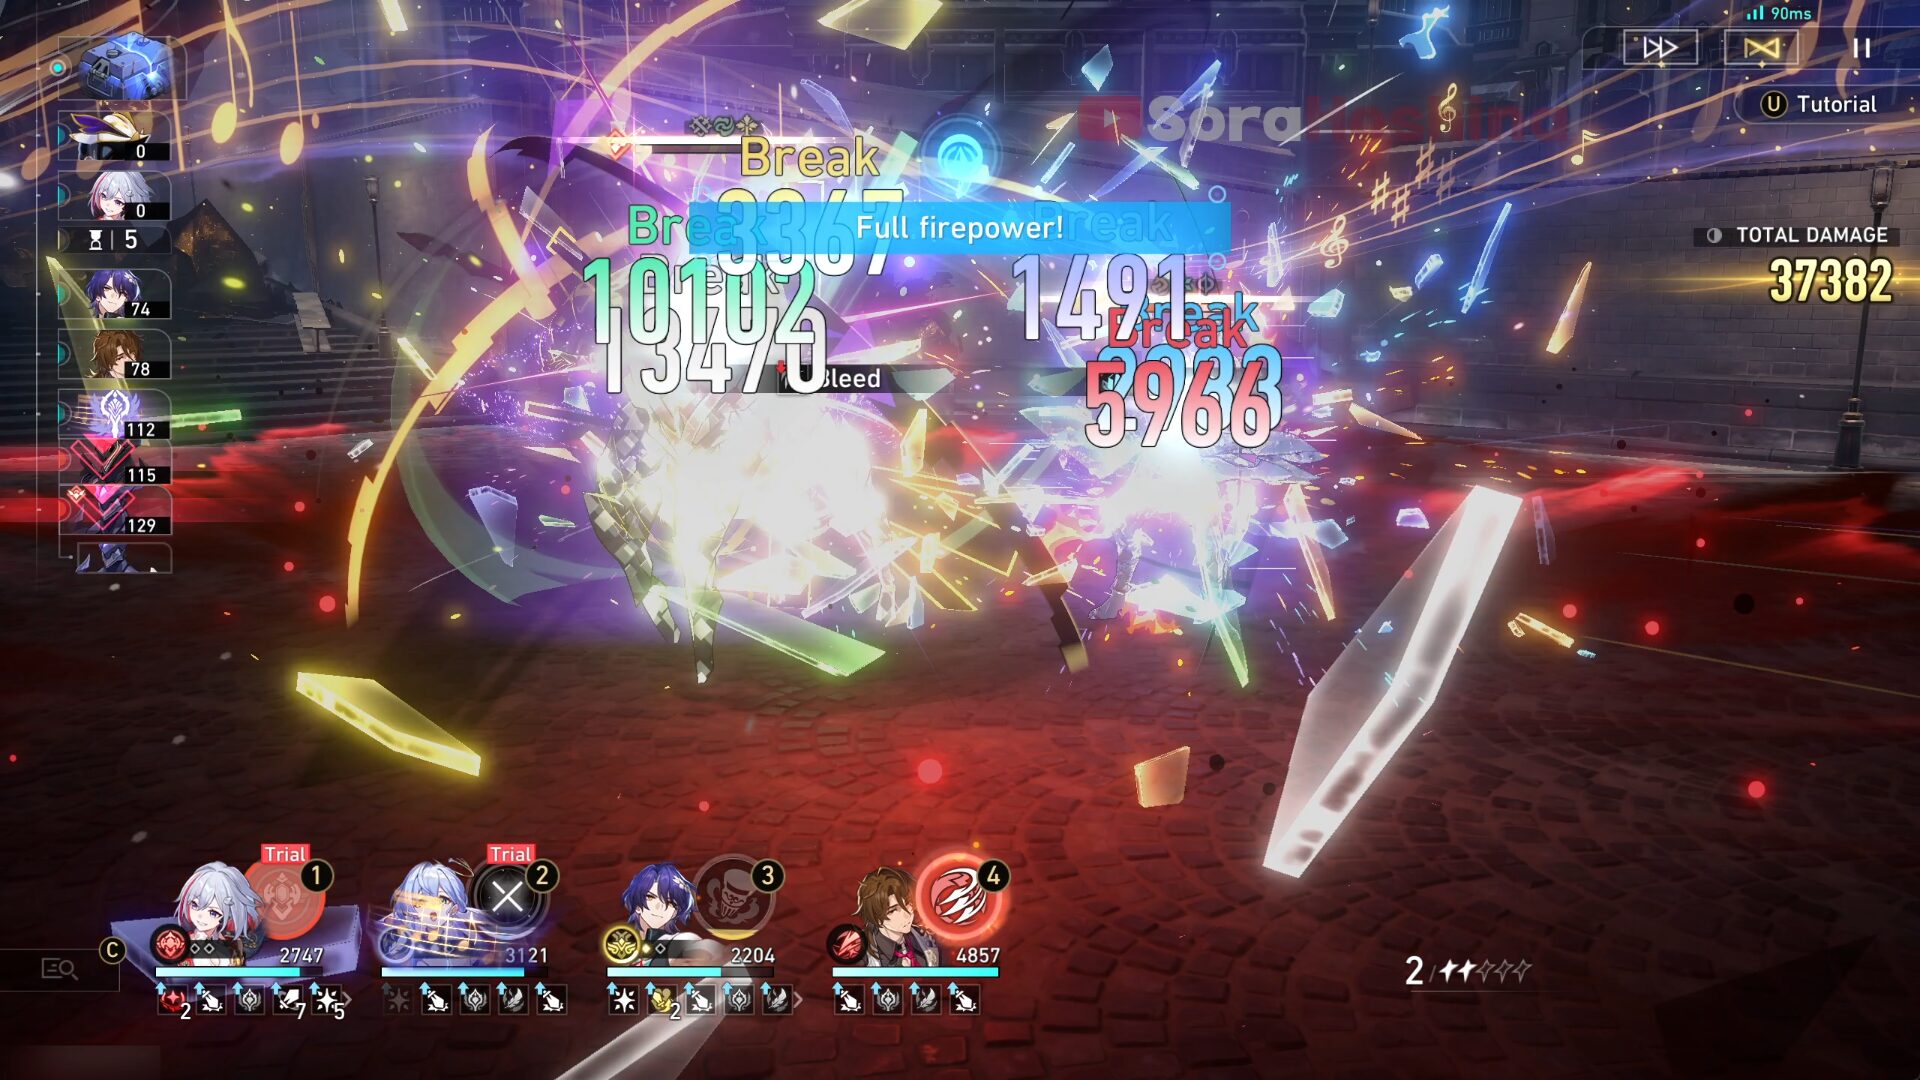
Stage 1 - Vanguard Breaker
Recommended Team

Stage Buff: When Breaking any enemy target's Weakness, Advances the attacker's action by 100% and recover 1 Skill Point(s). When Breaking enemy targets or attacking enemy targets in the Weakness Break state, deals Break DMG equal to 200% of the attacker's Break DMG.
F2P Team: Trial Firefly + Trial Harmony Trailblazer + Choose 2 of them (Ruan Mei / Asta / Tingyun / Pela / Gallagher / Huohuo)
P2P Team: Firefly + Harmony MC + Ruan Mei + Gallagher
You can bring 2 Harmony if you want. But if you want to bring a healer, make sure to only bring 1.
You can get S-Rank just by using the Trial Characters (+ your own supports).
Playthrough Video
Tips & Tricks

- Before anything, make sure Harmony's Trailblazer Ultimate is always available so Firefly can do Super Break DMG. Even better if you can get it up before Firefly's turn to wreak havoc.
- After that, get all other supports' Ultimate up as soon as possible.

- Because of the stage buff, always make sure that Firefly is the one doing the Weakness Break so she can have the next turn. If the enemy has a low Toughness Bar and only needs another one of Firefly's attacks, but there is an ally before Firefly, try to use their Skill that does not attack the enemy if possible (like Ruan Mei or Gallagher's Skill). It's okay though if the support does the Weakness Break sometimes if there are no other choices.

- When there are many enemies in one wave, defeat the mob first since they have a lower Toughness Bar (easier to Weakness Break), so she can have continuous turns from the stage buff (look at the video above to see an example at 1:12).
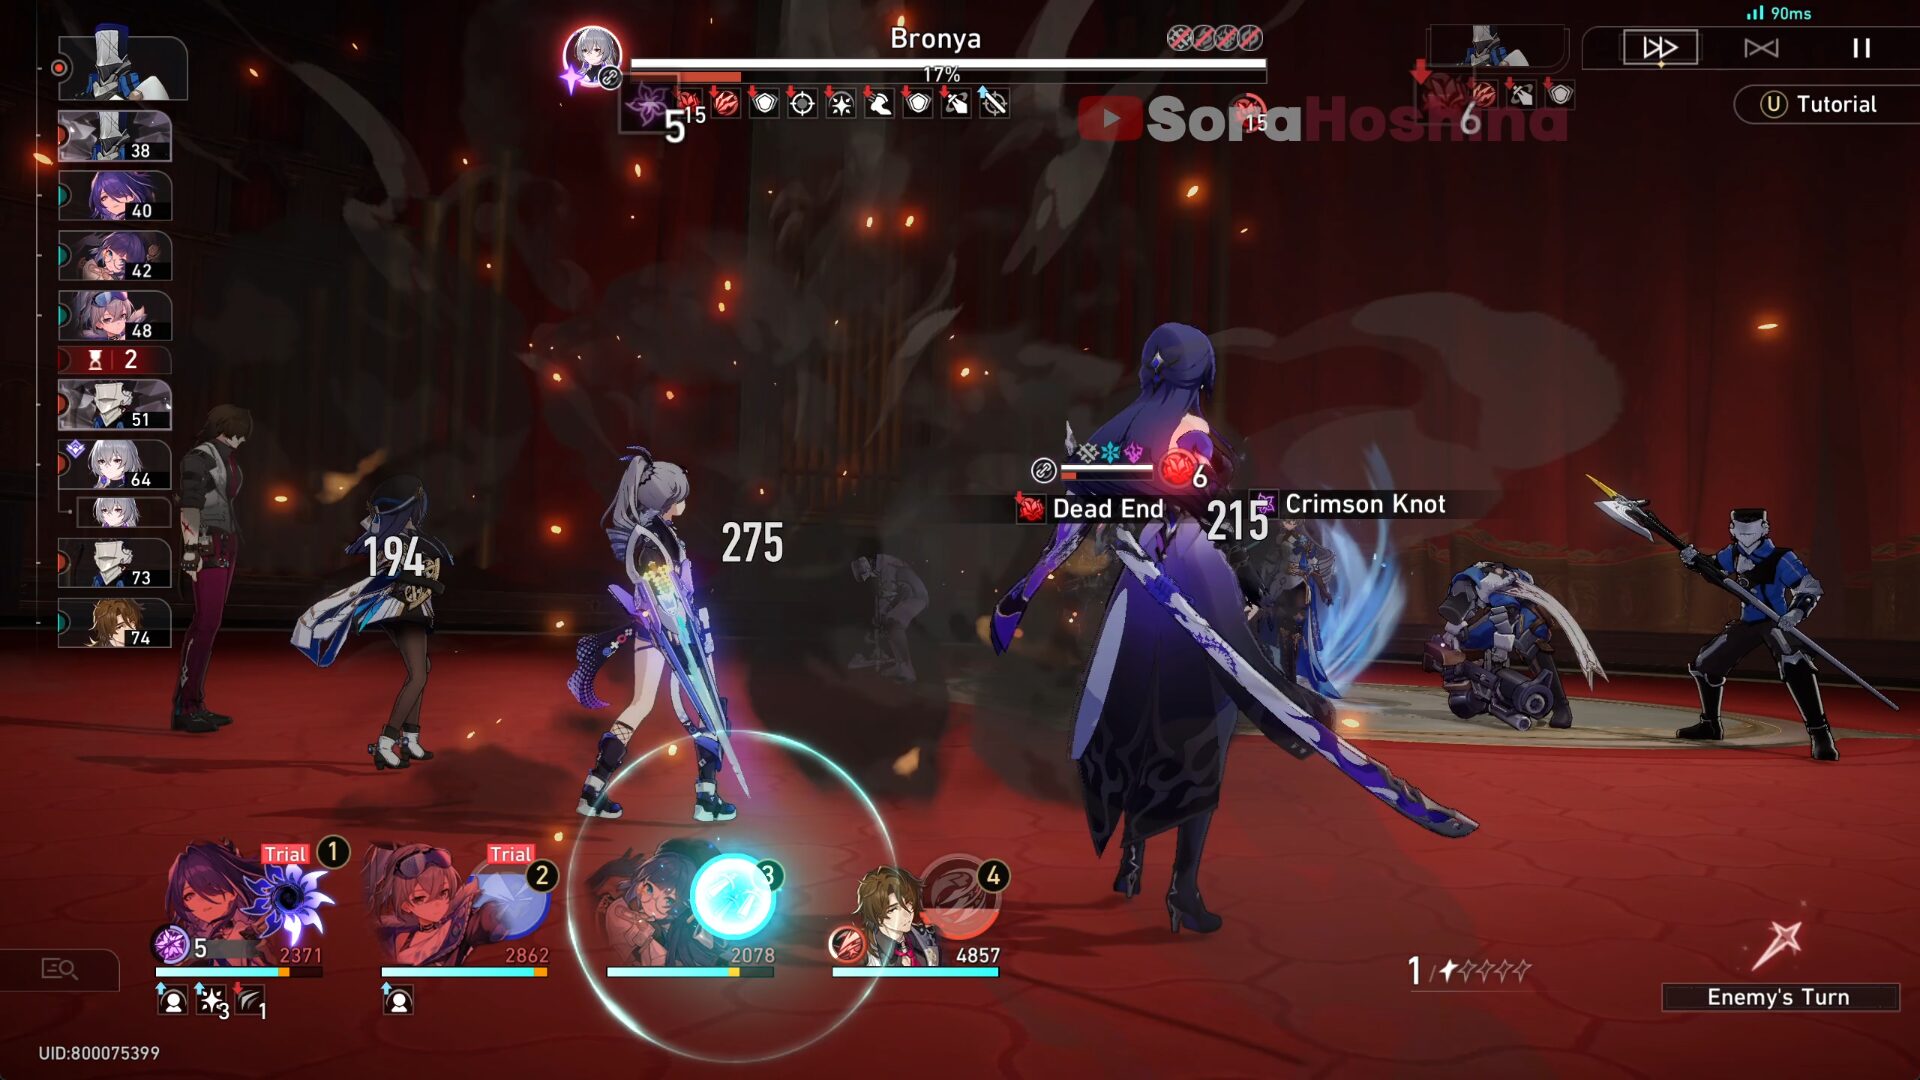
Stage 2 - Cycle of Suffering
Recommended Team
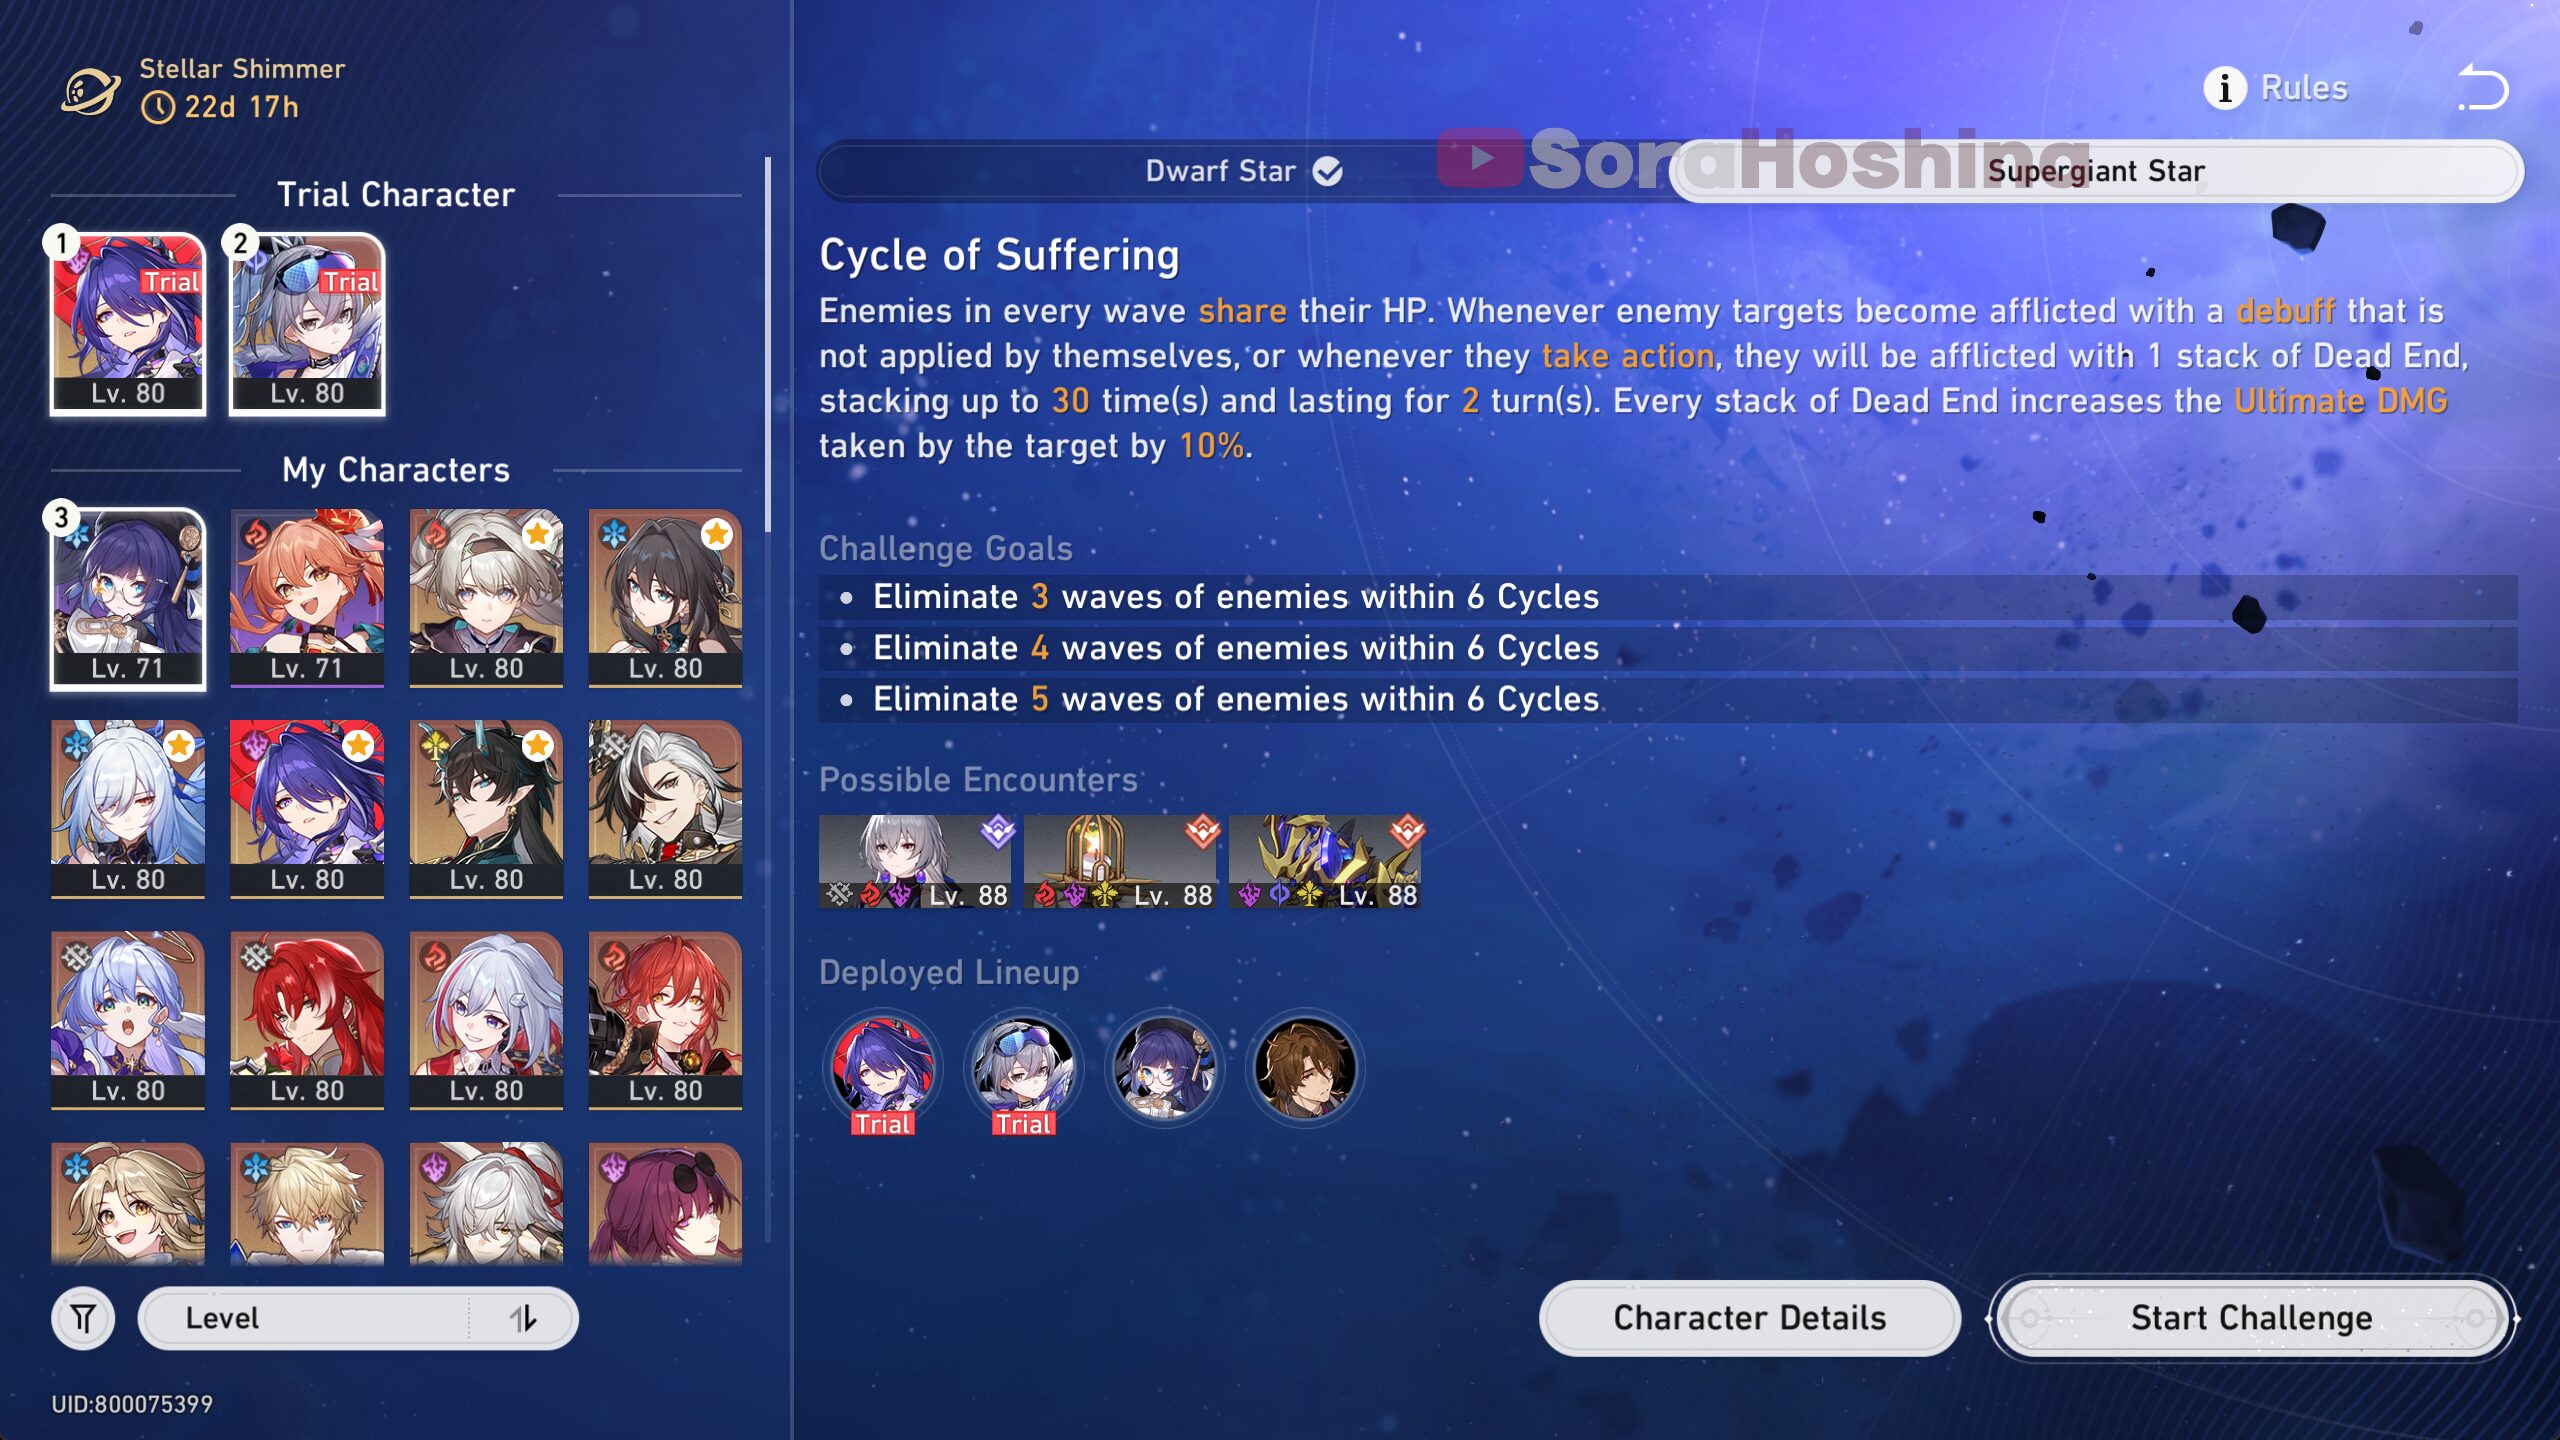
Stage Buff: Enemies in every wave share their HP. Whenever enemy targets become afflicted with a debuff that is not applied by themselves, or whenever they take action, they will be afflicted with 1 stack of Dead End, stacking up to 30 times and lasting for 2 turns. Every stack of Dead End increases the Ultimate DMG taken by the target by 10%.
F2P Team: Trial Acheron + Trial Silver Wolf +(Pela/Asta) + (Gallagher/Aventurine/Gepard with Trend of Universal Market LC)
P2P Team: Acheron + Black Swan + Pela + Aventurine
If you're using the Trial characters, make sure to bring a healer. You can get S-Rank just by using the Trial Characters (+ your own supports).
Playthrough Video
Tips & Tricks
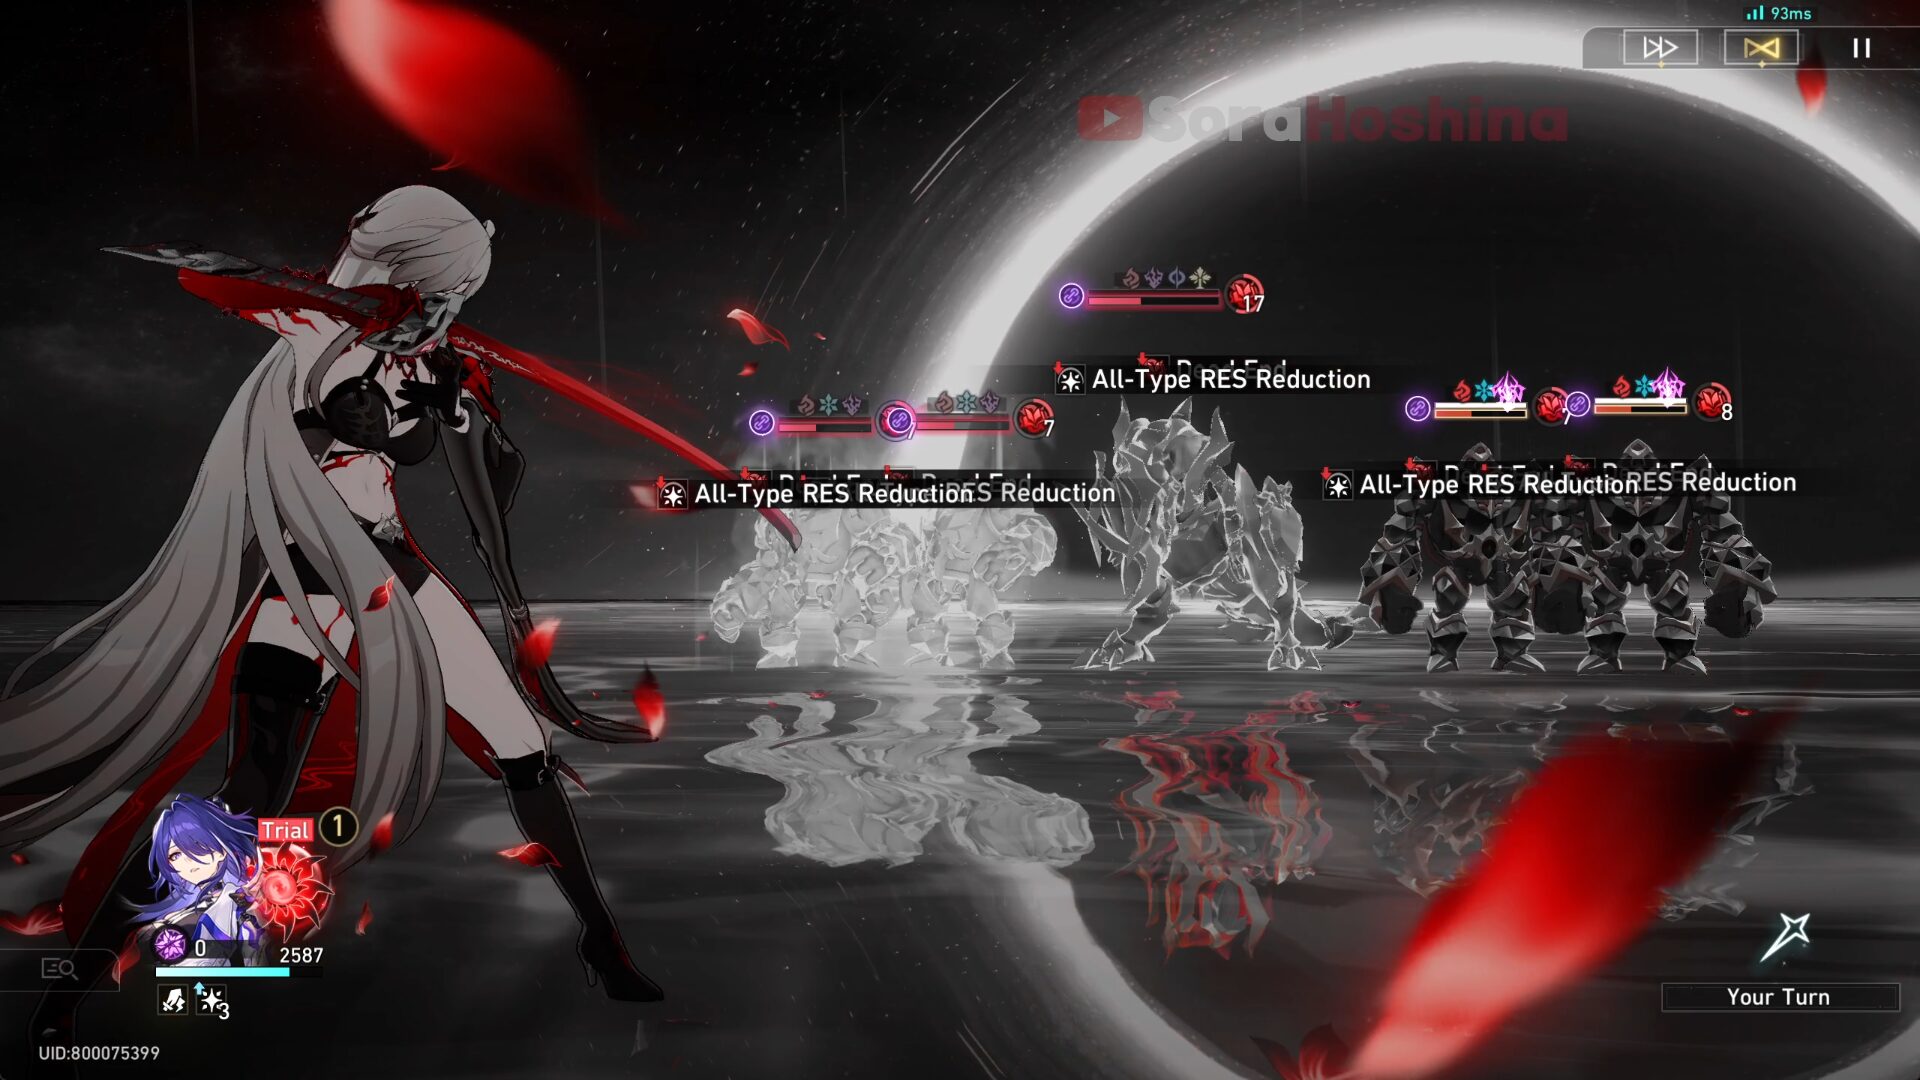
- In this stage, all enemies in each wave have Shared HP. In other words, if someone got slashed by Acheron's Ult, all of them would take damage.
- When using her Ultimate, make sure to always aim every slash at the enemy with the highest Ultimate Vulnerability debuff.
- When facing the row of enemies, if there is Mr. Domescreen (the TV enemies), make sure to always turn their face to the happy one (Surprise Channel) so they can provide extra energy to one of your allies (Acheron won't get any though).
- They're only in wave 1 sigh.
- The rotation here is simple: Inflict debuff on the SAME enemy (if it's a boss wave, inflict the debuff on the boss) every time you have the chance to stack the Ultimate Vulnerability debuff (can be seen beside their HP bar).
- This debuff will stay for 2 turns. Make sure to use Acheron's Ultimate in said 2 turns so she can take advantage of the debuff and deal even more damage than usual.
- When the enemy takes action, they will also gain a stack of the debuff = this also provides a stack for Acheron's Ultimate.
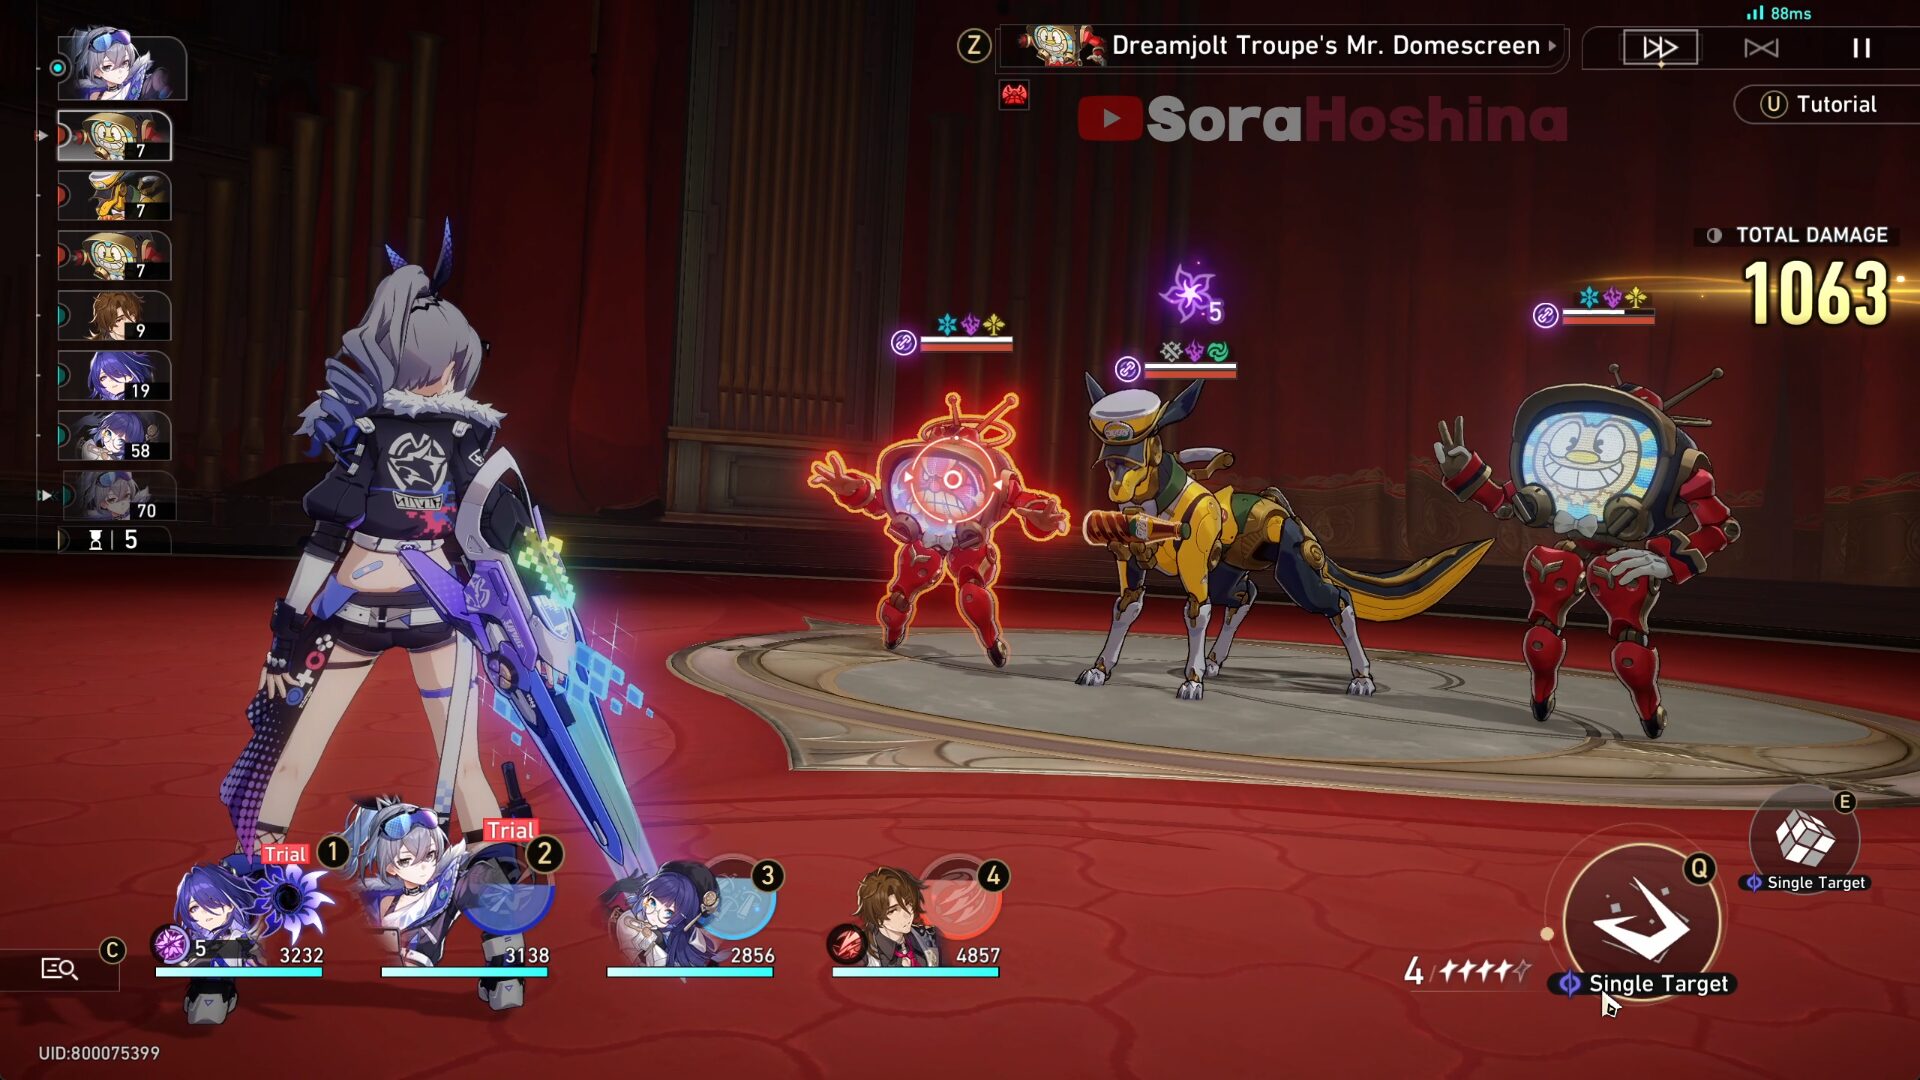
Stage 3 - Suprise Party
Recommended Team
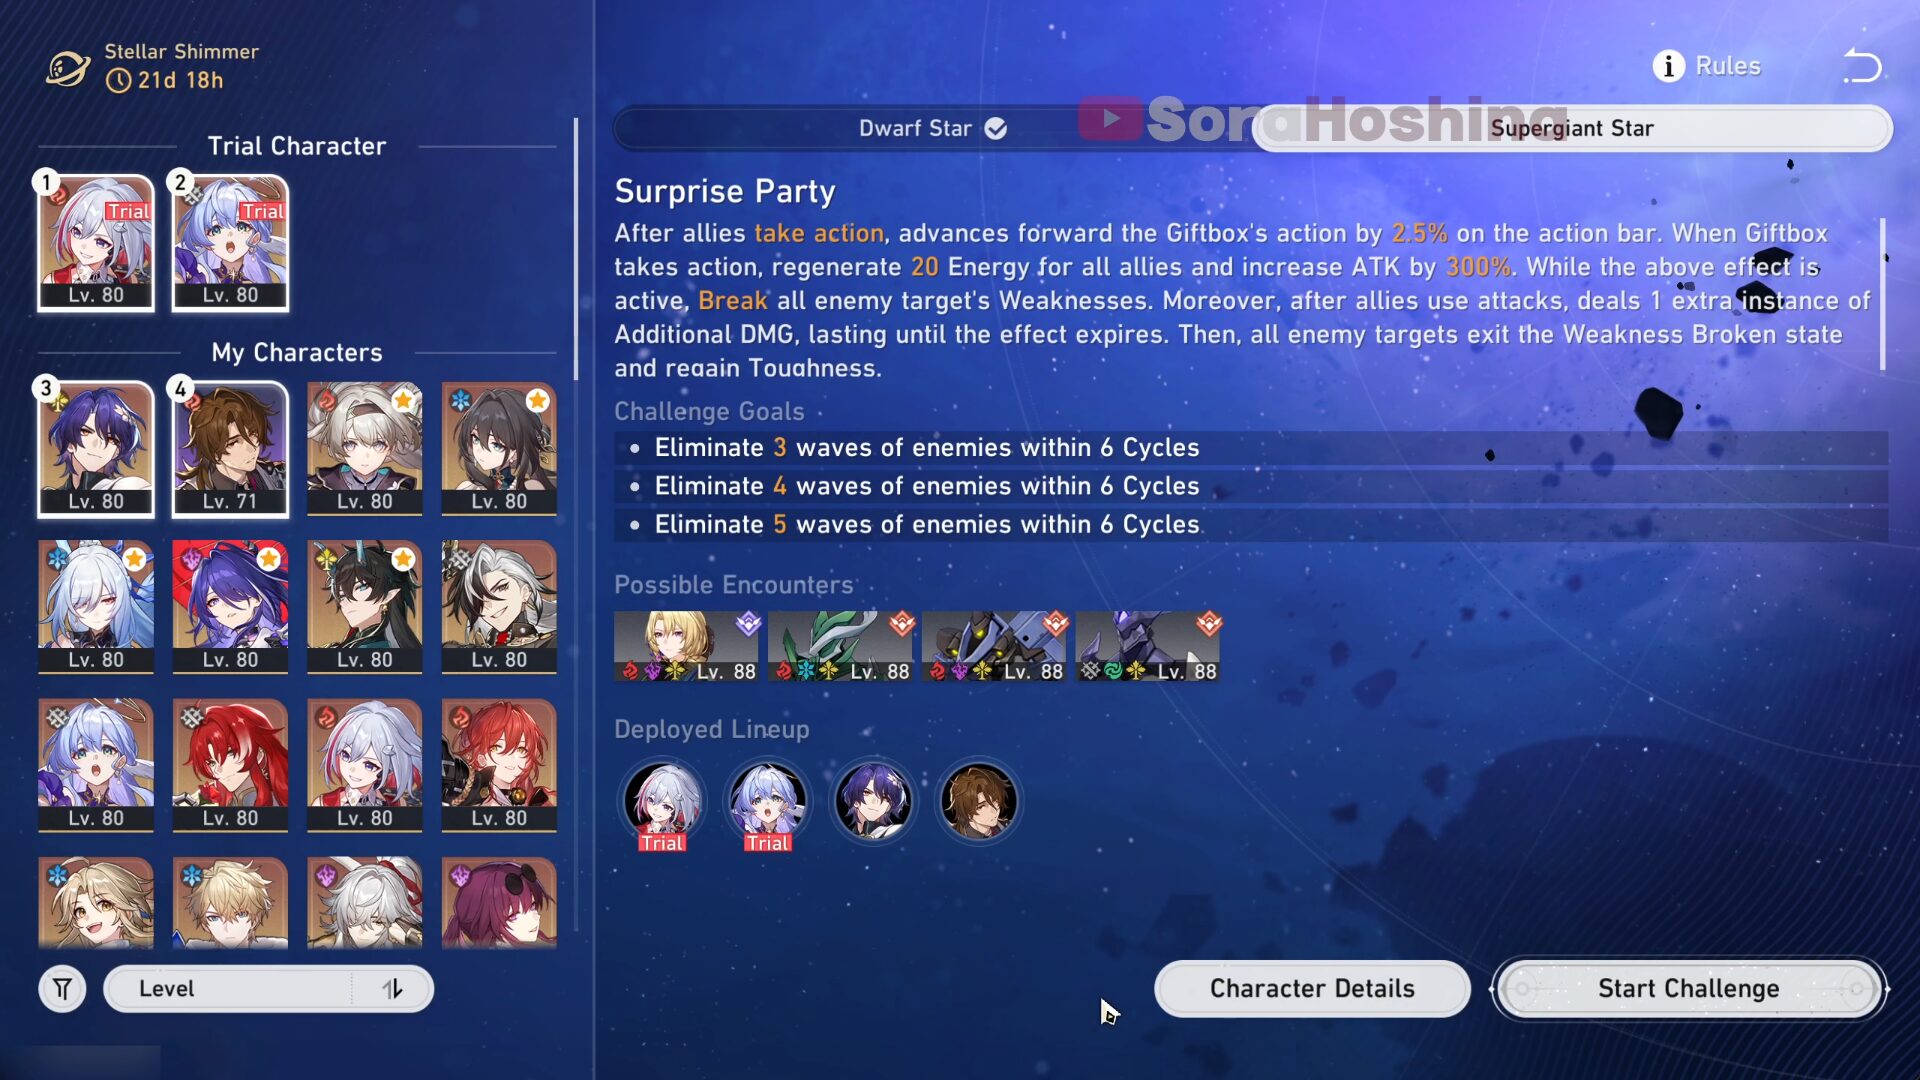
Stage Buff: After allies take action, advances forward the Giftbox's action by 2.5% on the action bar. When Giftbox takes action, regenerate 20 Energy for all allies and increase ATK by 300%. While the above effect is active, Break all enemy target's Weaknesses. Moreover, after allies use attacks, deals 1 extra instance of Additional DMG, lasting until the effect expires. Then, all enemy target exits the Weaknesss Broken state and regain Toughness.
F2P Team: Trial Topaz + Trial Robin + Dr. Ratio + (Gallagher / Aventurine / Ruan Mei)
P2P Team: Topaz + Dr. Ratio + Robin + Aventurine
You can get S-Rank just by using the Trial Characters (+ your own supports).
Playthrough Video
Tips & Tricks
- When the Giftbox on the action bar takes action, Breaks all enemy Weaknesses and greatly increases ally ATK until the effect ends. While the Giftbox's effect is active, go all out and attack the enemy to deal more DMG!
- How do we advance forward the Giftbox? After allies take action, that's it. Oh and follow-up attacks are also considered as a separate action so it too will help with the Giftbox.
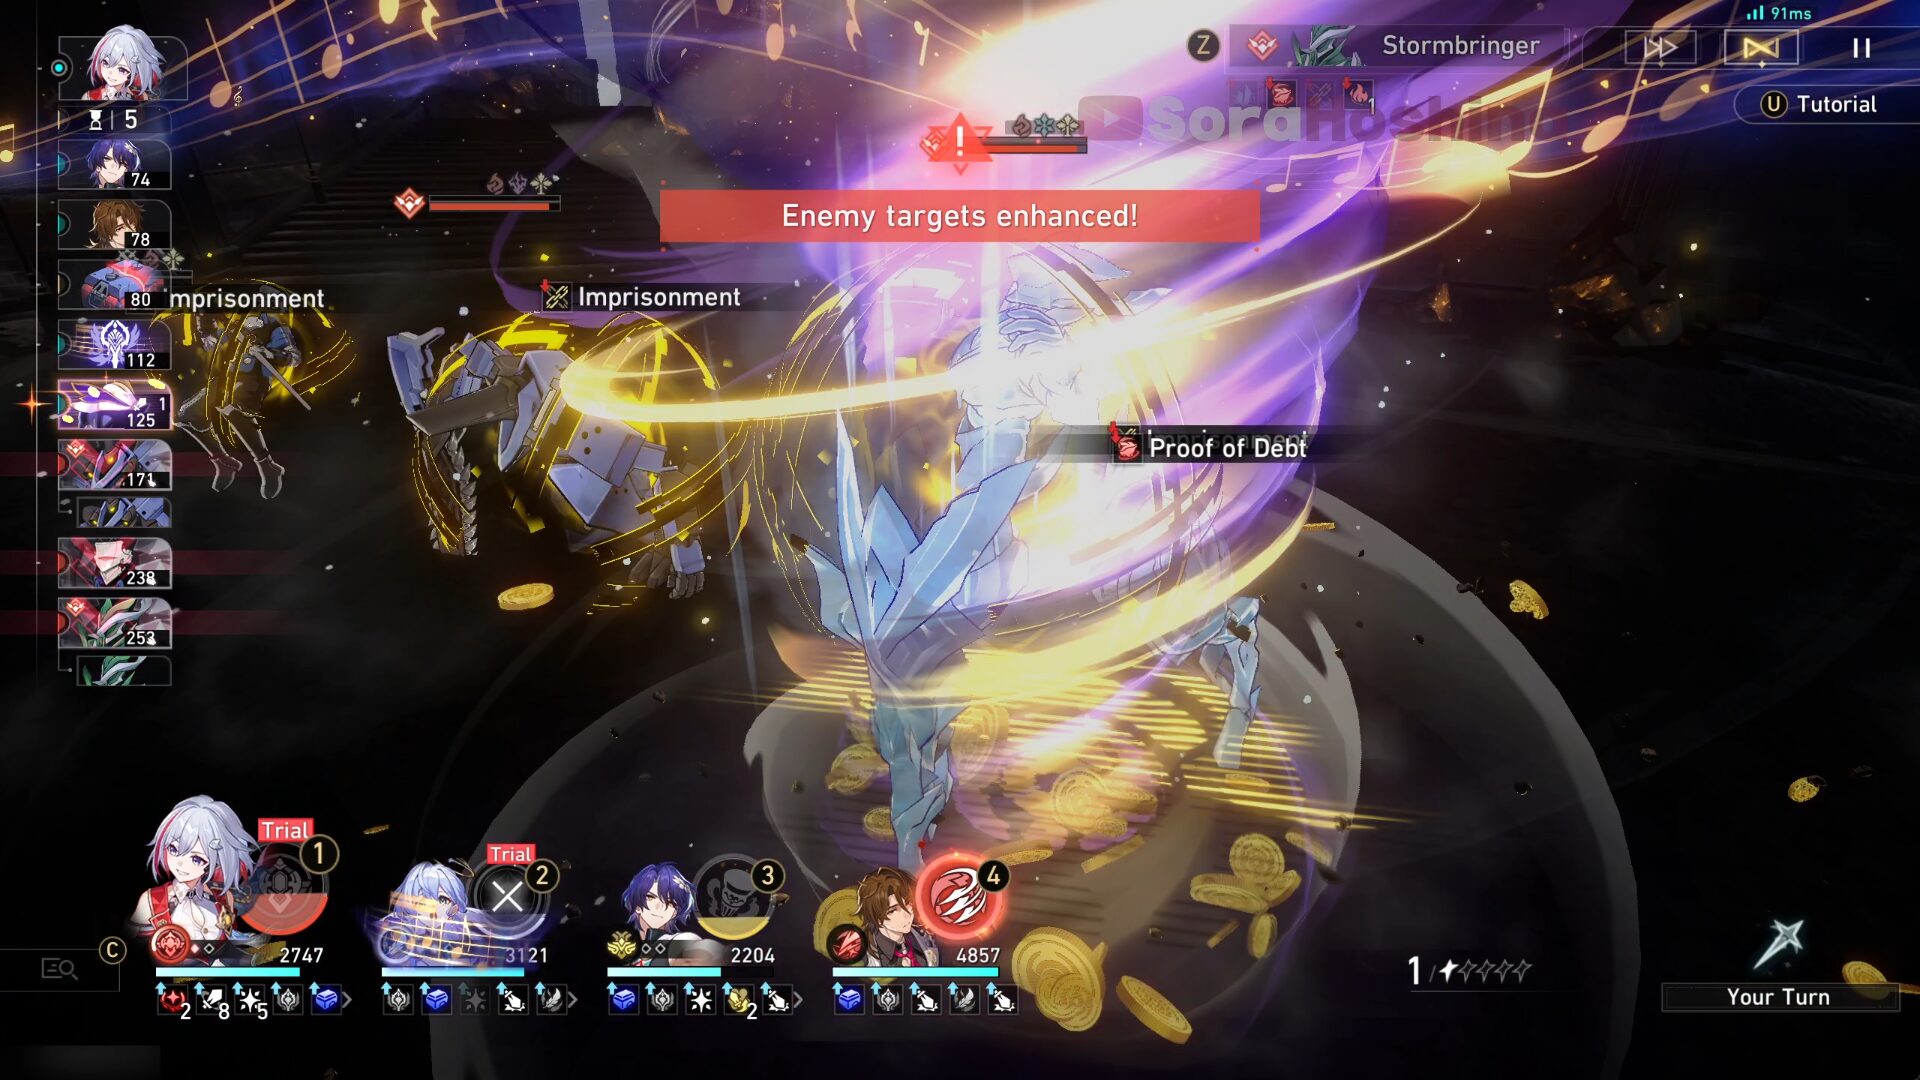
- The Giftbox effect will be brought to the next wave. For example, if the Giftbox takes effect in the 2nd wave, when you enter the 3rd wave, all the enemies in that new wave will get Weakness Break immediately as long as the Giftbox effect is still active.
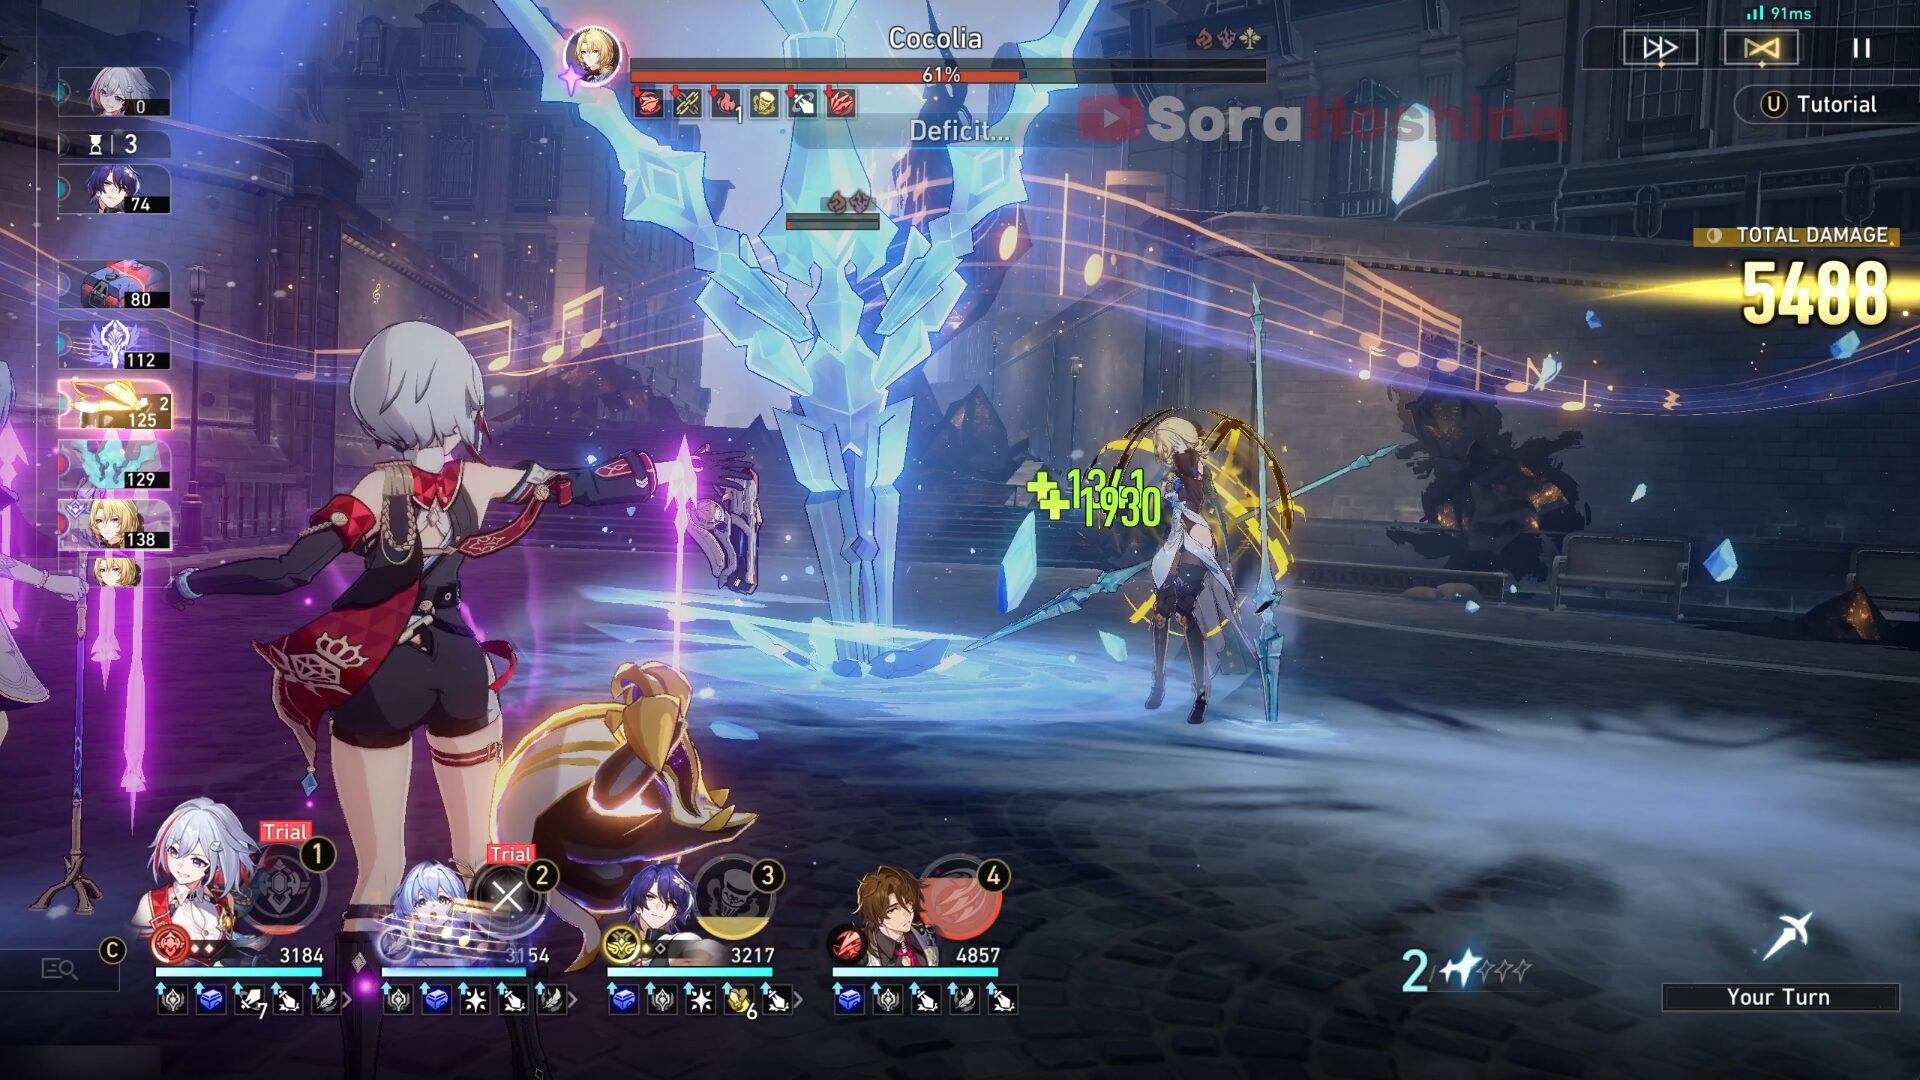
- They really change Cocolia's weakness from Quantum to Imaginary. Yeah, that's why Dr. Ratio is here. Since we have 2 single-target DPS here, it's best if you just focus on attacking Cocolia and not the ice spears. It should have low HP because of the Giftbox so you can try to deliver the last blow if it's bothering you.
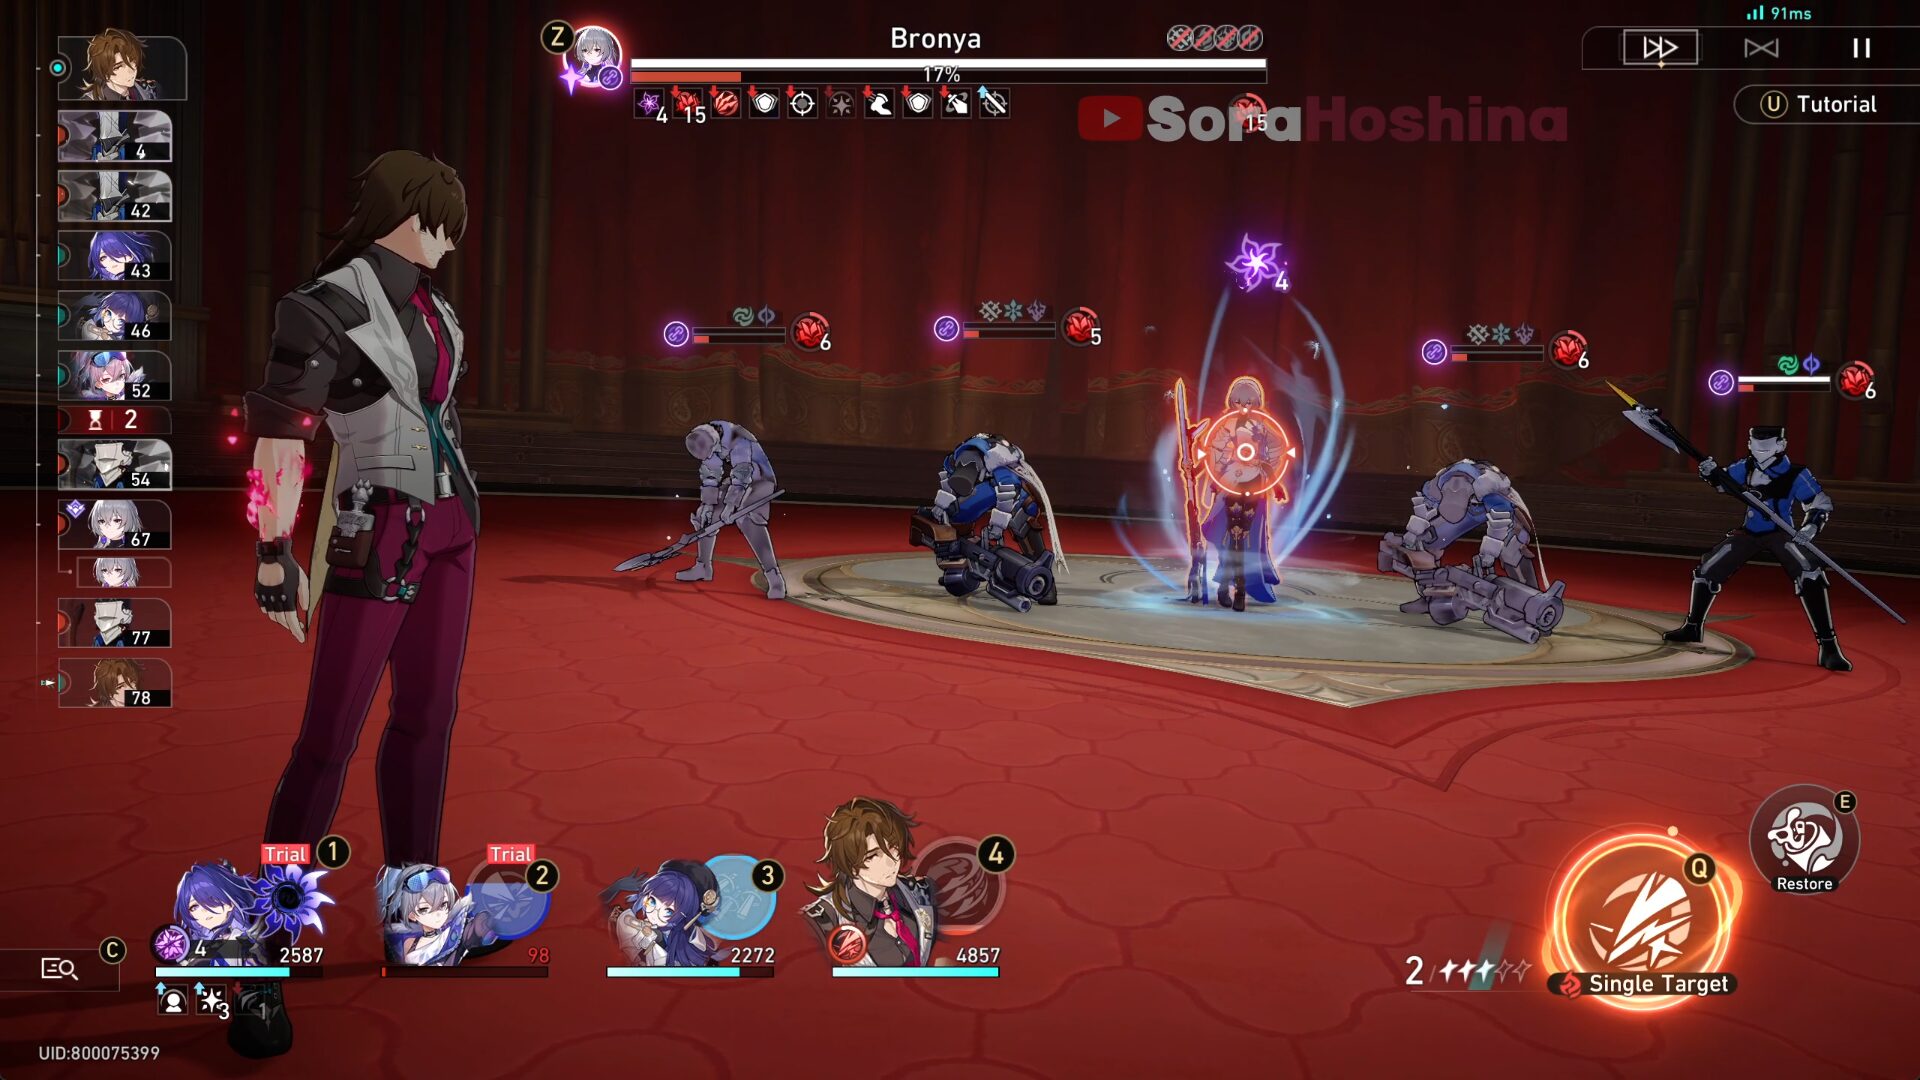
Stage 4 - Skin of Their Teeth
Recommended Team
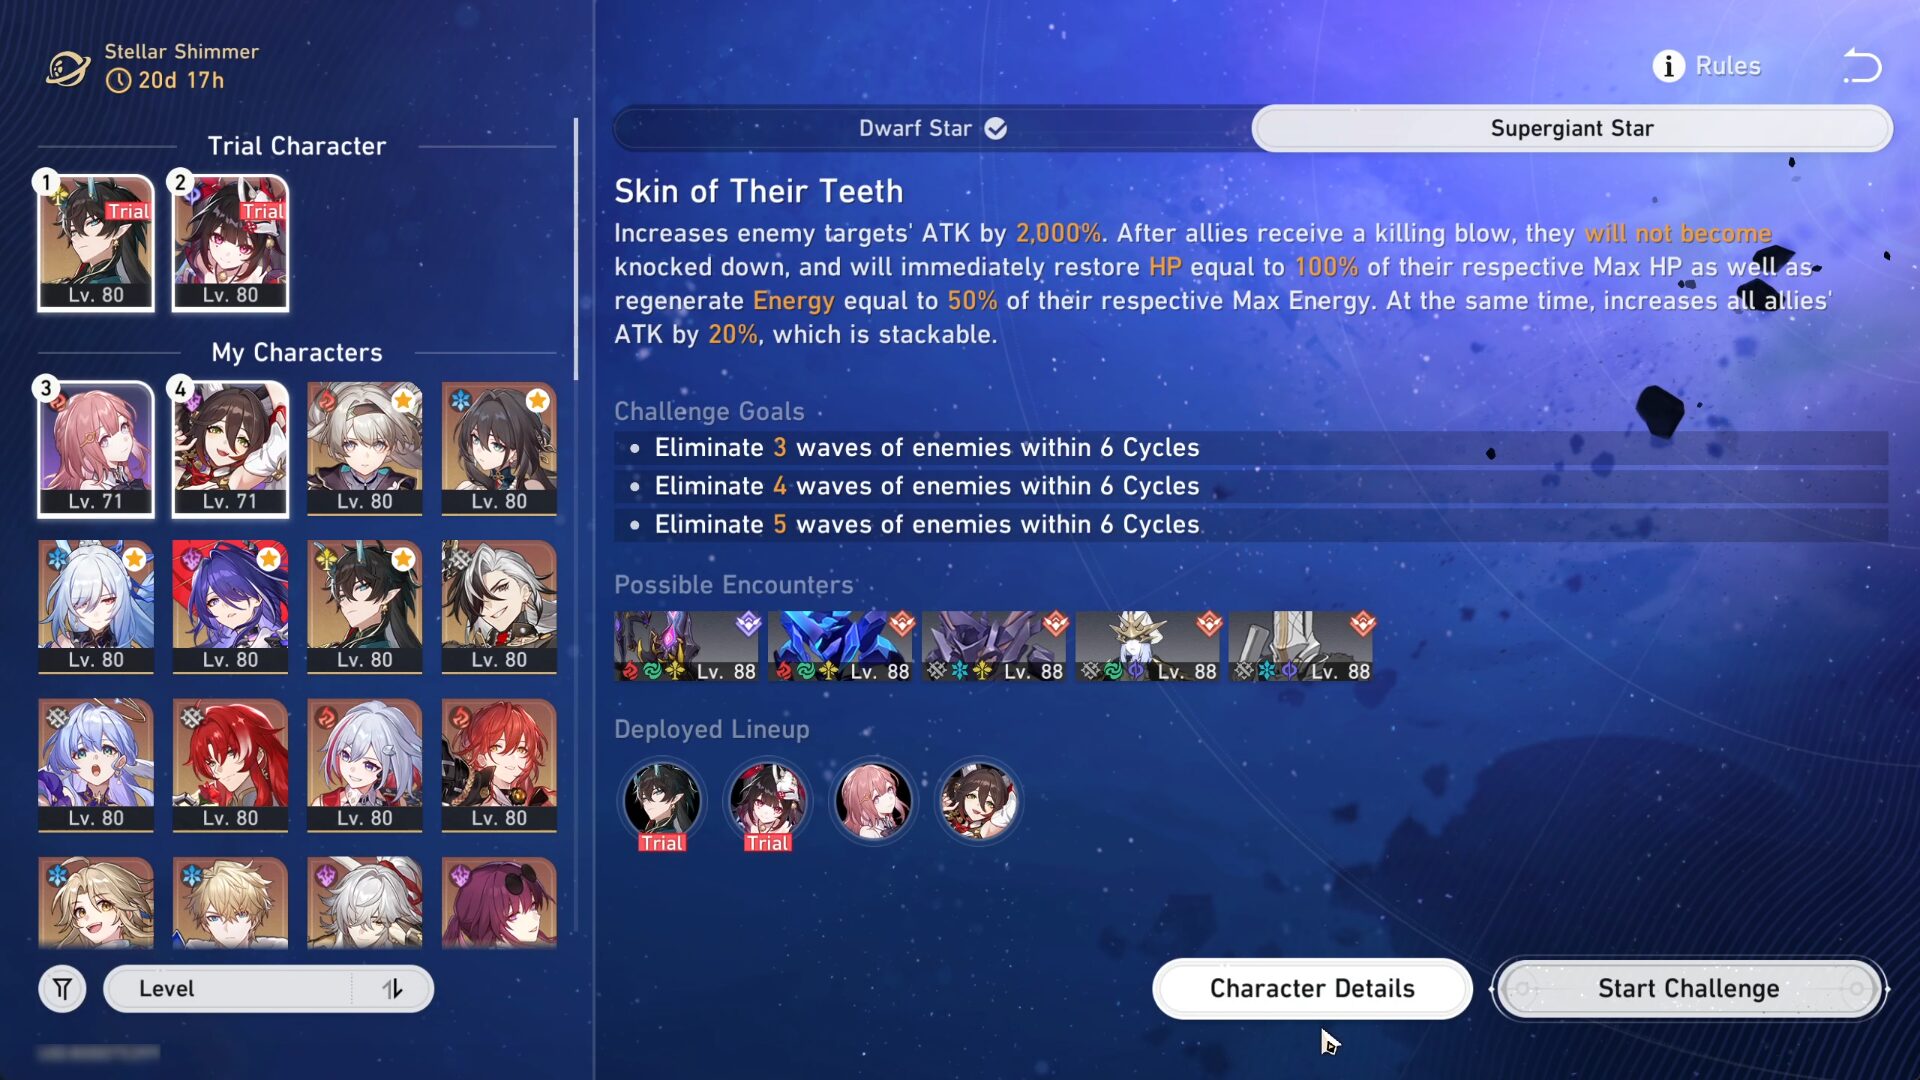
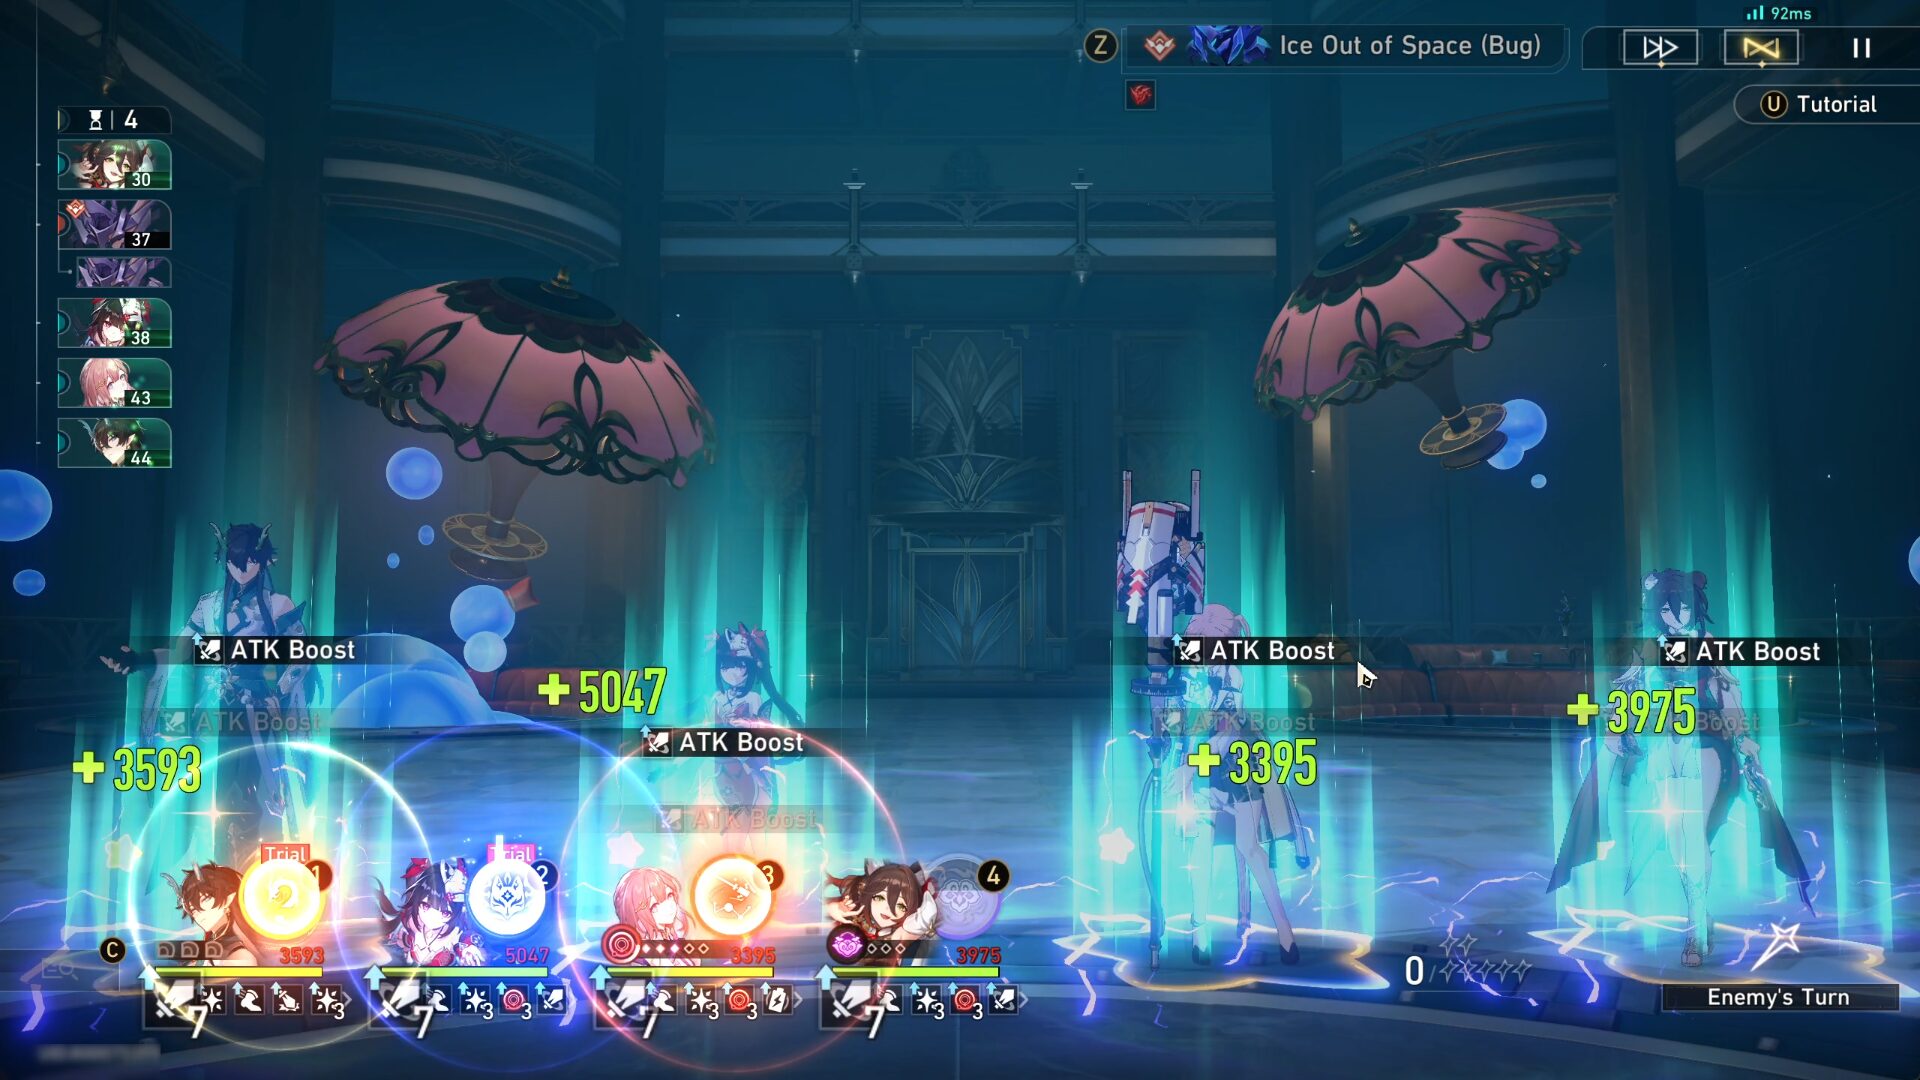
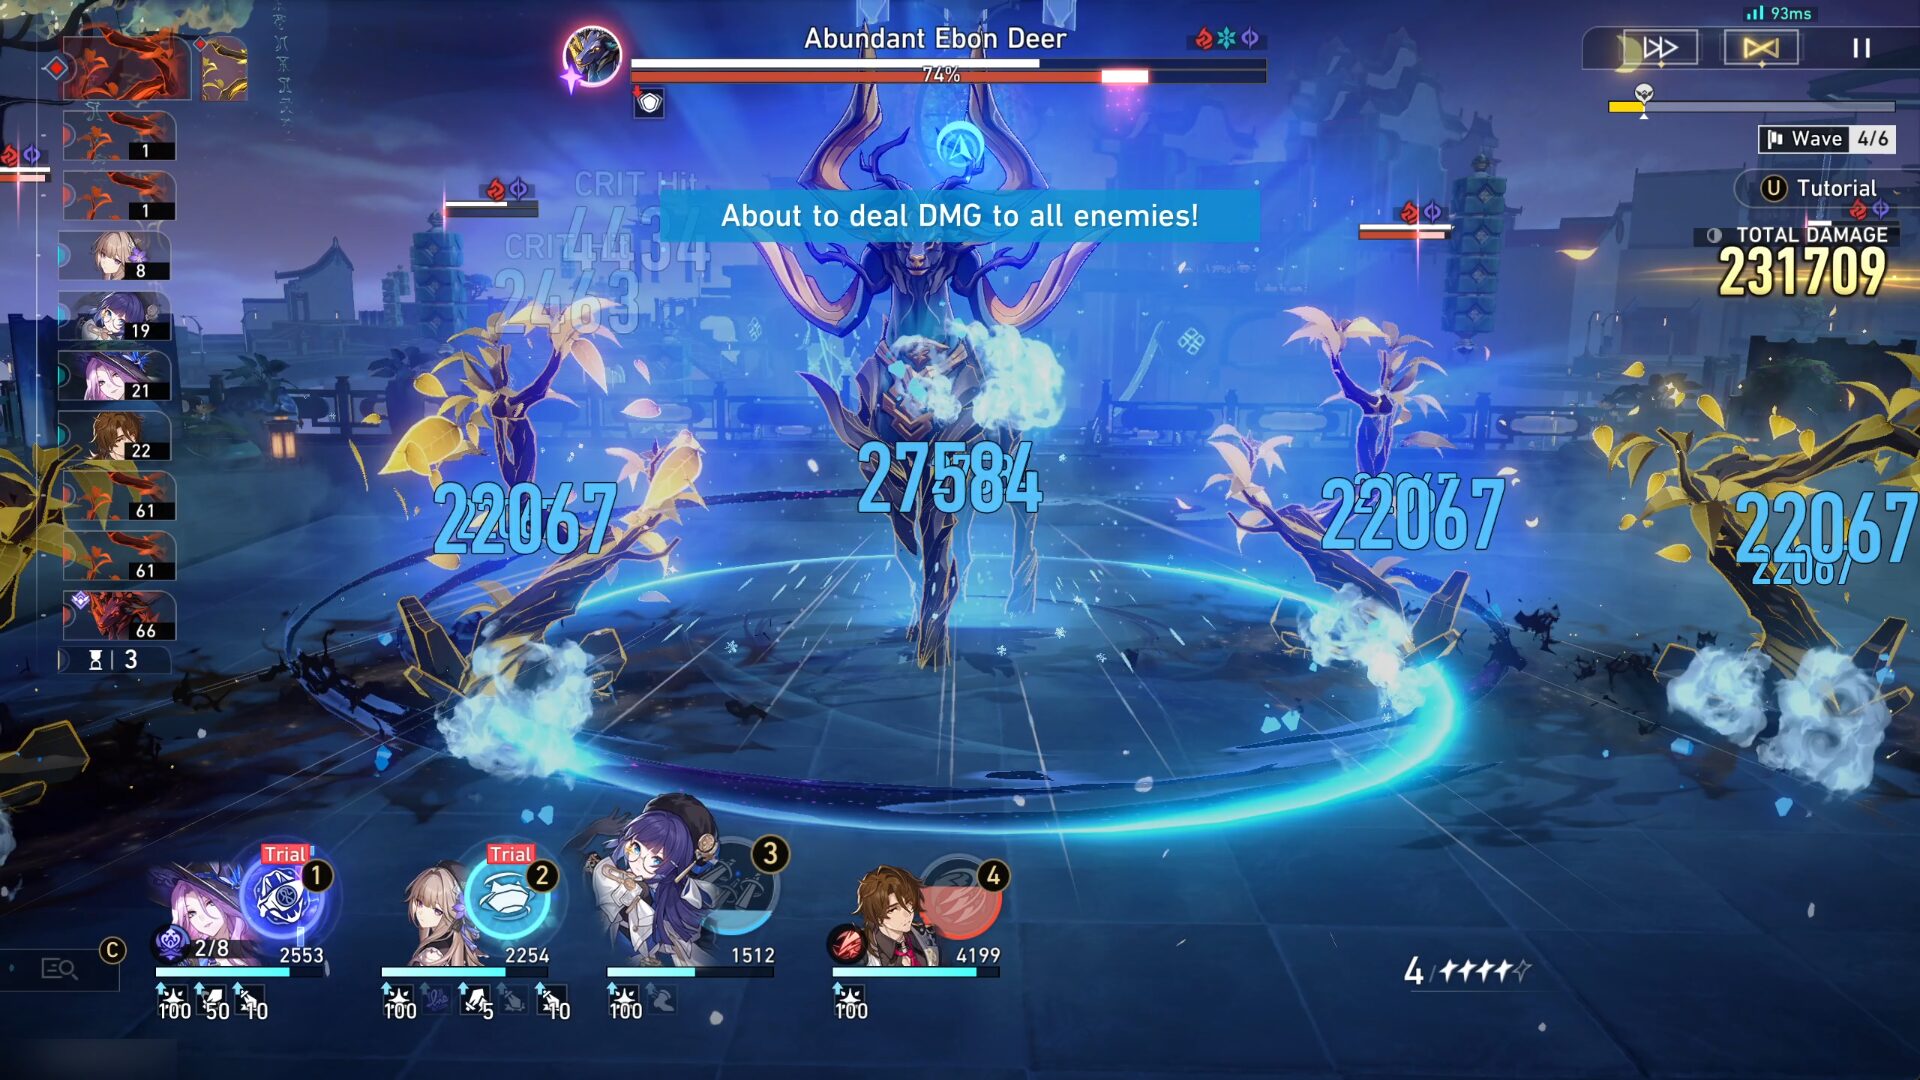
Stage Buff: Increases enemy target's ATK by 2000%. After allies receive a killing blow, they will not become knocked down, and will immediately restore HP equal to 100% of their respective Max HP as well as regenerate 50% of their respective Max Energy. At the same time, increases all allies' ATK by 20%, which is stackable.
F2P Team: Trial Dan Heng Imbibitor Lunae + Trial Sparkle + (Tingyun / Asta / any viable Harmony)
P2P Team: Dan Heng Imbibitor Lunae + Sparkle + Ruan Mei + Bronya
There is no need for a healer or shielder because they won't be able to keep your characters alive. In fact, death is the answer here so let your characters die and revive 100x in this stage so they can get the buff and stack them.
Playthrough Video
Tips & Tricks
- In this stage, each enemy has a god-awful amount of attacks so when they attack, most often than not your characters WILL die.
- However, when your ally receives any killing blows, they will NOT die. Instead, they will revive to full HP, regenerate 50% of the energy, and increase all allies' ATK by 20%. The attack buff is stackable so let your characters die. Aside from this, there's not much to say because that's the whole mechanism here; you die > get buff > and deal more damage.
- Although the ATK buff has no maximum limit, there are only 6 waves here so at most, you can get around ~50x of the ATK buff (as you can see in the image above, my team only got 48 of said ATK buff).
Stage 5 - Fatal Weakness
Recommended Team
Stage Buff: Enemy target's initial Toughness and Toughness Recovery Value decreases to 50% of their respective Max Toughness. Every time they receive Break DMG, receive 1 stack of Contusion, with each stack increasing DMG taken by 10%, stacking up to 10 times and lasting for 2 turn(s). After allies attack targets with Contusion, deal Break DMG equal to 100% of the attacker's Break DMG to the target.
F2P Team: Trial Boothill + Trial Ruan Mei + Harmony Trailblazer + Gallagher
P2P Team: Boothill + Ruan Mei + Bronya + Gallagher
You can get S-Rank just by using the Trial Characters (+ your own supports).
Playthrough Video
Tips & Tricks
- Every enemy has their initial Toughness down to 50% of their Max Toughness when they spawn.
- When enemies receive Break DMG, they are inflicted with 1 stack of Vulnerability (can be seen by the icon beside their HP bar). Focus attack on enemies with the most Vulnerability stacks to deal more Break DMG.
- When facing many enemies, let Boothill defeat the mobs first so he can gain Pocket Trickshot stacks. Try to get the maximum stack before he goes down with the elite enemy.
- In addition, try to get Boothill to be the one to inflict Weakness Break on enemy cause he hits hard.
- Try to get Harmony MC's Ultimate activated as soon as you can, preferably before Boothill used his Enhanced Basic ATK so he can deal Super Break DMG. The same goes with Ruan Mei's Skill and Ultimate.
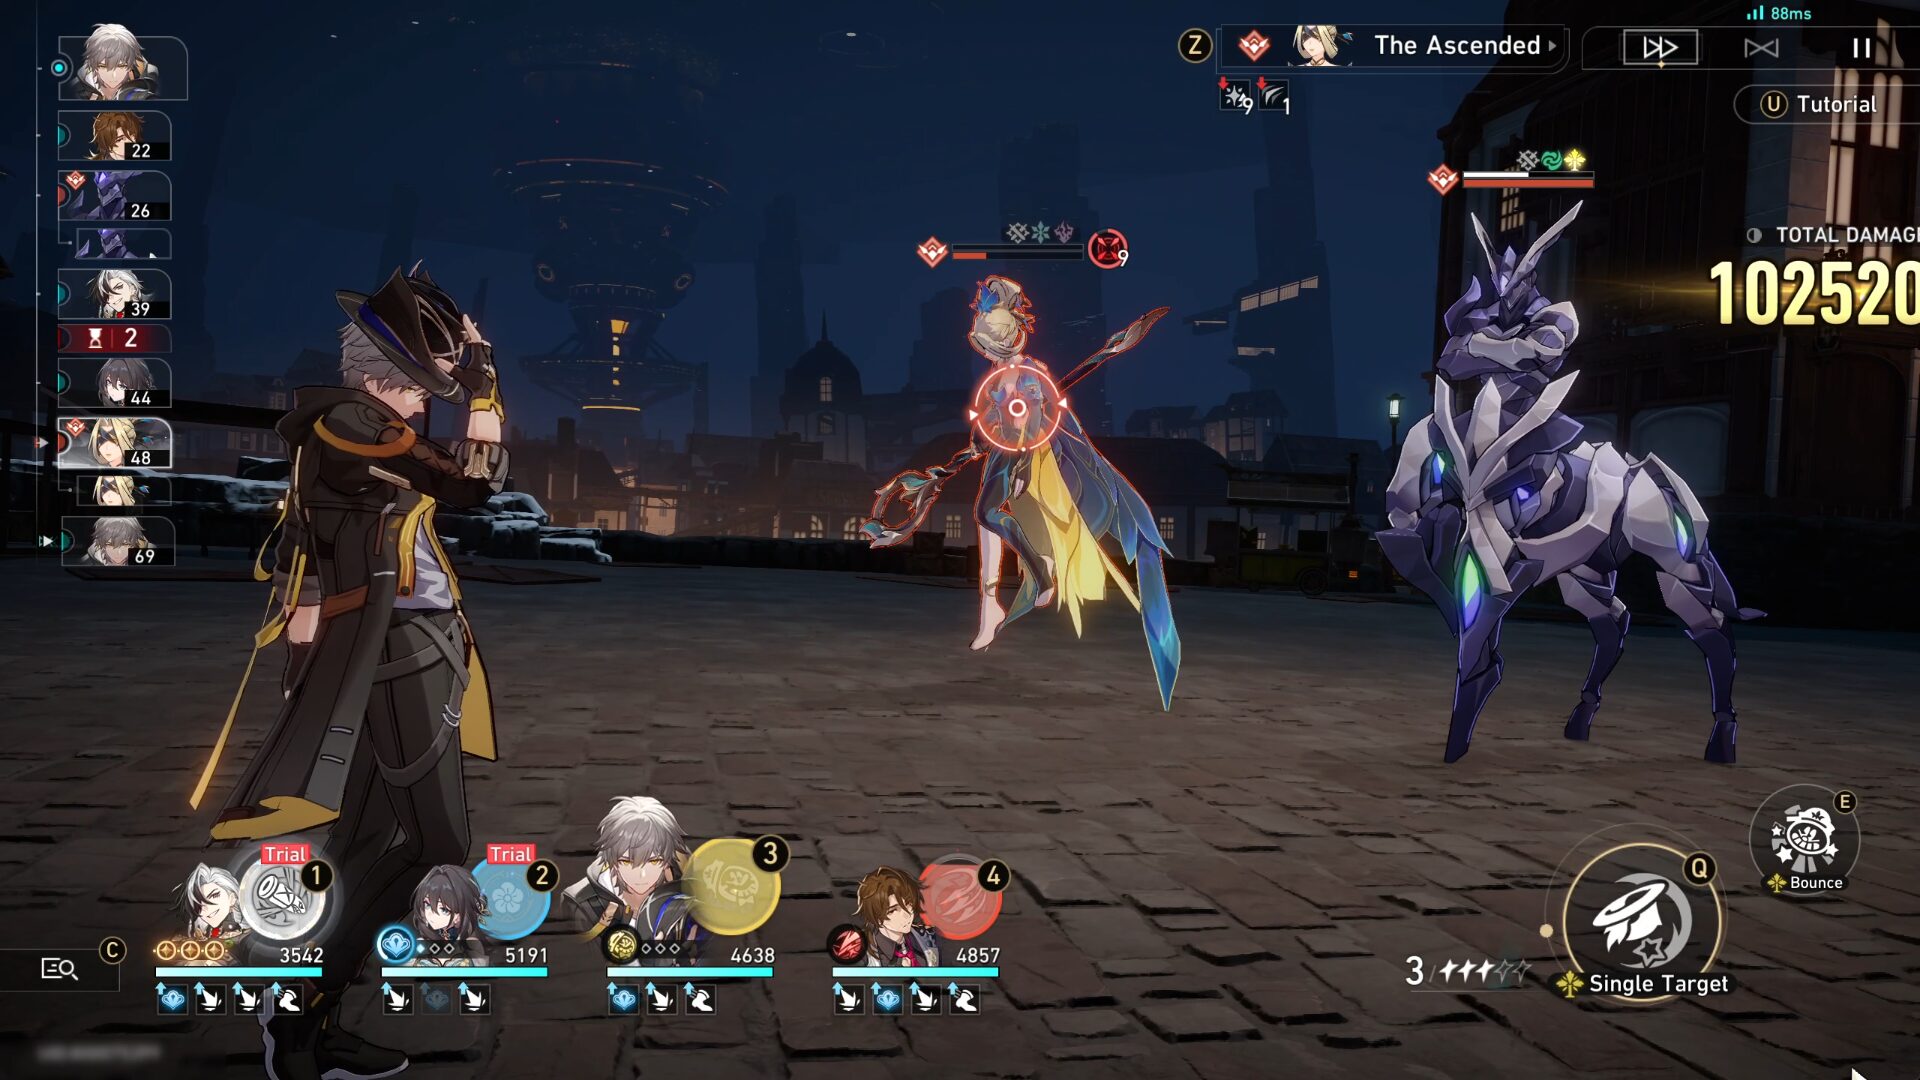
- On waves 3 and 5 where you face 2 elite enemies, choose one to defeat first based on your team. If you didn't bring a healer that can remove debuff, you should defeat The Ascended first so she can't inflict Black Prana debuff on your team (reduce max HP). If you bring one, you can choose any to defeat first.
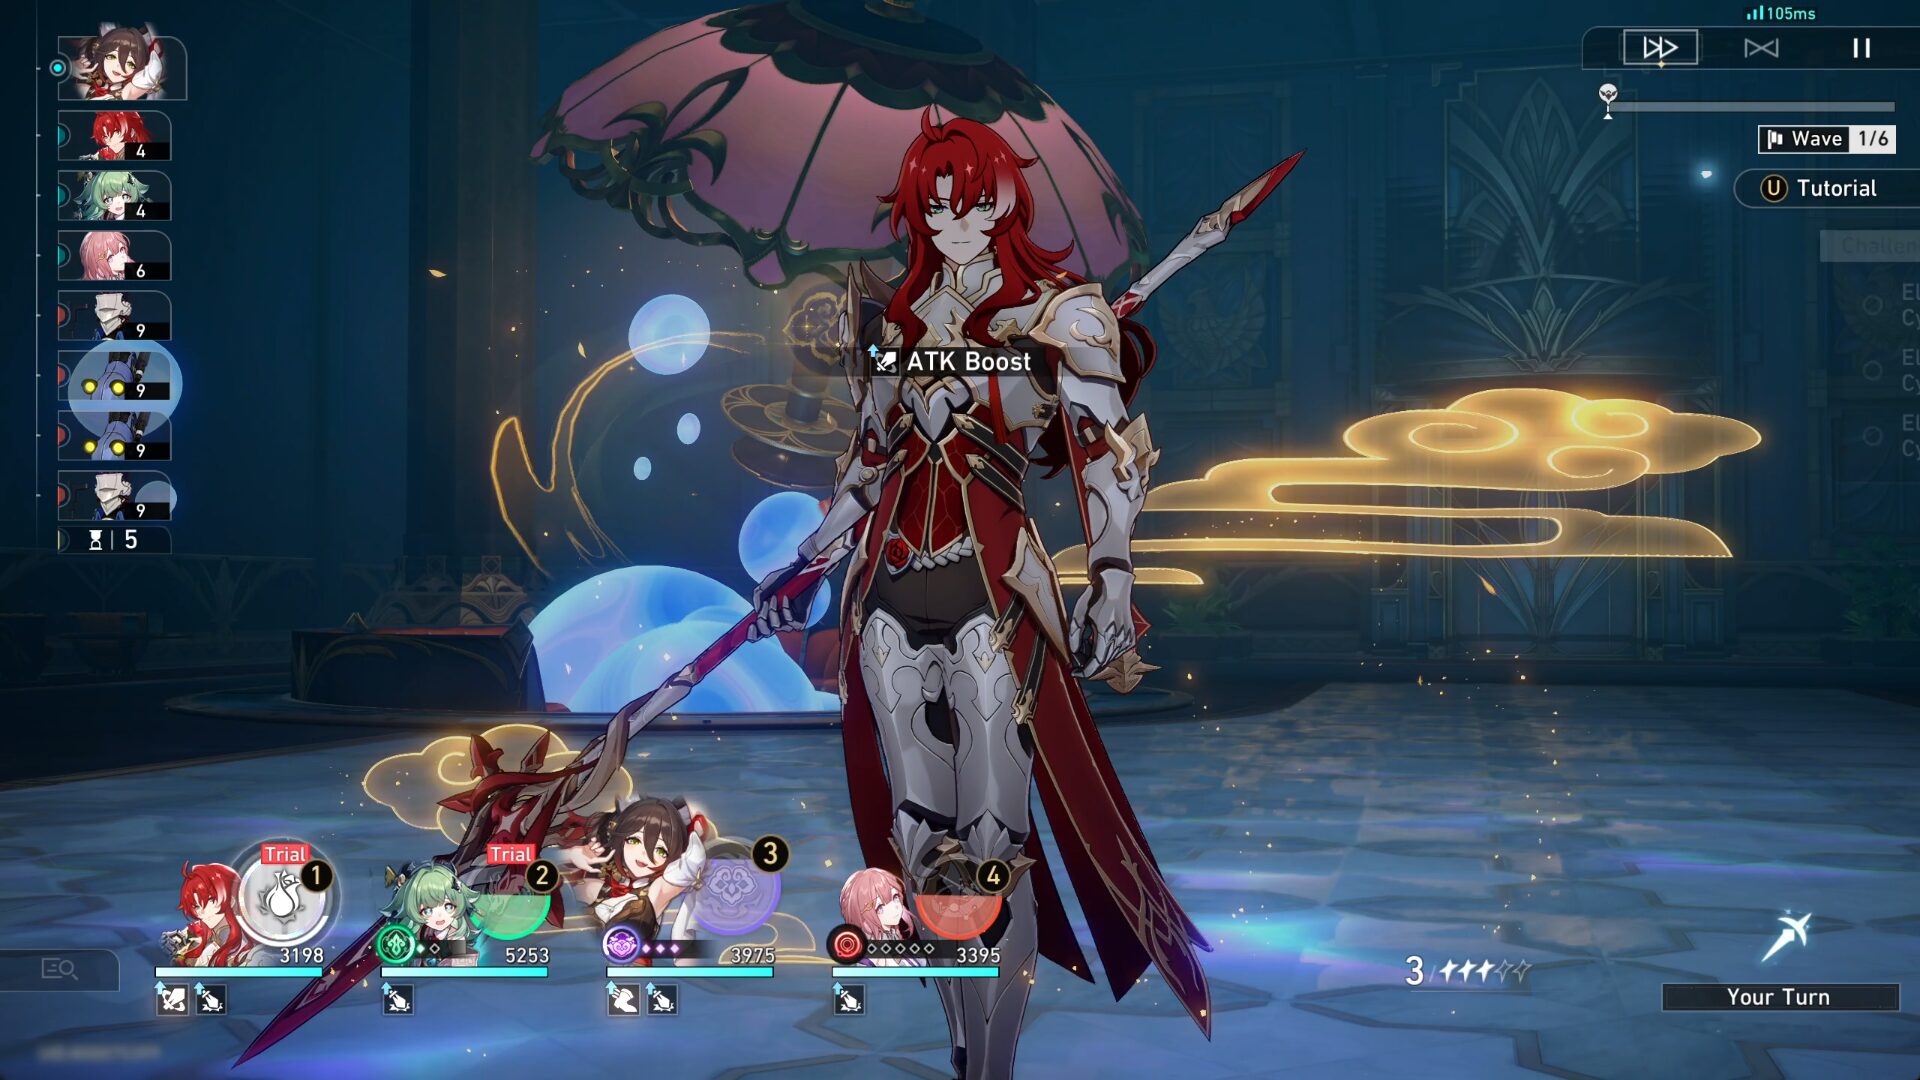
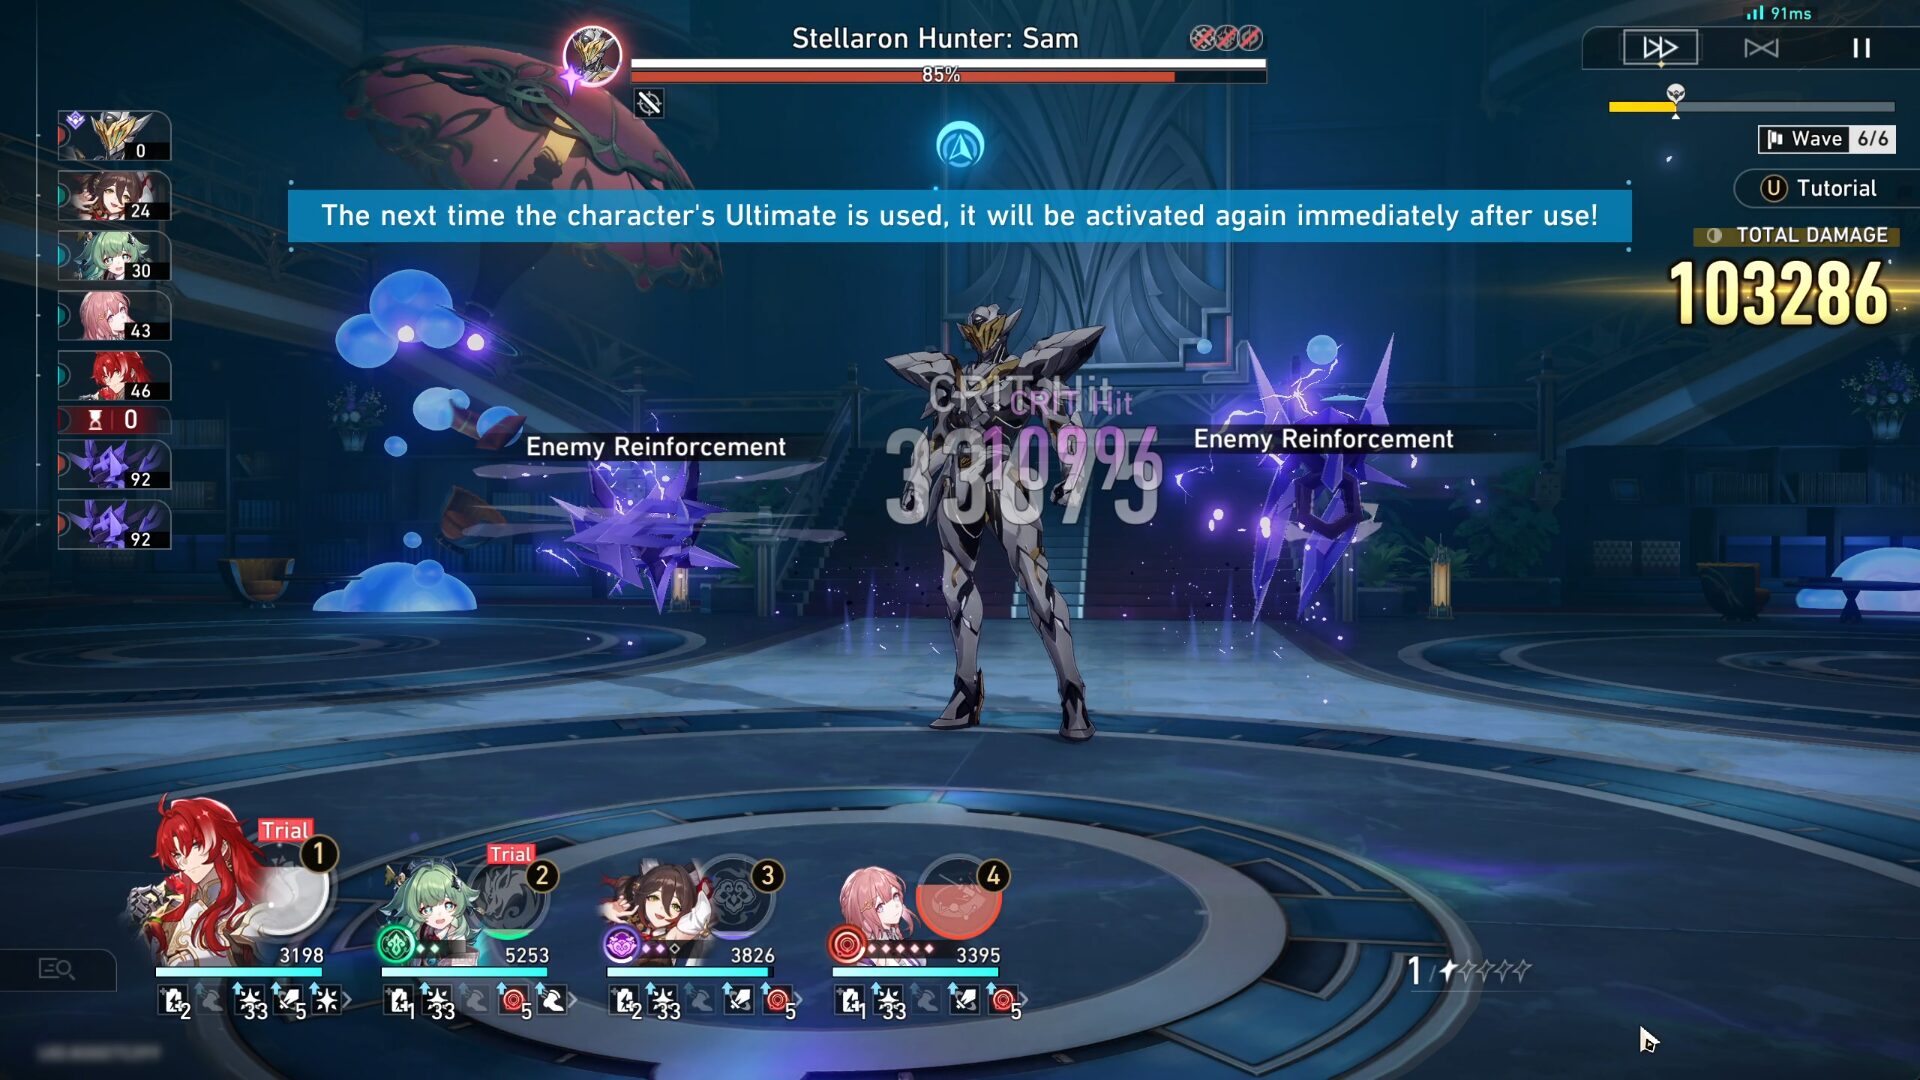
Stage 6 - Unending Finality
Recommended Team
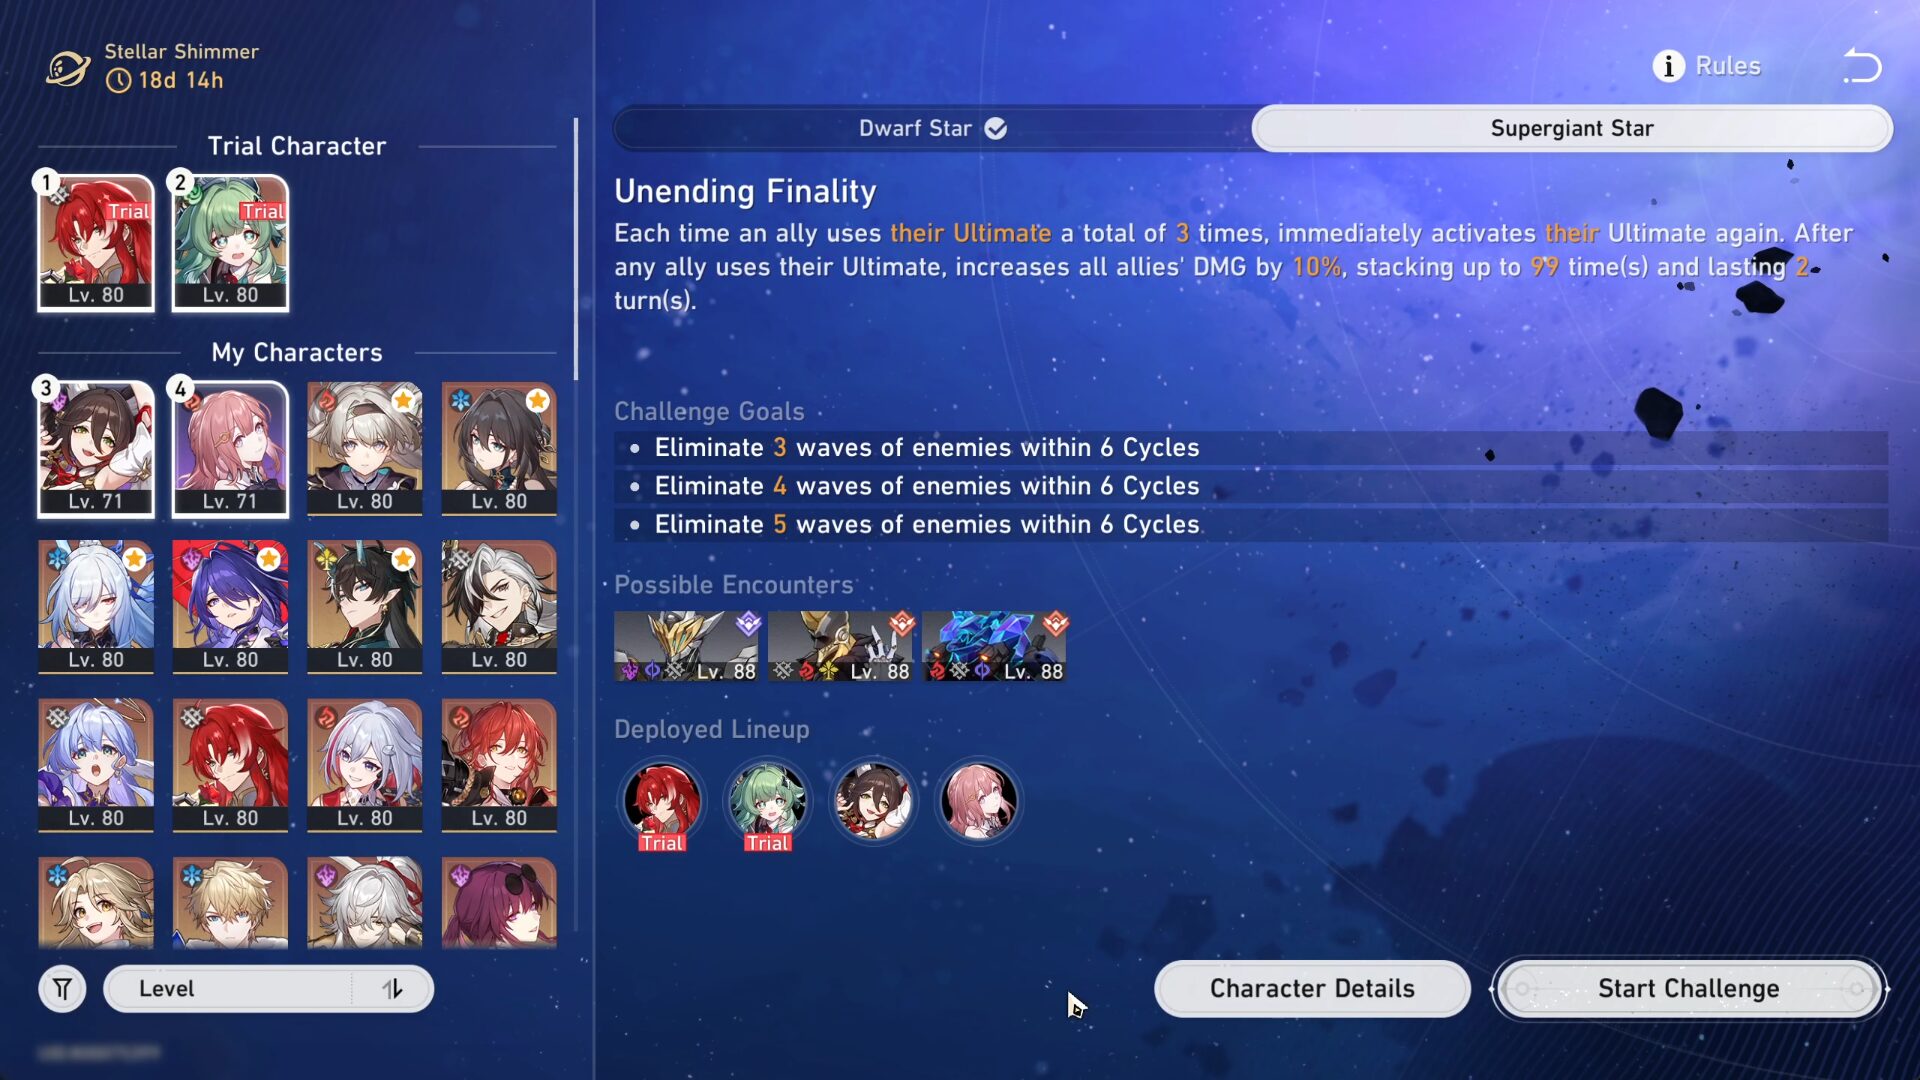
Stage Buff: Each time an ally uses their Ultimate a total of 3 times, immediately activates their Ultimate again. After any ally uses their Ultimate, increases all allies' DMG by 10%, stacking up to 99 time(s) and lasting 2 turn(s).
F2P Team: Trial Argenti + Trial Huohuo + Tingyun + Asta
P2P Team: Argenti + Huohuo + Tingyun + Ruan Mei
If you main Argenti, you'll know that Huohuo and Tingyun are the best support for him because they can provide him with Energy. The last slot can be given to anyone, notable Harmony or Nihility because Huohuo is already there for healing.
Playthrough Video
Tips & Tricks
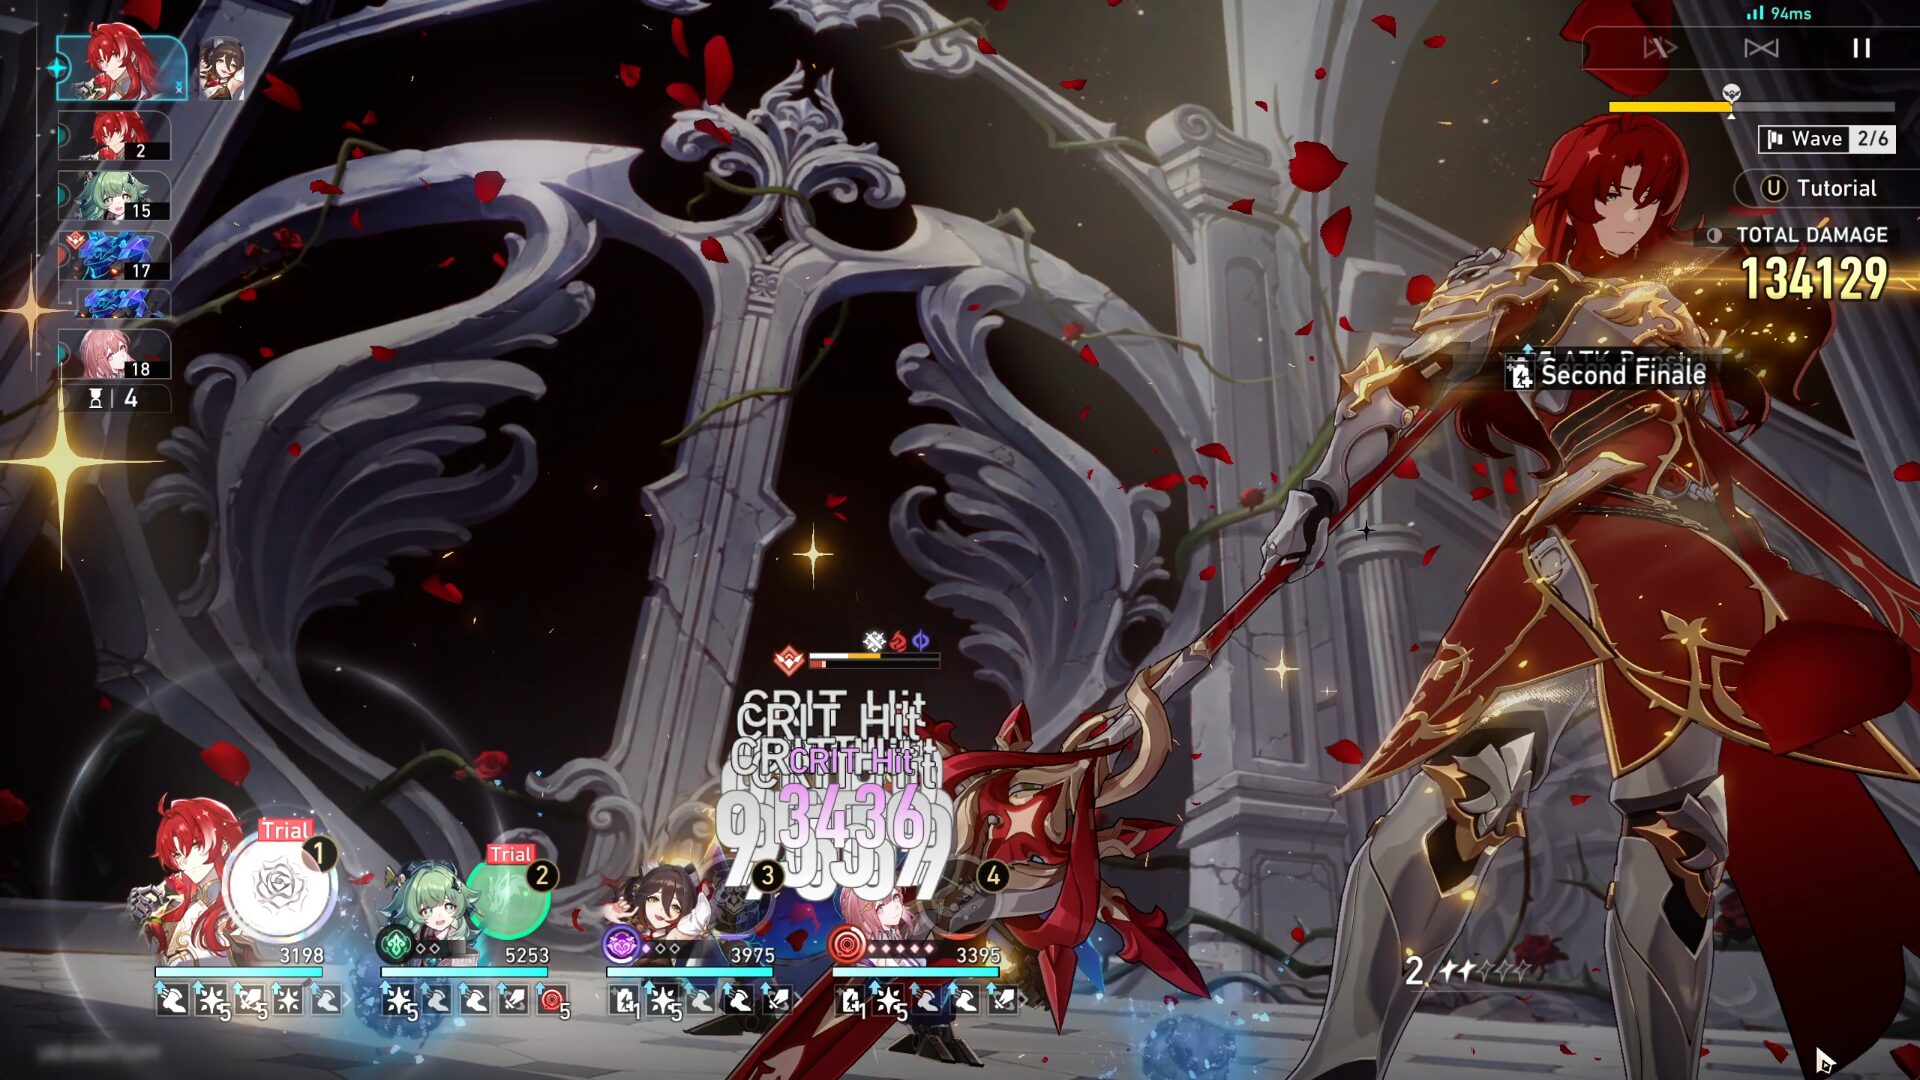
- After a single ally has used their Ultimate for a total of 3 times, they will immediately activate their Ultimate again. You can see the Ultimate stack icon below their HP.
- In Argenti's case, even if you use his initial Ultimate (90 Energy) 3 times, he will still get the full Ultimate (180 Energy) as the extra Ultimate.
- Before using Argenti's Ultimate, make sure Tingyun's Skill is activated on him. In addition, when you first start the stage, use Argenti's Skill at least once before using his Ultimate so he can get that free Crit Rate from his kit first.
- Only heals when necessary so you can save the Skill Point for Argenti. Other than him, support characters should just use Basic ATK after using Skill once so they can save SP.
- Since your DPS is an AoE DPS, it goes without saying that almost all of his attacks will be AoE attacks.
- But still going to mention it here, whenever anyone EXCEPT Argenti attacks, make sure to attack the remaining mobs of every wave. There are quite a lot of mobs here and they only spawn when the previous mobs are defeated so the supporters' job is buffing Argenti while also removing some of the mobs
- Argenti's Ultimate can easily wipe out the mobs but not the boss since it requires at least ~4 of his initial Ultimates / ~2 full Ultimate before the boss can be defeated (excluding Sam since her HP is huge).
Stage 7 - Incremental Repetition
Recommended Team
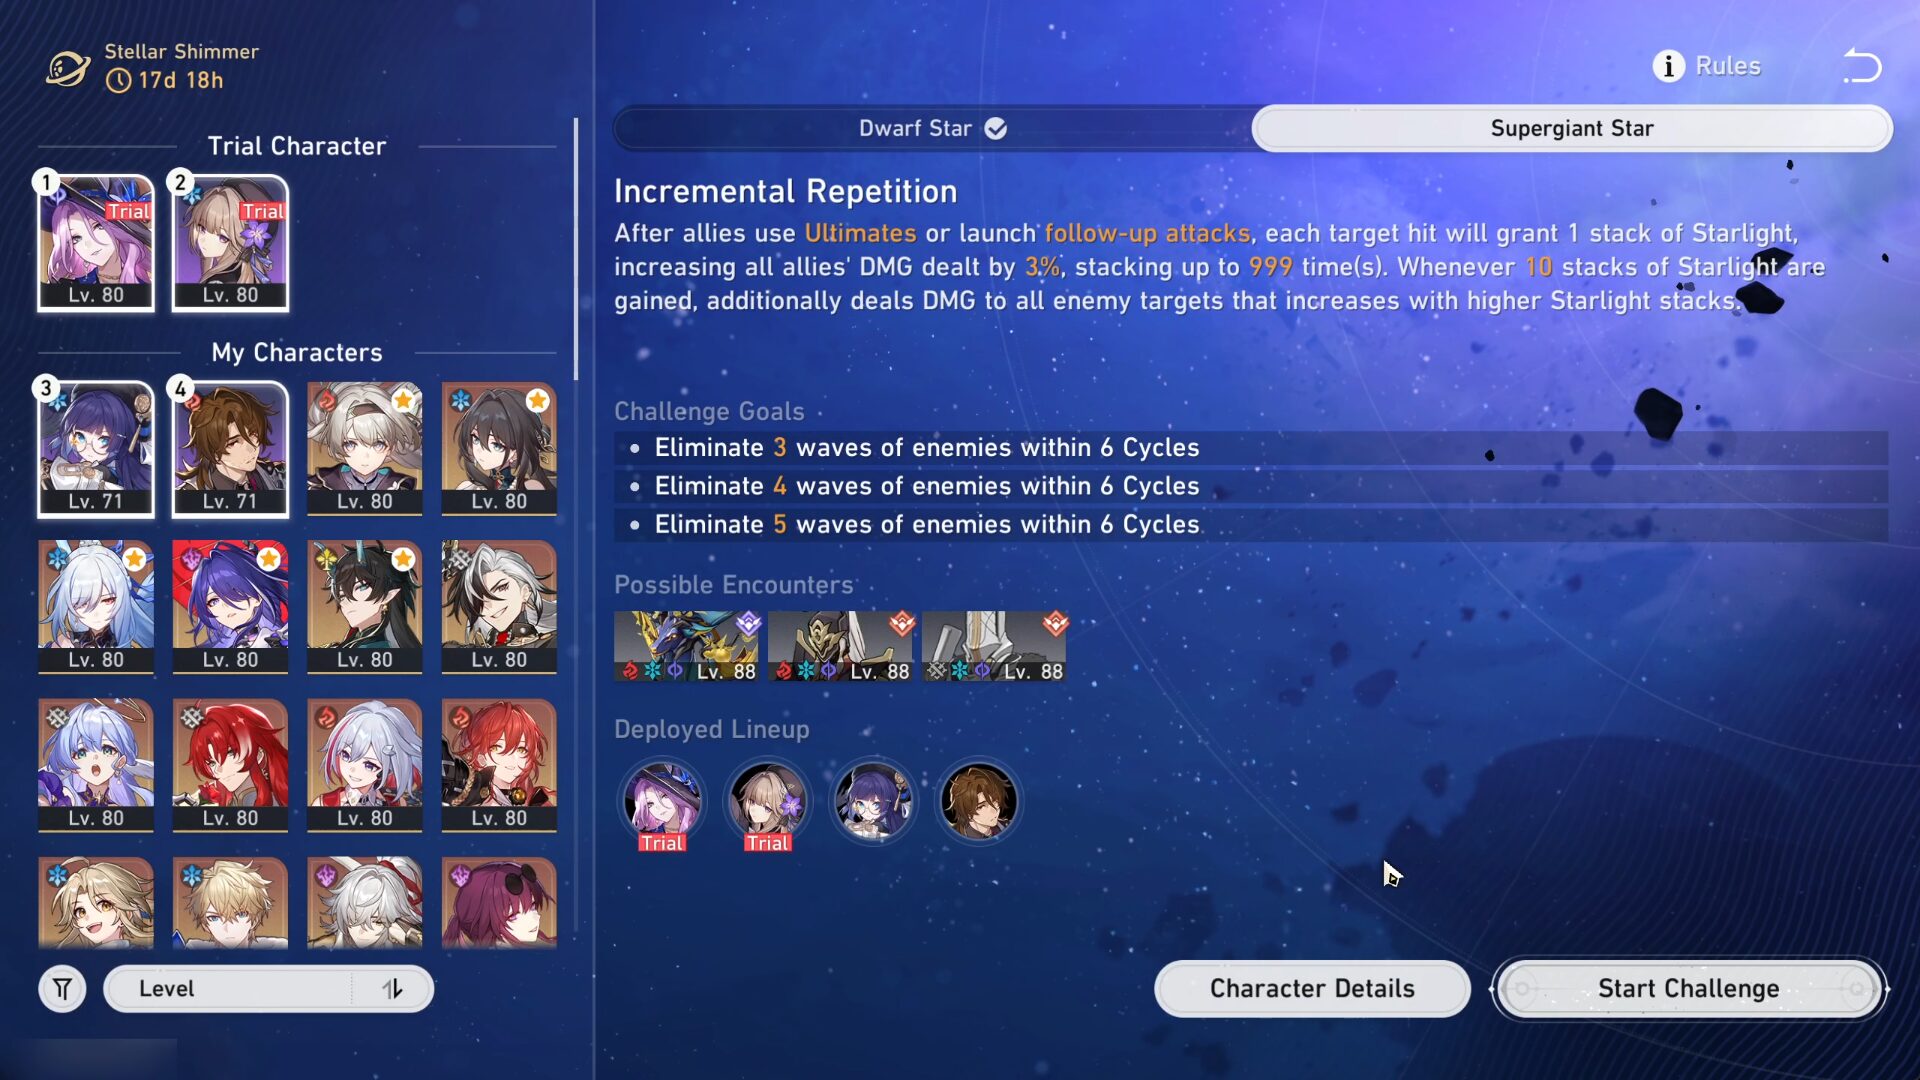
Stage Buff: After allies use Ultimates or launch follow-up attacks, each target hit will grant 1 stack of Starlight, increasing all allies' DMG dealt by 3%, stacking up to 999 time(s). Whenever 10 stacks of Starlight are gained, additionally deals DMG to all enemy targets that increases with higher Starlight stacks.
F2P Team: Trial Jade + Trial Herta + Pela/Asta + Gallagher
P2P Team: Jade + Herta + Robin + Aventurine
Playthrough Video
Tips & Tricks
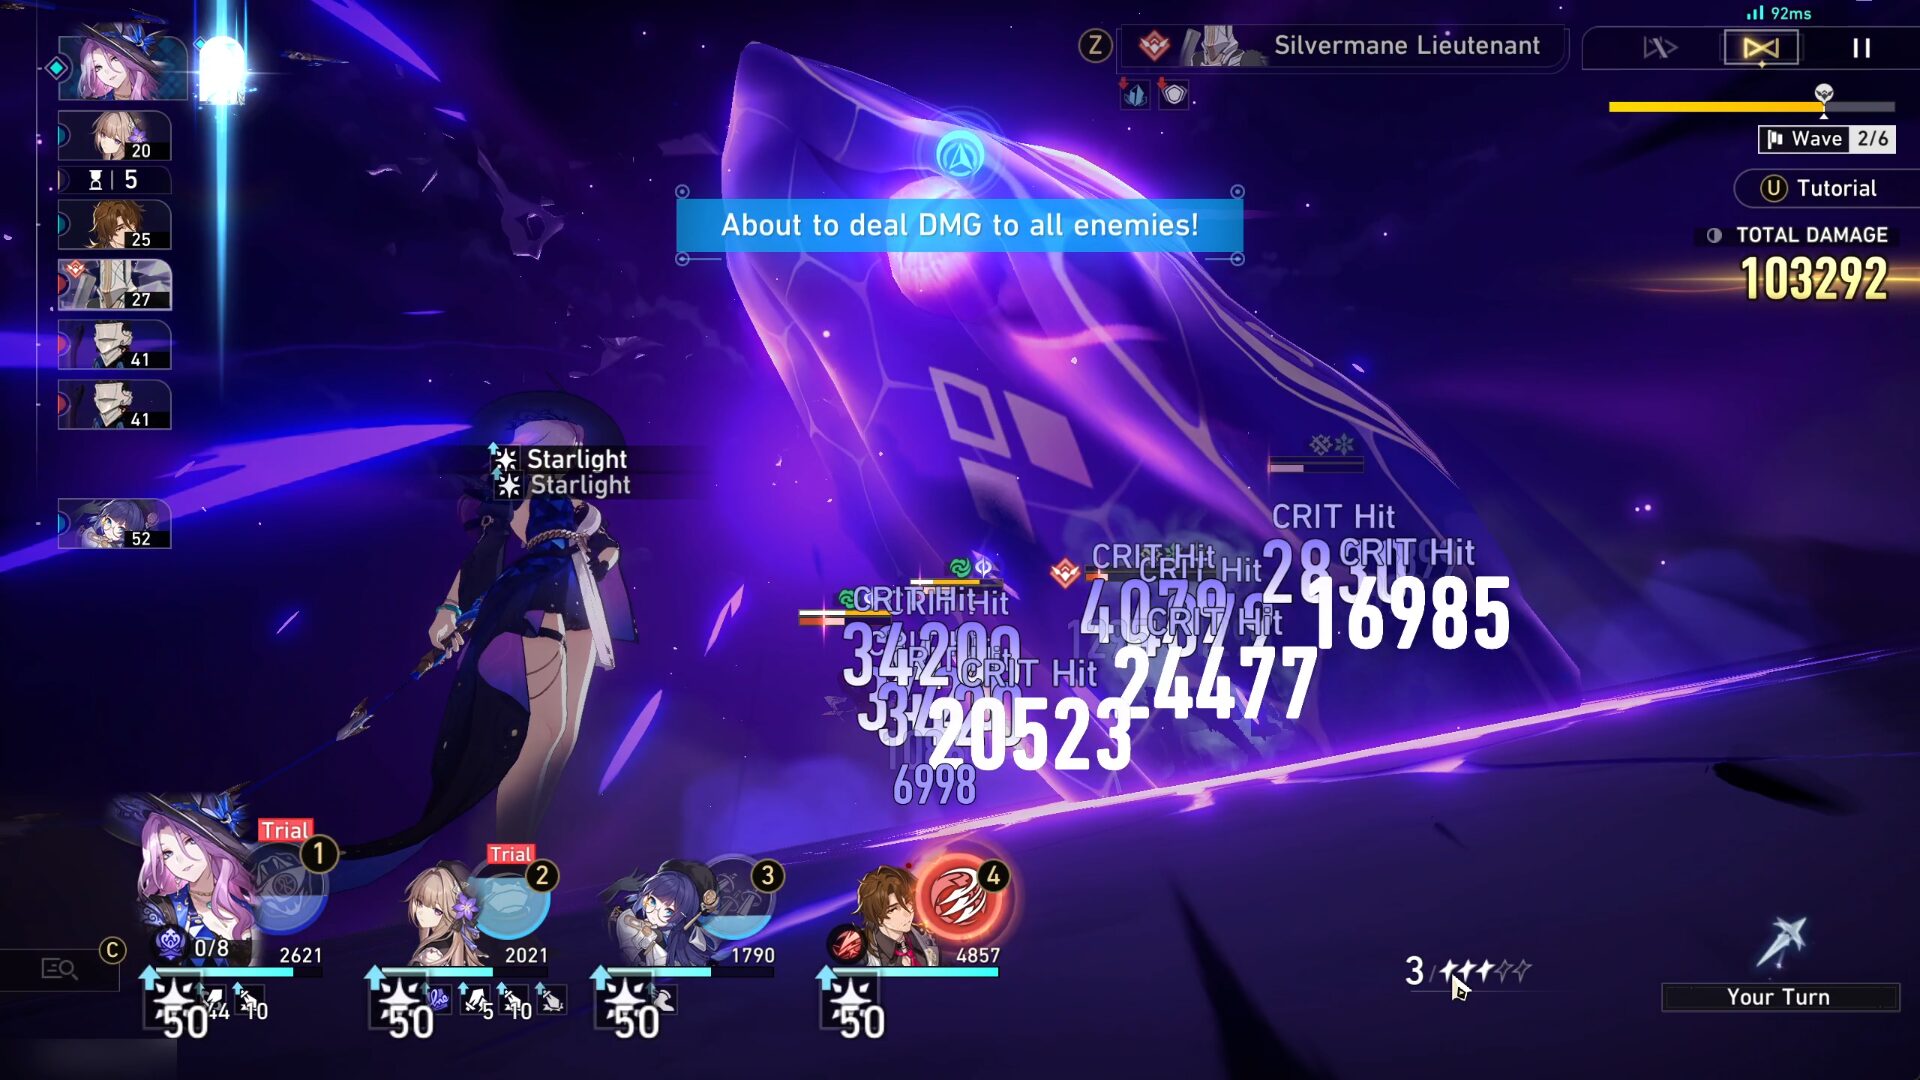
- After an ally uses an Ultimate or launches a follow-up attack (aka what Jade and Herta will always do), they gain corresponding Starlight stacks based on the number of targets hit, increasing the team's DMG boosting effect. The stacks can be seen under their HP bar.
- For every 10 Starlight stacks gained, additionally deals a fixed amount of DMG to enemies. This DMG increases with more Starlight stacks. In other words, just use FuA/Ultimate to stack Starlight and deal additional damage.
- So the maximum stack for Starlight is 999, and using the Trial characters, you should be able to get 100 stacks around wave 4. With those 100 stacks, the stage will deal a fixed amount of damage to all enemies (the higher the stack, the bigger the damage).
- Since both Herta and Jade are Erudition, their damage to single-target isn't that huge, that's why we need to rely on the Starlight stack to deal extra damage. And although the max stacks are 999, you can get at most ~250 stacks with the Trial Characters.
Stage 8 - Plague of Misfortune
Recommended Team
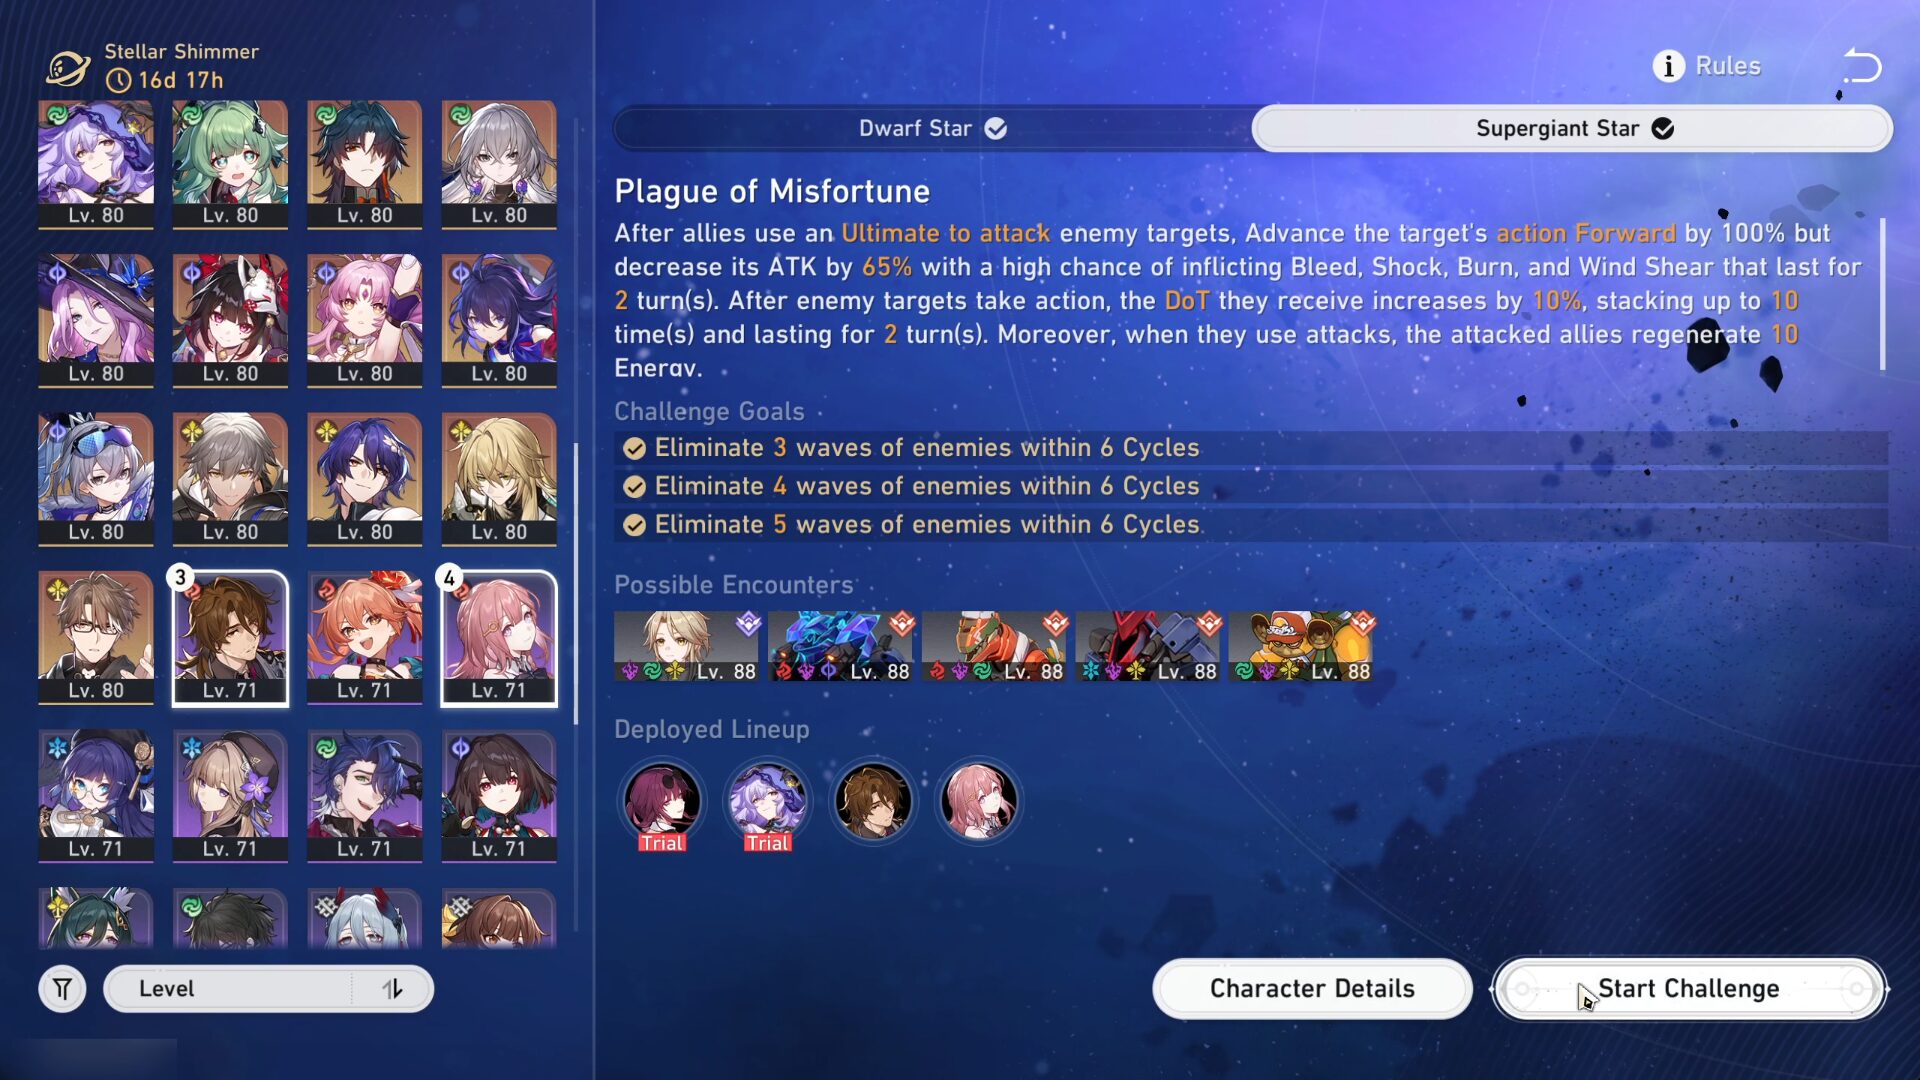
Stage Buff: After allies use an Ultimate to attack enemy targets, Advance the target's action Forward by 100% but decreases its ATK by 65% with a high chance of inflicting Bleed, Shock, Burn, and Wind Shear that last for 2 turn(s). After enemy targets take action, the DoT they receive increases by 10%, stacking up to 10 time(s) and lasting for 2 turns. Moreover, when they use attacks, the attacked allies regenerate 10 Energy.
F2P Team: Trial Kafka + Trial Black Swan + Asta/Pela + Gallagher
P2P Team: Kafka + Black Swan + Acheron/Pela + Huohuo/Aventurine/Gepard
It's best if you bring a team with everyone's Ultimate attacking enemies instead of Harmony with Ultimate that buff your characters. This will make the enemies got more DoT debuff and kill them faster.
Playthrough Video
Tips & Tricks
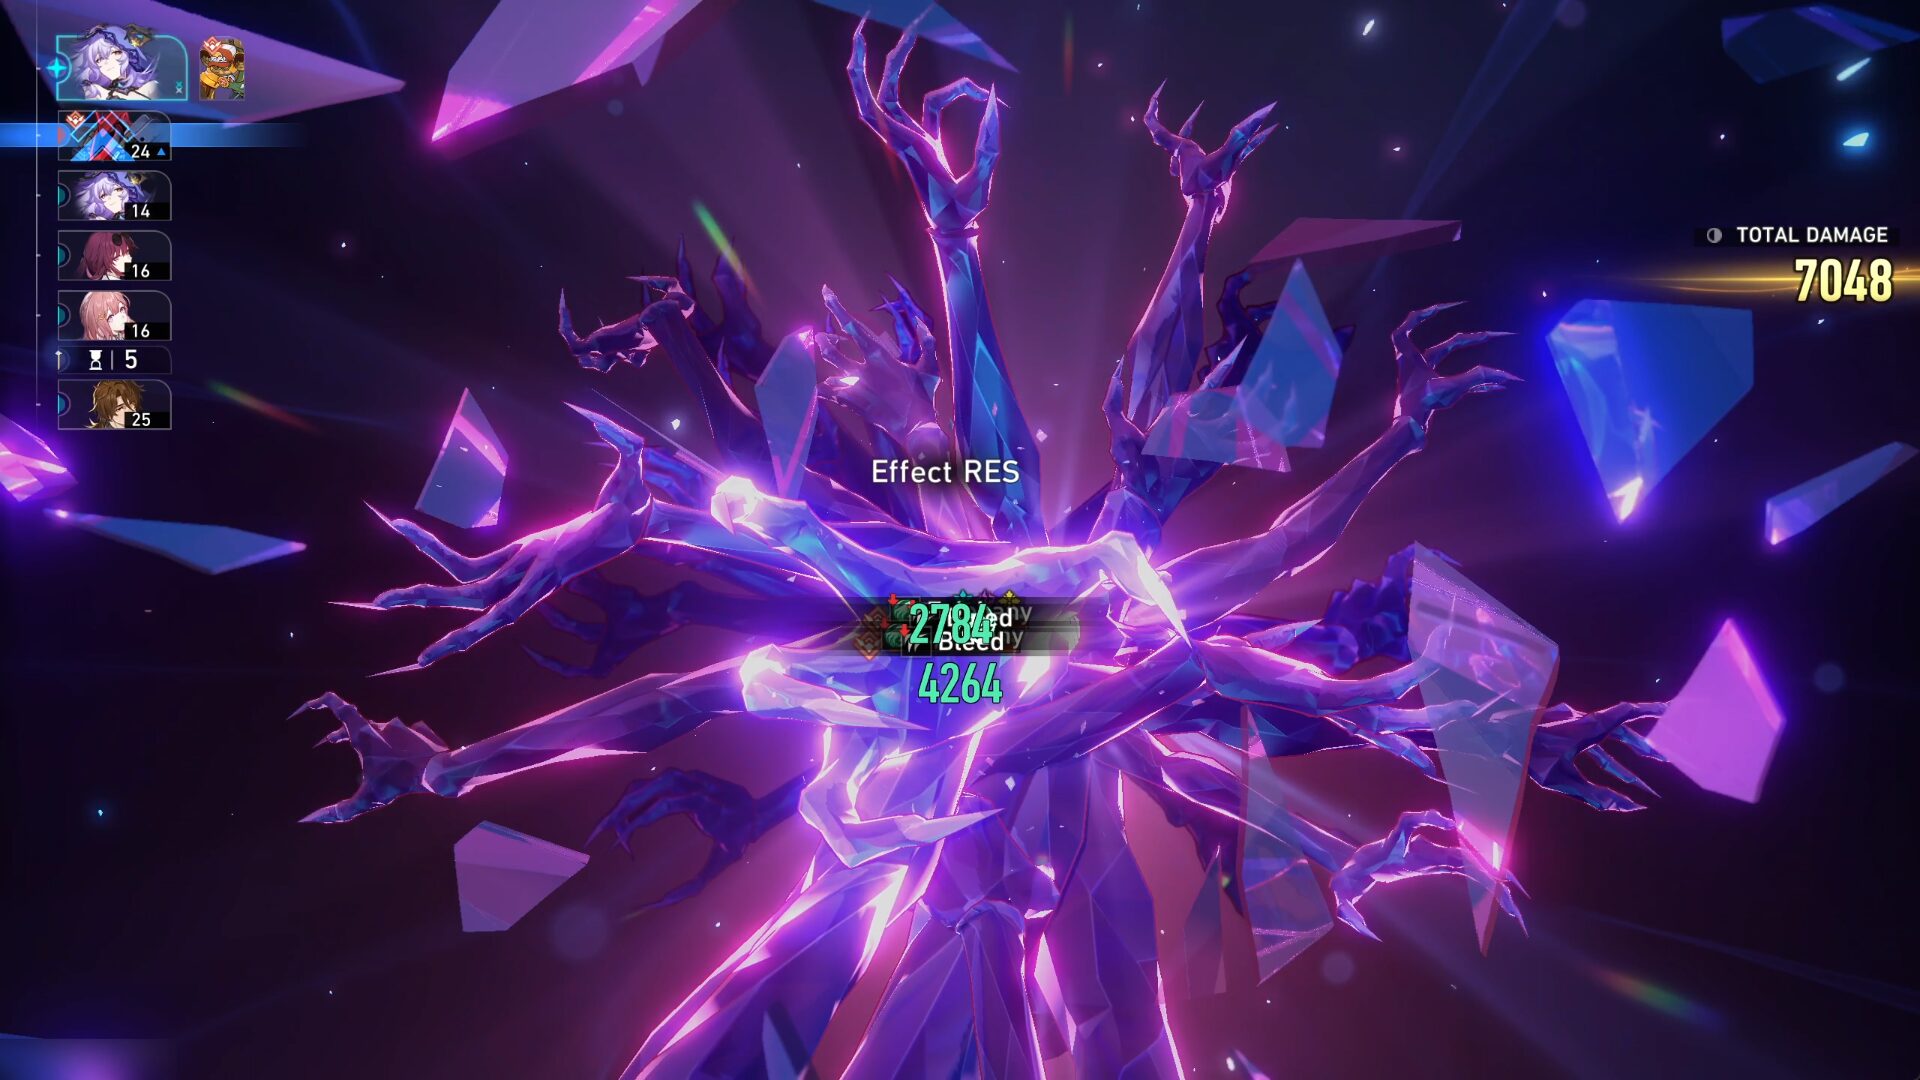
- After allies attack enemies with their Ultimates, enemy actions will be Advanced Forward by 100%, and they will deal less DMG and be inflicted with various DoT effects.
- Ultimates that don't attack an enemy (for example: Tingyun's Ultimate) do not count for the stage buff.
- After an enemy takes action, allies instantly use Ultimates to attack enemy. The enemy then immediately takes action again and receives a DoT effect.

- Although your character will regenerate extra Energy when an enemy attacks (from the stage buff), it wasn't that much to be honest, so you should still plan wisely on when to use those Ultimates (which auto-play sucks at).
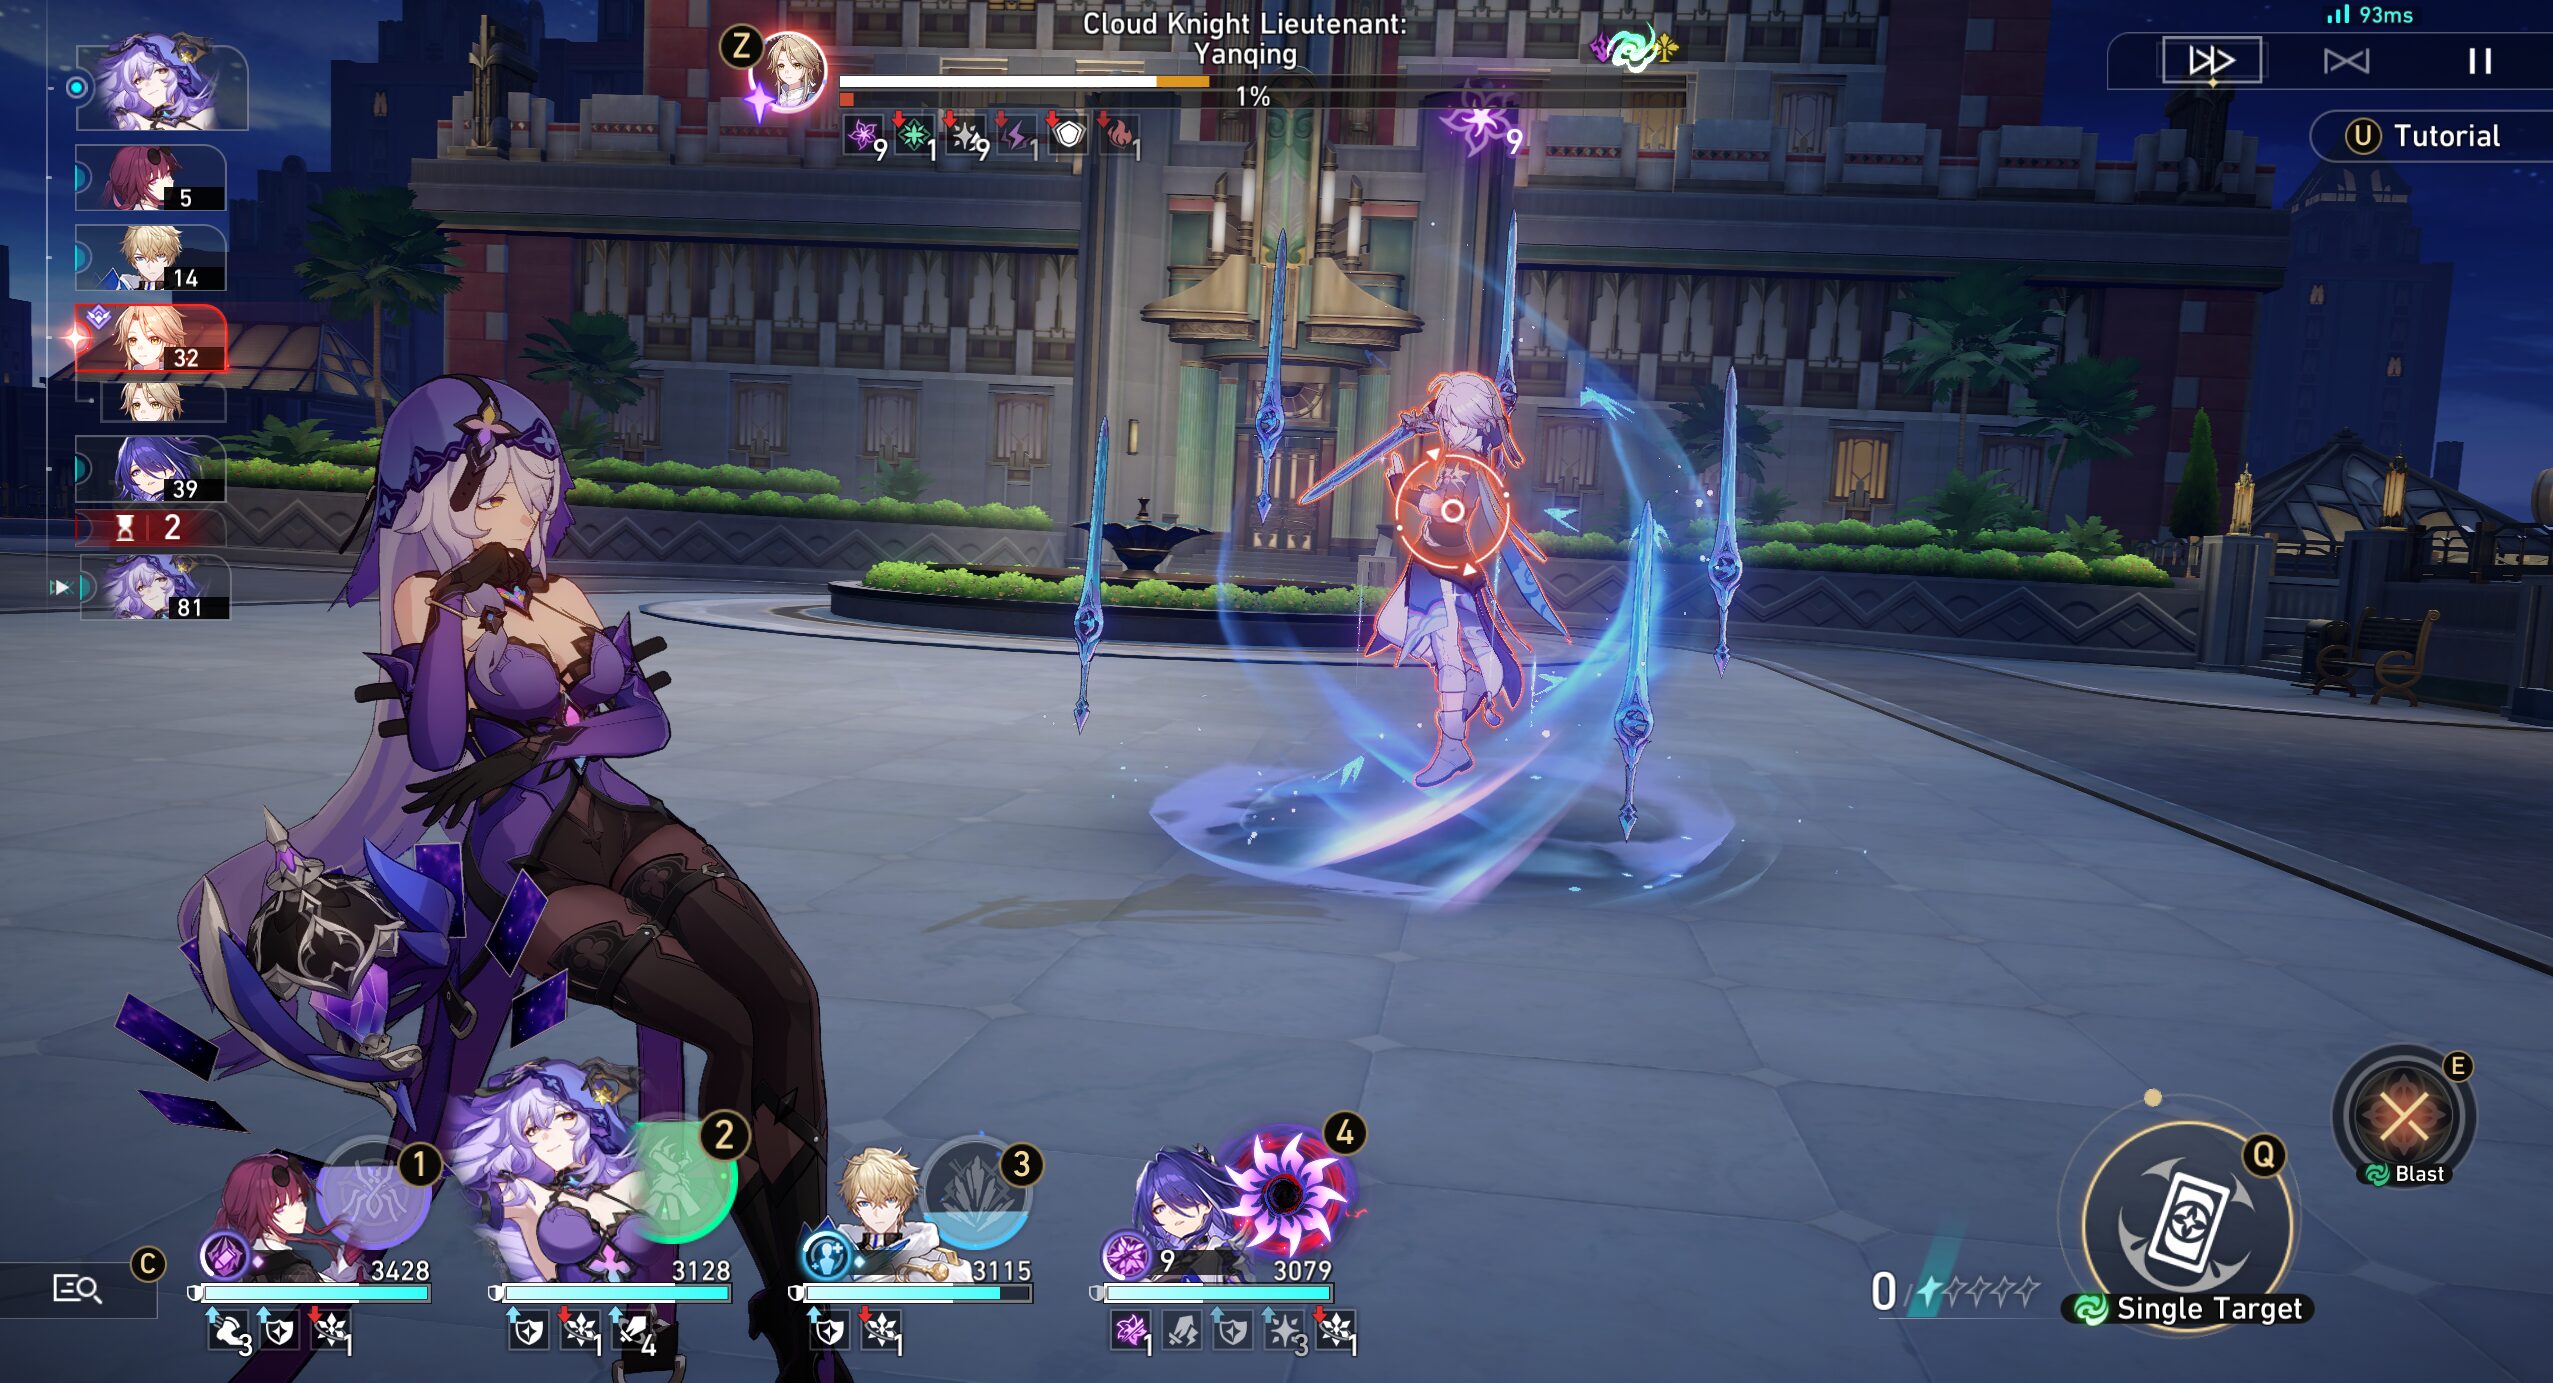
- The best way to spend that Energy is when there's an Elite enemy who can summon mobs like the Sweet Gorilla, Frigid Prowler, and Yanqing. Now this is where you save your Energy for a little bit and release it when the elite enemy has finished summoning more mobs.
- Don't forget that once the boss only have ~5% HP left, don't waste your Ultimate and save it for the next wave.
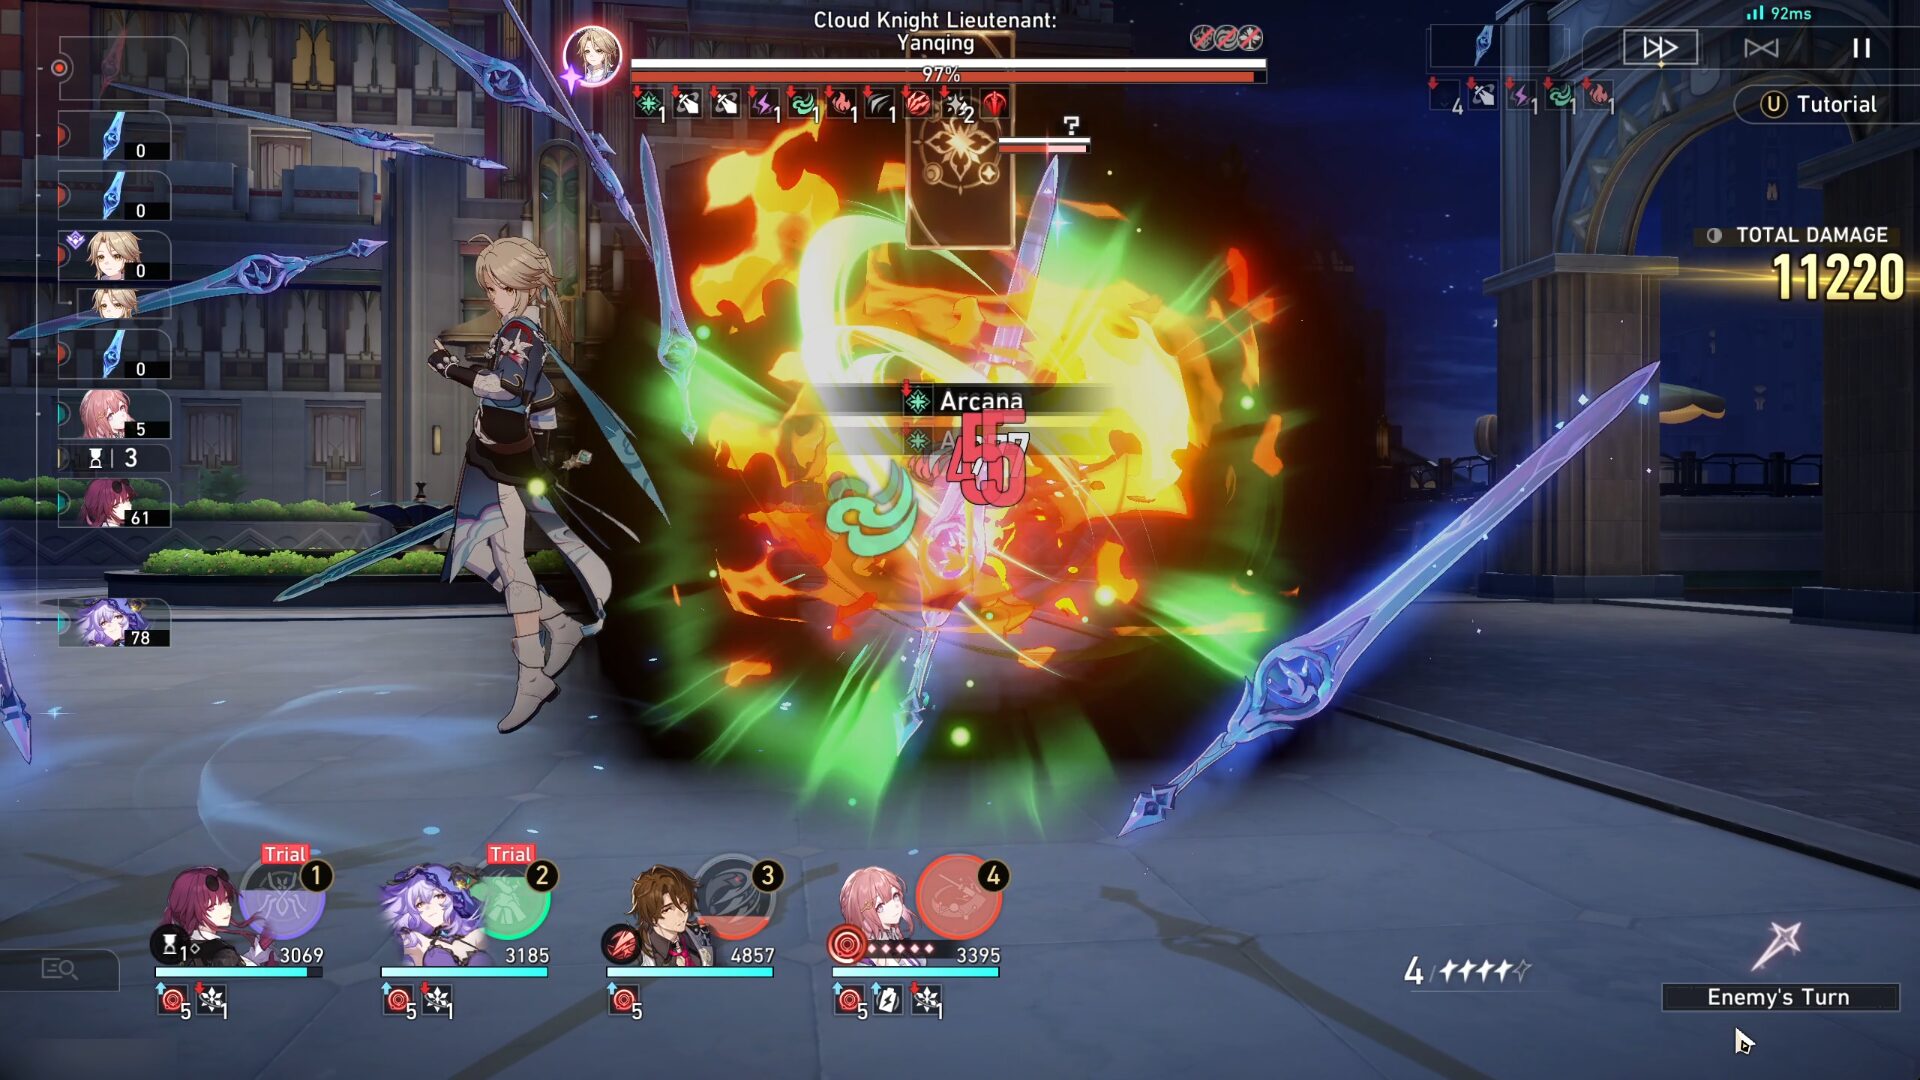
- During Yanqing's boss, you don't have to have all elements, in fact, both Kafka and Black Swan are enough to destroy all the swords he summoned. Use Ultimate once and the swords will gain DoT debuff that can kill them.
- What you need to worry is being frozen by Yangqing's attacks so bring a healer that can remove the debuff. Although it's better if you bring a shielder instead because of the gorilla elite enemy.
Gameplay Rewards

➥ Don’t forget to manually claim your rewards from the event page. By completing all the event challenges, you will get the following rewards:
- Stellar Jades x500
- Traveler's Guide x24
- Credits x400000
- Dynamic Outlining x40
- Relic Remains x160
- Lost Gold Fragments x40

Sora
Articles: 368More Articles

Honkai: Star Rail Version 3.0 Special Program Livestream Overview

Honkai: Star Rail 3 New Redemption Codes from 3.0 Livestream

Honkai: Star Rail Redemption Codes – January 2025

Honkai: Star Rail Fugue Character Guide

Honkai: Star Rail Pure Fiction Technicality Entrapment Guide

Honkai: Star Rail Jing Yuan Character Guide

Honkai: Star Rail Apocalyptic Shadow V2.7 Gusty Primate Guide
Honkai: Star Rail Which 5-Star Standard Character Should You Choose?
Honkai: Star Rail Sunday Character Guide

Honkai: Star Rail All 26 New Achievements in Version 2.7

Honkai: Star Rail Cosmic Home Decor Guide (Event Guide)

Honkai: Star Rail New Dialogue Inclinations (For Achievements) in Version 2.7
Honkai: Star Rail Stellar Jades Calculation in Version 2.7

Honkai: Star Rail Version 2.7 Special Program Livestream Overview

Honkai: Star Rail 3 New Redemption Codes from 2.7 Livestream
Honkai: Star Rail Apocalyptic Shadow V2.6 Sovereign Control Guide
Honkai: Star Rail Rappa Character Guide

Honkai: Star Rail Sound Hunt Ninjutsu Inscription Event Guide
Honkai: Star Rail All Treasure Chests in Penacony (Penacony Paperfold University College)