Table of Contents

The Luofu Temple Fair is currently taking place aboard the Skysplitter. Classic Xianzhou immersias, which were once only available offline, can now be experienced all in one place at the fair.
Event Overview
Event Gameplay Duration:
➥ 2024/09/30 12:00:00 – 2024/10/21 03:59:59 (server time)
※ After the limited-time event duration ends, Trailblazers will be unable to claim limited-time event rewards. Festive Revelry will be moved to Conventional Memoir, where Trailblazers can continue to experience its gameplay
Eligibility:
➥ Trailblaze Level ≥ 21
※ This content can be unlocked and experienced in advance through the Finality's Vision function.
※ Trailblazers are recommended to experience the content after completing Trailblaze Continuance "The Xianzhou Luofu — Finest Duel Under the Pristine Blue: Part II"
Event Overview:
➥The event features 4 gameplay modes, namely Hexanexus, Inventory Arrangement, Hexanexus: Remake, and Mutare Magnus.
➥ Each gameplay mode includes 3 Easy Mode stages and 3 Hard Mode stages. After completing Easy Mode stages, Hard Mode stages will be unlocked.
➥ After the event begins, the Easy Mode for the Hexanexus mini-game will be unlocked. The subsequent gameplay modes will open after completing the prerequisite gameplay mode.
Video Guide
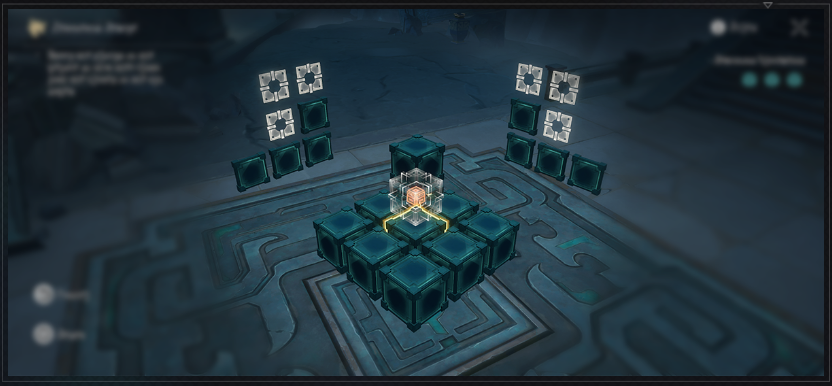
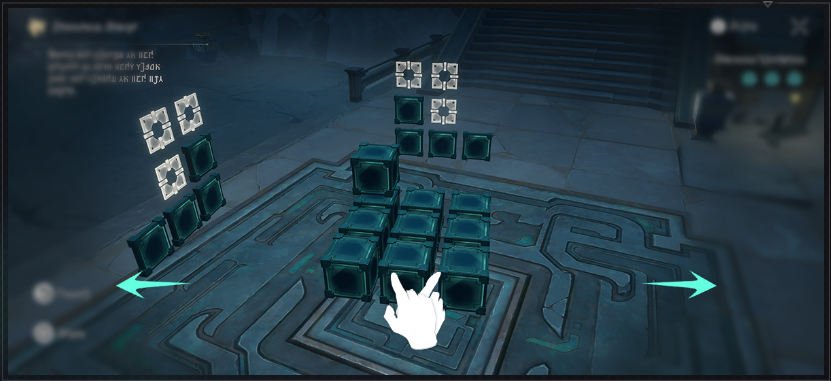
Hexanexus
Tutorial
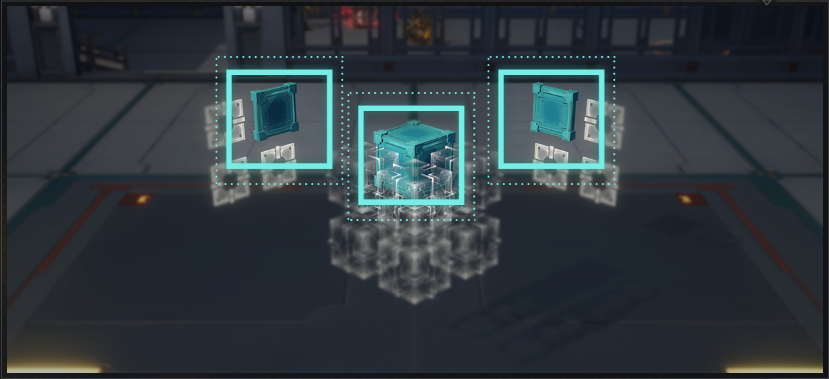
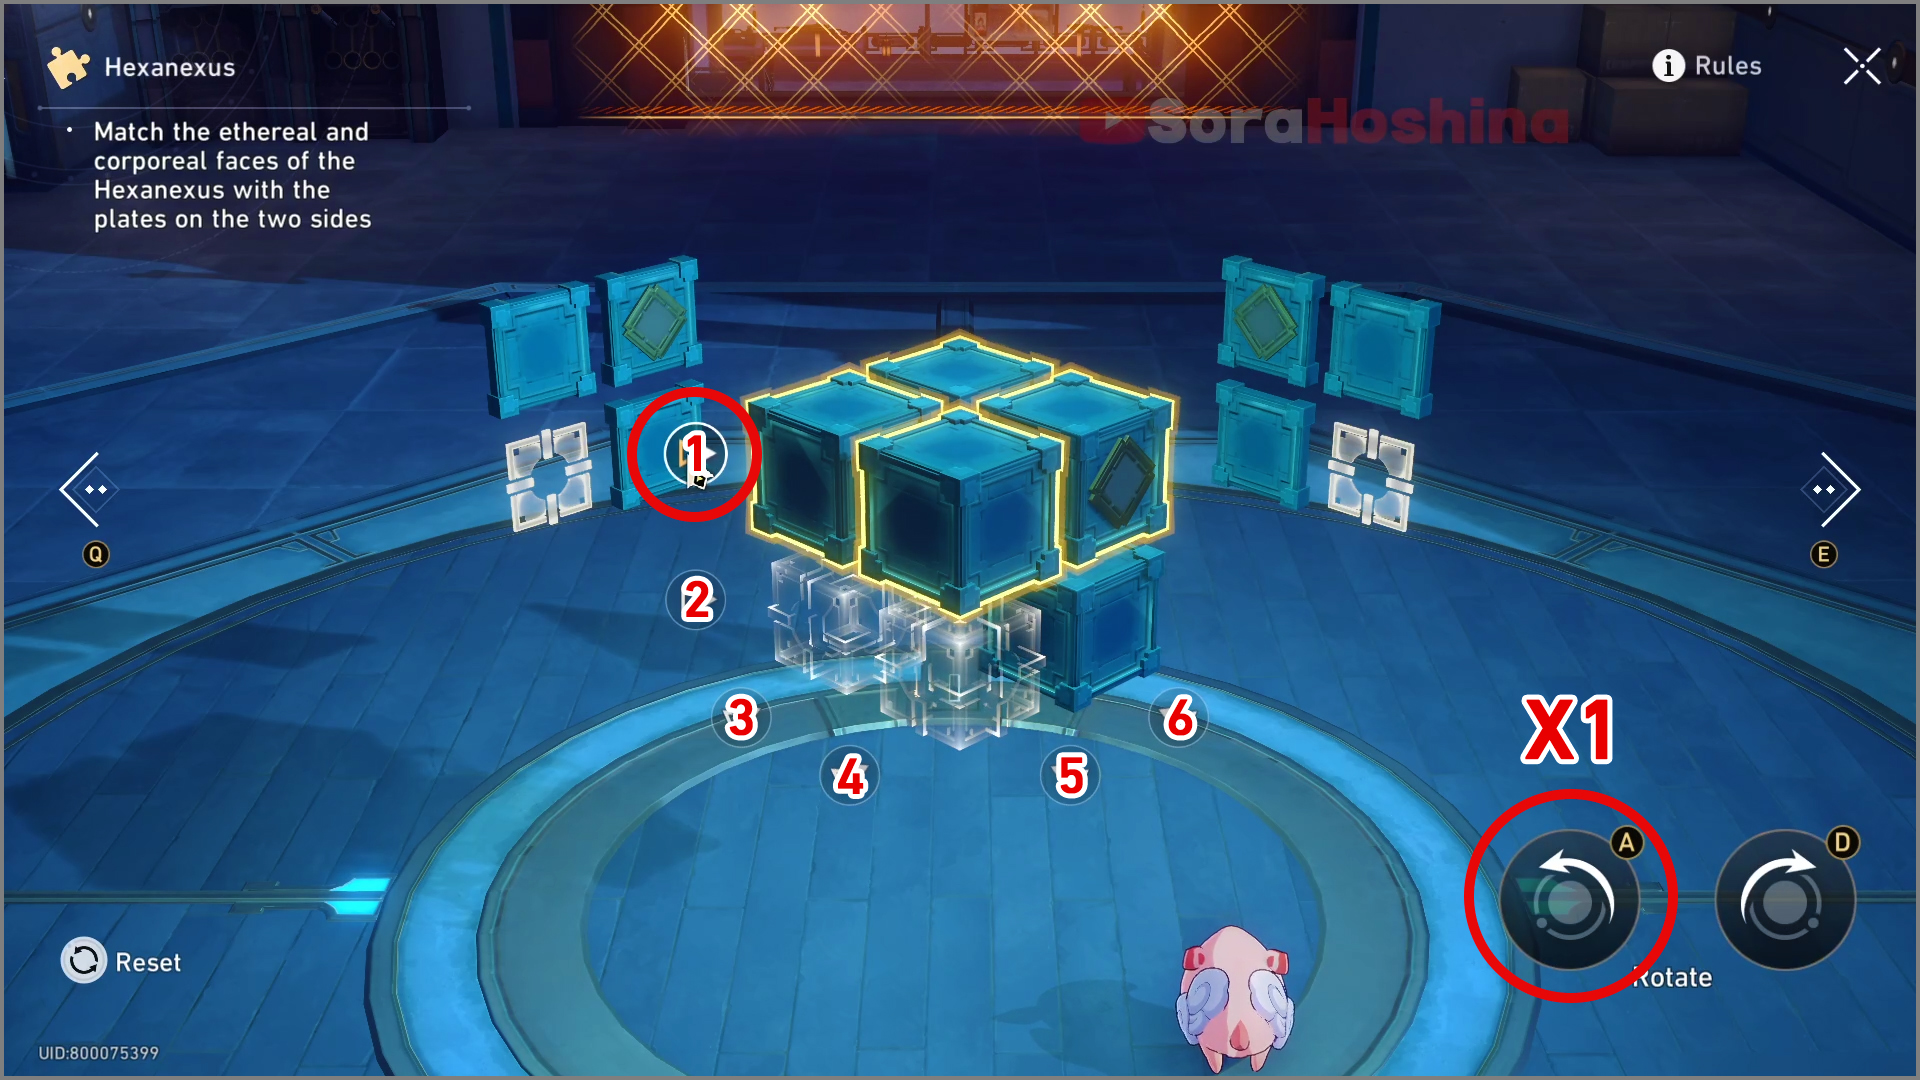
Rotate the corresponding area of the Hexanexus so that the physical blocks of the Hexanexus to correspond to the plates on both sides.
Click the small arrows below to select the corresponding Hexanexus physical blocks above and rotate them.
Some cubes have special patterns on them, which need to match the patterns on the plates on the two sides to solve the Hexanexus.

Click on the arrows on the left and right side in the interface to switch viewpoints.
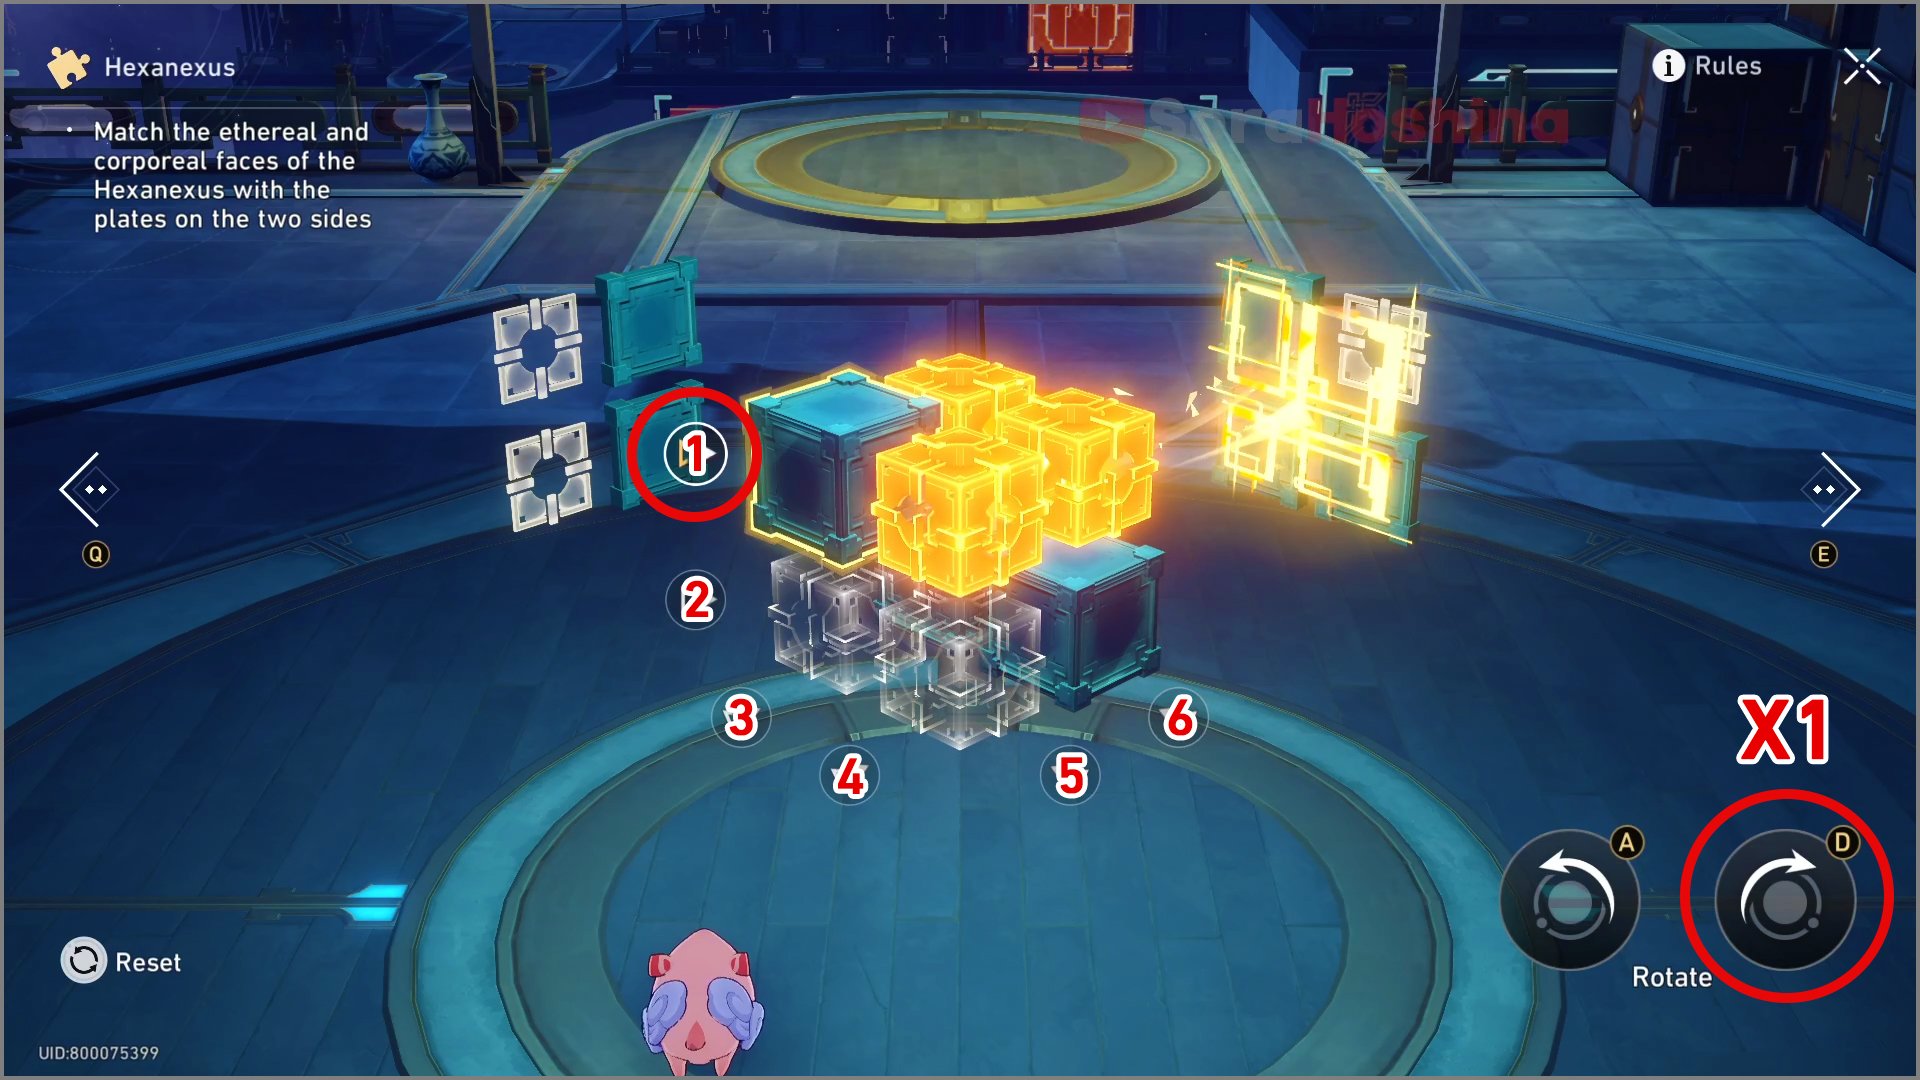
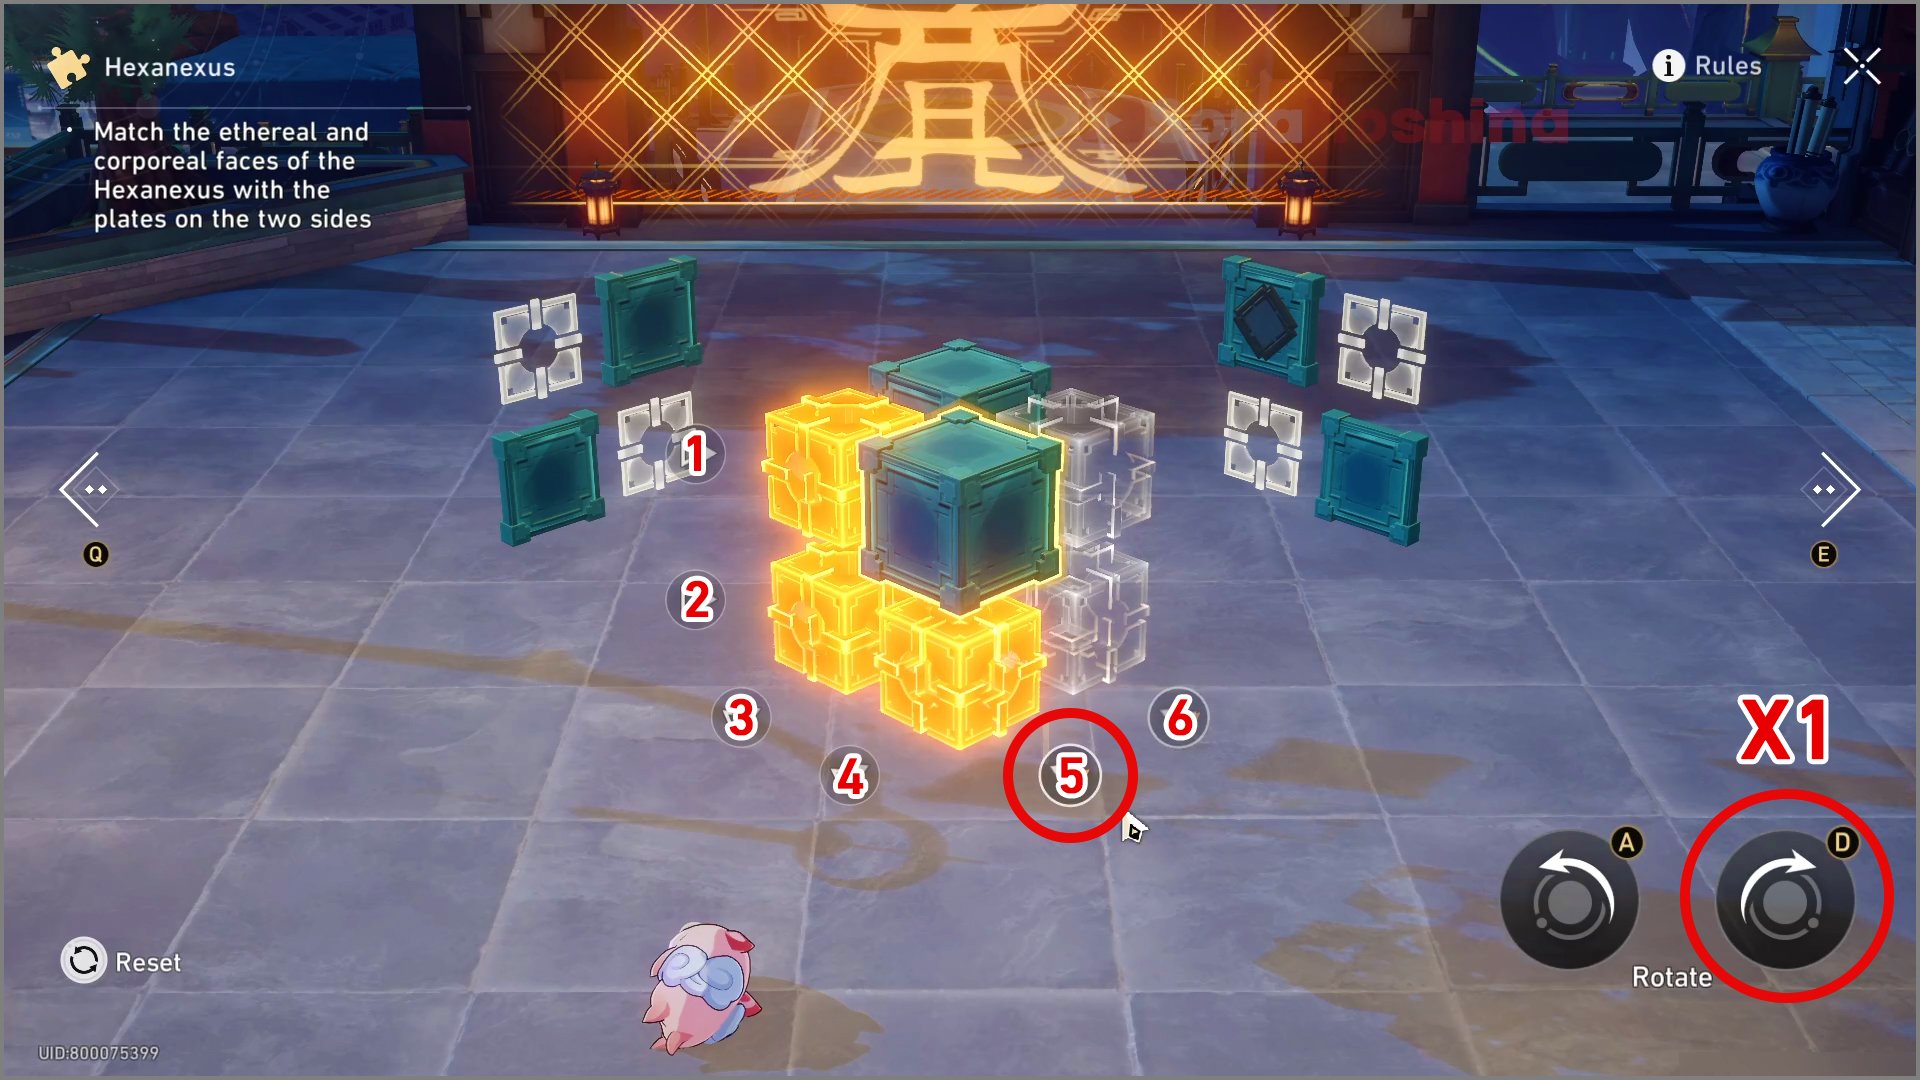
Easy Mode I
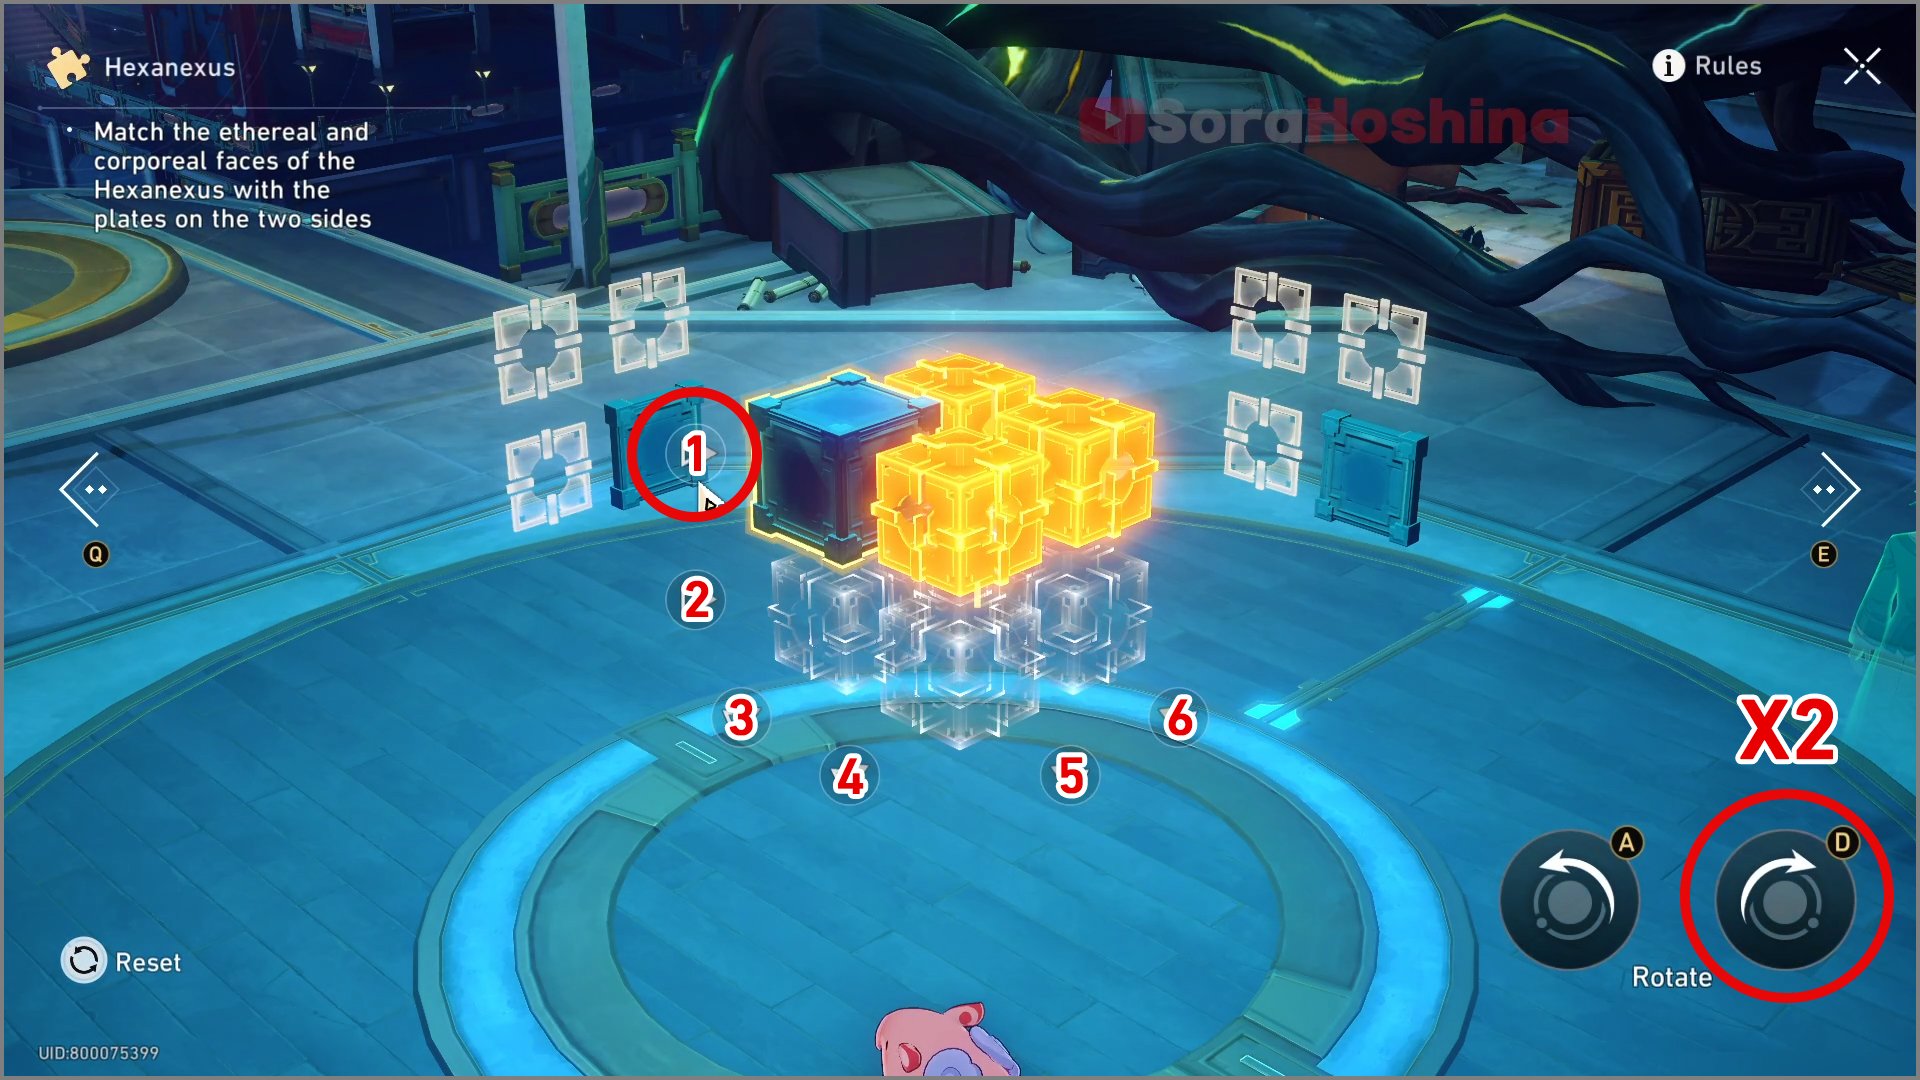
Step 1: Select the 1st switch and rotate it clockwise twice
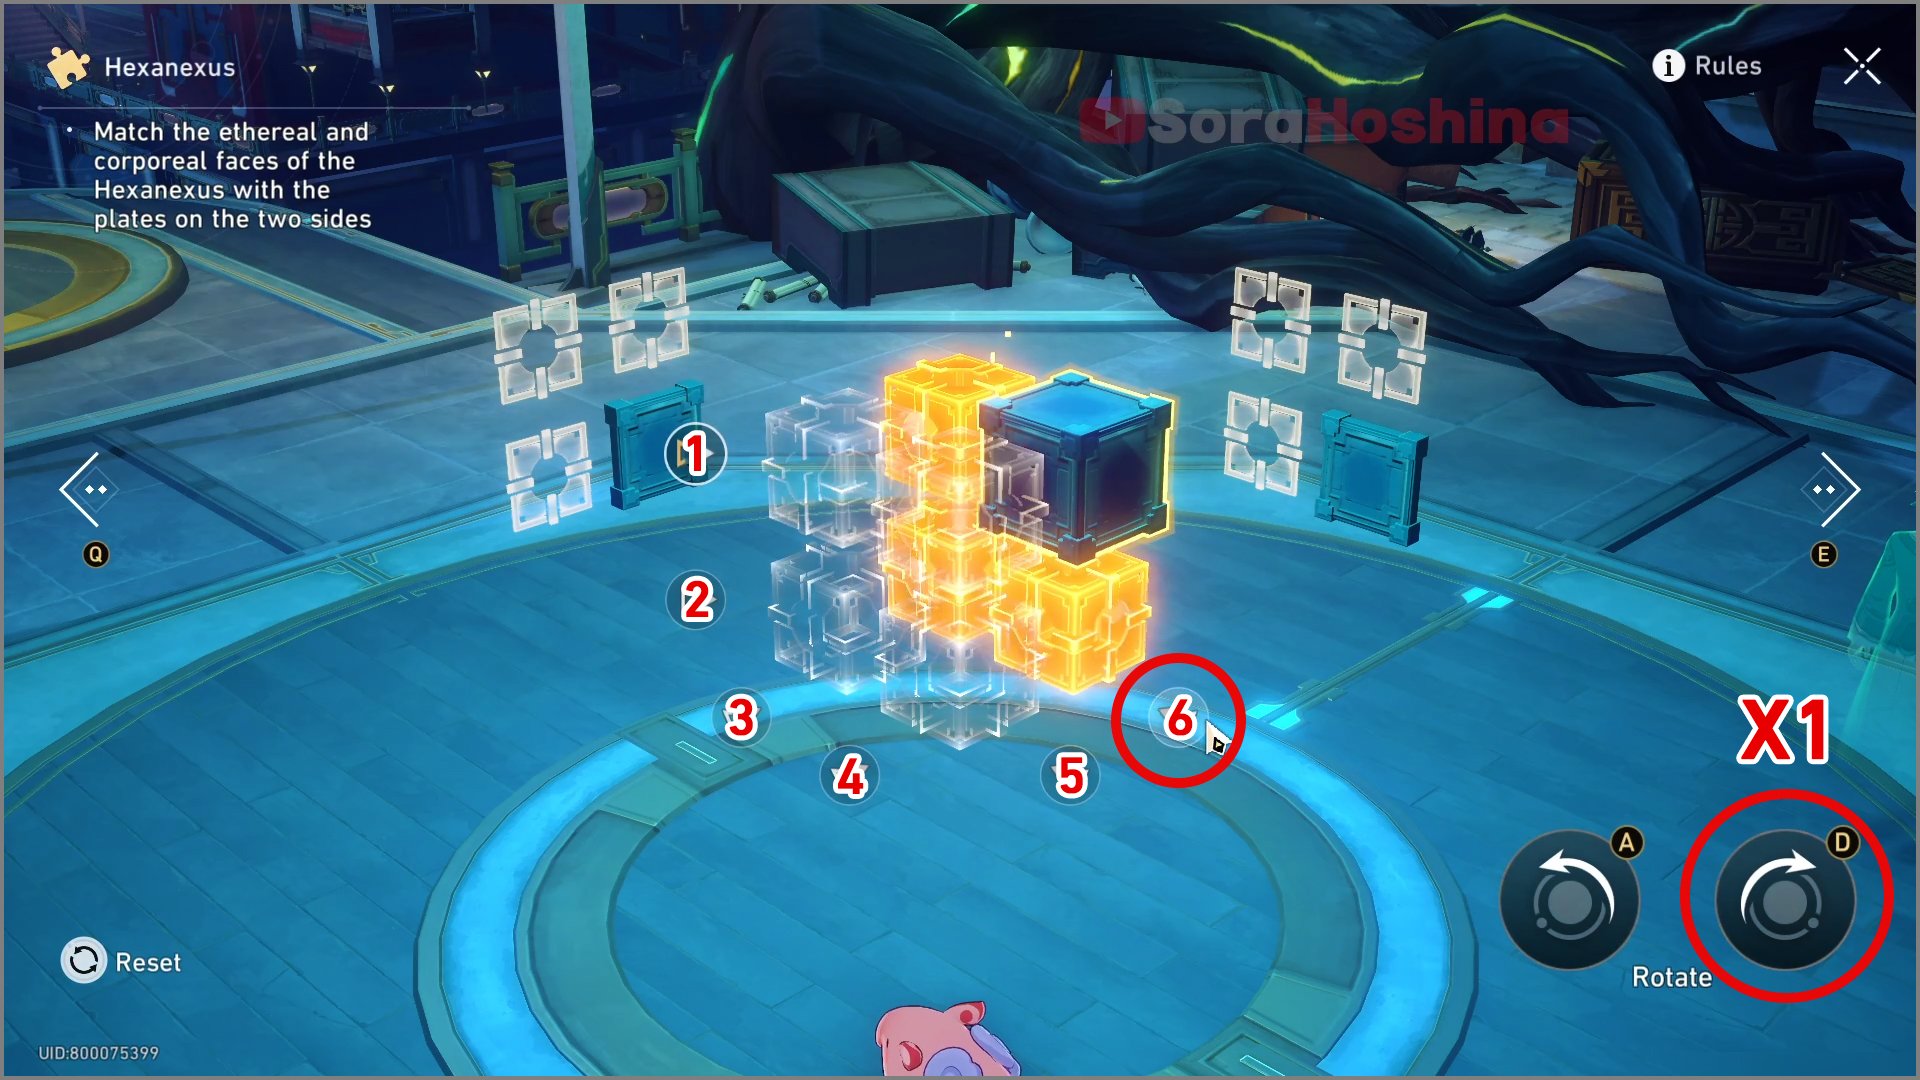
Step 2: Select the 6th switch and rotate it clockwise once
Easy Mode II
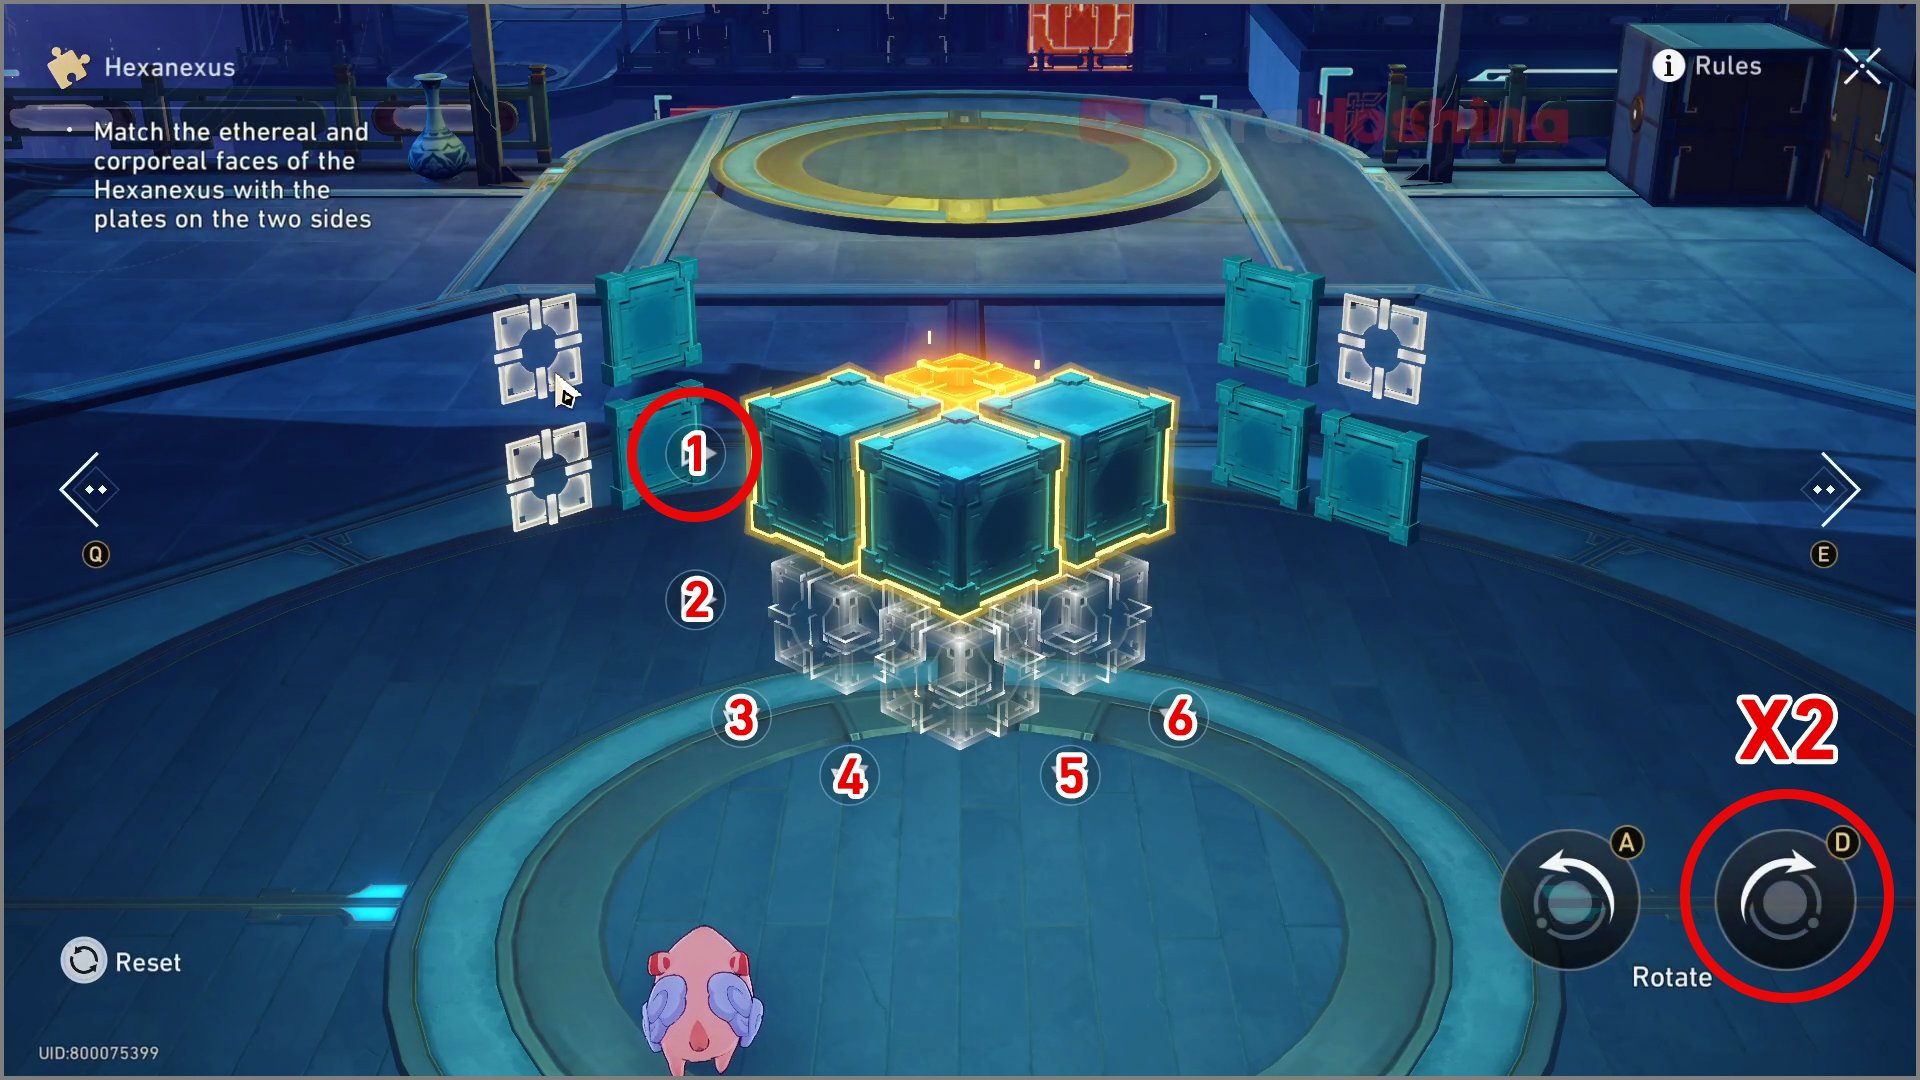
Step 1: Select the 1st switch and rotate it clockwise twice
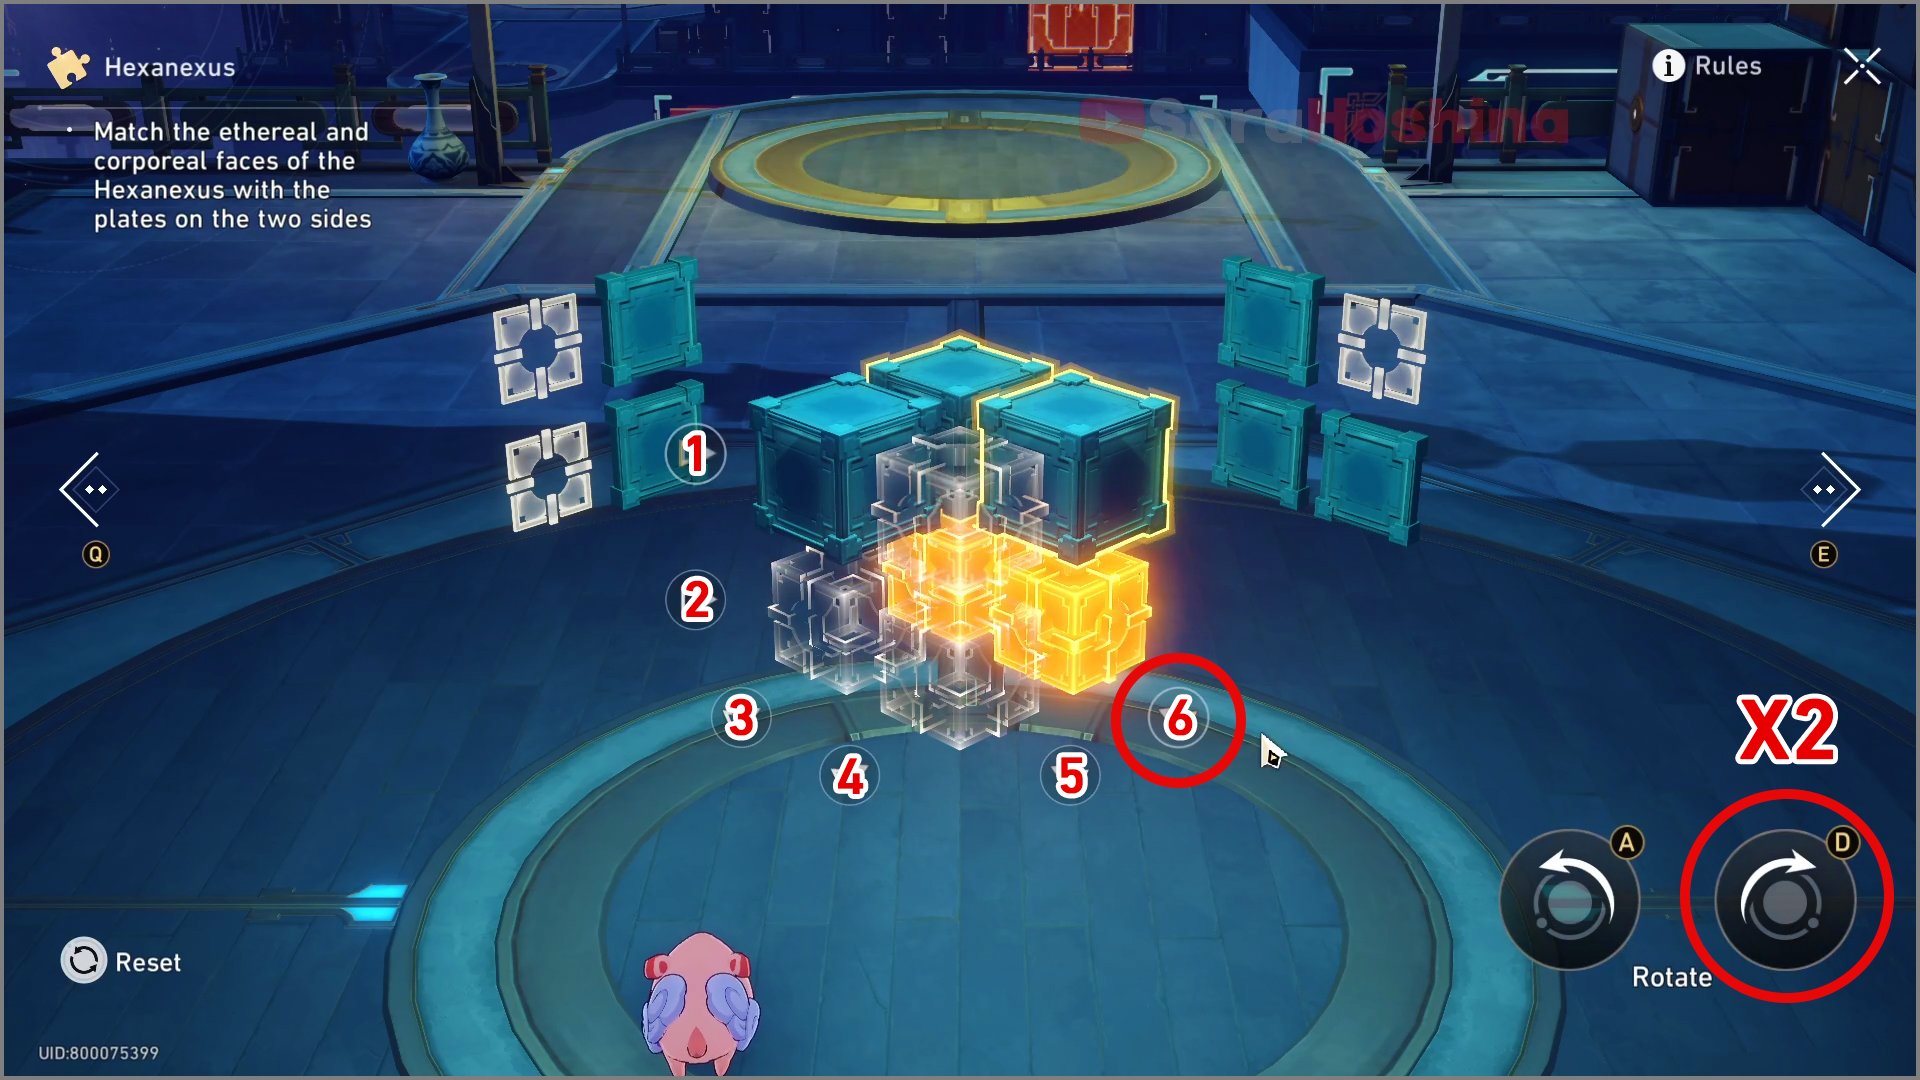
Step 2: Select the 6th switch and rotate it clockwise twice
Step 3: Select the 1st switch and rotate it clockwise once
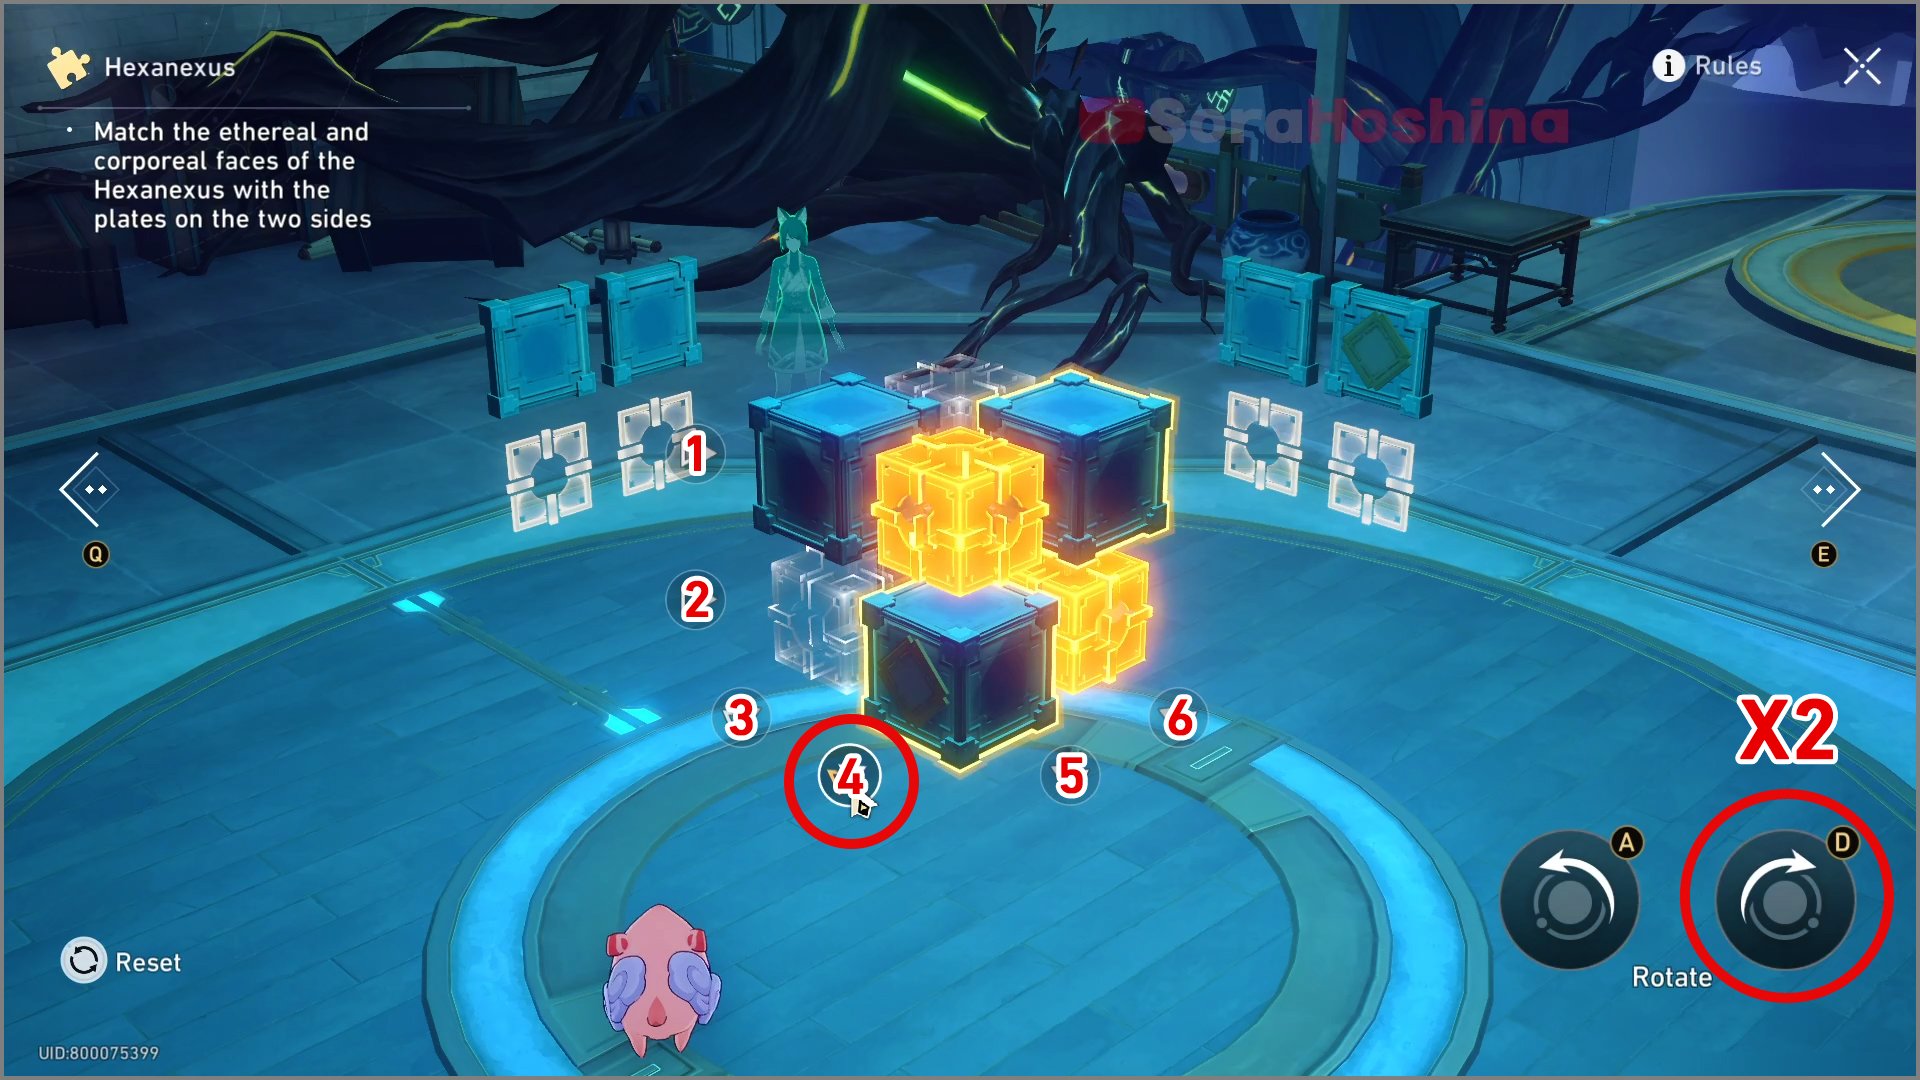
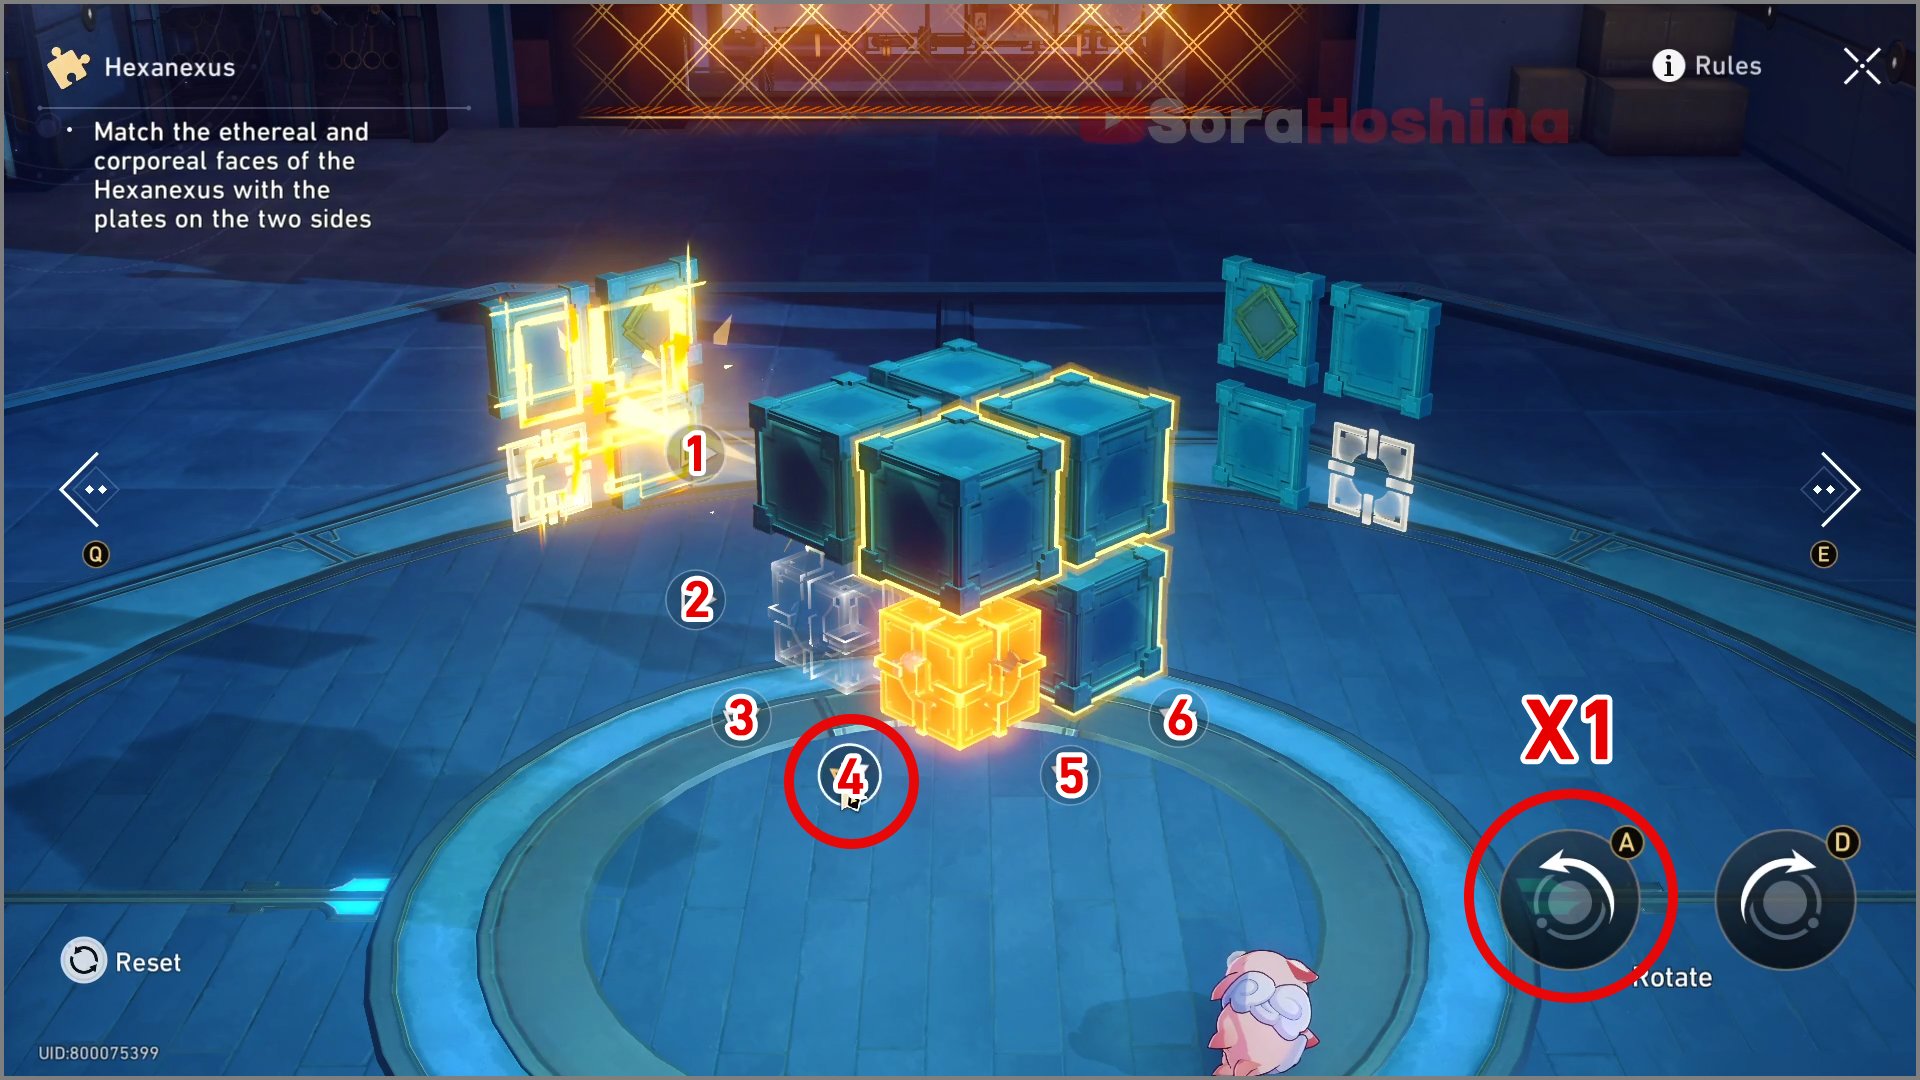
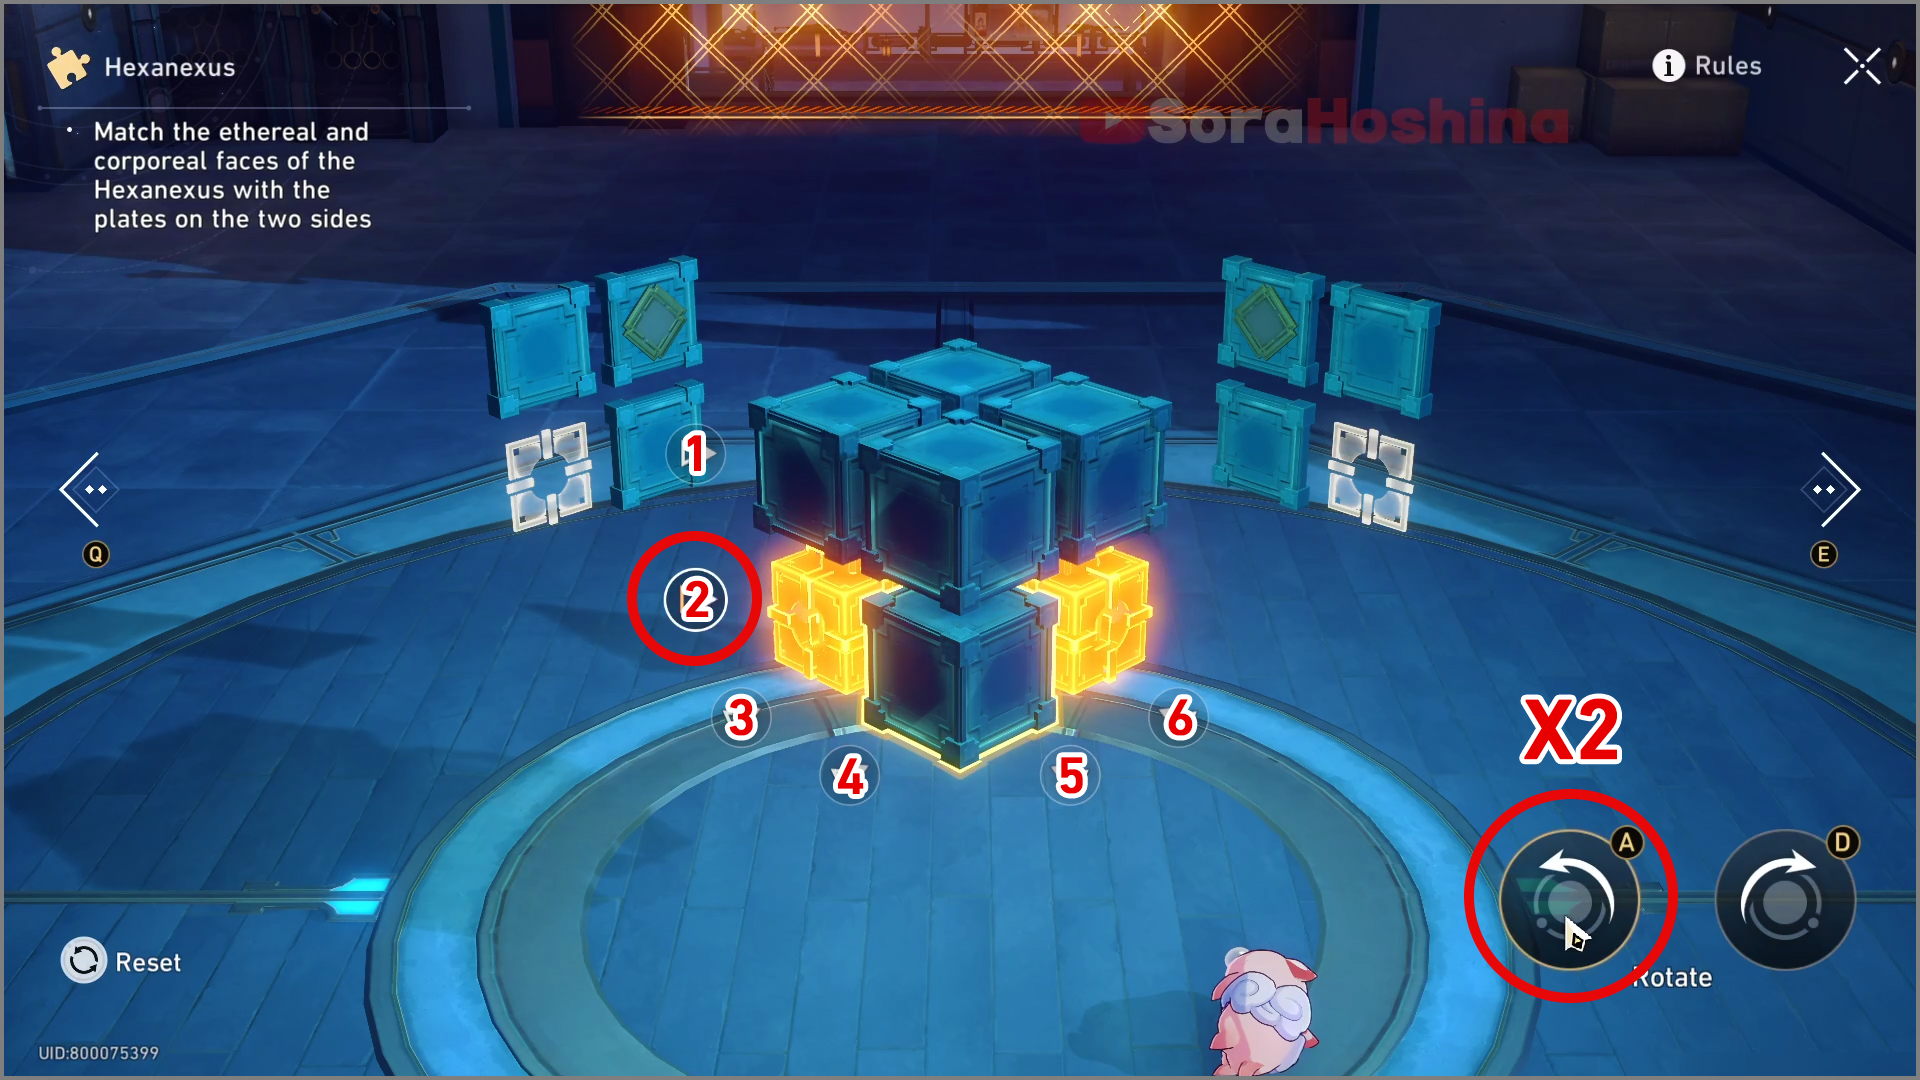
Easy Mode III
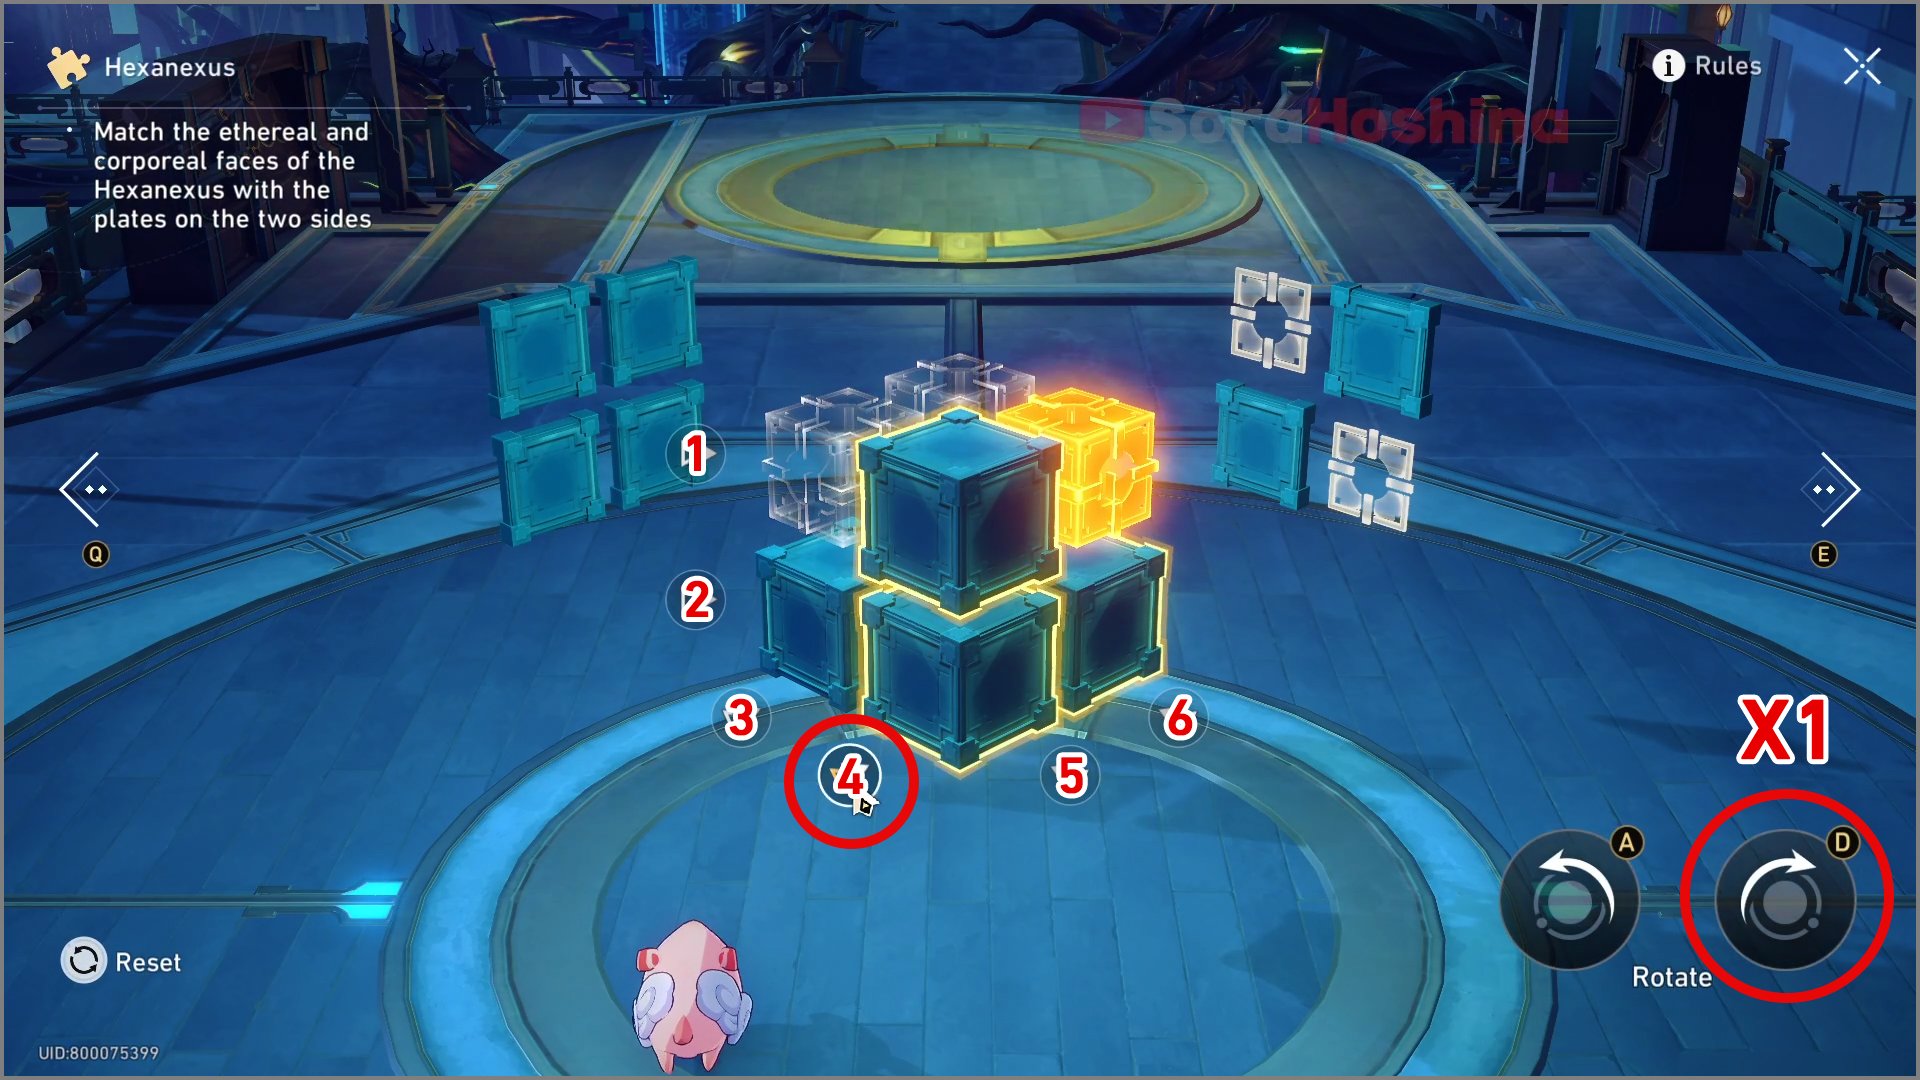
Step 1: Select the 4th switch and rotate it clockwise once

Step 2: Select the 2nd switch on the left and rotate it clockwise once
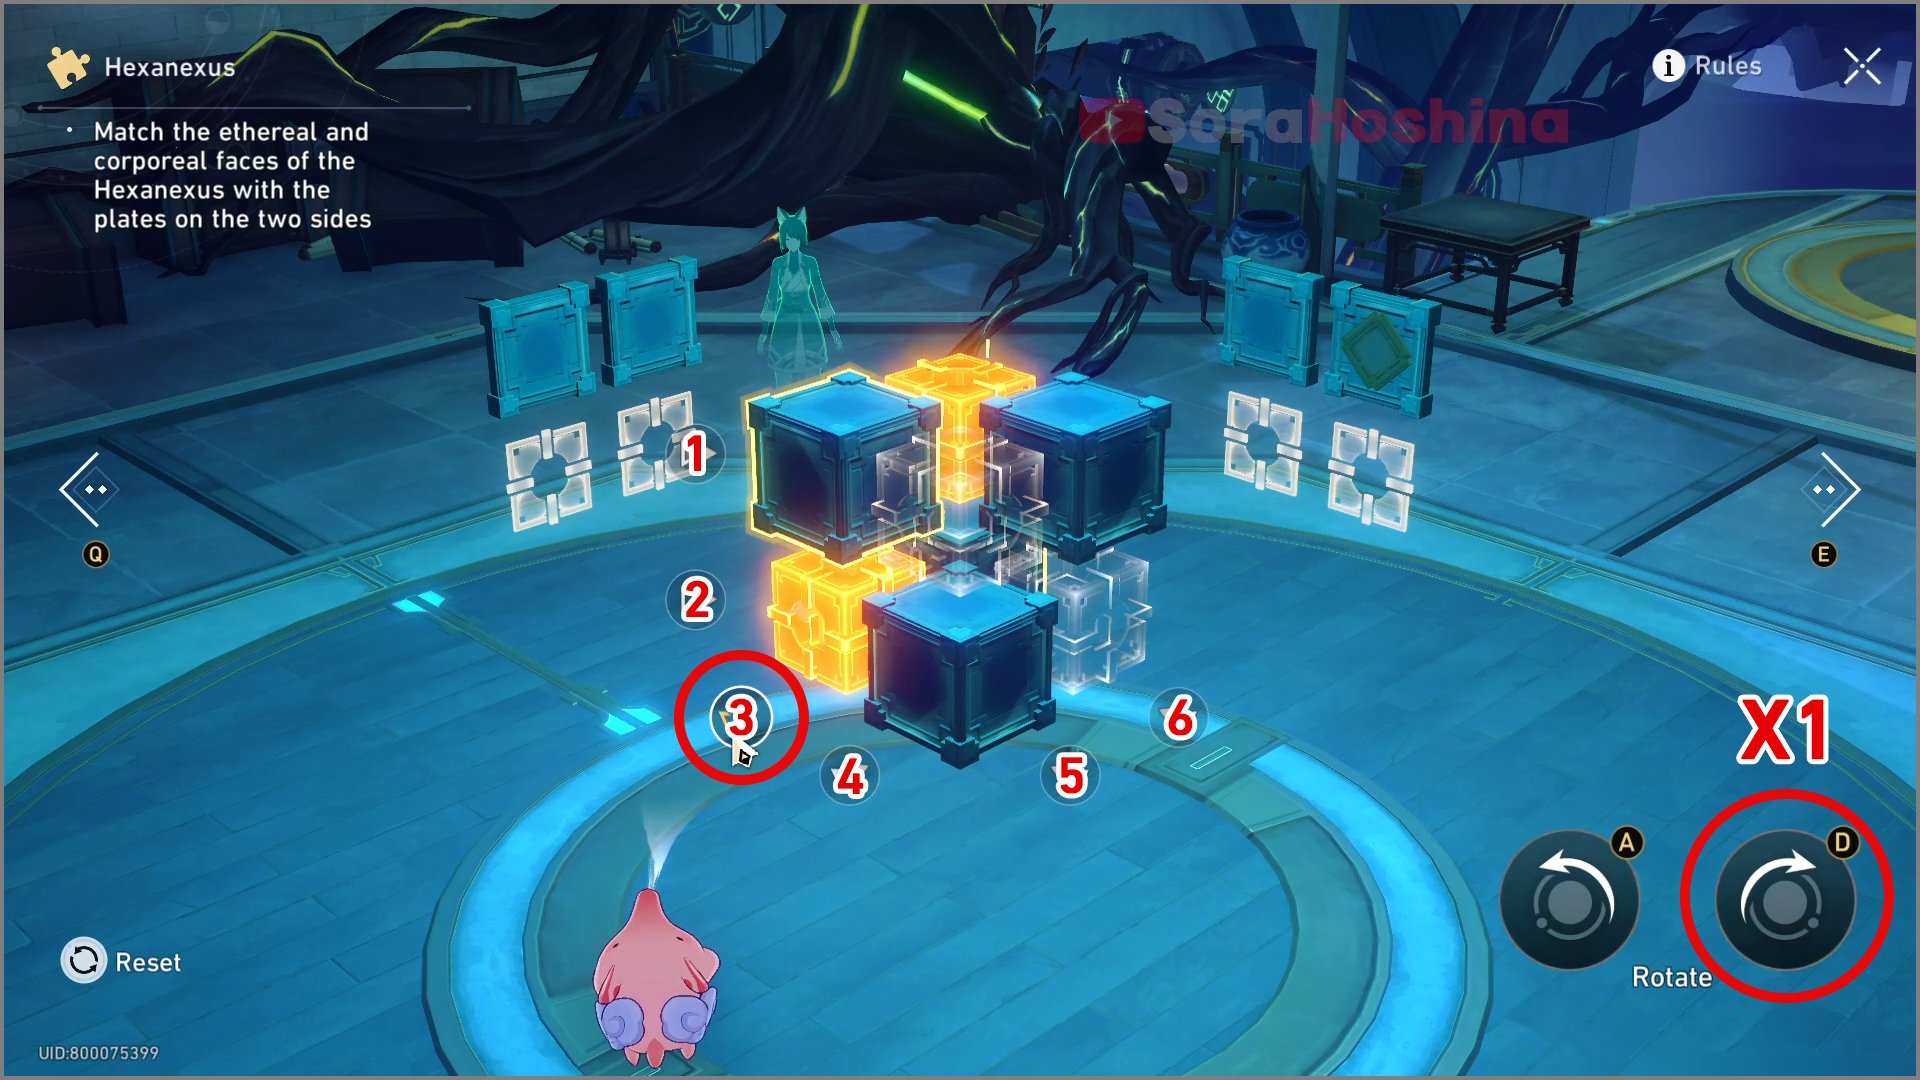
Hard Mode I
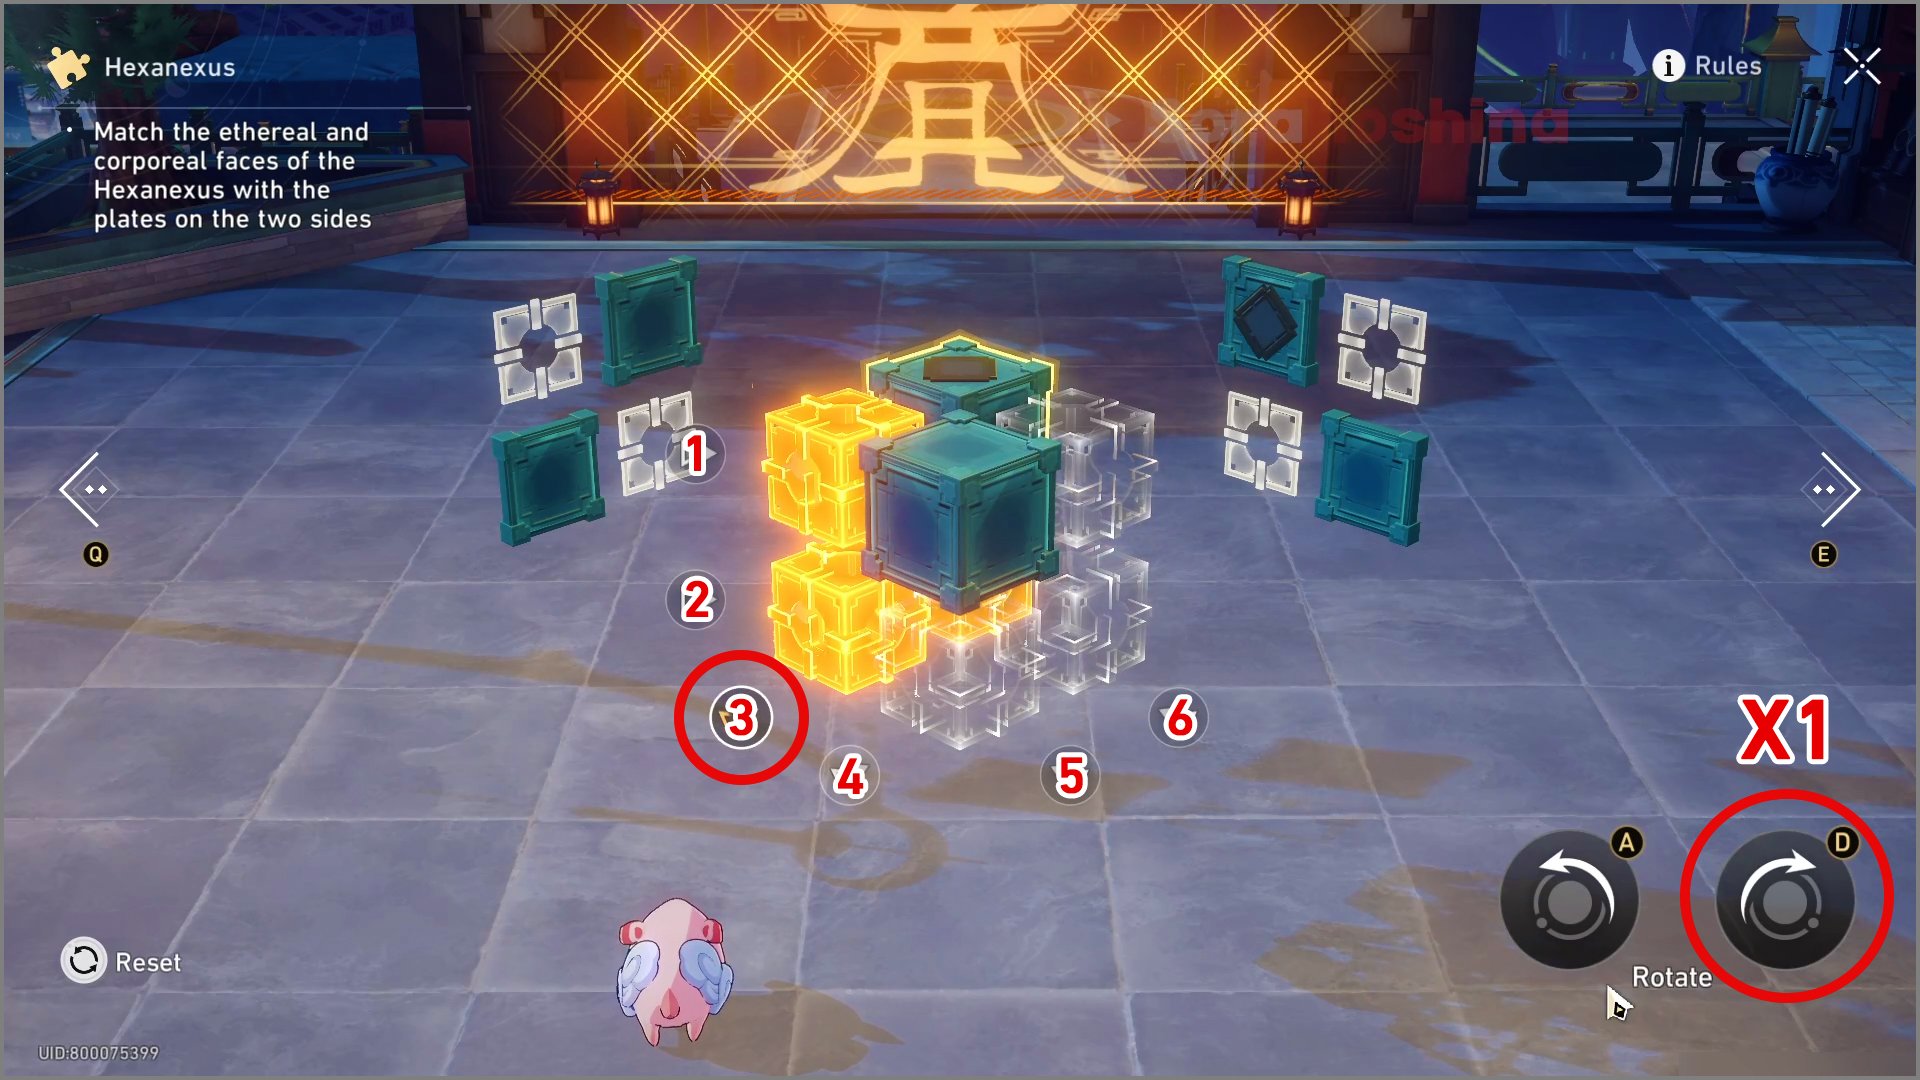
Step 1: Select the 3rd switch on the left and turn it clockwise once
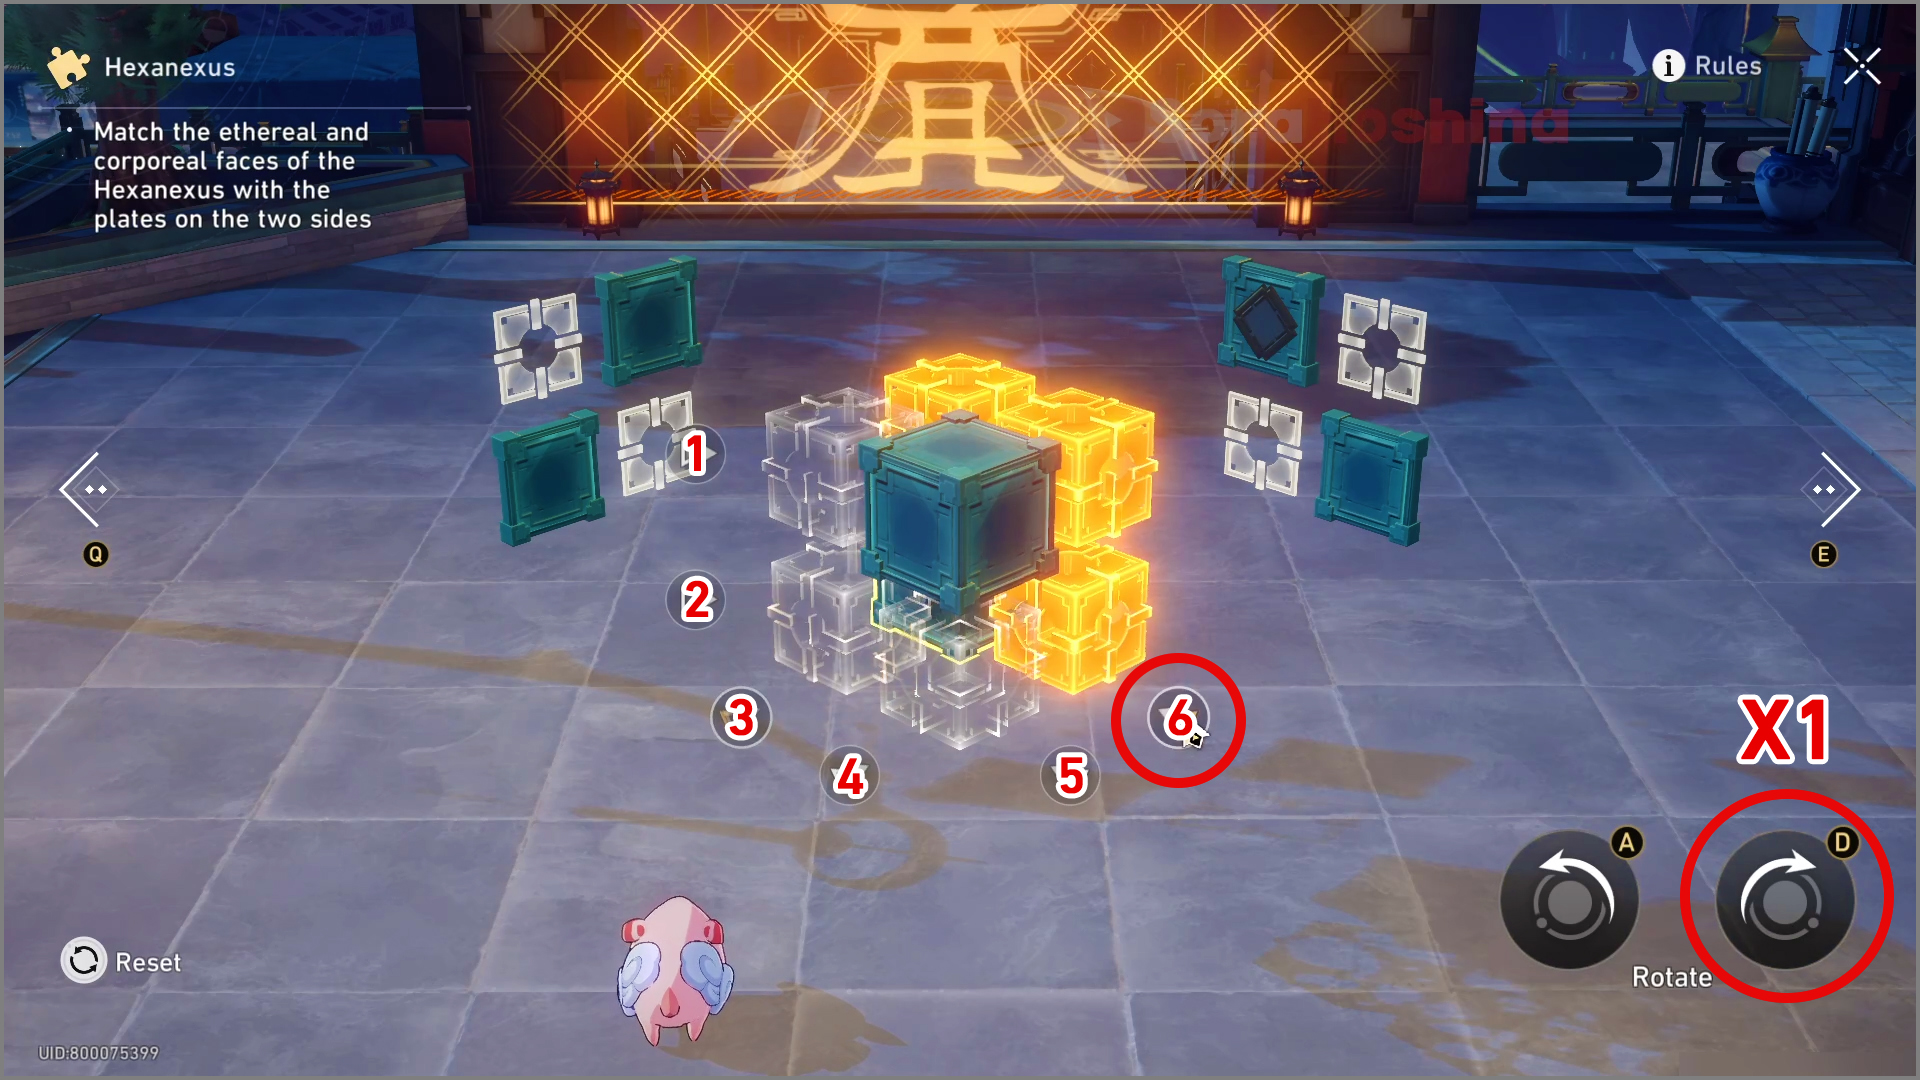
Step 2: Select the 6th switch on the right and rotate it clockwise once
Step 3: Select the 5th switch and rotate it clockwise once
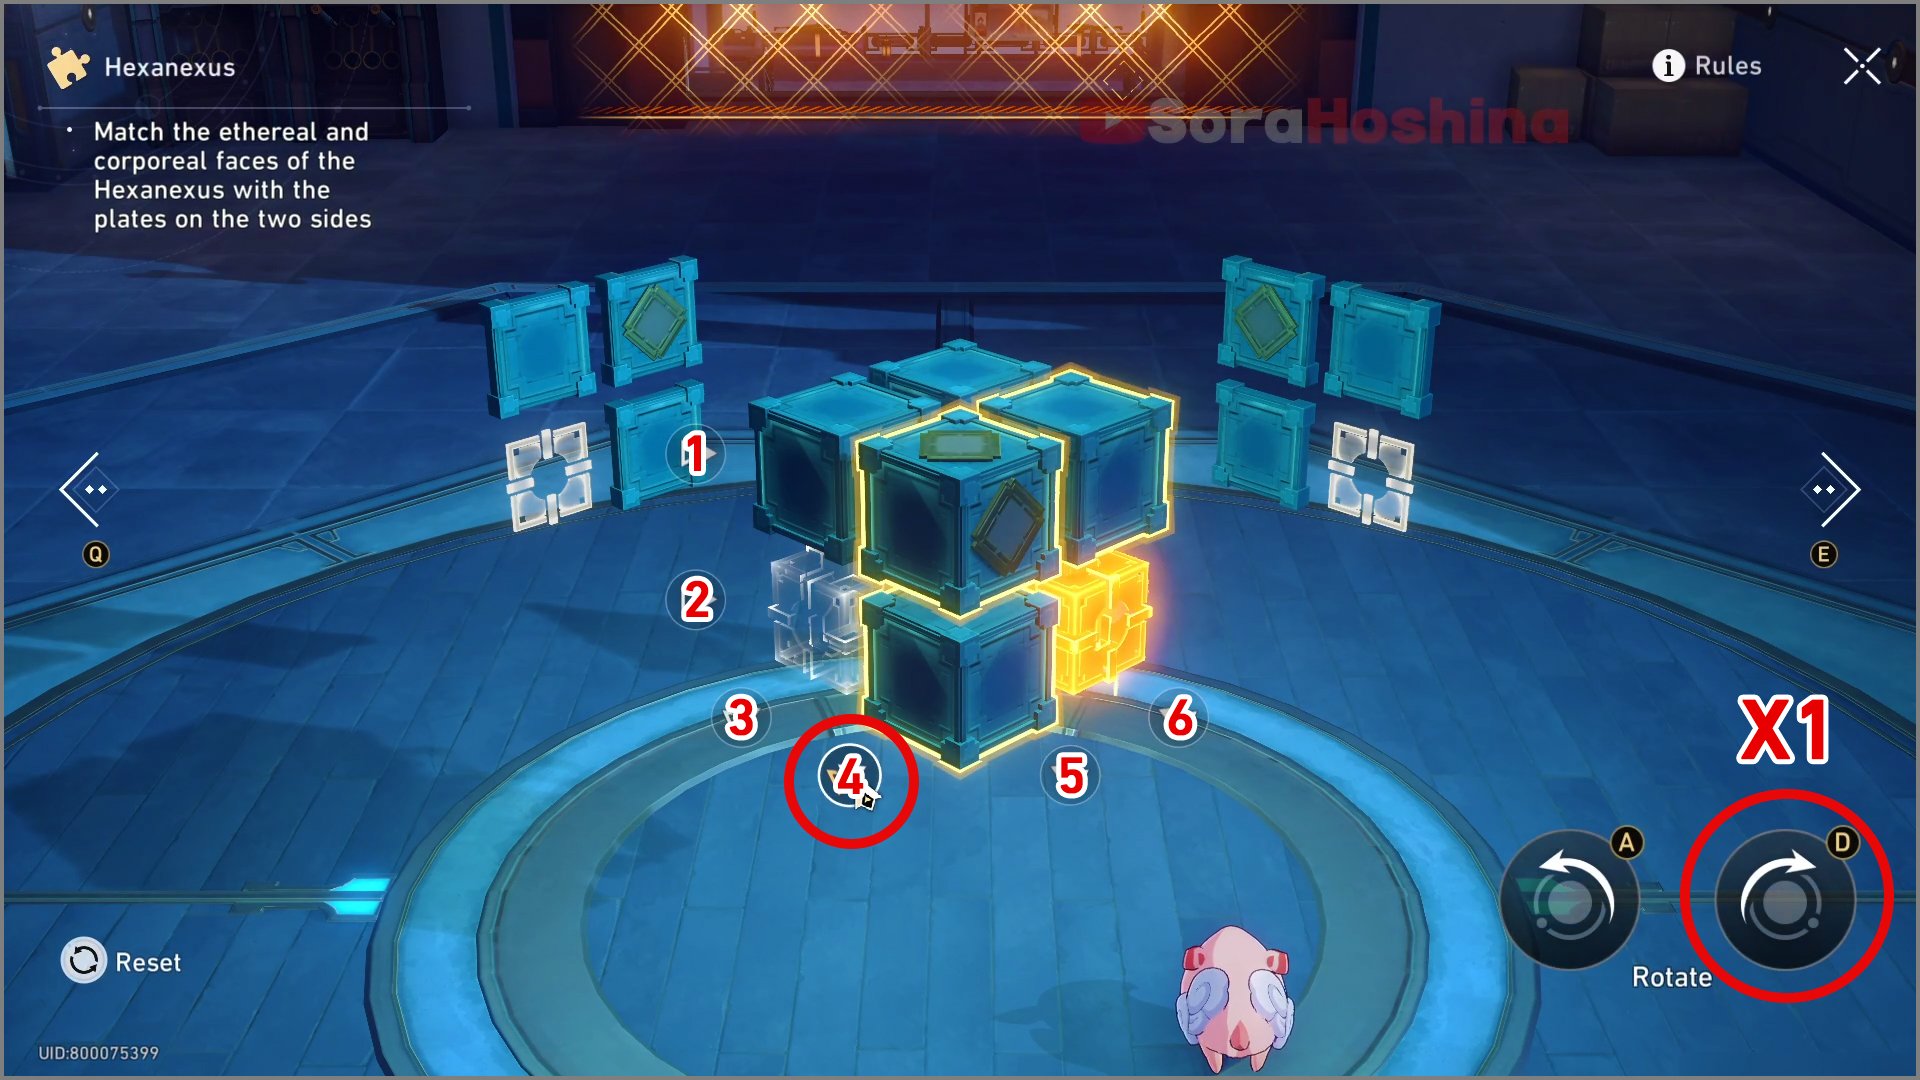
Hard Mode II
Step 1: Select the 4th switch in the middle and rotate it clockwise twice
Step 2: Select the 3rd switch and rotate it clockwise once

Step 3: Select the 5th switch on the right and rotate it clockwise twice
Hard Mode III
Step 1: Select the 4th switch in the middle and rotate it clockwise once
Step 2: Select the 1st switch on the left and rotate it counterclockwise once
Step 3: Select the 4th switch in the middle and rotate it counterclockwise once
Step 4: Select the 2nd switch on the left and rotate it counterclockwise twice
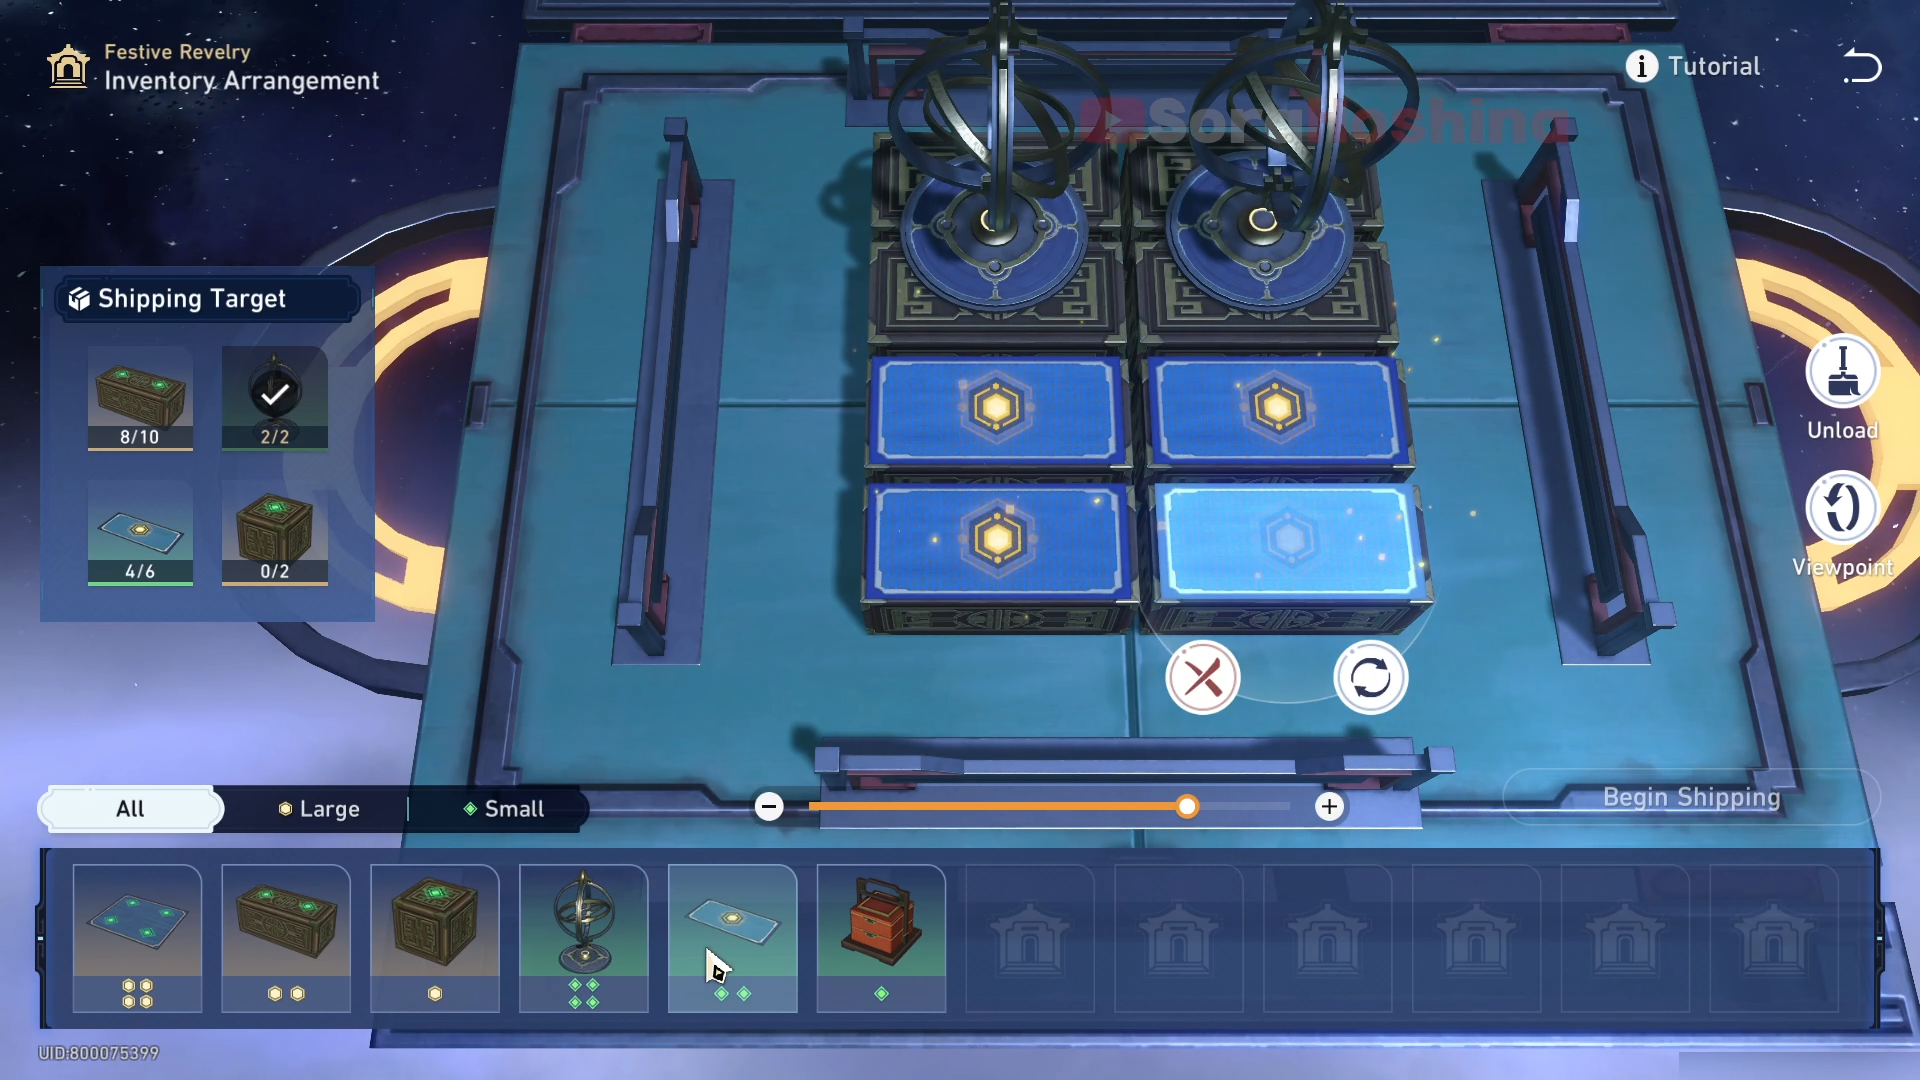
Inventory Arrangement
Tutorial
Conduct Inventory Arrangement on freight starskiffs and fulfill the designated number of goods as stated on the shipping targets on the left.
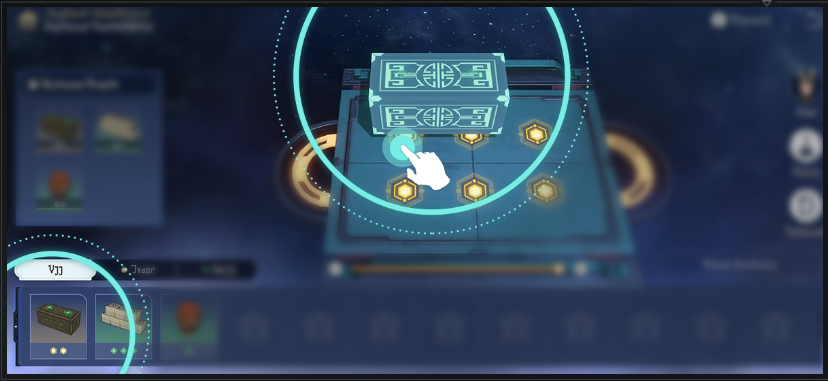
Select goods to perform rapid arrangement. Drag or rotate the goods to change their positions.
Goods needs to be placed at the designated type of Placement Spot. You can check the corresponding Placement Spot type for the goods in the Goods Catalog.
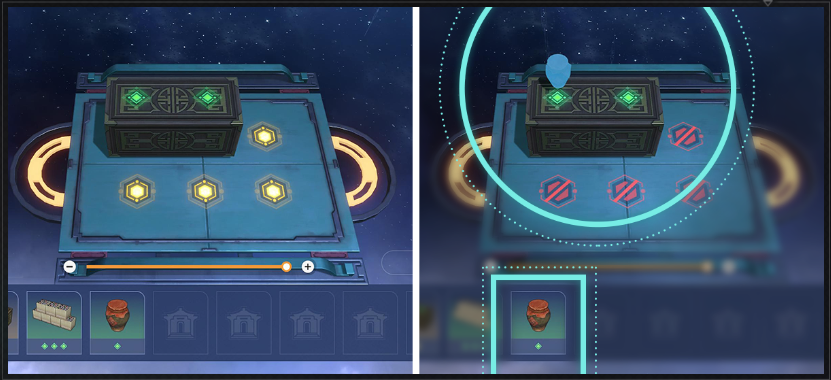
Easy Mode I

Step 1: Place 3 long brown boxes
Step 2: Select 1 box and 3 wine jars respectively
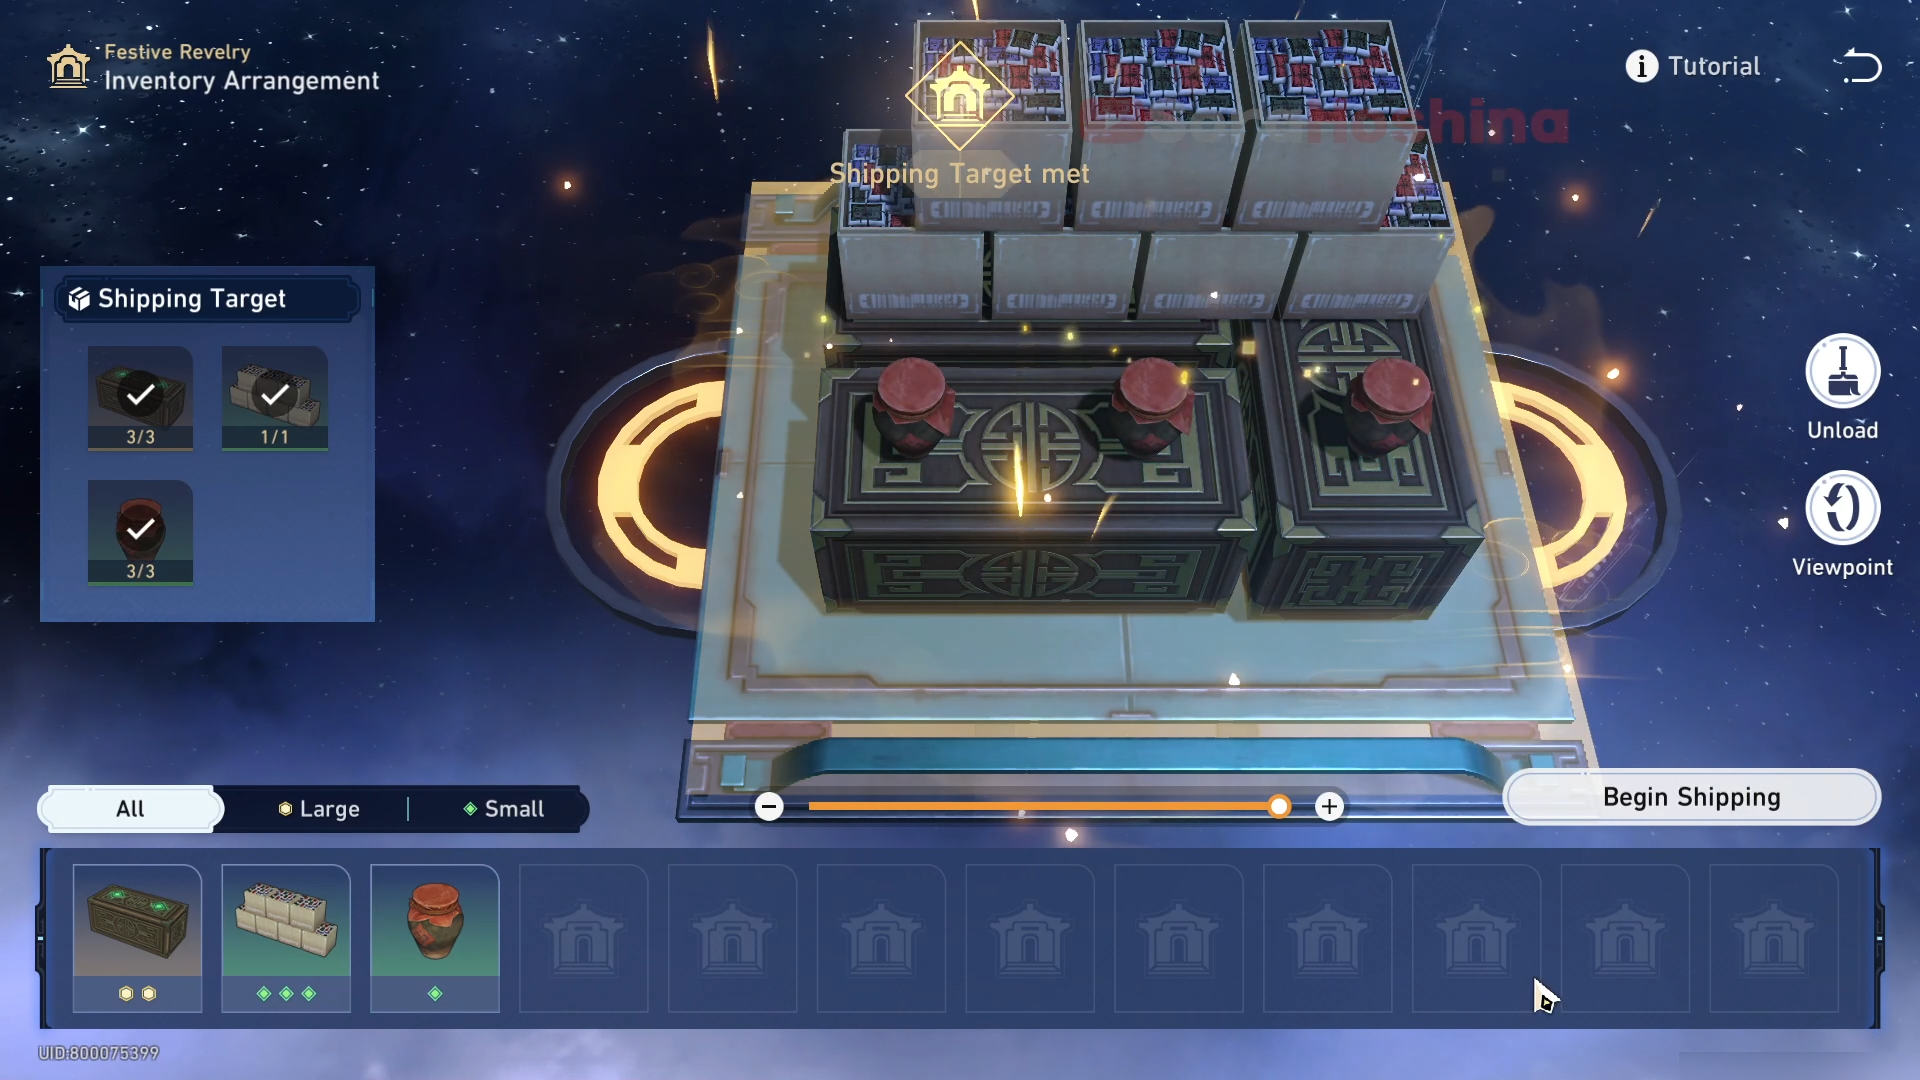
Easy Mode II
Step 1: Choose 2 long tables
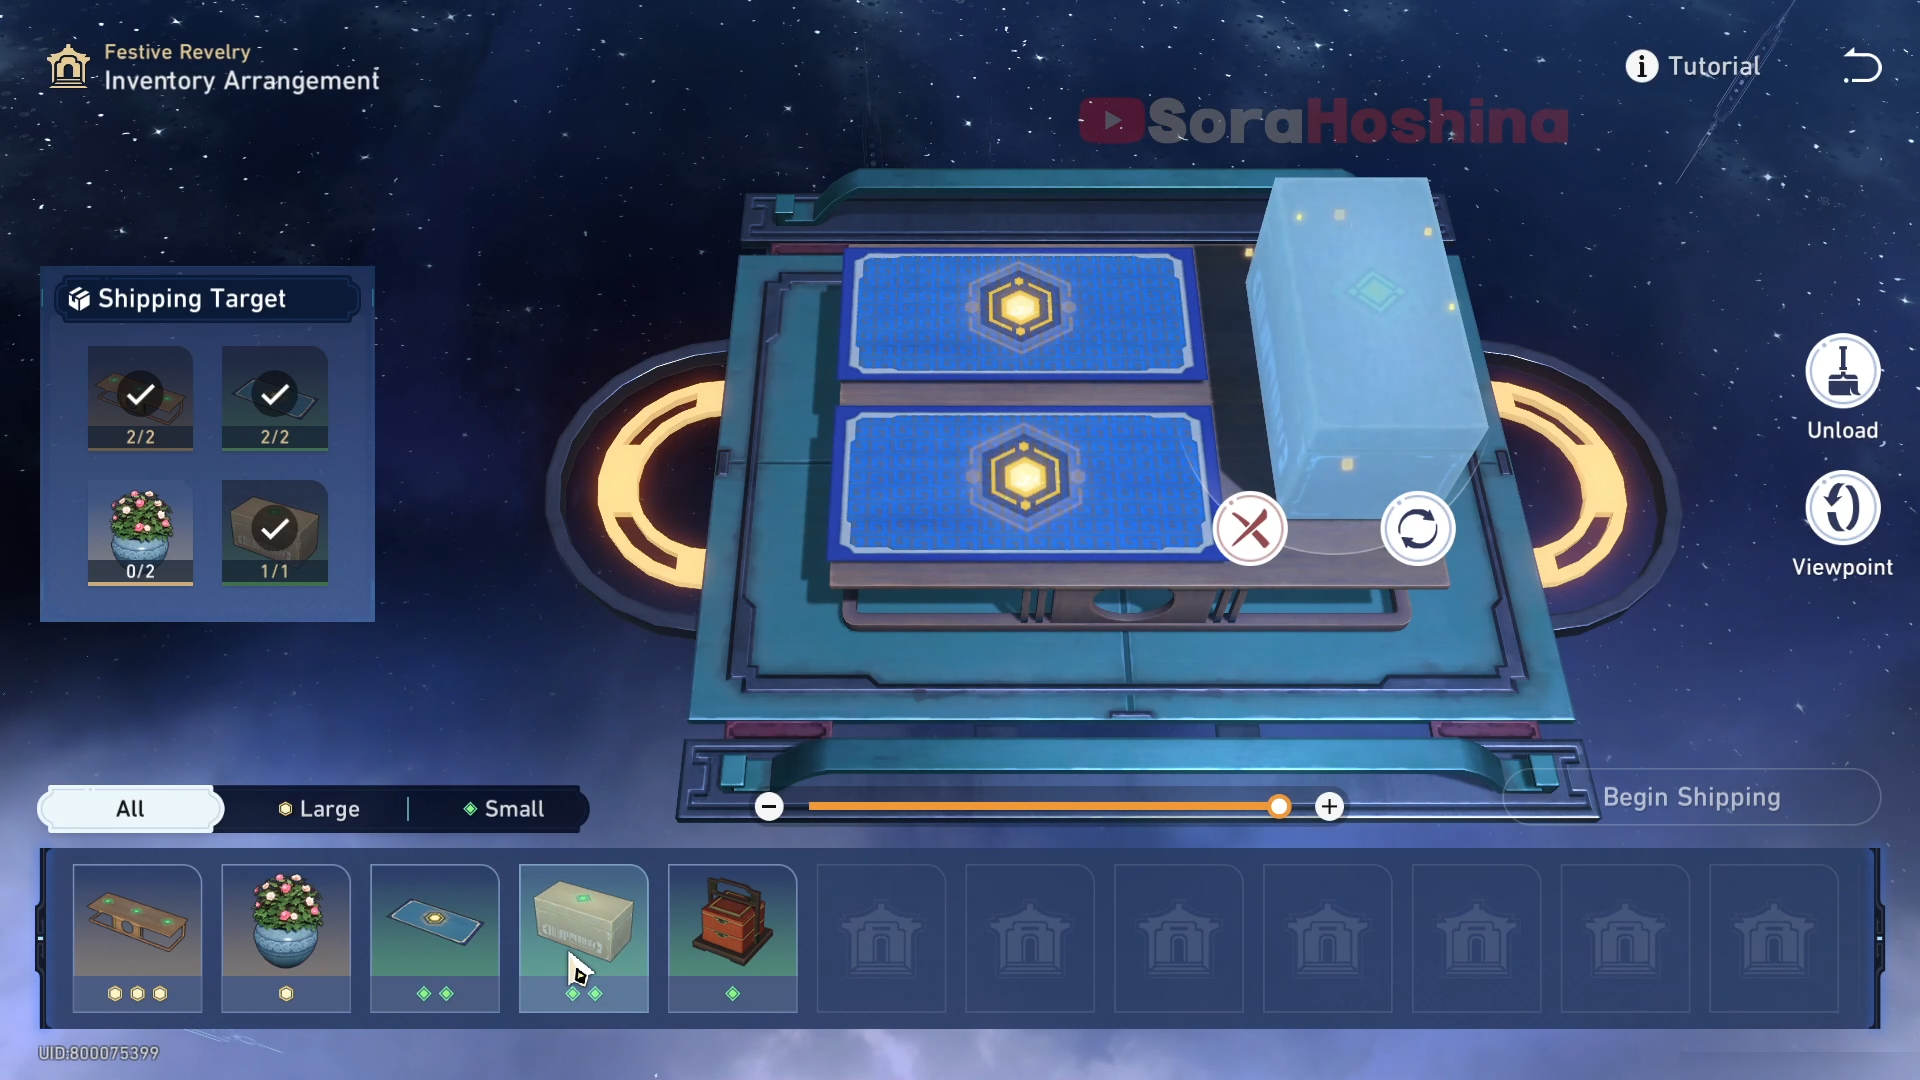
Step 2: Choose 2 carpets and a box
Step 3: Choose 2 flower pots, and you can add an extra food box
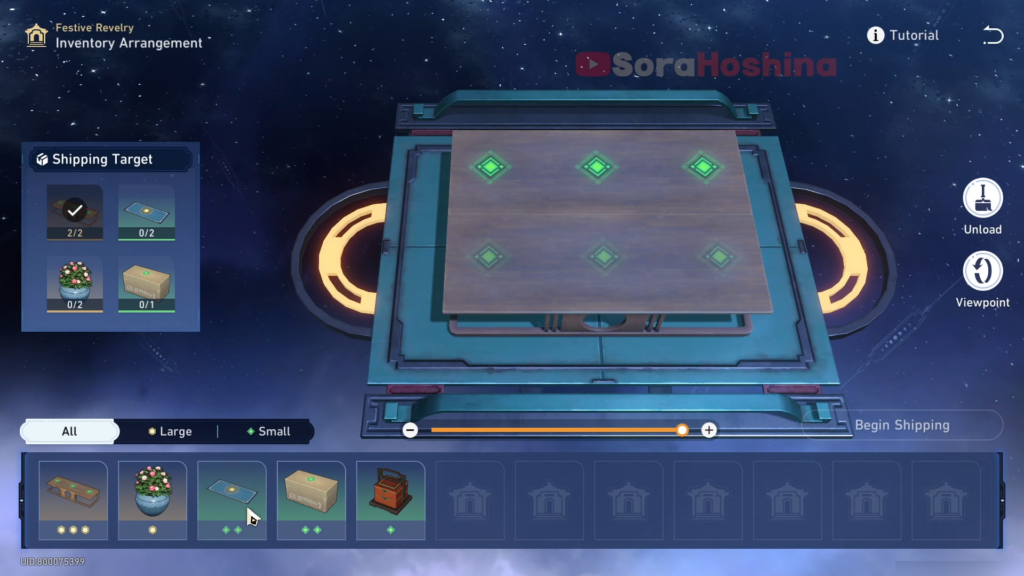
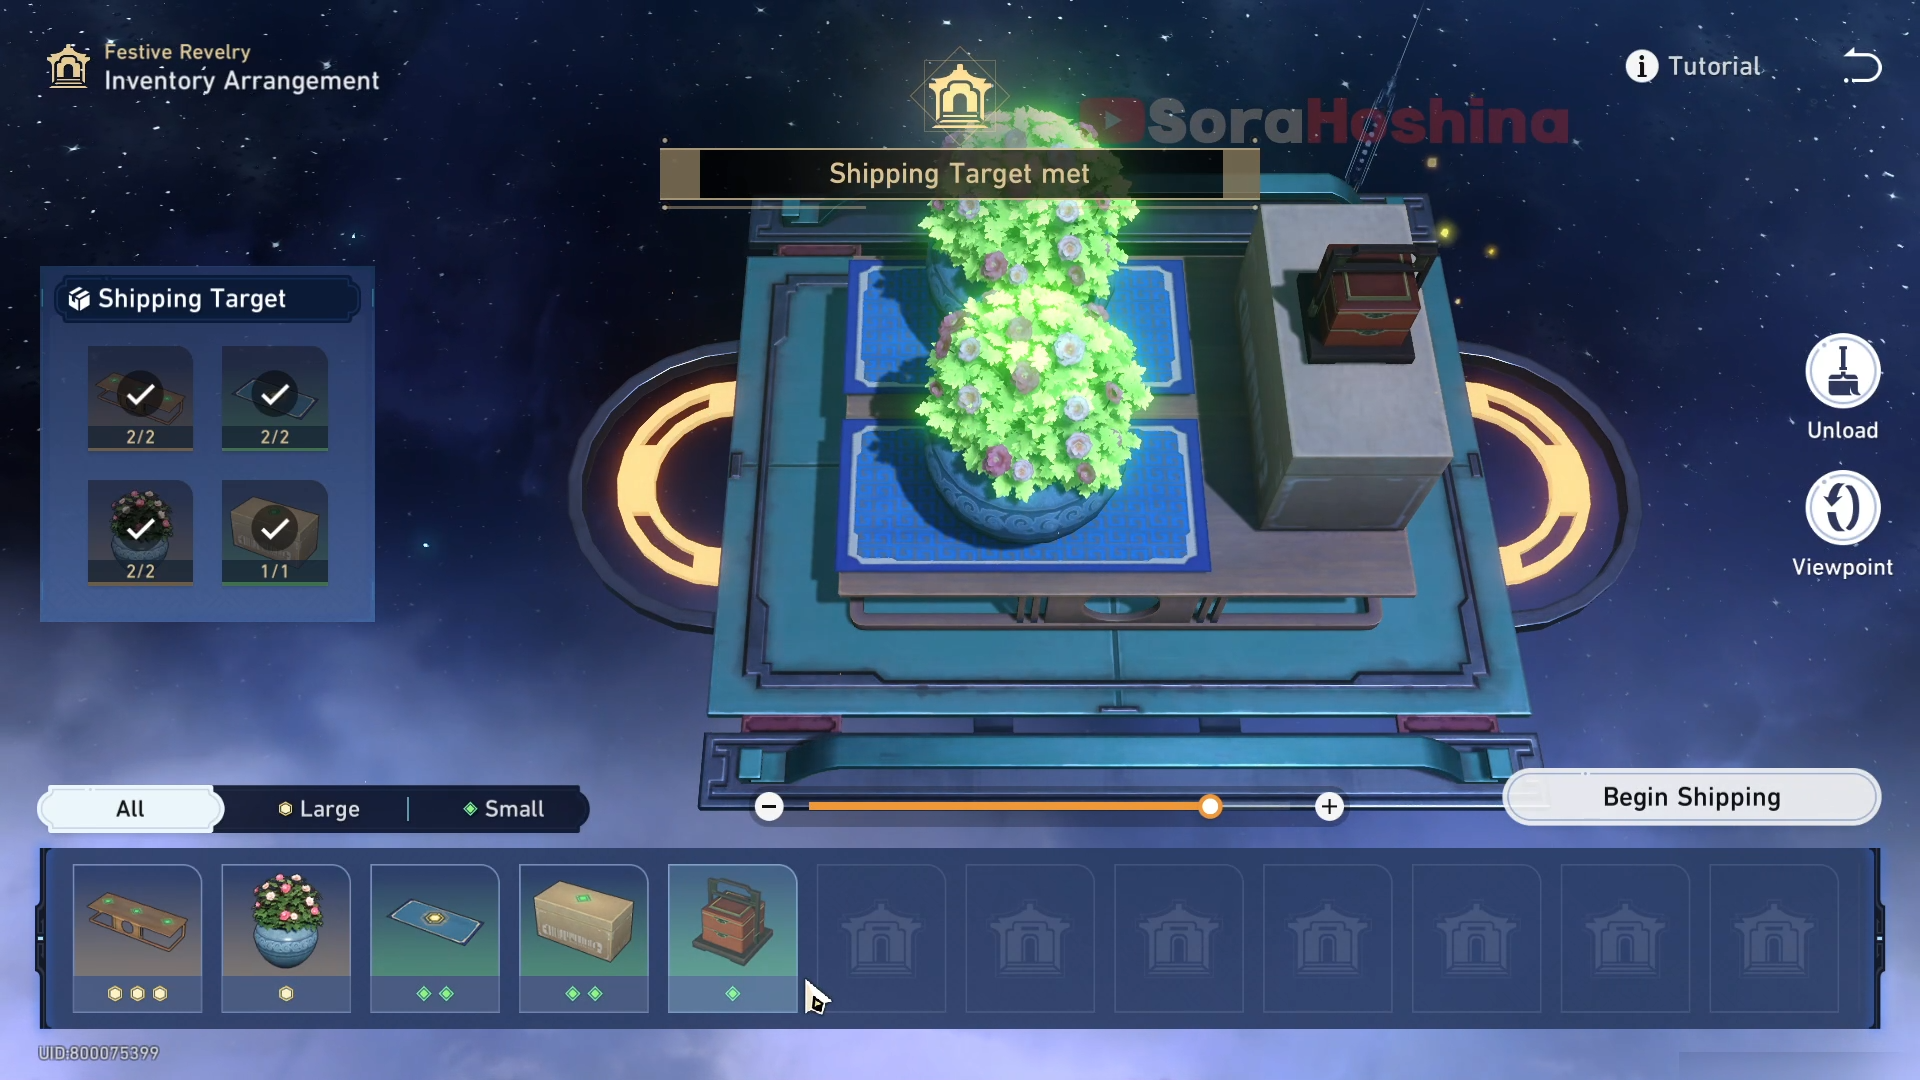
Easy Mode III

Step 1: Place 1 big lion, 2 long tables, and 4 flower pots
Step 2: Place 2 brown boxes first, then 2 cardboard boxes, then you can add the food boxes.
Hard Mode I
Step 1: Place 8 long brown boxes
Step 2: Place 2 globes and 4 carpets
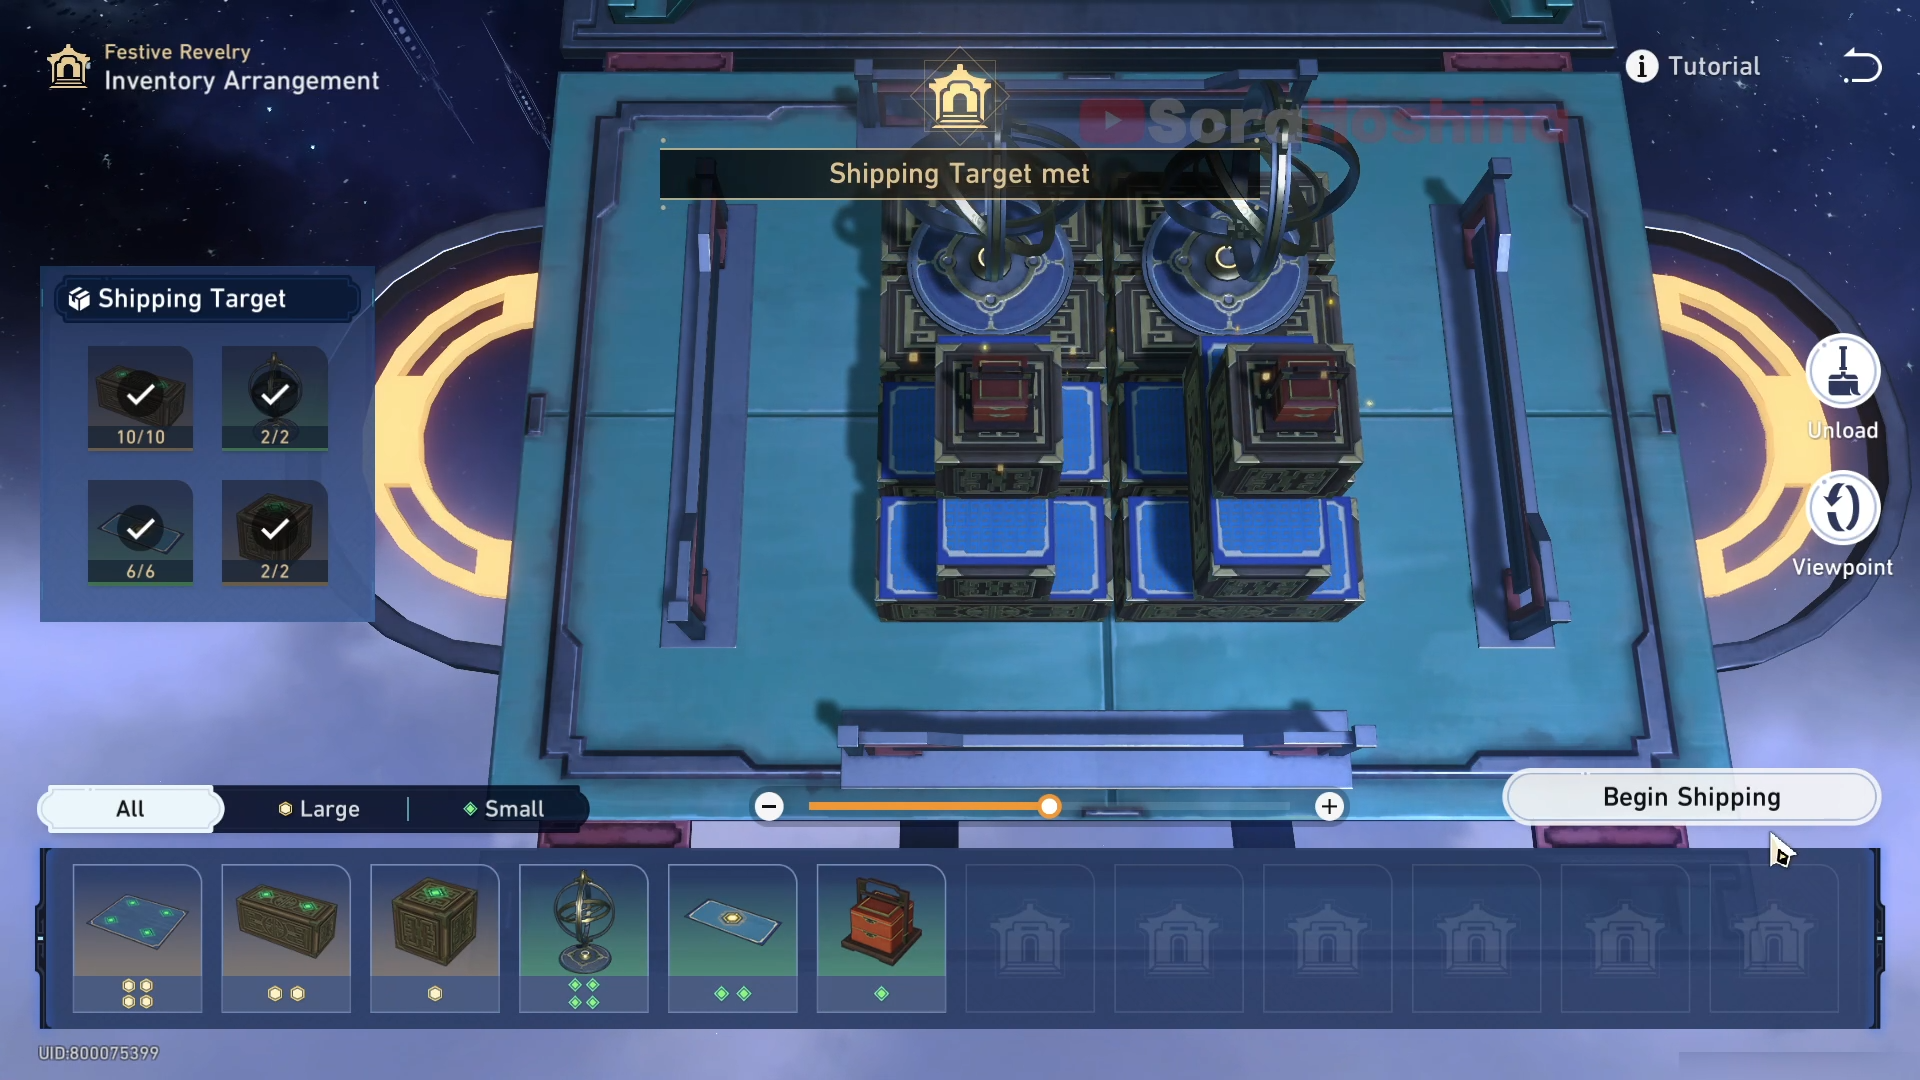
Step 3: Place 2 long brown boxes first, then 2 carpets on the boxes, and finally 2 small brown boxes. Add 2 food boxes if you want.
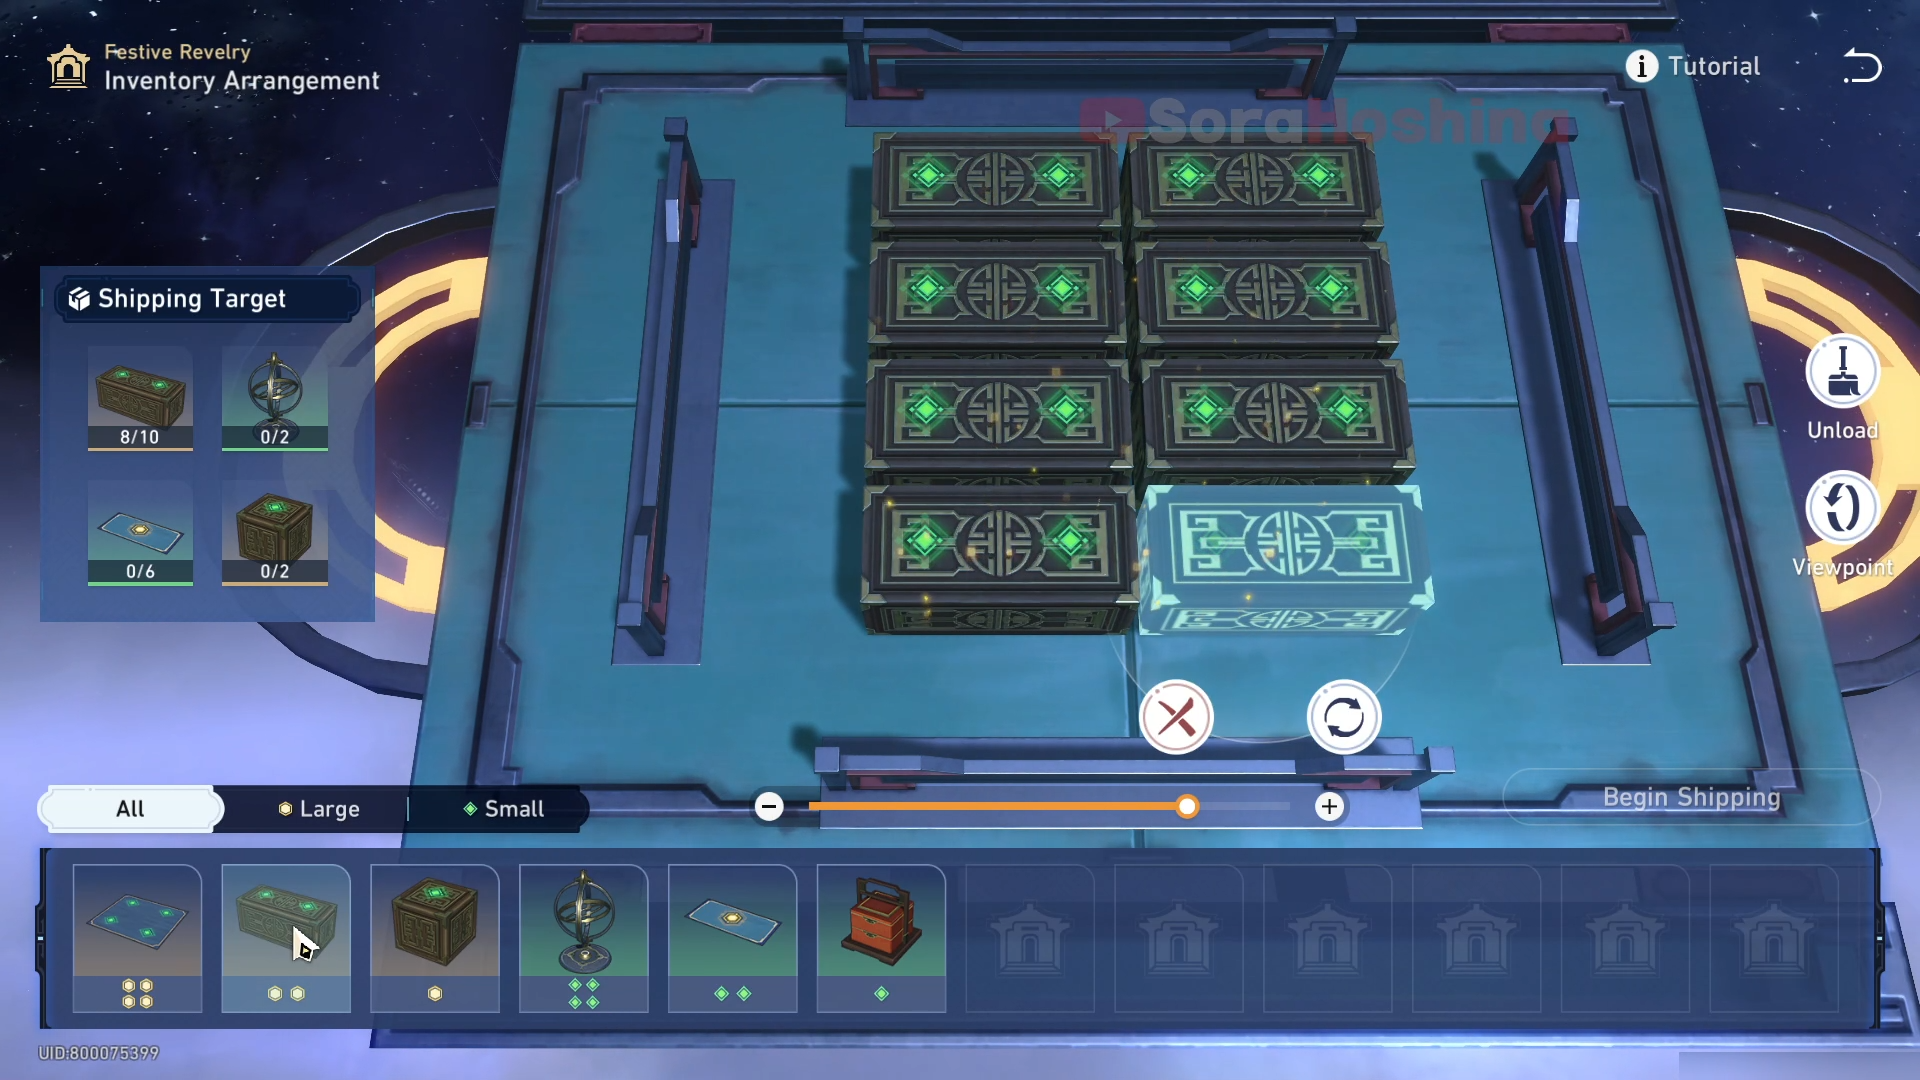
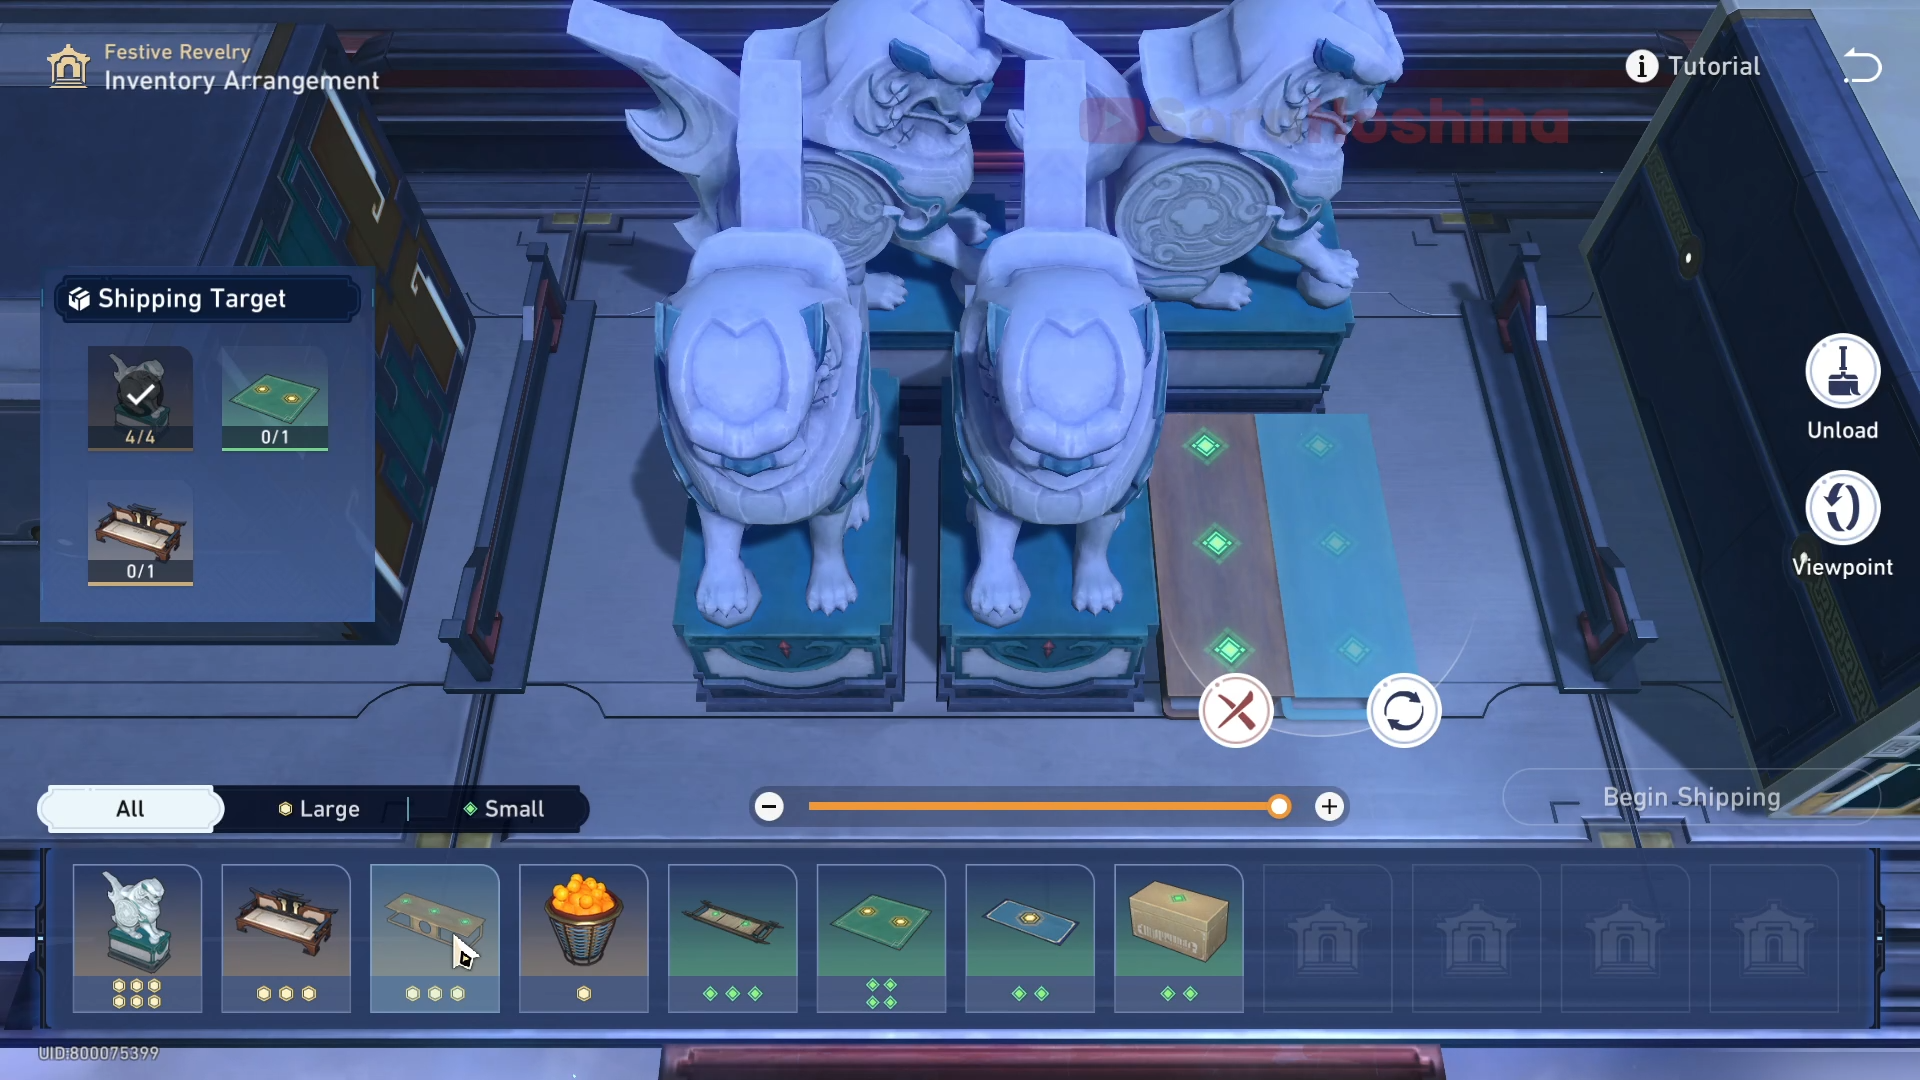
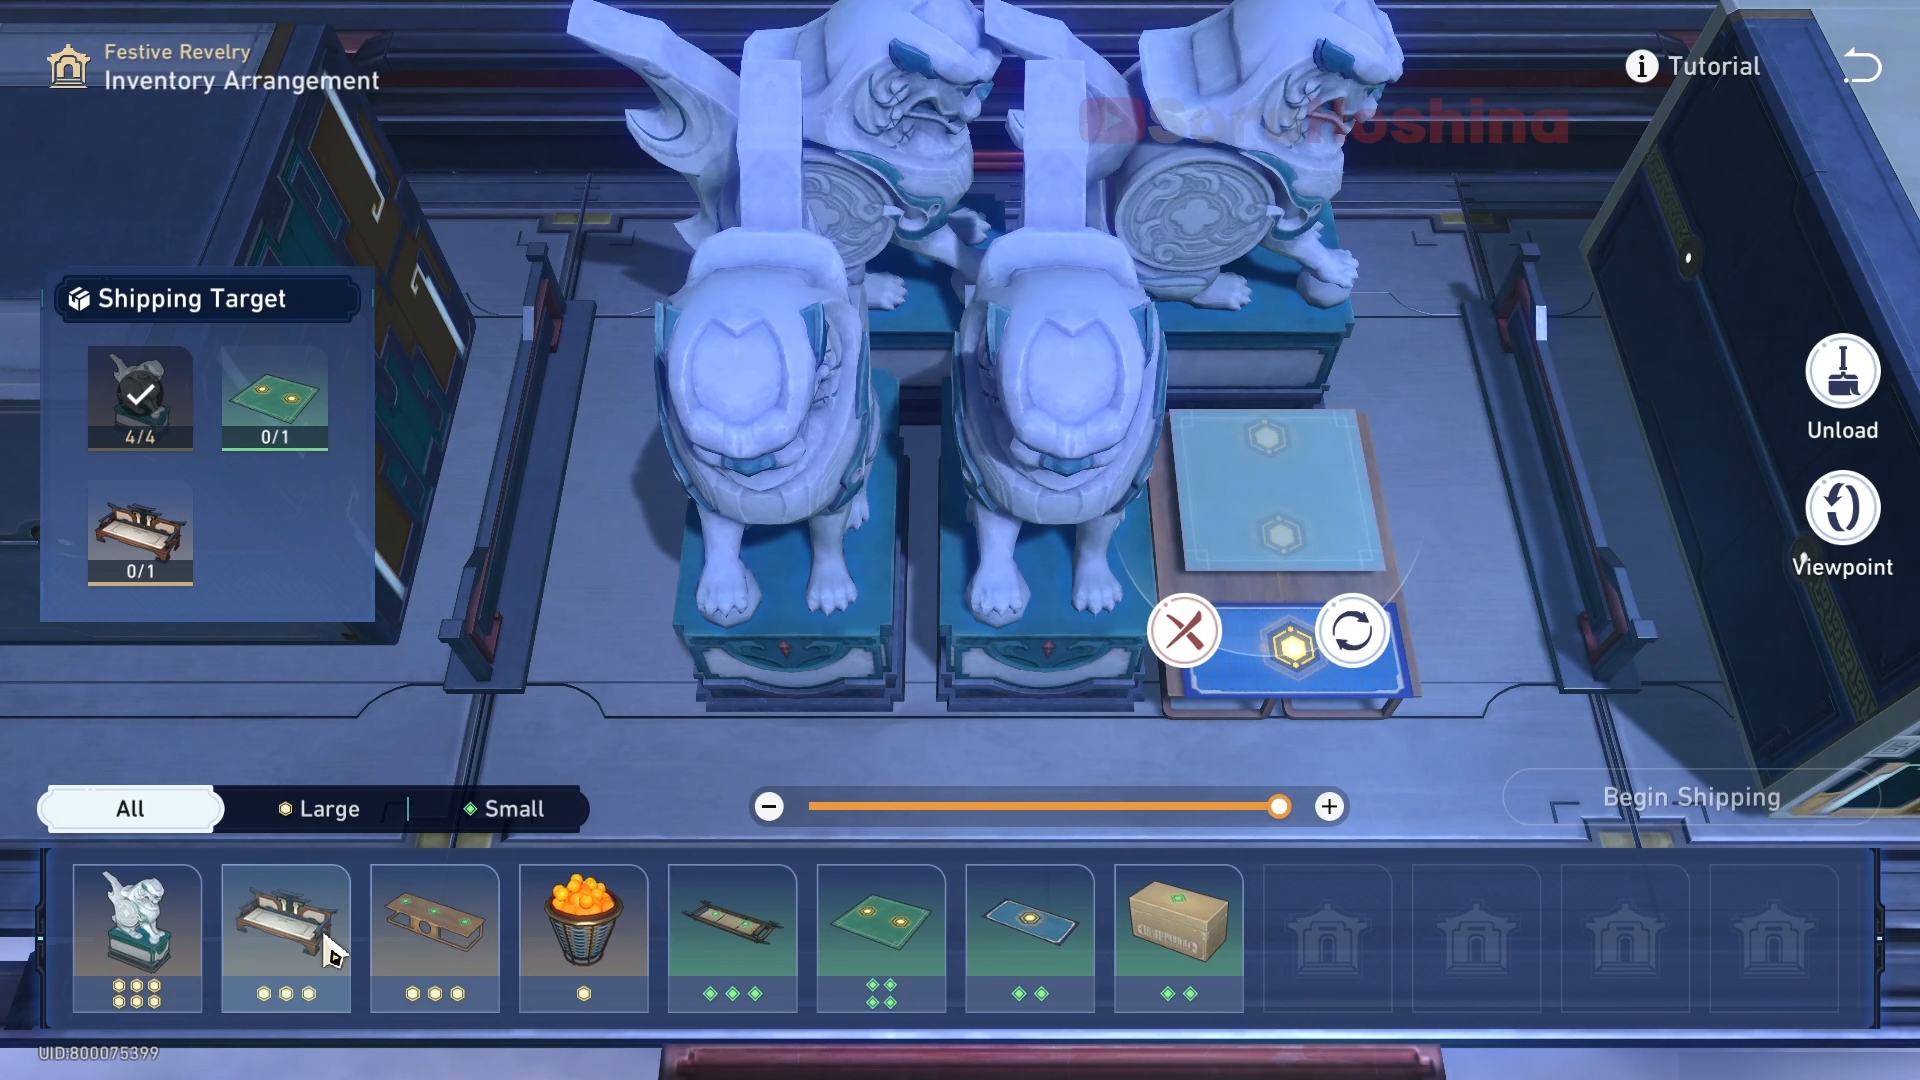
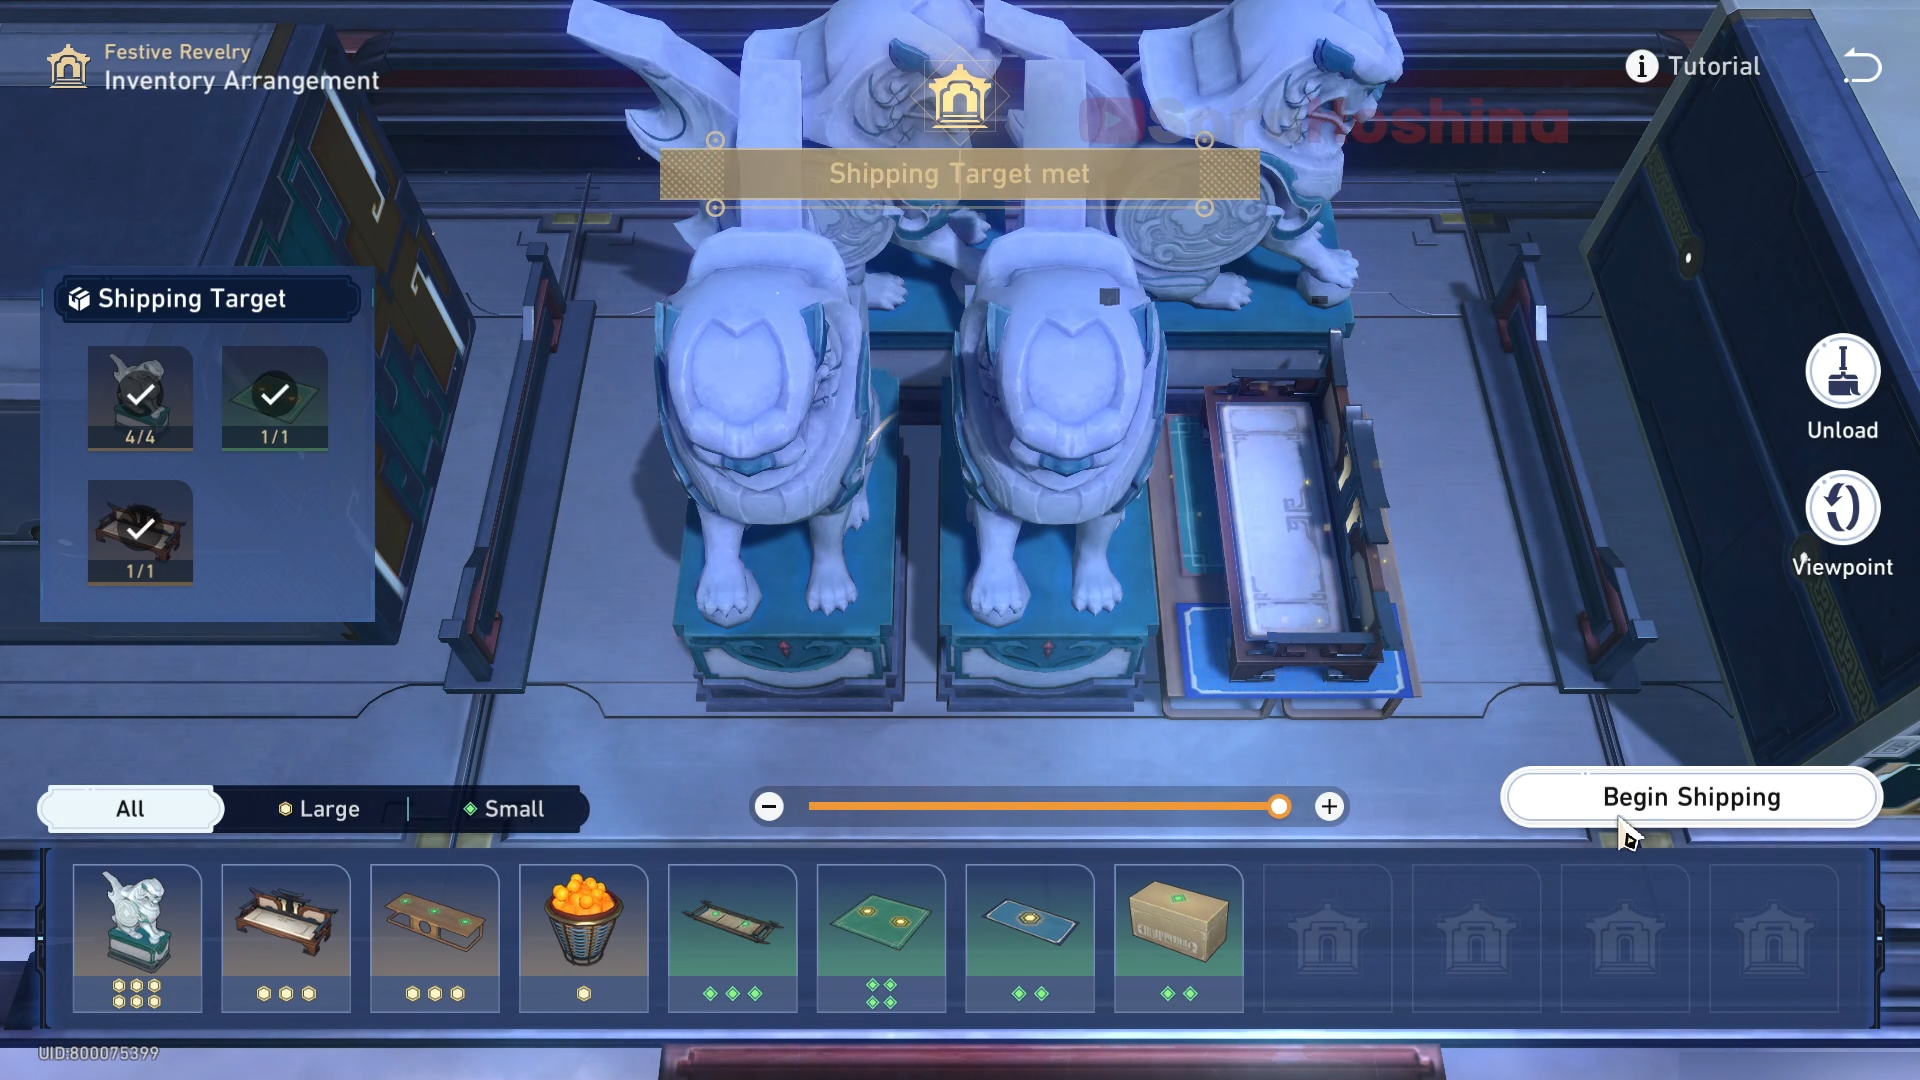
Hard Mode II
Step 1: Place 2 stone lions first, remember to rotate them, and then place 4 square carpets
Step 2: Place 8 long carpet strips
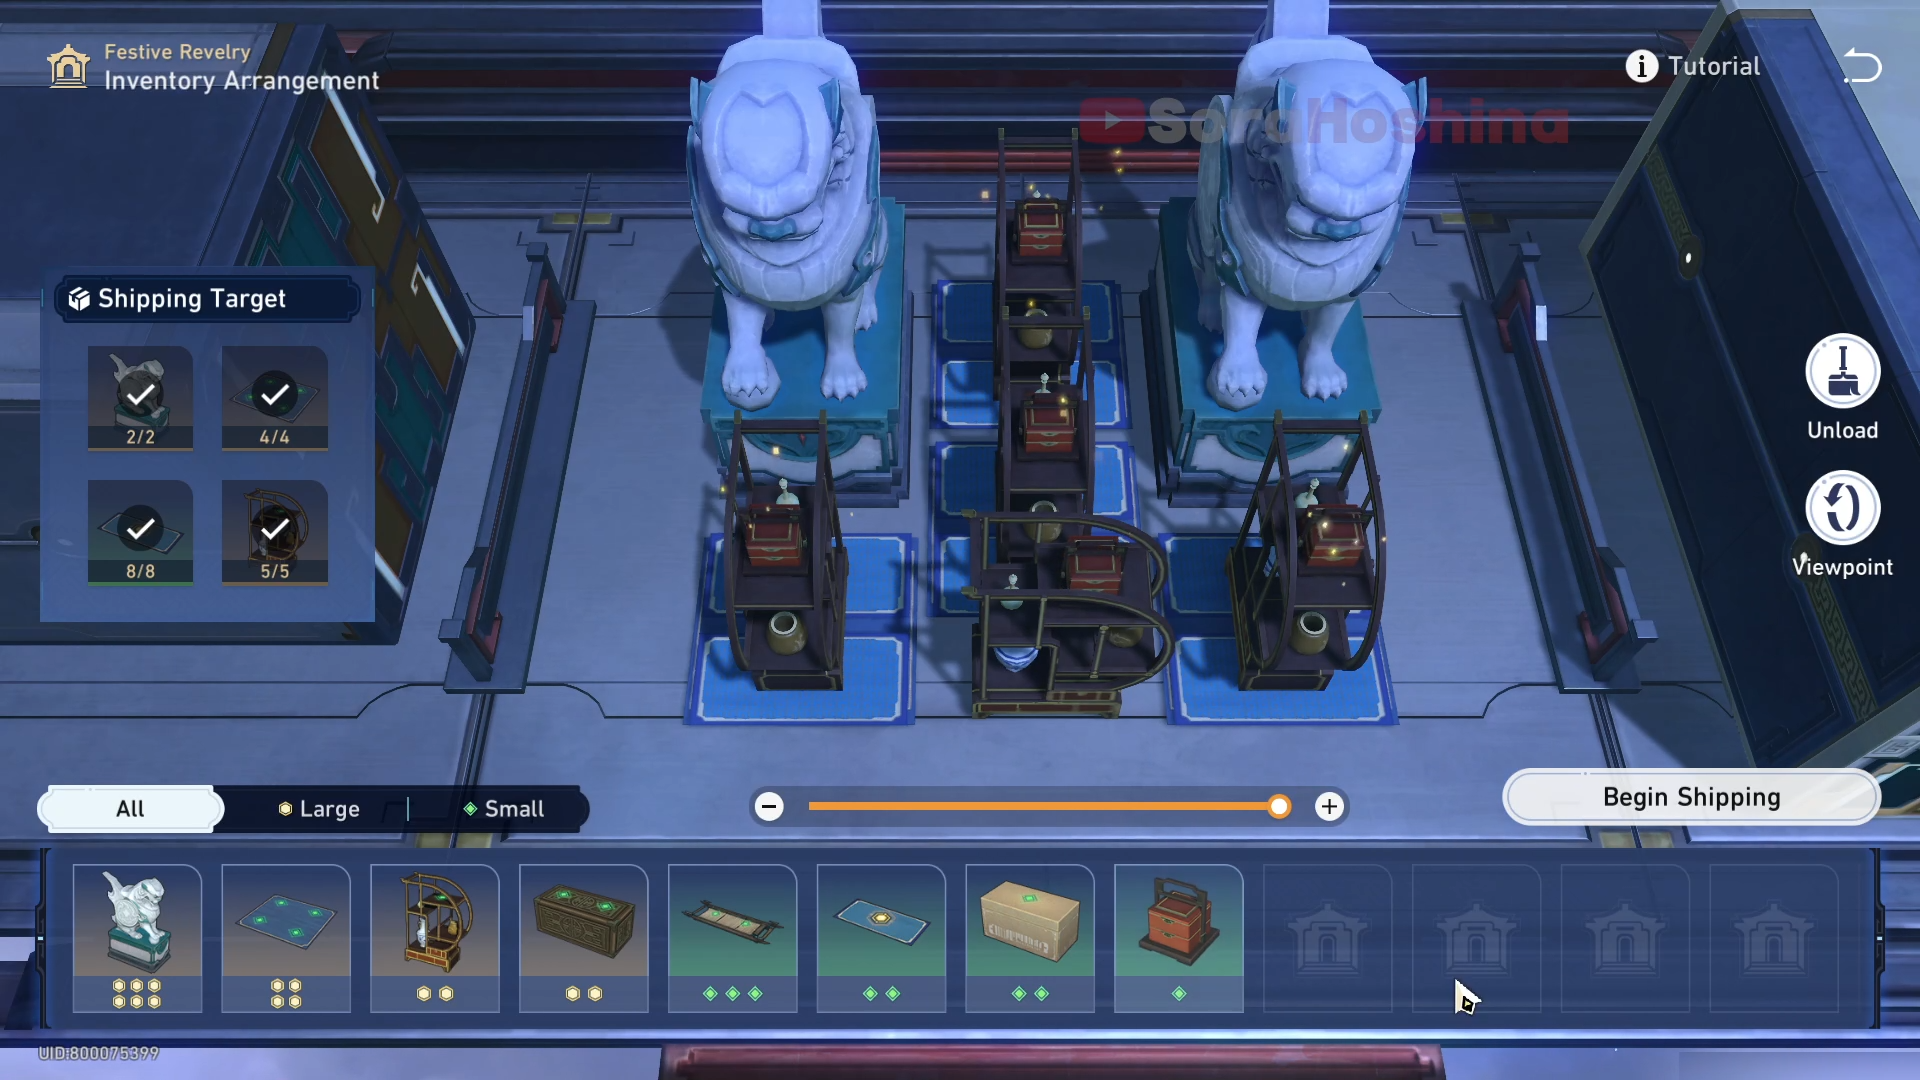
Step 3: Finally, place 5 display cabinets in a row. Add food boxes if you want.
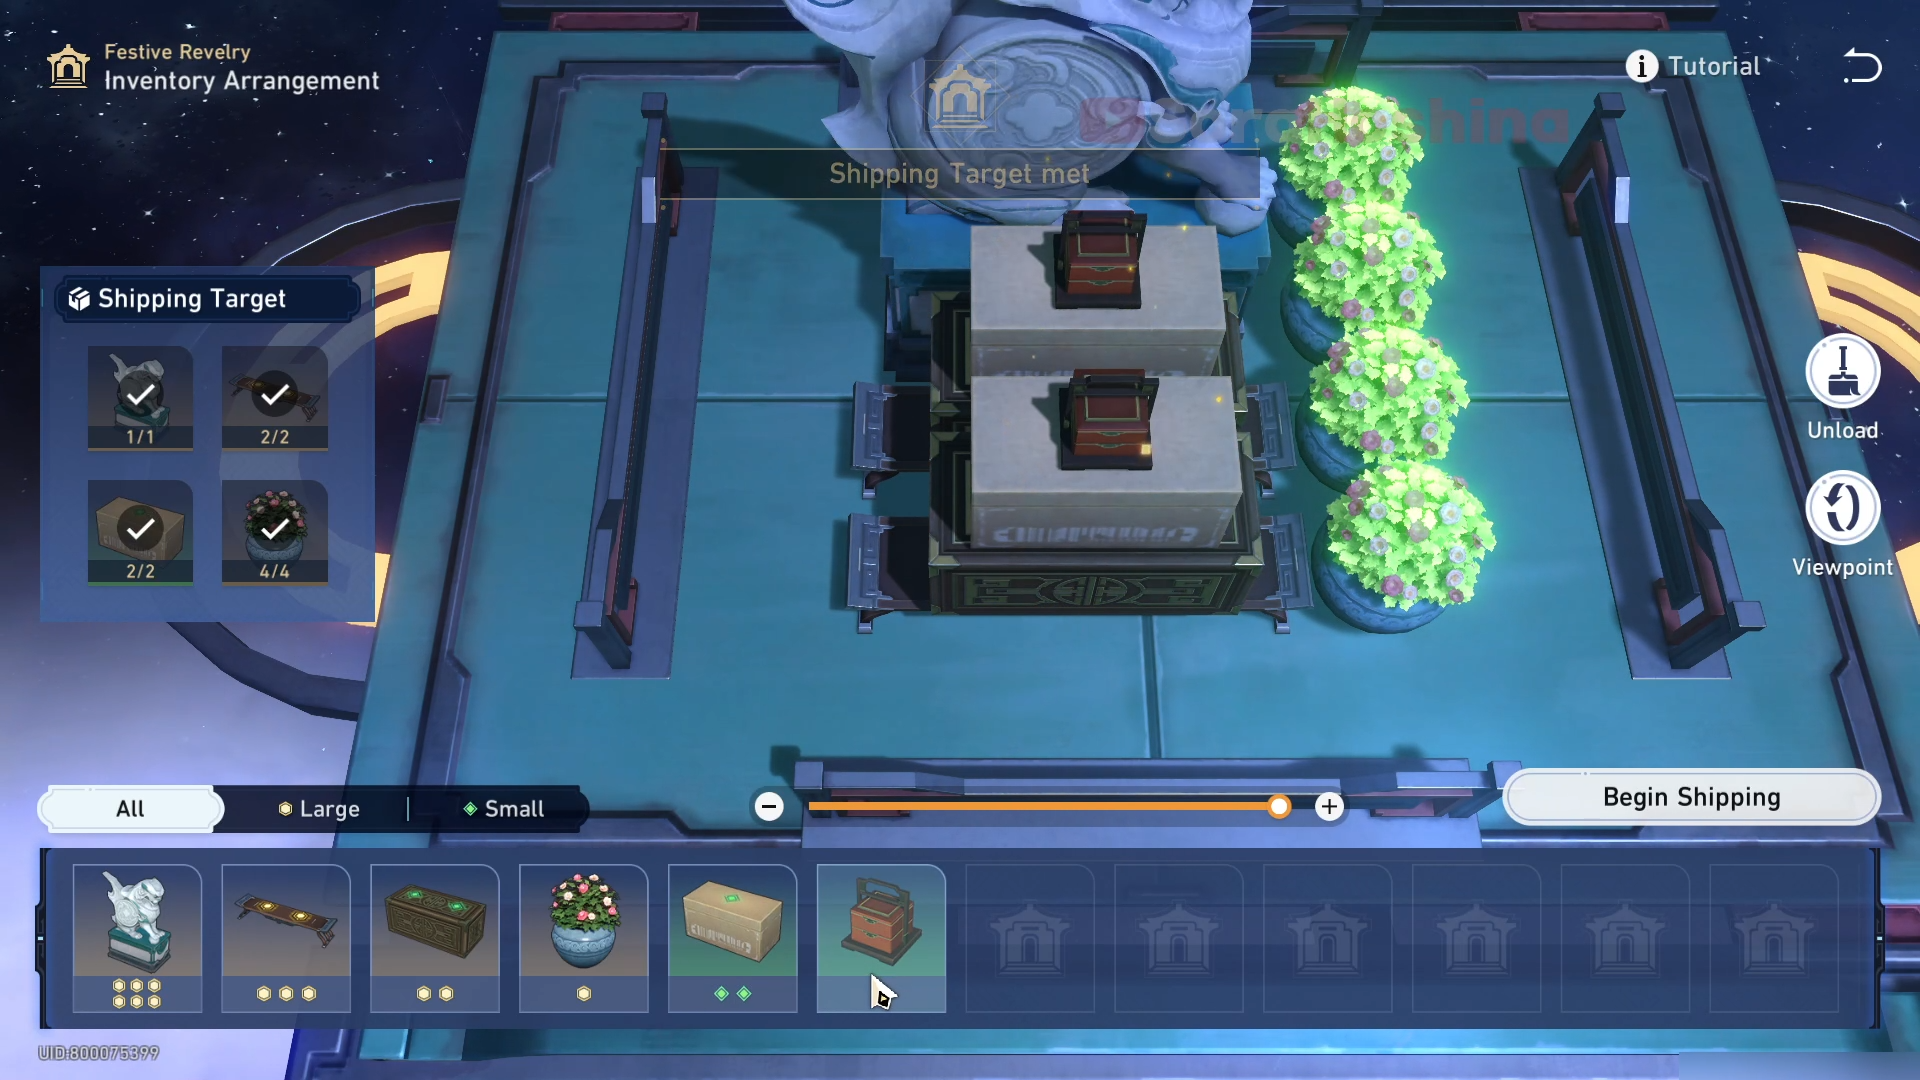
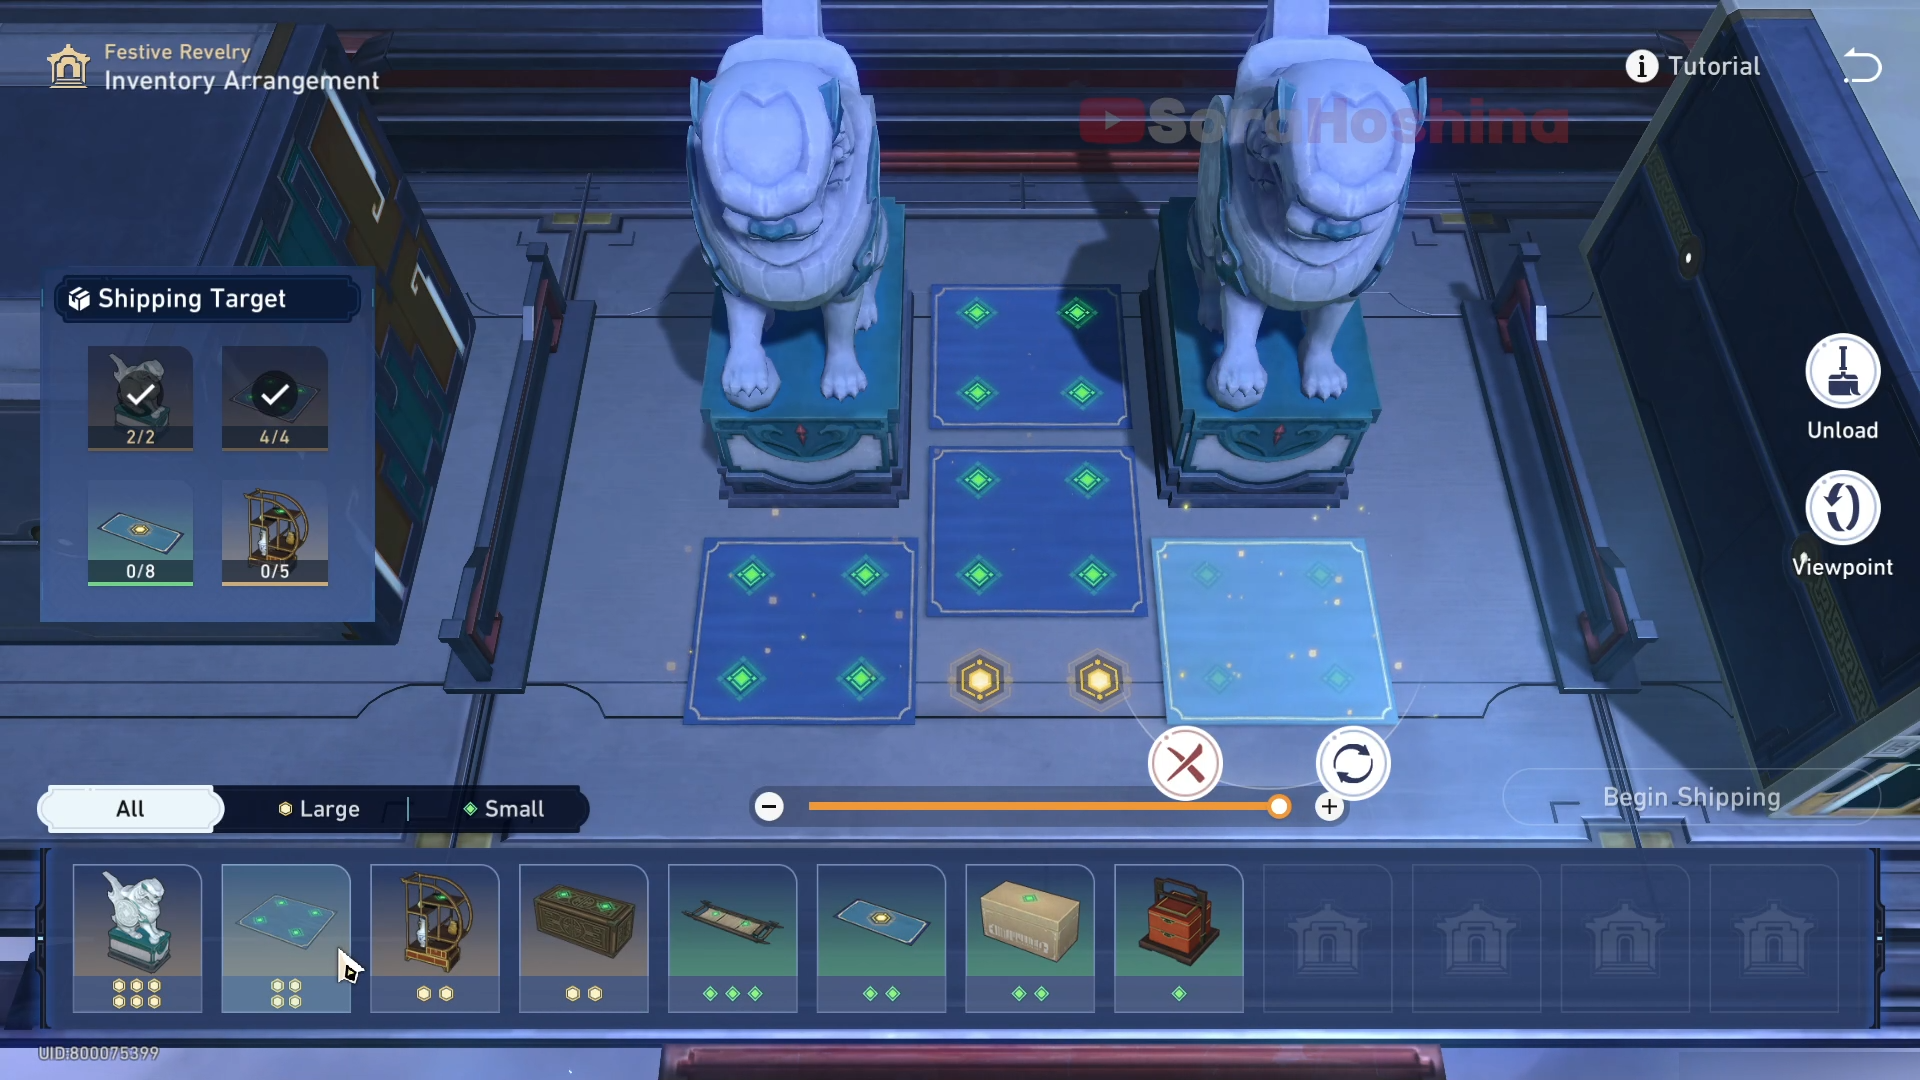
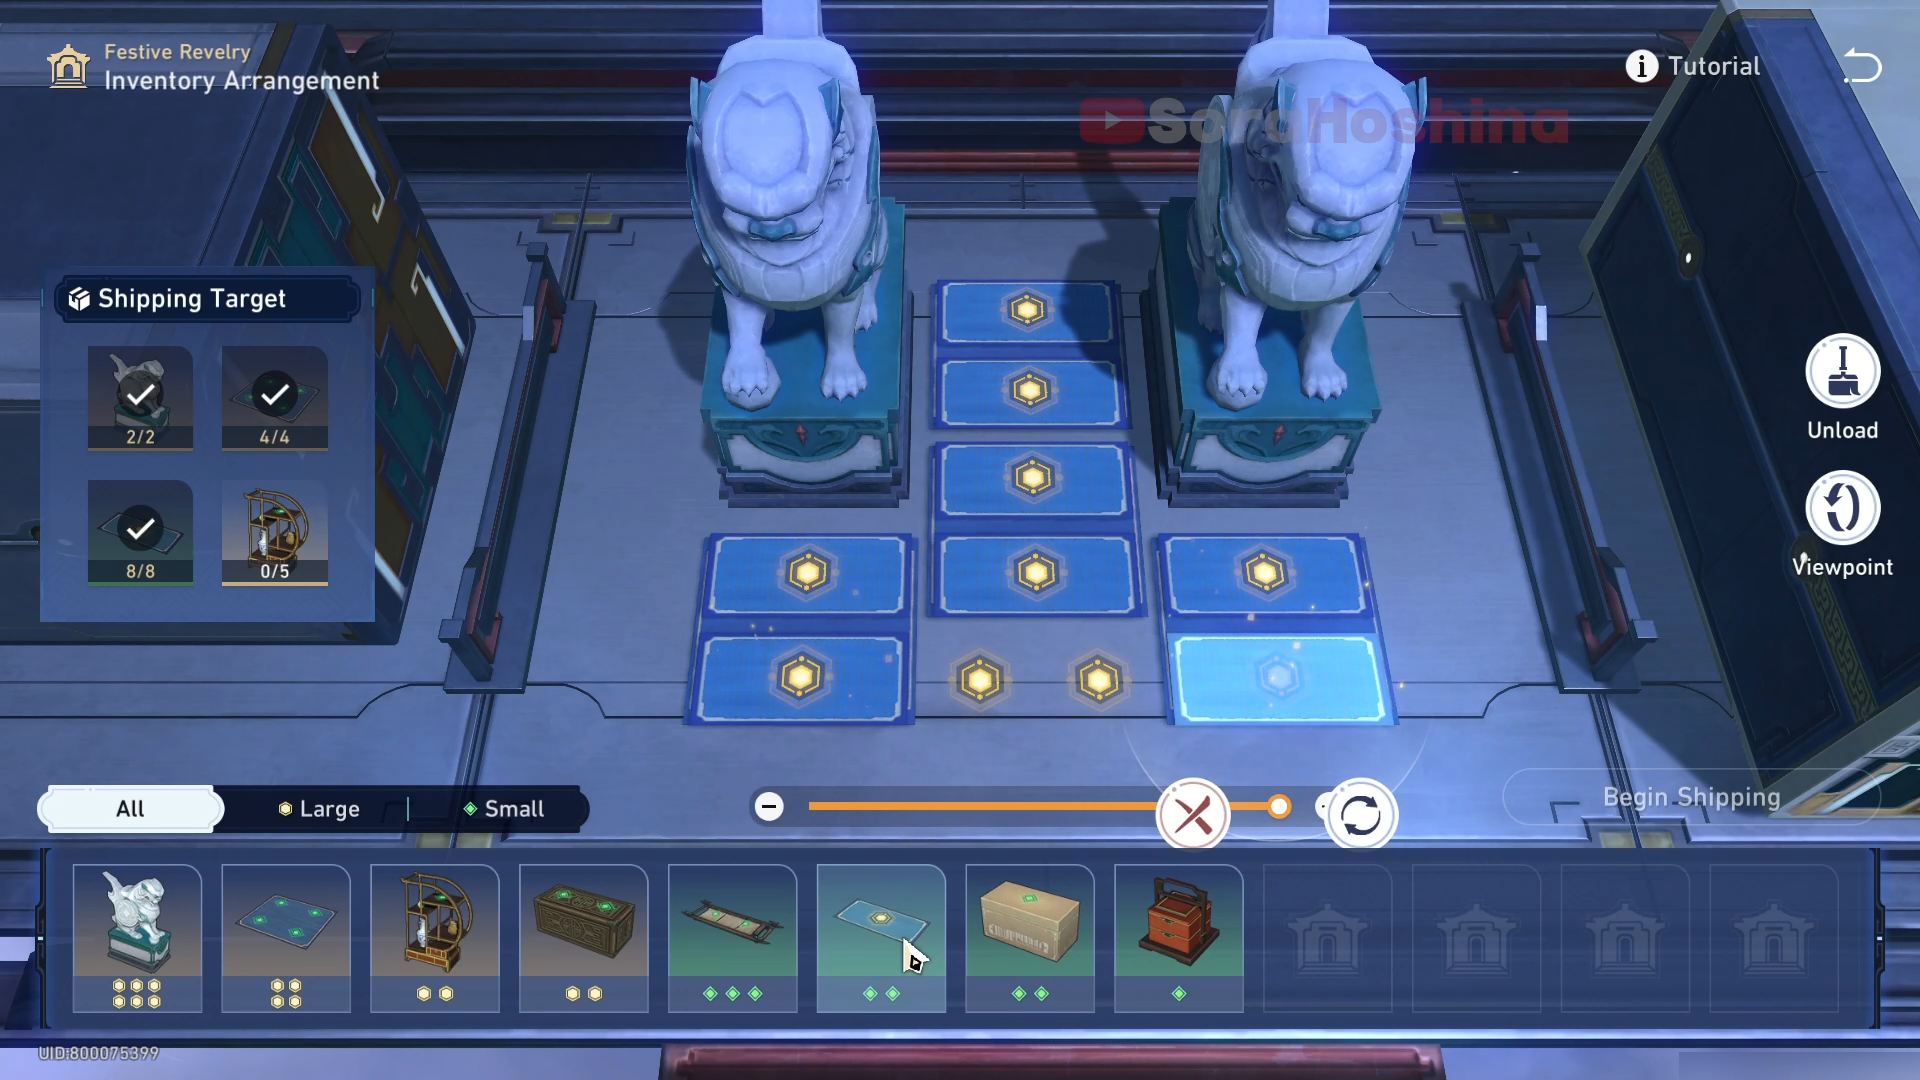
Hard Mode III
Step 1: Place 4 stone lions first. Note that the first two need to be rotated. Then place 2 factory stools.
Step 2: Place the 2x2 carpet first (rotate it), then the 2X1 carpet
Step 3: Finally, place the bench
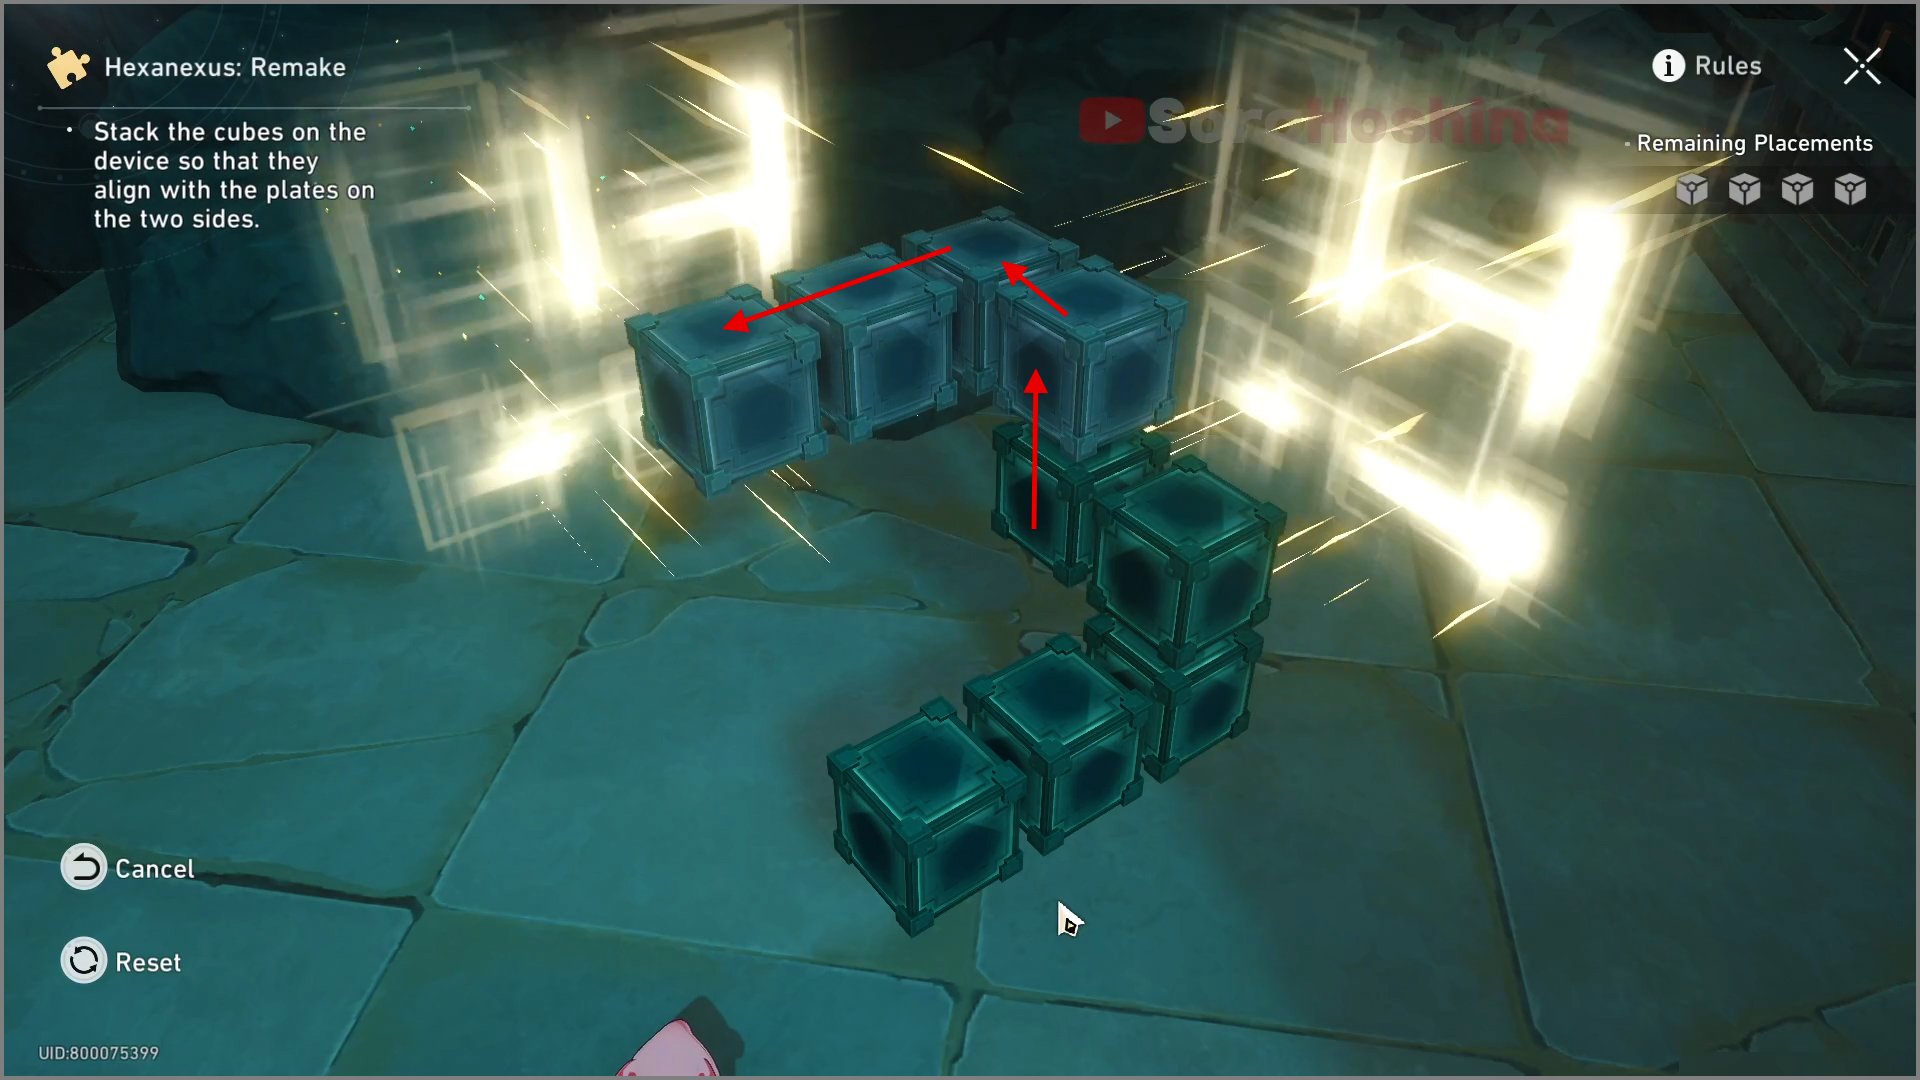
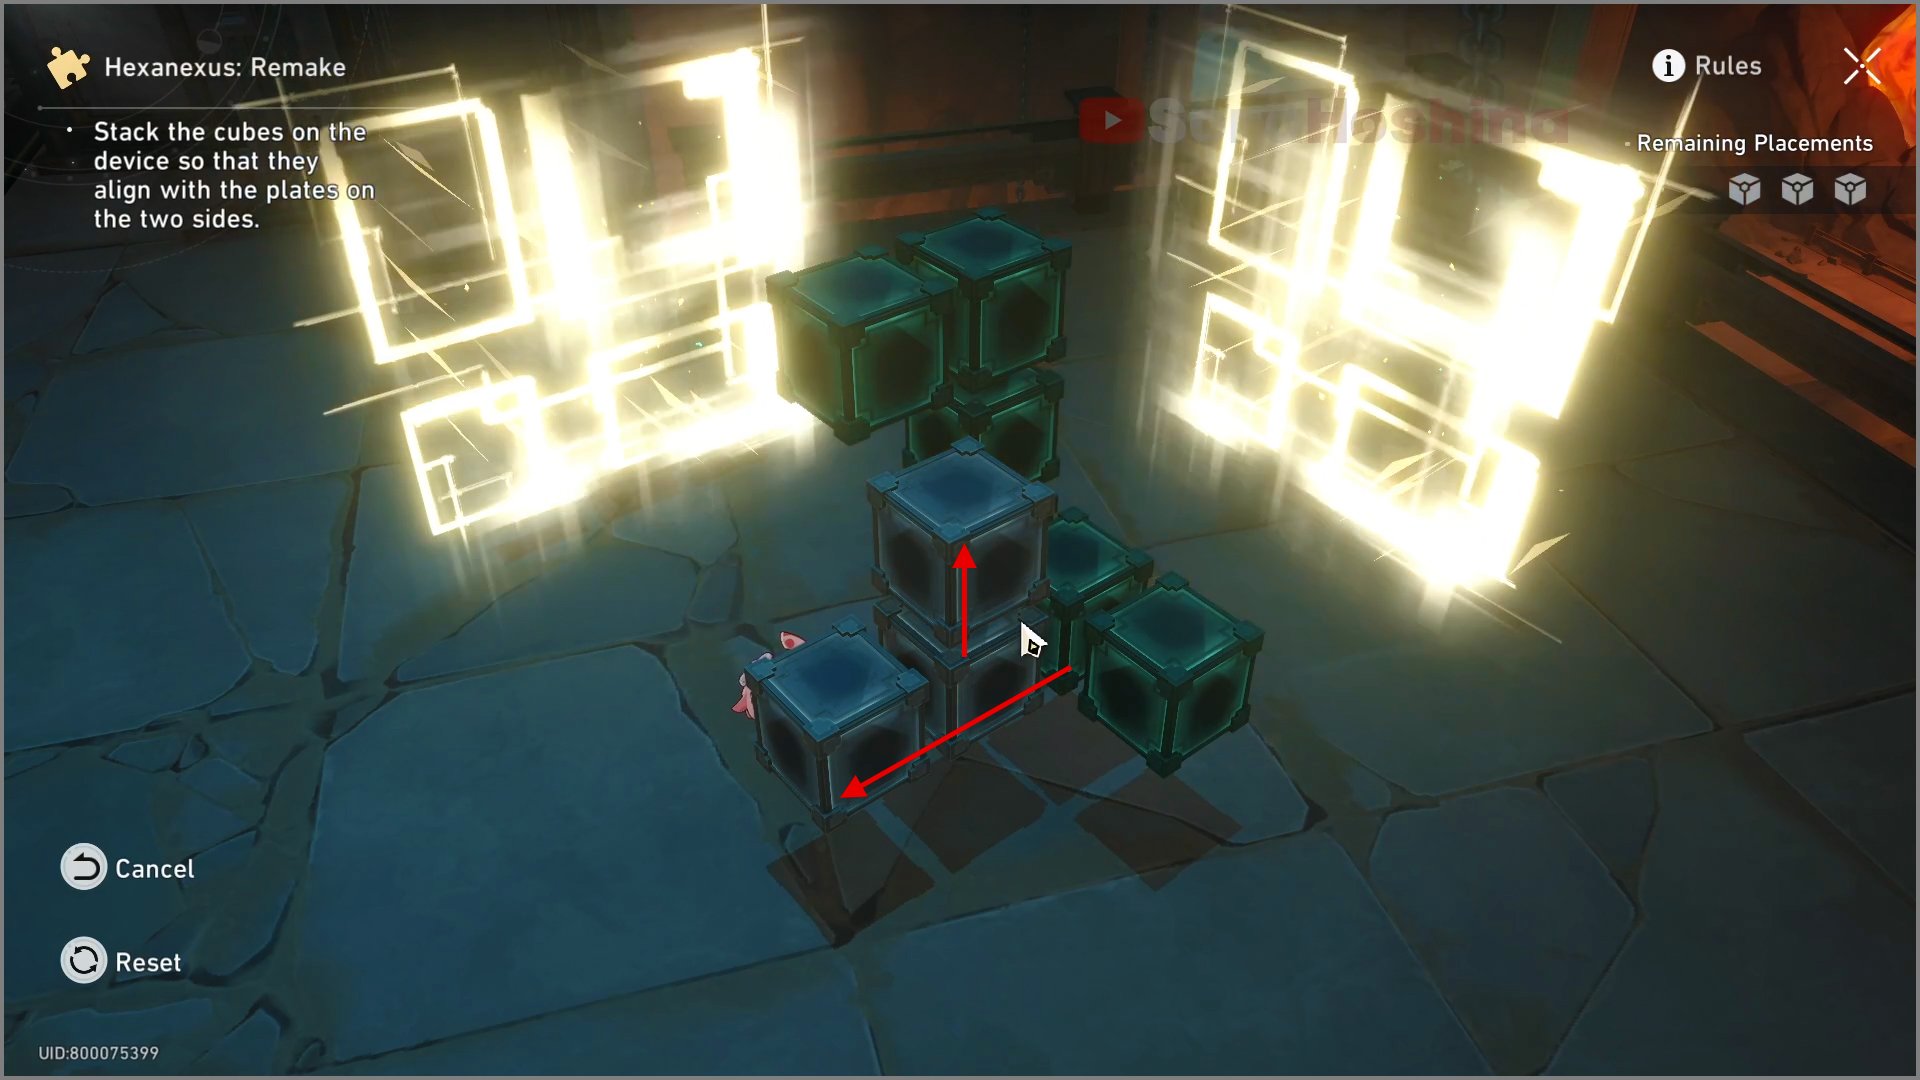
Hexanexus: Remake
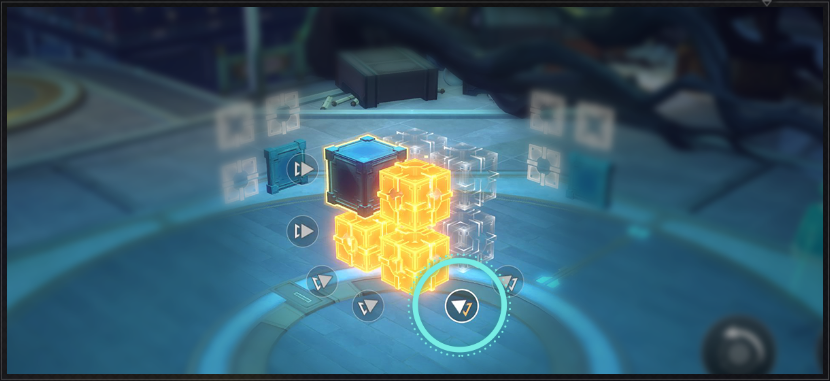
Tutorial
Select the device in the middle of the screen, and you can stack cubes along the indicated direction. Every time you stack a cube, a resource cube is consumed.
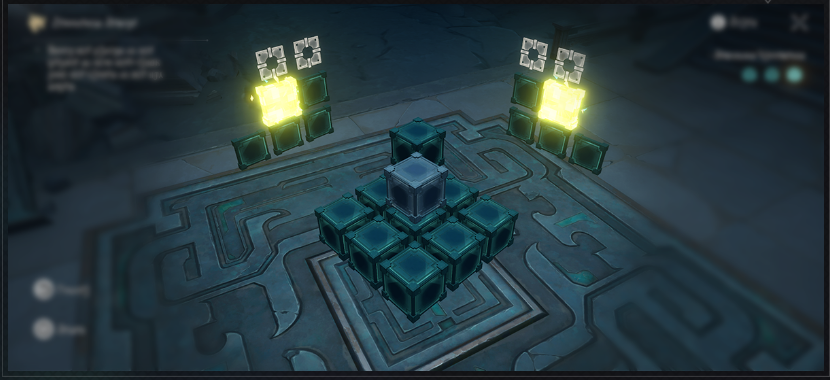
Stack cubes to alter the device's shape. When its shape matches with those shown on the plates on the two sides, the puzzle is solved.
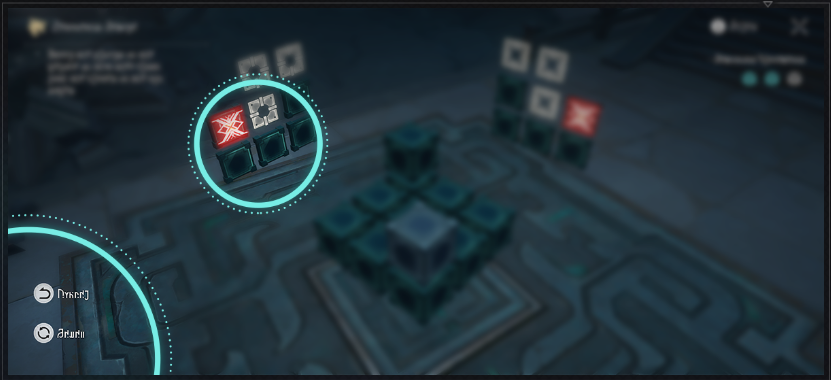
When stacking cubes on a non-designated spot, the plates on the two sides will show an error hint. Select Cancel or Reset to ever the stacking process.
Rotate the screen to observe the device from multiple angles.
Easy Mode I
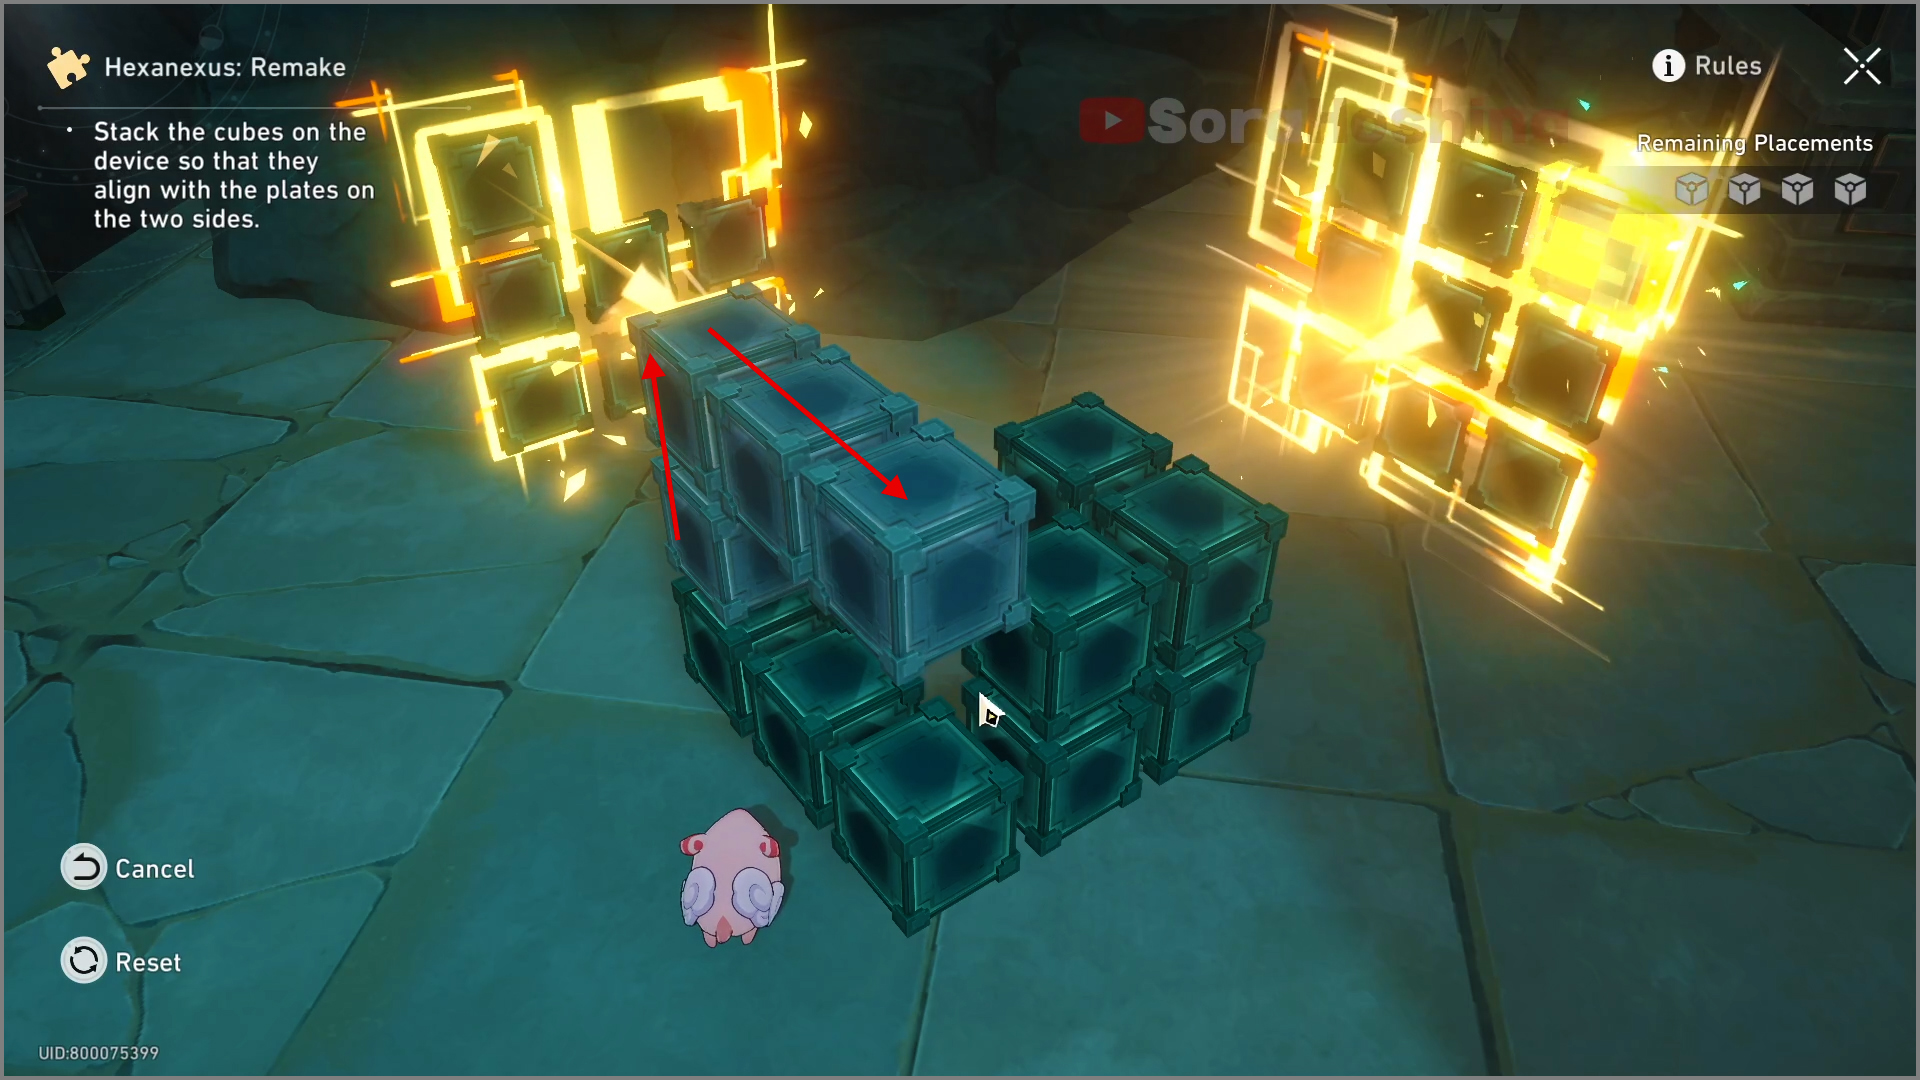
Easy Mode II
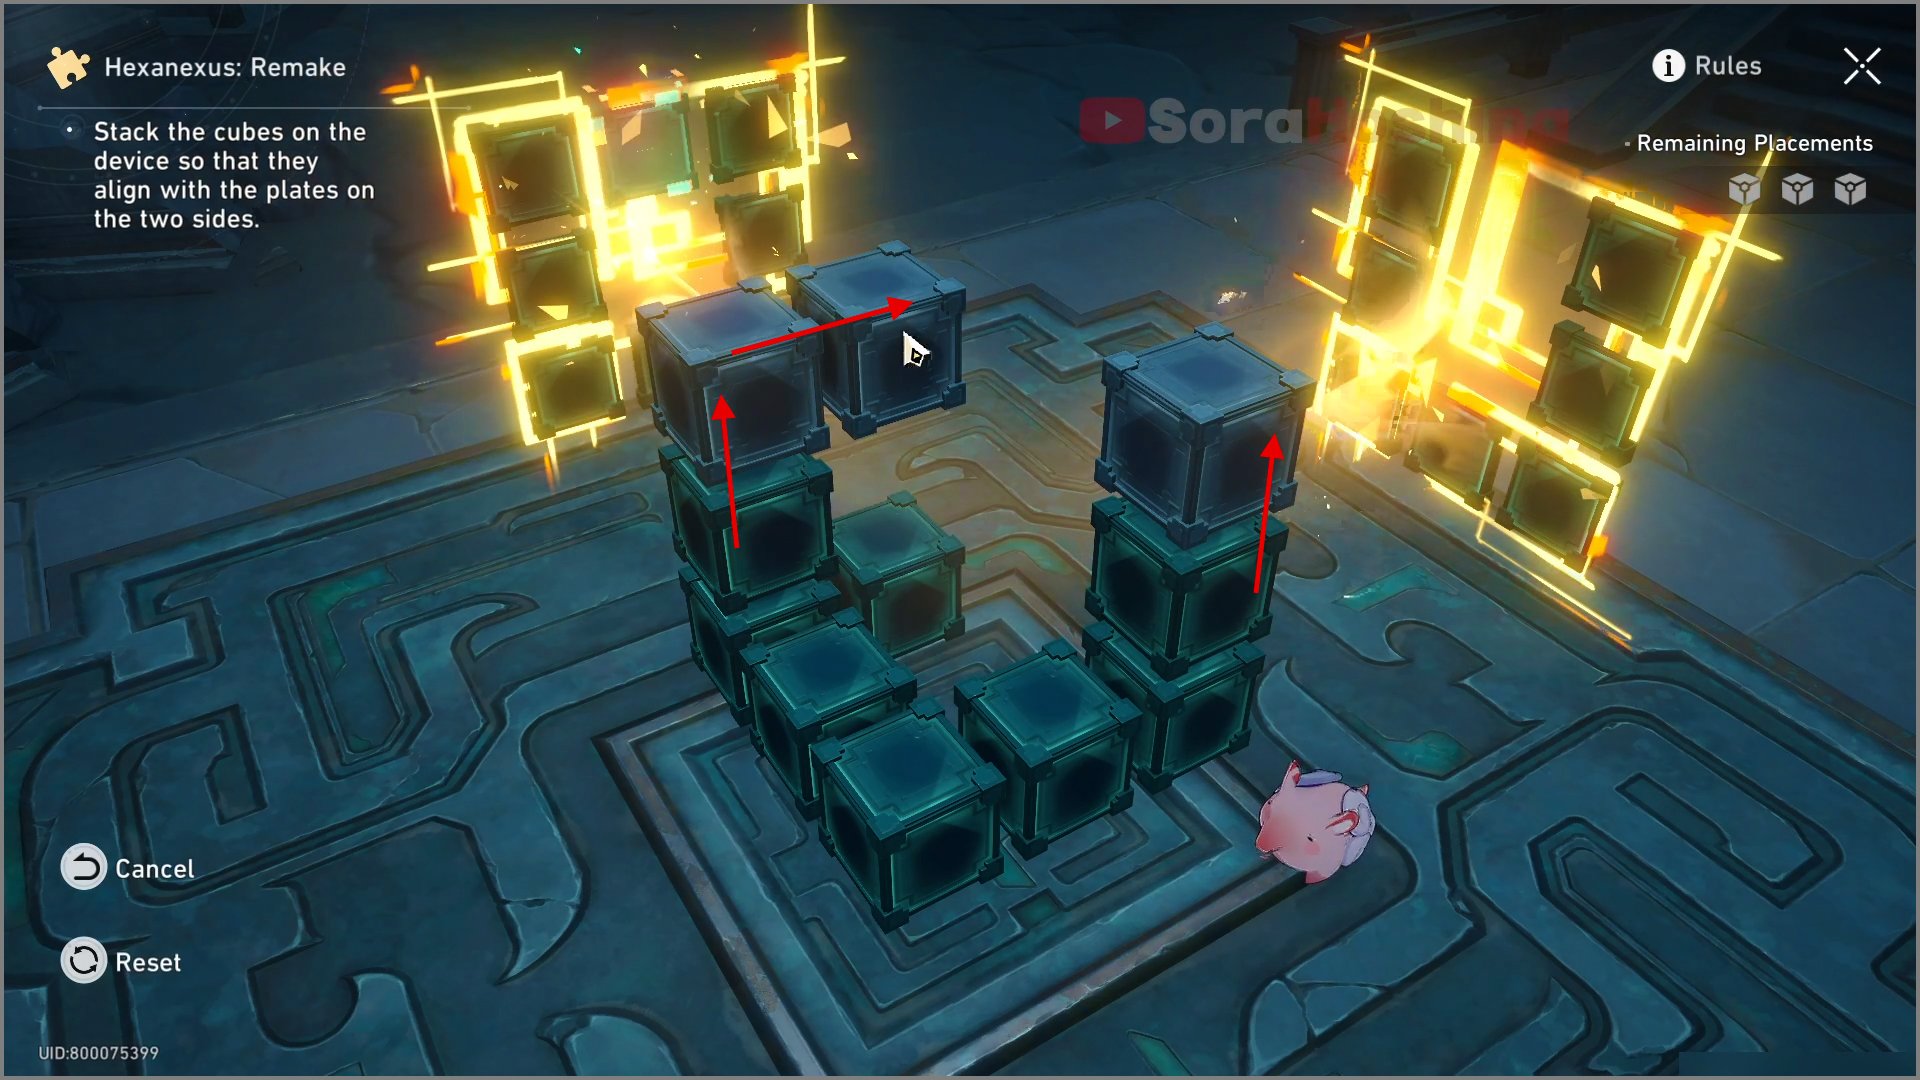
Easy Mode III
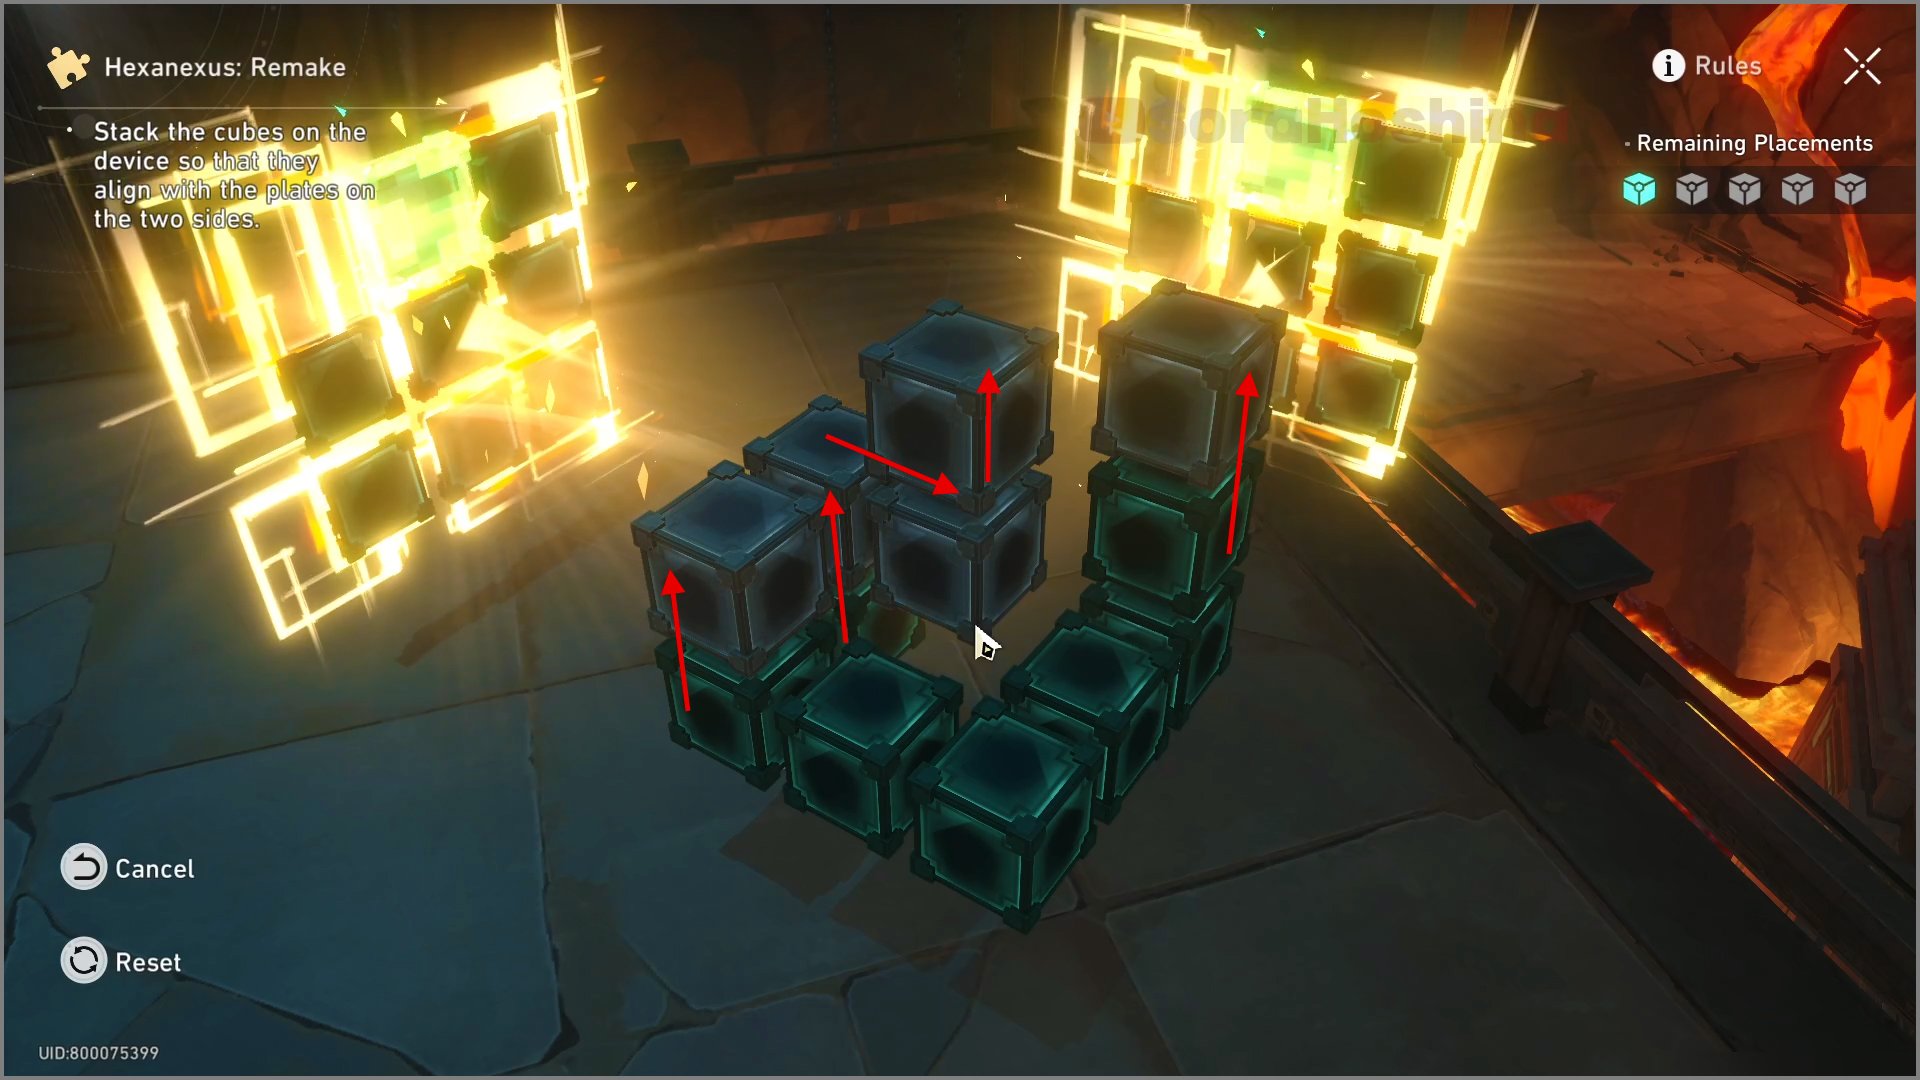
Hard Mode I

Hard Mode II
Hard Mode III
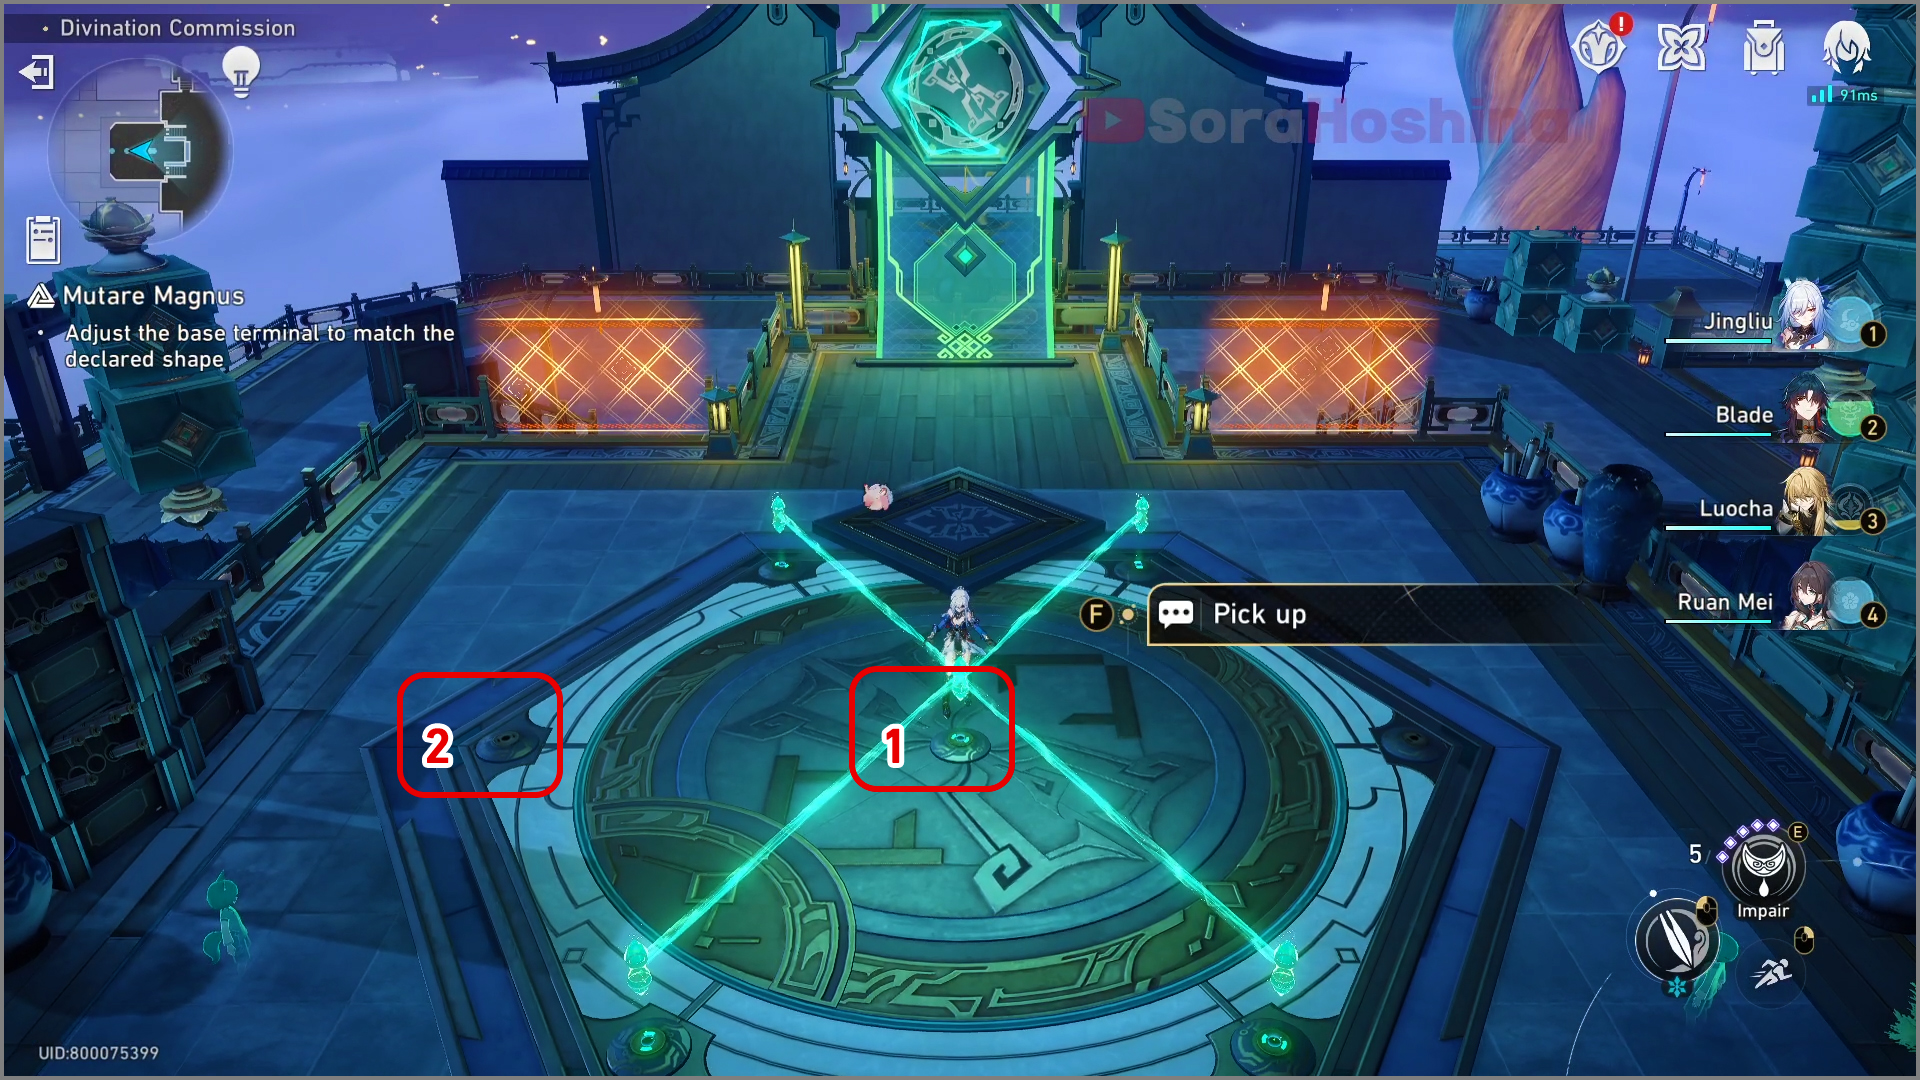
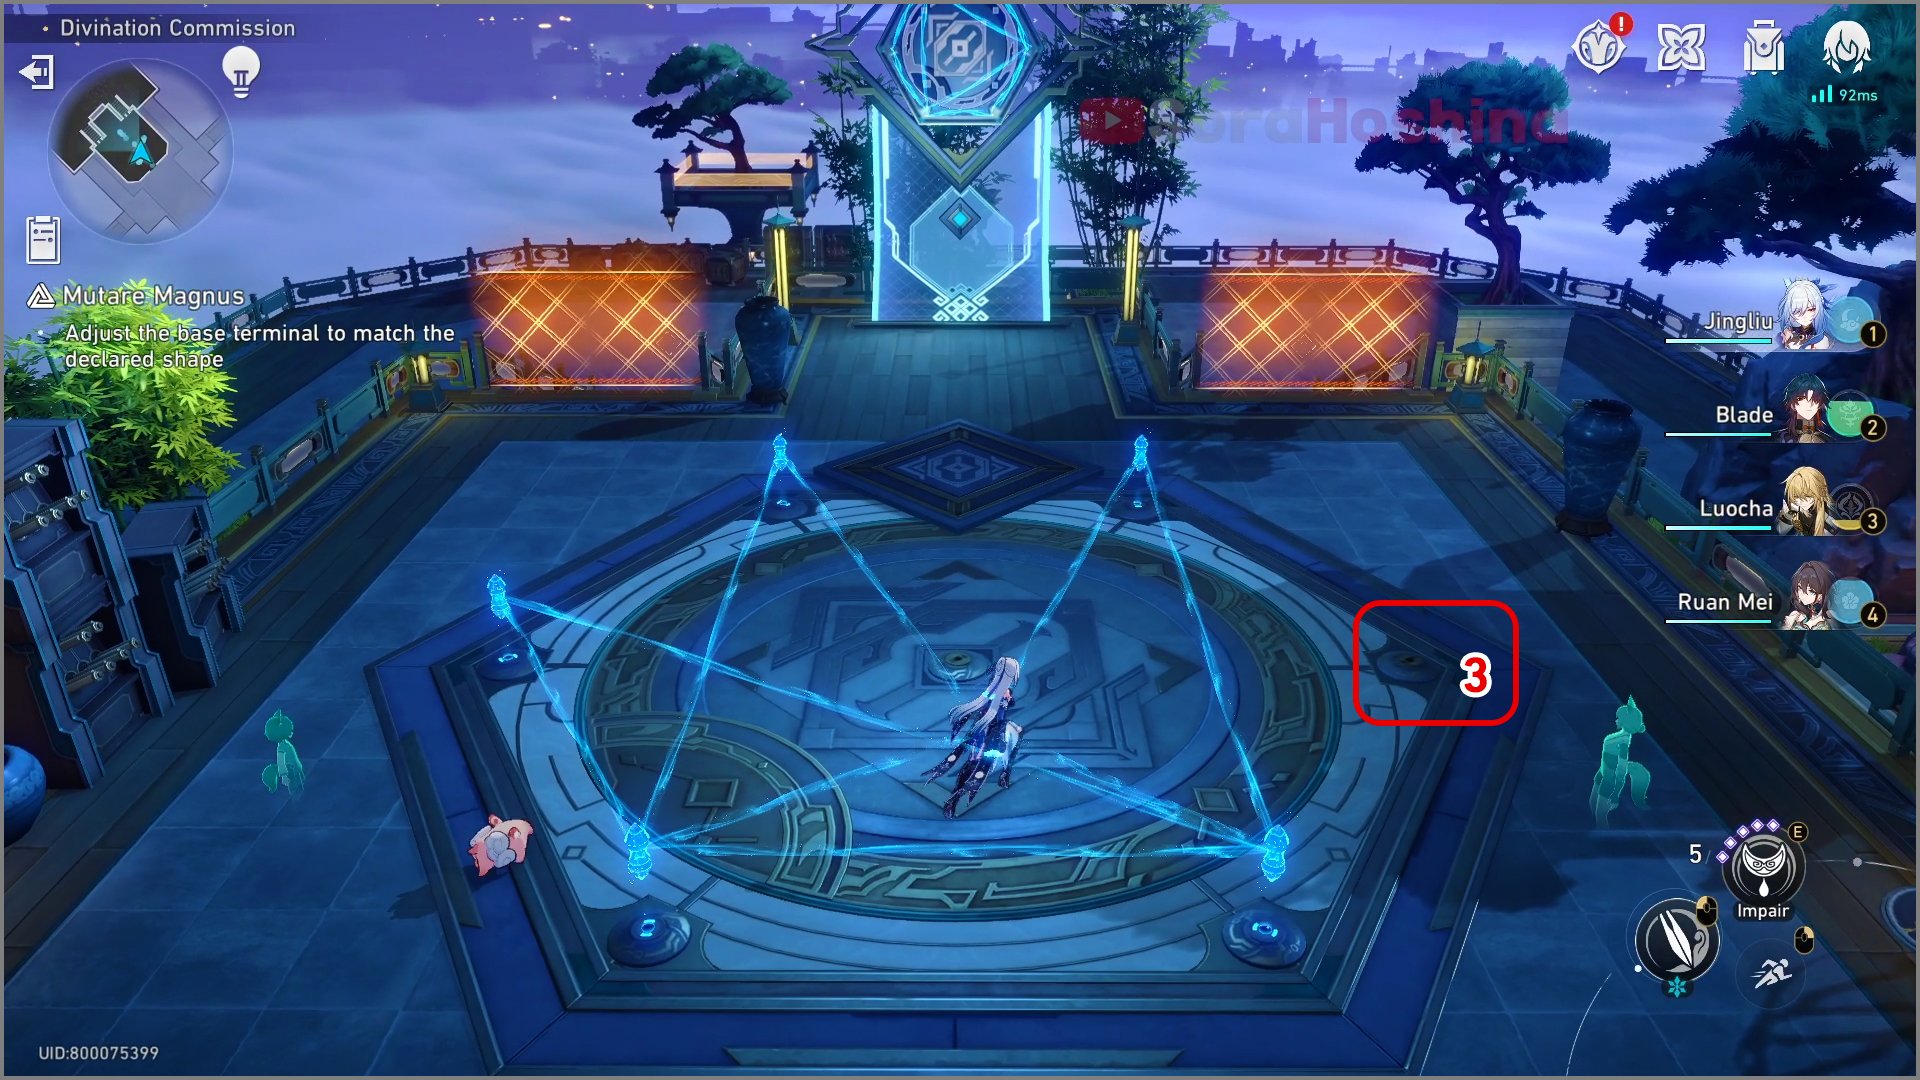
Mutare Magnus
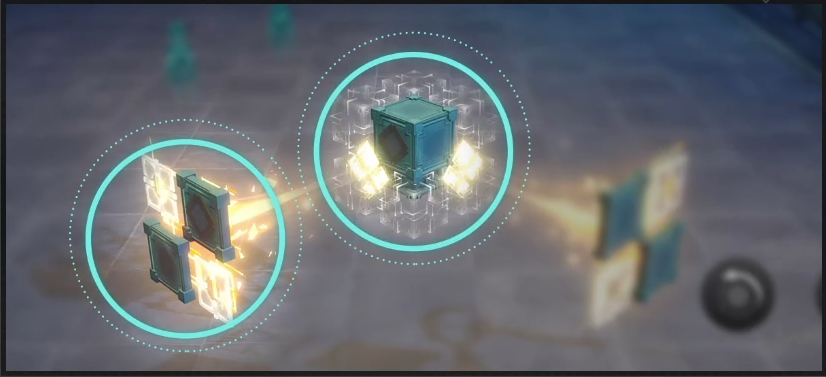
Tutorial
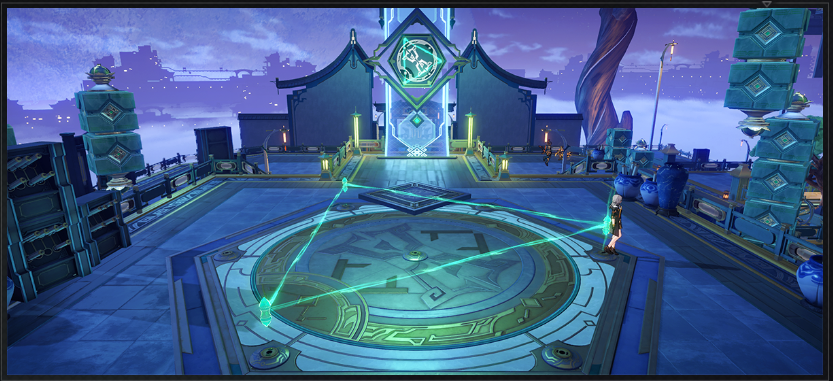
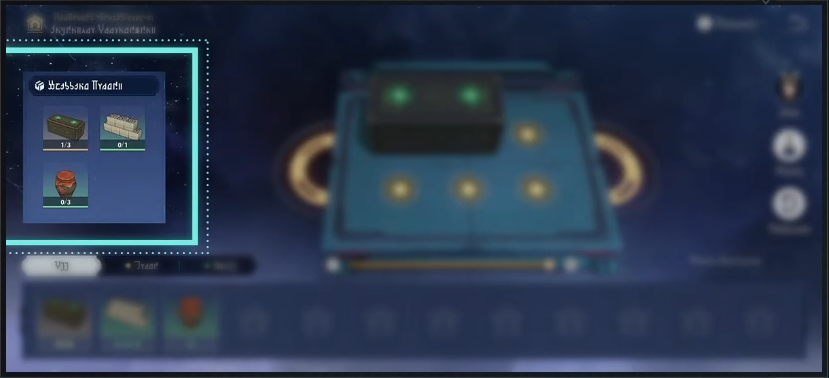
Move the base terminals on the ground and align the matrix's star patterns with the displayed pattern to complete the puzzle.
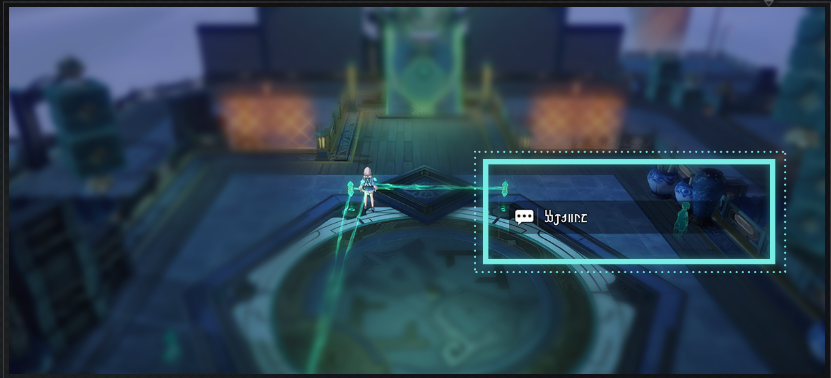
After interacting with the base terminals on the ground, you can pick them up. The connecting lines between the base terminals will not change. When you are already holding a base terminal, interacting with another base terminal on the ground will cause you to swap base terminals.
Easy Mode I
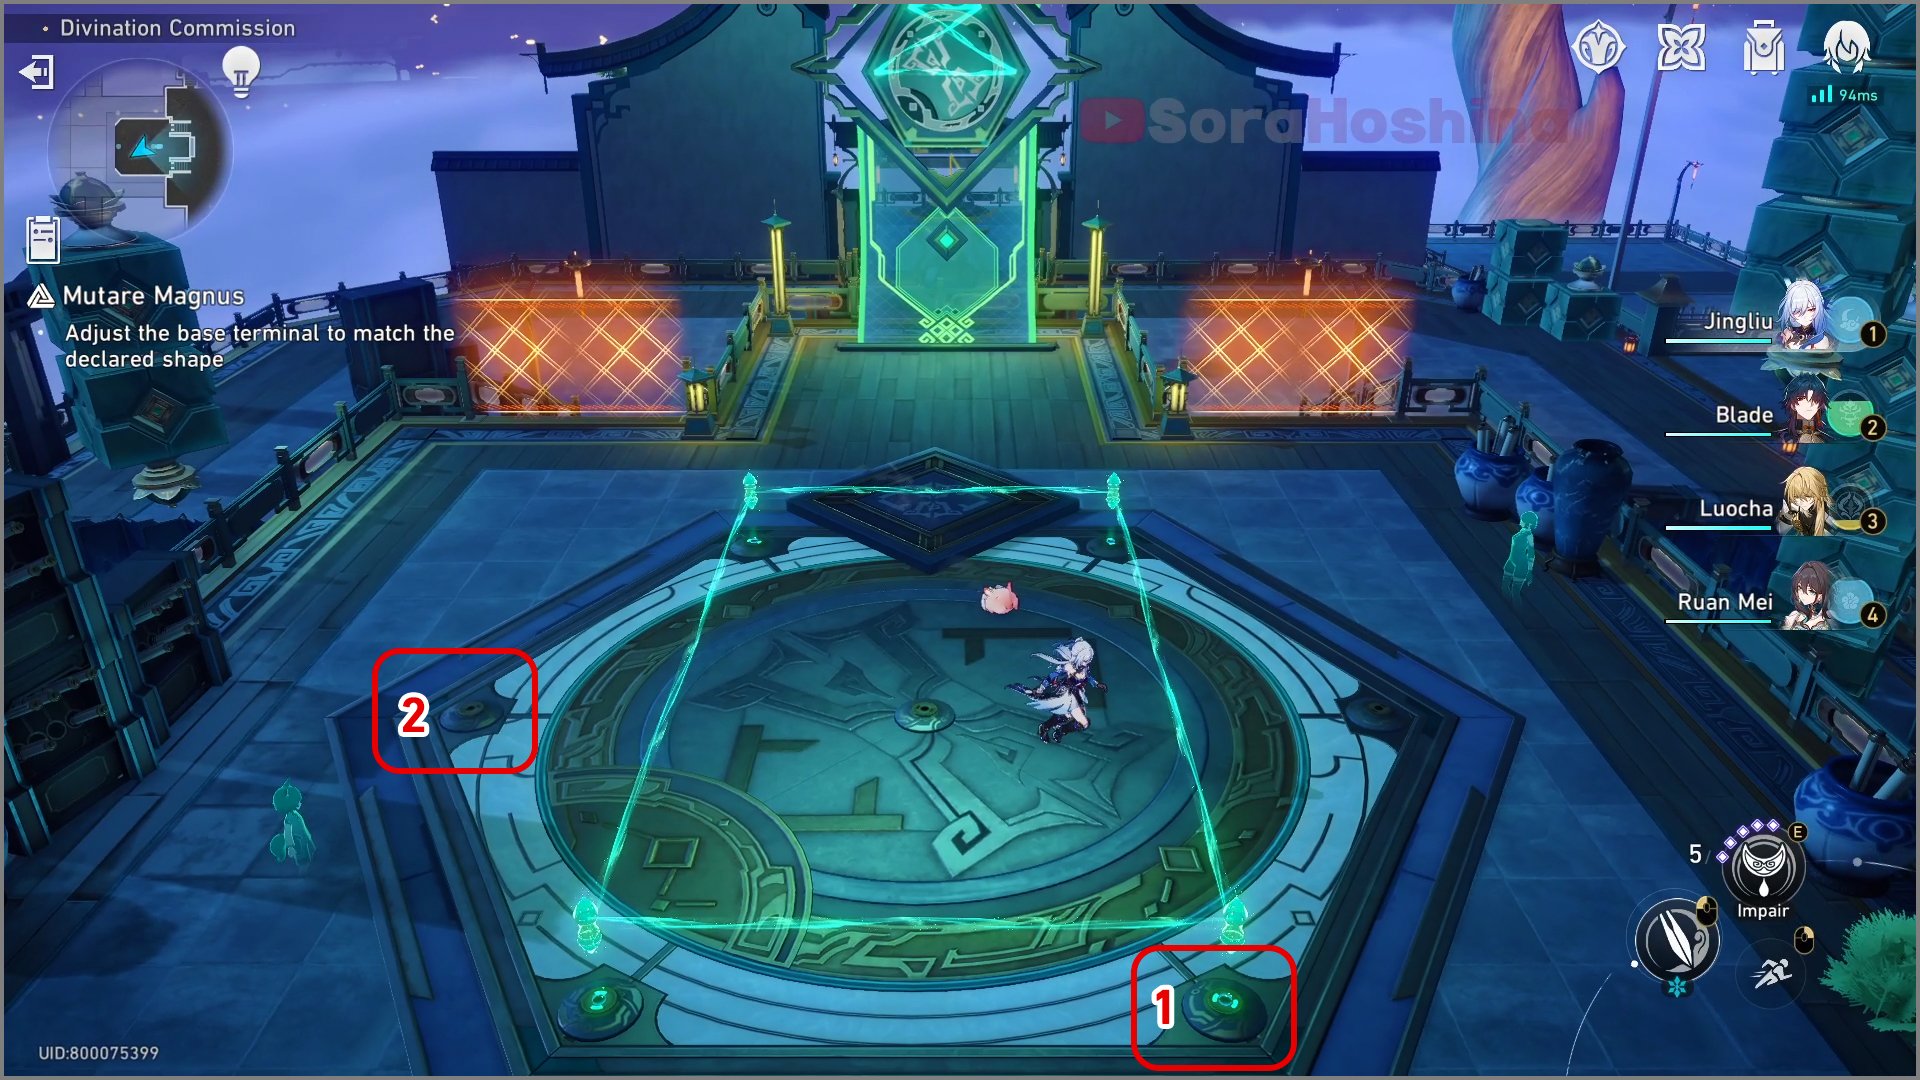
Step 1: Place the No. 1 base terminal at the No. 2 position
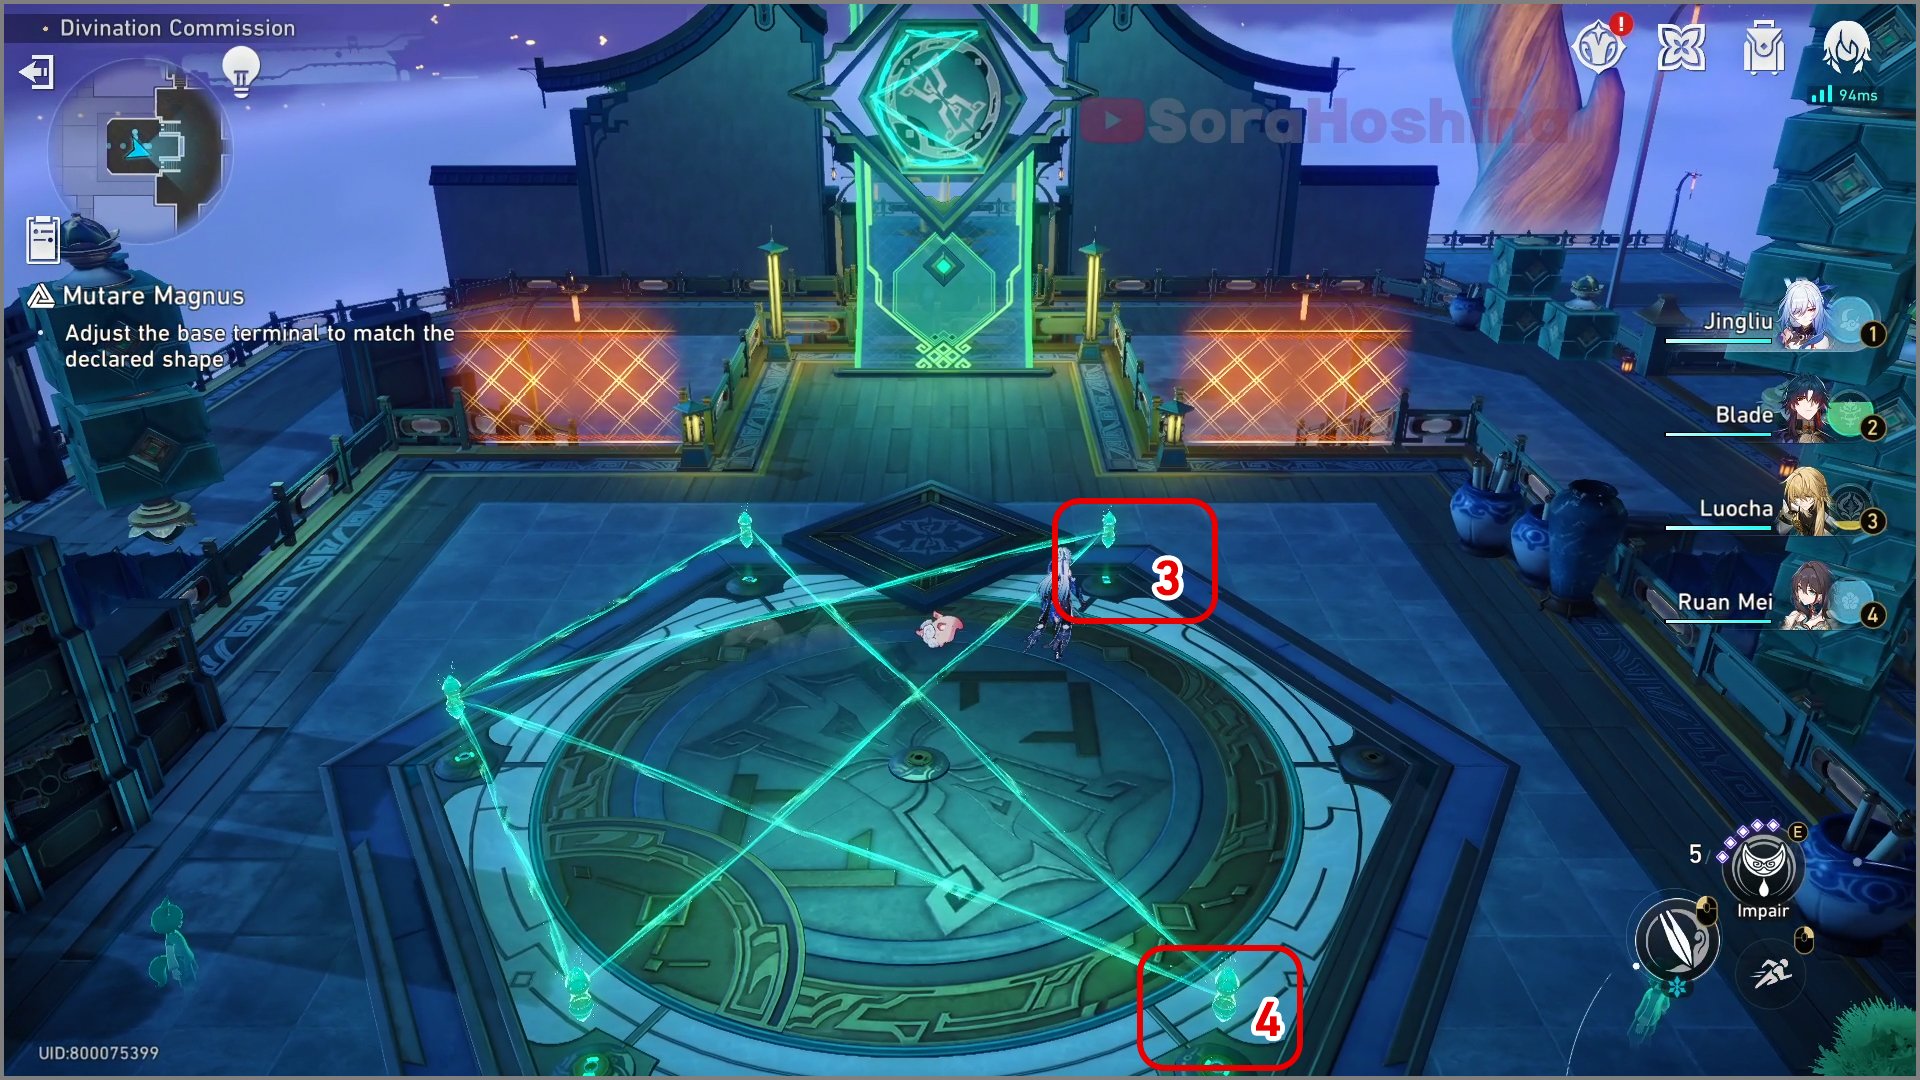
Step 2: Place the No. 3 base terminal base in the No. 4 position
Easy Mode II
Step 1: Pick up the No. 1 base terminal and place it on No. 2 (swap it)
Step 2: Swap the base terminal currently in your hand for No. 3
Step 3: Place the base terminal currently in your hand on No. 4
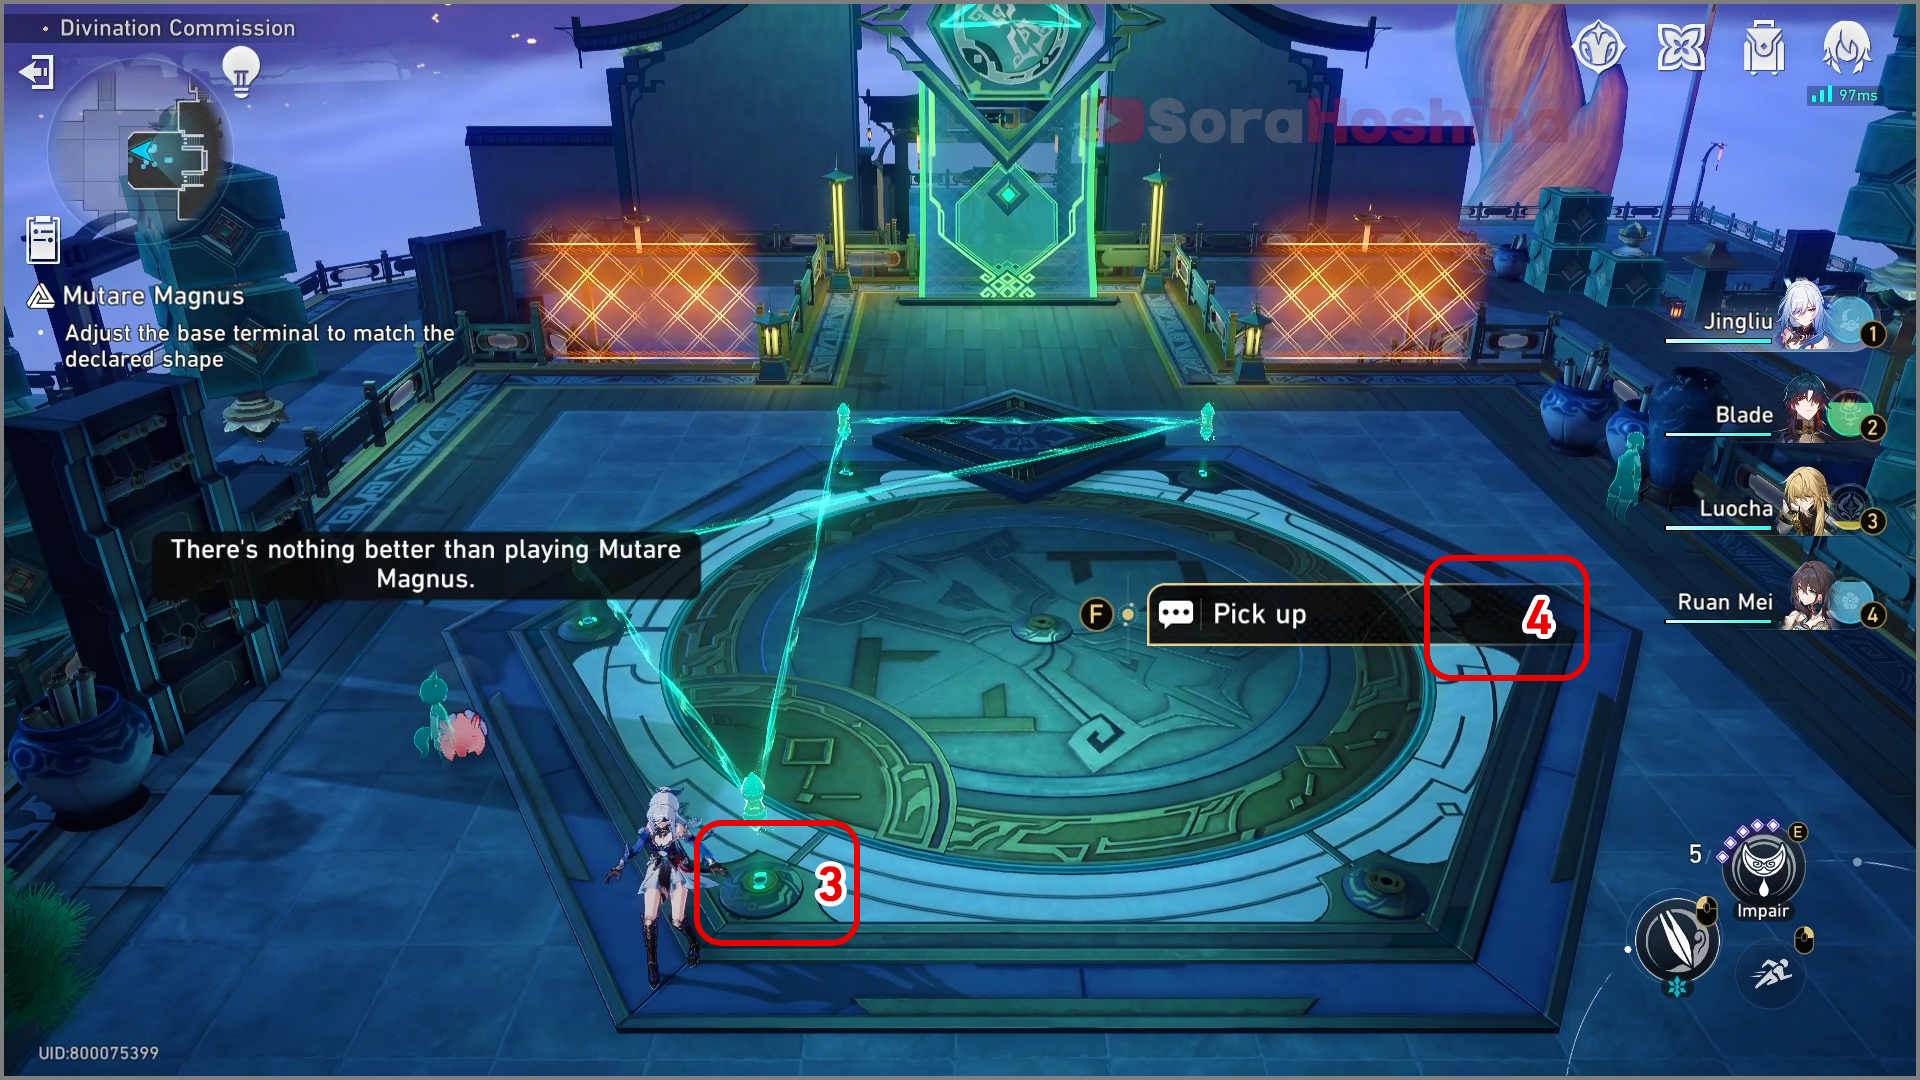
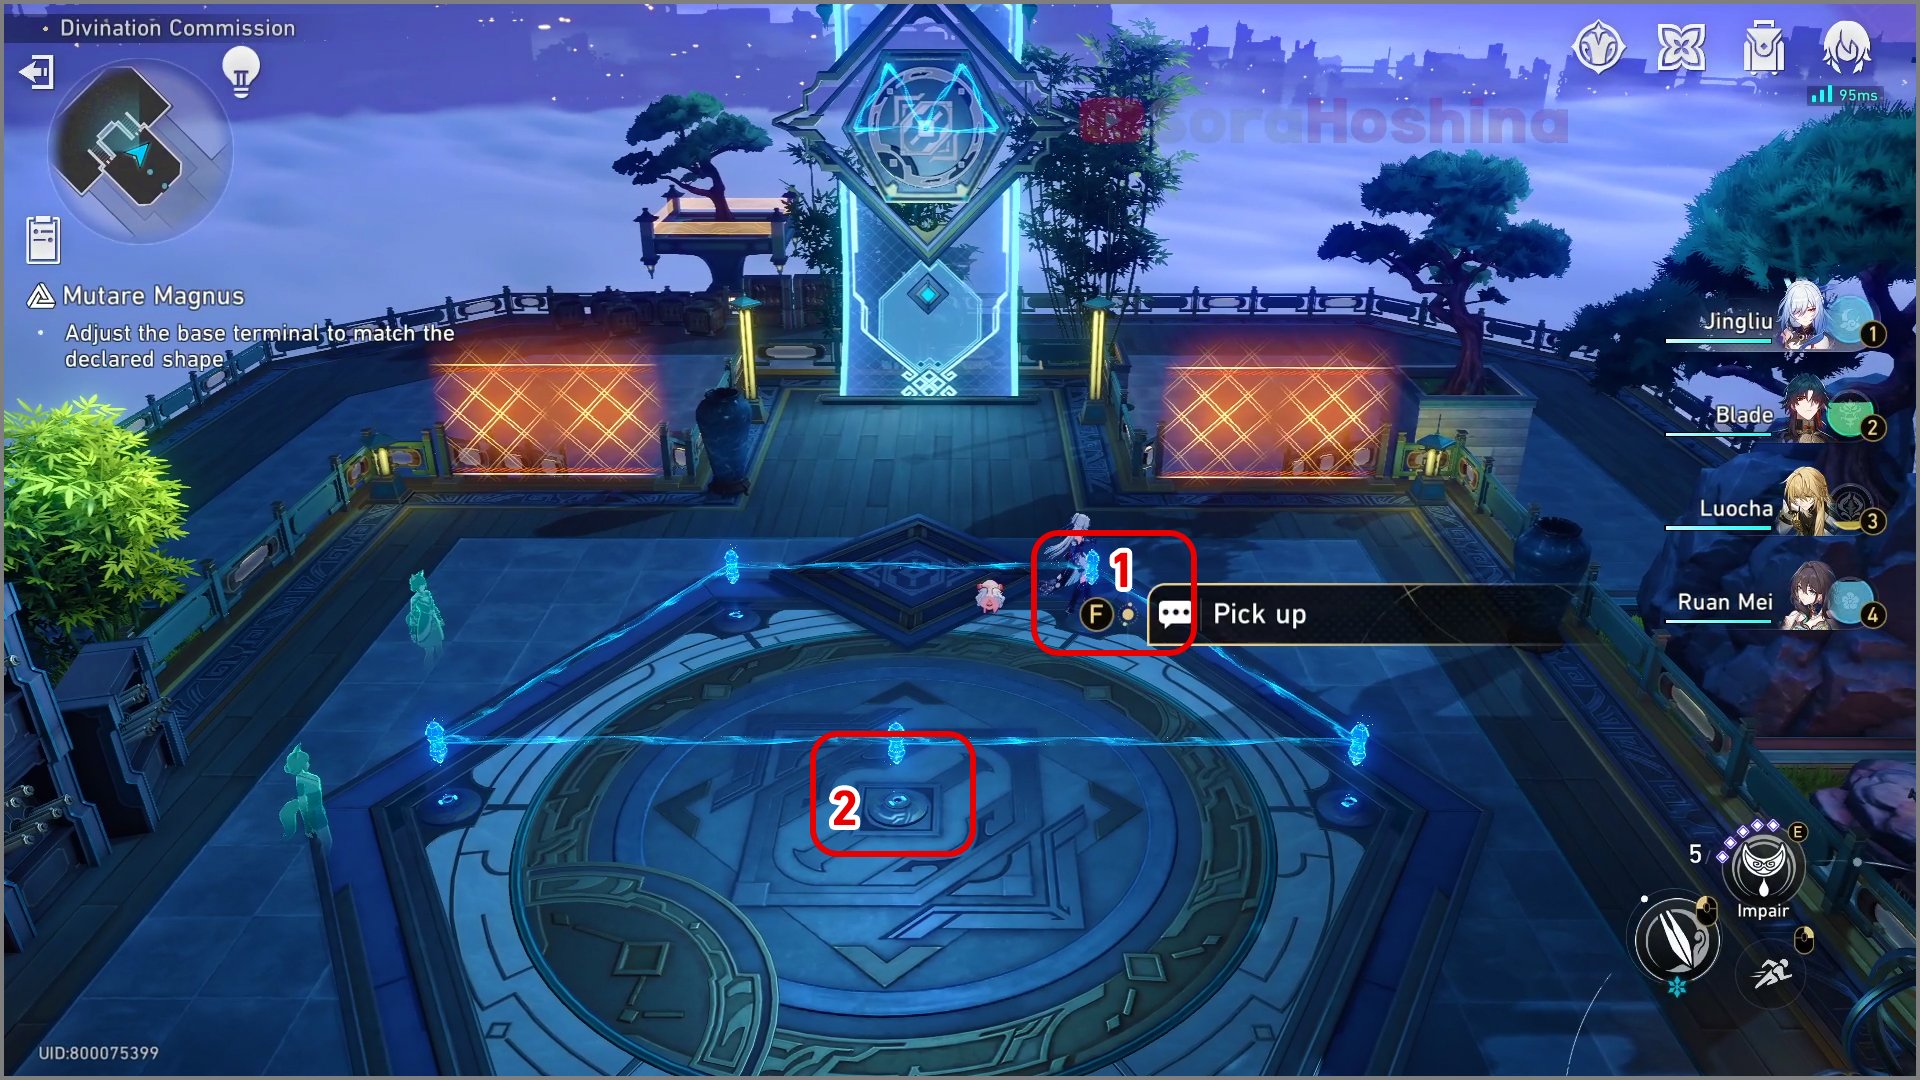
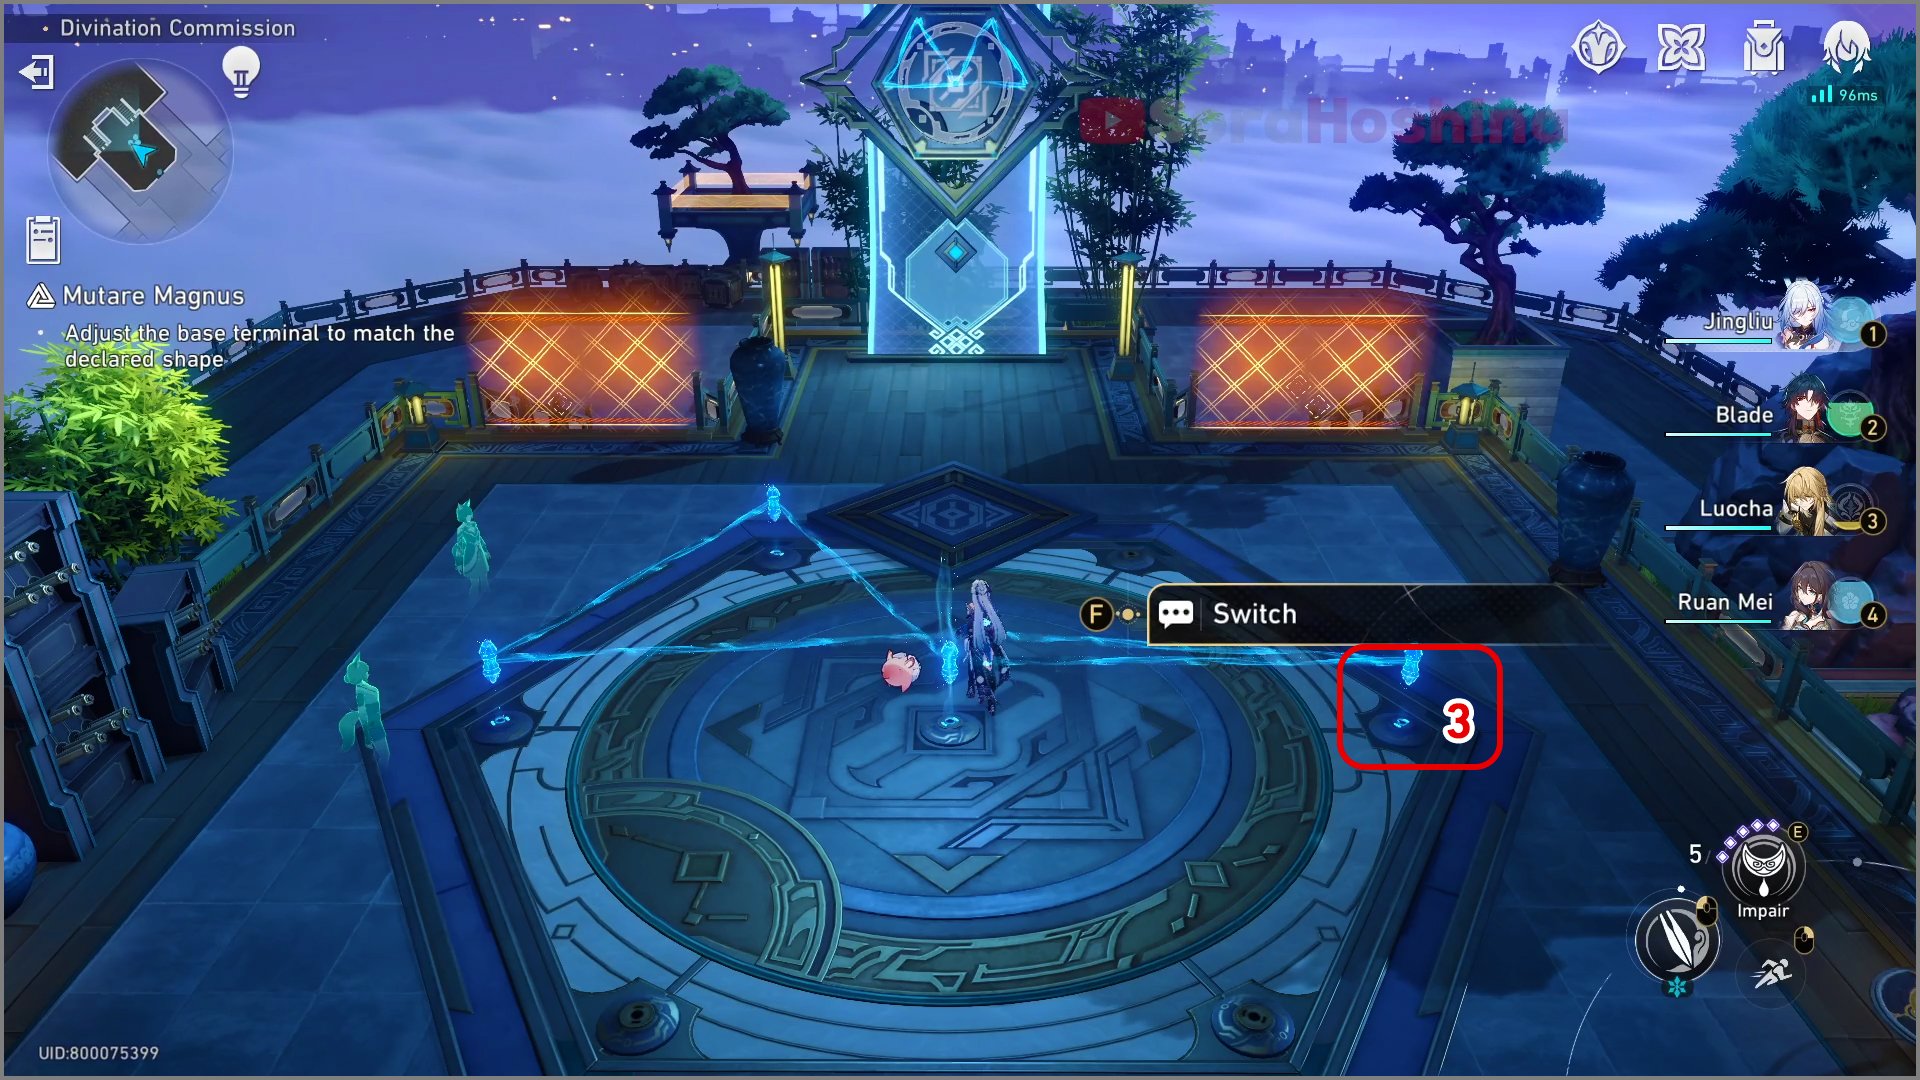
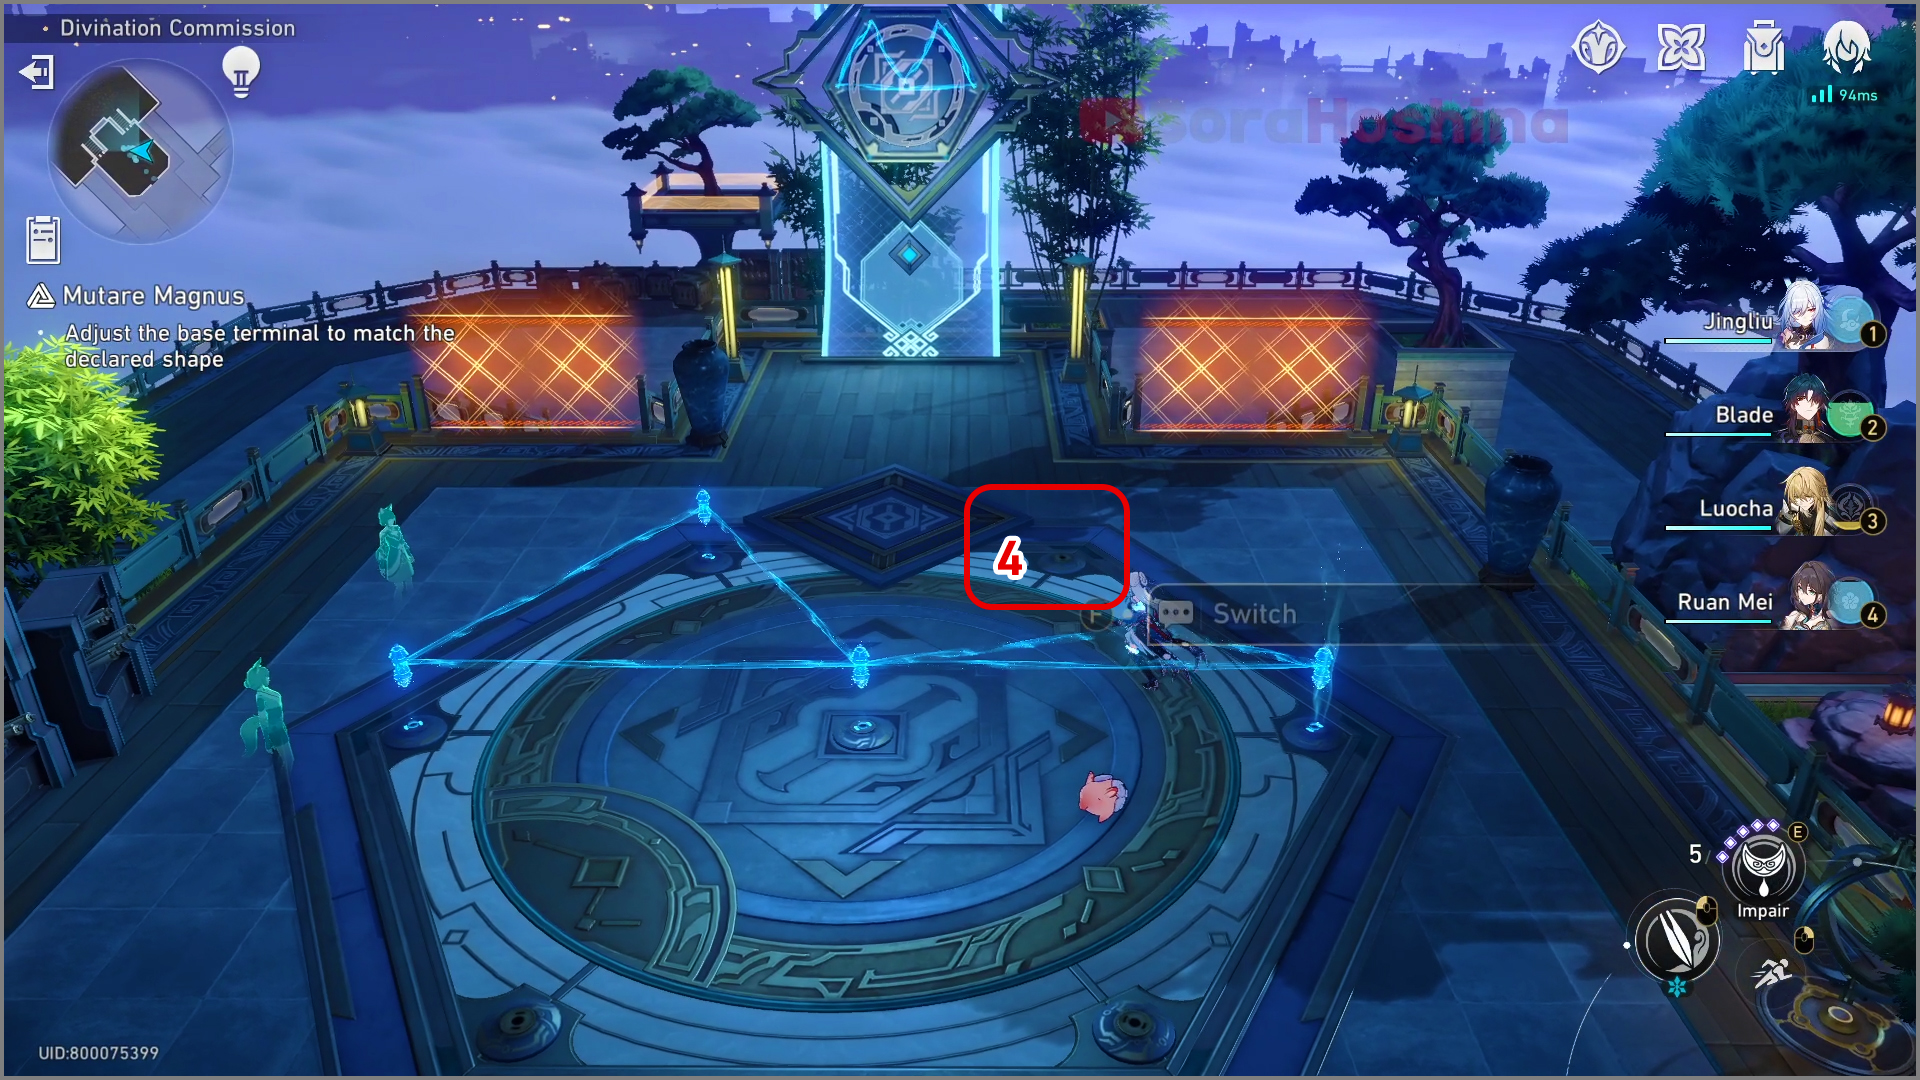
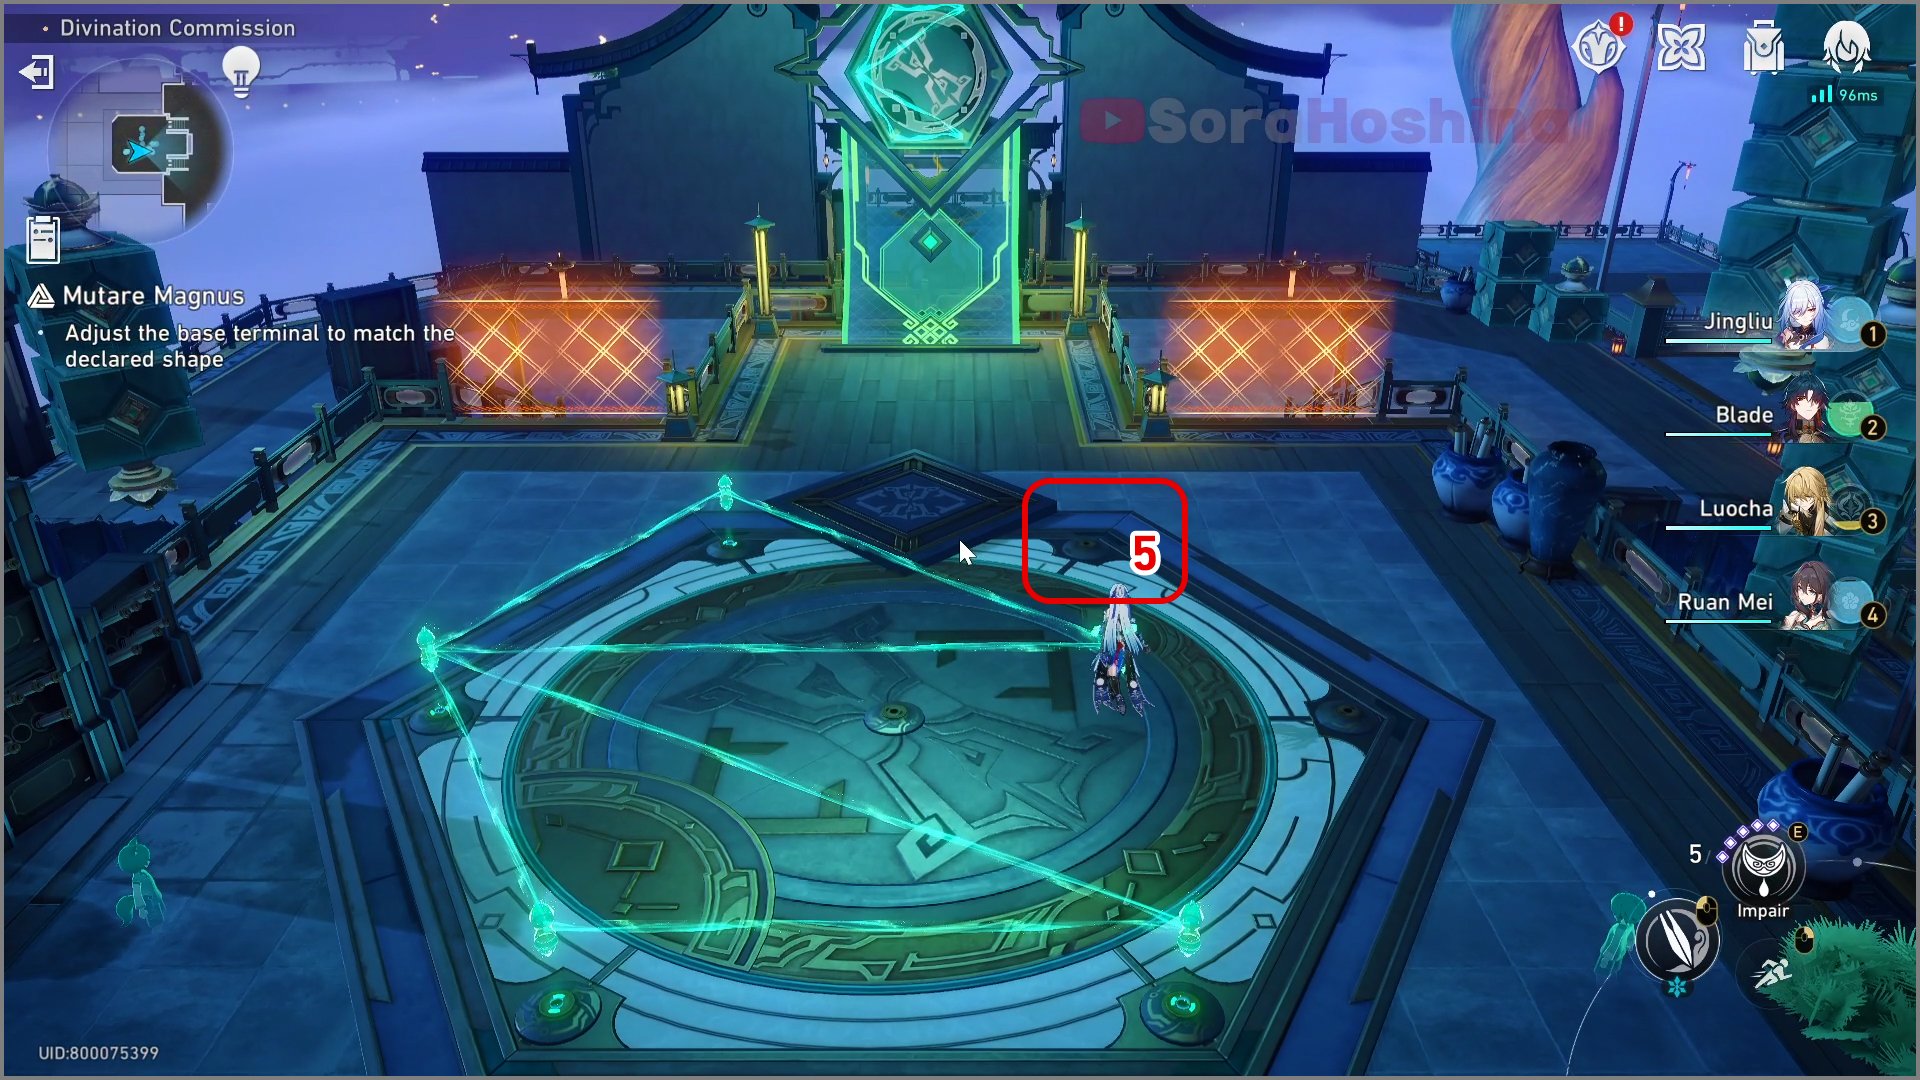
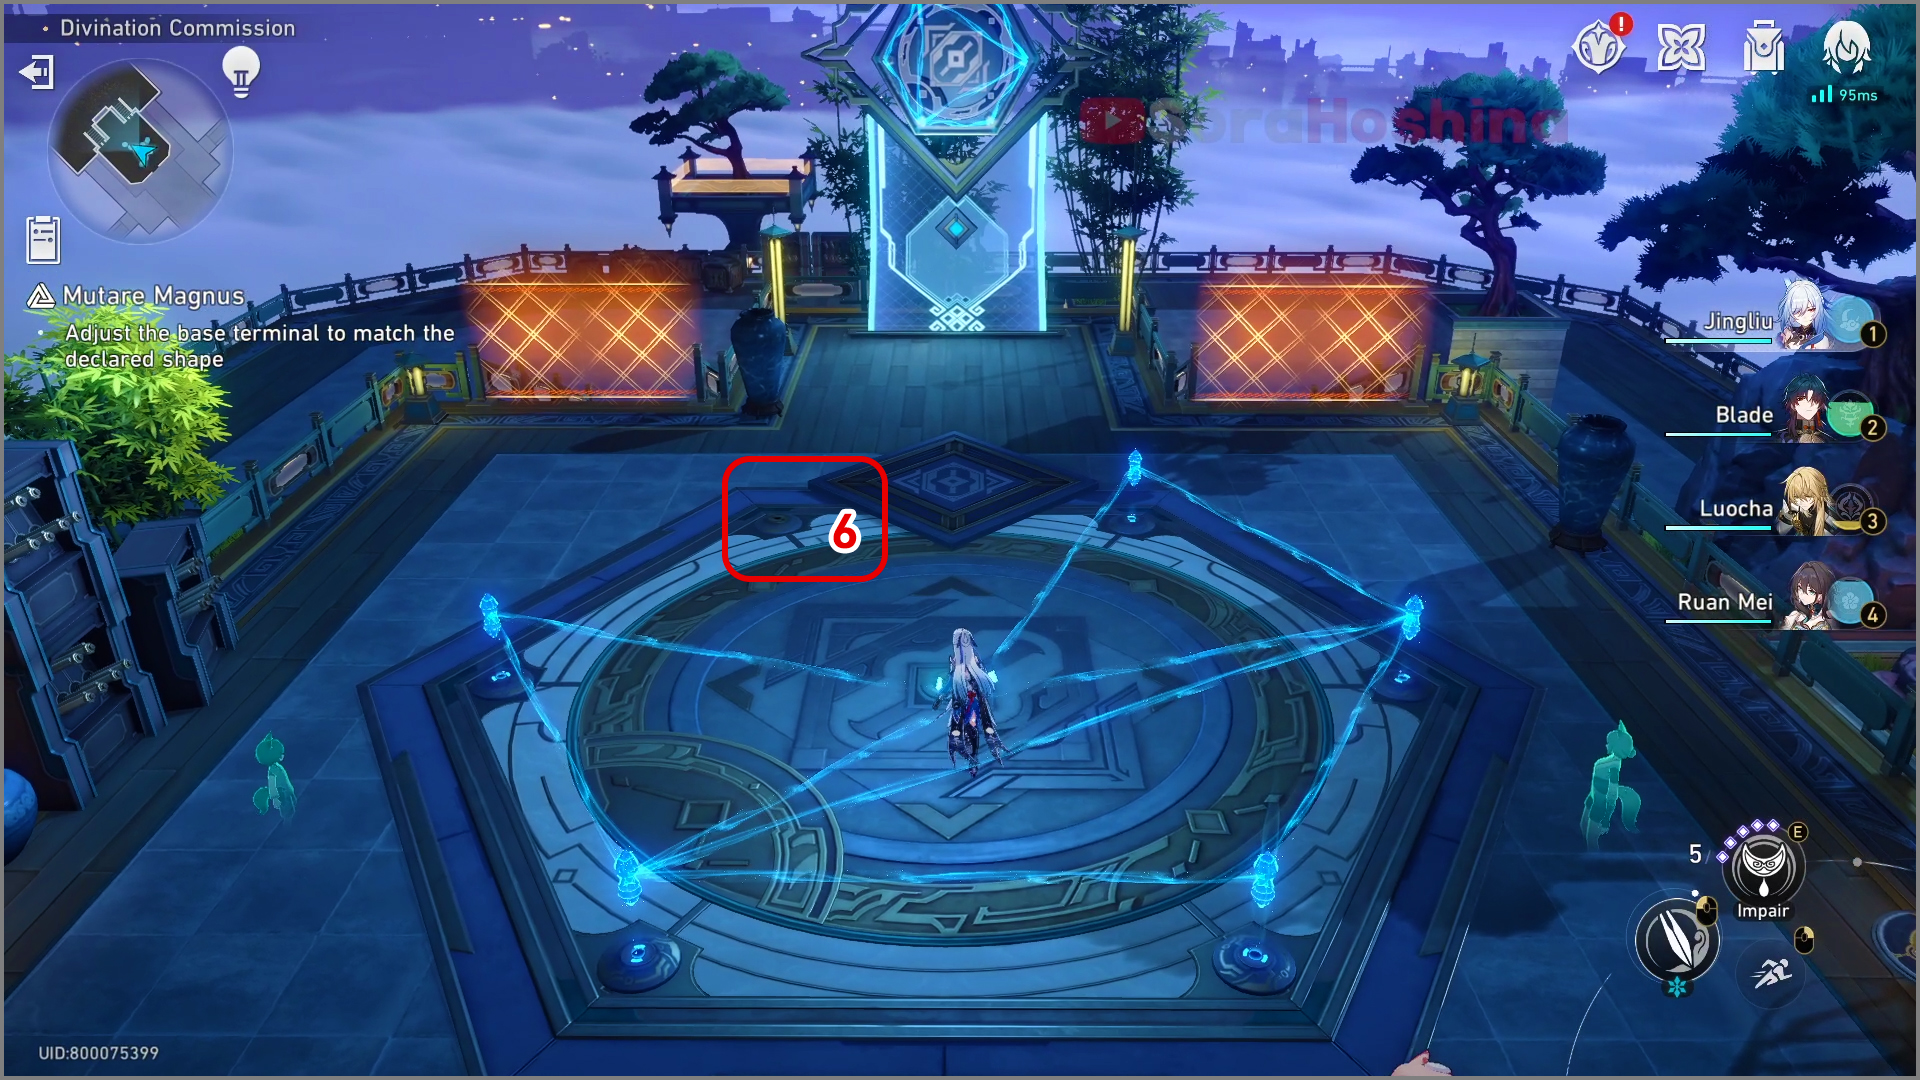
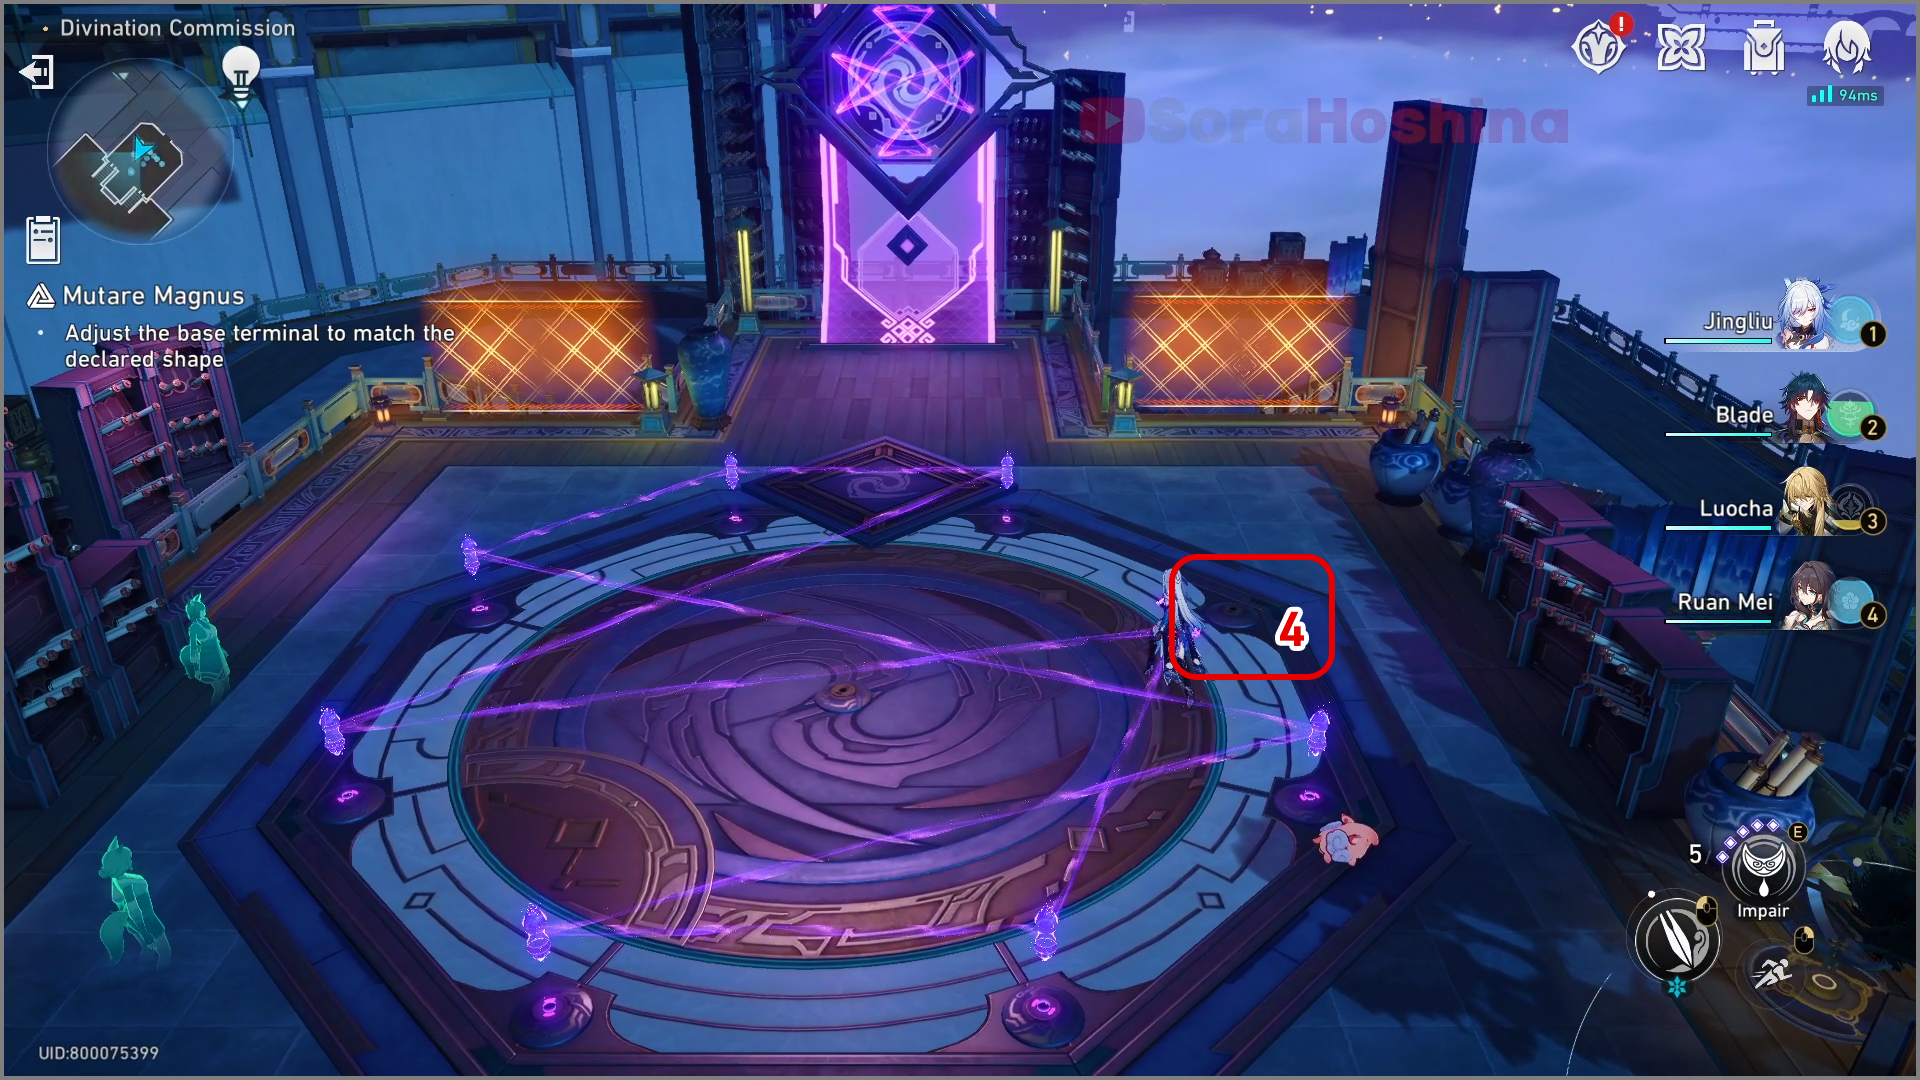
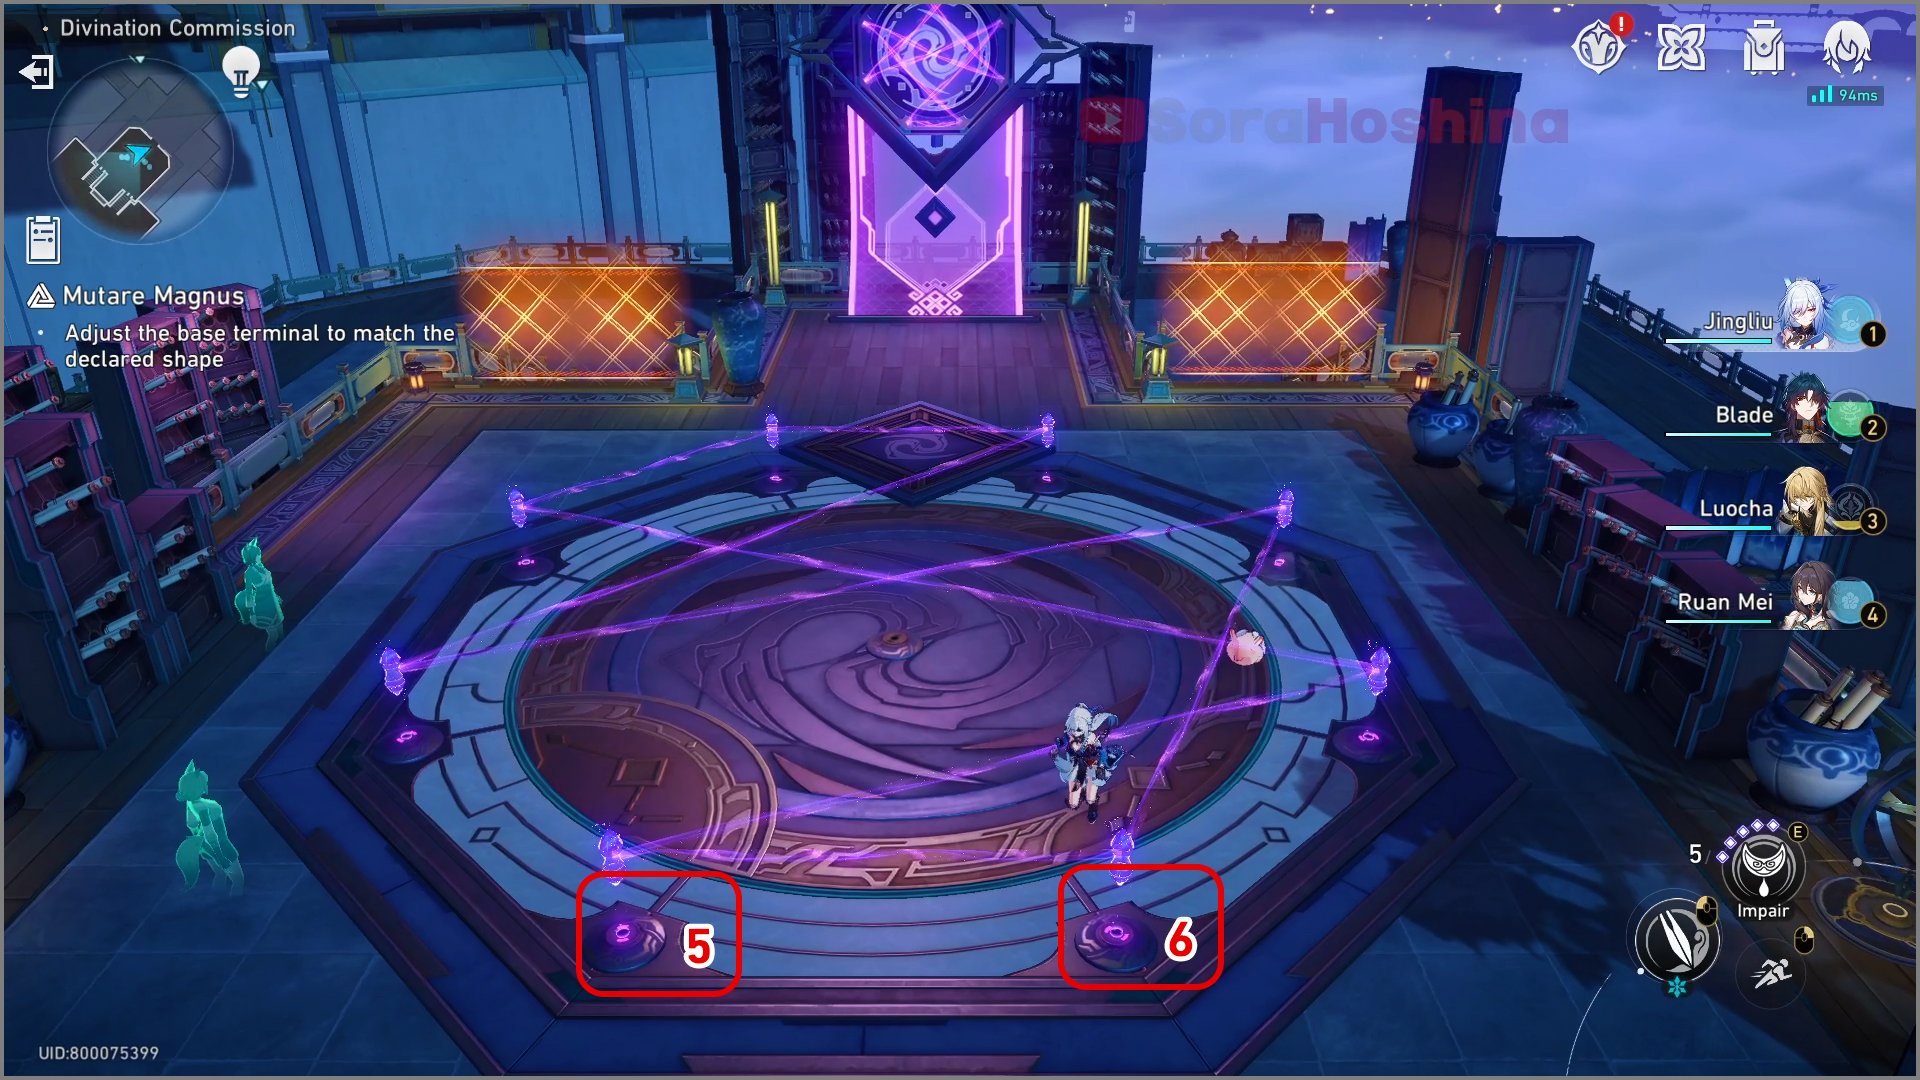
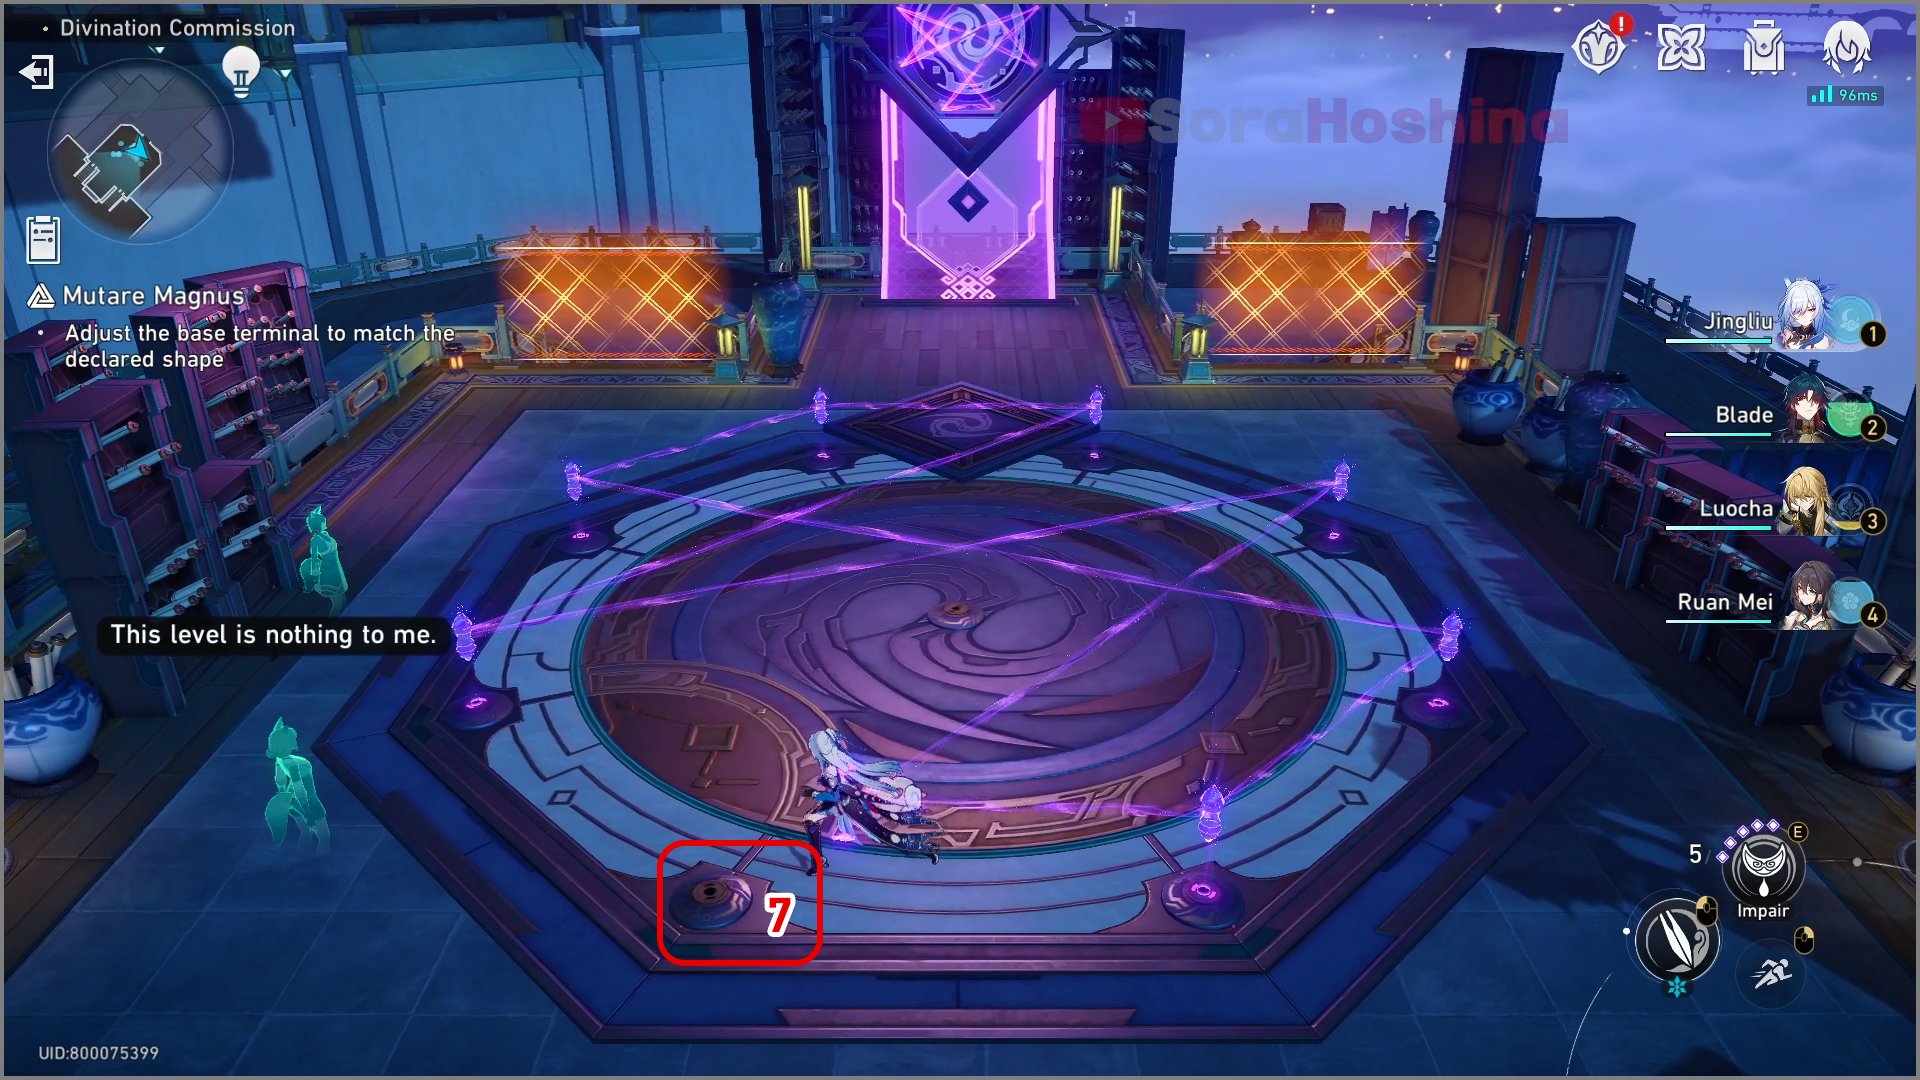
Easy Mode III
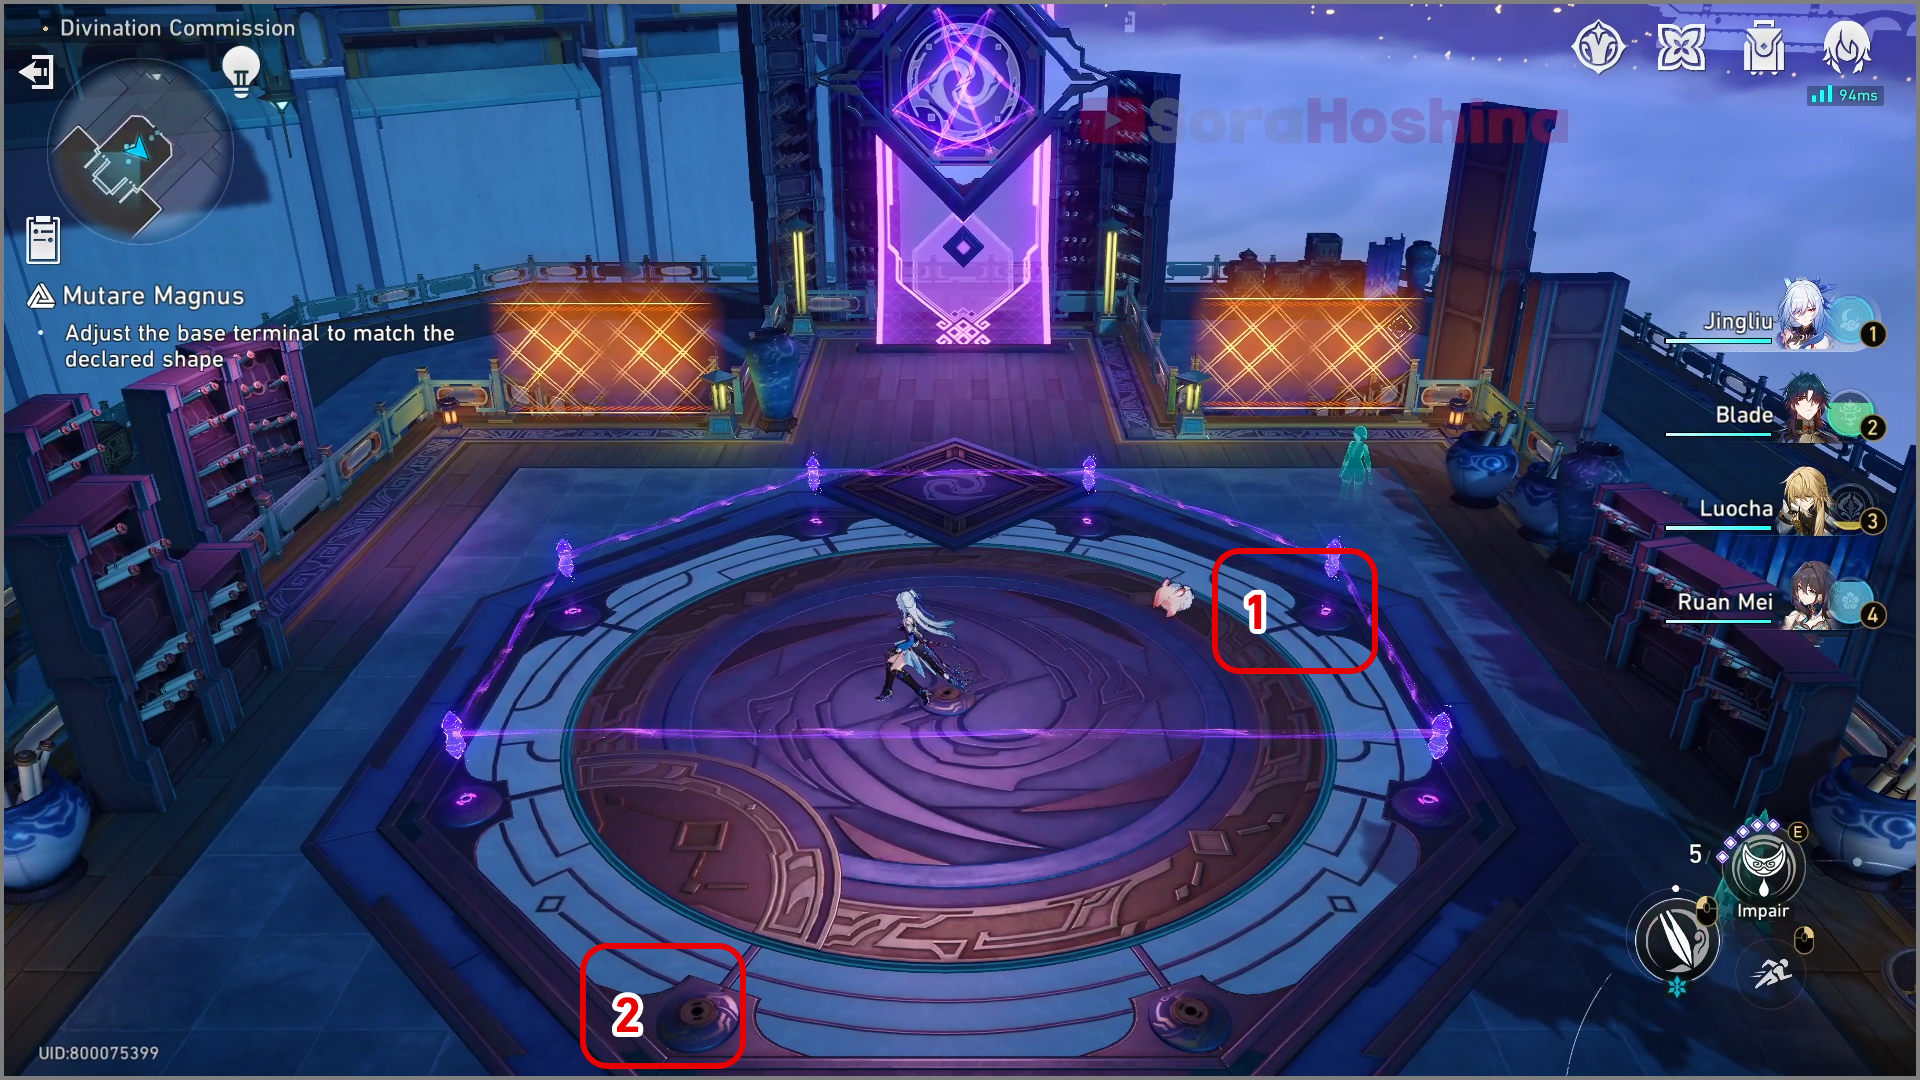
Step 1: Place the No. 1 base terminal at the No. 2 position
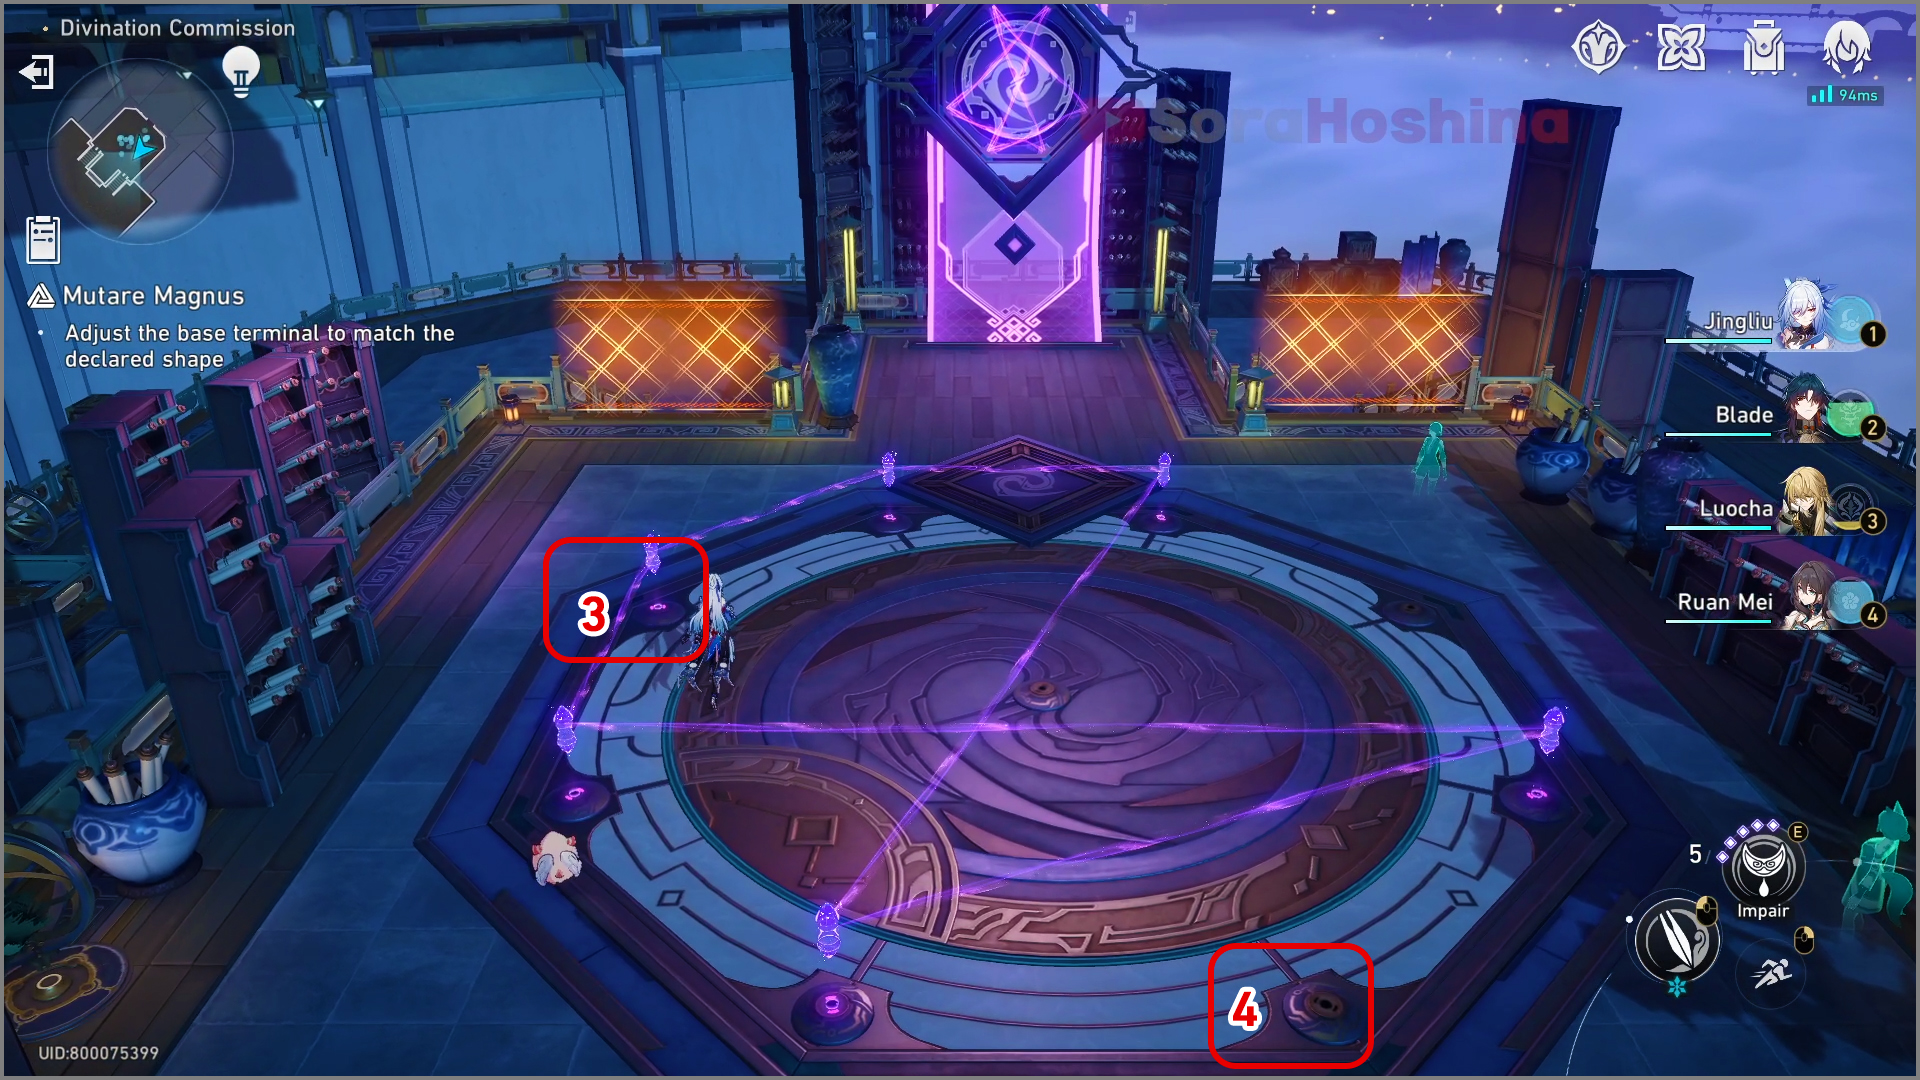
Step 2: Place the No. 3 base terminal in the No.4 position
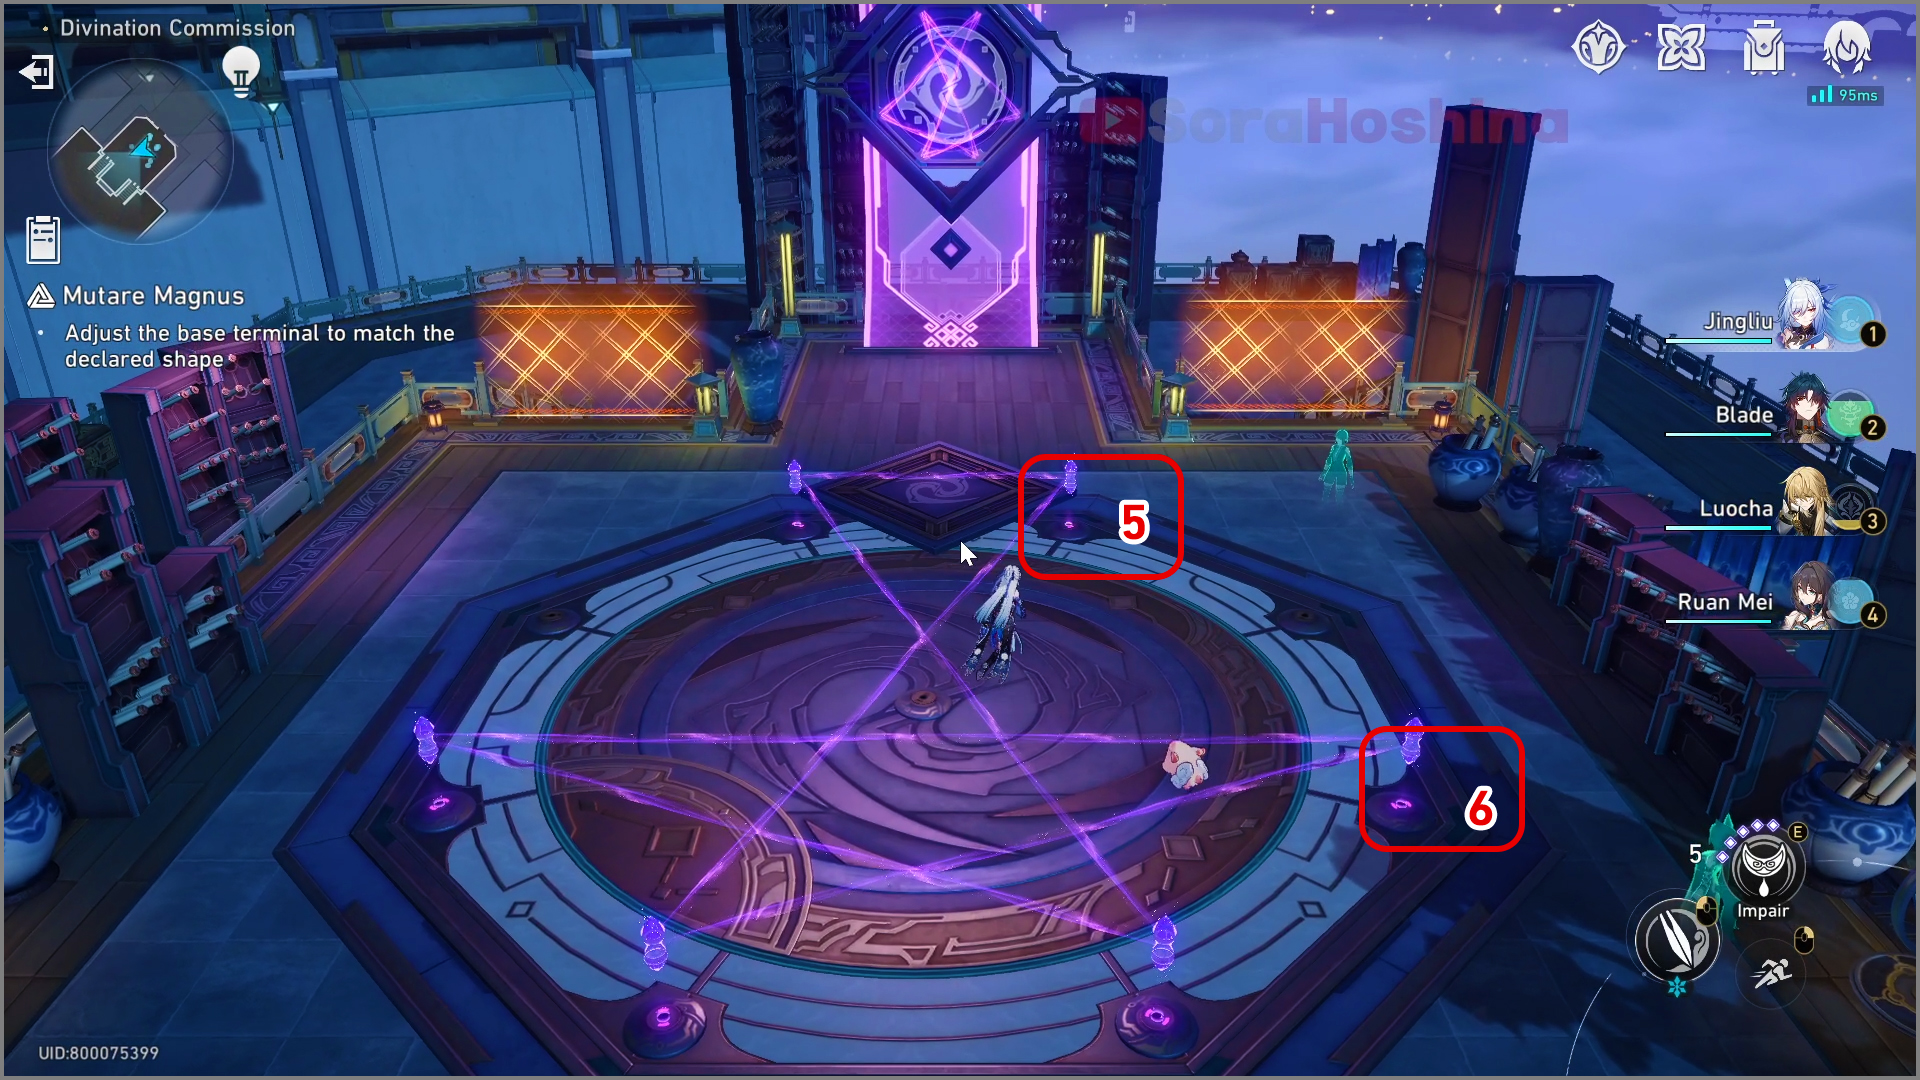
Step 3: Pick up the No. 5 base terminal and swap it with the No. 6 base terminal.
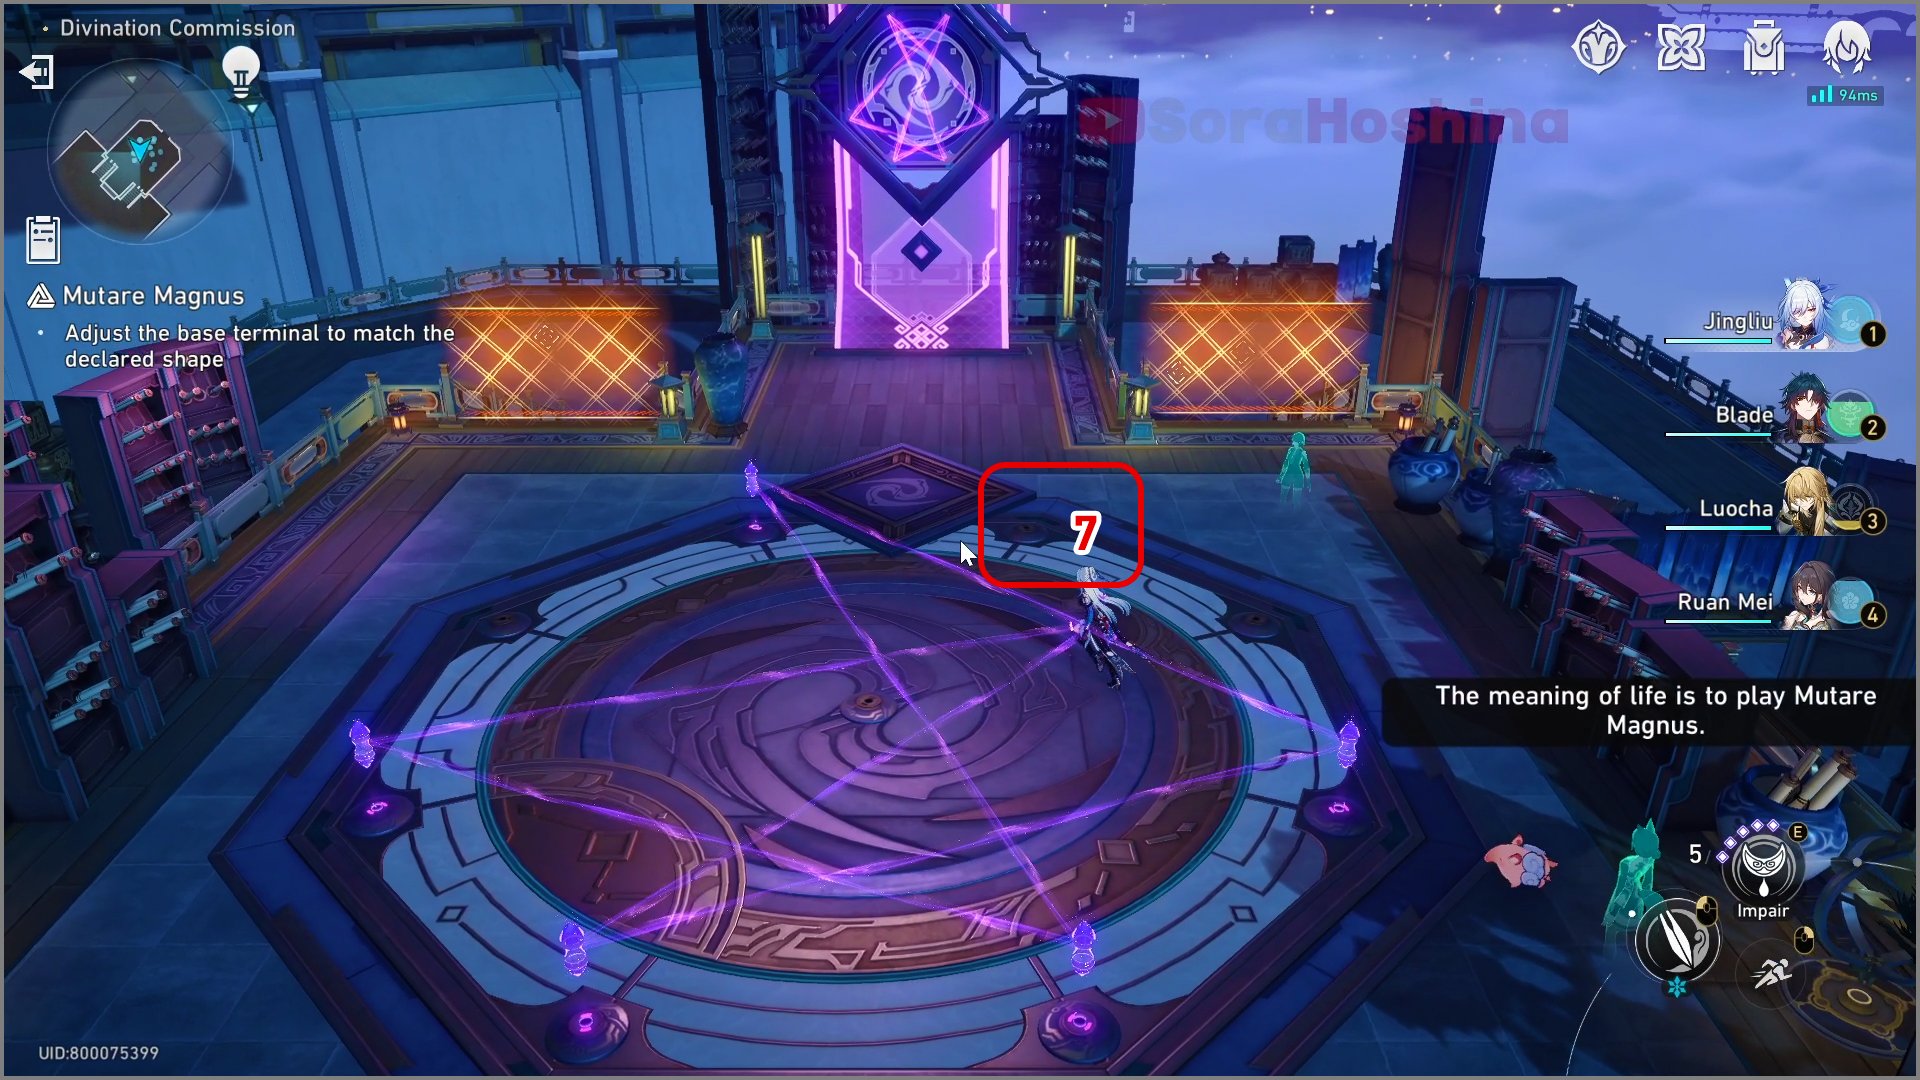
Step 4: Finally, place the base terminal currently in your hand at No. 7.
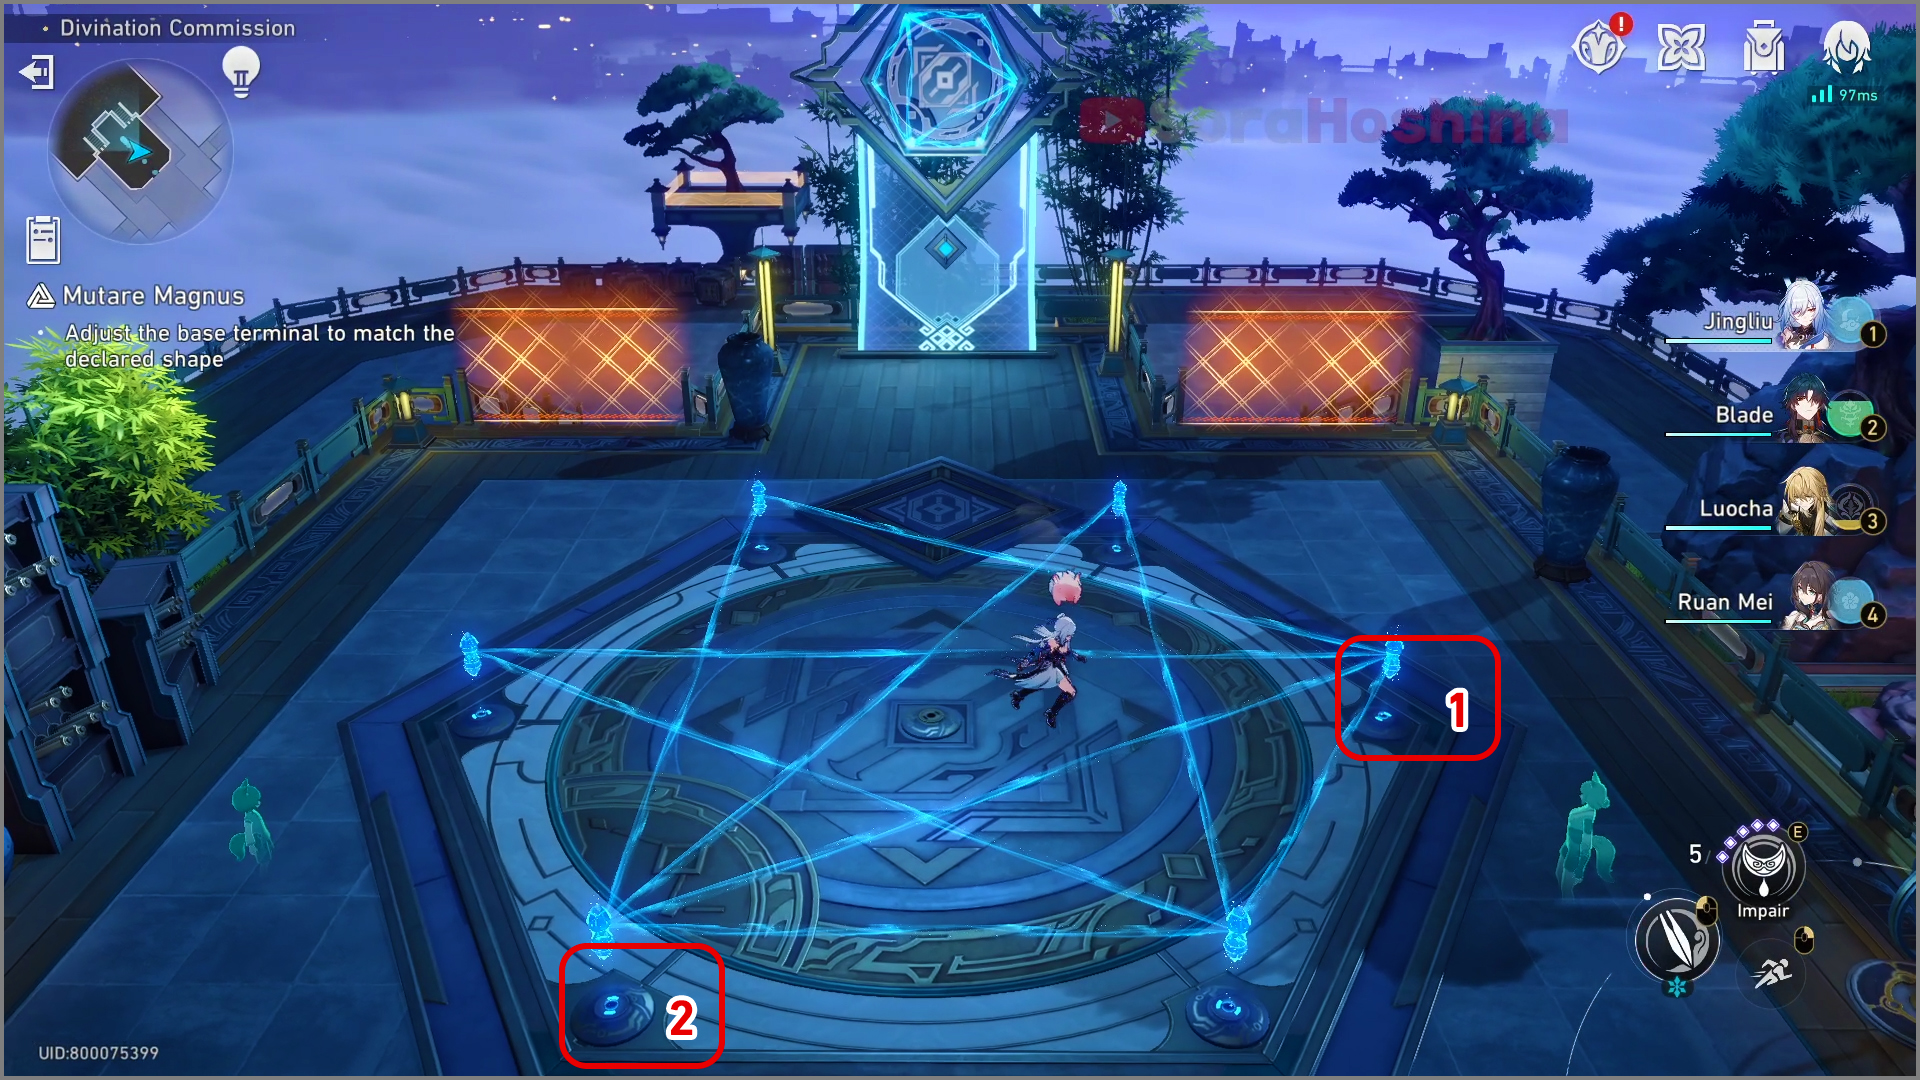
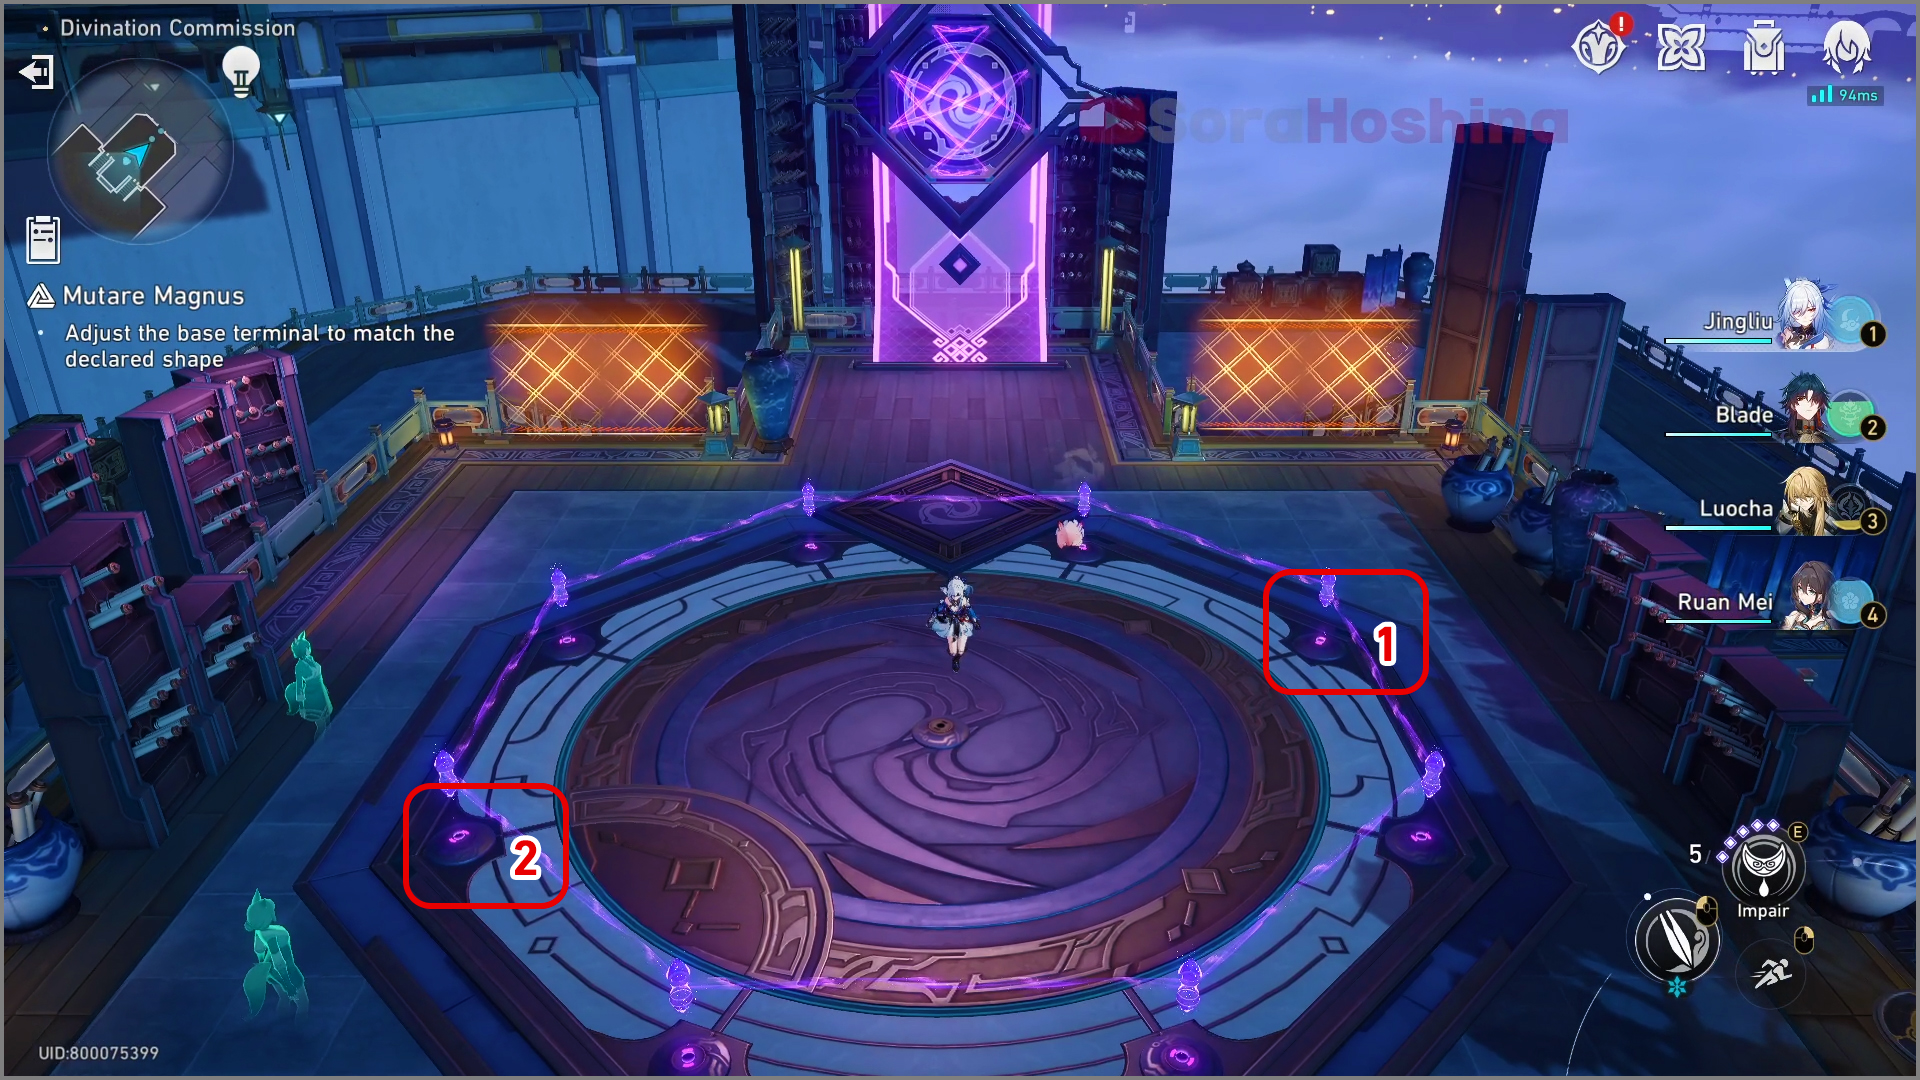
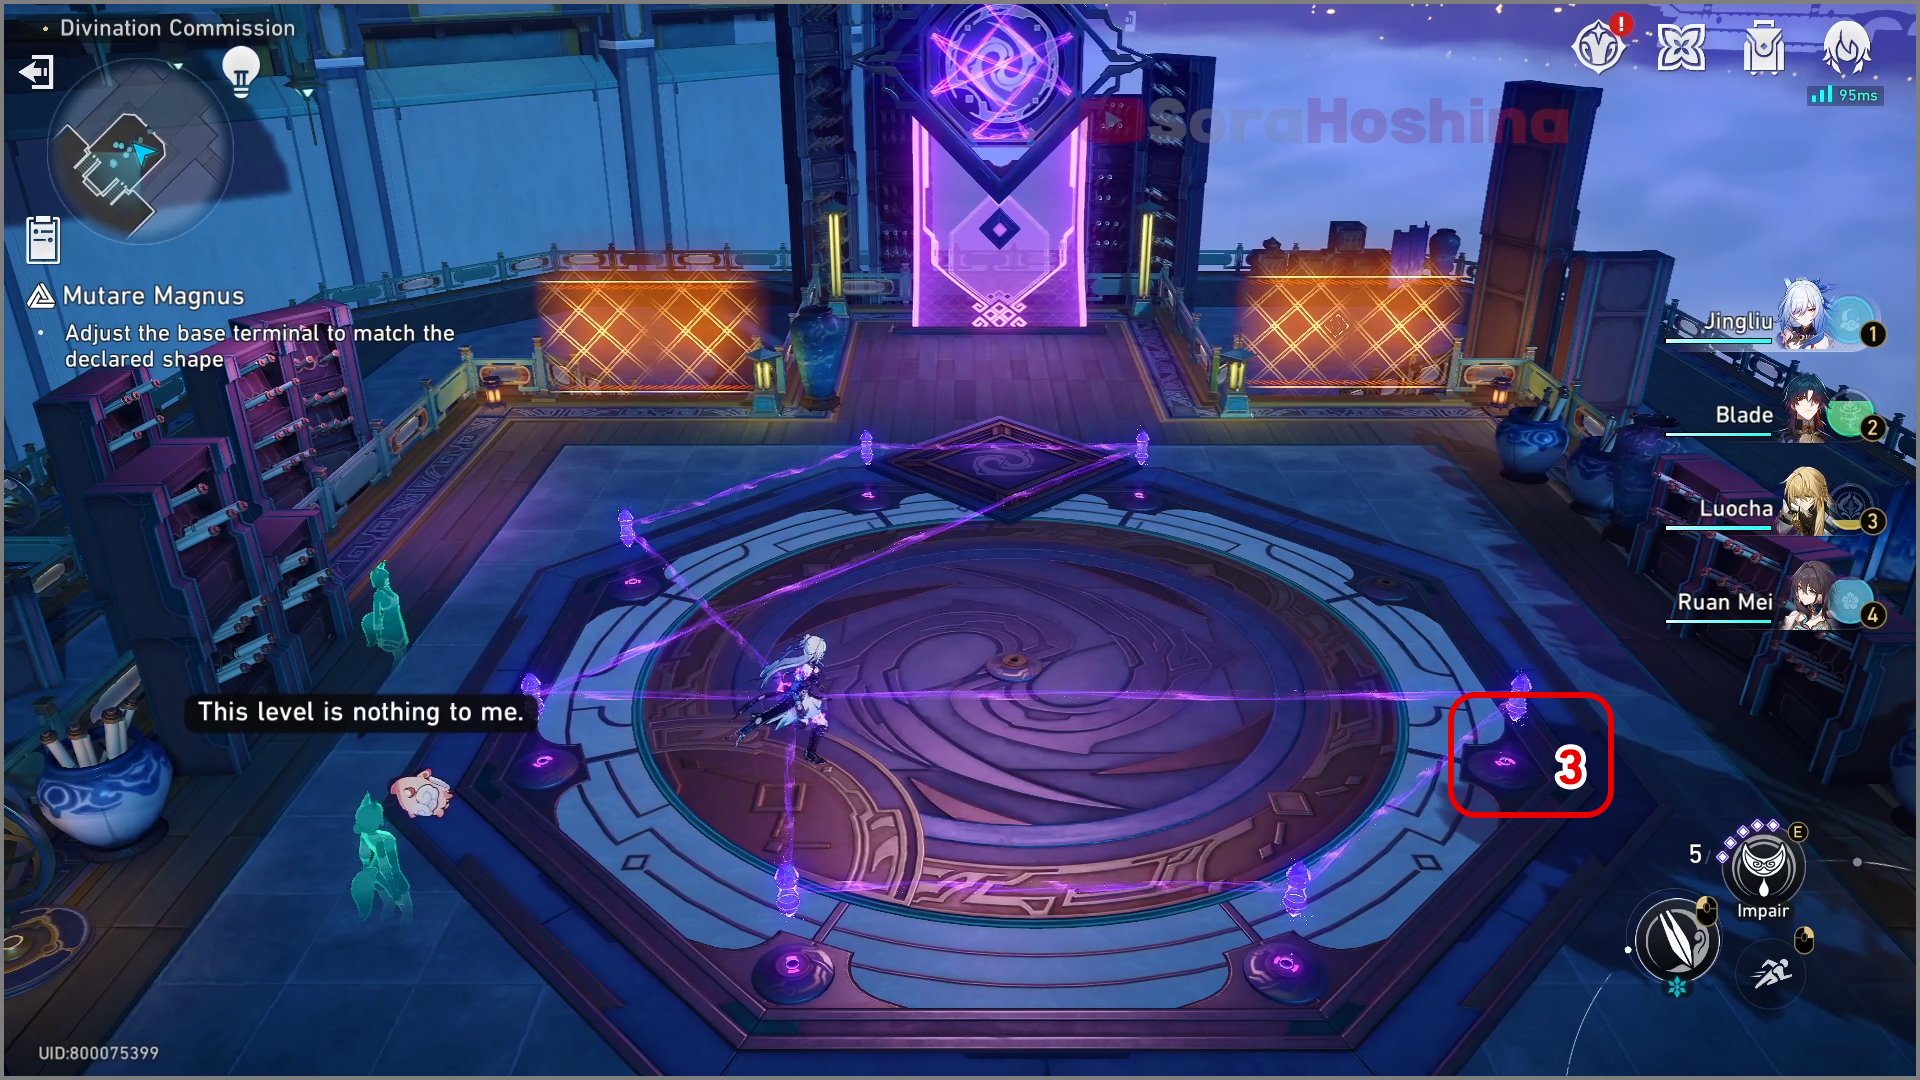
Hard Mode I
Step 1: Place the No. 1 base terminal at the No. 2 position
Step 2: Swap the No. 3 and No. 4 base terminal
Step 3: Finally, place the base terminal currently in your hand at No. 5
Hard Mode II
Step 1: Swap the No. 1 base terminal with the No. 2 base terminal
Step 2: Place the base terminal currently in your hand at No. 3

Step 3: Pick the 4th base terminal and swap it with the 5th base terminal
Step 4: Finally, place the base terminal currently in your hand at No. 6
Hard Mode III
Step 1: Swap the No. 1 base terminal with the No. 2 base terminal
Step 2: Exchange the base terminal in your hand with base terminal No. 3
Step 3: Place the base terminal currently in your hand at No. 4
Step 4: Pick the 5th base terminal and swap it to the 6th positions
Step 5: Place the base terminal currently in your hand at No. 7
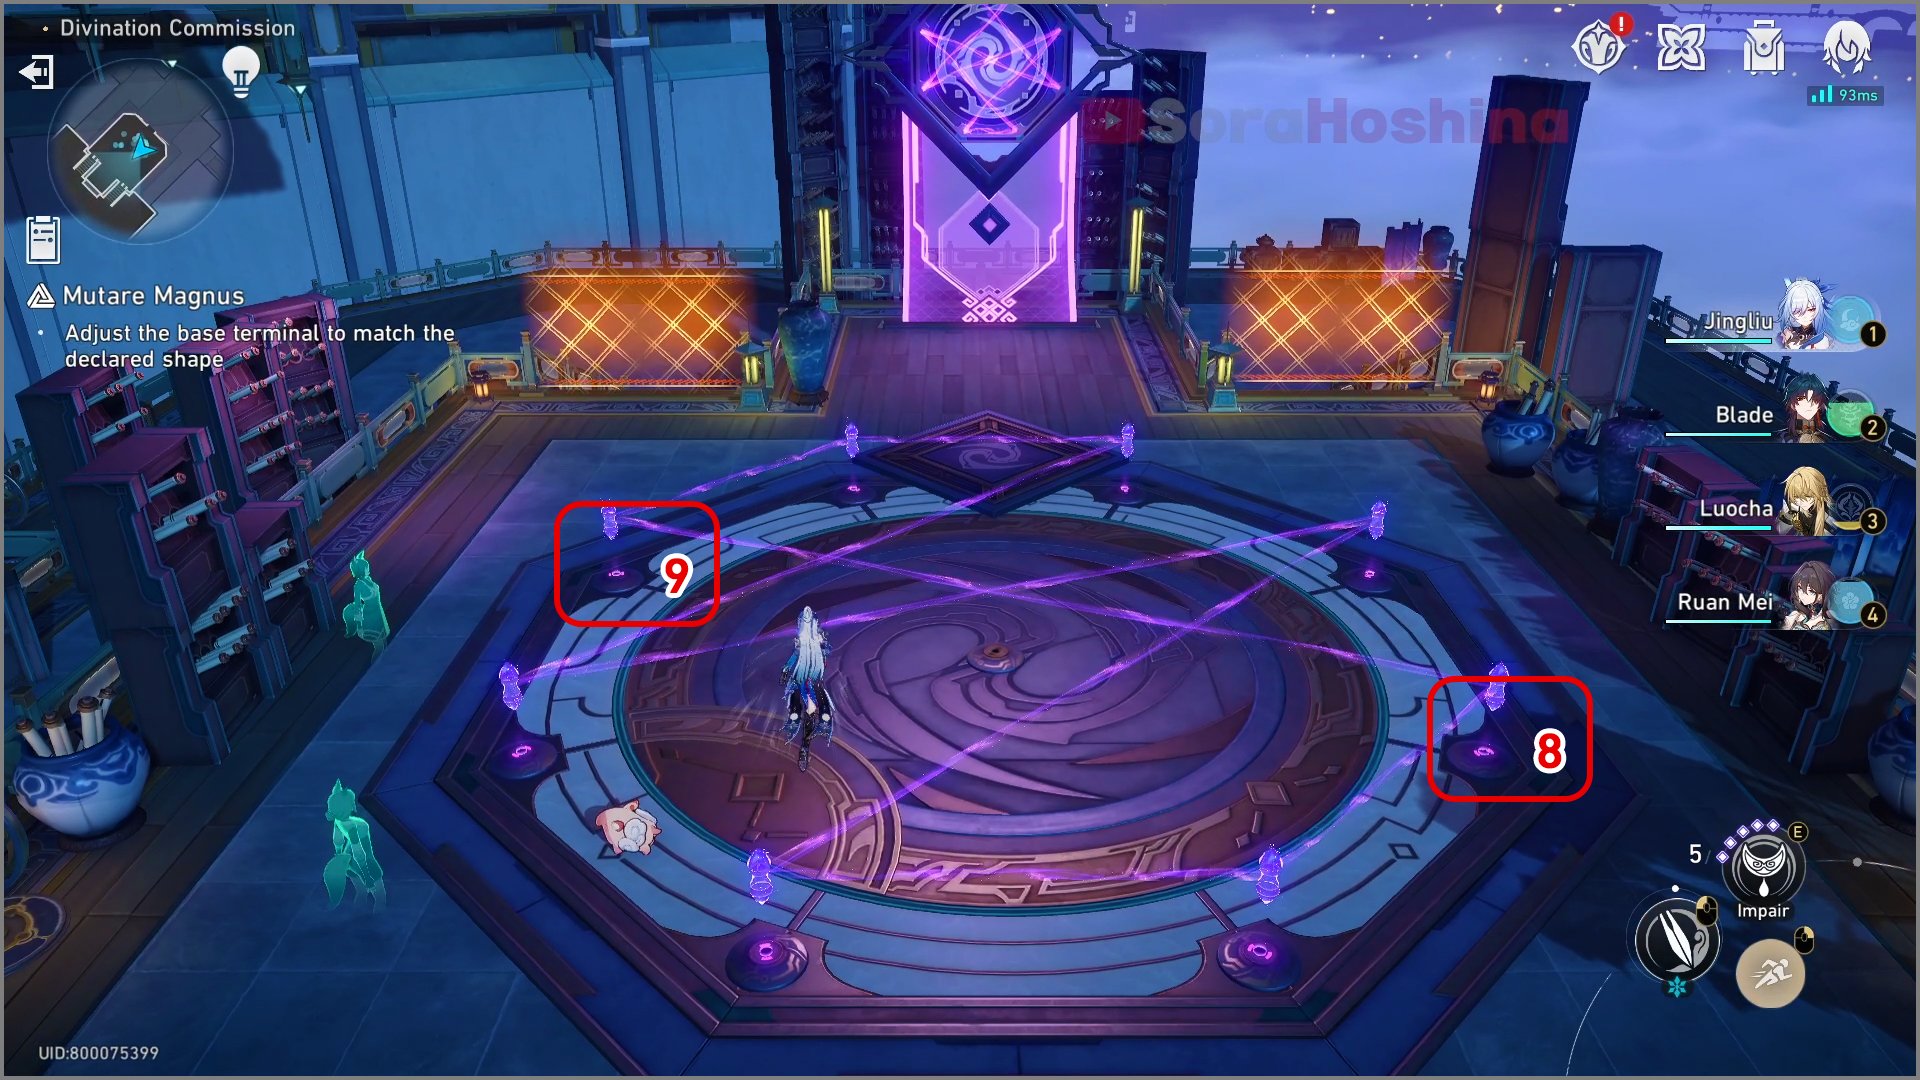
Step 6: Swap the base terminal on No. 8 to No. 9 and vice versa (No. 9 to No. 8)
Event Rewards
➥ Don’t forget to manually claim your rewards from the event page. By completing all the event challenges, you will get the following rewards:

■ Regular Rewards


Sora
Articles: 366More Articles

How to Play Honkai: Star Rail on Mac

Honkai: Star Rail Version 3.0 Special Program Livestream Overview
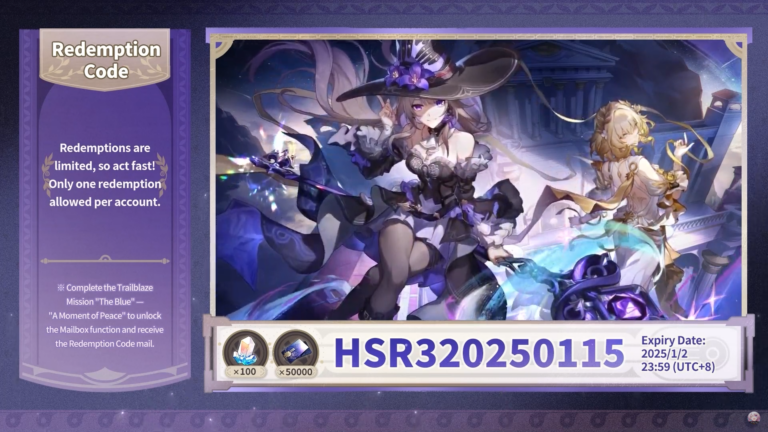
Honkai: Star Rail 3 New Redemption Codes from 3.0 Livestream

Honkai: Star Rail Redemption Codes – January 2025

Honkai: Star Rail Fugue Character Guide

Honkai: Star Rail Pure Fiction Technicality Entrapment Guide
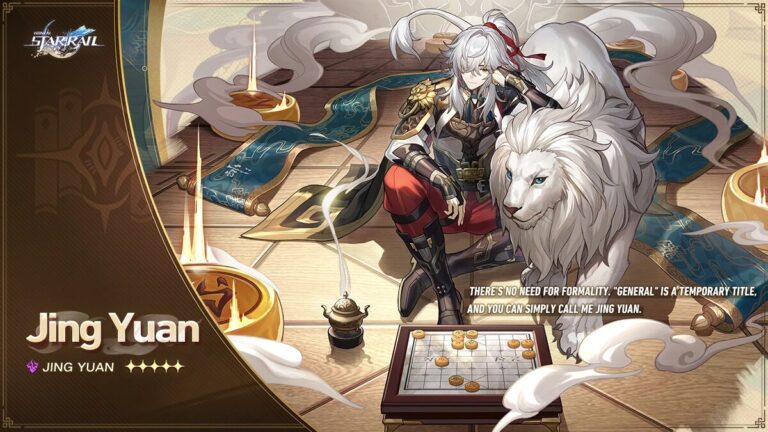
Honkai: Star Rail Jing Yuan Character Guide

Honkai: Star Rail Apocalyptic Shadow V2.7 Gusty Primate Guide
Honkai: Star Rail Which 5-Star Standard Character Should You Choose?

Honkai: Star Rail Sunday Character Guide

Honkai: Star Rail All 26 New Achievements in Version 2.7

Honkai: Star Rail Cosmic Home Decor Guide (Event Guide)

Honkai: Star Rail New Dialogue Inclinations (For Achievements) in Version 2.7
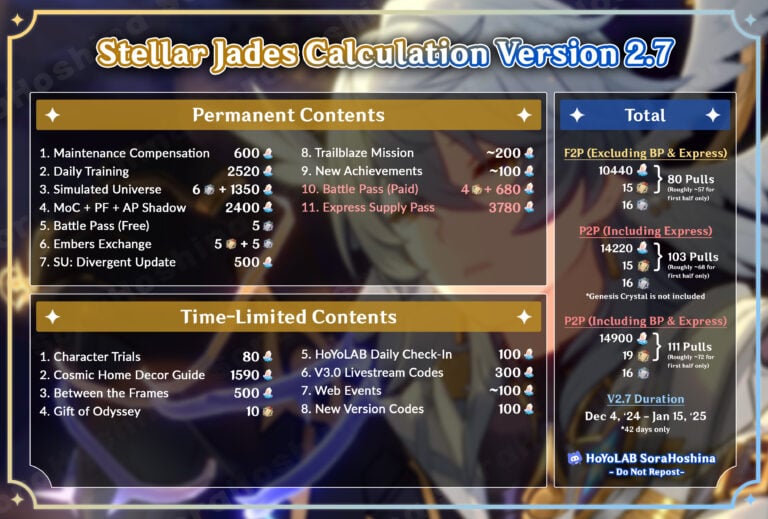
Honkai: Star Rail Stellar Jades Calculation in Version 2.7

Honkai: Star Rail Version 2.7 Special Program Livestream Overview
Honkai: Star Rail 3 New Redemption Codes from 2.7 Livestream
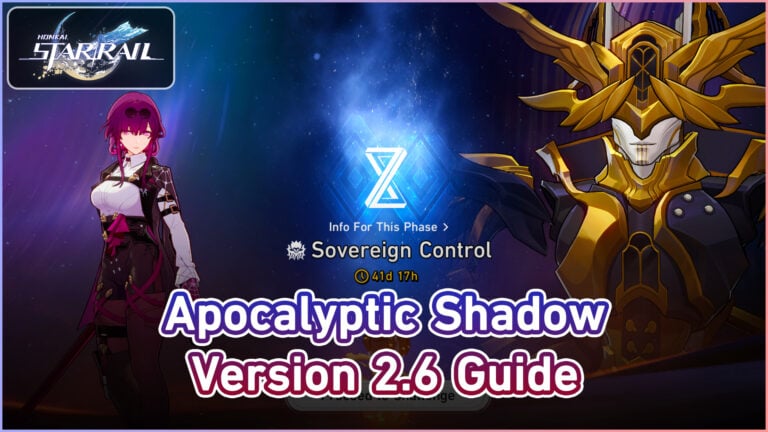
Honkai: Star Rail Apocalyptic Shadow V2.6 Sovereign Control Guide

Honkai: Star Rail Rappa Character Guide
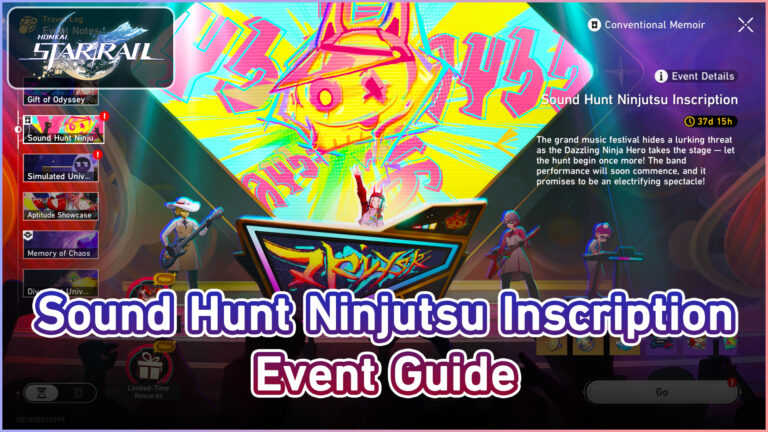
Honkai: Star Rail Sound Hunt Ninjutsu Inscription Event Guide