Table of Contents
Memory Turbulence

At the start of every wave of Cycle, summon 1 Trotter onto the field. The Trotter will be immediately defeated when it is Weakness Broken.
After the Trotter is defeated, Advance the attacker's Action Forward by 100%, then apply Memory Imprint to all allies. Every stack of Memory Imprint then apply Memory Imprint to all allies. Every stack of Memory Imprint increases the target's ATK by 15% and Break Effect by 30%, up to a max of 5 stack(s).
Enemies Lineup
First Half

Second Half

Team Recommendations
First Half
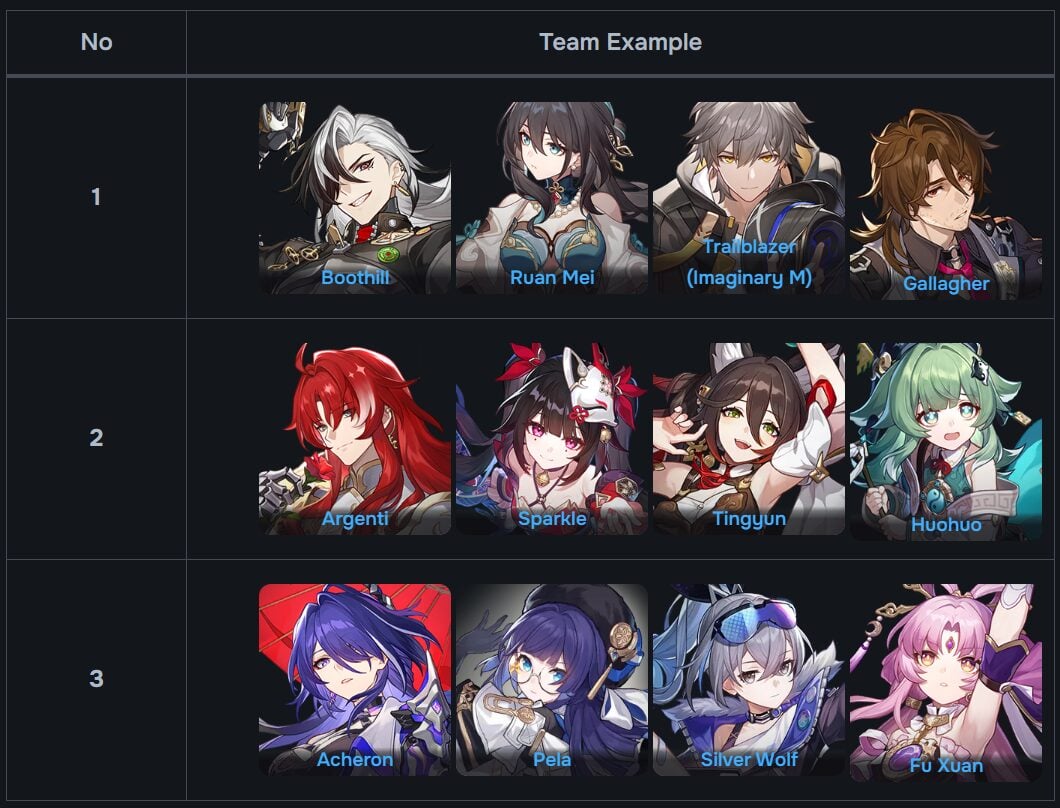
Recommended Elements: Lightning & Physical
Both single-target and AoE DPS are viable here, as long as they match the weakness of the enemy. Bringing a shielder or healer that can deal with CC is better here because of the Aurumaton Spectral Envoy skill to inflict Strong Reverberation on your characters.
Second Half
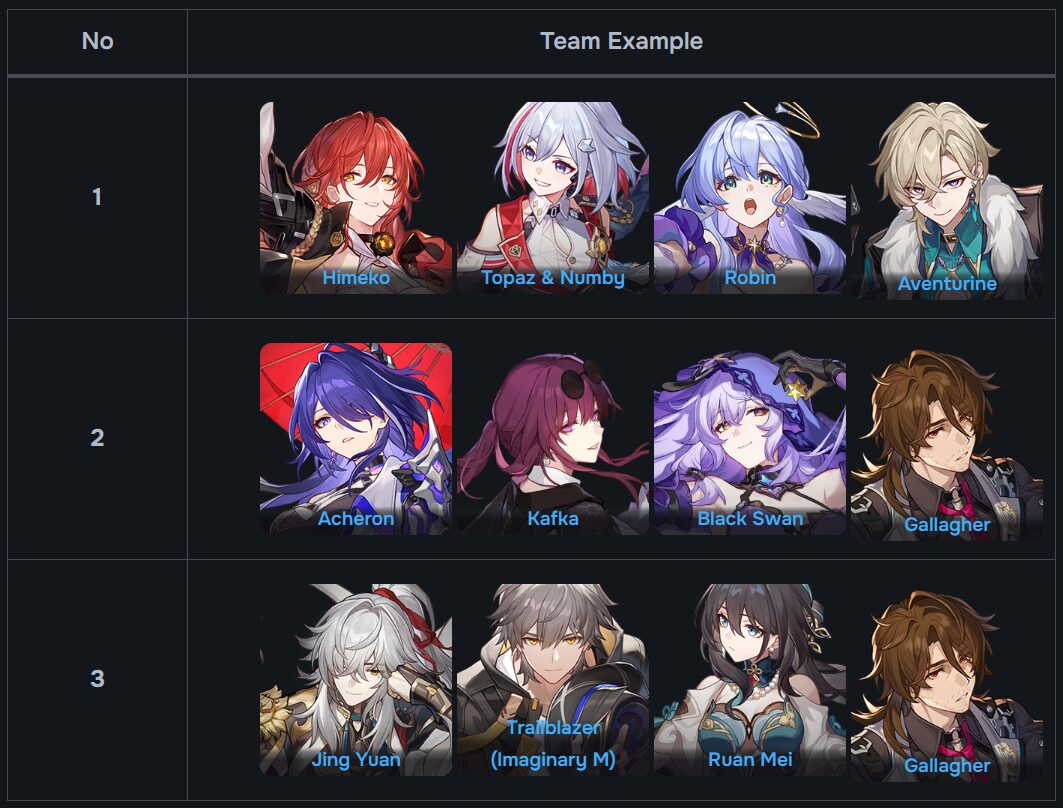
Recommended Elements: Lightning & Fire
Break damage is definitely favored here because you need to Weakness Break enemies to prolong the elite enemies' ultimate from happening. In addition, I recommend bringing AoE characters instead of single target DPS because, in that way, you can deplete many Toughness Bars of the elite enemies at once.
Observation
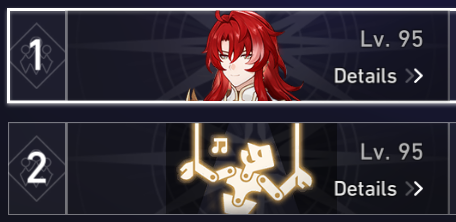
First Half: Argenti
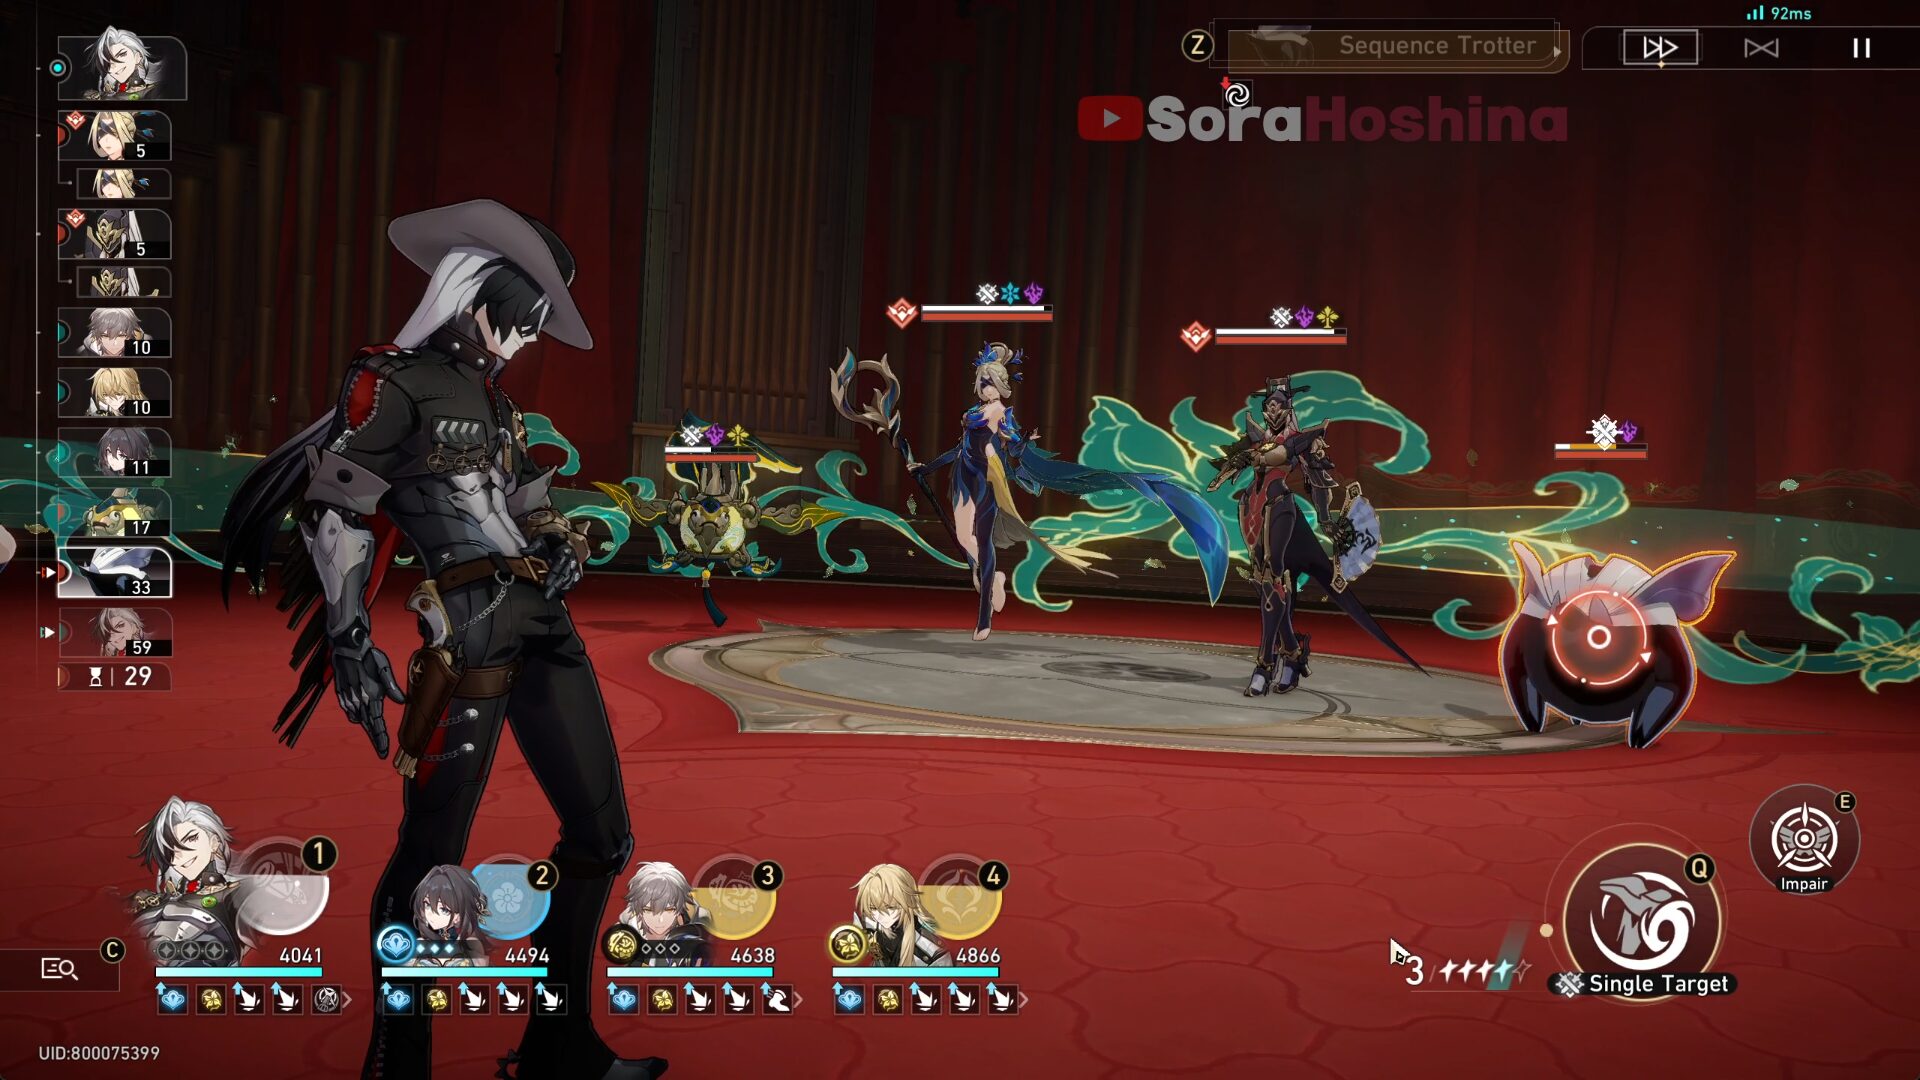
- In the first wave, there are many enemies. Hover over the Trotter and check if your DPS can Weakness Break in one move. If you can, definitely go for the Trotter first because once you Weakness Break it, your DPS will have their turn again immediately, while also getting bonus ATK and Break Effect.
- After the Trotter, it's the Dragonfish time because it deals AoE DMG. Pairing it with the Aurumaton Spectral Envoy is bad.
- Aurumaton Spectral Envoy can inflict Reverberation debuff on any of your characters. After targets afflicted with Reverberation receive an attack, they enter the Strong Reverberation state and then have the Reverberation state dispelled. Targets with Strong Reverberation cannot take action. You do not want the Dragonfish to attack your allies that have the Reverberation debuff.
- After all the mobs are gone, you can focus on either of the elite enemies. Since both can inflict debuff on your team, it's best to have a shielder or healer who can handle Crowd Control debuff.
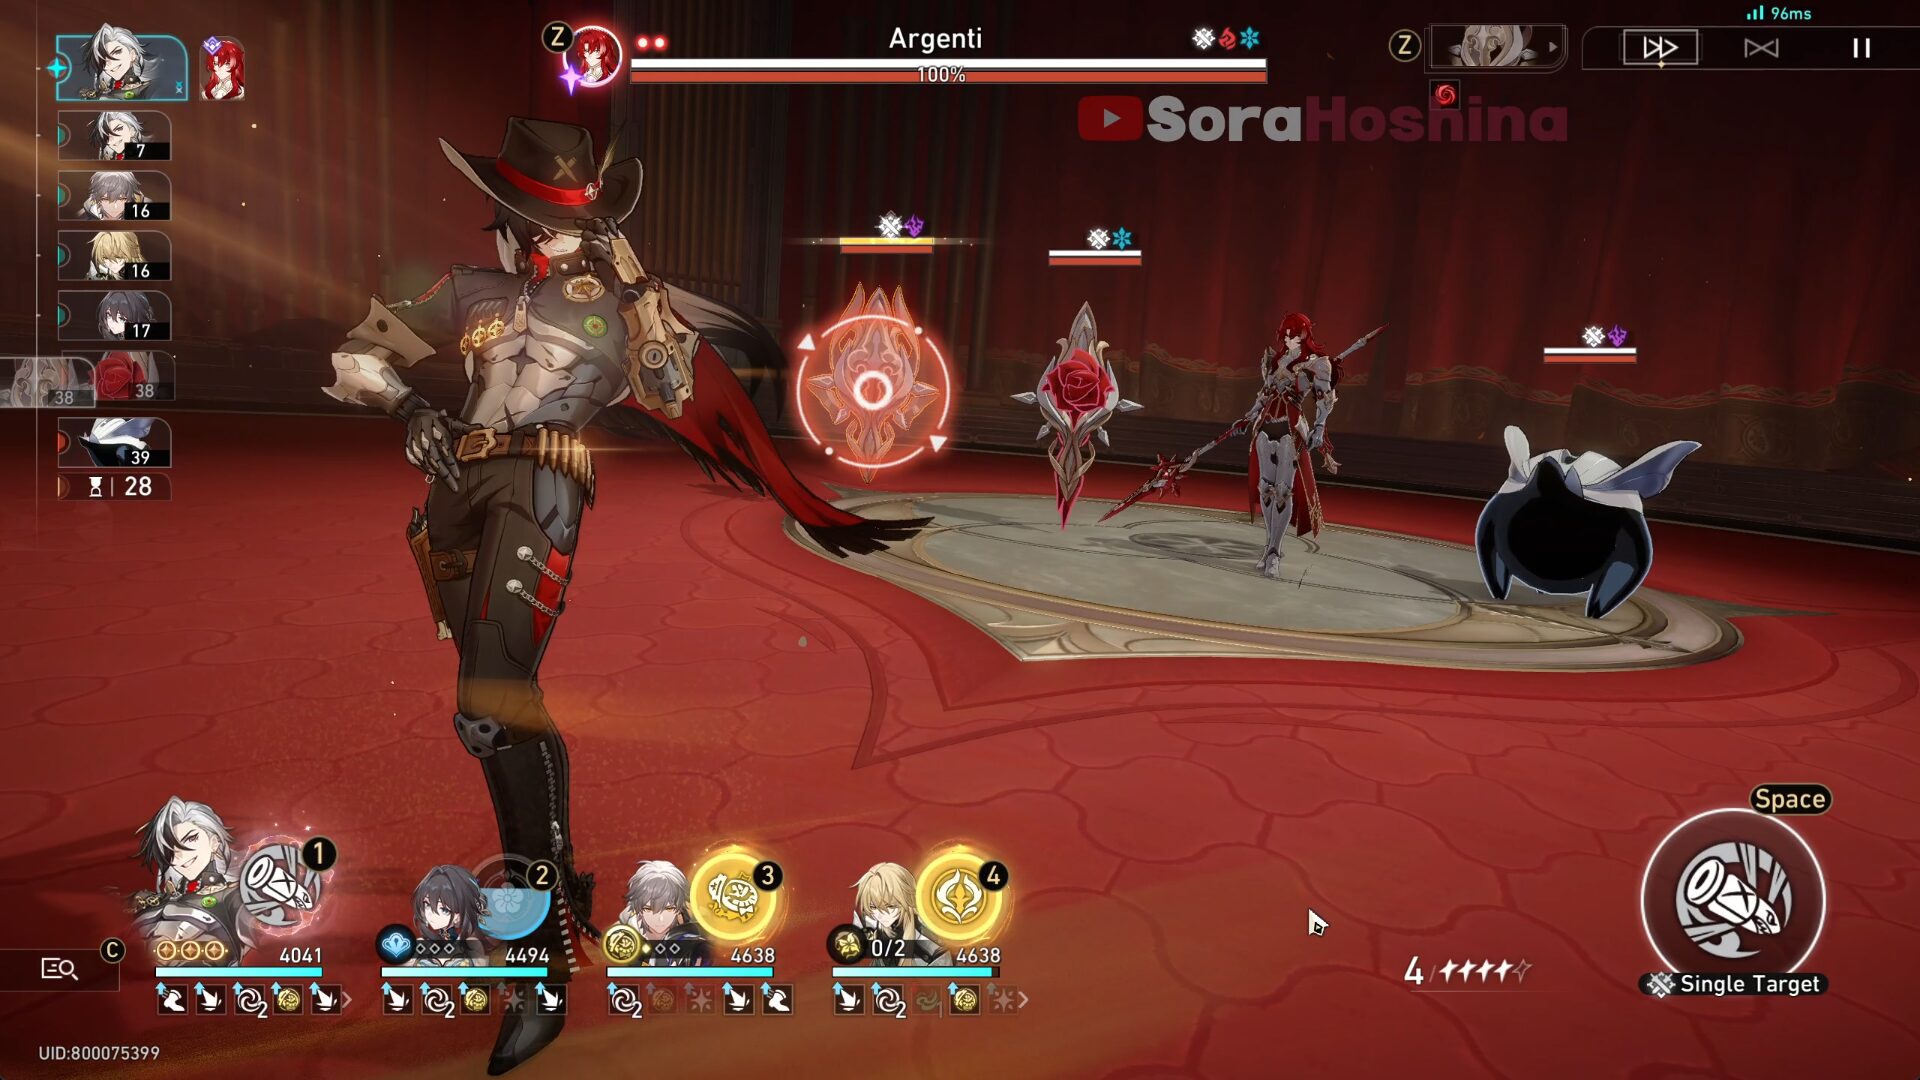
- In the second wave, we have Argenti alone. But fret not, he's not going to be alone much longer because he can summon statues that can either be an attacker, shielder, or buffer for himself. In his first phase, he will only summon 2 statues. Personally, I would go to destroy the shielder statue first because often when it's time for my single-target DPS turn (Boothill), the shielder will go right before him and cast a shield on Argenti, making him invisible from my DPS's attacks.
- In the second wave, Argenti's ability are the exact same but this time, he will summon 3 statues (4 statues if you don't have Trotter on the field). Same as before, I would recommend destroying the shielder first. After that, it's up to you whether you want to focus on other statues or Argenti alone (in case you bring single-target DPS like Boothill who can two-shot Argenti if he's Weakness Break).
- Just a lil' reminder that every time you destroy the statues, you will get the respective buff. For example, if you destroy the shielder statue, one of your characters will get a shield, if you destroy the buffer, your character will get a buff, and if you destroy the attacker, it will attack all enemies.
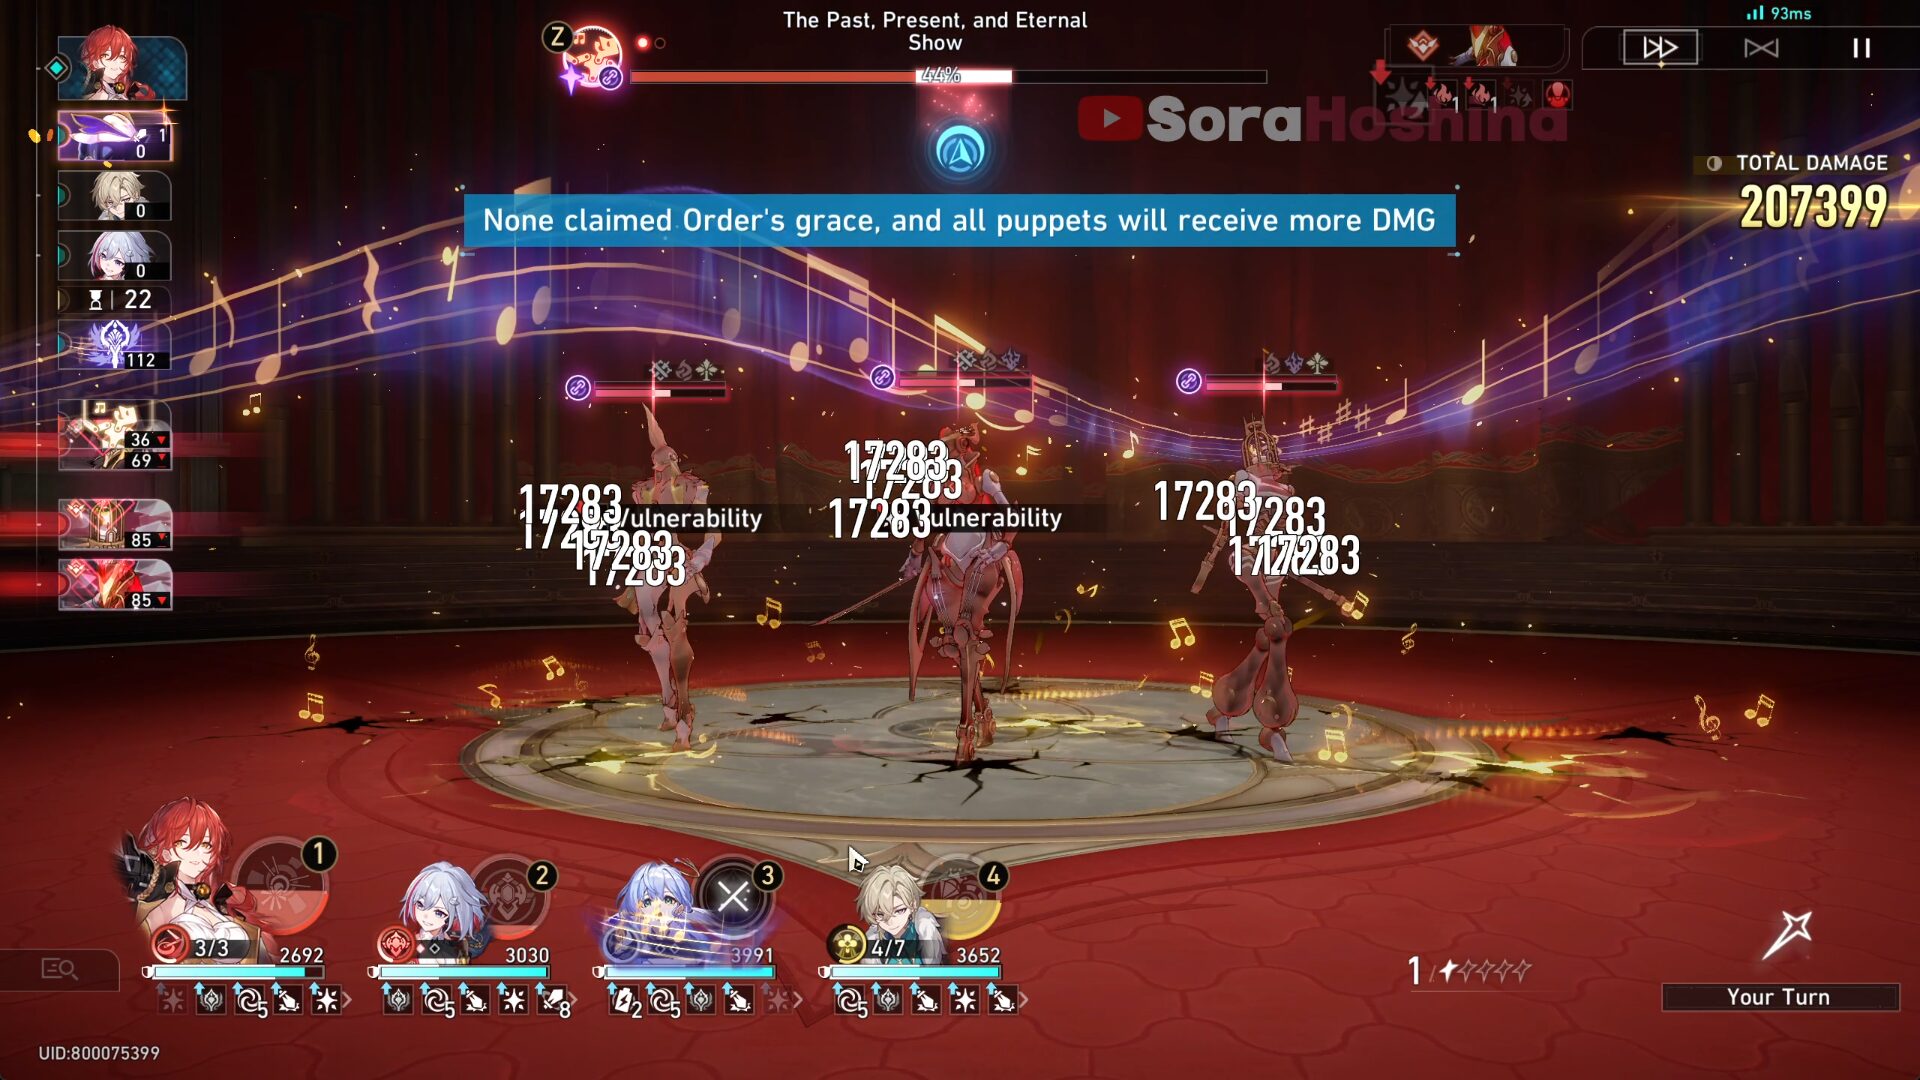
Second Half: The Past, Present, and Eternal Show

- In the first wave, there are 2 elite enemies and 2 midgets. I recommend focusing on the "Tomorrow in Harmonious Chords" because she has the ability to inflict Alien Dream on your team. If you bring a character that can deal AoE damage, you can just ignore the Heartbreaker Meme and focus on the elite enemies. But if not, you might want to defeat it first since it has DMG reduction as long as it's not in the Weakness Break state.
- Alien Dream: Cannot take action within a certain number of turns and regenerates minor amounts of HP at the start of every turn. When this unit is attacked, greatly increase the DMG it takes. Getting attacked dispels the Alien Dream state.
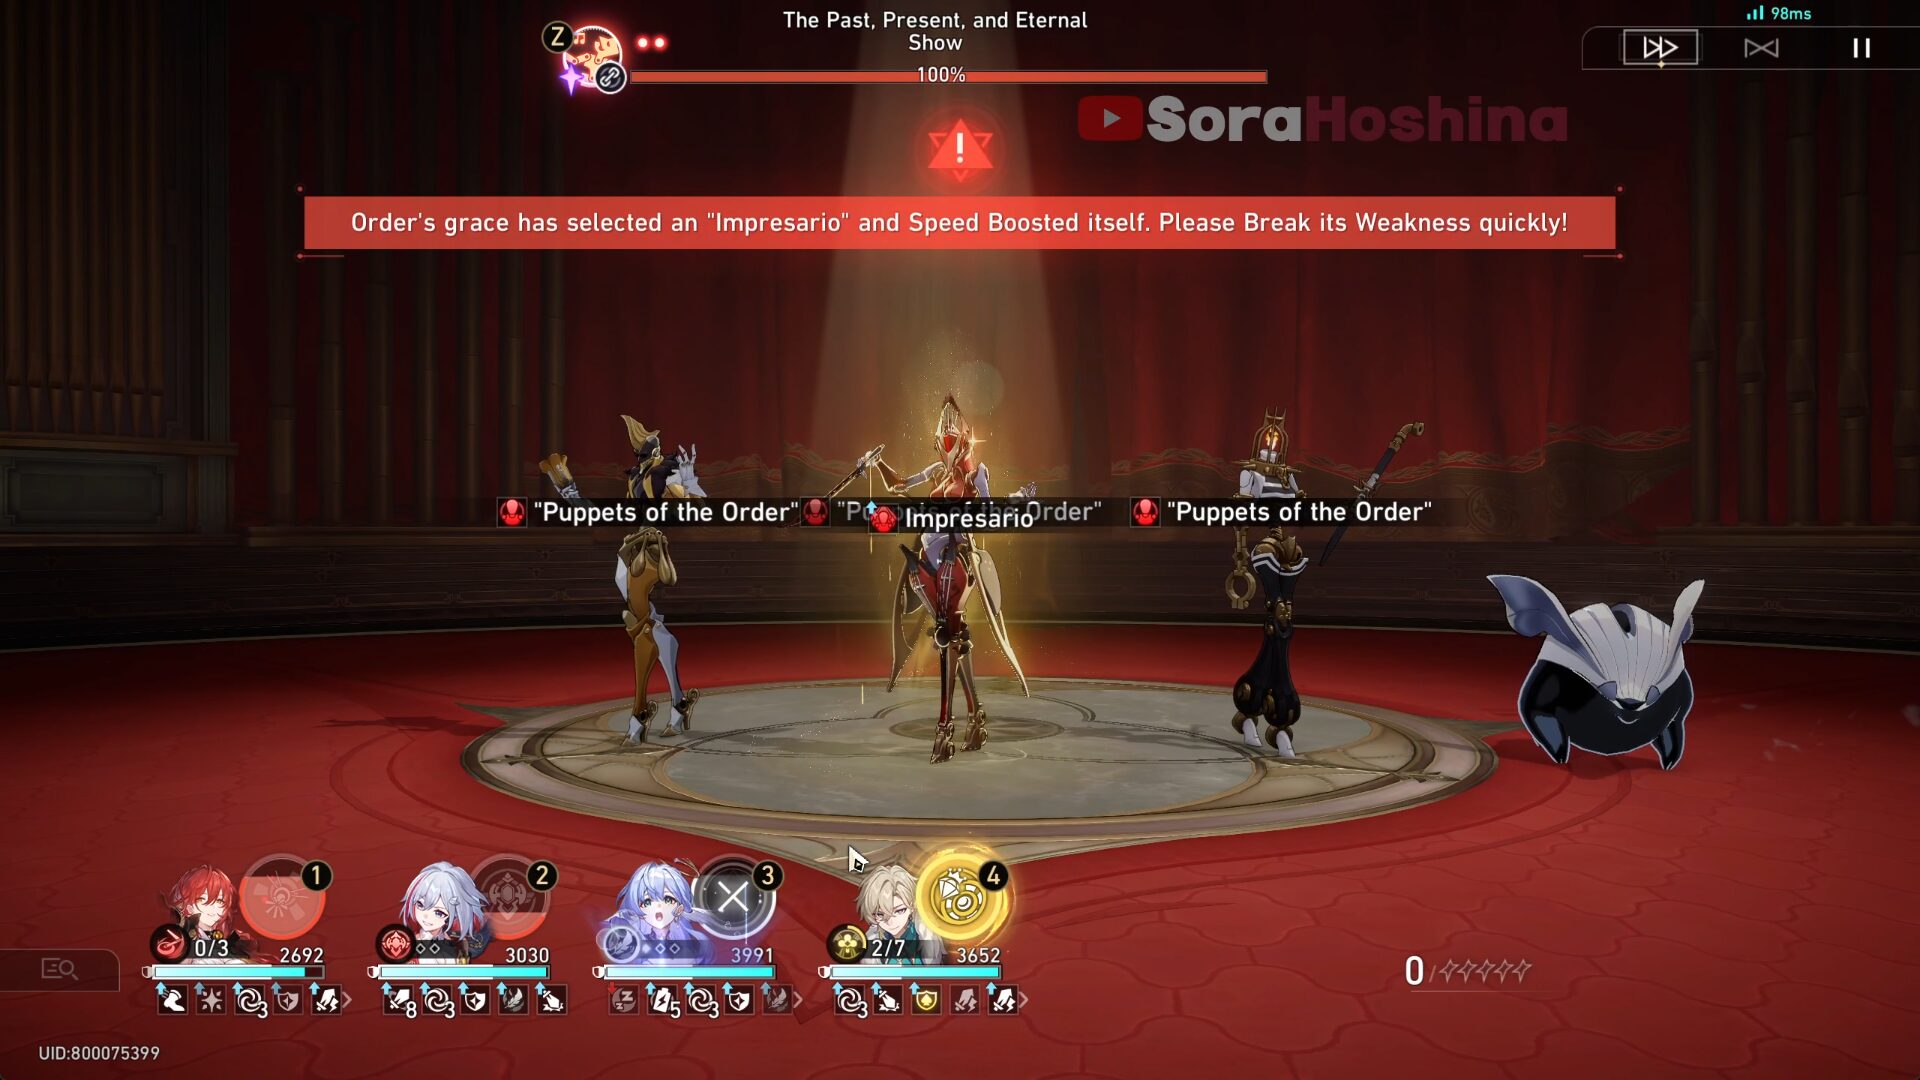
- In the second wave, there are 3 elite enemies controlled under 1 combined HP bar - The Past, Present, and Eternal Show. In the first phase, the big boss will grant Impresario to one of the elite enemies: giving them an extra action and increased SPD. You can remove this buff by Weakness Breaking said elite enemies. But the buff will re-select another elite enemy.
- If all the elite enemies are Weakness Broken, the big boss - The Past, Present, and Eternal Show - will receive DMG and also delay all elite enemies' turn. This is why AoE character has a great opportunity here cause they can deplete all enemies' Toughness Bar (Himeko is the best because all enemies have Fire Weakness.).
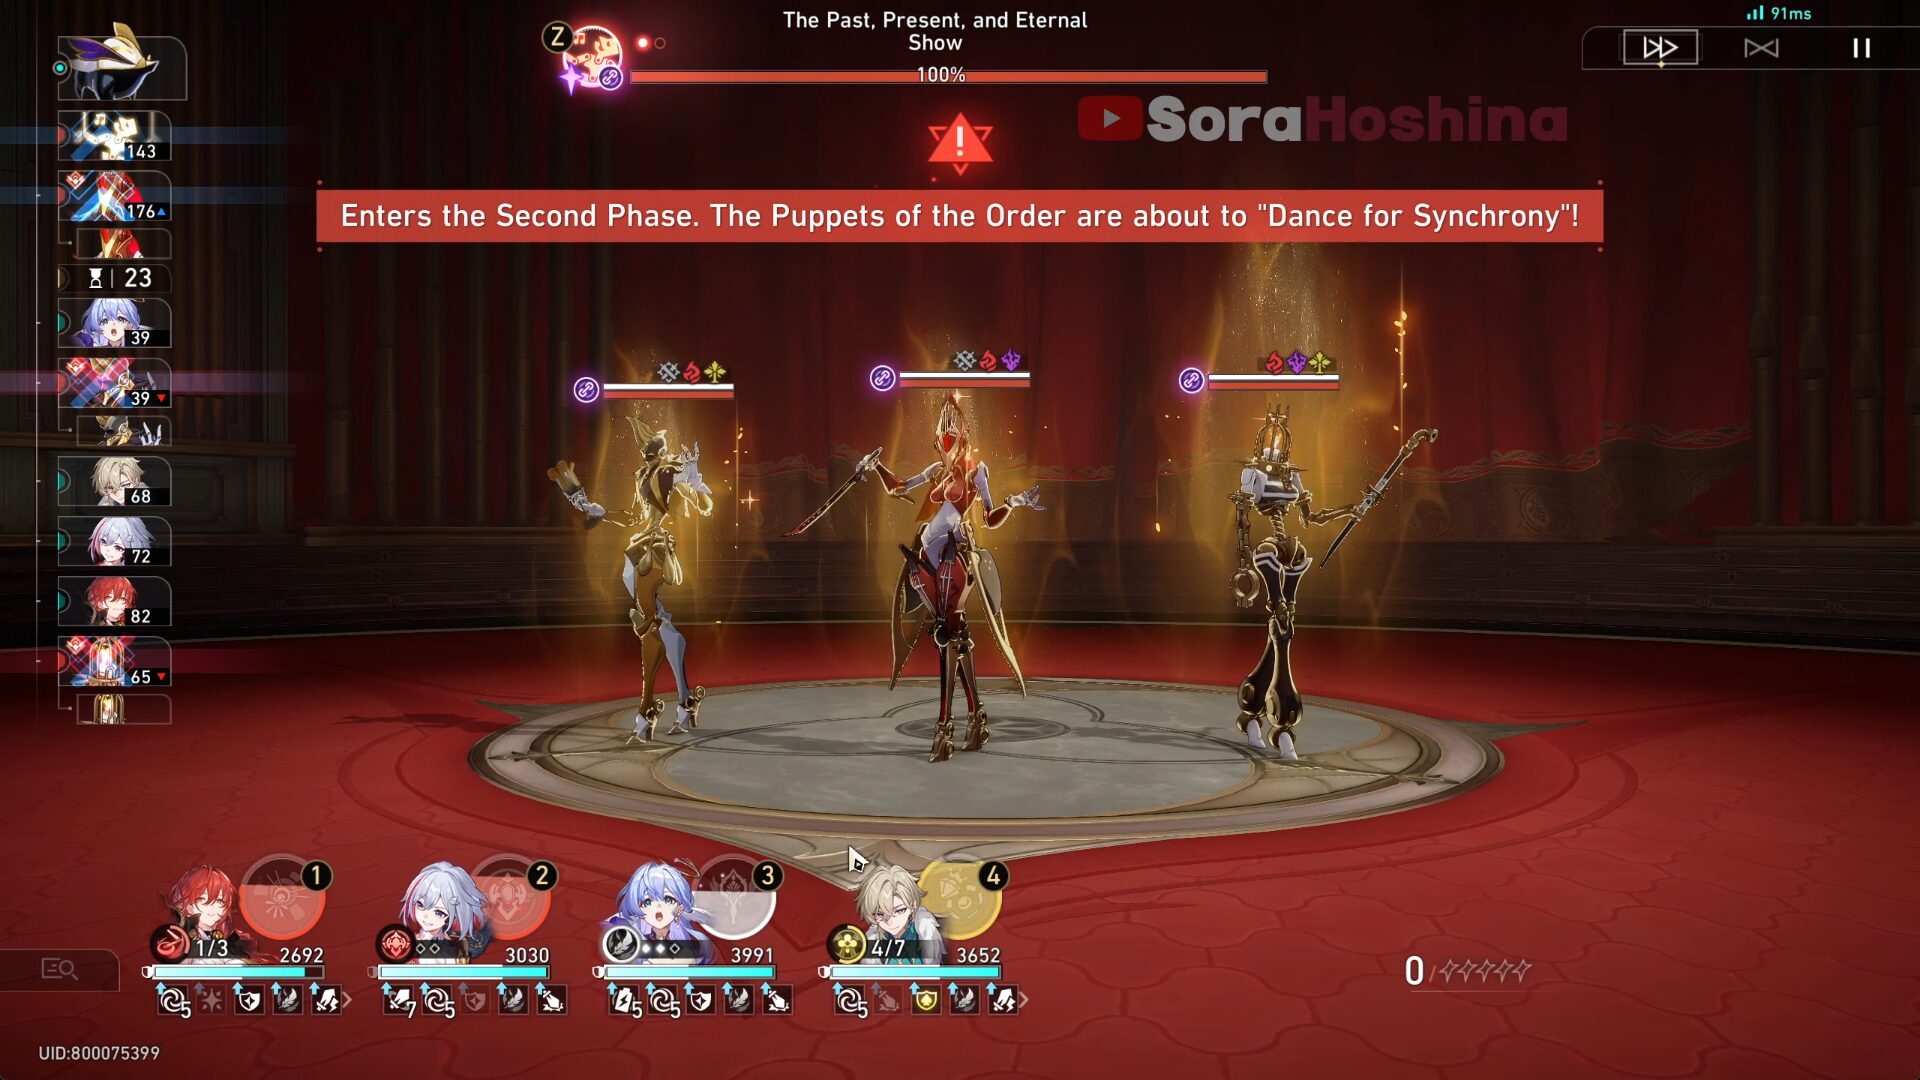
- In the second phase, the big boss will deal its first ultimate attack - Dance for Synchrony - inflicting debuff and Physical DMG. After that, the big boss will have their own turn (called Commandment) on the Action Order in the left corner.
Every time the Commandment acts, it will dispel all CC debuffs and Weakness Broken states on all elite enemies and unleash its ultimate attack once again.
You can delay Commandment's SPD by Weakness Breaking any of the elite enemies.
- All elite enemies will have Impresario so you can focus on whichever you want. Personally, I would go for "Tomorrow in Harmonius Chords" because her Alien Dream debuff is a hassle to deal with.
- Once all enemies are Weakness Broken, you can also focus on any elite enemy you want because all of them share the same HP bar. If one puppet receives damage, the overall HP of the big boss will also be depleted.

Sora
Articles: 368More Articles

Honkai: Star Rail Version 3.0 Special Program Livestream Overview
Honkai: Star Rail 3 New Redemption Codes from 3.0 Livestream

Honkai: Star Rail Redemption Codes – January 2025
Honkai: Star Rail Fugue Character Guide

Honkai: Star Rail Pure Fiction Technicality Entrapment Guide
Honkai: Star Rail Jing Yuan Character Guide

Honkai: Star Rail Apocalyptic Shadow V2.7 Gusty Primate Guide
Honkai: Star Rail Which 5-Star Standard Character Should You Choose?
Honkai: Star Rail Sunday Character Guide
Honkai: Star Rail All 26 New Achievements in Version 2.7

Honkai: Star Rail Cosmic Home Decor Guide (Event Guide)
Honkai: Star Rail New Dialogue Inclinations (For Achievements) in Version 2.7
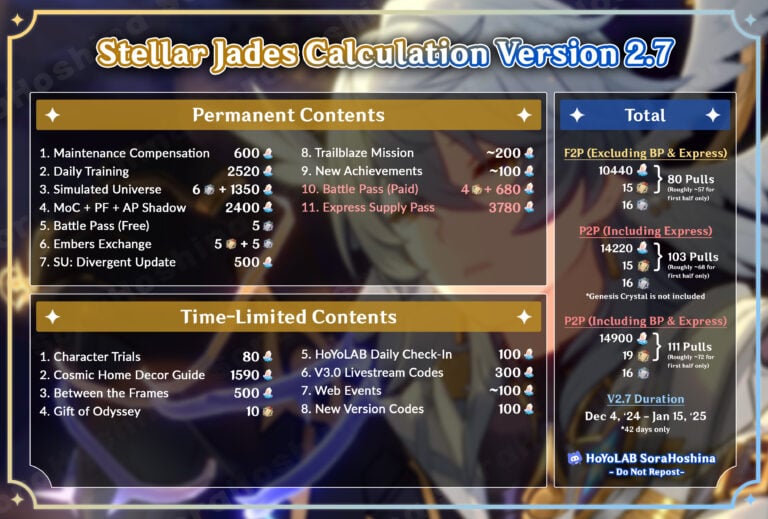
Honkai: Star Rail Stellar Jades Calculation in Version 2.7
Honkai: Star Rail Version 2.7 Special Program Livestream Overview
Honkai: Star Rail 3 New Redemption Codes from 2.7 Livestream
Honkai: Star Rail Apocalyptic Shadow V2.6 Sovereign Control Guide
Honkai: Star Rail Rappa Character Guide
Honkai: Star Rail Sound Hunt Ninjutsu Inscription Event Guide
Honkai: Star Rail All Treasure Chests in Penacony (Penacony Paperfold University College)