Welcome to our Snowbreak: Containment Zone Global Tier List! Find out the best characters in the game, ranked and reviewed by expert vicyush for the latest meta.
Notes
- Ratings and reviews reflect my personal opinion on the state of the game - you may disagree!
- Operatives are assessed at Manifest 2 with Tier 1 of their premium weapon; operatives whose performance significantly changes at higher investment levels will have an additional entry reflecting this.
- No ratings are defined within a certain tier, and the relative placement of an operative within a certain tier does not imply anything about this.
- A character being rated low does not mean they are (completely) useless! The main story and many other game modes are easy enough that they can be completed with any appropriately-levelled operative in the game.
- Despite this, using higher ranked units will make your life much easier even when playing said content, obviously.
- A glossary of terms used is below the tier list; use it as needed.
Tier 0
Extremely strong units with limited or no equal alternatives
Acacia - Kaguya
  | |
| Single Target | C |
| Mobbing | B |
| Support | S |
Role: Generalist Support
The simplest way to describe Kaguya's kit is that she throws a lot of things, and (most of) the things she throws are good.

Her normal ability throws projectiles (“darts”) that orbit around her, doing damage and reducing enemy move speed. With neuronics, she can have more of these, and they can also freeze enemies and make them take enhanced damage on Kaguya’s next attack. In practice, the wide radius at which the darts orbit makes them awkward to use, and while the freeze is nice (and a decent chunk of damage when you proc the damage amp that comes with it), it’s a lot more trouble than it’s worth.
Her support skill throws another dart that this time orbits a targeted area, dealing damage and more importantly reducing enemy resistances; a very potent debuffing tool. This is where Kaguya earns her keep, as a universal resist shredder that shows no sign of losing value anytime soon.
The grand finale is her ultimate, which again throws a projectile that lingers at the target area, dealing decent damage to enemies caught in it. When upgraded, it will also suck in enemies, making it very easy to use.
While slightly awkward to use and with some enemies being immune to her crowd control effects, her usefulness as a debuffer makes Kaguya more of a supportive operative, if not a very strong one.
Kaguya’s manifests are best described as “nice-to-haves,” and none of them significantly make or break her. Pine Aurora is the ideal option for getting the most value out of her support skill and is absolutely worth its price tag, especially after its buffs. Prismatic Igniter and Aye Aye Captain are strong alternative weapon picks for getting the most out of her use as a support operative.
Shockingly, the vast majority of her power is not locked behind manifests, but instead neuronics. All of them are good. Get all of them.
That being said, prioritise her support skill neuronics and the ultimate neuronic that sucks in enemies. You can probably skip her standard skill if you only use her as a support.
Mauxir - Shadow Ka
  | |
| Single Target | C+ |
| Mobbing | B- |
| Support | S |
Role: Generalist Support
Shadow Ka brings unique support abilities that challenge Kaguya as one of the top supportive operatives in the game, but also finds herself equally lacking in on-field performance. Not that it matters.
Mauxir’s first skill involves her throwing a clone of herself at an enemy, at which point it will blow up and do damage. It’s definitely a skill. The cooldown is long and the damage is just okay. You can hold it down to spin around, but it’s mostly a gimmick. Similarly, her ultimate is also just kinda there. A slow can situationally be useful, but for the most part you won’t really bother.
The real reason why most of you will actually care about Mauxir is her support skill, which is great. Casting her skill summons a dummy that attaches itself to the cast target, and also attaches to several other targets. All targets take damage over time, but you can attack the dummy to transfer 110% of damage that it takes to the main target. Aside from being a damage boost, providing a stationary target for you to hit is especially useful against mobile enemies.
It does come with some drawbacks, though. The dummy does not have weak spots, so you’re at the mercy of your operative’s innate crit rate to get critical hits. You can supplement this with the boost from Manifest 1 however, which provides bonus crit rate when attacking the dummy based on what gun class is attacking. It’s an okay boost for pistols, SMGs, and ARs, but with shotguns and snipers, you get a 100% boost which basically means every shot is guaranteed to crit. Shooting the dummy also bypasses any special damage reductions that an enemy might have (like on Ni-Mech), and will also transfer over debuffs that it receives. It’s also an extra part for operatives like Ethereal Cloud to attach to. All in all, a very good skill and the star of Mauxir’s kit.
Mauxir’s Deiwos passive allows for operatives to occasionally get a guaranteed crit that will do bonus damage based on her alignment index. It’s a nice bit of extra damage for most gun classes, but not very useful on shotgun operatives, as the bonus damage only applies to one pellet of a shot. It’s as silly on sniper operatives as you might think.
While her active operative performance is nothing to write home about, her ability to make DPS units hurt propels Mauxir to the top of the rankings. She’s not quite as universally useful as Kaguya, but instead trades off versatility for specialisation, leaning more into boosting gun damage ops and providing more value in that regard. That being said, even skill damage DPS units will find value here, with that boosted damage transfer proving very tempting.
As far as manifests go, all of them are pretty useful aside from manifest 2, which is just an attack decrease on enemies affected by her support skill. However, the higher cost of later manifests means that most players will opt to sit at manifest 1, which is a massive power spike and a must-have in its own right. If you can spare the resources though, strongly consider pushing her to Manifest 3, as the extra support skill duration is nothing short of life-changing. Mauxir obviously wants her signature weapon Alloy Truth, which is just a really good weapon in its own right. Lacking that, Wave from the Verdurous Holiday event shop is… fine. It’s definitely a downgrade, but it’ll do. Frigatebird is also a good option, and is probably better than Wave. If you want to use Mauxir as an active operative… give her 100 Battle Veteran and play her as a gun DPS, I guess.
As most of her usage will be in the support role, both of her support neuronics are an obvious choice for unlocking. Your mileage may vary for the rest, but it might be worth getting them anyway to level up her Deiwos passive.
Cherno - Enigma
 | |
| Single Target | S |
| Mobbing | A |
| Support | B+ |
Role: Skill Damage DPS
At peace with her other self, Cherno awakens a new set of abilities that keeps enemies popping, or at least for as many times as needed before they succumb to their fates.
We’re actually going to be going in reverse order this time, starting with her Deiwos passive. What a fun change of pace, eh? Anyways, Cherno’s passive lets her apply stacks of Enmity to an enemy every time she shoots them, up to 300 stacks. For every Enmity stack an enemy has, they take damage equal to a portion of Cherno’s attack stat to the enemy every half-second. Increasing her Alignment Index will make this DoT do more damage, so it’s a pretty good stat to have.
Cherno’s ultimate is pretty straightforward, dealing a reasonably large amount of damage, applying Slow, and (most importantly) also applies 100 stacks of Enmity to enemies hit. Don’t get me wrong, it’s no small amount of damage, but it’s not the biggest nuke Cherno has access to by a long shot. This ability will additionally spawn up to three Voids of Self-Loathing, which I will just call orbs going forward, around the target. This will come in handy later.
Her support skill is surprisingly complex for a DPS operative. It comes in two parts: first, it applies an AoE knockup and slow, then gives affected enemies ten “Shimmer” stacks that decay over time. Shooting an enemy with Shimmer will detonate the stacks on all enemies, dealing Chaos damage per stack. Of course, the slow is only for two seconds and the detonation damage isn’t super huge, but you could do a lot worse.
Finally, we get to Cherno’s standard skill, and the big payoff. Casting the ability spawns an orb at the target location. Enemies hit by an orb will get 30 Enmity stacks applied to them, and one more stack every second that they’re within the area of effect of one (no double dipping, though). Yes, these are the same ones as from her ultimate, which means that you can get an additional 90 Enmity stacks from there on top of the 100 you get to begin with. So what’s the payoff to all of these stacks? Well, you can charge this ability to detonate all your orbs, dealing a large burst of damage to enemies that increases with stack count. On a fully stacked up enemy, they’ll also take an extra 20% damage, and the amount of burst you can get with this is nothing short of ridiculous. To make it even better, detonating your orbs resets the skill’s cooldown and refunds you S-Energy, letting you do it all again, and again, and again, as many times as you want. It’s an amazing ability, and really what ties Cherno’s entire kit together.
Cherno brings versatile damage while being able to sustainably burst hard enough to make her a serious competitor in Neural Sim. Oh, and did I mention that her skill damage isn’t affected by damage reduction effects? Yes, that includes the pop too.
All of Cherno’s manifests are quite good (even manifest 5, which is pretty uncommon), but the cost-to-benefit ratio starts dropping off once you get her second manifest. The first two are especially important to her usability, as the first lets you stack Enmity faster and the second lets you pop harder. Cherno’s shop gun, Halo of Hope, isn’t half bad for an event weapon, but you really want her gacha weapon Uninvited Adieu if you can scrounge up the Digicash for it.
Similarly, Cherno doesn’t really have any bad neuronic nodes, and you probably want to max them out anyways to upgrade her Deiwos passive for more damage. Dziady Squad is the clear choice for Cherno, and you’ll want attack and Alignment Index to maximise her damage.
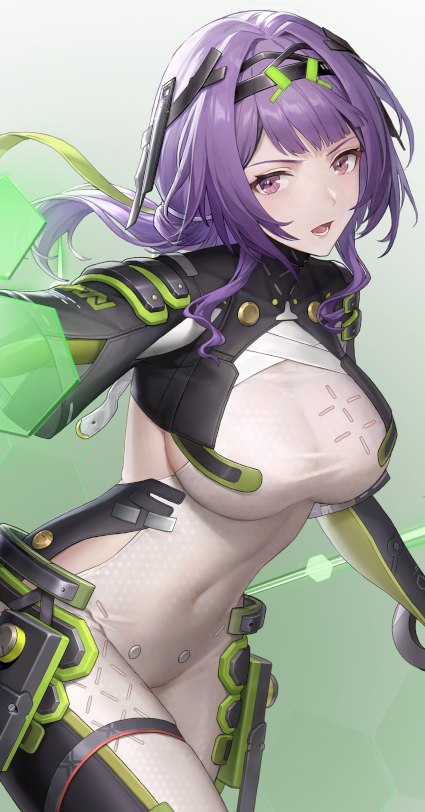
Enya - Exuvia
 | |
| Single Target | C |
| Mobbing | B |
| Support | S |
Roles: Skill Damage Support, Sub-DPS
Enya suits up in a new outfit that doesn’t leave much to the imagination. She also equips a strong supporting kit that does very well in its role, even if its intended sub-DPS mechanics don’t quite stick the landing.
Standard skills are usually throwaways on support characters, but Enya’s isn’t too bad. She essentially sends out an electric fence towards enemies, dealing Electric damage and applying a very brief Paralyze. So brief in fact, that it won’t even affect boss enemies, as they’re immune to Control effects shorter than two seconds in duration. It’s not too bad for general trash mobbing, though.
But really, Enya’s support skill is what you’re here for. She deploys a helper bot that boosts the skill damage of anyone inside near it. This alone makes this ability worth casting, and everything else it does is really just a bonus. That being said, staying near it will also generate stacks when your active operative deals gun damage. When the active operative deals skill damage, it’ll consume those stacks to deal additional Electric damage. The damage is actually surprisingly good, and can be a non-insignificant DPS contribution. Having the requirement that your operative both shoot a lot and deal a lot of skill damage (preferably at the same time) does limit the roster of operatives that she’s useful with, but boy is she a fun time with the ones that she has good synergy with.
Having near-constant uptime on this ability and being able to reposition the area also gives it quite a bit of flexibility in how you can use it. More specifically, recasting this ability to reposition the area of effect will trigger effects that activate on support skill activation a second time. It was also once an instant animation cancel too, but it’s since been patched out. Lame. As well, being near the bot gives you interruption resistance, which is very helpful for not being constantly staggered or knocked back when you just want to shoot some bad guys.
I guess I should mention Enya’s ultimate as well. She more or less shoves you into a cube, which gives you invulnerability for a while as it zaps nearby enemies. When its duration ends, or on recast, the cube blows up, dealing more Electric damage, applying Paralyze that’s a bit longer in duration this time, and most importantly, freeing you from the cube as it sends you off with a heal. It’s honestly a really goofy ability, but also one that most players probably won’t have a regular use case for, especially since it prevents you from doing anything but slowly moving around while in the cube.
Her Deiwos passive is a partywide skill damage boost. It’s extremely good. I don’t think there’s much more to say about it.
Enya doesn’t quite have the universal versatility of the top supports to really show off her potential, but she also doesn’t really need to as her raw buffing power and CC-immunity quality of life are more than enough in most cases.
Both her shop gun (Tribute of Rose) and gacha weapon (Abyssal Light) provide strong skill damage buffs designed for Enya to easily and constantly apply. However, Abyssal Light doesn’t provide much more of a boost to your main DPS’s skill damage compared to the free alternative, so that’s something to keep in mind before you go pick that up. It does significantly boost Enya’s support skill damage, so it’ll be up to you to decide whether you think it’s worth the price tag.
Similarly, Enya’s manifests don’t really matter too much if all you care about is using her as a support buffer. Her manifests are almost all designed to boost her own personal damage, but manifest 2 does increase the skill damage boost that her support skill provides. That’s about the farthest I’d go.
Enya has a decent amount of choice when it comes to logistics sets. Areca Squad will obviously work, but she actually outperforms it with Twilight when supporting an Electric DPS. Amarna will also go well with her constant skill damage applications. At any rate, you’ll want Alignment Index to boost her Deiwos passive, and attack because every other stat is kinda useless so you might as well boost her support skill damage.
Oh, and max out her neuros to upgrade her Deiwos passive. More skill damage for basically free is always nice to have.
Siris - Ksana
  | |
| Single Target | S |
| Mobbing | S |
| Support | B- |
Roles: Skill Damage DPS
Siris’ new outfit brings with it a new set of abilities, and in the process cures her memory loss for long enough to remember how to put down top-tier DPS.
Her standard skill puts up a shield and launches you forward with the goal of ramming into every enemy you see, even scooping them along for the ride in some cases. You can then recast this ability to detonate your shield for a big burst of damage to five unlucky targets in front of her. Doing so also grants you U-Energy and Resilience stacks, which will come in handy later. This ability can be used without S-Energy, but keeping it fed will allow you to generate more Resilience stacks and charge up that detonation faster. Being able to run fast also has other benefits, and it’s great for more rapidly getting around on larger or open-world maps.
Casting Siris’ support skill knocks up enemies, deals damage, and also gives any nearby allies an HP shield. Cute, but mostly a gimmick.
Rounding things off is Cycle of Inversion, Siris’ ultimate ability that applies marks to enemies before absolutely blasting anything marked to bits. Remember those Resilience stacks from her standard skill? Those now come into play as it consumes up to 100 stacks to nearly double the damage output. You can’t really adjust your aim during the marking period, but the cooldown of this ability isn’t that long to begin with anyways and you can also reduce it by doing any non-ultimate ability damage with her. The detonation of her standard skill chops off three seconds on its own! The damage is good, and its spammable nature means that anything that survives the first blast won’t have long to wait before it faces another.
Another thing about her Resilience stacks: whenever the stack amount increases or decreases by 20, Siris’ Deiwos passive grants a stack of Rejuvenation, which provides an attack boost that scales with Alignment Index. Because you can never have too much damage.
Manifest 1 is all but mandatory on Siris, giving you an extra source of Resilience stacks as well as increasing the amount of them you can stuff into your ult to 120. M2 is also quite useful as it lets you ramp up her Deiwos passive faster. Beyond that, things are less appealing as M3’s higher cost only gives you a very-diluted 20% Thermal damage buff. You’ll probably want to stop at M2 as a result.
Scarab Squad is the obvious shoo-in for logistics picks, comfortably beating out all other contenders. Rare for a DPS, you’ll actually want to prioritise HP stat rolls over ATK, which ends being the second-most useful for once. Alignment Index is also a usable consolation prize if one of the first two stats is unavailable, but it will take some time for her Deiwos to stack up and provide its benefit.
Scarabei will be your budget blaster of choice, as it gives Siris all the right stats. But as always, there’s a more premium weapon to be had, and Crowned Flail will provide a worthwhile damage boost.
With a strong and sustainable gameplay loop of charging at enemies, ulting them, and doing it all again as many times as needed, Siris is a very powerful damage dealer that anyone would find hard to forget.
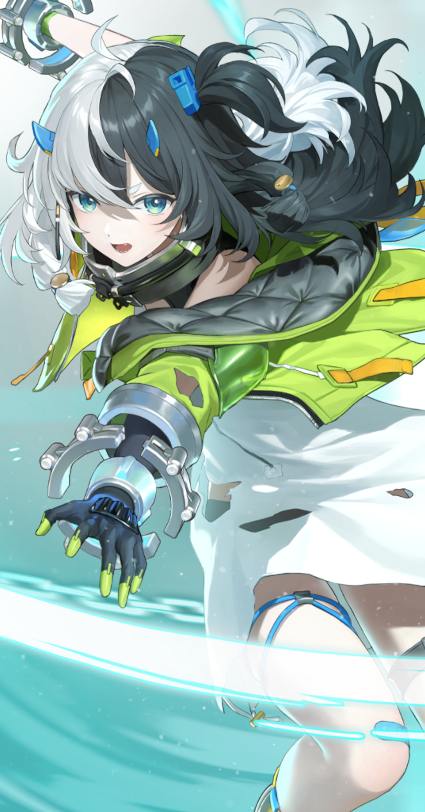
Lyfe - Infinite Sight
  | |
| Single Target | S |
| Mobbing | S |
| Support | B- |
Roles: Hybrid DPS
Lyfe revolutionises the world of weapon design as she becomes the first to hold two SMGs at the same time. Considering how she performs, I’d say the innovation paid off.
The star of Lyfe’s kit is actually her Deiwos passive, essentially being a fourth active ability. As you shoot enemies, you’ll also fill up an eye-shaped gauge in the middle of your screen. When maxed out, your next dodge fires off a ten-round burst of shots that are guaranteed to crit. Let’s just call it a dodge shot. It won’t give you the period of invulnerability that normal dodges do, but you’ll instead have CC resistance and damage reduction. The dodge shot also uses ammo and will halve its damage if you’re short a few bullets on cast. This ends up being your main damage tool, beating out any other action you can take. It also activates your other main damage source, but more on that later. Dodge shot’s damage multiplier scales with Alignment Index, with every 100 AI increasing the base damage multiplier of 136% by another 10%. If you couldn’t guess, this is pretty good.
Going back to real abilities, we have her standard skill which actually does not a lot of damage. It doesn’t really matter though, as its actual purpose is to apply Insight marks to enemies. You’ll want these for two reasons. For one, shooting an enemy with a mark will charge up your dodge shot faster which means more damage sooner. But also, when those dodge shots hit an enemy with marks, they’ll detonate and deal bonus skill damage, called Insight Rays. Detonations won’t consume the mark so all ten hits of Lyfe’s dodge shot can trigger it, creating a really big burst of damage. Oh, and casting Lyfe’s standard ability also instantly readies her dodge shot with neuros unlocked, because it would be just wrong if it didn’t.
Her support skill fires a line attack that can stun enemies. It’s certainly an ability.
Finally we get to Lyfe’s ultimate, which is a very cool way to kill waves of mooks and not much else. Because it doesn’t detonate Insight marks you end up losing up to half of your overall DPS, which kinda sucks. But its long cast animation gives it an extra use in single-player modes, where the time stop during the cutscene won’t stop the cooldown of your standard ability, allowing for what’s essentially a cooldown reset if you go by game time (make sure to instantly cancel your ult to properly take advantage of this). But since the animation only plays on the first cast in a mission, you’ll have to treat it as a single-use bonus.
Manifest 1 on Lyfe means a 20% final damage boost to all of her dodge shots, which is obviously good. M2 is also a useful pickup, refunding a third of your dodge shot charges on cast and speeding up your rotations. M3 is where it starts to become less appealing. The increased unlock cost only makes the now-heavily-diluted 12% ballistic damage boost that much worse of a deal.
If the comically large buff numbers didn’t make it obvious, there’s no reason not to use Nova Squad on Lyfe unless you hate doing damage. Attack and Alignment Index is the way to go, but you can also see benefit from crit damage, crit rate, and even skill haste for slightly faster rotations.
The limited dual SMG pool means you don’t really get much of a choice here. Revolving Glow initially looks to be basically the same as the premium Nightborne Crown, but small differences in how their weapon skills work make for a much larger difference than initially thought.
As she jumps and flips around mobs and bosses alike, Lyfe unleashes a hail of bullets that leave no doubt about her offensive power.
Fenny - Starshine
  | |
| Single Target | B+ |
| Mobbing | B+ |
| Support | S |
Roles: Ballistic Damage Support
You know what’s better than bullet? More bullet. Perhaps even, more powerful bullet. Well that’s exactly what Fenny’s got for you, so you’re in luck.
Fenny’s standard skill lets her in a direction as she magics out some bonus ammo for her gun. The direction you dash will affect what those bullets do - a forward dash provides slower-firing explosive shots, strafing left or right gives the bullets increased Kinetic damage, and falling back turns the bullets into a source of extra S-Energy when they hit. You can actually completely remove its cooldown once you unlock her neuros, which makes Fenny probably the first dedicated support that also isn’t a total brick as a DPS unit. It’s definitely good for a bit of fun, but don’t expect chart-topping performance.
Moving on to her support skill, we’re reminded that sharing is caring, and caring is very powerful. On cast, Fenny personally delivers you bonus ammo based on the ammo capacity of your weapon as well as Fenny’s. As if not having to reload wasn’t good enough, firing bonus ammo will also deal increased damage based on Fenny’s attack stat. You can have up to three uses stocked up at once with neuronics unlocked, enabling an irresponsible amount of spray-and-pray. Your active operative doesn’t even have her actions interrupted, since Fenny makes a cameo appearance when she tosses you that bonus mag. You really can’t ask for more.
A quick pit stop for some technical stuff. While bonus ammo can still benefit from ballistic damage buffs like from Amano-Iwato or Dharma while firing bonus ammo, it won’t activate any Aptitude effects. Bonus ammo also gets used up first, but only by actually shooting and not skill casts that aren’t Lyfe IS’ dodge shots (it’s technically not an ability). And of course, only Fenny can give you more bonus ammo, and multiple sources don’t stack.
Lastly, we have Fenny’s ultimate ability, which more or less plunks down a laser that deals continuous damage while it’s active. You don’t actually have to sit around and babysit it either, which can open up some fun possibilities. Like her standard skill, it’s another surprisingly good ability but nothing too crazy.
Of course we can’t forget about Fenny’s Deiwos passive, which boosts the ballistic damage of your entire team with no strings attached. If you couldn’t guess, that’s pretty darn good.
Fenny’s M1 is quite interesting in that it provides a special buff to characters she gives bonus ammo to (yes, this includes her) based on their weapon type. Snipers, pistols, and crossbows get a 15% final damage boost to weak spot hits, shotguns get an extra pellet per each shot which again means more damage, and assault rifles and (dual) SMGs get get to roll the dice for a 12% chance for each shot to fire off a bonus bullet. All of these effects are very useful, so why you’d skip this is anybody’s guess. Easier to understand is skipping the rest of her manifests, however. Manifests 2 and 3 primarily boost the uptime of Fenny’s support skill, which ends up being kinda overkill when you consider how good its uptime already is. But if you push through anyways, you’ll find that Manifest 5’s ability for bonus ammo to ignore a portion of enemy resists to be quite useful, if not exorbitantly expensive.
Seasun gave everyone a free set of Reverie Squad on Fenny’s release, and it is in fact what you should be using. Optimal substats are equally obvious, as the attack and Alignment Index boost that the freebie set comes with are exactly what you want.
It might be tempting to use Strawberry Shortcake and cheap out on buying Pixel Age, but Fenny’s Deiwos and M1 requiring a Kinetic weapon means that Shortcake gets filtered out of contention. Heart Hunter builds on Pixel Age’s ballistic damage boost by tossing in the ability to ignore a portion of enemy resists, which makes it well worth the tribulations of the gacha.
Sometimes the solution to a problem really is “apply more bullet,” and Fenny takes that to the logical extreme, providing top-tier supportive power while also being no slouch on her own.
Tier 0.5
Very strong units lacking one or more specific strengths to make them T0 viable
Tess - The Magician
  | |
| Single Target | B- |
| Mobbing | C+ |
| Support | A+ |
Role: U-Energy Support
If you need U-Energy, Tess can supply it. However, the lack of utility beyond that limits her usefulness beyond her specific niche.
Tess’ standard skill tosses a card at an enemy, applying one of a variety pack of effects based on the card’s colour. I could go into them all in more detail, but there really isn’t much point as the damage isn’t meaningful enough to make her viable as an active operative. Which makes sense, since she’s designed as a support.
Her support skill is a damage buff for the active operative. It’s initially only a boost to Electric damage, but a neuronic upgrade gives it universal applicability, which makes you wonder why it wasn’t like that to begin with. It can also apply a Control effect depending on the kind of elemental damage you apply to an enemy, but the duration isn’t very long and bringing the right elements for the effect you want in the first place can be annoying. Also, the animation duration of this ability is painfully long. Why is it like that.
Rather unusual for a support, Tess’ big appeal is actually her ultimate ability. While active, shooting enemies will cause Tess to do follow-up shots that very quickly generate a large amount of U-Energy. It also doesn’t cost any U-Energy to activate, which is a first for the game and further drills in the point that this is meant as a U-Energy generation tool if it wasn’t obvious already. Make sure to use that U-Energy though, as Tess takes all of it back once her ultimate duration ends. You get a shield and cooldown reduction on her ult for anything not used, but it’s more of a consolation prize than anything else.
Tess ultimately (haha) is a more utility-focused support who primarily enables other operatives to get access to their own ultimates as fast as possible. And while she’s really good at doing that, not a lot of DPS operatives actually benefit that much from the U-Energy battery. It’s certainly nice to have, but most of the time you’d be better off with a dedicated damage support. The exceptions here are Yao - Winter Solstice, Fritia - Hush, and Cherno - Enigma, all of whom greatly enjoy having faster access to their ultimate abilities and make very good use of it. As a result, Tess has found a place in high-end Neural Simulation setups where her lack of lasting usefulness isn’t important. This also means that once you finish Tess’ initial ability rotation and her ultimate duration ends, she doesn’t provide a whole lot and her usefulness plummets. This makes her relatively inflexible and not really suited to general gameplay. But when paired with a DPS operative who can benefit from her utility and allow fights to end quickly, the value she brings is simply irreplaceable.
Tess’ Manifest priorities are different depending on who you intend to use with her. Gun damage operatives don’t really need more than Manifest 2, while characters like Hush see a useful benefit from Manifest 3. If you want to really ball out and go all the way, Manifest 5 is surprisingly not bad compared to a lot of other Manifest 5s in the game; not having to cast Tess’ support skill to get its damage boost is great because of how long its animation is.
Being a sniper operative and a support, Tess only really has three weapon options - her signature weapon Eccentric Joker, the event weapon Wasp, and Deep Sea’s Call. I don’t think I have to tell you that her signature weapon is the best in slot here, with Wasp being a surprisingly distant second, not having the damage buff that Joker gets. Deep Sea’s Call technically does work, but it also turns off her first Manifest which kind of goes against the reason why you’d want to use her in the first place.
Being released with Hjartagard Squad, Tess is obviously designed to take full advantage of it. For logistics substats, Tess wants as much U-Energy recovery as she can get, as it’ll let her supply even more U-Energy with her ultimate ability. The second one is less important, but some extra Alignment Index can help speed up U-Energy generation just a bit.
Since Tess is a support, you don’t have to bother levelling the neuronics for her standard ability. But since her unconventional design means that both her support and ultimate abilities see use, it’s important to remember to upgrade the neuronics for both of them too.
Fenny - Coronet
 | |
| Single Target | A+ |
| Mobbing | A |
| Support | A- |
Roles: Ballistic Damage DPS, Support
Coronet is an operative who wants to get in enemies’ faces and plug them with lead, and has the abilities to do it.
Her active skill, Optimal Condition, raises her attack speed by a massive amount, and also boosts her electrical damage with neuronics. Being based on a stack system, Manifest 1 additionally removes the time restriction, giving this ability potentially unlimited uptime. This does come at the cost of reduced ability to break parts, a traditional strength of shotgun units. Furthermore, her ultimate skill, Center Stage, brings AoE crowd control and interrupts enemy skills to buy you breathing room to work with.
Even in scenarios where the shotgun playstyle doesn’t work, Coronet’s support skill grants the active operative a potent boost to their rate of fire, further enhancing her value.
On the whole, Coronet has a very cohesive kit that synergizes well and allows for extremely strong damage potential against enemies while properly supported. However, her long reload downtime and lack of range really holds back her DPS potential and makes it hard for her to keep up with top meta picks if not.
While technically usable even without Manifests, Manifest 1 is a major power spike and what really brings her to T0.5 performance. Manifests 2 and 3 are highly recommended though, as they make Mercy stack upkeep both more forgiving and rewarding. Similarly, Coronet is also not technically dependent on a weapon, but Sunny Payback is a huge quality of life improvement, as it will provide extra pellets for more damage and better stack generation while her active skill is up.
All six neuronics are useful and worth investing in; which and how many you level is dependent on what you want out of Coronet and how much you’re willing to invest.
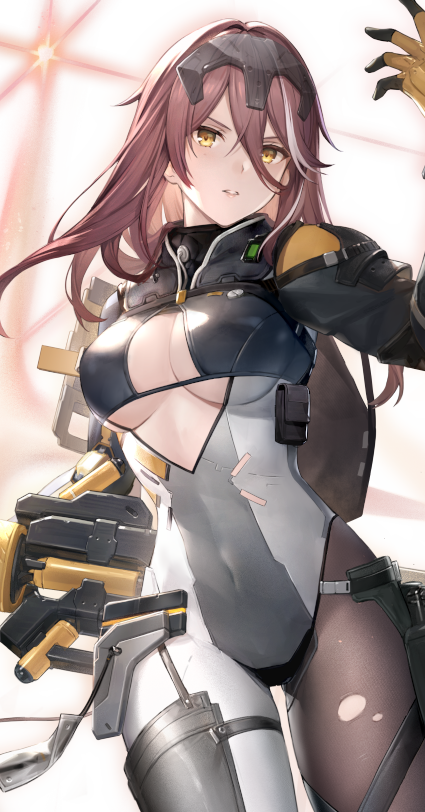
Yao - Winter Solstice
 | |
| Single Target | S |
| Mobbing | B+ |
| Support | B |
Role: Ballistic Damage DPS
Team Dependant!
Once one of the best bossing DPSs in the game, Yao unfortunately sees herself upstaged by contemporary releases.
The highlight of Yao’s kit is actually her synergy with Space Cowboy, which allows her to consistently pump out high damage shot after high damage shot by using her active skill, Scorching Sun Awakening. Her ultimate skill, Searing Resurrection, then proceeds to temporarily give her a gun that does even more damage while also passively reducing all damage she takes by 20% while not in her ultimate skill form.
Yao’s spotlight has faded as other powerhouse DPS operatives have emerged, but she can still hold her own while vaporising enemies with her ult’s oh-so-satisfying charged shot.
While good even without manifests, manifest 1 sees a massive power spike from being able to reload her special weapon from Searing Resurrection. However, she is however highly dependent on Space Cowboy to reach her full potential and drops to Tier 1 without either that or manifest 1.
Both neuronics for her active skill and ultimate are very strong investments. Her support ability neuronics are less important (but still really good!), as scenarios where you wouldn’t want her as your active operative are far and few between, anyways.
Chenxing - Ethereal Cloud
 | |
| Single Target | A+ |
| Mobbing | A- |
| Support | B- |
Role: Ballistic Damage DPS
While the authenticity of how “ceremonial” her outfit is remains to be seen, there’s no doubt about her ability to pump out damage.
Her basic ability is the bread and butter of her kit, giving her strong mobbing ability. The chain damage to marked targets is very notably based on the actual damage of the shot that triggers it, allowing Chenxing to still meaningfully benefit from gun damage buffs (to the point where Amano-Iwato is as good or better than Mingyi, the set seemingly designed for her, in this regard).
Chenxing’s support skill is more of the same, though with less power and more restrictions in its usage.
Dominance, her ultimate ability, is… alright, I guess. It’s not a bad ability by any means, but it’s more AoE mobbing on an operative who already has a lot of it. At least it can refresh her mark duration and provide a ballistic damage amp. Do note that just tagging an enemy with it is enough to apply the amp that will persist even if they leave the area, so it’s still worth using.
Overall, this creates an operative who can shred through hordes of enemies while also being able to put down strong sustained DPS even against beefier solo targets. Of note is the fact that her marks can be applied to breakable parts, making her ridiculous against multi-part bosses like Hela or either Ni-Mech.
As far as manifests go, stage 2 is likely the sweet spot as this is when the duration of your marks increase. She’s perfectly playable without, though. Having an electric assault rifle is vital to being able to use her Deiwos ability, but your options are… not great. Your only real offensive options are her signature weapon, Anti-Evil Ward and the 3* electric AR, as all the other electric ARs in the game are support-oriented. Grab Wild Leer from the permanent event weapon shop if you don’t have AEW, or wait for Chenxing to come on rerun.
Considering that the main gimmick of Chenxing are her marks and chain damage, maxing both neuronics for it are your top priority. After that, her ultimate neuronics are worth looking into, if not just to help maintain her mark uptime and also increase their effectiveness.
Katya - Blue Bolt
  | |
| Single Target | A+ |
| Mobbing | A |
| Support | B- |
Role: Ballistic Damage DPS
Katya makes a stylish entrance, providing competent performance thanks to great DPS uptime and strong damage potential. She takes abilities from other operatives and puts her own spin on them, passing the plagiarism check and maintaining her own identity.
The main showpiece of Katya’s kit is her standard ability, Death Traverser. On cast, she enters the Guidance III form which is kinda similar to Coronet’s standard skill self-buff if it was like twice as good but also cut off your legs. While in Guidance III state, you lose a chunk of per-shot damage, U-Energy gain, and parts break power in exchange for fixing her rate of fire to 8 shots per second, or 480 RPM. This is more than triple the standard rate of fire for crossbows, but still not quite as fast as ARs and SMGs. For now. More on this later. What you also lose is the ability to move around normally, locking you in place unless you decide to exit Guidance III by recasting the skill or dodging out of it. The latter is preferred, as it’ll reset the cooldown of Death Traverser and even provide a 15% attack boost once the appropriate neuronic is unlocked. You’ll want to be in Guidance III as much as you can while in combat, as it’s your main damage steroid and well worth the tradeoffs. Of course, you do have to spend some time stretching your legs between stints as a turret, as being in Guidance III state shuts off passive S-Energy regeneration and makes every shot cost S-Energy.
Her support skill also resembles that of another operative (Swift this time), as a targeted shot that propels you back and can be used to dispel CC effects. Katya’s version has more of a circular AoE and also freezes enemies hit, but also like Swift’s support skill, it’s just alright.
Finally, we get to her ultimate ability, which has two components to it. Its active part calls down a continuous barrage of arrows that follow an enemy and do continuous damage. It can also freeze enemies if it hits them enough. It’s nothing too flashy or even interesting, but it’s decent enough damage and usually worth bothering to spend the U-Energy on.
The passive component has a very unnecessarily long description in-game and I really don’t want to type all that out, so here’s a simpler explanation. Shoot the enemy, apply stacks. Apply enough stacks, the enemy freezes. It’s really as simple as that. At just two seconds though, it’s not a very long freeze duration which can occasionally be an annoyance when you want to apply a different Control effect that lasts longer, especially with Neural Sim bosses having long Control-immunity lockout periods after one is applied.
Katya’s Deiwos passive is a remix of Ethereal Cloud’s, being a percent chance to apply extra damage when shots hit enemies, with tweaked numbers and an extra damage boost to frozen targets. It’s extra damage, so I can’t really complain about it. Chenxing might have something to say, though.
Now with all of her abilities explained, we still have about a quarter of Katya’s kit left to cover, as the crossbow class also comes with an alternate firing mode. As opposed to standard rapid-fire action, the alt fire shoots more slowly but sends out explosive bolts that detonate on impact. The damage and area of effect are pretty decent, but the RoF penalty limits its usefulness to blowing up packs of enemies. It also can’t hit multiple parts on a single enemy, before you get any funny ideas.
The alt fire also interacts with her abilities. Guidance III sets its RoF to a lower (but still boosted) value, and shots fired in this mode have a doubled chance of activating Katya’s Deiwos passive but do half damage. When the passive activates, it also applies an extra stack for Katya’s ultimate’s passive.
Katya brings strong damage and high uptime to the table, establishing herself as a reliable DPS choice for a wide variety of roles. The easiest point of reference is Ethereal Cloud, who Katya beats out in single-target damage, but does fall behind against multi-part enemies. Of course, Katya also has unique benefits of her own, being able to occasionally provide CC by herself and never having to reload thanks to whatever magic feeds her crossbow with unlimited ammo.
Manifest 1 is a must-have, as it’s the only way of increasing Katya’s attack speed while in Guidance III. It allows each shot to grant a stacking RoF boost that maxes out at a very non-negligible 25% and brings it up to par with AR fire rates. Aside from that, the rest of her Manifests aren’t super outstanding, though Manifest 3 is a much-appreciated quality of life improvement. Considering there are only three crossbows in the game, you don’t really get a lot of weapon choice. Neptune Nova is obviously ideal, as its built-in S-Energy regen greatly helps with maintaining Guidance III uptime (doing more damage also helps). Failing that, the event-exclusive Alpine Gentian is a free and serviceable stand-in, so there really isn’t any reason to use anything else.
Eli Squad is your obvious logistics set of choice as the non-critting nature of crossbows locks Katya out of an otherwise solid Amano-Iwato pick. It’s also basically a better Mizuho, so I wouldn’t bother with that either. For substats, attack will always be useful. Duking it out for the second substat slot are crit rate, crit damage, and Alignment Index. While crit stats aren’t completely useless due to directly being converted into more damage, a top-level Alignment Index roll will still come out on top. Do the math and see how your values shake out. As for neuronics, you can probably get away with just her standard and ultimate abilities, as bringing Katya along just for a CC dispel sounds like a questionable use of resources.
Eatchel - The Cub (High Investment)
 | |
| Single Target | B |
| Mobbing | B |
| Support | A+ |
Role: Generalist Support, Healer
Read Eatchel’s base review here.
Now all grown up (sort of) and sporting a maxed out copy of her preferred premium bonking stick, Eatchel finds a place as a potent attack buffer now that her chunky heals can finally be effectively converted into offensive might. While still not a one-size-fits-almost-all solution like other higher-rated supports, she can more than pull her weight with Manifest 3-5 further increasing the potency of her claws and T2 Blitzing Fangs almost doubling the heal-in-hurt-out conversion ratio. Now if only someone could get her to stop chewing on all the enemies she helps take down…
Tier 1
Viable, but more niche or outclassed by better options
Acacia - Redacted
 | |
| Single Target | C |
| Mobbing | B- |
| Support | A+ |
Roles: Generalist Support
Acacia is the first operative you roll from the gacha, and useful at all stages of the game. Being able to spam bouncing daggers will trivialise early-game content, though this damage does fall off quite quickly.
Her ultimate can be upgraded to provide a damage boost, while also slowing enemies to allow for other DPS units to more easily aim for weak points and face lower pressure from attacks while doing so.
Surprisingly, the best part of her kit is her support ability’s slow effect. As all enemies are vulnerable to slows (this includes Neural Sim bosses), Acacia’s support skill can always be of use, and is by far the best user of the Navigator Squad logistics set, which adds in an additional damage amp. Bringing Acacia also gives a decent amount of starting U-Energy from her Deiwos ability, allowing for earlier ultimates.
Useful even without manifests. Not reliant on a specific weapon, but most players at this point have surgically attached a Prismatic Igniter to Acacia to maximise her supportive potential.
For early-game use, her active skill cooldown reduction neuronic is of high value, as lower cooldown allows you to recharge an extra dagger in the time it takes you to throw the ones already stocked up. But make sure you max out the rest eventually too, as it’ll get you extra starting U-Energy.
Fenny - Lionheart
 | |
| Single Target | B+ |
| Mobbing | B+ |
| Support | B- |
Roles: Ballistic Damage DPS
Lionheart is a bit of a one-trick pony, but by god if it isn’t a really good trick.
Queen Bee is a deceptively amazing ability that grants mobility and CC while also seeing eventual upgrades that grant her a laundry list of goodies, from more damage and a partial reload to a shield and even the ability to reset its cooldown. Queen Bee can very usefully also be cast without a target, providing free mobility to reposition away from a dangerous area.
Her support skill is useful CC, though her ultimate is quite disappointing in damage output and too energy-intensive as a CC tool.
But as it turns out, Fenny has quite a high raw attack stat for a four star operative. This makes her surprisingly good for simply shooting enemies in the face. Who would have thought?
Useful even without manifests, though manifest 1 makes her quite a lot more fun. She’s not reliant on a particular weapon, but Tiny Grains has good synergy with her tendencies to jump right into the thick of things.
Her standard skill neuronics are very strong and worth investing in. The rest are less so, but you might as well get them anyways to max out her Deiwos passive for more damage.
Eatchel - The Cub
| |
| Single Target | C |
| Mobbing | B |
| Support | A |
Role: Generalist Support, Healer
Eatchel pounces onto the scene with flashy moves and a high-impact ultimate ability. But a closer look unfortunately reveals that she’s often more bark than bite.
Her standard skill is a short dash that sucks in enemies, which then gives Eatchel two enhanced shots that pierce through enemies. It’s worth noting the two bonus shots count as skill damage, and not as normal bullets, which means they don’t get benefits from things like Amano-Iwato. But as filler skills for support operatives go, this is actually one of the less-bad ones. I can’t speak for its DPS potential, but it’s definitely quite a bit of fun as a way to brawl with enemies in more casual content. Surprisingly not terrible.
Now things get properly interesting. Eatchel’s support skill is another short dash that knocks back and stuns enemies, then provides a heal. However, it passively also restores health every second while the ability isn’t on cooldown. What this means is that unless you need the CC or an emergency burst of healing, it’s actually better to not use this ability as the active healing is basically the same as the amount you’d get from the passive heal across the same cooldown window. And with her logistics set, not using her support skill actually becomes dramatically better. More on that later.
Finally, we get to Unyielding Rise, Eatchel’s ultimate ability and a whole novel of description text. So I’ll keep it simple for you. When you cast her ultimate, Eatchel does a bunch of attacks and heals allies for a pretty substantial amount. Meanwhile, the damage she does with this ability gets stored as “claws” that boost your attack by a percentage of the stored amount in said claws. If your active operative’s health drops too low though, two claws are automatically consumed to provide a burst of healing and a brief invulnerability period. So how big are these buffs, if you’re spending at least 40 U-Energy and up to 100 for it? Pretty big, actually. It’s probably the largest single attack boost you can get, and the healing that you get is no small amount either. But the problem is that even if it’s a huge buff that hypothetically has great value for its U-Energy cost, that cost is still there. It makes using this ability a slight hassle on a good day, and completely unviable in many scenarios. So most of the time, this ends up getting used as an emergency panic heal rather than anything else.
Overall, Eatchel pumps out enough heals from her various abilities to definitively take the crown as the top healer in the game. However, it’s a throne of questionable value as healing really isn’t something that’s needed in most scenarios. And even when it is needed, the game provides easily-obtainable alternatives. And as offensive support ability goes, Eatchel’s relatively low-impact support ability that you don’t even use most of the time, alongside her high-cost ultimate, means that she can find herself struggling to match the benefit of SR support operatives at times. But when she has her chance to properly charge up and deliver her buffs, there’s nothing else in the game that comes close to the power boost she provides.
As far as Manifests go, they’re all pretty decent. Manifest 1 lets you permanently have two claws up at all times though, and is cheap enough to be something you should at least consider if you have a spare slot in your daily Personal Files farming. Her signature weapon Blitzing Fangs is actually not that bad at Tier 2, but is a bit more questionable in value at T1 compared to the much more obtainable Lapis Lazuli. Rock Python, the freebie alternative from the event shop is… really bad. It’s quite possibly the worst event weapon released to date. Even Eatchel’s Kinetic-locked Manifest 1 can’t save it from straight-up losing to Lapis. Yeah, it's really bad.
For logistics, Lux Squad is the obvious pick, and it’s because of its specific behaviour that not using Eatchel’s support skill becomes optimal. Since the heal boost stacks that Lux Squad provides only gets consumed on skill cast, if you never use Eatchel’s support skill, the passive healing that you get benefits from that heal boost without ever consuming the stacks that provide it. That being said, if you don’t need the extra healing and don’t have her signature weapon to convert healing to damage, you could use any of the other supportive logistics sets to benefit your specific use case.
Onto her neuronics, then. If you ignore the usefulness of the abilities themselves, the neuronics they get are all actually pretty meaningful boosts to their capabilities. Spec them out based on what you see yourself using, though her support and ultimate ability neuronics get a special shoutout as the former lets her apply a stun on cast, and the latter guarantees you at least two claws that will be charged up by her ultimate.
With further investment, Eatchel sees an increase in rating.
Lyfe - Wild Hunt
 | |
| Single Target | A |
| Mobbing | A |
| Support | A |
Roles: Hybrid DPS, Support
Lyfe puts on a special icy exosuit, freezing enemies and bringing a hybrid of skill and gun damage to the game.
Her standard skill, Frost Wolves, is the star of Wild Hunt’s kit. It continuously dispenses ice missiles to mow down enemies and freeze the ones it can’t instantly take down. Running on its own ammo system, it can be refilled when shooting targets with a Frost weapon after Manifest 1, enabling amazing uptime and surprisingly usable bossing potential.
While still not quite a universal trash cleaner on par with Chenxing - Ethereal Cloud, Wild Hunt brings useful CC to the table with her support and ultimate abilities, which both freeze enemies in a large area of effect.
Of particular note is the DoT that her support ability applies (even if you don’t freeze your target!), which ticks often enough to make Wild Hunt a surprisingly strong support with Amarna. The fact that she can use Alloy Truth, one of if not the strongest support weapon in the game, doesn’t hurt either.
While useful even without manifests, manifest 1 is a major breakpoint in maintaining her skill uptime. Manifest 3 is a luxury, but another very potent upgrade, almost doubling the ammo capacity of her standard skill. As a DPS, she is Tier 2 without manifest 1. Fortunately, she also works just fine as an Amarna support right out of the box. Stardust Memory is strongly preferred, as other SMG options are… lacking. If using her as a support, any of the support SMGs are viable options from top-shelf selections like Alloy Truth to more easily-obtained options like Frigatebird. Use your brain.
Both active skill neuronics are a high priority. Her support neuronics are worth snagging due to reasons listed above, though your mileage may vary for her ultimate.
Marian - Swift (High Investment)
 | |
| Single Target | A+ |
| Mobbing | A- |
| Support | B- |
Role: Ballistic Damage DPS
Read Swift’s base review here.
The benefits of letting more Swift into your life are very noticeable and very immediate. Manifest 3 cuts an entire second from Swift's standard skill cooldown, significantly increasing her skill uptime. This allows for much more effective DPS against enemies, which is further supplemented by Manifest 4’s increase to her standard skill damage numbers. Your mileage may vary with Manifest 5 however, as it doesn’t do as much to extend combos as it might seem.
When built, Swift can hang with the best, being competitive or even better than T0 operatives against squishy bosses. But as HP numbers increase, she can start to run out of steam even with the benefit of additional Manifests.
Haru - Absconditus
 | |
| Single Target | B+ |
| Mobbing | S |
| Support | B+ |
Role: Skill Damage DPS, Mobbing
Haru trades her ponytail for a sword and dons the Absconditus tactical suit. She gains strong mobbing power, but loses some of her DPS uptime against enemies tough enough to survive her initial attacks.
Haru's standard skill is the most important part of her kit, as you'll be spamming it a lot. Working on a charge-based system, each cast does three hits of damage to up to five enemies each, doing decent damage overall. While the ability passively reduces its cooldown when shooting enemies, you'll definitely want to be getting kills to make the most of its neuronic that refunds a skill charge after a kill. In all, it's enough to make Haru a strong mobbing tool for most applications, but beefier enemies and bosses can definitely lead to a less pleasant experience.
Her support skill is more of the same, actually doing quite a lot more damage than her standard skill, but on a much longer cooldown. With neuronics, it can also stun enemies hit, which is also nice.
Should you want more power, you still have Haru's ultimate. On cast, it does a large area-of-effect slash on enemies, then transforms into the Body as Blade (BaB) state and gains 50 Victory Points (VP), which are what you use to maintain BaB, costing one VP per second. While in BaB, Haru's standard skill doesn’t cost S-Energy, has no cooldown, and does an additional hit of damage (bringing the total to four per cast). However, each cast costs two VP, limiting how many uses you can get out of it. Additionally, you can recast Haru's ultimate while in BaB to perform an attack similar to the initial ultimate cast, but dealing way more damage. This costs 15 VP, but can also be recast without meeting the VP cost, after which you get kicked out of the Body as Blade state. Neuronics greatly improve the power of the recast, allowing for standard skill casts to potentially grant a free ult recast, and each ult recast refunding VP based on the number of enemies hit.
Of particular note is her Deiwos passive, which executes shieldless enemies below a certain HP threshold scaling with Haru's attack stat. This greatly helps with finishing off enemies and maintaining standard skill charges.
It's clear to see that Haru is heavily biased towards clearing crowds, and she'll happily mob up trash mobs all day. However, when enemy HP values get higher or the target becomes beefy bosses instead, Haru can find it harder to find resets and end up waiting on cooldowns for her skill charges, in which time her gun DPS isn't particularly impressive. With mobbing becoming a less valuable niche, Haru struggles to keep up with gun-based damage carries where it matters, but can still find a place for general use.
Haru's first two manifests offer the most bang for your buck, with the first allowing you to start missions with a free ultimate and the second providing an easily-stackable attack boost. The value proposition becomes much harder beyond that, so stopping at one or two is more than fine. Haru obviously wants her intended best-in-slot, Psyche-16, but does well enough with the free Wild Wasp Stinger from the Fogbound Dream event shop. In particular, the faster-firing semi-automatic pistols are preferred as they'll allow you generate more cooldown reduction faster for better skill uptime. Despite this, Star Ocean is more than fine as a permanently available stand-in, synergizing well with Haru’s abilities and actually making her a competitive DPS against the Fiends in Neural Sim.
All of Haru's neuronics are actually pretty useful in their intended roles, so invest in them based on what you expect to use. For almost all of you, this means prioritising her standard skill, then ultimate skill, then finally her support skill if you find yourself using that often.
Fritia - Hush (High Investment)
 | |
| Single Target | A+ |
| Mobbing | C+ |
| Support | B- |
Roles: Skill Damage DPS, Laser Beam Death Ray
Team Dependant!
Read Hush’s base review here.
With her heat ray further juiced up, Hush finally brings a notable amount of damage to burn foes to a crisp. Manifest 3 allows for her to further increase her ultimate duration by regenerating U-Energy while her ultimate is active, and Manifest 4 increases its damage. Manifest 5 is an appreciated easy skip however, as it only provides some damage reduction.
Finally getting a strong support (Tess) to let her fire off her laser in a reasonable timespan, Hush pumps out surprisingly fast Neural Simulation times that rival top DPS operatives. However, her lack of general versatility means that this is as high as her rating can go unless she sees changes to her other abilities.
Vidya - Agave
 | |
| Single Target | A- |
| Mobbing | A |
| Support | B |
Role: Parts Break, Skill Damage DPS
The third DPS release to follow Seasun's skill DPS formula pairing a high-uptime standard ability with a big burst damage tool dependant on its own unique resource, Agave unfortunately misses the mark and tends to leave players frustrated when extracting her otherwise-above-average potential.
Read the full review here.
Tier 2
Usable, but nothing special
Marian - Queen of Pain
 | |
| Single Target | A- |
| Mobbing | B |
| Support | C |
Role: Ballistic Damage DPS, Support
Marian is the quintessential “sniper sniper,” with simple gameplay and competent damage. However, she also rewards good positioning through her passive buff to ADS ballistic damage while not moving.
Smokescreen is a simple get-out-of-jail-free card, but its passive skill component is your primary DPS boost. Scope in, hit harder; it’s as simple as that. The clone left behind by the active component can also be used as a follow-up shot when her ultimate ability is activated once the corresponding neuronic is unlocked.
Her support and ultimate abilities are both quite similar, as single-target nukes. Her ultimate in particular is excellent for mini-bossing due to its low cooldown and energy cost, allowing you to use it on tougher enemies for quick takedowns while also not feeling pressured to save it for an eventual boss fight like you might with other operatives. Her support skill has also seen new uses as a resist shredder for other top DPS picks.
Useful even without manifests. Not reliant on a specific weapon, but prefers Mark of Mesmer to further enhance her ADS playstyle.
Prioritise her ult neuronics. After this, upgrading her Smokescreen neuronics will increase the passive bonus from ADSing that's attached to it.
Fritia - Little Sunshine
 | |
| Single Target | C+ |
| Mobbing | B- |
| Support | A |
Role: Ballistic Damage Support
Fritia comes with a fiery set of skills, but her lacklustre active operative performance keeps her on the bench, where she’s much more useful.
Neither of Fritia’s active operative skills are particularly noteworthy. Her standard skill is a decent enough crowd knockup, but doesn’t do a lot of damage and comes on a long cooldown compared to its effect. Meanwhile, Her ultimate’s effects activate too slowly to majorly contribute to DPS.
Fortunately, her support ability is great. It gives the active operative bonus Thermal damage on each shot, helping faster-firing operatives get the most out of their bullets. However, her support neuronic that claims to increase final damage to burning targets only affects the bonus damage granted by her support ability, which noticeably makes her much less useful with slower-firing operatives, like Yao. The bonus damage does apply to every pellet fired from shotguns though, which is a large DPS boost to shotgun operatives. Note that this support ability will not work with bonus ammo provided by Fenny - Starshine, making it so you’ll have to pick between one or the other.
Fritia winds up as an operative that’s decently useful overall, but not enough to make her stand out from the crowd.
Useful even without manifests. Prefers Strawberry Shortcake to gain maximum value out of her support skill.
Both support skill neuronics are very good. If you insist on using her as an active operative, prioritise her active skill neuronic that increases its range, as this will allow you to deal with large groups better.
Chenxing - The Observer
 | |
| Single Target | B- |
| Mobbing | B |
| Support | A |
Roles: Skill Damage Support, Healer
Chengxing has an interesting zone control playstyle that unfortunately falls a bit flat, but can at least provide skill damage buffs to spice up her otherwise-boring role as a healer.
Her normal ability, Heavenly Law, drops a turret that attacks enemies and draws aggro. In practice, the turret damage output isn’t all too amazing and the main use you’ll get out of this (if any) is from the crowd control from tower zaps and by using them as aggro dummies.
Psychic, her support skill, drops a tower like her standard skill, this time spawning healing pickups. Compared to Yao’s healing, Chengxing’s heals are chunkier in size, but fewer in amount. This leads to lower absolute healing, but allows for more freedom in positioning due to the heal dispenser (which also can attract enemy aggro) yeeting the heal over to your active operative (the range is quite generous and much less restrictive than Yao’s band-aid circle). Unlike Yao’s heal, Chengxing’s support ability also increases the active operative’s skill damage, essentially trading off some healing for potentially a lot more damage. This is where most of Chenxing’s usage comes into play, as her own personal damage isn’t quite up to snuff.
The kit is tied together with Chengxing’s ult, Divine Purification. This drops a larger turret which again repels enemies, but also buffs up your existing attack turrets. When upgraded, it does damage on entry and gives Chengxing chain lightning of her own that ricochets up to five times. Though with her turrets feeling mostly lacklustre, how much value you’ll get out of this may vary.
Neuronics allow for her standard and support abilities to further buff up the active operative’s skill damage by a significant amount, which means her support skill provides an even larger buff, and when used as an active operative means that Chengxing’s turrets output even more damage.
Chenxing can use any AR, but note that Trial’s Eve is not worth using and you should just equip Strawberry Shortcake instead. It’s really kind of awful. All five manifests are meaningful, but she works perfectly fine without.
Prioritise her support ability neuronics, as you’ll probably be using her for her support heals most of the time. Her ultimate neuronic can bring some useful DPS boosts when using her as an active operative, but not by a huge amount. Her Deiwos passive is generally not worth the cost to upgrade, as most players will use Chenxing as a support where she has no S-Energy issues.
Marian - Swift
| |
| Single Target | B |
| Mobbing | B- |
| Support | B- |
Role: Ballistic Damage DPS
An exception among the current sniper roster, Swift is a sniper who does not have to aim.
Her active skill, Cloud Shot, fires a homing shot at an enemy as well as making the next normal shot lock on as well, allowing for constant mobility while maintaining DPS. The lock-on also is very useful when facing more mobile enemies that may be more difficult to otherwise land effective fire on. Aiming at targets marked by Cloud Shot is still desirable when opening your combos, as it will lock your next Cloud Shot cast in turn, creating a self-sustaining series of lock-on attacks.
Swift’s support skill is nothing to write home about, but it’s a crowd control cleanse that also provides some extra mobility.
Wounded Bird, her ultimate, is more important than it might seem. Yes, it does enough damage to be worth its energy cost, and also provides ten seconds of extra defence penetration to contribute to DPS after the fact. But what you really want from this is the free reload it provides so you can continue your combos.
Her Deiwos passive allows her to ignore a certain amount of enemy defence when attacking weak points. Free damage is free damage. It also increases her gun’s magazine size by one, which is always nice.
Ultimately, Marian finds herself with a very strong burst rotation while she has Cloud Shot charges, but unfortunately one that ends quickly and leaves her with not a lot to do.
Hitting Manifest 2 is the best cost-to-benefit ratio, though later manifests are important to helping extend her burst window and increase its availability. Swift is technically flexible with her weapon selection, but Horn of the Orca is basically mandatory as its bullet refunds allow her to extend her damage rotations.
Both neuronics for her active skill and ultimate are useful investments, while her support skills are more niche and situational in value.
With further investment, Swift sees an increase in rating.
Mauxir - Meow
 | |
| Single Target | B+ |
| Mobbing | B |
| Support | B+ |
Roles: Skill Damage Support
Ballistic Damage DPS
Mauxir is an oddball of an operative who subverts traditional gameplay patterns and offers unique tools not found elsewhere.
Maurxir’s quirks start off with her standard skill, a unique soul grab mechanic that allows for Mauxir to bypass traditional SMG weaknesses and effectively deal damage to enemies that SMG operators typically struggle with. It comes with some drawbacks, but can also be kitted out with some fun party tricks like low-health executes and AoE damage given enough manifests.
Her support skill is also quite similar, but can only be hit by skills, which somewhat limits its practical usage. Despite this, its ability to generate extra targets allows skill-based operatives like Absconditus and Kaguya to hit and double dip on damage, making her very useful as a support in the right conditions. The orbs generated by her support skill can also passively spawn without a cooldown when an enemy is affected by a control ability, allowing for very high uptime on support orbs. It’s not unlikely for this skill to only get better over time, as more operatives release with new potential synergies.
Finally, Mauxir’s ultimate ability can do one of two things. On cast, it immediately executes enemies below a certain health threshold based on Mauxir’s current health, though this effect can be difficult to use effectively. If the execute fails, Mauxir instead gains a self-buff that grants bonus damage on shots scaling with her maximum health. This bonus damage can also be granted by skill hits from other operatives in your squad, providing an additional source of damage to operatives who don’t typically find a lot of value in their own ultimates. In particular, it has strong synergy with Chenxing - Ethereal Cloud due to the bonus Aptitude only having a cooldown per target hit which allows for even stronger damage with Chenxing’s marks (which count as skill damage).
Mauxir remains as a valuable asset for those who know how to use her to her full potential, but most players will find it more tempting to leave her on the bench for simpler power boosts.
Mauxir is useful even without manifests, but they mostly provide compelling benefits. Of particular note is Manifest 3, which reduces the defence of orbs based on their missing health. As well, Manifest 5 is NOT recommended and something to be avoided, as its effect causing orbs to detonate can actually cause you to lose DPS.
As a support, you will want the two neuronics in her support and ultimate skills that allow other party members to have access to her party tricks. The rest are all notable quality of life boosts and can be invested in based on your own discretion.
Tier 3
Not amazingly strong, but still viable or niche
Yao - Quiet Quitter
 | |
| Single Target | B |
| Mobbing | B- |
| Support | A- |
Role: Healer
Sniper and healer are two conflicting identities for a character, but Yao makes it work just well enough to go home on time.
As an active operative, Yao relies heavily on her standard skill, Five Minute Break, to enhance her DPS. With it active, she becomes a fast-firing DPS with a bottomless magazine that can deal with farther-away enemies in a pinch. Since you get her for free as well, she can do decently enough as your main sniper until you get better options.
Her support skill and ultimate really both do the same thing, and makes Yao one of the strongest healing operatives pound-for-pound. Her support skill is excellent for total sustained healing, and her ultimate further doubles down on this. Do note that making the most of her medical potential can restrict your movement a bit, as her support skill’s healing drone isn’t the fastest and her ultimate does leave her napping in a chair.
In Quiet Quitter form, Yao isn’t the most impressive DPS, but she doesn’t have to be, as her healing power is more than enough to make her a valuable pick in early-game squad lineups.
Yao works right out of the box, but her first two manifests massively boost her healing power, and are quite easy to obtain thanks to the new player login campaign. Olympus is a shiny SSR that you’ll get for free, but Deep Sea’s Call provides an additional attack boost while statsticking hard enough to beat it on healing too.
As most players will end up using Yao exclusively as a healer, unlocking both support neuronics is a pretty obvious decision. After that, both active skill neuronics are decent DPS increases if you find that useful, while her ultimate neuronics also help with its uptime and add extra utility through CC resistance.
Lyfe - Wednesday
 | |
| Single Target | B |
| Mobbing | B |
| Support | B+ |
Role: CC Support
Wednesday is most simply described as a budget version of her SSR variant, Wild Hunt. Persistent attack drones sound interesting on paper, but ultimately do not do enough meaningful damage, nor do they provide CC like Wild Hunt’s Frost Wolves.
Her support ability does give her some niche use as Paralyze sources aren’t super common, which is at least something..
Fundamentally still a decently designed kit with undertuned numbers, in her current state she’s simply stuck always being worse than her 5* variants.
Not meaningfully dependent on manifests, but you will get at least manifest 1 on her no matter what, as the game provides many free Wednesday shards through career missions. She’s also not reliant on a specific weapon, but Work-in-Progress is free and really your only good on-element option, so you might as well stick to that. But realistically you’ll mostly be using her in a supportive role, so take your pick from the support SMGs the game has to offer.
All of Wednesday’s neuronics are meaningful upgrades, though neuronics that refresh drone duration can be hard to effectively use given the lack of a clear indicator on their remaining duration.
Siris - The Goldfish
 | |
| Single Target | B- |
| Mobbing | C+ |
| Support | B |
Roles: Ballistic Damage Support
The forgetful goldfish packs a punch while also providing strong utility. However, she does come with caveats in either role, limiting her ultimate usefulness.
Her normal ability, Initial Coffin, grants Siris 25% damage reduction, but also allows her to get bonus Kinetic Aptitude on her next attack after dodging. While the numbers on said echos may not seem very high, they apply to every pellet fired by her shotgun, which adds up to a meaningful amount. However, this ability starts its cooldown when the buff expires and not on cast, leaving you with 10 seconds of uptime every 25, which isn’t amazing.
Most good operatives have a “killer feature” that makes them valuable in a team composition. Siris’ is the ability to build a wall, and make the enemies pay for it. Her support skill deploys a barrier that blocks enemy fire while still allowing friendly operatives to shoot back. When upgraded, the wall will additionally provide the 25% damage reduction from Siris’ normal skill to the active operative after the wall expires, though you can’t get the bonus Kinetic Aptitude. While shooting through the barrier will provide said bonus damage, your mileage may vary at a 30% activation rate. Keep in mind though, the wall is fixed in place which can reduce its usefulness if you’re forced to bail out while dodging area-targeted attacks. In practice, this skill is of dubious usefulness, as enemies threatening enough for this skill to be useful tend to instantly break it, while enemies that can’t are weak enough that the wall isn’t needed at all.
Finally, Siris’ ultimate is another potent self-buff, granting her a massive shield while also granting defence reduction, movement speed, and crowd control resistance. Should you end up not needing all that shielding, 20% of any left over gets converted into a heal for her. Yet, this buff only lasts for ten seconds, which really isn’t enough time to really get value out of the shield and other buffs.
Overall, Siris is a dual-role brawler that tries to do two things and ultimately isn’t amazing at either. All of her skills come with awkward drawbacks and most players may find her “killer feature” to be little more than a gimmick.
Manifest 1 is amazing value, extending the usefulness of her support skill, but whether you want to push past her inconsistently useful manifest 2 is up to you. Any Kinetic shotgun will work on Siris, with luxury options including Tiny Grains for a more offensive role, and Precious Baby for more defensive prowess. For support applications, Lapis Lazuli allows her to also provide an attack boost.
All of her neuronics are quite useful, and Siris can be flexibly specced to reflect what a specific player would want to use her for.
Cherno - Those Two
 | |
| Single Target | C+ |
| Mobbing | C |
| Support | B+ |
Roles: CC Support
Cherno tries her best, but doesn’t quite succeed in bringing an alternative playstyle to the game with a powerful summon in tow. She does however find a use when she keeps the monster in its cage.
Her active skill is a reasonably useful area interrupt, though its range is too small to be effective without her neuronic upgrade (and still a bit lacking afterward). It’s not entirely useless, but also not anything to write home about.
Clear Empty Skies, her ultimate ability, attempts to get around the inherent weaknesses of the SMG class… by outsourcing the work to someone else. I wouldn’t blame her. Beloberg actually can output some very strong damage numbers, but the inability to directly control its behaviour and its constant HP drain on Cherno makes it a tricky and sometimes frustrating tool to use, even with the ability to switch out to another operative after summoning Beloberg.
However, her support skill gives Cherno a place for players looking for additional ways to slow enemies. It lets the player zoom around with a ghostly Cherno, applying the Slow effect to all enemies she passes through. This will trigger the damage amp from Navigator Squad, making her a more mobility-focused alternative to Redacted.
While Cherno wants at least a few Manifests to become viable as a DPS operative, all of her supporting power is available right out of the box. For DPS purposes, Arctic Fox can seem like a tempting option, but its low skill uptime makes it difficult to use effectively. Stick to 100 Battle Veteran for a boost to your gun damage. In a supporting role, she has access to strong weapon choices like Alloy Truth and Frigatebird as a means of providing a further damage boost.
All of Cherno’s neuronics provide meaningful upgrades to her abilities. Invest in her neuronics to suit the role you want to play her in.
Tier 4
Occasionally useful, but overall underperforming.
Nita - Hands
 | |
| Single Target | C |
| Mobbing | B |
| Support | B- |
Roles: CC Support
While initially unimpressive, Nita turns out to bring just enough utility and damage to find herself an occasional spot on team lineups.
Her active ability is a strong close-range CC tool that also allows her to generate a large amount of personal shielding, while her ultimate and support abilities are useful CC tools. Combined with all her manifest and neuronic upgrades, Nita becomes a potent shield tank with high durability. However, such a role is simply not needed in the game’s current state, as enemies simply do not deal enough damage for a main tank to be necessary.
Despite this, her support ability turns out to be quite a useful mobility tool, with the range on the dash matching or exceeding even that of Lionheart, and the followup movement speed buff and shield that can be applied with it are always nice to have.
Does not see any major gameplay strategy changes as she gains manifests, though her first manifest does provide a way to convert her shielding into more damage, as well as knock back enemies which can be useful in cheesing some stages. Not reliant on a specific weapon, but Precious Baby can further increase her survivability, while Tiny Grains can provide some offensive utility and Lapis Lazuli will maximise her value as a support.
All of Nita’s neuronics do provide some use, and you can invest in them as you wish, depending on what you want.
Fritia - Hush
| |
| Single Target | B |
| Mobbing | C+ |
| Support | B |
Roles: Skill Damage DPS, Laser Pointer
Team Dependant!
Hush’s character bio notes that her exoskeleton more or less only got approved because of the heat ray that it comes with, and this translates over to her gameplay disappointingly well.
Her normal ability, Strongest Chain, is an AoE crowd control tool with okay enough damage. However, the cooldown is painfully long and the ability only pulls in four other targets, which is a strange caveat to include.
Her support skill takes a similar support approach like her 4* variant, this time providing a defensive buff that comes with CC immunity when upgraded with neuronics. Unfortunately, it has a drawback of being limited to five hits (though it can linger with halved effectiveness once you unlock the corresponding neuronic), and also only lasting ten seconds. Being restricted in lifespan by both hits and time (neither of which are particularly impressive in duration) limits its overall usefulness, especially in stages with turrets and other rapid-firing enemies.
Perhaps the reason that these two abilities are so strangely limited in effectiveness is to allow for more power budget to be distributed to her ultimate ability, the heat ray. Damage-wise, it can be good. Very good. In fact, it’s the main reason for Hush’s high tier placement. However, using said heat ray roots you in place, which is less than desirable. Being CC’d while using your ultimate also cuts it off early, which is a mild inconvenience. The solution to this problem turns out to be through manifests. Manifest 2 is the most sane stopping point as far as cost-to-benefit goes, as this is where using her ultimate applies her support skill buffs to Fritia herself. This significantly reduces the drawback of being rooted during her ultimate, and if her support skill has the appropriate neuronic, also gives Fritia CC immunity to prevent undesired interruptions. Manifest 1 also removes the limit on her ult duration, allowing it to continue as long as you can feed it energy.
At Manifest 2, Hush is just okay. Her ultimate doesn’t quite have the uptime or damage to make up for her other weakness. Lava Bones is the no-brainer best-in-slot, but if you don’t have it, try to give her a fire AR of some kind. This will unlock one of the free methods of increasing her ult damage via neuronics.
Given that the main gimmick of Hush is her heat ray, you will obviously want to prioritise both of her ult neuronics, with the CC immunity (“Iron Body”) on her support ability being the next most important. The other three neuronics are of less importance.
With further investment, Hush sees an increase in rating.
Enya - Big Sis
 | |
| Single Target | B |
| Mobbing | B- |
| Support | B- |
Role: Ballistic Damage Support
Enya is an operative that attempts to be a versatile multitool, but ultimately spreads herself too thin in the process.
Her active skill throws a cluster of bombs that bounce outward until they hit an enemy, at which point they explode. However, they don’t have enough range to effectively deal with groups of enemies not in close range, yet also spreads out too much to be useful against all but the largest hordes. Tight corridors make the spread much more manageable, but it’s more often than not frustrating to use.
Feathered Serpent, her ultimate ability, provides Enya with an extra boost to her DPS by passively storing charges of bonus damage that get applied on hits, but they don’t recharge fast enough to make a large impact in many scenarios. The ultimate also has an active ability that deals damage to an area while also releasing a large stack of said bonus damage charges, but I’ve found it to be awkward to aim, as it will often aim too close or too far from the enemy you want to hit.
The real star of Enya’s kit is her support ability, which once was enough to make her Winter Solstice’s best friend. Said support skill applies a bomb to an enemy that amps the next shot on that enemy’s damage by up to 30%, which can be a lot when you consider how much damage operatives like Winter Solstice output per shot. Unfortunately, the 15 second cooldown leaves her with limited uptime on this ability, and stronger supports like either Acacia make her value proposition harder to justify.
In the end, Enya works, but it’s hard to give stronger praise than that. All of her abilities come with significant drawbacks that limit her full potential. She really just needs better numbers on her abilities, but until that happens, Enya finds herself being a jack of all trades, master of none.
While all of her manifests provide some benefit or another, none of them meaningfully make a difference to her power. Prismatic Igniter is the obvious choice for support applications, while Lucky Times helps to supplement her DPS should you choose to use her in that role.
All of her neuronics are pretty decent upgrades to her abilities. Choose based on what you want out of her, but you probably want to upgrade her support neuronics first.
Tier 5
Strongly needs buffs or a rework.
Haru - “The Ace”
 | |
| Single Target | B- |
| Mobbing | C- |
| Support | B- |
Role: DPS?
A clunky mix of abilities leaves Haru with a confusing playstyle that reaps questionable rewards. Her active skill, Triple Tap, wants to be charged up to have maximal effectiveness, but its long charge time means you’re giving up non-insignificant gun DPS in exchange for it unless you can’t hit weak points. Vanishing Phantom, her support ability, can be used as an execute ability against low-health targets, and actually is a relative strong point of her kit.
The other relative bright spot in Haru’s kit is her ultimate ability, which applies a knock-up and provides decently strong followup damage via her Sword of Oaths on shots hit. However, the split power budget that adding both a knock-up and a damage buff creates makes this ability one that tries to do two things and is resultantly not great at either; the knock-up does not do damage and the zone is not particularly large, and the Sword of Oaths has too long of a cooldown to majorly contribute to DPS, even with her neuronic upgrade.
Does not see any major gameplay strategy changes as she gains manifests. Prefers Star Ocean, though whether you want to spend resources pulling this may be questionable at best.
If you are dead-set on using Haru, you’ll find that all of her neuronics have some use, and you can invest in them to suit whatever playstyle you manage to come up with for her.
Glossary of Terms
AoE
Short for Area of Effect. Denotes abilities that can also affect nearby enemies that are not the primary target.
Bossing
The act of fighting strong boss-type enemies, or the corresponding role that an operative might have.
See also: mini-bossing, the same concept but applied to less powerful enemies that are still significantly stronger than average mooks.
CC
Short for Crowd Control. Denotes the ability to temporarily disable an enemy’s ability to act, or the corresponding role an operative might have.
DPS
Short for Damage Per Second. Denotes the ability to output consistent damage, or the corresponding role that an operative might have.
Different types of DPS exist:
- Break DPS: Specialised in doing large amounts of burst damage during boss fights where the boss is temporarily downed and vulnerable
- General DPS: all-purpose, good at everything but may not be the best at anything.
- Single Target DPS: large amounts of damage, but in a way that may limit the number of targets that can be quickly and effectively engaged.
Tank
An operative with the role of taking damage for other operatives.
May have sub-specialized roles:
- Off-Tank: Short for Offensive Tank. An operative that is intended to take hits while also dealing back non-insignificant damage as well.
- Main Tank: An operative intended to be heavily focused on taking damage, often at the cost of personal damage output.
- Shield Tank: An operative specialised in mitigating damage taken through the use of shields.
Mobbing
The act of effectively fighting large clusters of enemies, or the corresponding role that an operative might have.