Table of Contents
Star Master is a game mode where you capture enemies and summon them to do the fighting for you. It's kind of like Pokemon if it was a little buggy and existed in an open world best described as "quaint." So in other words, it's kind of like Pokemon.
But much like a certain other monster-catching game that I've been making unfair comparisons to, it can be difficult taking on the challenge content without a good idea of how to approach it. That's uh, where this guide comes in.
Also, I'm just going to call the captured enemies you summon "recruits" for the sake of brevity.
Taking A Backseat
There are a few major differences between Star Master and normal gameplay:
- Most of the things you fight are generic mook enemies (ie. they can be CC'd by anything, and don't have a CC lockout timer)
- Your own damage is basically irrelevant, not so much because you do less damage but because enemy HP values are super inflated
- Your ability to heal your recruits is also more or less negligible due to the sheer health pool that they have
This calls for a shift in mindset away from how you normally play the game. You're not the star anymore, but rather a support that enables your recruits to output damage while not dying themselves. How do you do this? By being as much of a nuisance to enemies in ways that don't involve doing damage. Enemies that are slowed, paralyzed, stunned, or frozen can't fight back, after all.
So how does this apply to you, the player? It means you kick out your DPS and bring a squad of Control effect supports, of which the pool is much larger thanks to the fact that you mostly fight non-boss enemies. So without further ado, meet the new Tier 0 lineup (this is a JOKE, don't take it seriously).
Shotgun Diplomacy

Shotguns are incredibly useful here for their parts breaking utility (parts HP is NOT inflated here like HP is) and ability to stagger non-boss enemies, which is what you'll mostly be fighting. It's highly recommended that you bring one as your main operative And the top recommendation here goes to... Nita.
Yes, really.
Everything that makes Nita a suboptimal pick in normal gameplay becomes her greatest strength here. Her standard skill can group up enemies to be decimated by your recruits' AoE attacks, and her defensive nature means she's a great bullet sponge for tanking aggro. She can also make great use of Twilight Squad, shredding enemies' Kinetic resistances and allowing your recruits to do more damage, as many deal Kinetic damage. If you have Tiny Grains, that's another way of amping your recruits' damage, though defensive options like Precious Baby will work too.
Of the rest of the shotgun pool, Eatchel is the only other one of note. This isn't for her healing, but for the relatively short cooldown of her support skill, which comes with an AoE stun. This can be comboed with Navigator Squad for another damage amp. Be careful how you use it, though, as its additional knockback effect can toss enemies out of your recruits' AoE attacks.
What Doesn't Attack Can't Hurt You
While I don't think anyone would be missing Nita in their roster at this point, you still have a few party slots left to fill. And as far as that goes, anything with a good Control effect on their support skill will do great. Acacia - Kaguya can group up enemies from a distance (and resist shred, of course), while Katya, Lyfe (both of them), Haru - Absconditus, and Acacia - Redacted can also meaningfully contribute. But there is another surprise star that you'd do well to include.
It's Cherno! No, not her new flashy Enigma variant, though it can also provide decent Slow utility. I mean her original "Those Two" form. While its support skill cooldown is longer, the Slow duration is more than twice as long, and is much more flexible in its use, letting you zip around and tag every single enemy even if they aren't conveniently grouped up. Plus, she's a lot easier to obtain, being a lower rarity and all that.
If you do find yourself taking more damage than you'd like, you can give up a party slot to bring a healer. Just keep in mind that it's for yourself, not your recruits.
Choosing Recruits
There are a lot of different recruits you can bring, with varying stats and skills to consider. It can be a bit overwhelming. Fortunately, you can ignore a good chunk of them. The team comp I've been getting the most value out of uses two beefy frontliners to buy room for the third member to dish out damage from a distance.
Raining Fire
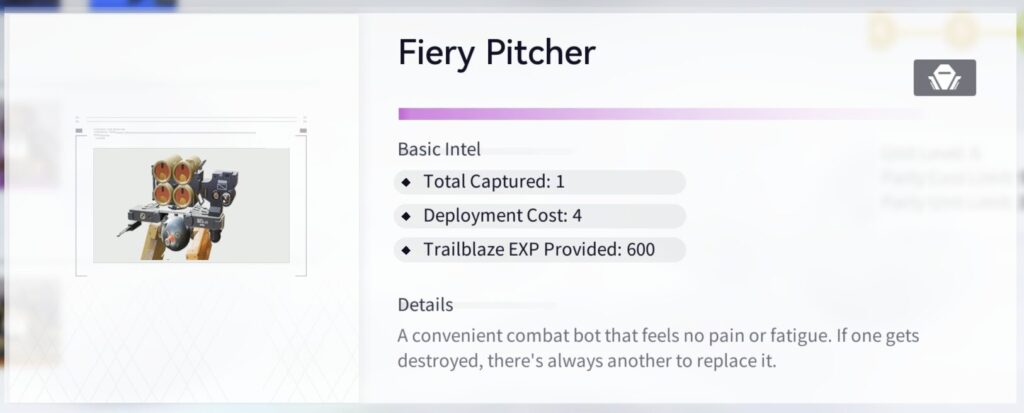

The Fiery Pitcher is great. It shoots out a barrage of high-damage ground attacks that melt through groups of enemies, and has its own stun to temporarily incapacitate anyone that gets too close (that's your cue to bail it out and draw its aggro away). Even when its rocket launcher is destroyed, its backup gun can still deal respectable damage. If you haven't gotten your hands on one yet, I'd keep an eye out for it.
But for stages with bosses you want to take out ASAP, it'll be well worth swapping it out for a single-target specialist. Since you'd be replacing your Fiery Pitcher, you might as well take advantage of the freed up cost cap and bring in an Adventist Archer. It does have some issues hitting floaty Titan bosses, but is otherwise a powerhouse of single-target DPS. Forget any of the operatives in the game, this and the Fiery Pitcher are the real waifus here.
If you're missing these, you can reasonably make do with the Coyote Steel Ball or Adventist Sapper. Other strong ranged DPS picks include the Lightbulb and Cleaning Rod on the Coyote side, and the Repeat Crossbow Adventist is also worth consideration.
Beefy Boys
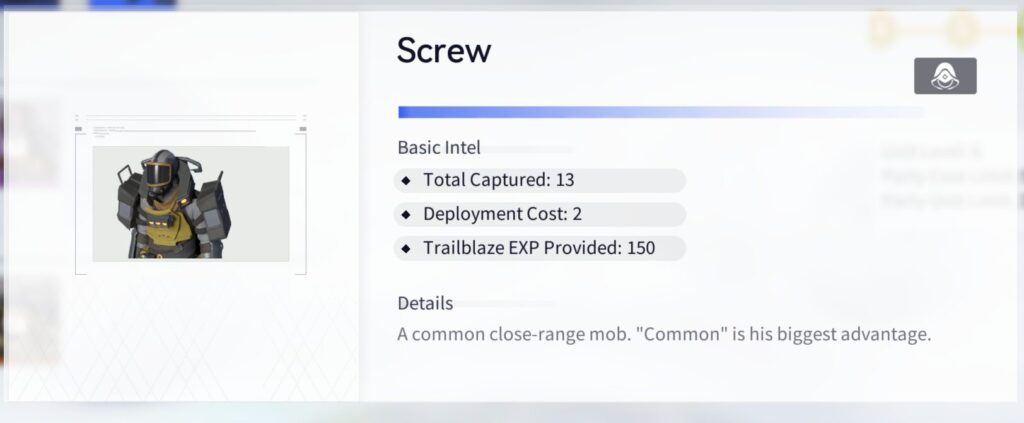
I'm not sure if the Screw from the Coyote faction is everyone's starter recruit from the tutorial for this game mode, but they should be common enough that anyone who's been regularly doing their captures probably has two or eight of them lying around by now. They're nothing fancy, but they get the job done. Likewise, they don't attack super fast but the hits that do land carry a decent amount of punch, and they're tanky enough to be a decent frontline for your ranged DPS to do its work. Oh, and they're cheap for how much tankiness you get; nothing else at the two-cost-or-less price point really comes close. At just Trailblaze level 5, you can run two of these and a Fiery Pitcher or Adventist Archer, which is exactly what I did for most of the challenge stages. The Adventist Swordsman is a pricier option with presumably better performance to match, but I didn't really test it out as my pair of Screws were more than enough.
Talent Show

The recuits you capture can have one or more of a random set of skills, bringing an extra layer of depth to team comp strategy. The number one most valuable skill to have is Squeeze Together, as it will generate a black hole that groups up enemies, letting your AoE DPS recruits hit them all at once and preventing them from wandering around. I'd consider it a must-have. But other than that, it's pretty straightforward - backline DPS recruits will want anything that improves its damage-dealing capabilities, while defensive or healing options work well with frontliners. Some notable hits and misses:
- Blender can be a good way to supplement damage on melee recruits that don't attack quickly (most of them)
- The shield generated by Final Defense only blocks one or two enemy attacks at most, and you ideally don't want your recruits dying to trigger the effect, anyways
- Forehead Flick is probably too unreliable to be useful, and you'll be providing enough CC that the stun it can provide shouldn't be too necessary
- An Apple a Day is about the best supportive healing option you could use (and much more potent than anything you could bring), but it's still not a lot, only restoring 3% of a recruit's max HP every 15 seconds at most
- More For Me is actually not too awful, as it scales off the massively inflated damage your recruits do
- Shattered Ice is surprisingly useful, especially against Titan enemies.
- Right Back At Ya can be pretty funny with melee recruits, but your mileage may vary.
Stage Clears
The strategy for a lot of these is largely the same: spam the hell out of your control abilities while using Nita's standard skill off cooldown to keep applying Kinetic shred and stagger or interrupt the attacks of any enemies you can. There are still some more specifics to keep in mind, though, so feel free to reference the following pace notes as well as this video of me clearing everything.
Stages 1 & 2
Easy warmup levels with the Fiery Pitcher. Break the gas tank on the Chained Ax in stage 2 to quickly chunk out its HP for a faster clear.
Stage 3
Your first real challenge stage. You have to actually destroy all the box mines before they self-destruct, so don't think you can just bait them into blowing themselves up to cheese the objective. This is much easier with Kaguya, as you can group them up from a distance, but using Nita's standard skill followed by a quick dodge out of aggro range will do the trick just fine. Swap out your Screws for any ranged attackers you have, because you don't want them running in and getting blown up.
Stage 4
Only four, decently tanky enemies here, so the Fiery Pitcher gets benched for a single target DPS like an Adventist Archer. Break the armor on the Hammer and Trumpet for a free down, and keep an eye on the Forge Spark to make sure it doesn't get up to anything.
Stages 5-7
Mostly just mooks here, so the Fiery Pitcher is back in.
Like the Chained Ax, breaking the the gas tank on the Furnace in stage 5 will instantly wipe out a portion of its health. Don't forget about the Forge Spark that spawns in wave 2, that thing can hurt.
For stage 6, the only thing you really have to worry about is the Phantom Shot Adventist in the last wave, but breaking its gun (it counts as a part) will knock it out on the spot. The enemy Adventist Archer is basically no threat since you can shoot it to cancel all of its attempts to fire its bow.
If you've managed to clear up to here with no issues so far, stage 7 will be a freebie for you. Relax and enjoy.
Stage 8
A Teumessian boss fight, because of course.
Put your single target DPS back in, because that's the only enemy here. Do your best to keep it paralyzed (mind the CC lockout) to minimize its ability to be a nuisance. Destroy every star you see; you should be able to take out any of them out in three shots or less. Cancelling its invulns isn't actually too important here, as we're not looking to set a speedrun record, and it's time where the CC lockout ticks down essentially for free.
Stage 9
The Adventist Archer stays in for this one, because despite there being a decent amount of mooks that spawn, the Purification Sage (the mech thing) that shows up in wave 2 is enough of a threat that you want to be able to delete it ASAP. Everything else isn't too much of a threat.
Stage 10
The enemies here aren't too much of a threat (Fiery Pitcher is back on the menu), but the invincibility totems can wreck a run if you're not paying attention. Destroy them to stun all enemies on the field, and note the 15 seconds you get before another one spawns; keep destroying them as soon as they show up and you'll find this to be pretty trivial.
Stage 11
Basically stage 4, but Adventist-flavoured this time. The same strategy applies.
Stage 12
This is the last stage you can play before getting gated to Trailblaze level 11, and it's a noticeable step up in difficulty. I would strongly recommend raising your Trailblaze level enough to bring a fourth recruit (probably another DPS) if you don't have Wild Hunt or Katya to provide a large AoE freeze. The two elite Titans (Gurah and Gamir) that spawn are big enough threats that the Adventist Archer is recommended here to nuke them down. Try not to take too much damage in wave 1, because wave 2 spawns a lot of mooks to go with Gamir. Break the ball on its right shoulder to prevent it from putting up a defensive wall around itself, and make sure to play bodyguard for your archer, because it getting swarmed by dogs (Calamities) is a very real possibility.
Once you have all these stages completed, pat yourself on the back and keep on catching new recruits until the Veteran Planet opens, at which point it'll be a good time to start looking to clear the rest of the challenge stages. The guide for that is coming soon, stay tuned.