Table of Contents
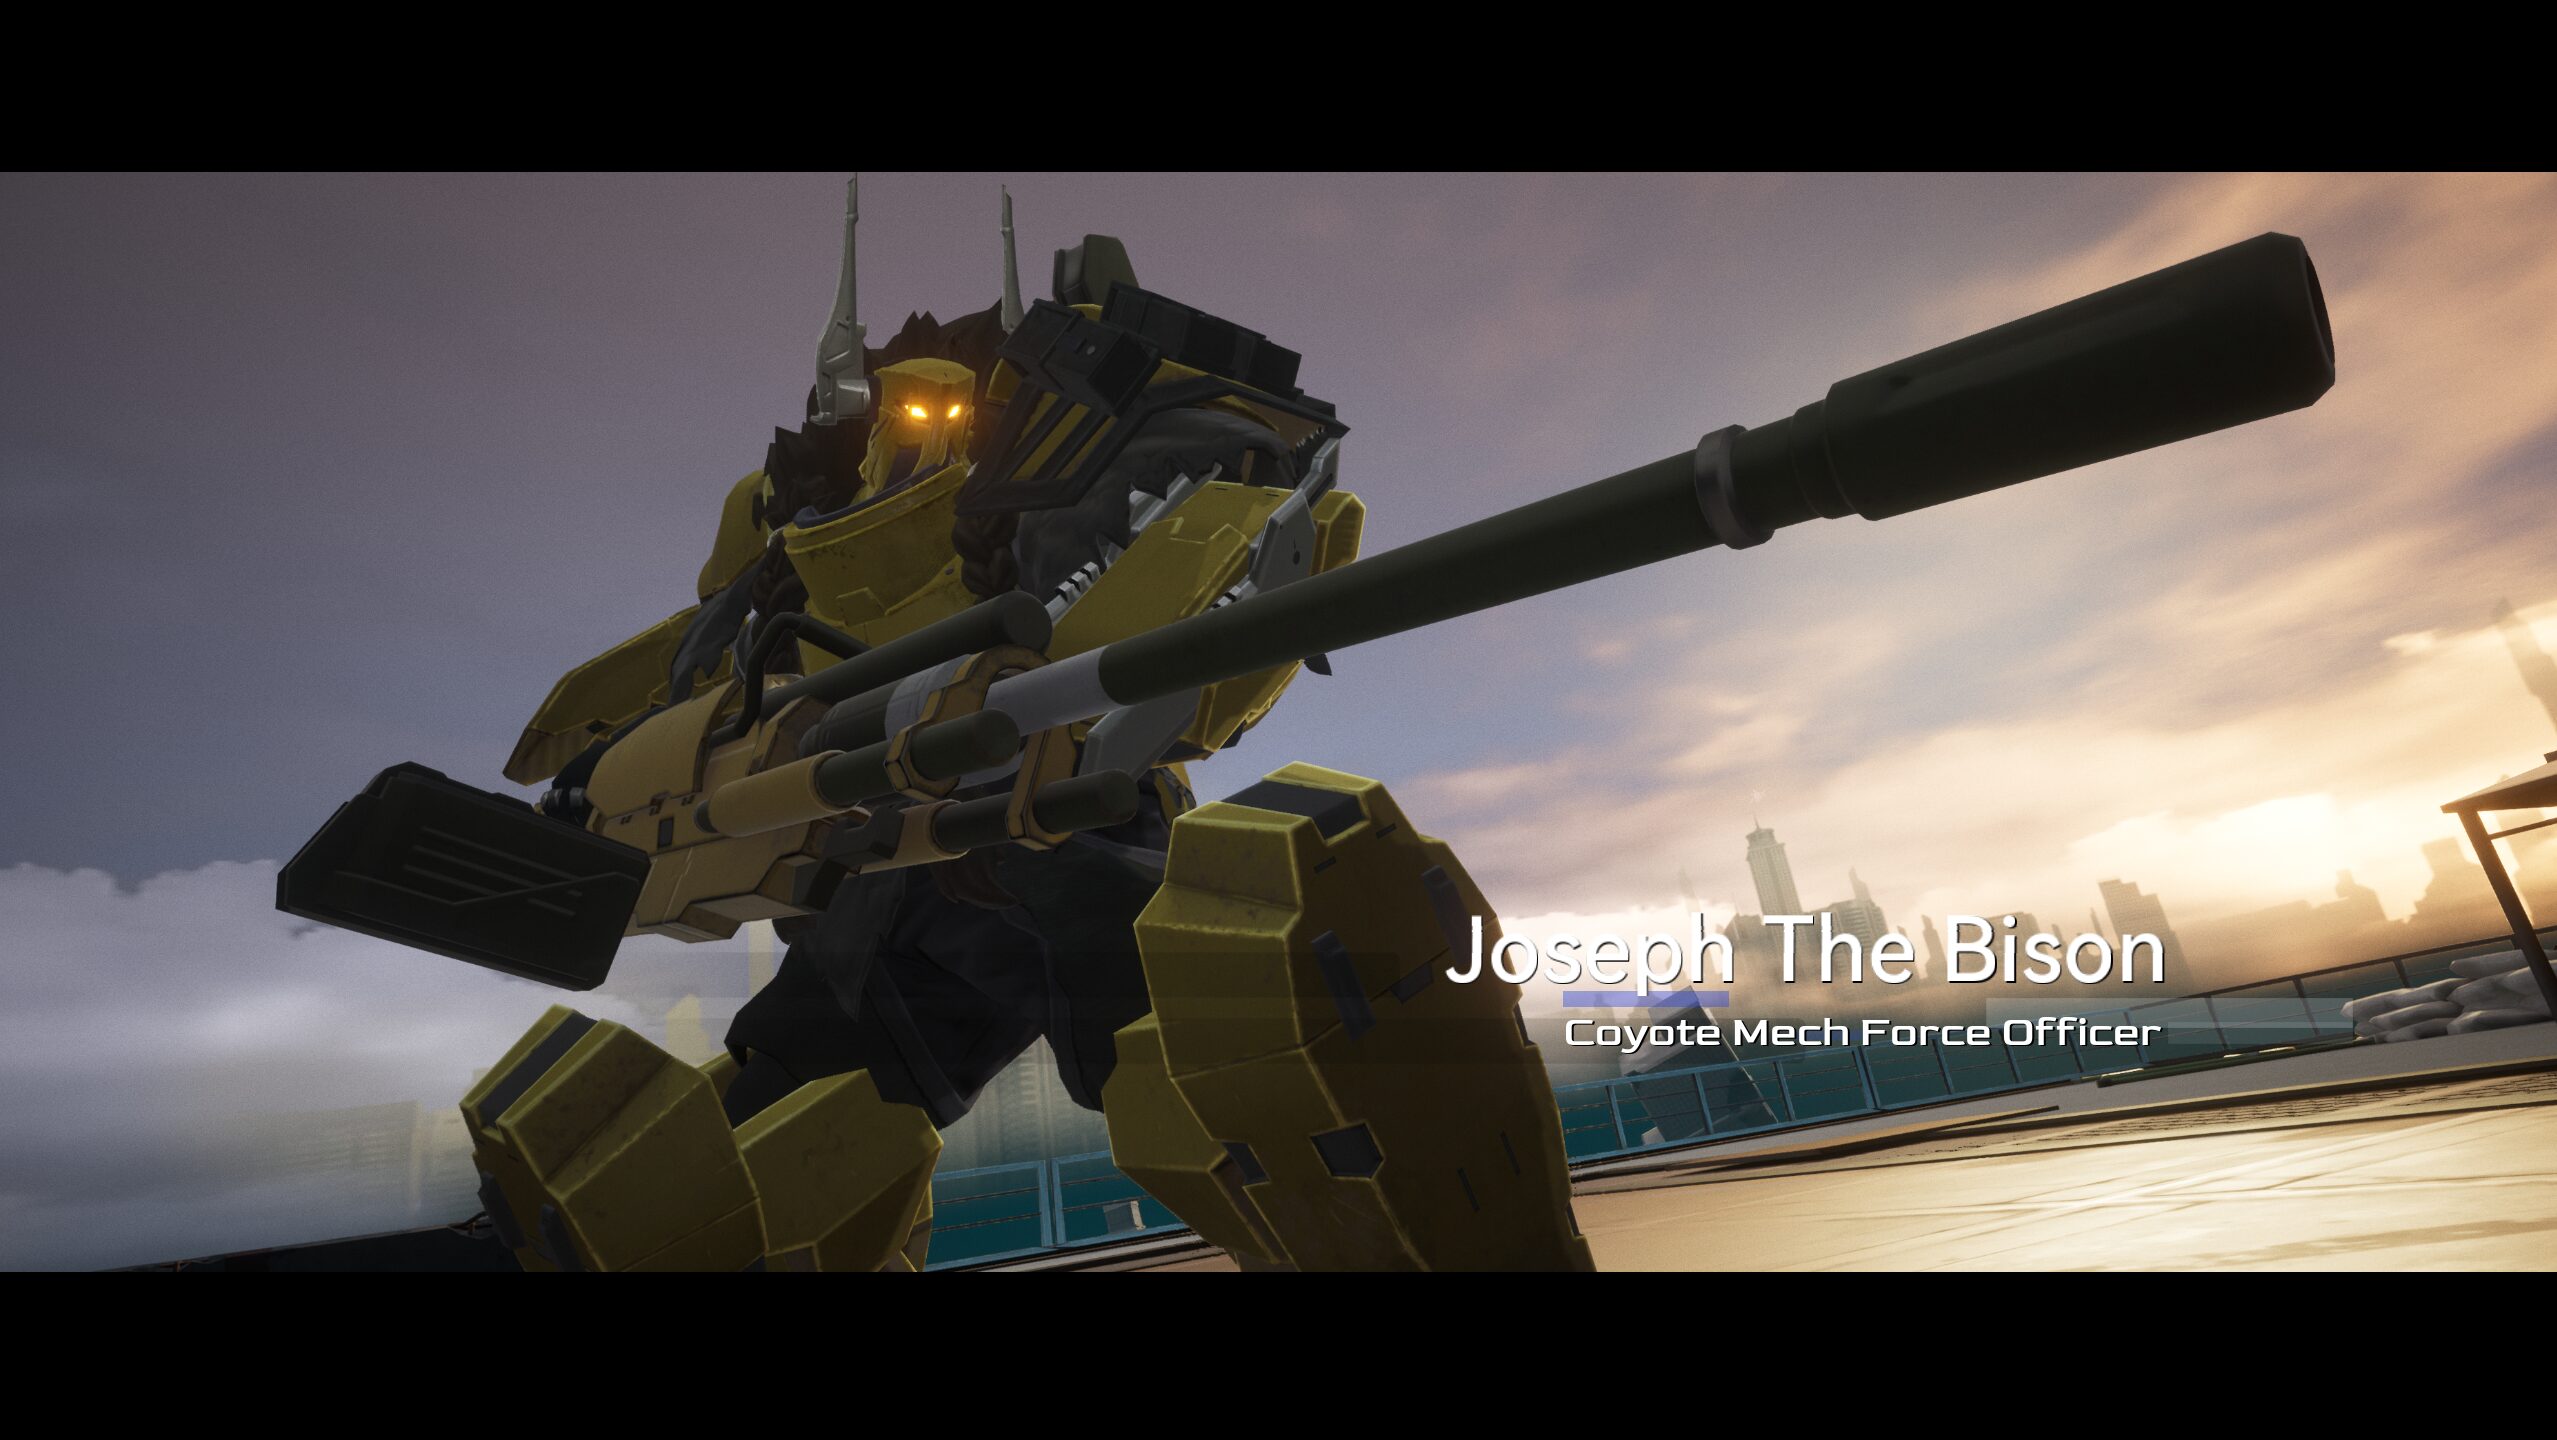
Officer in charge of the Coyote Mech Force. Nicknamed "The Bison" due to his foul temper and in-your-face fighting style.
Joseph The Bison, or Joe for short, is the featured boss of chapter 3. He has two phases with very different attacks in each, keeping players on their toes.
Back to Neural Simulation overview
Attacks and Behaviours
Phase 1
In phase 1, Joseph attacks you from range with his cannon.
During phase 1, Joseph will jump sideways occasionally.
This is not to be confused with his forward dash.
Charged Shot
Joseph charges up a shot that does damage and staggers on hit. It can be relatively easily sidestepped. At higher difficulty levels, Joe will use this attack after his sideways jumps.
Missile Volley
Joseph launches three volleys of small missiles. These can be trivially sidestepped, but also don’t do that much damage anyways, so you can ignore them if you really want.
Buster Shot
Joseph deploys a line of electric fences, then fires a large missile at your location, dealing huge damage and knocking you back on hit.
At higher difficulty levels, the fence is instead deployed in a circle around you. This makes things quite a bit more difficult, as you can no longer just walk out of the range of the missile.
The electric fences themselves have some interesting properties. They deal damage and stagger you if you walk into them, and (more frustratingly) their hitbox extends above their visual model. Also, Katya can dodge through them for some reason.
This can make shooting back difficult, as you might end up hitting the fence instead.
Casual players: It’s possible to time a dodge right as the missile lands and avoid taking any damage. If that doesn’t work, you can also just break the fence and escape the circle.
Speedrunners: This attack sucks. It’s not really because of the attack itself, but because the fences make hitting Joe really annoying. If you’re bringing CC supports, you ideally should be bursting him down fast enough that he never gets to use this attack. If not, you can (should) dodge out of the ring of fences before they land if you react fast enough to the sound cue or his attack animation. In either case, resetting until you get a run where he doesn’t use this attack is a viable option as well, though he really likes using this attack so your mileage may vary.
Downs
When Joseph reaches 80% HP, he will enter a down state where you can freely attack him.
When he reaches 60% HP or lower, he will enter an invulnerable state, taking off some of his armour and moving to phase 2 of the fight.
Phase 2
Joe ditches his cannon and moves in to get personal with a more melee attack set.
Dive Bomb
Joseph flies into the air and dives back down to the ground after a delay. Being hit by the landing will knock you back. This attack has two variants that he can cast. At higher difficulty levels, both variants will deploy a ring of explosives around Joseph once he finishes his dive.
Joseph can deploy electric fences around you before performing the dive. At low levels, there will be a gap in the fence for you to casually walk out from.
However, at higher difficulty levels, the fences will instead form an enclosure around you. This makes this attack quite frustrating to deal with, especially considering that the fences have a chance to not be destroyed when Joseph lands.
Casual players: You can deal with this the same way that you can deal with the fences in phase 1.
Speedrunners: Reset. This attack might as well be a run killer as it makes it very difficult to even attack him back while he prepares to dive down. Aiming high enough to target him will often result in your view being blocked by a fence, and this is true even with sniper rifle operatives, as the scoped-in view is not a true first-person perspective.
In the other variant of this attack, no fences are deployed.
This variant is a massive freebie, as Joseph will always overshoot and land behind you, letting you attack him with no risk the entire time as long as you don’t move backwards into the landing zone.
Rocket Slash
Joseph deploys two lines of fences on either side of you, then dashes forward to slash with the claws on his arm, staggering on hit. You can literally just walk out of this attack due to the delay between when the attack begins and when Joseph actually dashes forward.
This attack can also be cast without the fences, in which case it can require a dodge to avoid being hit.
Rocket Fist
Joseph runs into range, then dashes forward to punch you, staggering on hit. This attack is very similar to the fence-less version of Rocket Slash, but requires Joseph to get within a certain distance of you first, which you can exploit as a DPS window.
Triple Strike
Joseph runs into range, then does three melee hits, with the third being a ground area of effect that staggers. Like Rocket Fist, Joseph has to be within a certain range of you to perform this attack, and will do all three attacks even if one misses.
Wrist Shot
Joseph fires a stream of bullets from his wrist-mounted guns. You can dodge them by just sidestepping, and they don’t do enough damage to make eating a few shots a major issue. A freebie.
Down
When Joseph reaches 30% HP, he’ll enter another down state like in phase 1.
Strategy
Despite his appearance, Joseph actually has quite a large head hitbox that extends above the visual model. It roughly extends to the height of the horns on his helmet and the space between.
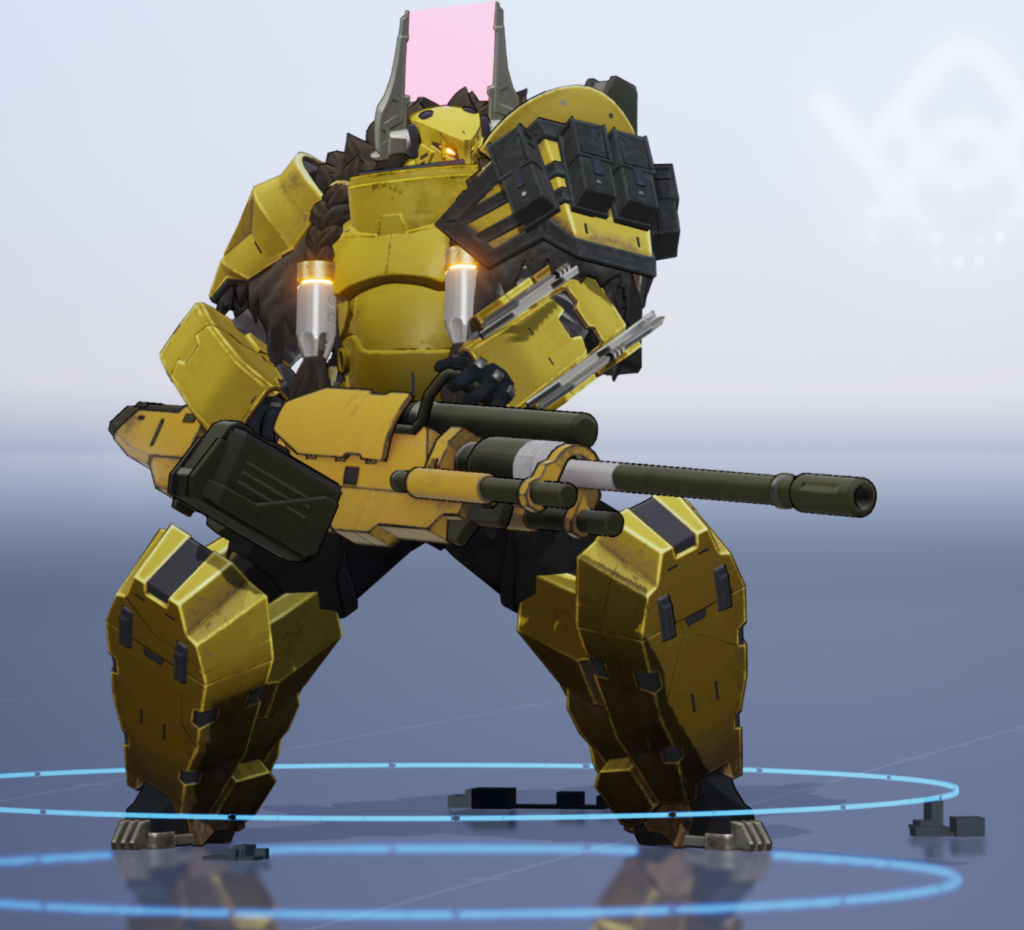
It is highly recommended to abuse this extra hitbox space to avoid hitting his shoulders or anything else blocking the visual head area.
Joseph’s main difficulty comes from his Buster Shot and fenced Dive Bomb, due to the electric fences that are deployed in those attacks. If you can handle those attacks (or are willing to reset until you get a run where he doesn’t use those attacks), you’ll find that the rest of his attacks don’t pose that much of a threat.

Being an armoured boss, Joseph might be trouble for pistol or SMG-based DPS choices due to ricochet issues. While otherwise pretty flexible for DPS options, he really is food for bursty operatives like Yao - Winter Solstice and Cherno - Enigma. When properly supported, they can burst down Joe before he even gets a chance to properly fight back. This is further compounded by the ability to skip phases of the fight:
Down Skipping
When Joseph enters a down, he cannot perform any actions. This includes transitioning to phase 2! What that means is that if you can deal enough damage, you can skip the entirety of phase 2 by killing Joseph during his first down. This does require a very high-damage setup, though, so don’t expect to pull this off if your teams are lacking.
This still has uses even for less-invested setups. You might be able to skip the rest of phase 1, letting you avoid having to deal with any more Buster Shots for the rest of the fight. Furthermore, if you can drop him to 30% HP, Joe will immediately transition to phase 2 - then down again, letting you finish him off for free.