Table of Contents
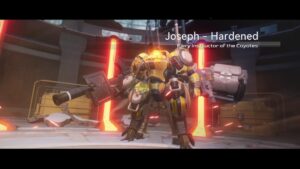
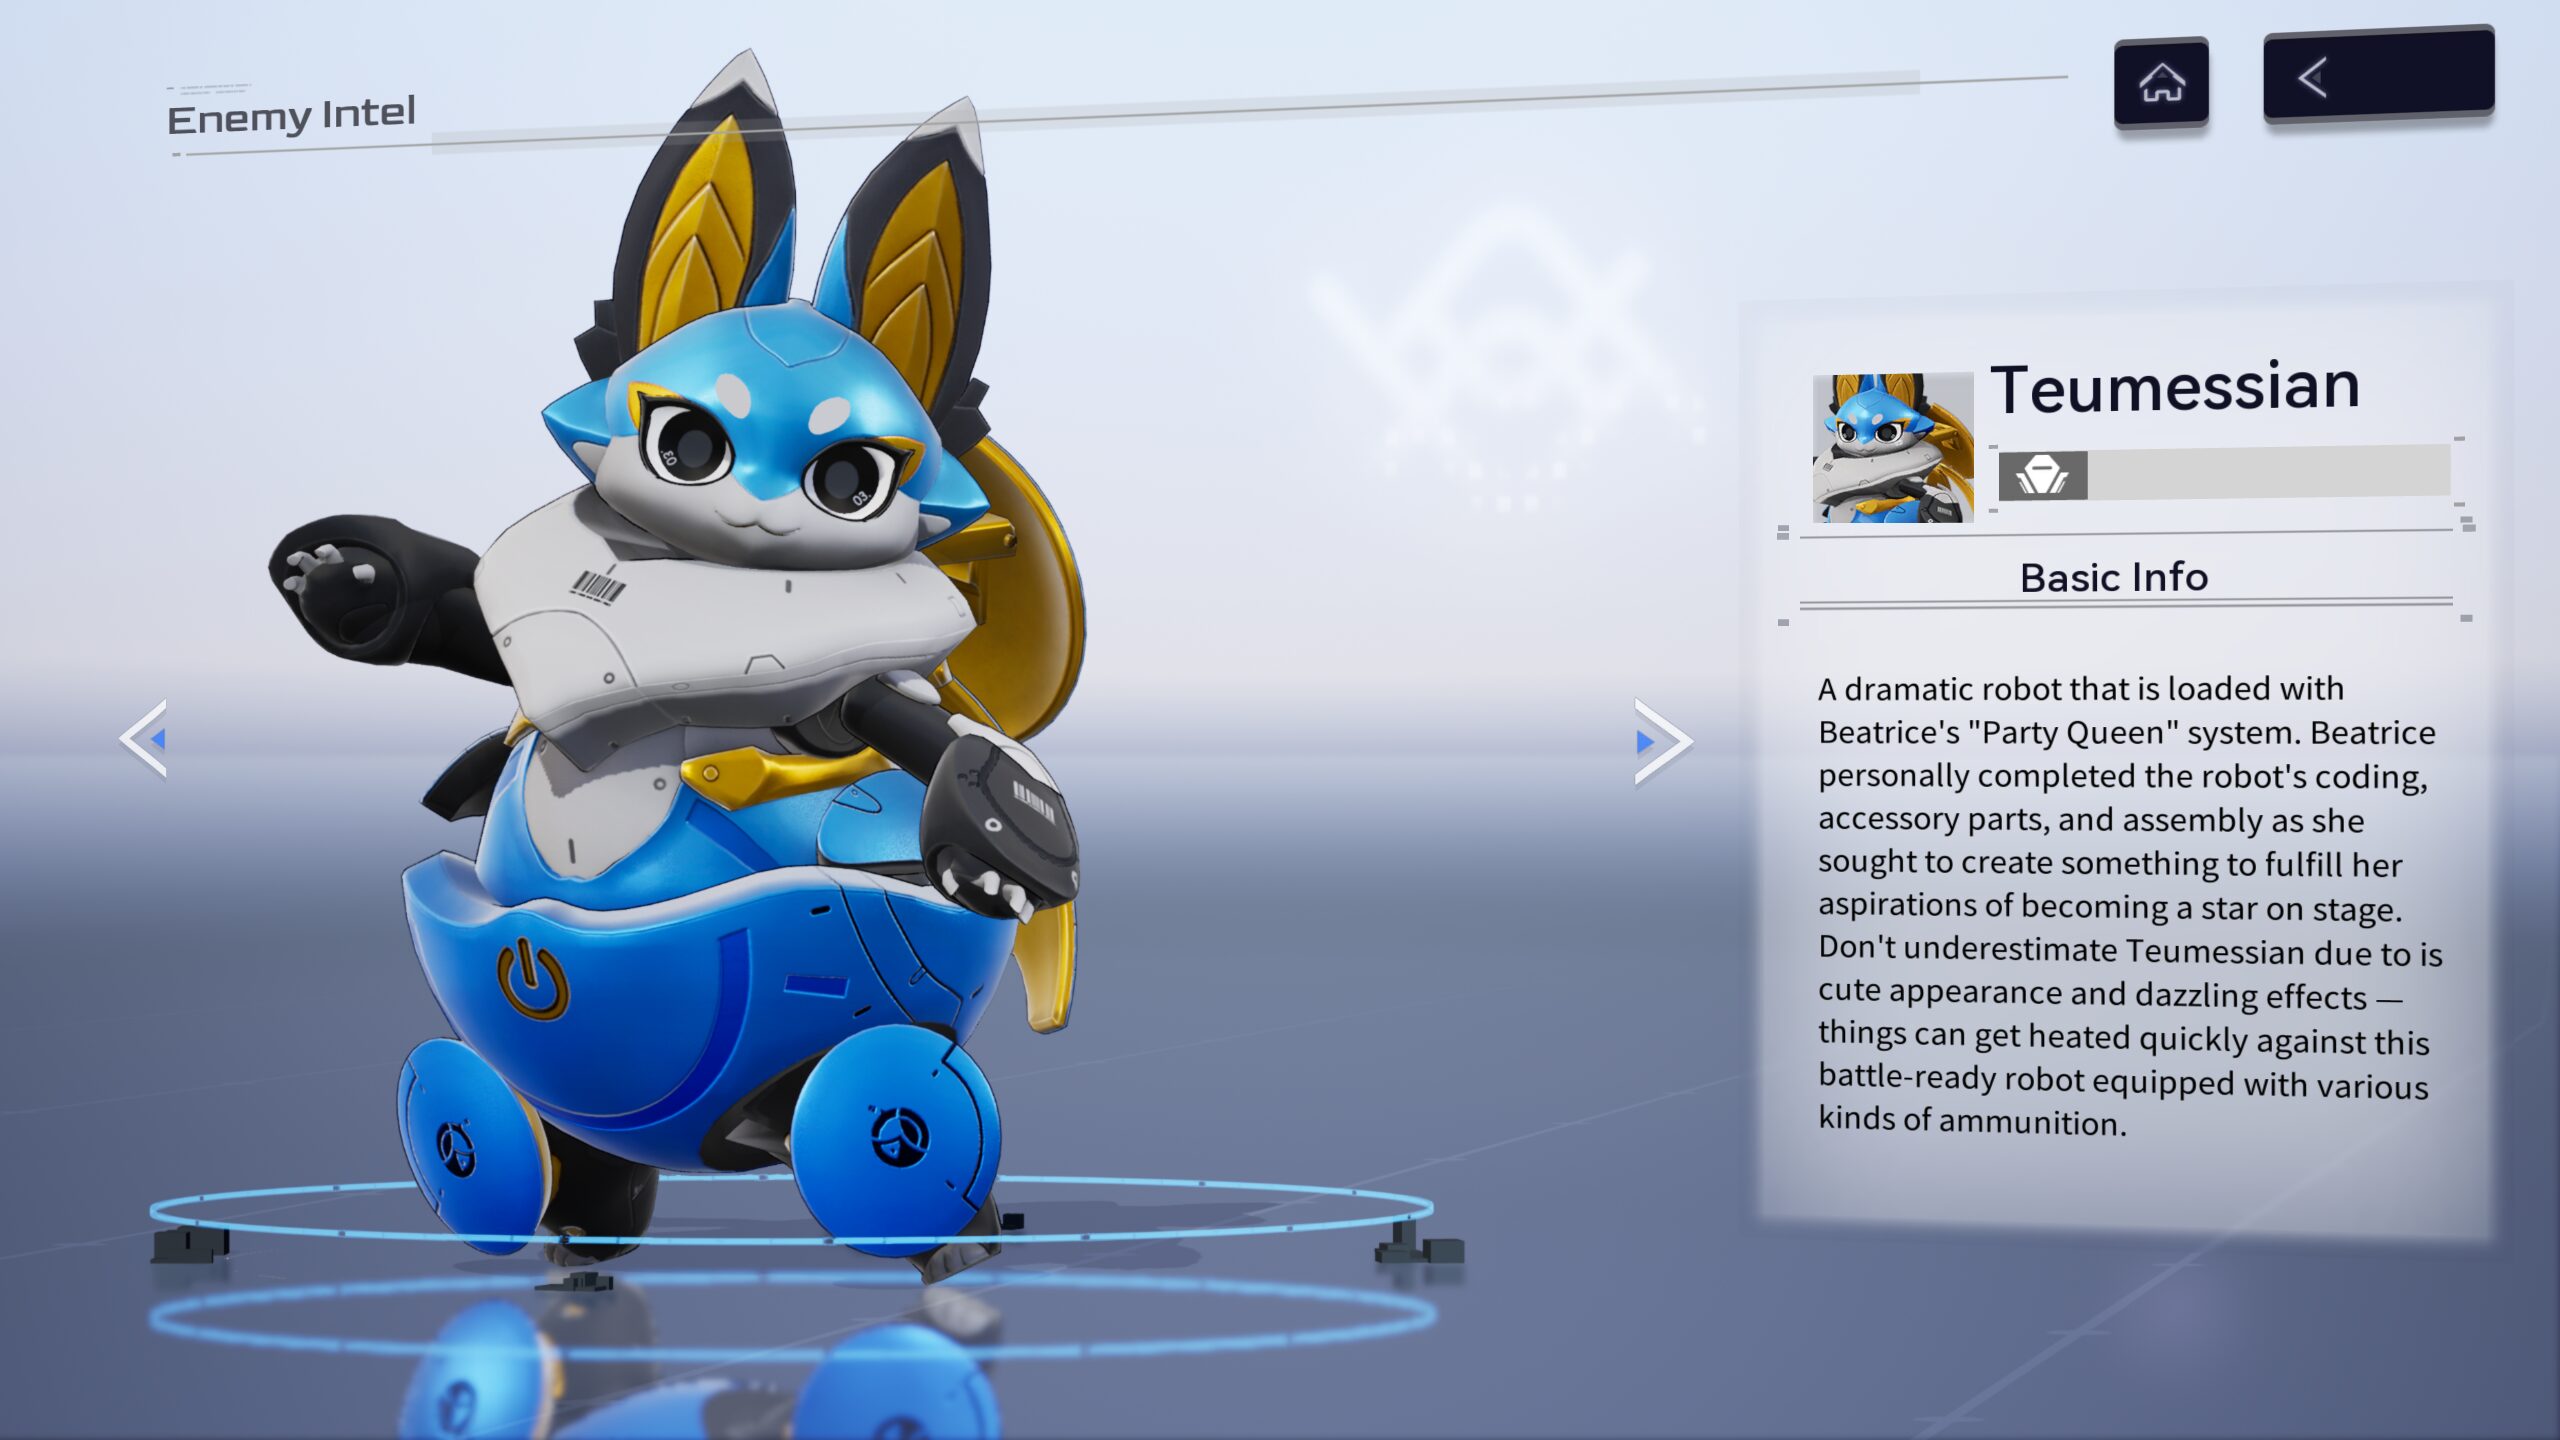
A dramatic robot that is loaded with a “Party Queen” system. Things can get heated quickly against this battle-ready robot equipped with various kinds of ammunition.
Teumessian is a mechanical boss who first appeared in the Verdurous Holiday event. It has a casual and laid-back attitude with an almost cartoonish demeanour, but also has some rather annoying attacks and behaviours. It’s technically based on a fox, but I call it a rat because verbal abuse always helps make you feel better about annoying boss fights.
Behaviour and Attacks
Despite its looks, Teumessian can be quite mobile, rolling into a ball to rapidly reposition.
Star Missiles
Teumessian has a special “star” missile which will frequently appear in its move set. It has some special properties compared to normal projectiles.
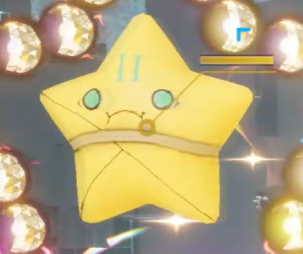
When hitting the player, it will deal damage and stagger. It also has parts HP and thus can be destroyed in mid-air. This also means that it can bodyblock shots intended for Teumessian. At higher difficulty levels, the star missile will also spawn an expanding ring of normal projectiles if it expires without hitting the player or being destroyed.
Destroying these stars will also spawn orbs that return back to Teumessian, inflicting one stack of a defense reduction debuff, up to eight stacks. Every four stacks will increase the
Basic Attacks
Teumessian does not have phases, using the same abilities throughout the fight.
Body Slam
Teumessian performs a body slam followed by a twirl that ends with a ground pound. At higher difficulty levels, the ground pound will also spawn a ring of projectiles. Being hit with the body slam or the ground pound will knock back the player, but being hit by the spin will not. This move is very telegraphed, as Teumessian has to be close to you to do this attack, which means sometimes it will just run normally to you to be in range.
Casual players: While Teumessian is spinning, you can outrun it with sprinting. Use this to get out of range of the final ground pound to make sure you don’t get hit!
Speedrunners: Take advantage of Teumessian’s attempts to get in range for this attack to lay down damage. Once the initial body slam animation begins, you can start putting as much distance between you and Teumessian as you need to ensure you don’t get hit by the final ground pound, then continue DPSing safely, as Teumessian will be downed for some time after the ground pound. If you don’t get out of range, you might find this ability to be very annoying to deal with.
Windmill Charge
Teumessian charges towards you before falling over. Being hit by the charge will stagger you. The charge can be sidestepped relatively easily, letting you take advantage of the down period after to deal damage. Be careful not to be hit by the star missiles that are spawned when Teumessian falls over though, as they have mild homing capabilities at higher difficulty levels.
Ground Pound
Teumessian does a roll similar to its non-attack roll that instead ends in a ground pound. At higher difficulty levels, the ground pound will also spawn a ring of projectiles. This move is quite telegraphed as long as you know to expect it.
Star Shot
Teumessian fires projectiles at you in the pattern of a star, with a star missile in the middle. This too can be easily sidestepped.
Balloon
Teumessian suspends itself from a balloon, occasionally firing star missiles at you along with arcs of normal projectiles. After a period of time, Teumessian will exit the state, winding up in the air for a moment before diving towards and past you, knocking you up if hit. This dive releases star missiles and extra projectiles at higher difficulty levels. The balloon state can be ended early by destroying the balloon that it is hanging from, but this is generally not recommended as it’s the easiest DPS window that you get, with Teumessian staying still and only occasionally attacking you with slow projectiles. Just remember that star missiles have their own hitbox and try not to waste shots on them when you mean to attack Teumessian instead (strafing side to side can help you aim around them).
You used to be able to shoot Teumessian while it was winding up its dive to interrupt it, but apparently you can’t anymore. I don’t know if it’s a bug or a deliberate change, but I’ve bug reported it anyway so hopefully it gets fixed soon if it is actually a bug.
HP Triggers
Bubble Party
At 70% HP, Teumessian interrupts any move it is currently performing to fall over, giving you a DPS window. Once it gets up, it dash-rolls towards the centre of the arena, turning invulnerable while it spawns several props with parts HP. The ones at the centre of the map will constantly fire bubbles which deal damage on hit but do not stagger, and more are spawned at higher difficulty levels. Needless to say, this move is incredibly annoying as the spawns add extra projectiles that can hurt you and generally clutter up your screen with a lot of distracting visual noise. Also, the bubbles have their own health bars and can similarly bodyblock shots like star missiles.
Luckily for you, this move is very easy to cancel. When this trigger activates, Teumessian will always interrupt any move it is currently performing to fall over, clueing you in to what’s coming next. Once it gets up and prepares to curl into a ball to speed towards the middle of the map, apply a Paralyze effect and the move will be cancelled.
Best of all, you can reliably do this with the very first operative you ever get, Lyfe - Wednesday.
Present Box
At around 20% HP, Teumessian will once again dash-roll towards the middle of the arena, summoning a present box that unfolds to reveal an… acorn? Well whatever it is, it explodes shortly after, doing huge damage and knocking you back. You can similarly cancel this like with Bubble Party, but it’s less obvious when it’ll happen as it’s not quite as clearly telegraphed. It seems that you have to let Teumessian stay at such a low HP level for quite a bit of time before it’ll actually do this move (as opposed to the 70% trigger, which always happens unless cancelled), so the best way to deal with this turns out to be “kill it faster” and not see it at all.
Strategy
Teumessian isn’t a particularly complex fight, but its attacks can be very distracting which can then lead to silly mistakes. Keeping presence of mind here is especially important given Teumessian’s tendencies to get in your face or be otherwise obnoxious.
As for where to shoot the rat, the ideal target is its ears. Its head will work too as a weak spot, but I find that it can be a bit inconsistent. For this reason, you want to keep Teumessian at a medium range, far enough away to have time to react to its attacks, but also close enough that you can run around it when it flops over to be able to hit its ears which would otherwise be obscured by its fat body. Similarly, you want to avoid being right at the edge of the arena, as it can make Teumessian charge towards you and flop over at that spot, making its ears clip into the wall where you can’t attack it.
Team Building

Teumessian doesn’t inherently favour any one operative, so any of the usual top DPS picks will do just fine here. Less-optimal Hush setups might find it a bit tricky dealing with the 70% trigger though.
Support picks are similarly flexible. Unless you're outright killing Teumessian before it can activate Bubble Party, you'll probably want some source of Paralyze if not just to cancel that. Lyfe - Wednesday is the simplest and most accessible option, but you can also use Chenxing - Ethereal Cloud (support skill) and Fenny - Coronet, who actually can apply Paralyze with her ultimate ability, though it would be difficult to generate enough U-Energy to use it in such a short timespan. Tess - The Magician can also apply Paralyze with her support skill, even if paired with a non-Electric DPS as the damage from her ultimate will proc it. The timing for this can be tricky though, and requires you to be able to output enough DPS to have her ultimate still active by the time you hit the HP trigger.
Casual players will get decent use out of Siris here, as Teumessian has quite a few projectile spam attacks. Meanwhile, high end speedrunners can also opt to just double down on damage supports if they feel that they can burst down the rat during its 70% HP down, before it begins its bubble-filled performance.