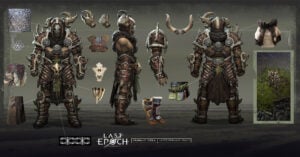
Introduction
Welcome to our Last Epoch Sentinel Build Tier List. The contents of this guide were sourced from Bina's Last Epoch Master Spreadsheet, where he details the builds that have been used and tested. The builds are tested against the following categories: Speed, Corruption, Arena, Tankiness, Single Target, Cycle Start, and Hardcore.
Tier List Explanation
S-Tier:
- What They Are: The best of the best. These builds outshine others in strength, flexibility, and effectiveness in almost every game scenario.
- Why Use Them: Perfect for players who want to excel in the game, tackling the toughest content with ease.
A-Tier:
- What They Are: Really powerful, just a notch below S Tier. Great at certain things, but not as universally adaptable.
- Why Use Them: Great for those who want a potent build that can handle most challenges without needing the absolute best.
B-Tier:
- What They Are: Dependable and effective, B Tier builds are good but lack the edge to push them to the top. They're balanced, offering a mix of damage and survivability but not excelling in any particular aspect.
- Why Use Them: Ideal for players who prefer reliability or are still mastering the game. They're good all-rounders.
C-Tier:
- What They Are: Average builds that can get the job done but might struggle with higher difficulty levels or efficiency. They might have notable weaknesses or require specific setups to shine.
- Why Use Them: Good for experimenting or for players who enjoy a challenge. They might also cater to unique, niche playstyles.
D-Tier:
- What They Are: The least powerful builds that are generally outclassed by other options. They might be fun or interesting but don't expect top-tier performance.
- Why Use Them: Best for casual play, trying something different, or self-imposed challenges. Not recommended for competitive or high-difficulty content.
S Tier
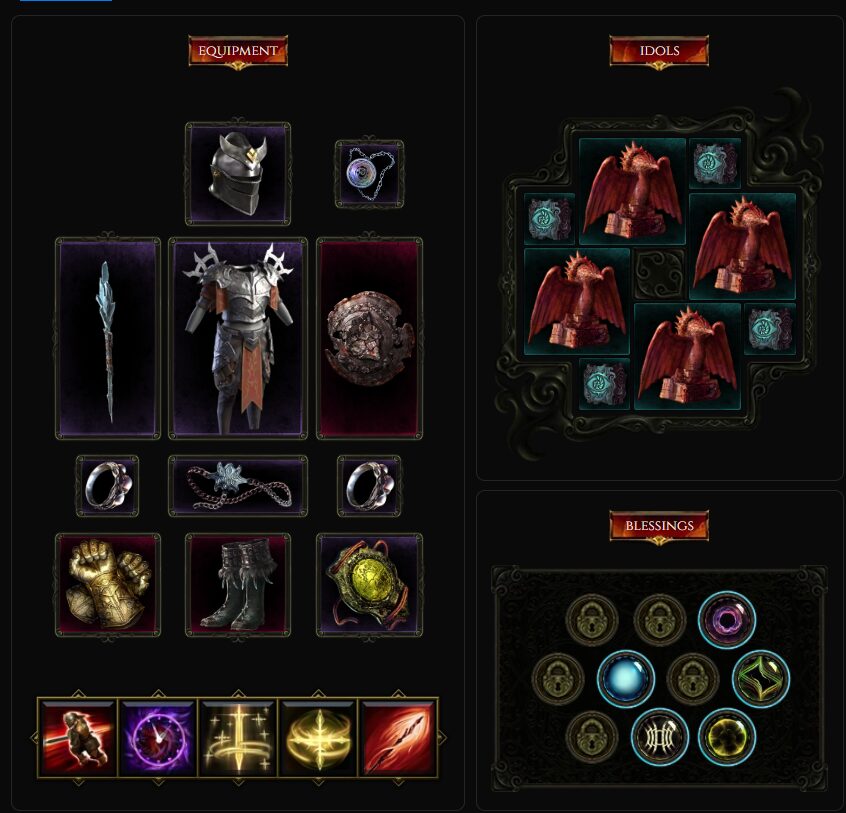
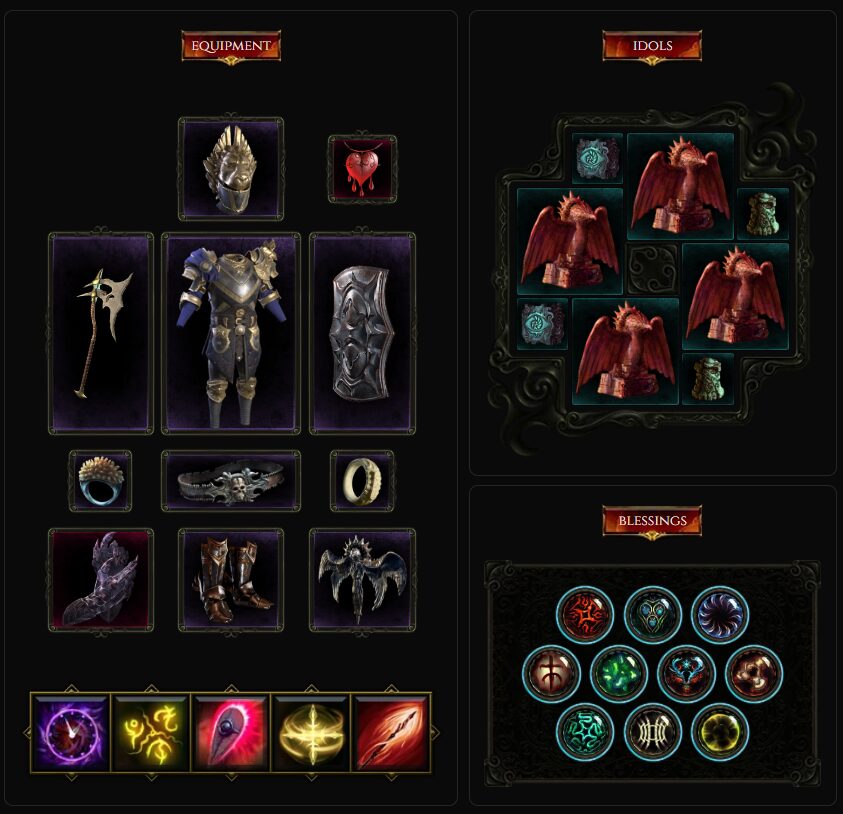
Nova Hammerdin Paladin
At the core of this build is the Hammer Throw skill, but it's not just any Hammer Throw - it's a cataclysmic nova of hammers that radiates outwards, obliterating anything in its path with critical physical damage.

Key Components of the Build:
- Critical Mastery: By scaling Crit, particularly through Eagle Wing and Li'raka's Claws, each Hammer becomes a potential critical hit, greatly amplifying your damage output. This critical scaling transforms your Paladin into a relentless storm of destruction.
- Sigils Of Hope: Keeping 4 Sigils Of Hope active is crucial for this build, not just for the significant buffs to damage and defense they provide, but also for the sustain in longer fights, ensuring your Paladin remains a beacon of power on the battlefield.
- Strategic Skill Use: Volatile Reversal is not just a means of repositioning or escaping; it's a calculated strike, placed precisely to maximize damage output, making it a key tactical skill in your arsenal.
- Unshakable Defense: With Face of the Mountain, this build reaches new heights of tankiness, capping Block Chance and turning your Paladin into an indomitable fortress, capable of withstanding onslaughts that would fell lesser heroes.
Gear Priorities:
- Crit and Block: Focus on gear that enhances your critical strike chance and block effectiveness, as these are the twin pillars upon which your build's effectiveness rests.
- Speed and Survival: Look for items that offer movement speed and additional defensive stats, as mobility and survivability are key to navigating the most chaotic battlefields.
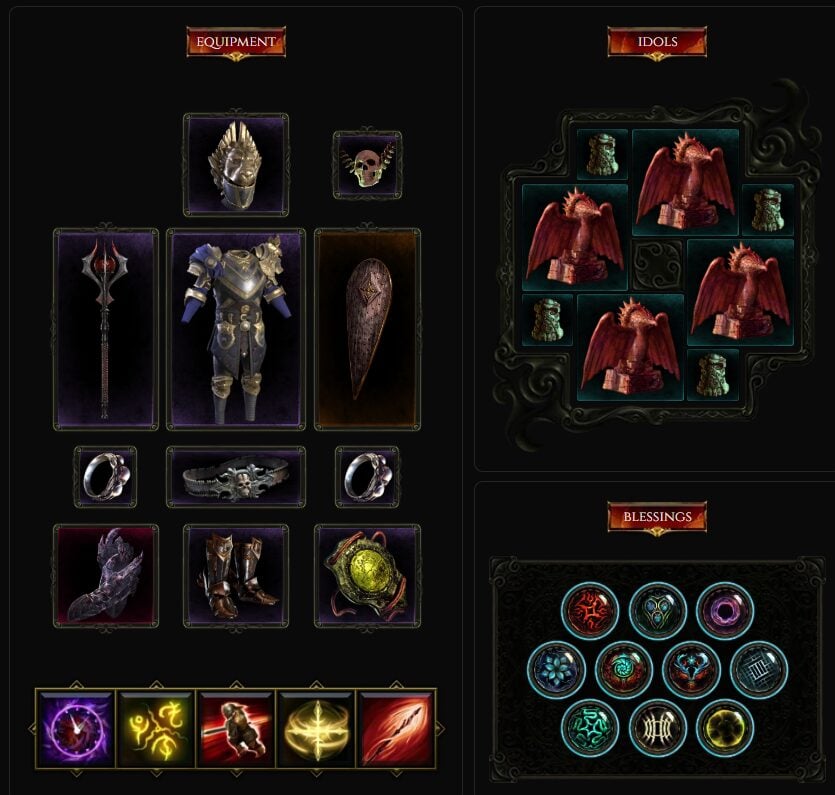
Bleed Hammerdin Paladin
This Paladin doesn't just wield the light; they infuse it with the raw, unyielding force of nature, turning each hammer throw into a deadly dance of bleeding wounds and shattered bones.
Build Highlights:
- Bleeding Tempest: The core of this build lies in the relentless assault of spiraling hammers, each one a harbinger of doom for those it touches, marking them with the kiss of bleed, a relentless physical ailment that saps the life from foes over time.
- Sigils of Empowerment: The summoning of 5 Sigils Of Hope is not just a ritual of power; it's a declaration of divine dominion, each sigil a testament to the Paladin's unwavering resolve and the blessings they wield.
- Temporal Assault: The clever use of Volatile Reversal isn't just about dealing damage; it's a strategic maneuver that places the Paladin right where they need to be, turning the tides of battle in an instant.
- Bastion of Regeneration: The build's emphasis on Health Regen and Ward through Vessel of Strife transforms the Paladin into a veritable fortress, capable of withstanding onslaughts while their foes bleed out.
- Intellect from Might: Cleaver Solution offers a unique twist, converting the Paladin's raw strength into cunning, allowing for more potent spells and harder hits.
Gearing for Victory:
- The Arsenal of the Crimson Crusader: While the build can flourish without them, unique items like Salt the Wound, Blood of the Exile, and Bulwark of the Last Abyss amplify the Paladin's capabilities, turning them into a force of nature.
- Tools of Destruction and Preservation: Azurral's Fury and Aurora's Time Glass are not mere trinkets but keys to unlocking the true potential of this build, each piece of gear a vital component in the symphony of destruction.
In Battle:
- Dance of the Spiraling Hammer: Master the arc of your hammers, positioning yourself to ensure maximum coverage, letting no enemy escape the embrace of your bleed.
- Aegis of Sigils: Keep your Sigils Of Hope active, their divine energy fueling your crusade and fortifying your resolve.
- The Rhythm of War: Sync your movements with Volatile Reversal, using it not just for damage, but as a tactical tool to navigate the chaos of battle.
A Tier
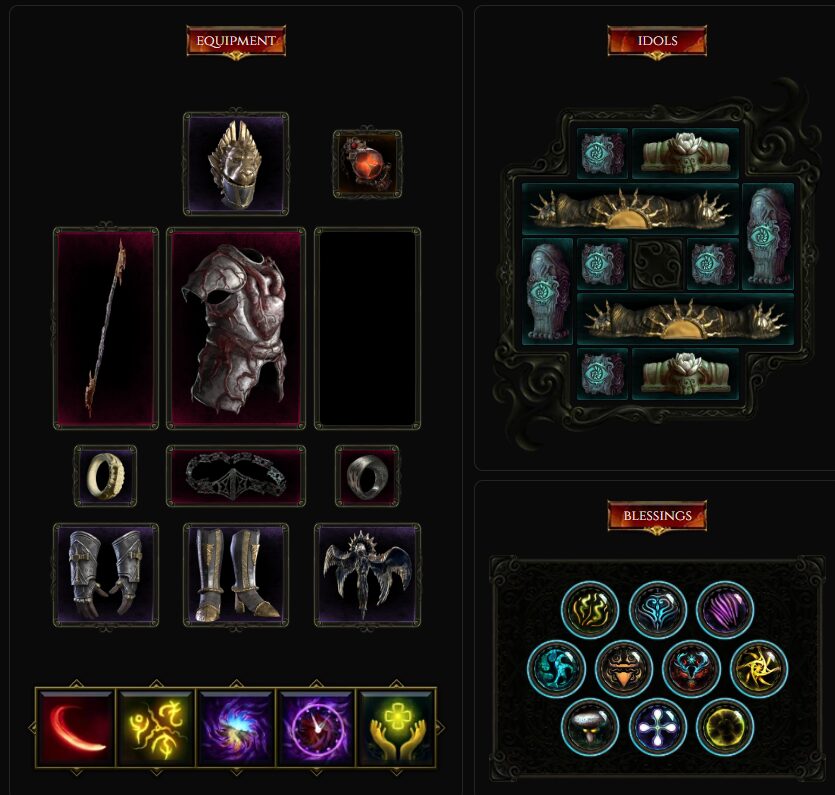
Echo Warpath (Void Knight)
At the heart of this build is the pure, unadulterated joy of spinning through hordes of enemies, a whirlwind of void energy that leaves nothing but devastation in its wake. It's a build that's as straightforward as it is exhilarating, turning the battlefield into a dance floor where you're both the lead dancer and the DJ.
Key Highlights of the Build:
- Simplicity & Accessibility: With a light rotation, this build is not just easy to play but also disability-friendly, ensuring that the joy of spinning to victory is accessible to a wide range of players.
- Mobility & Speed: The inclusion of Darkstride boots elevates your Movement Speed, scaling with Added Melee Void Damage. This not only makes navigating through the Monolith of Fate a breeze but also turns you into a formidable force in the Arena.
- Strategic Echoes: The build's ability to generate echoes while spinning ensures that you can clear packs without breaking stride, perfectly balancing offense and mobility.
- Optimized Gear Synergy: Utilizing items like Wings of Argentus and the Grand Patience of Herkir, along with a legendary Apathy's Maw, enhances both your survivability and damage output, making you a relentless force on the battlefield.
Judgement Aura Paladin
At the heart of this build lies the Consecrated Aura, a dual-natured force emanating from the Paladin's Judgement. This aura not only incinerates adversaries with holy fire but also bathes allies in rejuvenating light, making it a cornerstone of the Paladin's arsenal.
Build Highlights:
- Divine Rotation: The core rotation of Holy Aura, Javelin, Judgement, and Volatile Reversal not only orchestrates a symphony of destruction and healing but also ensures a steady flow of Mana, crucial for sustaining the Paladin's divine interventions.
- Regenerative Might: By emphasizing Healing Effectiveness and Mana, every action the Paladin takes is imbued with restorative power, reinforcing their resilience and ability to support allies.
- Path of Sanctity: The Paladin's march is a journey of healing, with Holy Trail offering sanctuary in the midst of chaos, a testament to the Paladin's role as a beacon of hope.
- Aura of Benediction: Holy Aura transcends mere personal defense, becoming a bastion for all who stand with the Paladin, imbuing them with strength and protection.
Gear Focus:
- Healing and Mana Synergy: Gear that amplifies Healing Effectiveness and Mana not only bolsters the Paladin's ability to withstand the trials of battle but also enhances their capacity to sustain the Consecrated Aura's demands.
- Divine Artifacts: Though not essential, items like Bulwark of the Last Abyss, Hand of Judgement, and Orian's Eye elevate the Paladin's capabilities, enabling them to channel more potent divine energy and endure the rigors of their holy quest.
In Battle:
- Divine Precision: Deploy Judgement strategically, ensuring that its Consecrated Aura encompasses both foes and allies within its hallowed ground.
- Ebb and Flow of Mana: Use Volatile Reversal judiciously to replenish your Mana, maintaining the rhythm of your divine rotation and ensuring the continuous presence of your Consecrated Aura.
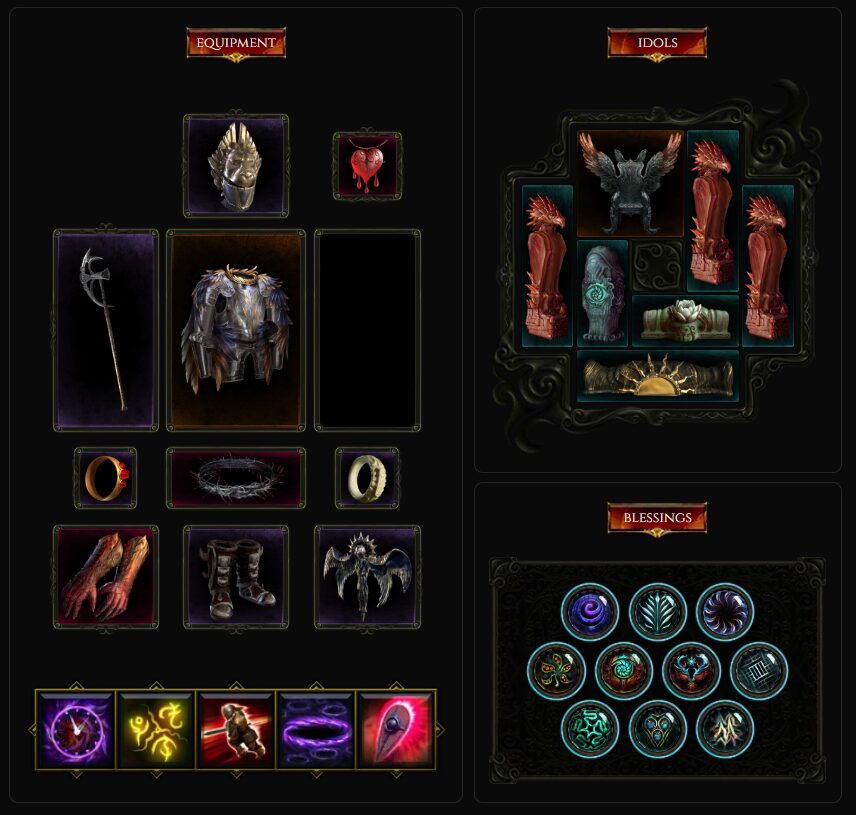
Holy Trail Javelin Paladin
This Paladin is nothing short of divine, weaving the sacred with the martial in every javelin cast. With each throw, a Holy Trail unfurls in its wake, a spell of dual purpose: it's a bane to foes and a boon to allies. This isn't just any Paladin; this is the epitome of battlefield grace and power, capable of standing its ground in any scenario the game throws at it. The ease of play, coupled with formidable area-of-effect (AoE) capabilities and stellar healing powers, makes this setup a game-changer.
Here's how to make the most of this celestial warrior:
- Aim and Cast: Precision is key. Aim your javelin with care and upon release, it carves out a Holy Trail. This isn't just any path; it's a spellbinding mix of lightning and fire that wreaks havoc over time.
- Healing Steps: Your own Holy Trail isn't just a weapon; it's a lifeline. Walk its length to mend your wounds, turning the battlefield to your advantage as you draw enemies into its divine wrath.
- Divine Aura: Embrace the power of the Holy Aura. This isn't just support; it's a blessing, amplifying the might of you and your allies.
- Sigils of Hope: Keep the faith, and keep it fourfold. Maintaining four Sigils of Hope is crucial, each a testament to the incredible buffs they bestow.
- Strategic Reversal: Deploy Volatile Reversal with precision, right amidst the fray, for that extra punch.
And while not essential, there are a few Uniques that could elevate your Paladin to celestial heights:
- Atrophy: A touch of decay to bolster your holy crusade.
- Bastion of Honour: Stand unyielding, a bastion against the darkness.
- Ravenous Void: Devour the void, and let its power fuel your righteous fury.
B Tier
Smite Hammerdin Paladin
The essence of this build lies in its unique blend of Hammer Throw's relentless assault and Smite's heavenly firepower. Each Hammer not only deals its own damage but also serves as a harbinger for Smite's lightning strikes, effectively doubling the devastation.
Build Highlights:
- Shotgunning Hammers: The spiraling trajectory of Hammer Throw maximizes the hit potential on single targets and packs of enemies alike, ensuring no foe escapes the storm.
- Lightning Procs: Smite, invoked through the hammers, brings the fury of the storm to the battlefield, zapping foes with potent lightning strikes that add a layer of AoE damage.
- Critical Mastery: Emphasizing Crit, particularly through talents like Holy Precision and Deep Impact, transforms your Paladin into a storm of critical strikes, significantly enhancing damage output.
- Mana as a Damage Vector: By stacking Mana, thanks to Devotion, every point of Mana not only fuels your abilities but also serves to amplify your damage, making your Paladin a reservoir of untapped power.
- Strategic Maneuvers: Volatile Reversal is more than a mere mobility tool; it's a strategic asset, allowing you to reposition for optimal Hammer throws or to escape perilous situations, all while dealing bonus damage.
- Impenetrable Defense: With Face of the Mountain, your Paladin becomes a bulwark against the chaos, capping Block Chance and ensuring that your divine mission is unhampered by mortal wounds.
Gear Focus:
- Critical and Mana: Prioritize gear that boosts your critical chance and mana pool, as these are the keystones that support the architecture of your build.
- Defensive Balance: Seek out equipment that enhances your survivability, through increased block chance, health, and resistances, ensuring your Paladin can withstand the onslaught of the fiercest foes.
Smite Hammer Throw Void Knight
At the core of this build is a beautifully destructive interplay between Hammer Throw and Smite, turning the battlefield into a deadly dance floor where enemies are mere participants in their own demise.
Primary Tactics and Playstyle:
- Hammer Throw as Your Bread and Butter: Utilize Hammer Throw not just as a damage dealer but as the catalyst for your build's unique mechanism, proccing Smite and unleashing a barrage of void bolts from above.
- Shotgunning Hammers for Maximum Impact: Master the art of "shotgunning" with your hammers, ensuring they hit as many enemies as possible to maximize the proc rate of Smite and thus, the void bolt descent.
Strategic Buffs and Positioning:
- Sigils of Hope for Buffs Galore: Keep four Sigils of Hope active at all times, leveraging their buffs to enhance your offensive and defensive capabilities.
- Anomaly and Time Bubble for Control and Defense: Employ Anomaly strategically to keep Time Bubble up, offering both a defensive boon and a means to control the flow of battle.
- Volatile Reversal for a Tactical Edge: Use Volatile Reversal wisely, not just for the extra damage, but for its positioning advantages, allowing you to navigate the battlefield with precision.
Essential Uniques and Gear Optimization:
- Key Uniques for Unlocking Full Potential: While the build is formidable on its own, acquiring uniques like Bulwark of the Last Abyss, Anchor of Oblivion, Bleeding Heart, Ravenous Void, and Wrongwarp can exponentially increase your build's effectiveness, pushing it to its absolute limits.
- Gear Optimization for Synergy: Focus on gear that enhances your core mechanics, particularly items that boost void damage, hammer throw effectiveness, and Smite proc rate. This synergy is crucial for turning your Void Knight into an unstoppable force.
Electrify Javelin Paladin
Imagine yourself not just as a warrior of light but as the very tempest of the divine, hurling javelins that are not mere projectiles but conduits of the storm's wrath, each strike a thunderous proclamation of your power.
Build Fundamentals:
- Electrifying Arsenal: At the core of this build lies the relentless assault of javelins, each one not just a weapon but a harbinger of the storm, imbuing enemies with the devastating Electrify ailment.
- Divine Conduits: The Adorned Rahyeh Idols aren't mere trinkets; they're pacts with the divine, ensuring that with every throw, Smite is called down, turning the battlefield into a storm-scarred domain.
- Aura of the Storm: With Holy Aura, you're not just a warrior; you're a beacon of power, blessing those around you with the might of the storm, bolstering allies and daunting foes.
- Sigils of the Tempest: The Sigils Of Hope are not just symbols; they're the very pillars of your strength, each one a testament to your unyielding power, fueling your storm with their divine essence.
In the Heart of the Maelstrom:
- Storm of Spears: Master the art of the javelin, turning each throw into a bolt of divine retribution, a relentless downpour that leaves no ground untouched.
- Thundercaller's Rhythm: With each strike, let the idols channel the divine wrath, synchronizing your javelins with the rhythm of the heavens, each Smite a crescendo in the symphony of battle.
- Bastion of the Tempest: With Volatile Reversal, you're not just a herald of the storm; you're its heart, positioning yourself where the tempest's eye is needed most, ready to unleash the next barrage.
C Tier
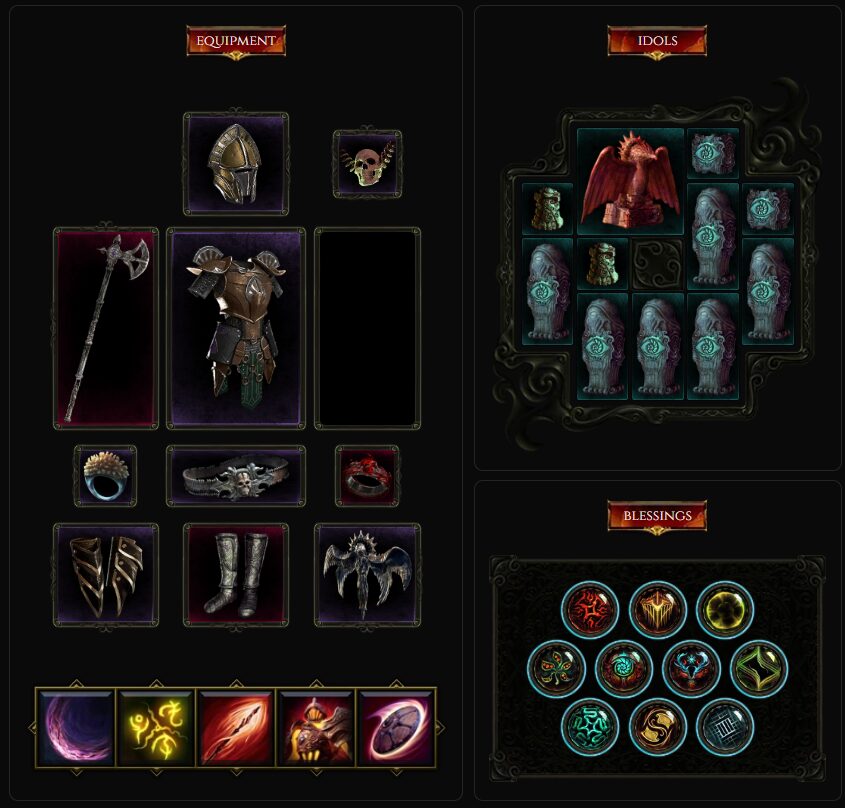
Rive Void Knight
Embark on your journey through "Last Epoch" as a Rive Void Knight, a warrior whose very presence on the battlefield spells doom for foes. This build combines the precision of a skilled duelist with the unstoppable force of a seasoned warrior, making every encounter a display of dominance.
Core Mechanics and Strategy:
- Rive as Your Primary Weapon: At the heart of your arsenal is Rive, a three-strike attack sequence that not only deals significant damage but also grows more powerful with each hit. This makes it your go-to skill for both clearing mobs and dismantling bosses.
- Healing Hands for Mobility: Utilize Healing Hands not just for its healing properties but also as a means to swiftly navigate the battlefield, positioning yourself strategically to unleash devastation.
- Flame Drinker's Blade for Damage Amplification: Boost your damage output further by incorporating Flame Drinker's Blade into your rotation, ensuring that each strike of Rive carries the potential for catastrophic damage.
Ignite and Buffs for Enhanced Performance:
- Jasper's Searing Pride for Easy Ignites: This item simplifies the process of stacking Ignites on your foes, amplifying your damage output without the need for additional gear focused on fire damage.
- Sigils of Hope & Time Bubble: Maintain four Sigils of Hope at all times for their substantial buffs, and employ Time Bubble strategically to enhance your offensive and defensive capabilities.
Advanced Tactics and Gear:
- Volatile Reversal for Damage and Positioning: Master the use of Volatile Reversal to not only deal extra damage but also to reposition yourself advantageously during combat.
- Key Uniques for Scaling: While not strictly necessary, acquiring items like Siphon of Anguish, Shattered Chains, Titan Heart, and Aurora's Time Glass can significantly enhance your build's effectiveness, providing you with the edge needed to excel in both bossing and mapping.
Ignite Shield Rush Forge Guard
At the heart of this build is a symphony of fire and steel, with Shield Rush serving as the opening act, igniting enemies with each charge, and setting the stage for a devastating performance.
Core Mechanics and Strategies:
- Shield Rush as Your Spearhead: Use Shield Rush not merely as a mobility tool but as your primary means of engagement, igniting foes in your path and setting up the battlefield to your advantage.
- Ignite and Conquer: With Maehlin's Hubris Gloves transforming all bleed chances into ignite chances, every hit becomes a potential inferno, turning your Forge Guard into a walking pyre.
Strategic Skills and Buffs:
- Sigils of Hope for Unyielding Strength: Keep four Sigils of Hope active at all times, bolstering your defenses and augmenting your offensive capabilities, making you an unyielding force on the battlefield.
- Lunge for Fury, Abyssal Echoes for Depth: Use Lunge not just to engage but to maximize your Crusader's Fury buff by hitting as many enemies as possible, and employ Abyssal Echoes for that extra layer of damage and battlefield control.
Essential Gear and Uniques:
- A Foundation of Uniques: While the build is formidable in its own right, equipping uniques like Bleeding Heart, Wings of Argentus, and Throne of Ambition can elevate your Forge Guard to new heights, enhancing survivability and damage output.
- Optimize for Ignition: Focus on gear that enhances your ability to ignite, whether through increased fire damage, ignite chance, or effects that synergize with your fiery onslaught.
Manifest Armor Forge Guard
This Forge Guard stands as the epitome of destruction and resilience, wielding single-target damage capabilities that are the envy of the realm, ready to conquer every challenge the game dares to throw its way.
Here's how you harness the infernal might of this metallic titan:
- Shield Throw Dynamics: Turn defense into offense. A well-aimed Shield Throw at your Manifest Armor transforms it into an engine of destruction, unleashing devastating melee AoE attacks amidst the enemy ranks.
- Speed of the Forge: The essence of your power lies in the speed of your throw. Scale your Throwing Attack Speed to invoke Manifest Inspiration with relentless frequency, turning the tide of battle with each swift strike.
- Sigils of the Forge: Forge your path to glory with five Sigils of Hope, each a bastion of power, fueling your crusade with their incredible enhancements.
- Standard of Power: Plant the Javelin's Battle Standard deep in the heart of conflict. Its node is not just a marker; it's a source of strength and sanctuary, bolstering your offensive and defensive prowess.
- Molten Might: Enhance your Manifest Armor with the searing edge of Void Cleave's Molten Blades and the fiery trail of Scorching Path, turning its very presence into a pyre of destruction.
While the core of your might is unyielding, a trio of Uniques can forge your path to legendary status:
- Suloron's Step: A stride that crosses the boundaries of realms, enhancing your every move.
- Ribbons of Blood: Bind your foes with these crimson bands, each a testament to your unassailable power.
- Apathy's Maw: A void that consumes not just the flesh, but the very will of those who dare stand against you.
D Tier
Smite Shield Throw Paladin
Imagine stepping into battle, not just with the might of your arm and the strength of your faith, but with the very elements at your command, bending the fury of the storm to your will as you become the harbinger of your foes' demise.
Build Essentials:
- Ricochet Retribution: The heart of this build lies in the mesmerizing dance of shields, each throw a calculated strike that bounces between enemies, leaving devastation in its wake.
- Celestial Conductor: With every shield that flies, the sky responds, Smite's lightning answering your call, turning the battlefield into a storm-scarred vista of divine retribution.
- Critical Stormfront: The build's mastery lies not just in the strength of its blows, but in their precision. By scaling Critical Hits, each strike is a potential maelstrom, multiplying the devastation with every hit.
- Mana, The Wellspring of Power: Through Devotion, Mana becomes more than just a resource; it's the foundation of your strength, each point amplifying your capacity to unleash destruction.
- Bulwark of the Heavens: With Face of the Mountain, you don't just defend; you become the defense itself, a bastion against which the waves of your enemies break.
In the Heat of Battle:
- Shield Symphony: Master the arc and bounce of your shields, turning each throw into a cascading series of divine strikes, a chain of devastation that leaps from foe to foe.
- Conductor of the Storm: Sync your throws with the rhythm of the heavens, letting each call of Smite be timed with the precision of a maestro, turning the sky into an ally.
- The Fortress Moves: With Volatile Reversal, you're not just a static defender; you're the advancing storm, positioning yourself where you're needed most, always ready to unleash the next barrage.
Conclusion
And that wraps up our journey through the Sentinel build tier list! I hope this exploration has shed some light on the various paths you can take with your Mage, from the unbeatable strategies of the S Tier to the unique quirks of the D Tier. It's been great diving into the strengths and nuances of each category with you.
Whether you're about to embark on a new adventure or refine your current strategy, I wish you thrilling battles and epic victories in Last Epoch. If you ever want to revisit this or delve into new builds, you know where to find me.
Until next time, may your choices lead you to triumph!