Table of Contents
Memory Turbulence

All allies' Basic ATKs and Skills deal 50% increased DMG. Whenever a Skill Point is consumed. Memory Turbulence gains 1 hit(s) per action, up to a maximum of 10.
At the beginning of each Cycle, for each Hit Per Action, Memory Turbulence deals DMG to a random enemy based on the target's Max HP.
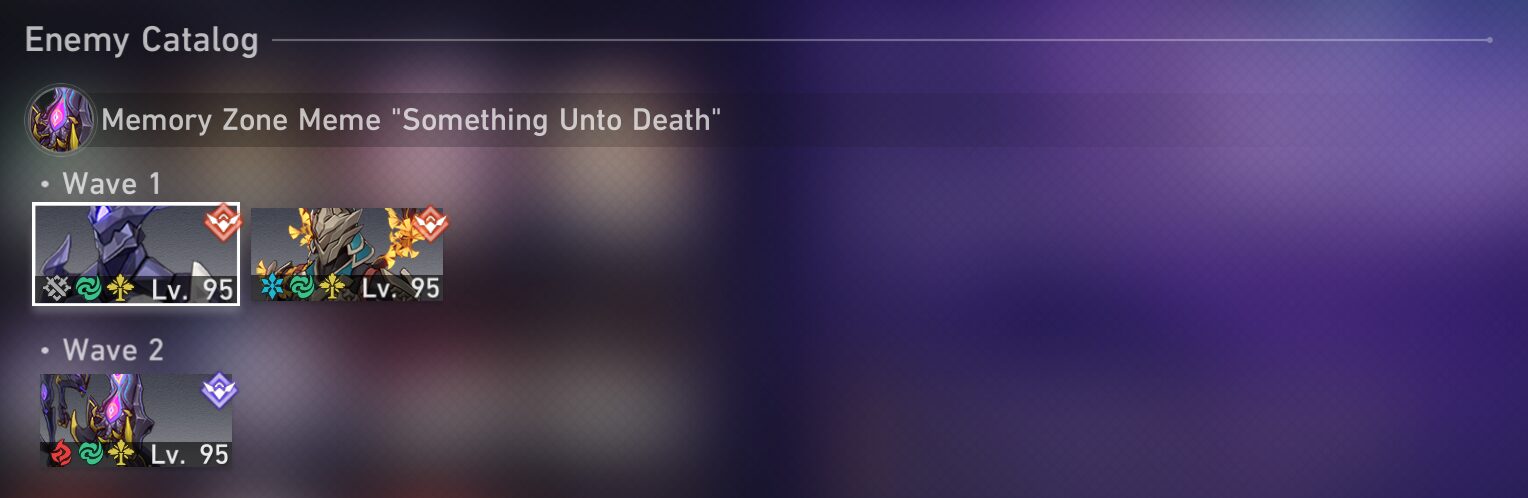
Enemies Lineup
First Half

Second Half
Team Recommendations
First Half
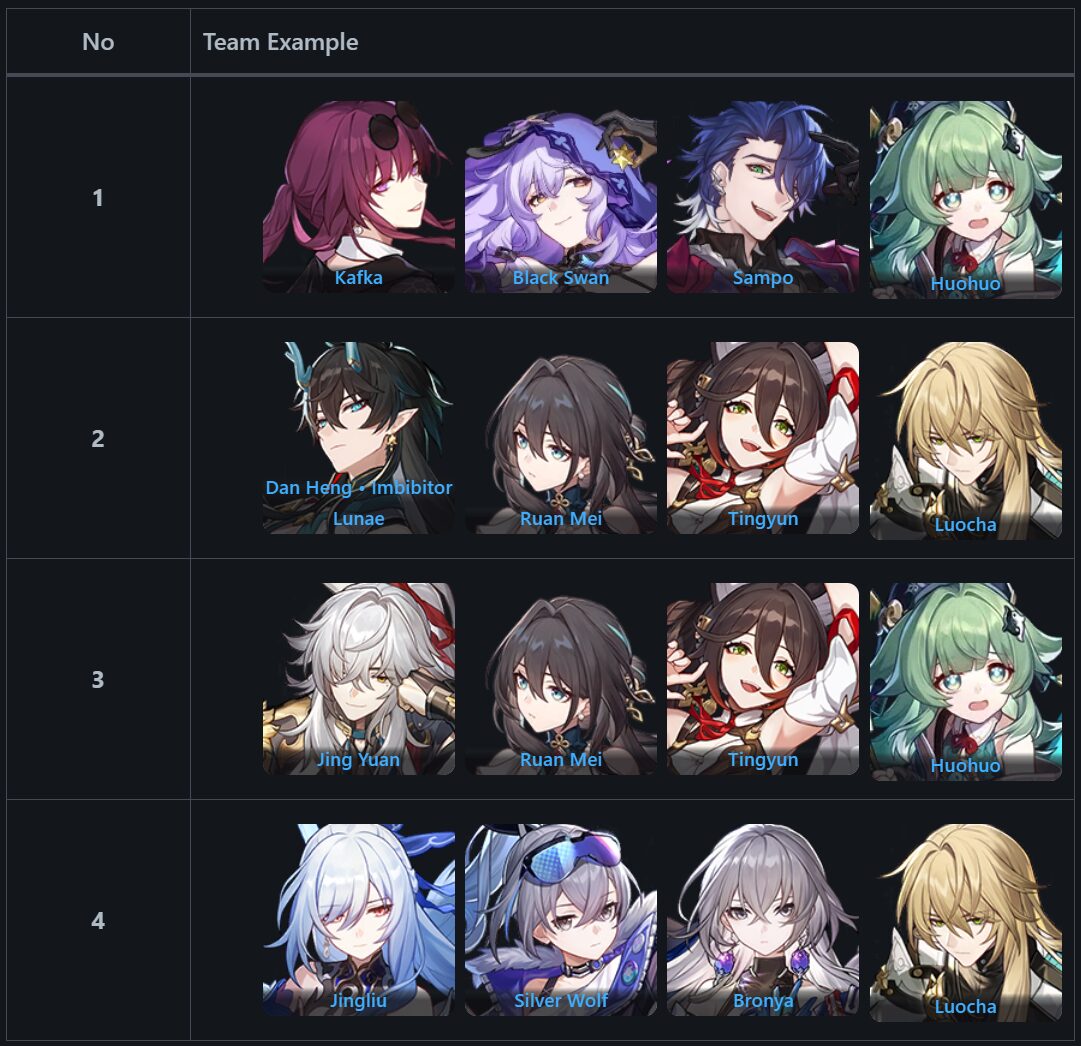
Recommended Elements: Lightning
It's recommended to use Blast/AoE DPS character as there will be many enemies in the first wave, but not so much in the second wave. Using single-target DPS works too, but make sure the enemy has the DPS element as a weakness (like Dr. Ratio and his Imaginary attack) or at least bring Silver Wolf to add a new type of Weakness.
Second Half
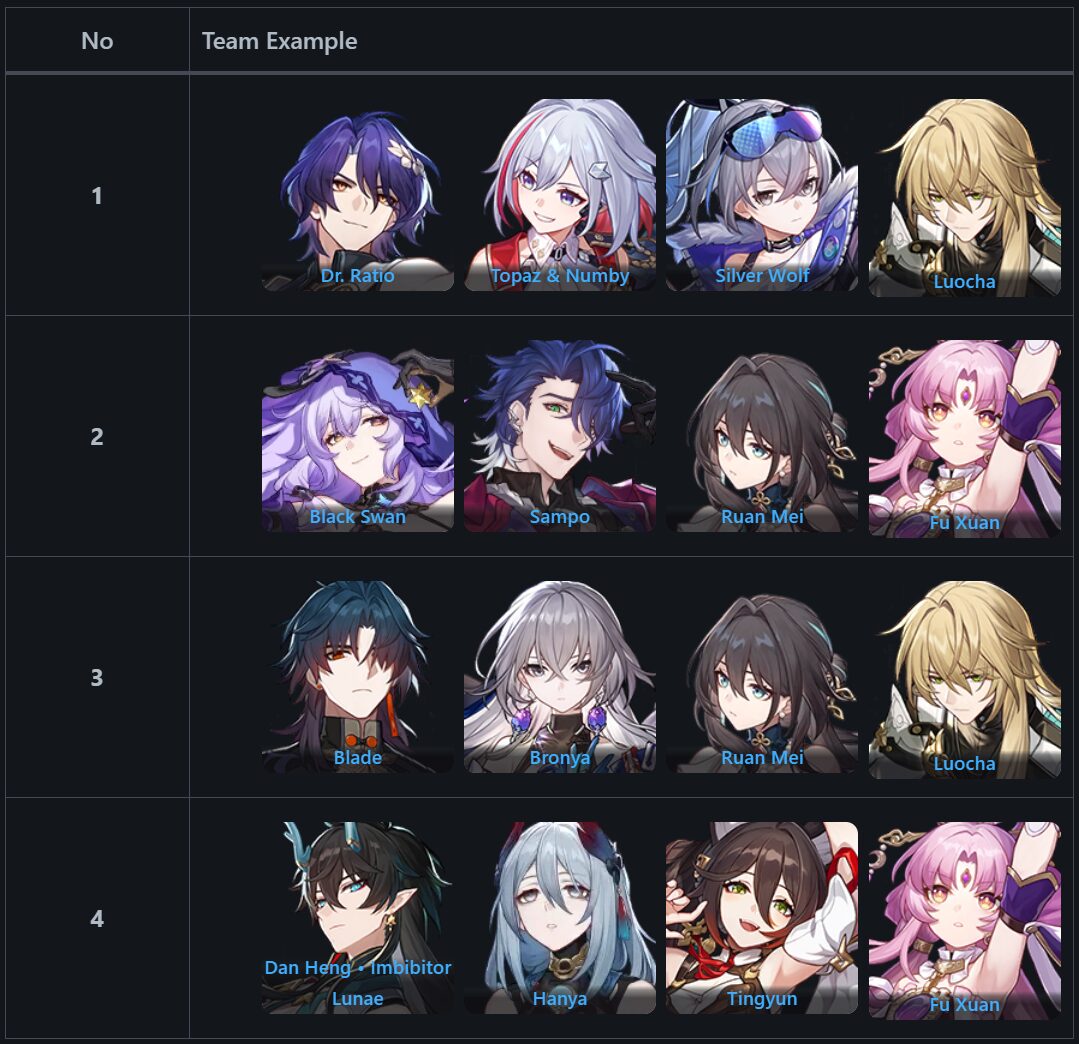
Recommended Elements: Imaginary & Wind
First of all, remember that there will Disciple of Sanctus Medicus here, and he has a buff that can heal himself. You want to add a character that removes those buffs like Luocha or Pela, unless, your DPS is strong enough to handle him or at least Weakness Break him. Then, we'll have the Meme Something Unto Death as the new final boss here.
Since there is only one enemy in the last wave, having a single-target DPS is great, but don't forget that your characters will be locked inside Morbid Dreams (where you need to hit it multiple times to free the characters from the dream). Black Swan is great here since when her Arcana stacks, it also kinda deals 'damage' to said enemies. Don't worry if you still want to use a single-target DPS, as the Memory Turbulence will help in attacking random enemies, as long as you consume Skill Points.
Observation
First Half: Gepard & Searing Prowler
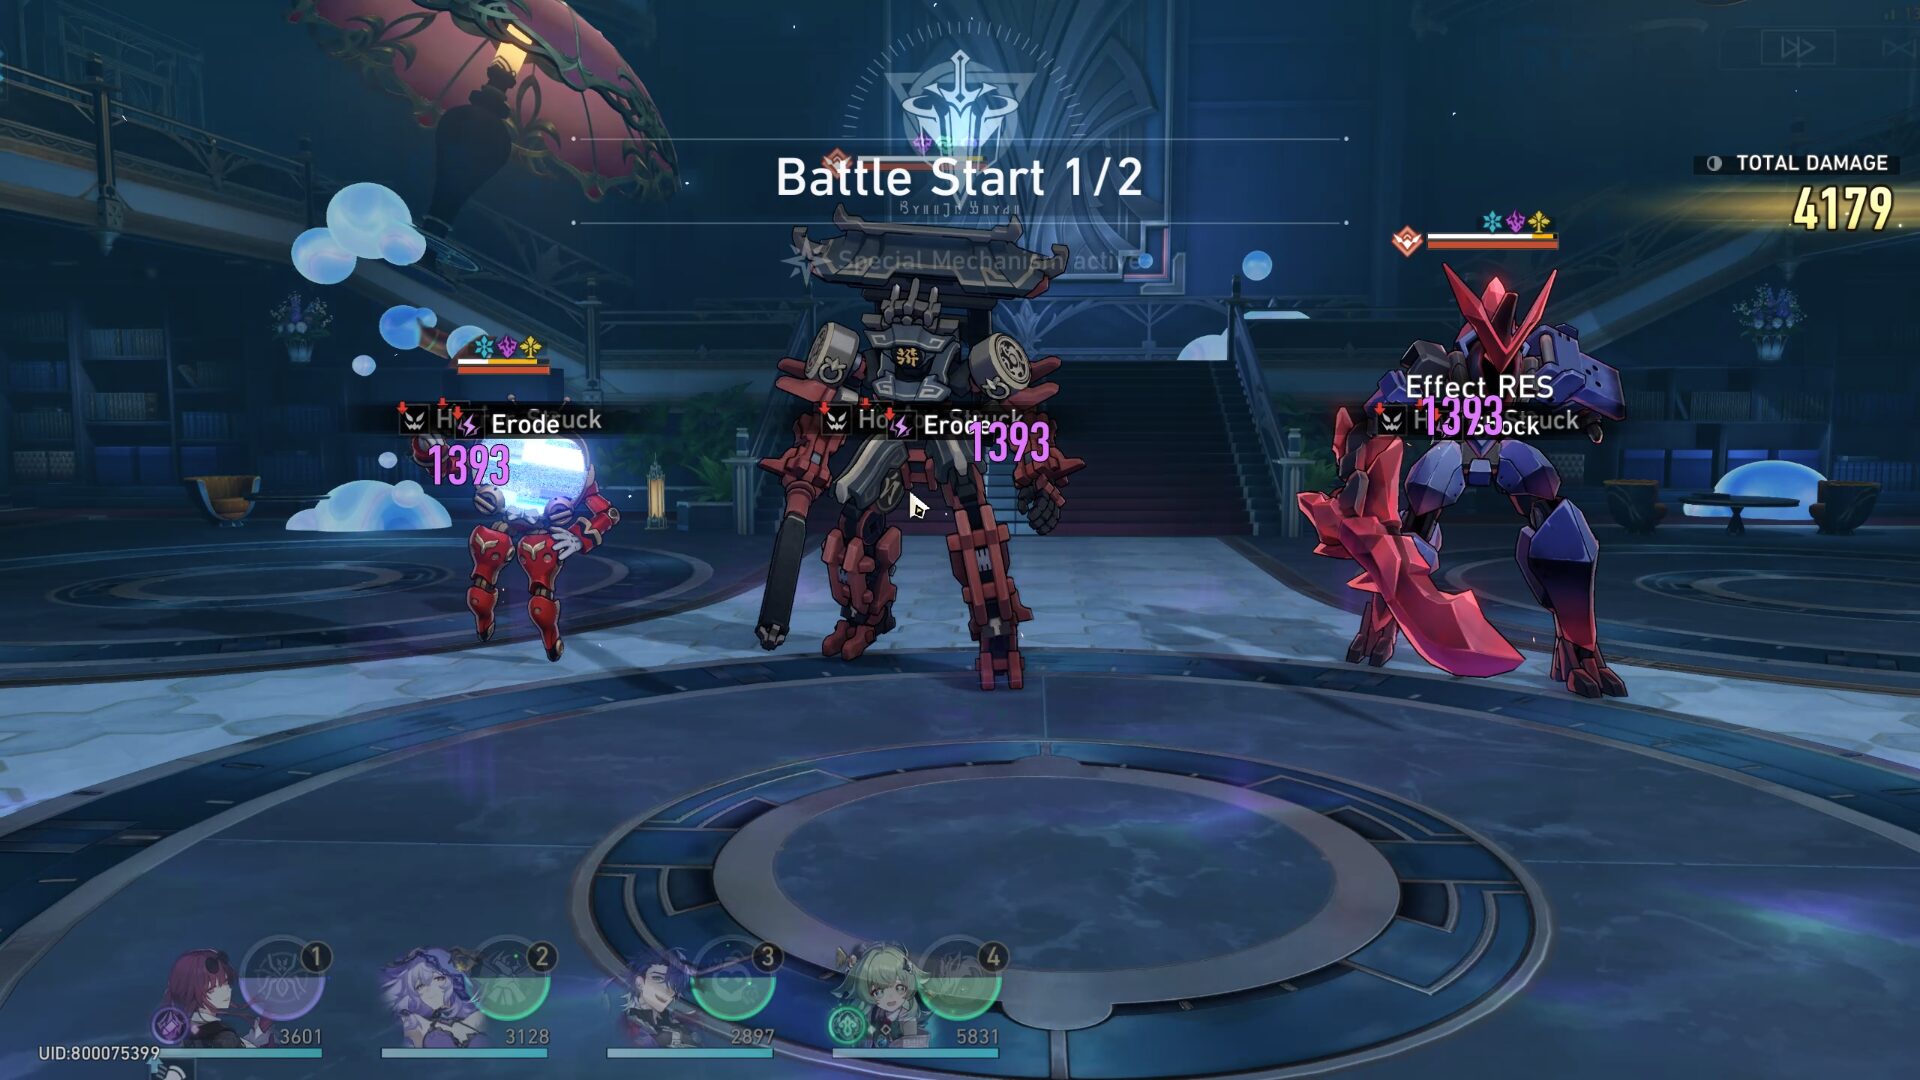
- Start the battle with a Lightning attack. There will be 3 enemies at first, but then the Aurumaton Gatekeeper will summon 2 Dragonfishes. First of all, make sure that the Mr. Domescreen is in the Surprise Channel before its next turn so your (random) character can gain Energy.

- When the 2 Dragonfishes arrive, focus on them until they explode so they can contribute to dealing some damage to other enemies (their AoE attacks are also annoying). Only after that should you focus on dealing with both elite enemies.
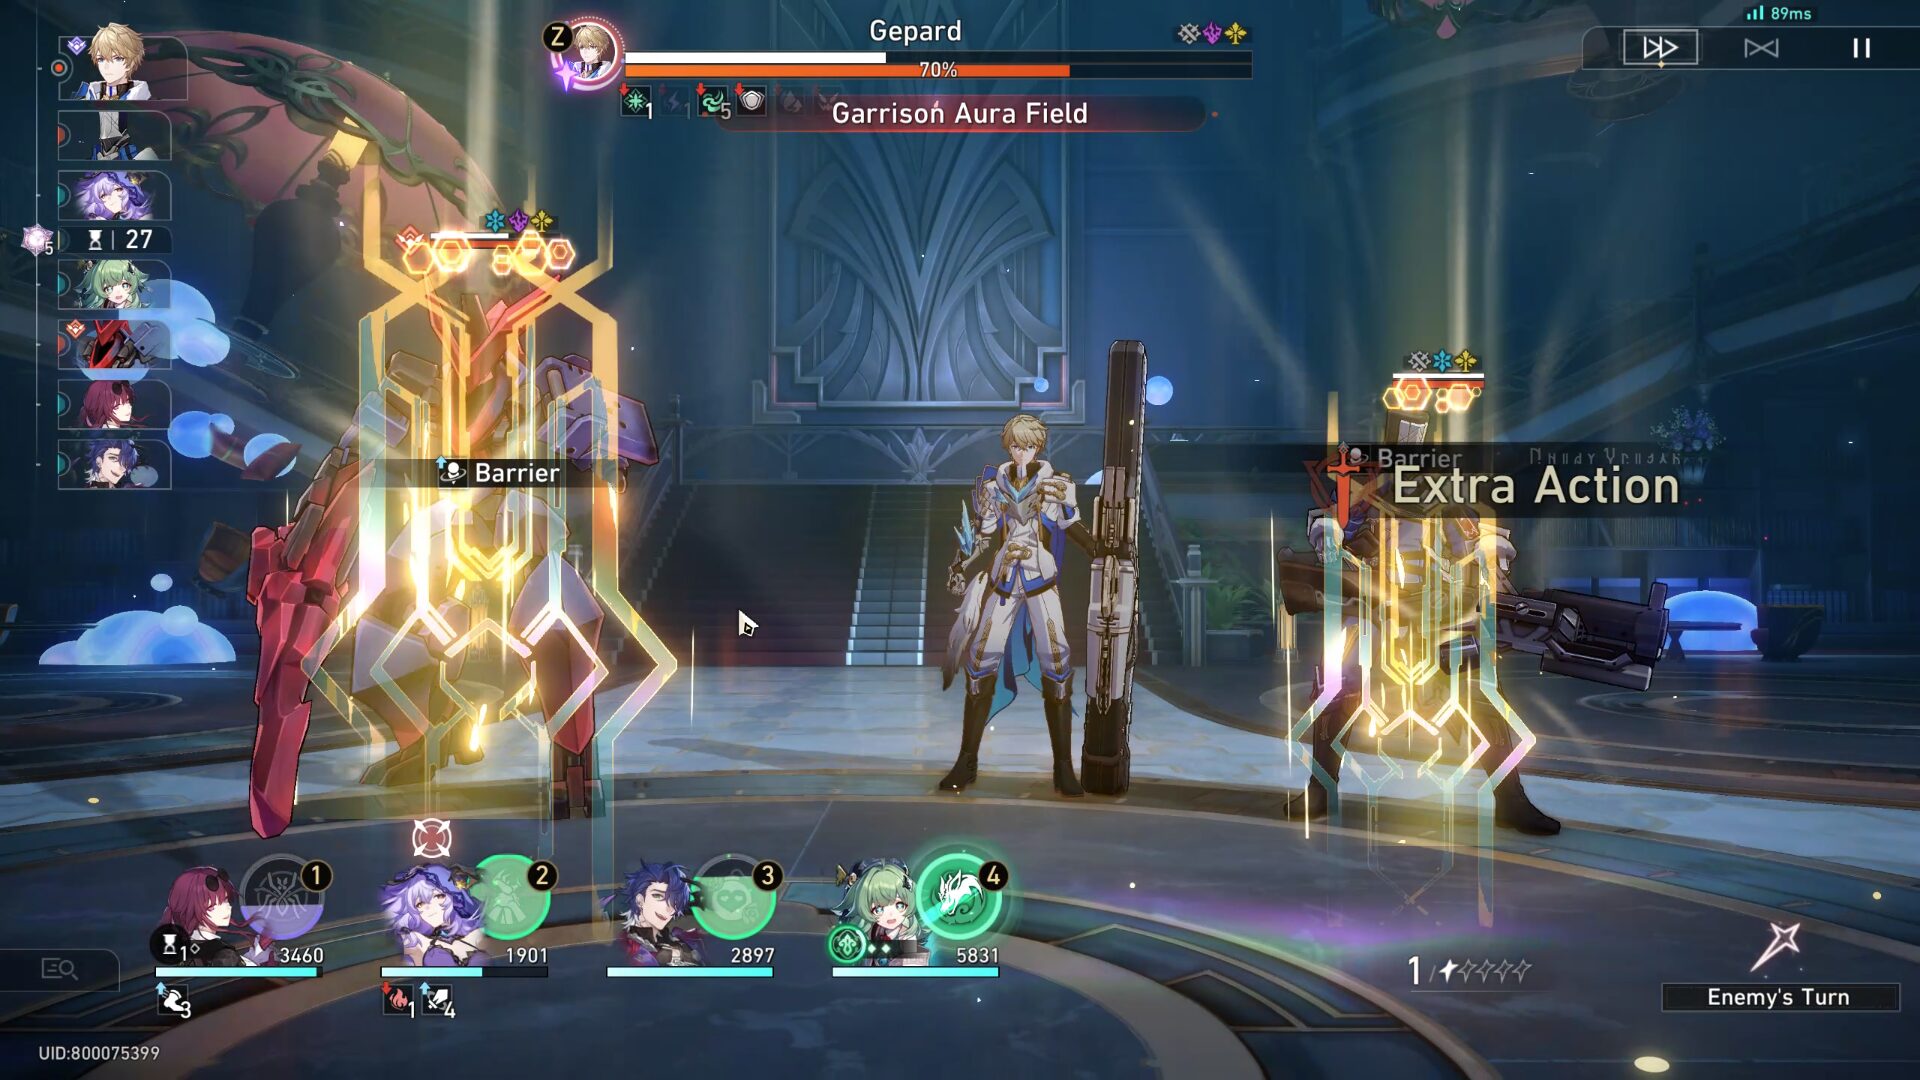
- The second wave featured Gepard and one Searing Prowler. But later, Gepard will summon one Silvermane Soldier. Here, I suggest focusing on attacking Gepard because of various reasons:
- If there are too many enemies, the Memory Turbulence may attack enemies with the lowest priority (aka the Silvermane Soldier).
- He might shield all other enemies right before the Memory Turbulence attack.
- His Ultimate (where he slams his guitar case) hurts like a truck.
Second Half: Memory Zone Meme "Something Unto Death"

- In the first wave, start the battle with an Imaginary attack. From the start, keep attacking the Sanctus Medicus. This is because the said boss will keep summoning more Mara-Struck Soldiers. It's better to focus on the big boss than the pawns.
- I hope you bring Pela or Luocha here. Use their ability (Pela's Skill or Luocha's Ultimate) to remove the hit recovery buff of the Disciples, otherwise, that elite enemy can absorb a lot of HP and make him pretty invisible since he keeps healing.
- If you don’t have Pela (or any character that can remove a debuff on enemies), another option is to defeat the two Mara-Struck Soldiers that he summons until they die for the first time. After they use their Rebirth skill (revive and restore 50% HP), it won’t matter anymore, and move on to the next Mara-Struck Soldier. Only after the 2 Mara-Struck Soldiers are gone will the hit recovery buff on the elite enemy disappear.
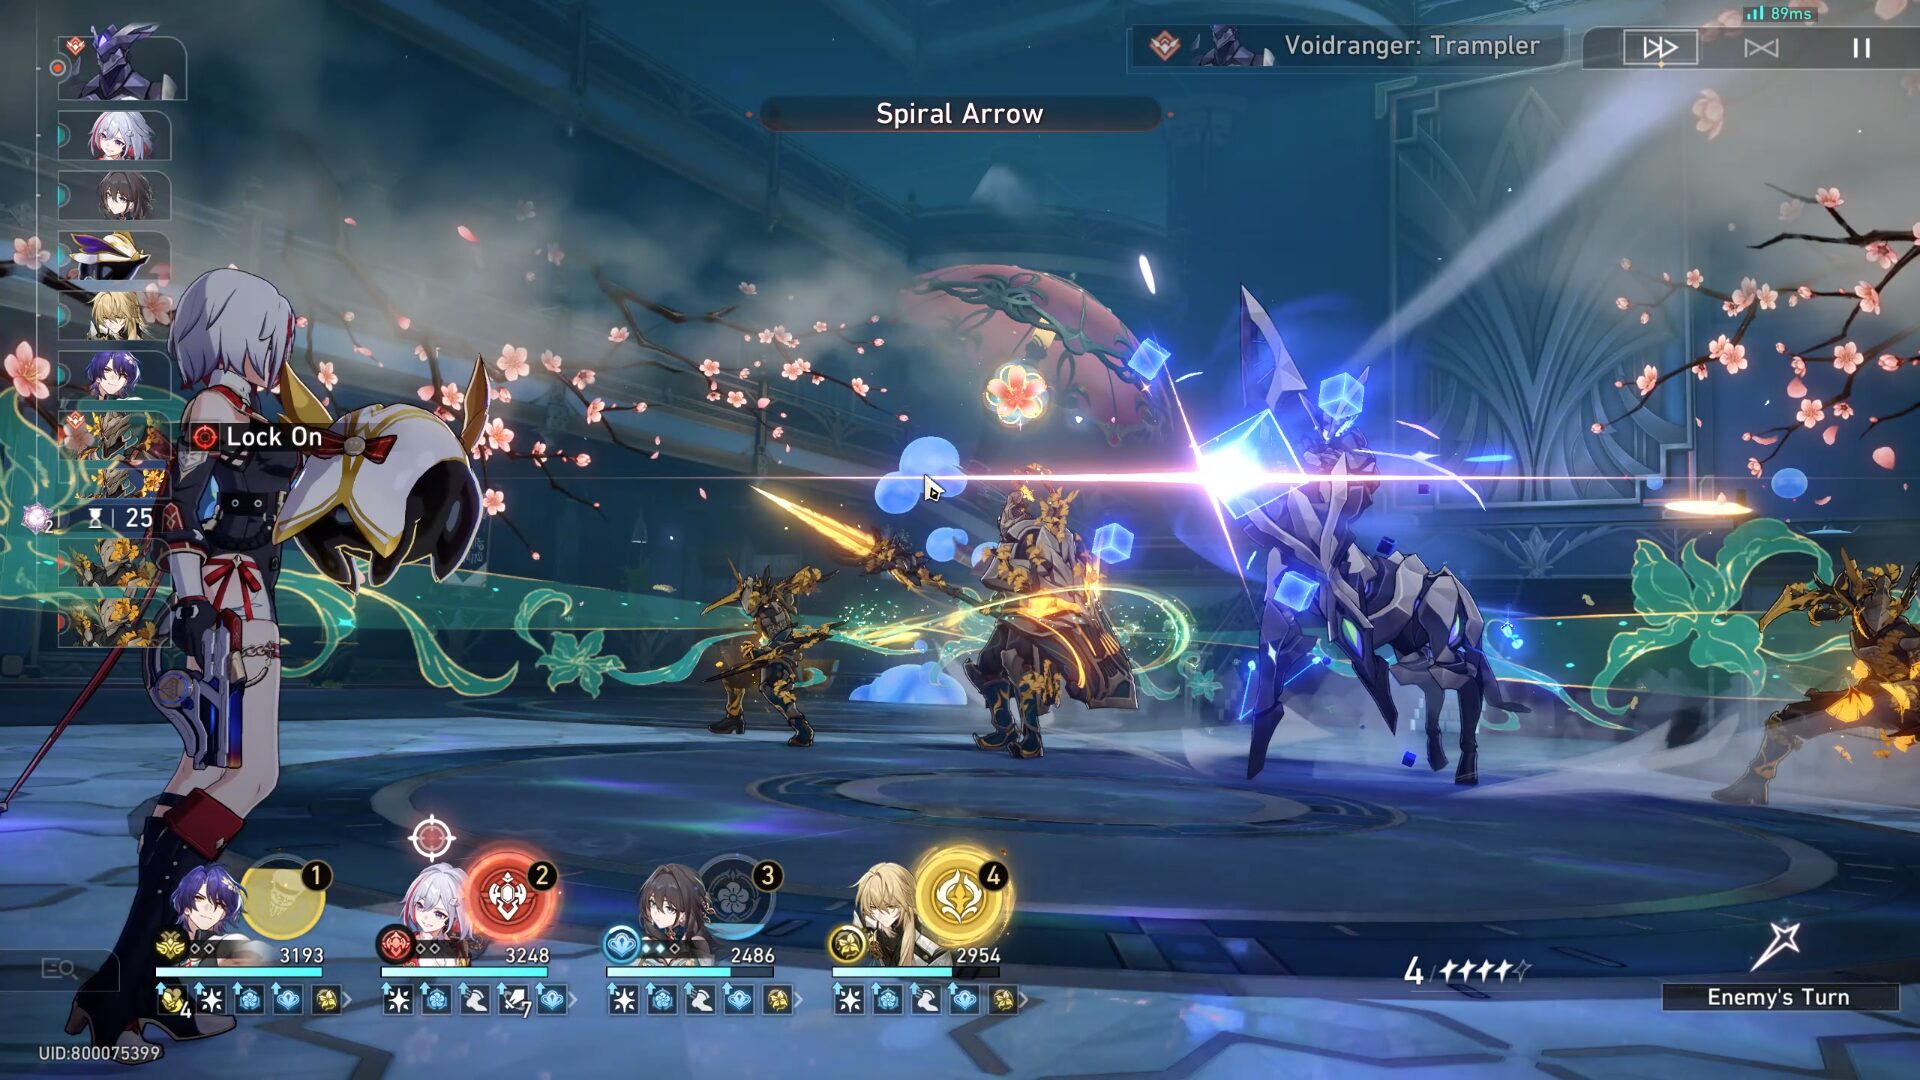
- The one ability you need to be careful of from Voidranger is Spiral Arrow, which locks onto a single target. Then, in the next action, it will deal massive Quantum damage to that locked character. Make sure you have a Shield on the targeted character so they can survive or you can use Taunt to redirect that attack.
- Another option to cancel that ability is to inflict a Weakness Break on the elite enemy while it is still casting so it will be interrupted.
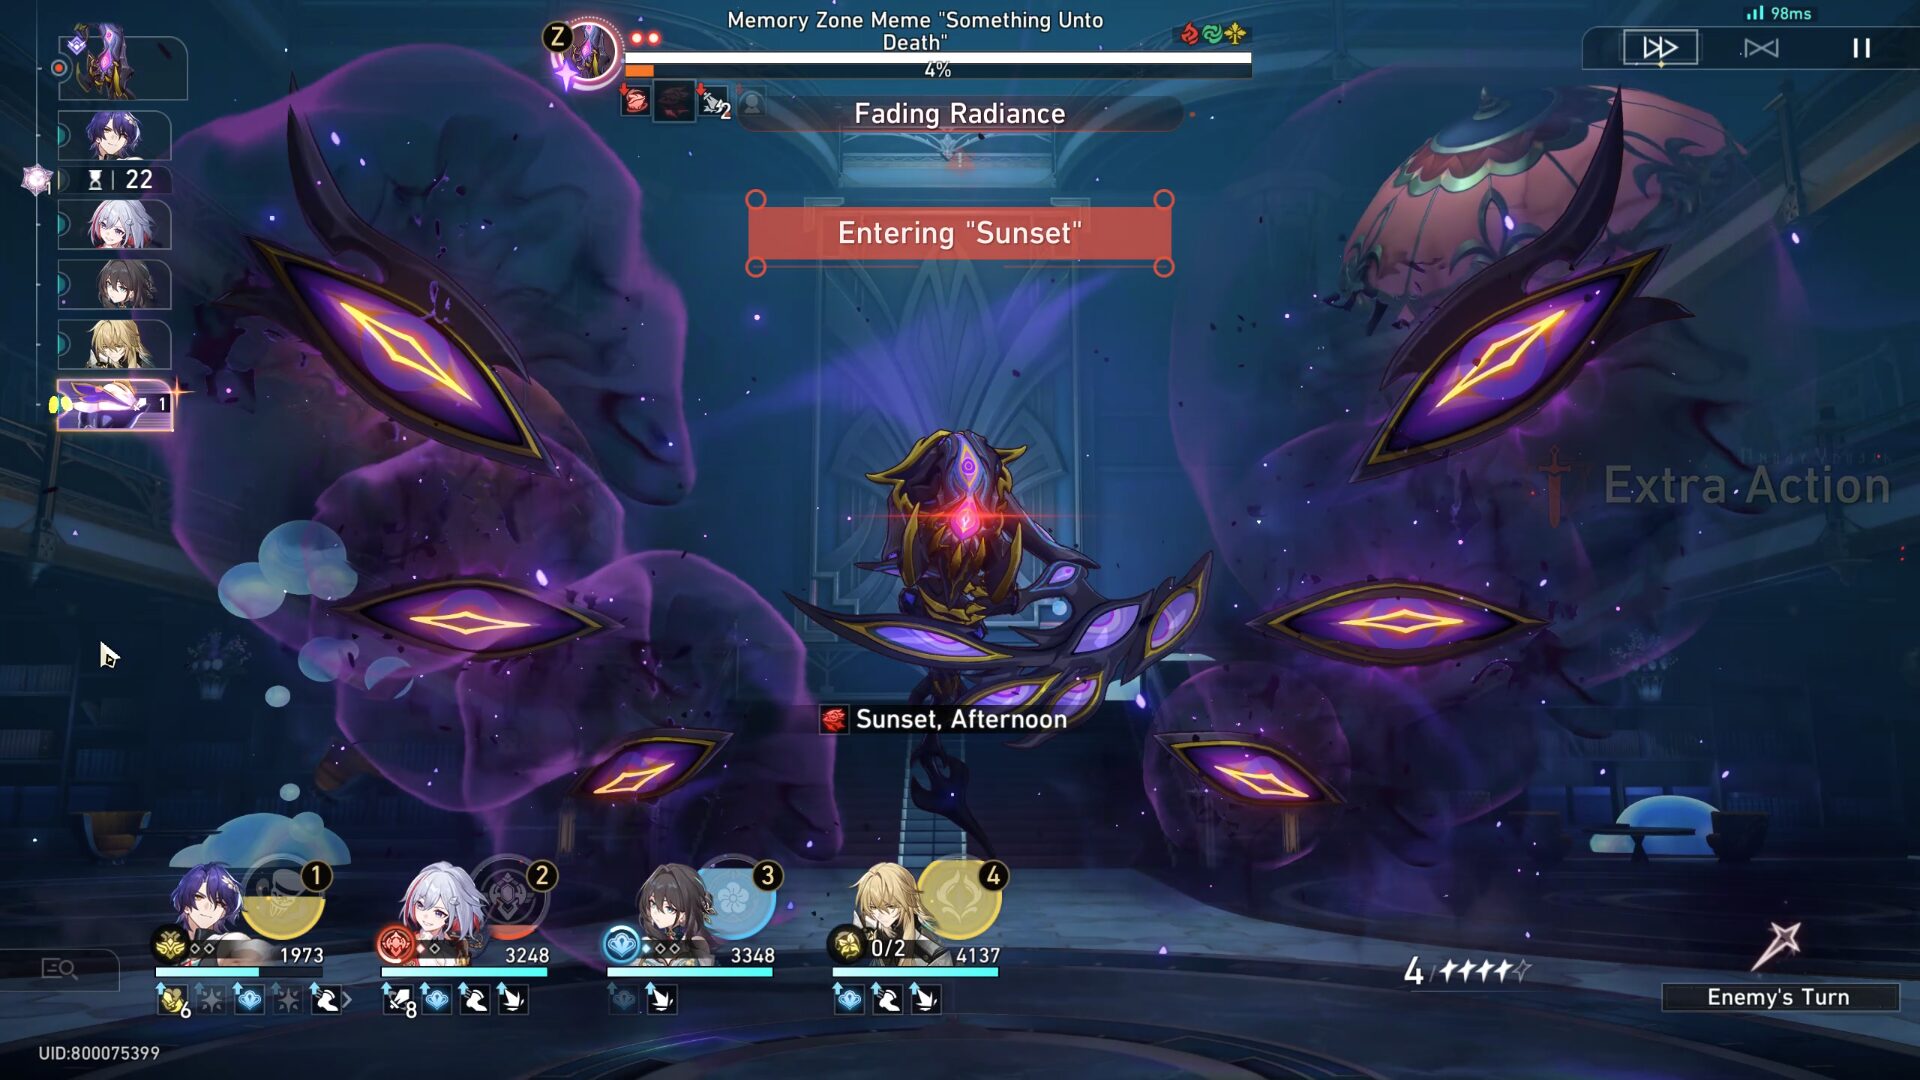
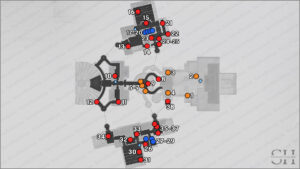
- Against the Meme (I'm gonna call it the Reaper from now), in the first phase, it will have the [Fading Radiance] Skill. It will enter the Sunset state, and gains 1 stack each time a character uses Basic ATK, Skill, or Ultimate.
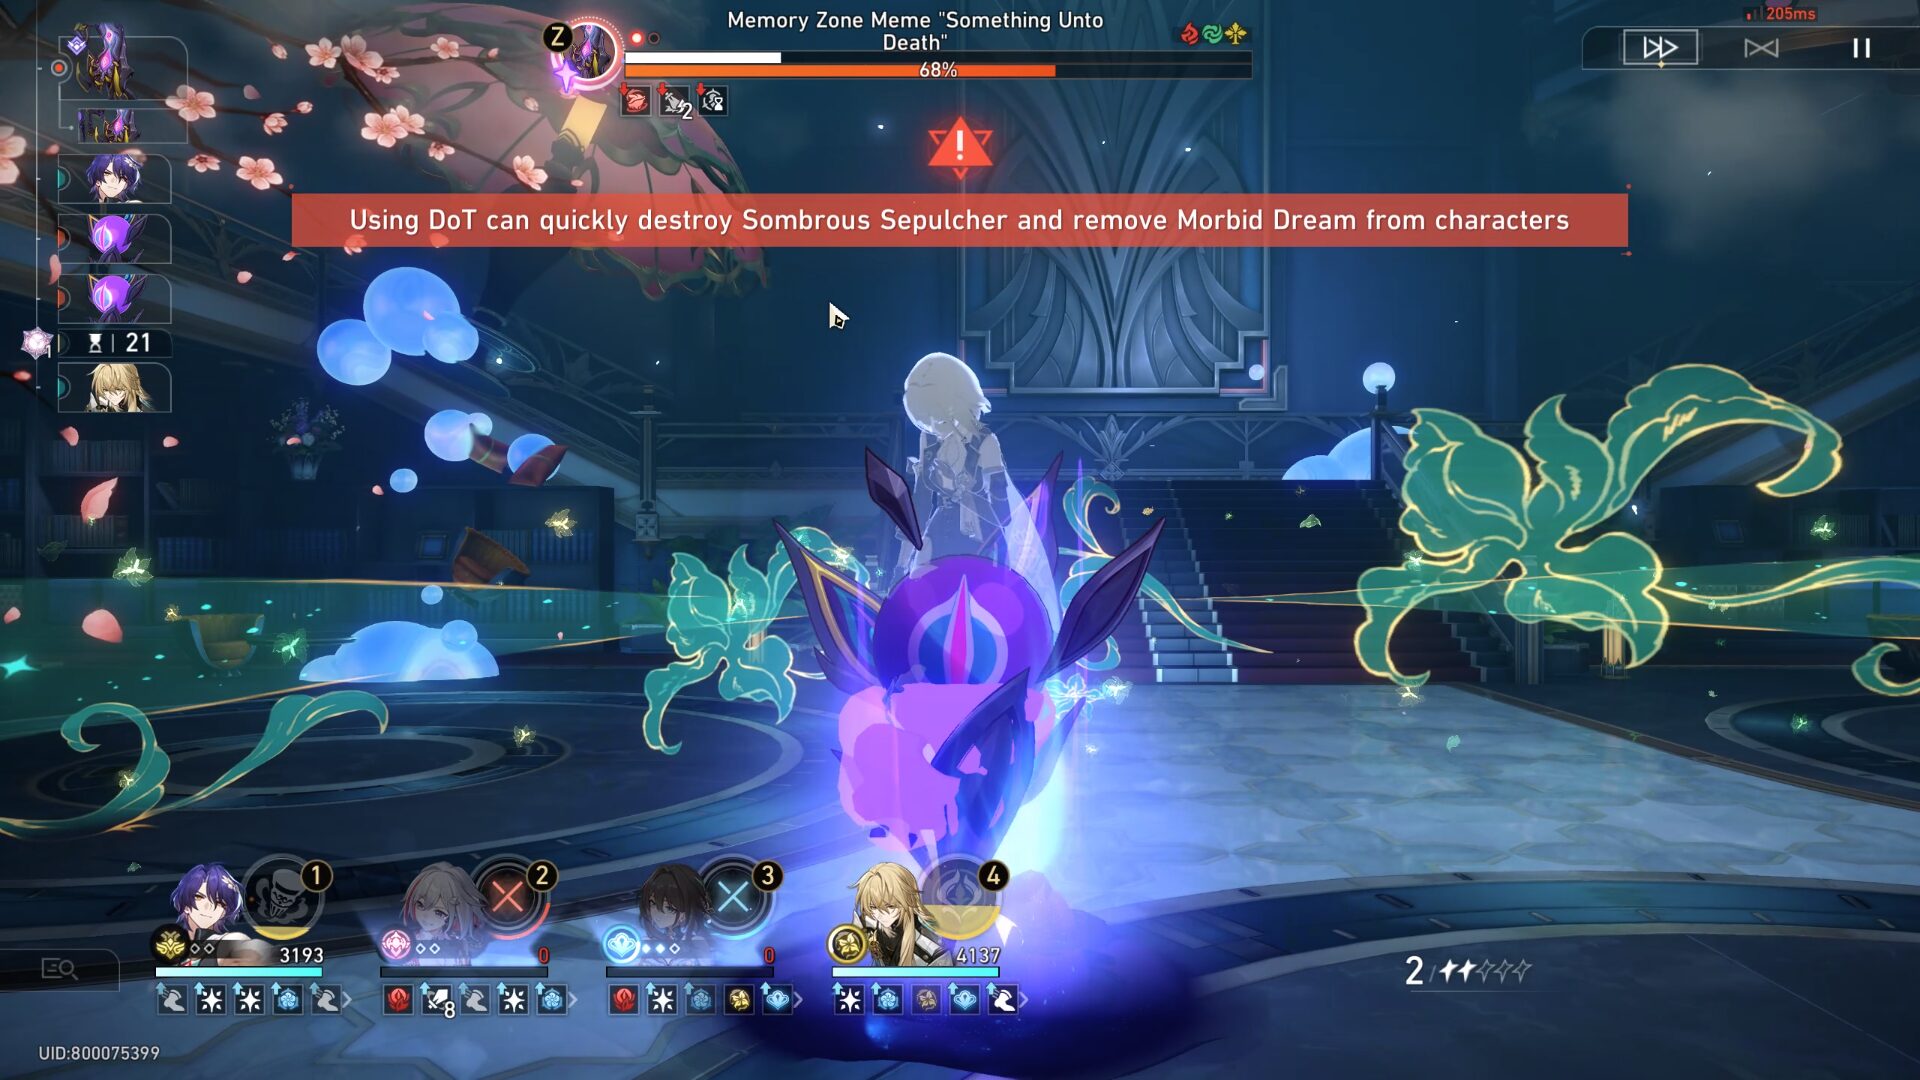
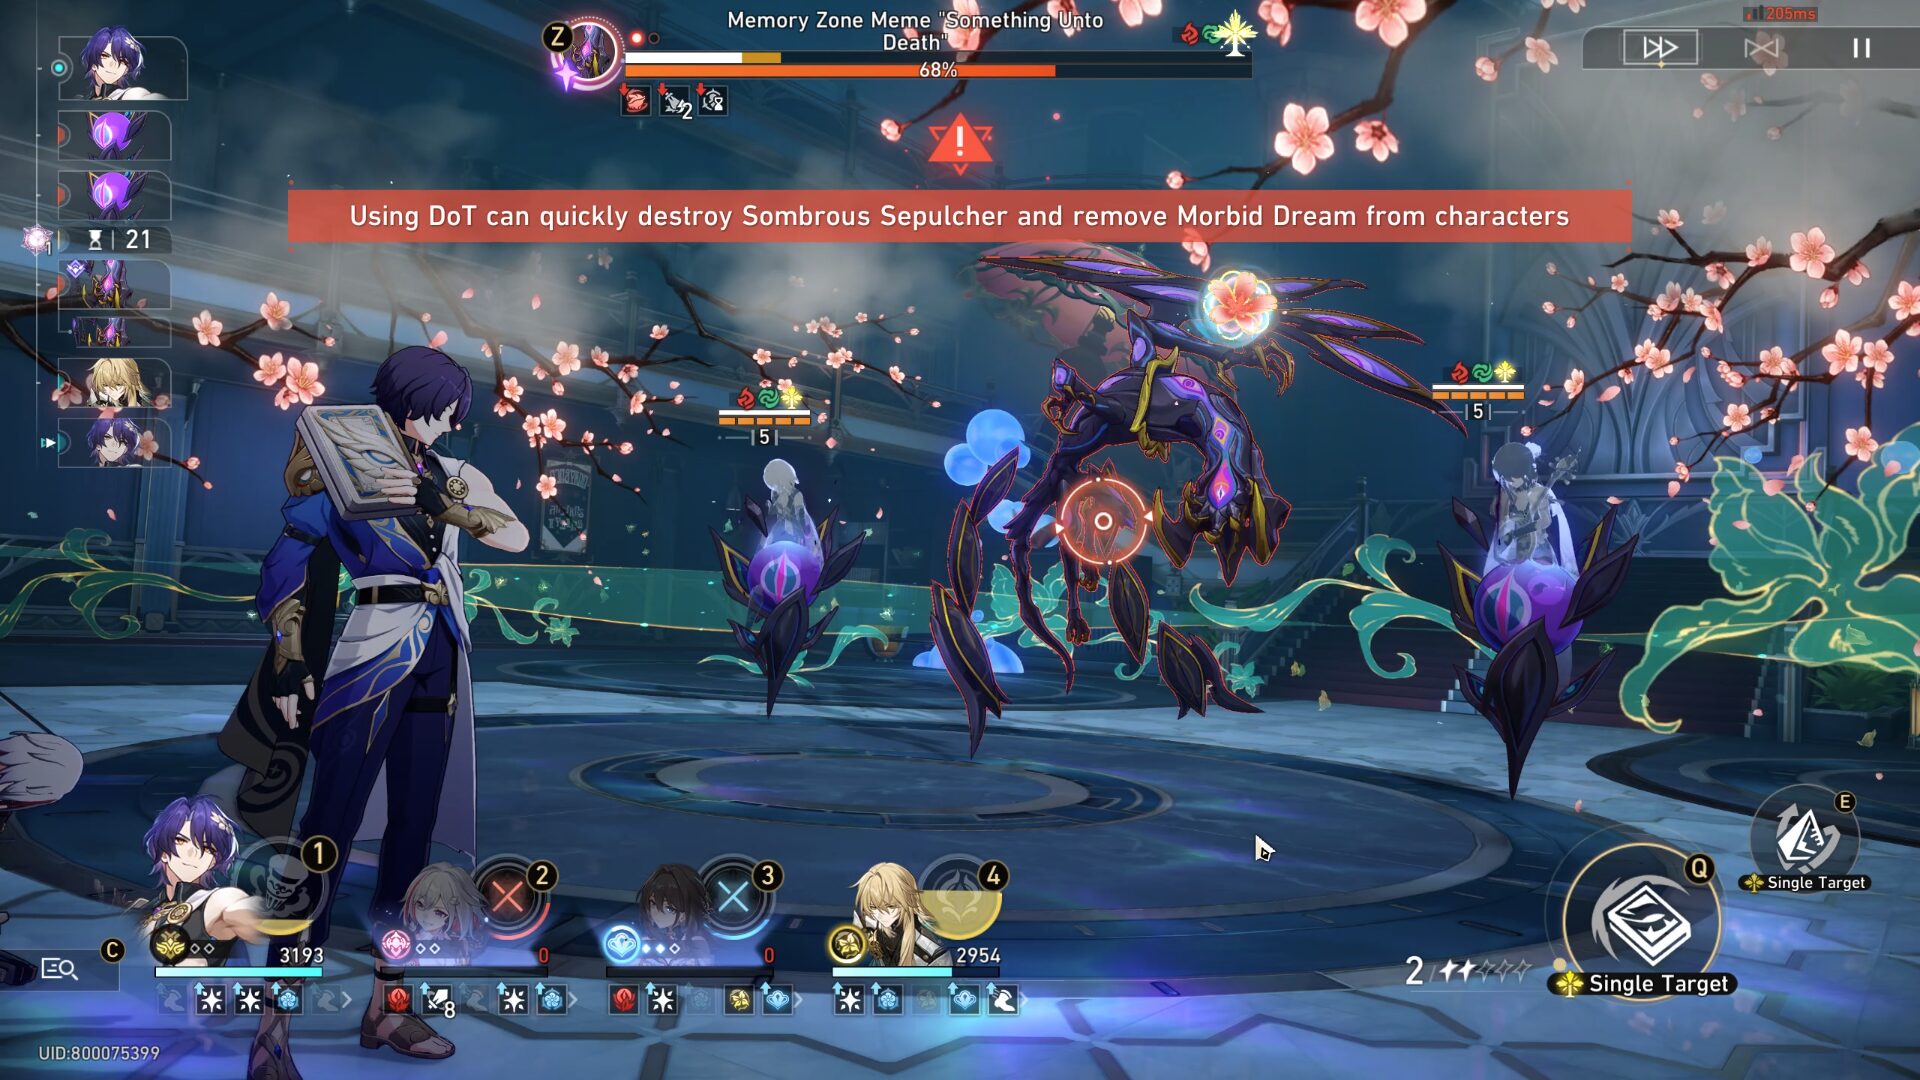
- When Sunset reaches 3 stacks, it will immediately launch a killing blow on the last-acting character and inflict Morbid Dream on them. Characters that are locked within the Morbid Dream cannot move until you destroy all 5 stacks of the Sombrous Sepulcher (the thing that is locking your character).
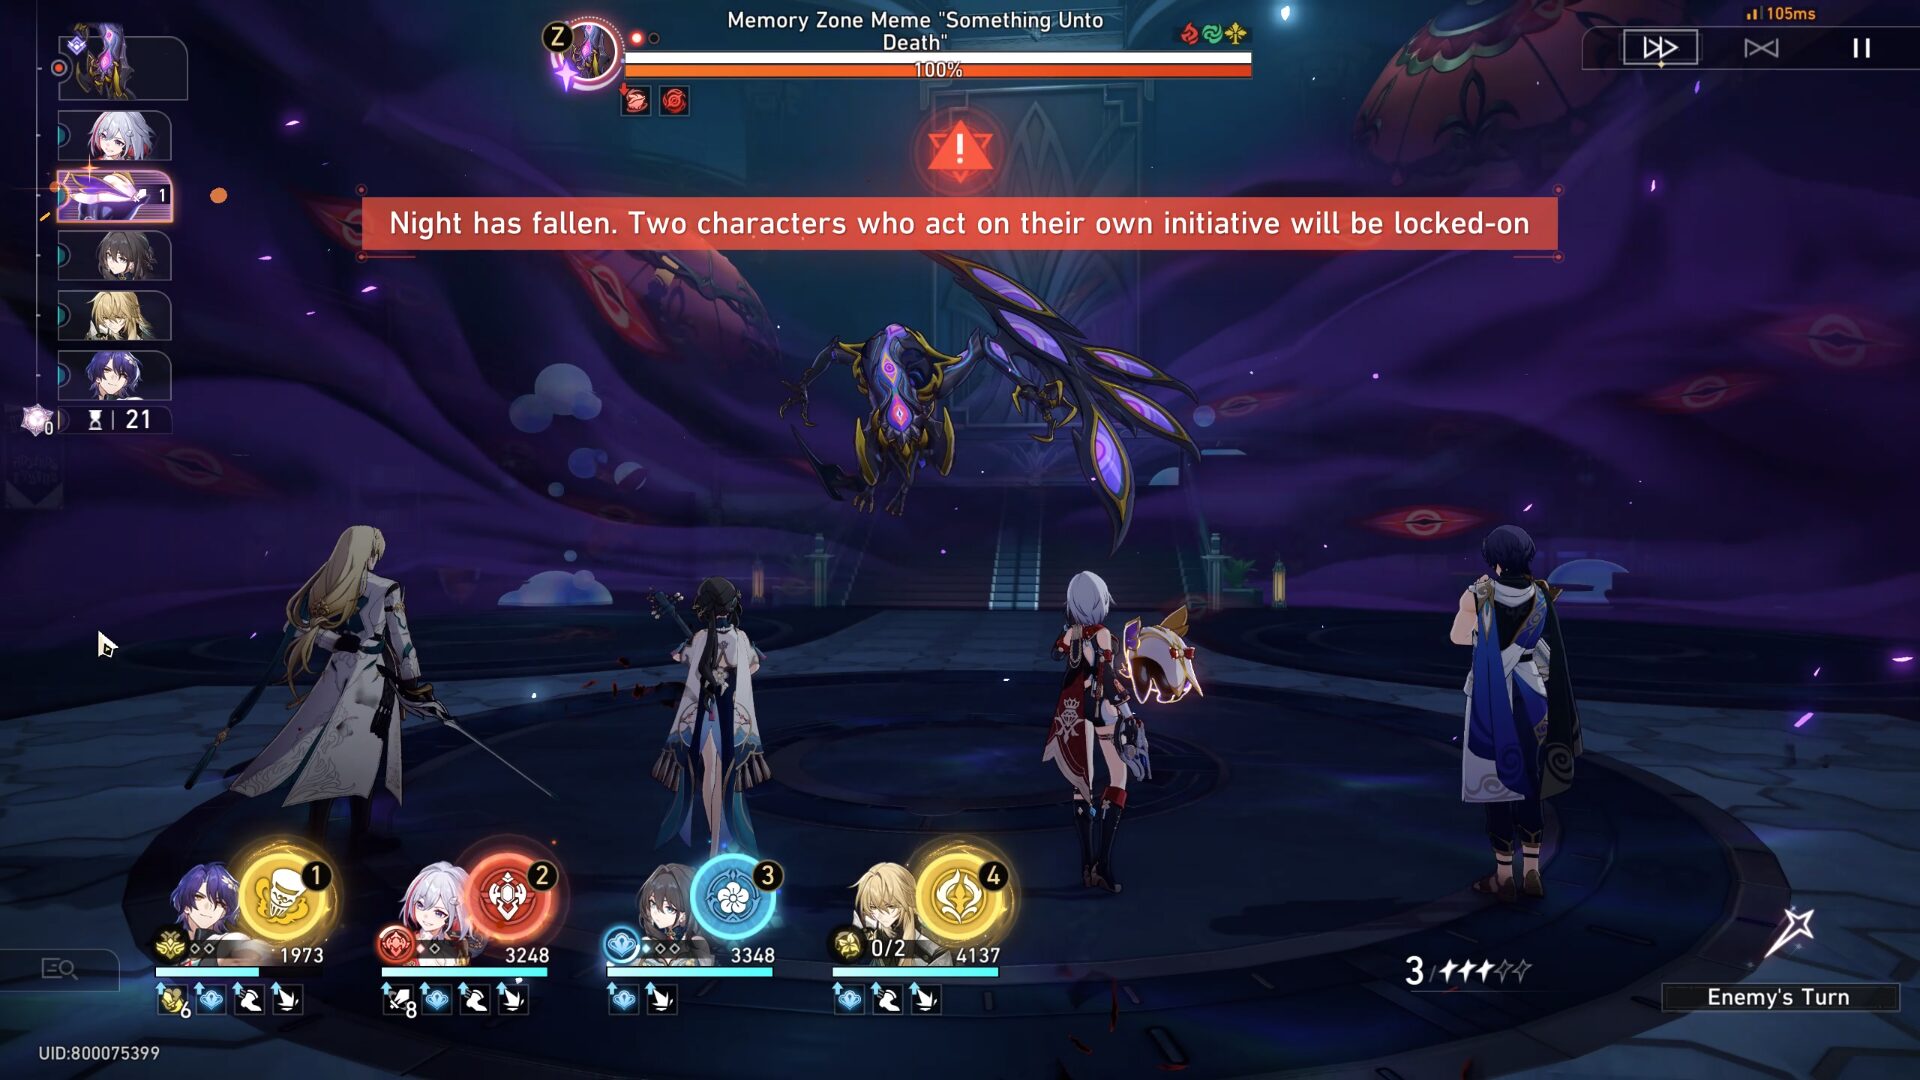
- In the second phase, all your characters will have their Ultimate fully recharged. However, the first 2 characters that you will use (by using their Ultimate / Normal ATK / Skill) will be locked by the Reaper to get locked inside the Morbid Dream (marked in the circle above). Choose your first 2 characters wisely; I recommend the Sub-DPS and buffer, while letting your Main DPS and healer be.
- After the 2 characters are locked inside the Morbid Dream, use your Main DPS to scratch as much HP as you can from the Reaper and also keep your DPS healthy with the healer. After 2-3 turns, the Reaper will use 'Go Into That Good Night' again where it will lock onto another 2 characters.
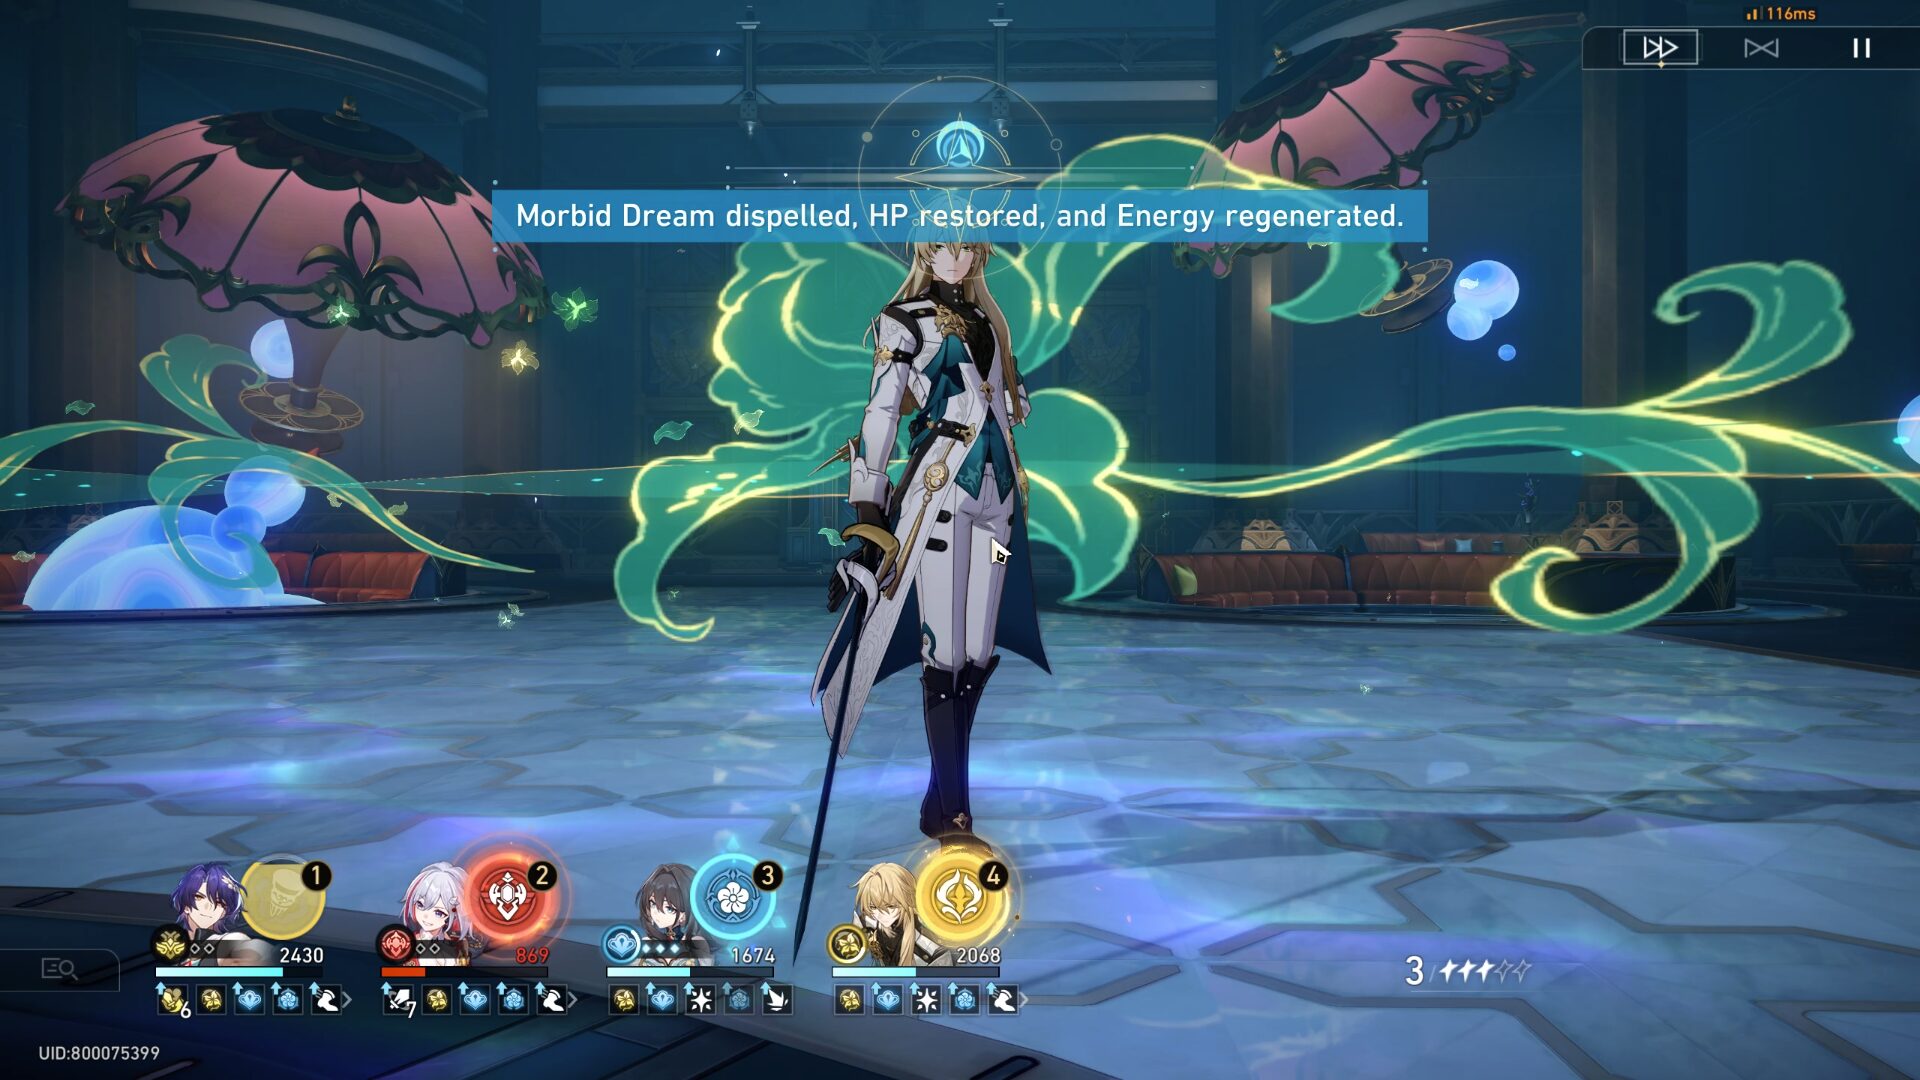
- Unless you are confident that your DPS can deal the finishing blow to the Reaper, make sure to attack the Morbid Dreams so it will let your locked characters go. Every character that just awoke from the Morbid Dream will have their HP restored to half, and their Energy fully refilled.

SoraHoshina
Articles: 181More Articles
Honkai: Star Rail Stellar Jades Calculation in Version 2.2
Honkai: Star Rail Version 2.2 Special Program Livestream Overview

Honkai: Star Rail 3 New Redemption Codes from 2.2 Livestream

Honkai: Star Rail Version 2.1 Tier List (April 2024)

Honkai: Star Rail Serval Character Guide

Honkai: Star Rail Luka Character Guide
Honkai: Star Rail Lynx Character Guide

Honkai: Star Rail Jingliu Character Guide
Honkai: Star Rail Aventurine Character Guide

Honkai: Star Rail Redemption Codes – April 2024
Honkai: Star Rail Tides of War Event Guide

Honkai: Star Rail Dan Heng Character Guide

Honkai: Star Rail Pela Character Guide
Honkai: Star Rail Gallagher Character Guide

Honkai: Star Rail Luocha Character Guide

Honkai: Star Rail Acheron Character Guide

Honkai: Star Rail Vignettes in a Cup Event Guide
Honkai: Star Rail All Stickers in Dreamscape Pass (Part 2)

Honkai: Star Rail All 20 Origami Birds in Penacony Clock Studio Theme Park