Table of Contents

A researcher from the Maintenance Department unexpectedly made a fighting game inside the Memory Bubble. He invites you to come and play.
Gameplay Overview
Event Gameplay Duration:
➥ 2024/04/13 12:00:00 – 2024/05/06 03:59:00 (server time
Eligibility:
➥ Complete the Trailblaze Mission “Jarilo-VI — Silent Galaxy”
Event Overview:
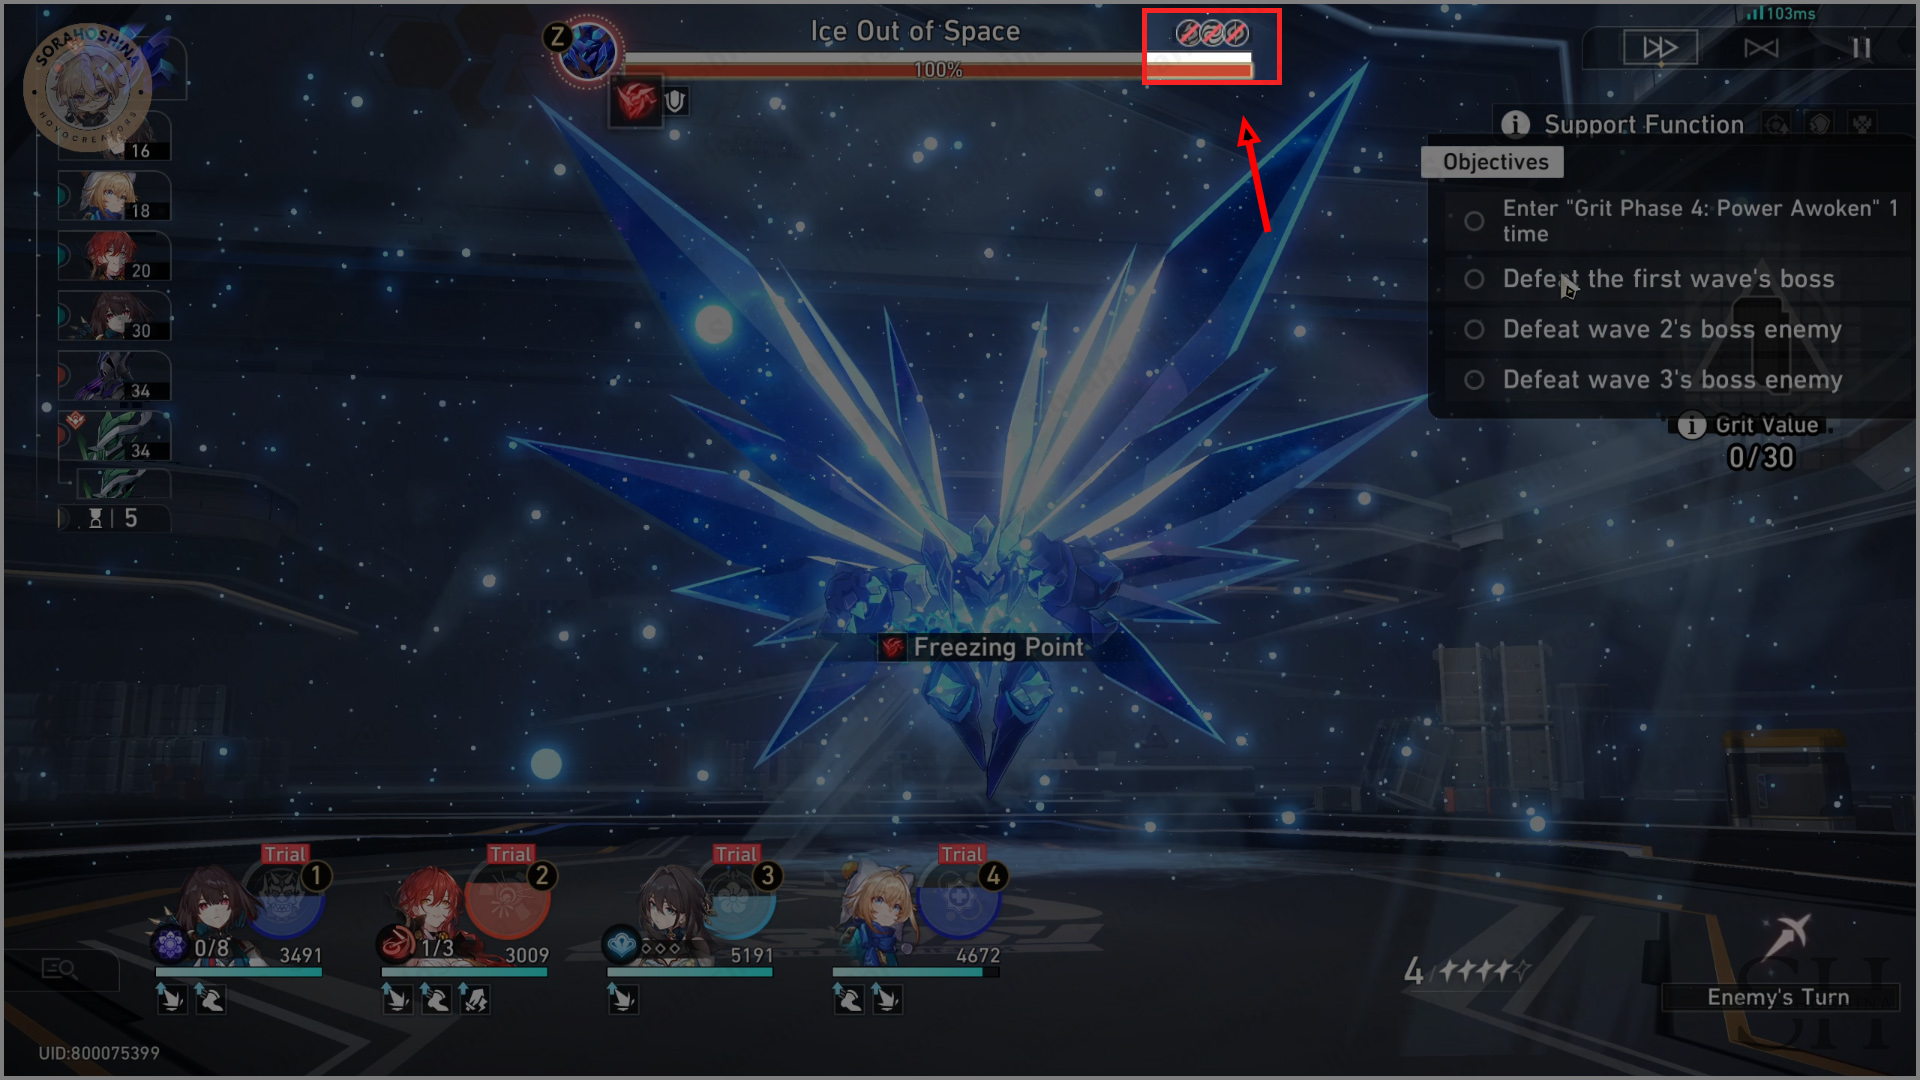
➥ In this event, 6 combat stages will unlock one per day.
➥ For every stage, you need to defeat boss enemies from 3 waves within 6 Cycles, and the non-boss enemies will continuously refresh.
➥ Every stage has a Grit Mechanic. Once triggered, it can rapidly accumulate Grit Value and increase Grit Phase.
➥ Every time Grit Phase is increased, 1 additional Support Function will be activated and more Stage Buffs can be obtained.
➥ Once you enter Grit Phase 4: Might Unleashed, you will receive powerful Stage Buffs that will help you defeat the enemy!
➥ If there are unused Cycles remaining when you pass the stage, you will receive a higher rating.
Gameplay Tutorial
● When characters defeat enemies, they regenerate only 50% of the Energy that they would normally do in regular battles.
● Increasing the Equilibrium Level will also increase enemy levels.
● Trailblazers can use trial characters to challenge the event.

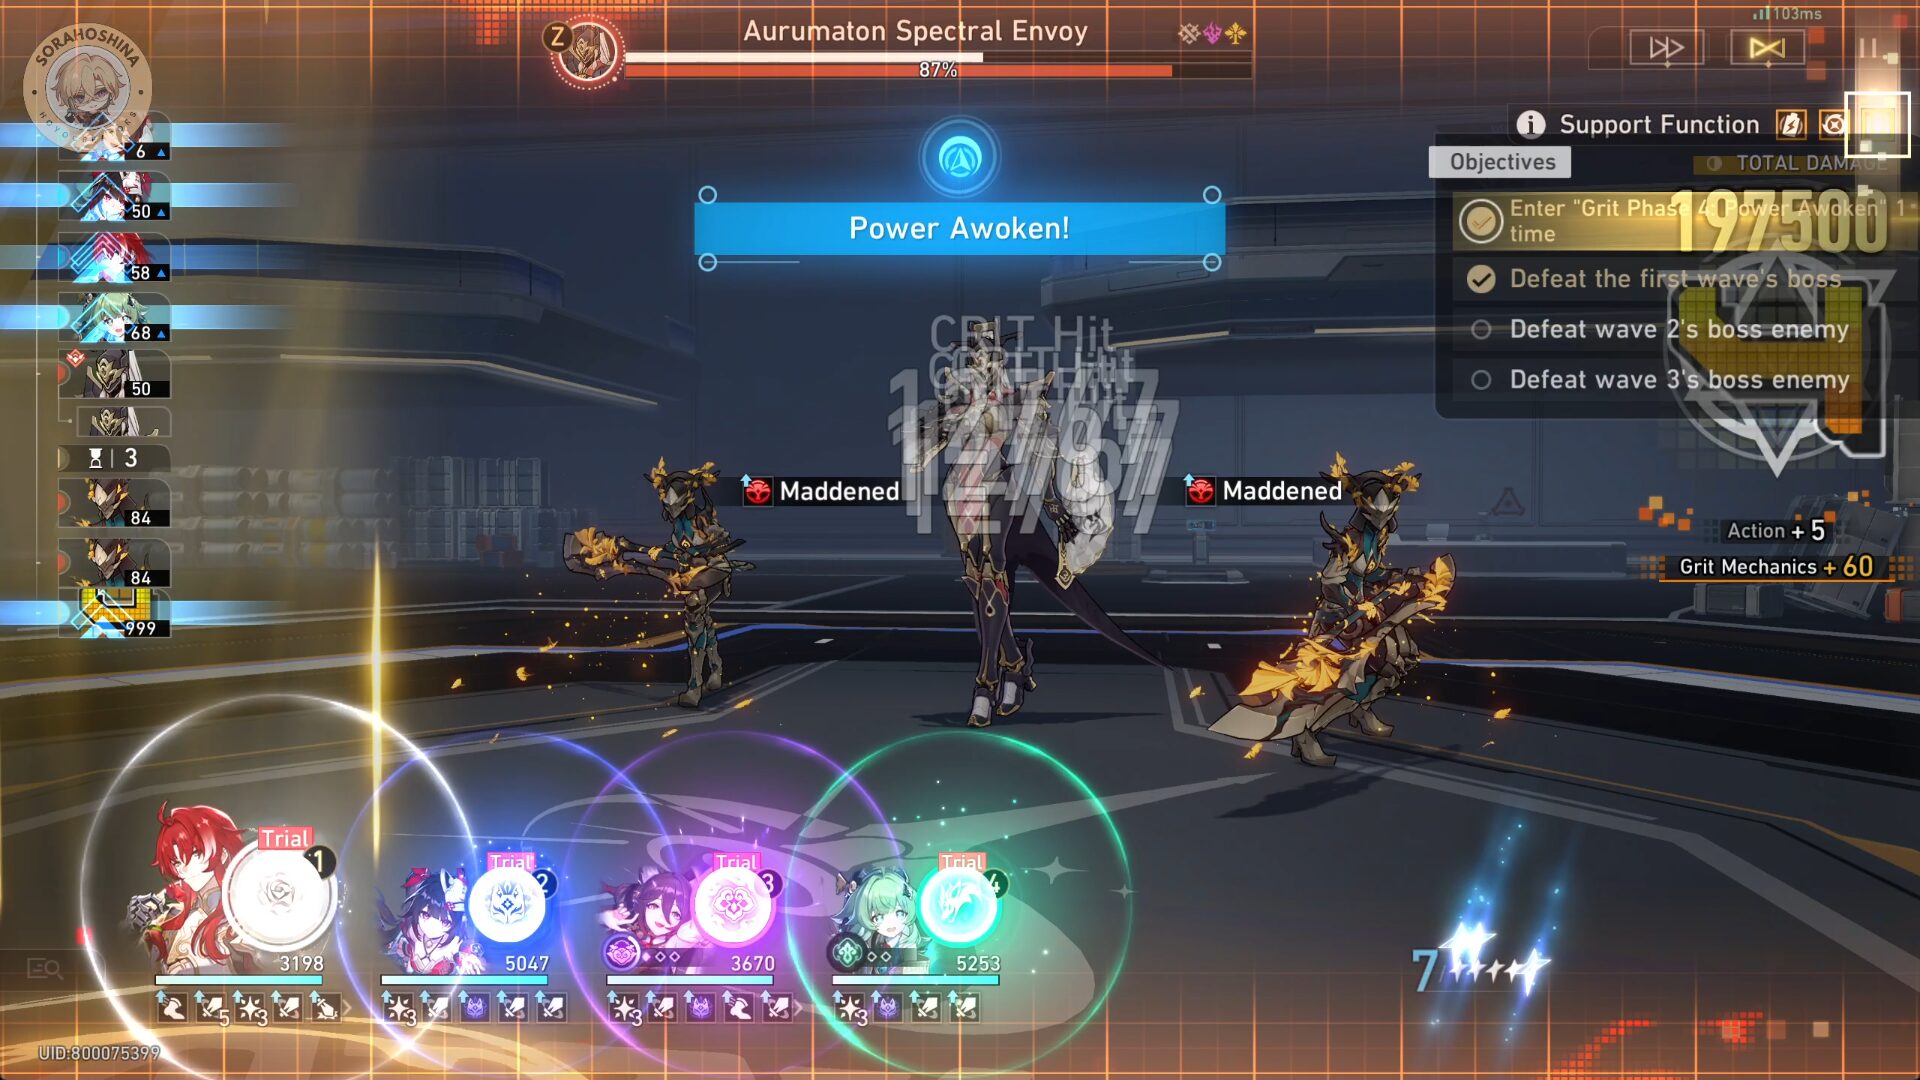
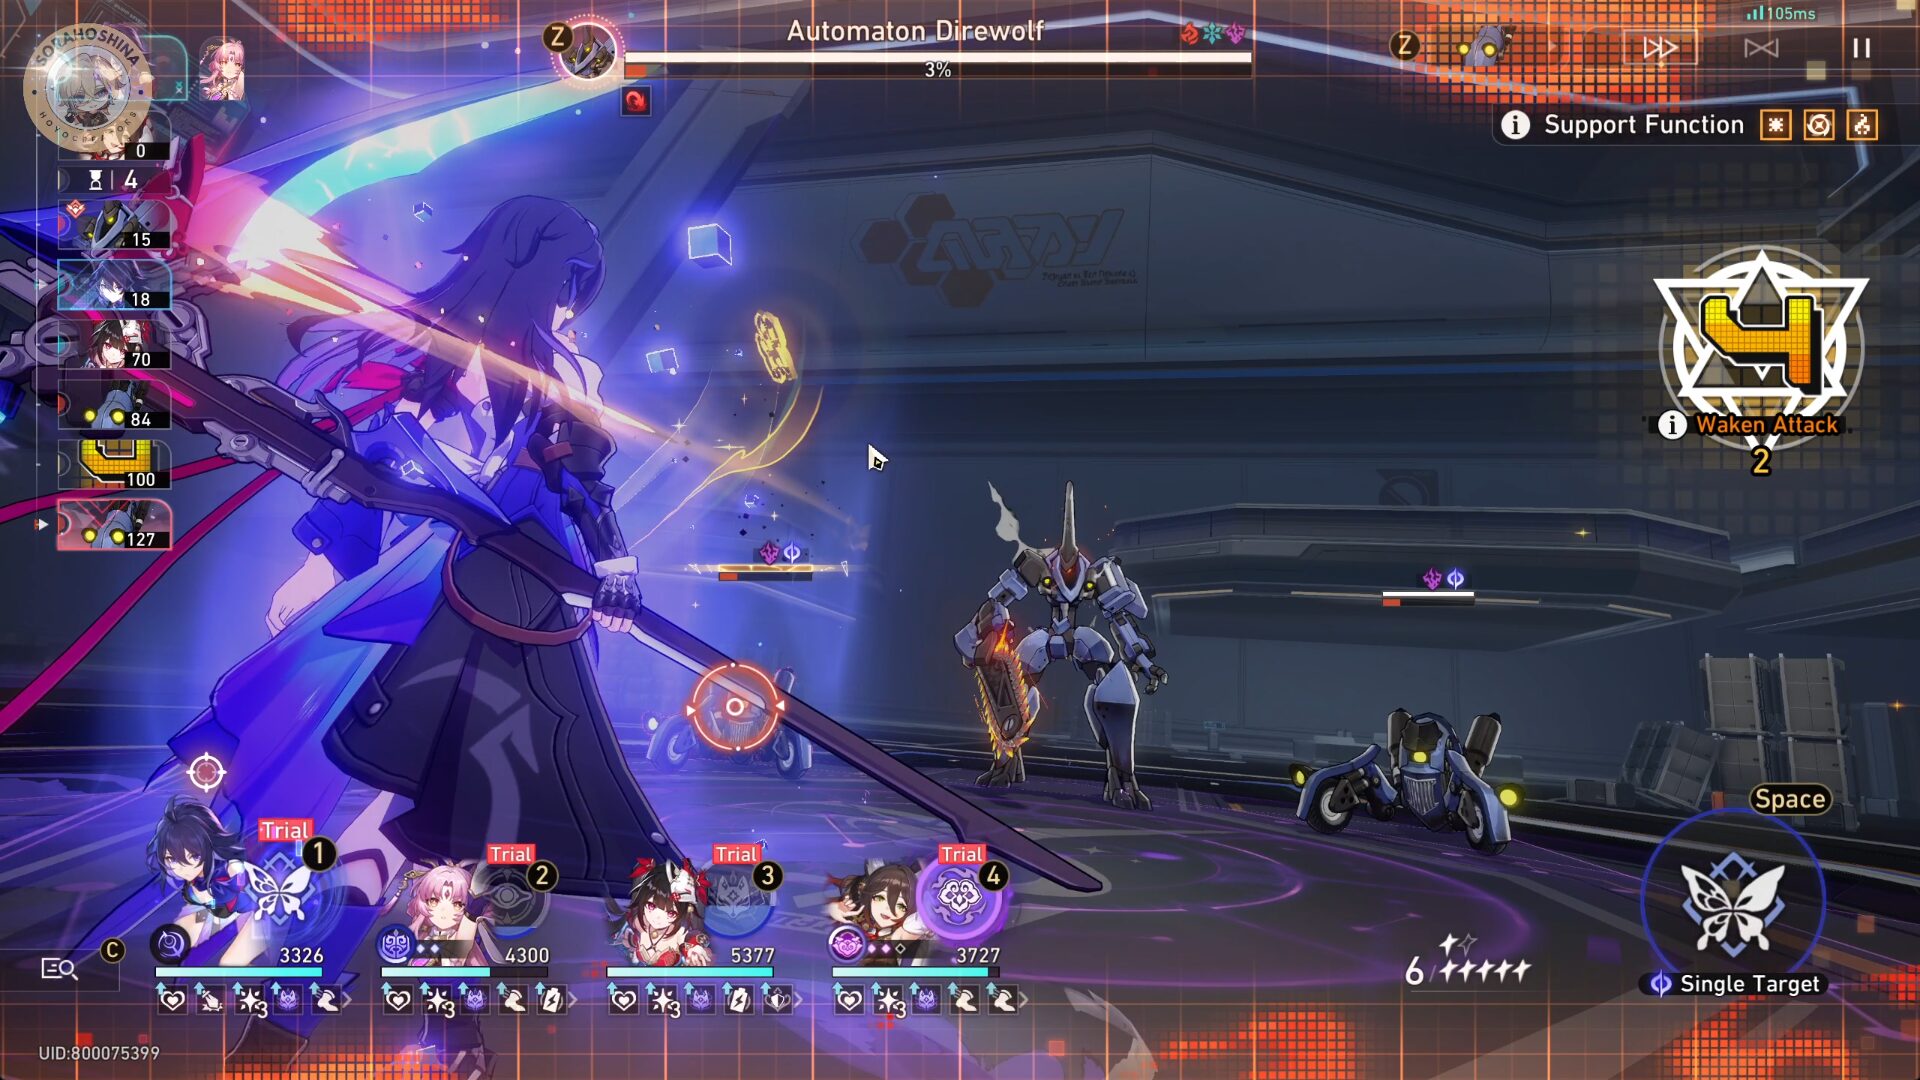
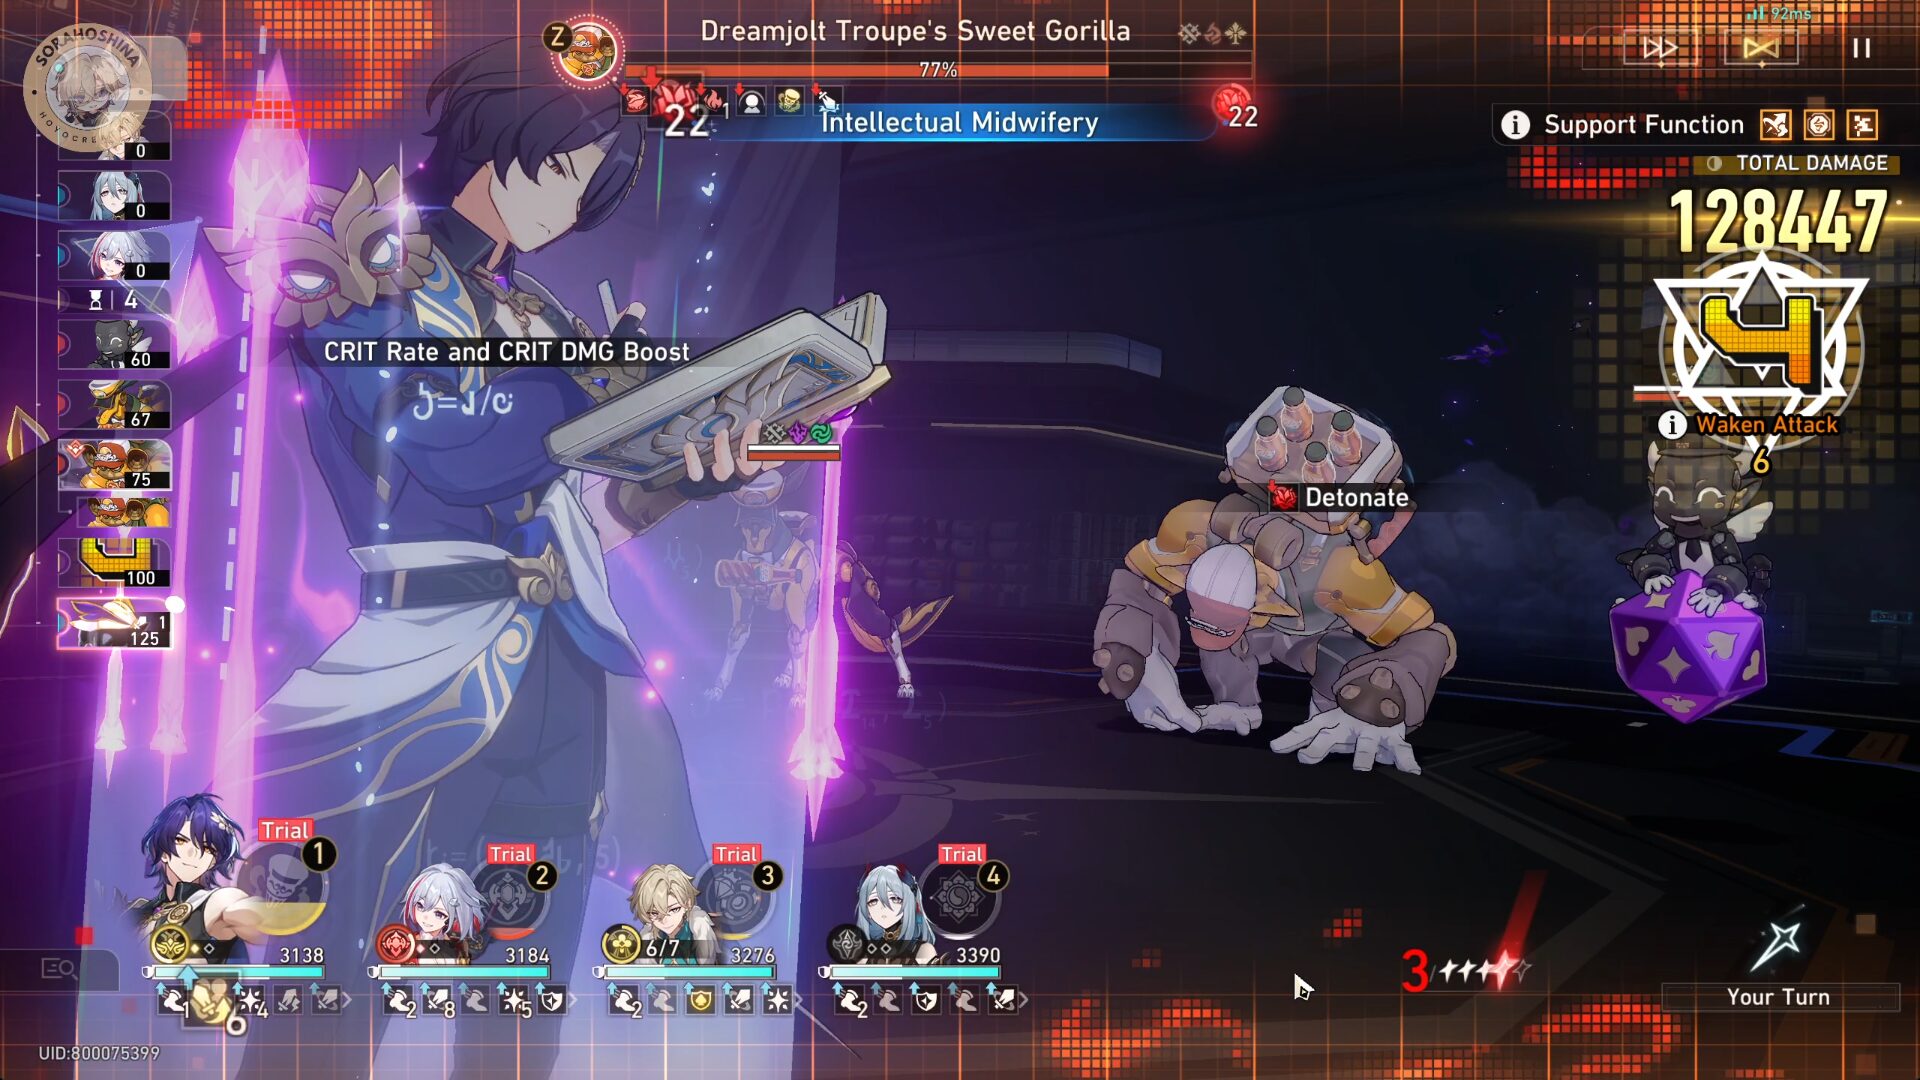
Accumulating Grit Value during battle can elevate your Grit Phase.
When entering "Grit Phase 4: Power Awoken", you can obtain powerful stage buffs an significantly improve your combat effectiveness.

There are a total of 4 Grit Phases. With each higher phase you reach, you can additionally unlock 1 Support Function and obtain powerful stage buffs.
Before entering combat, you can choose to add Support Functions for each stage.

Every time a character takes action in combat, Grit Value will be accumulated.
Every stage will have unique Grit Mechanics, and triggering them will greatly increase Grit Value, thus allowing you to quickly elevate your Grit Phase.

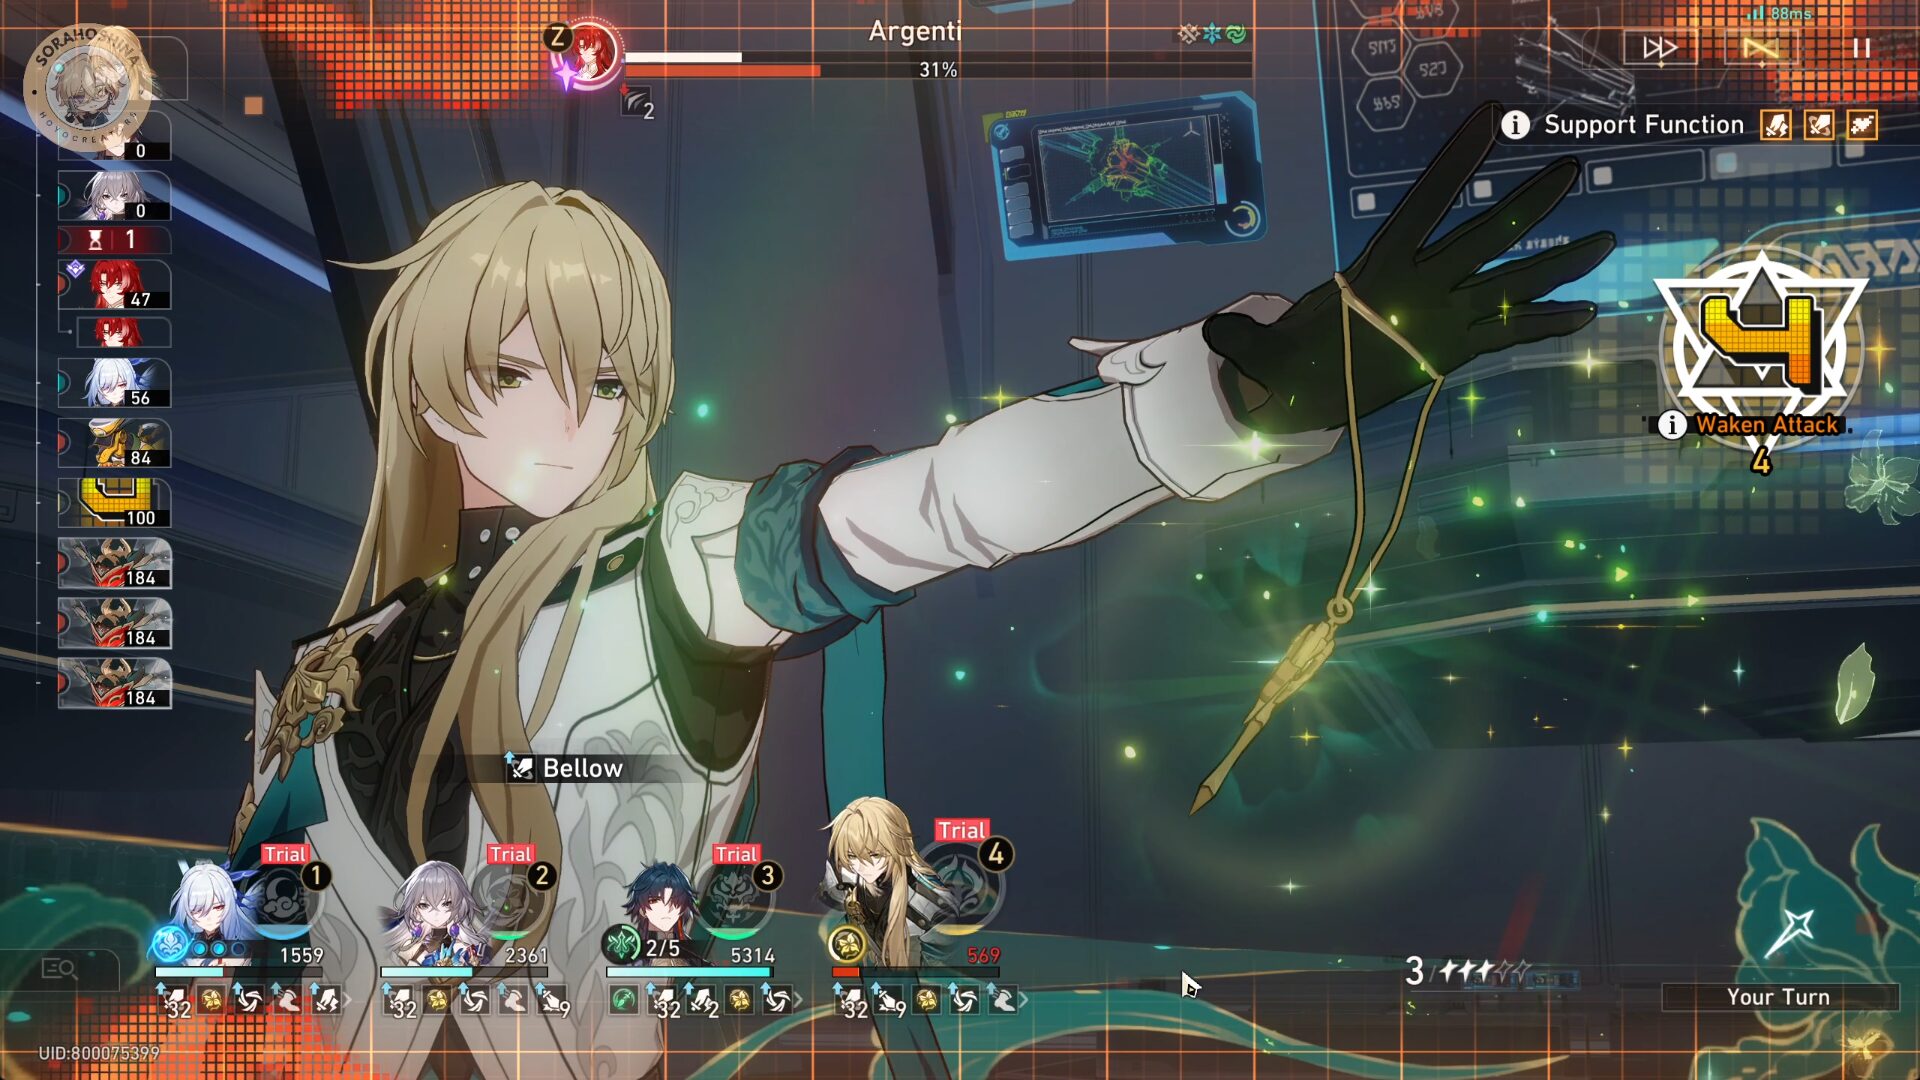
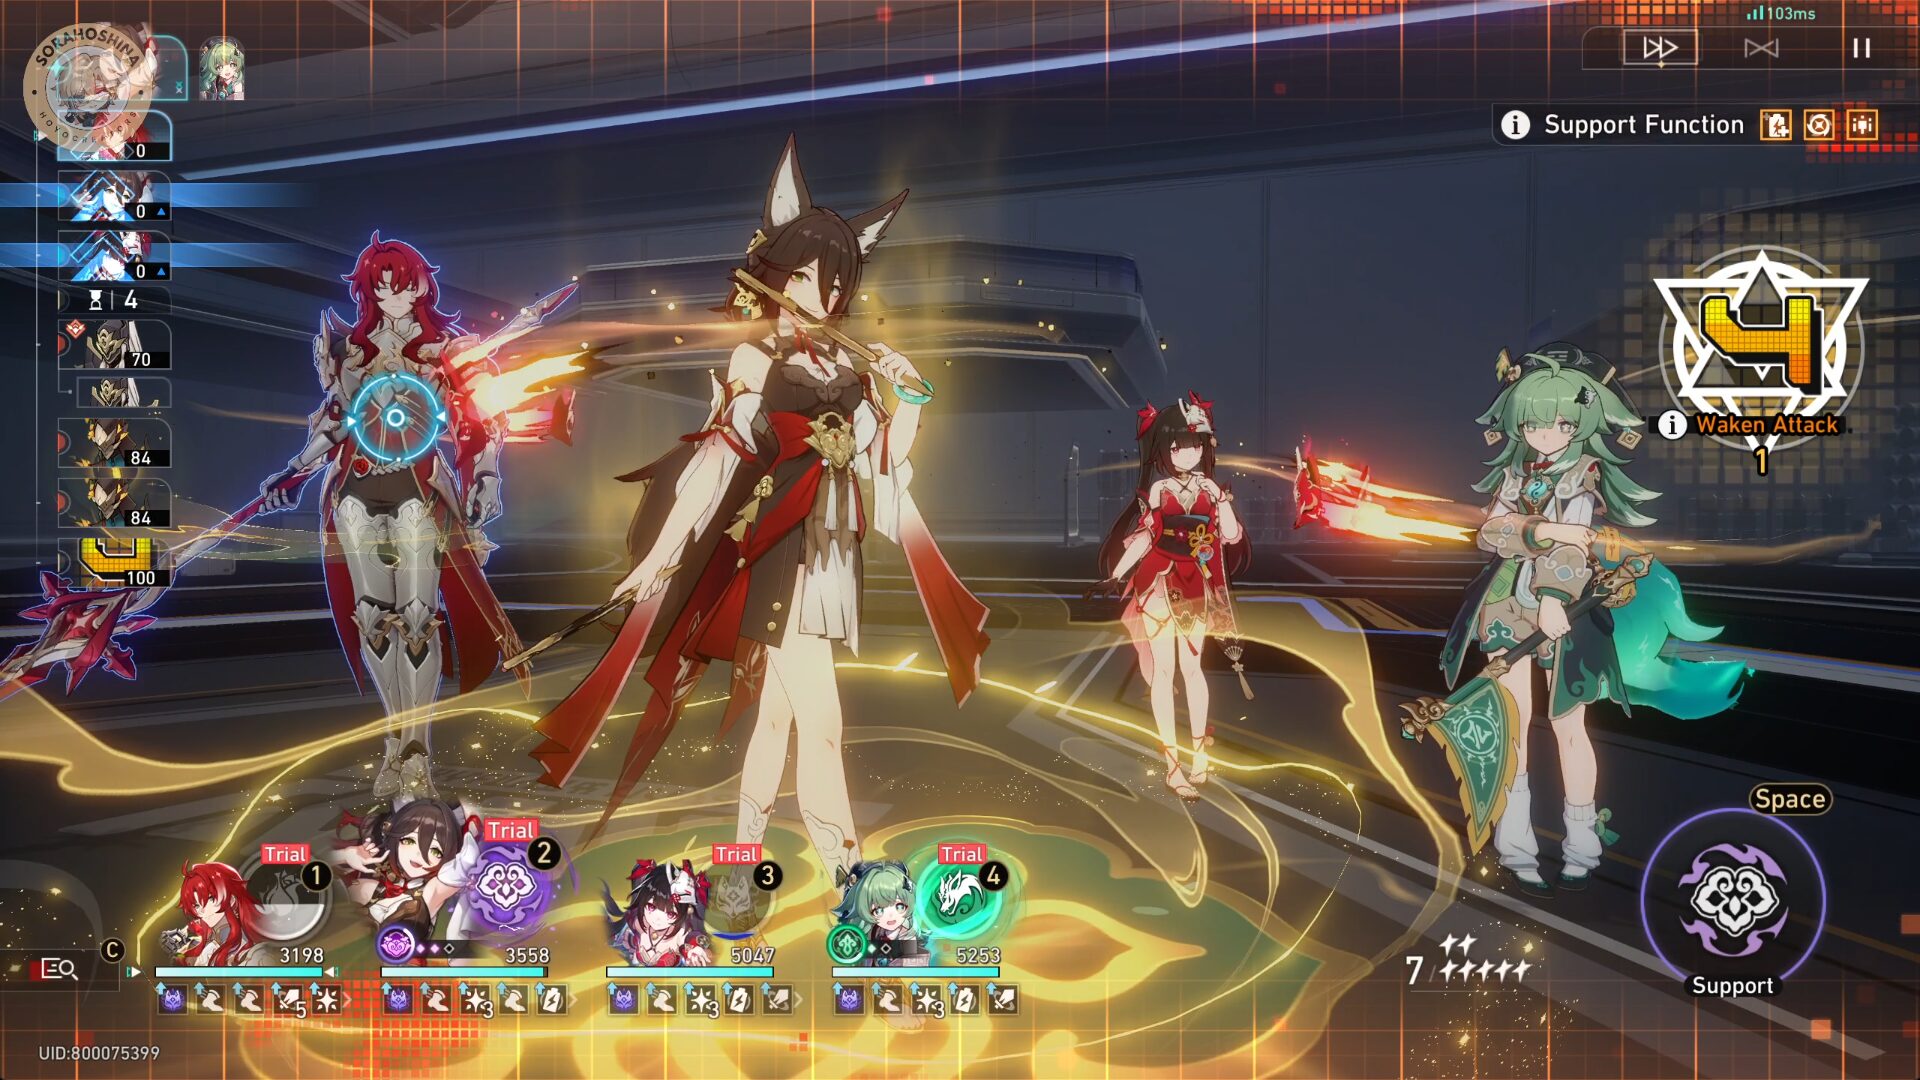
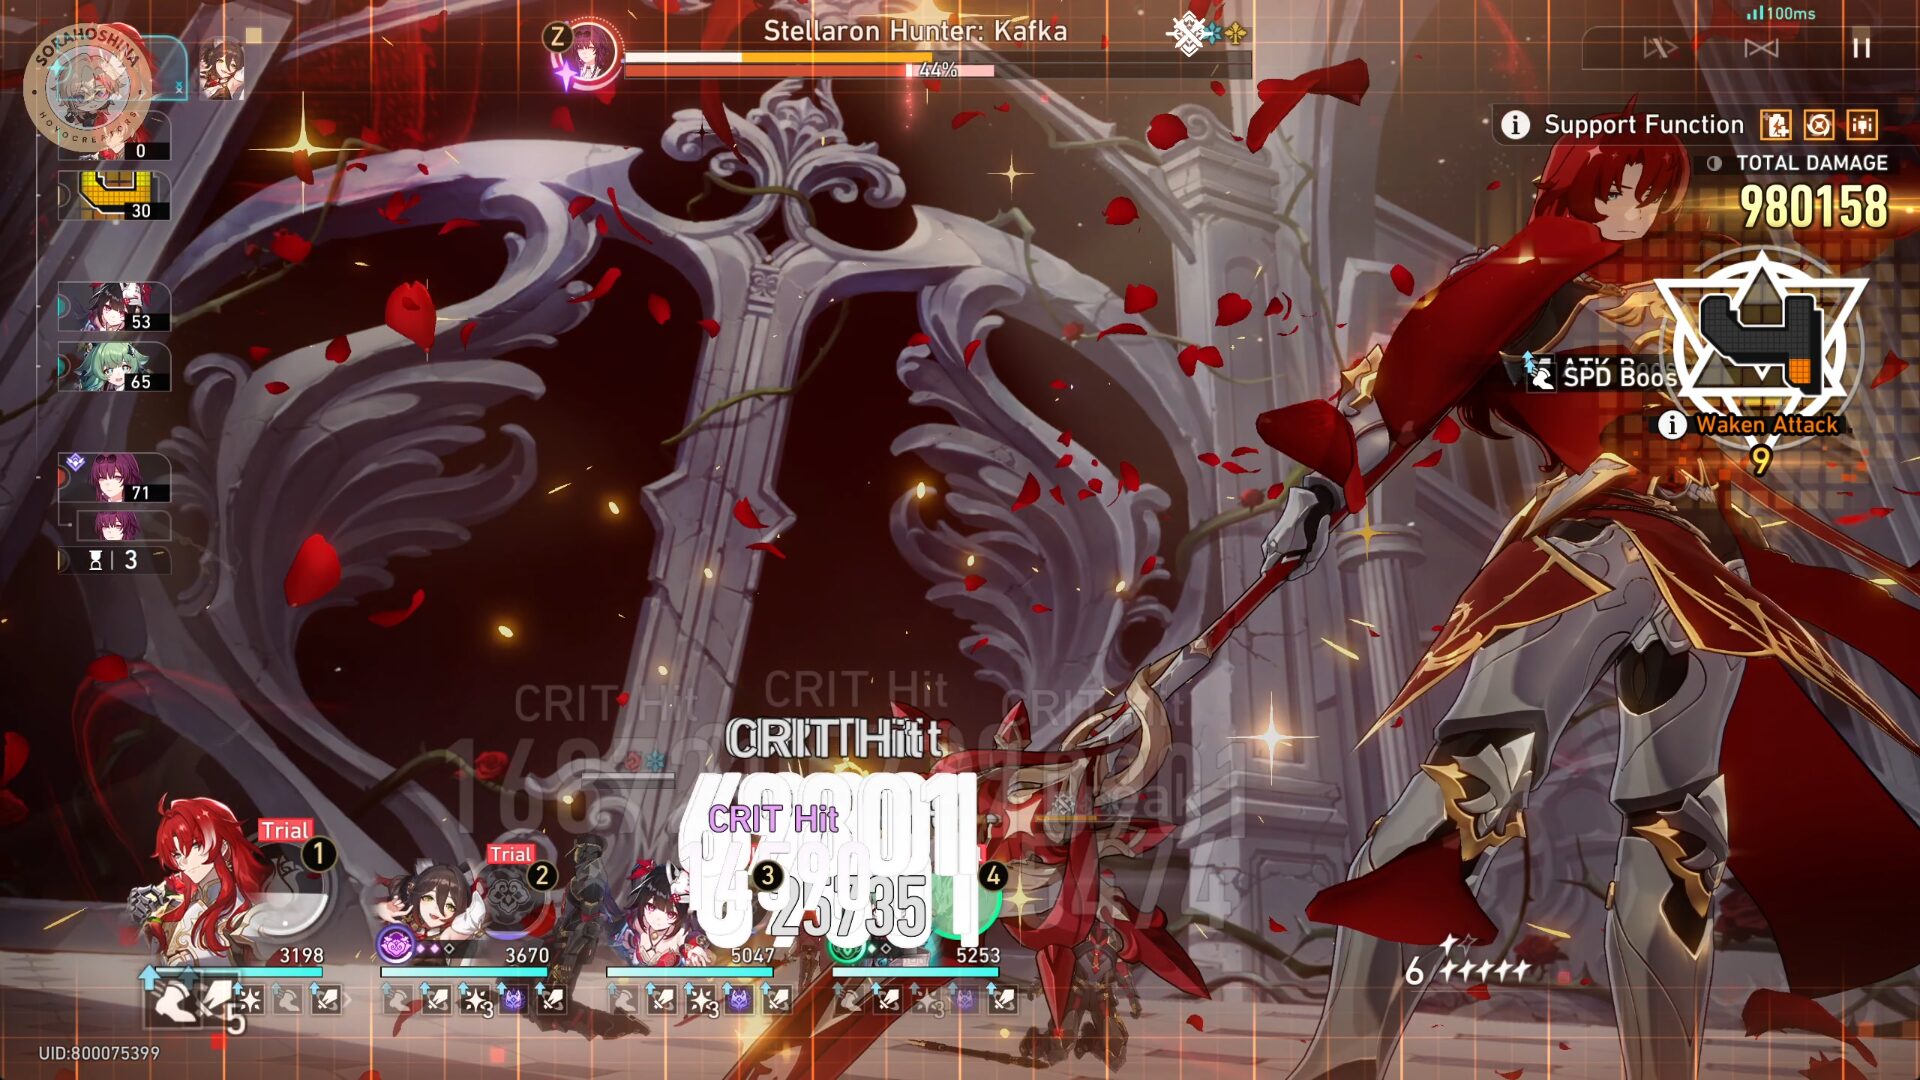
Every time you attack enemies during "Grit Phase 4: Power Awoken", Waken Attack accumulates.
Based on the accumulated Waken Attacks during this phase, a certain amount of Grit Value will be returned after the phase concludes.

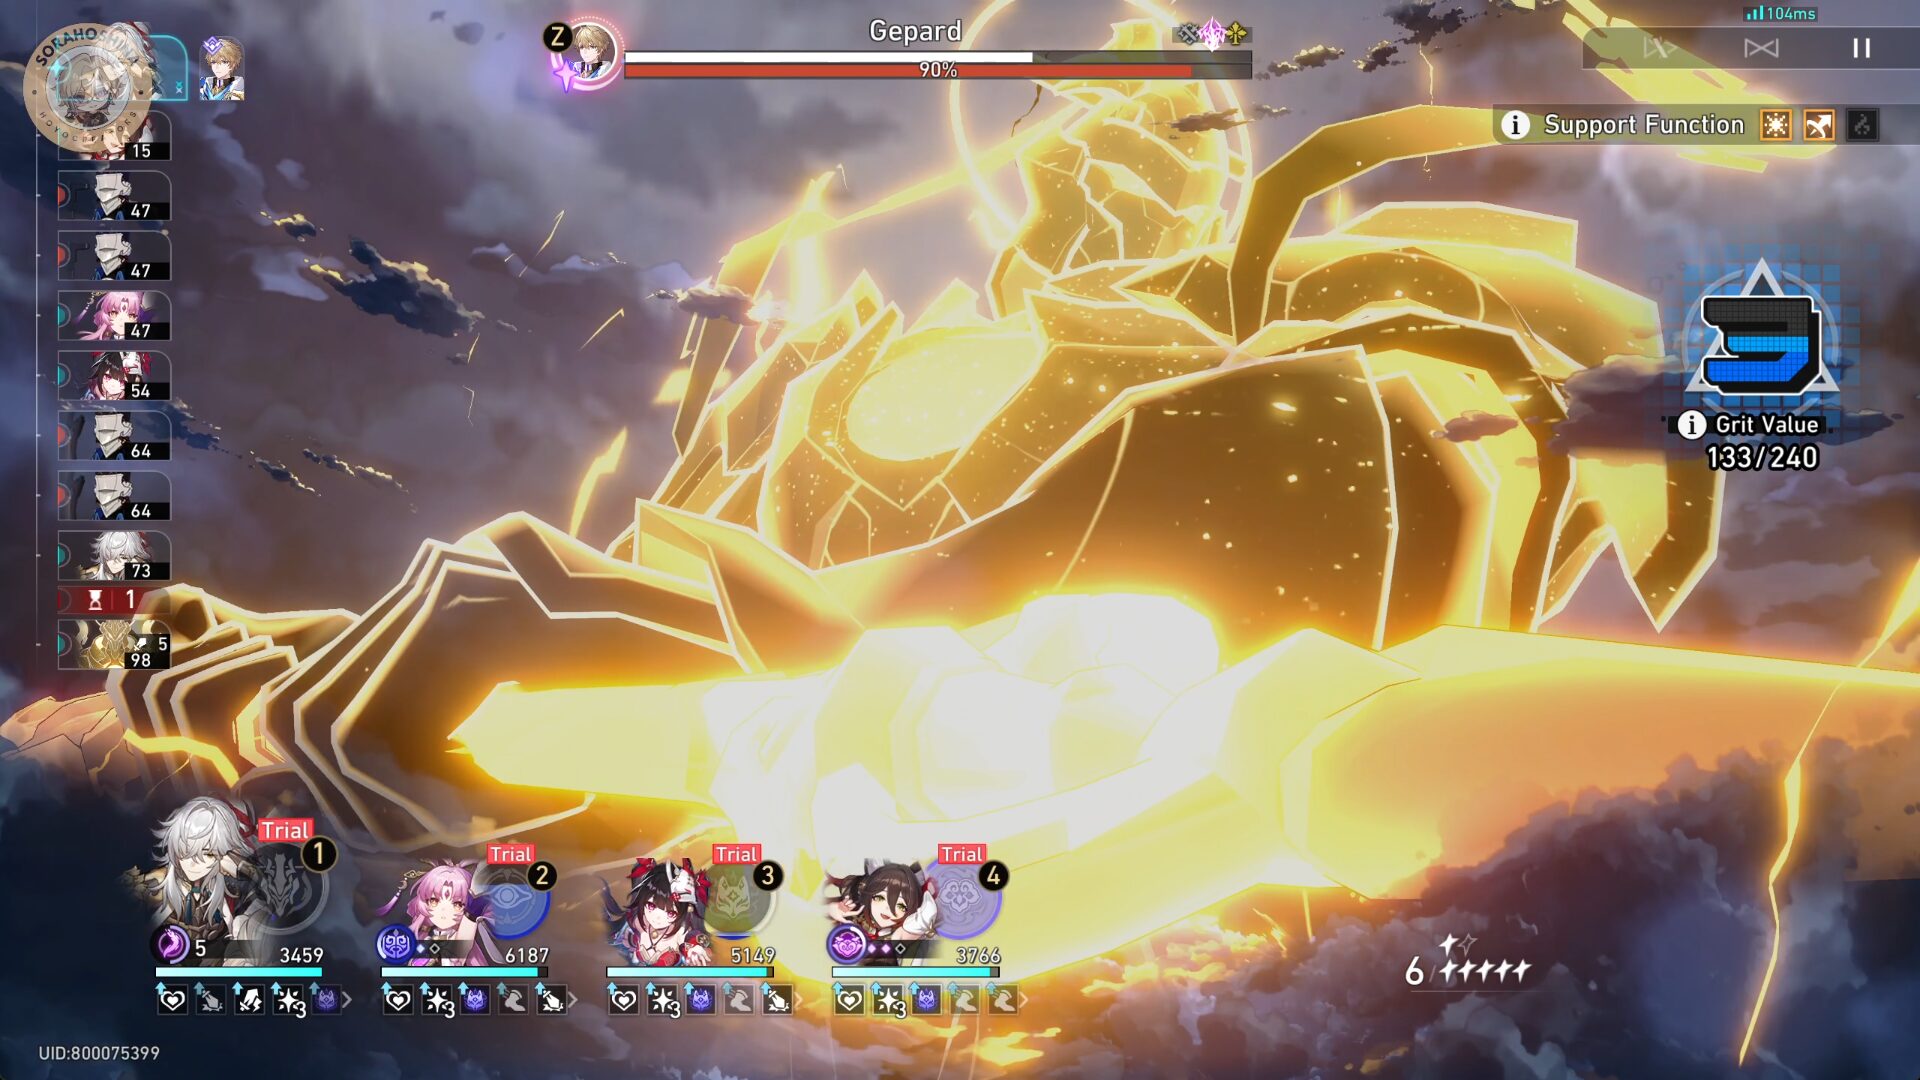
Recover Skill Points when entering "Grit Phase 4: Power Awoken" and activate all characters' Ultimates, then all characters immediately take action while also greatly increasing their Effect RES.
Tides of War
Stage 1 - Trotter Effect

Defeat the Trotters in this stage to obtain a large amount of Grit Value. You need to defeat the Trotter before it escapes.

Every Trotter defeated will inflict all enemies with random DoTs.
Make good use of the DoTs applied by defeating Trotters to quickly take down boss during "Grit Phase 4: Power Awoken."
Team & Buff Recommendation
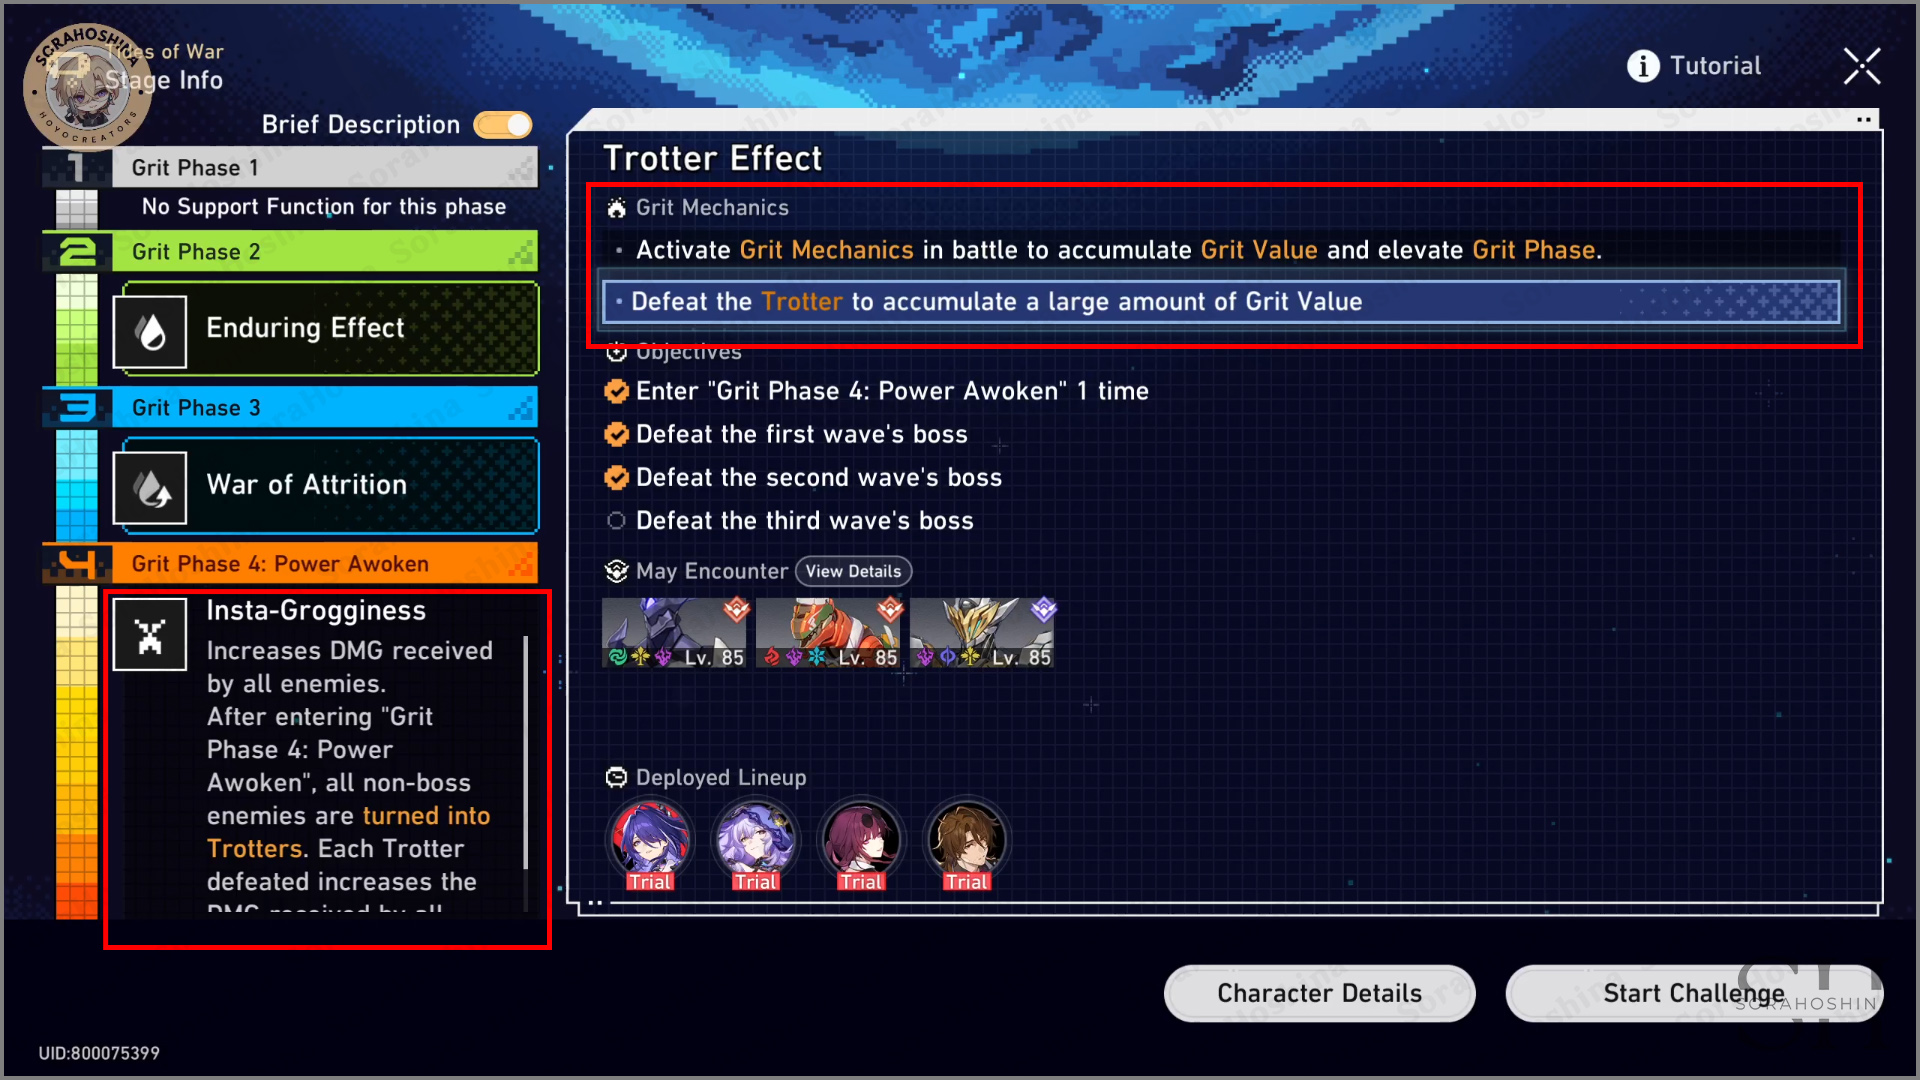
THE MECHANISM:
Defeat the Trotter to get lots of Grit Value.
GRIT PHASE 4:
Increases DMG received by all enemies. When entering phase 4, all non-boss enemies will turn into Trotter. Each Trotter defeated will increase the DMG received by all enemies.
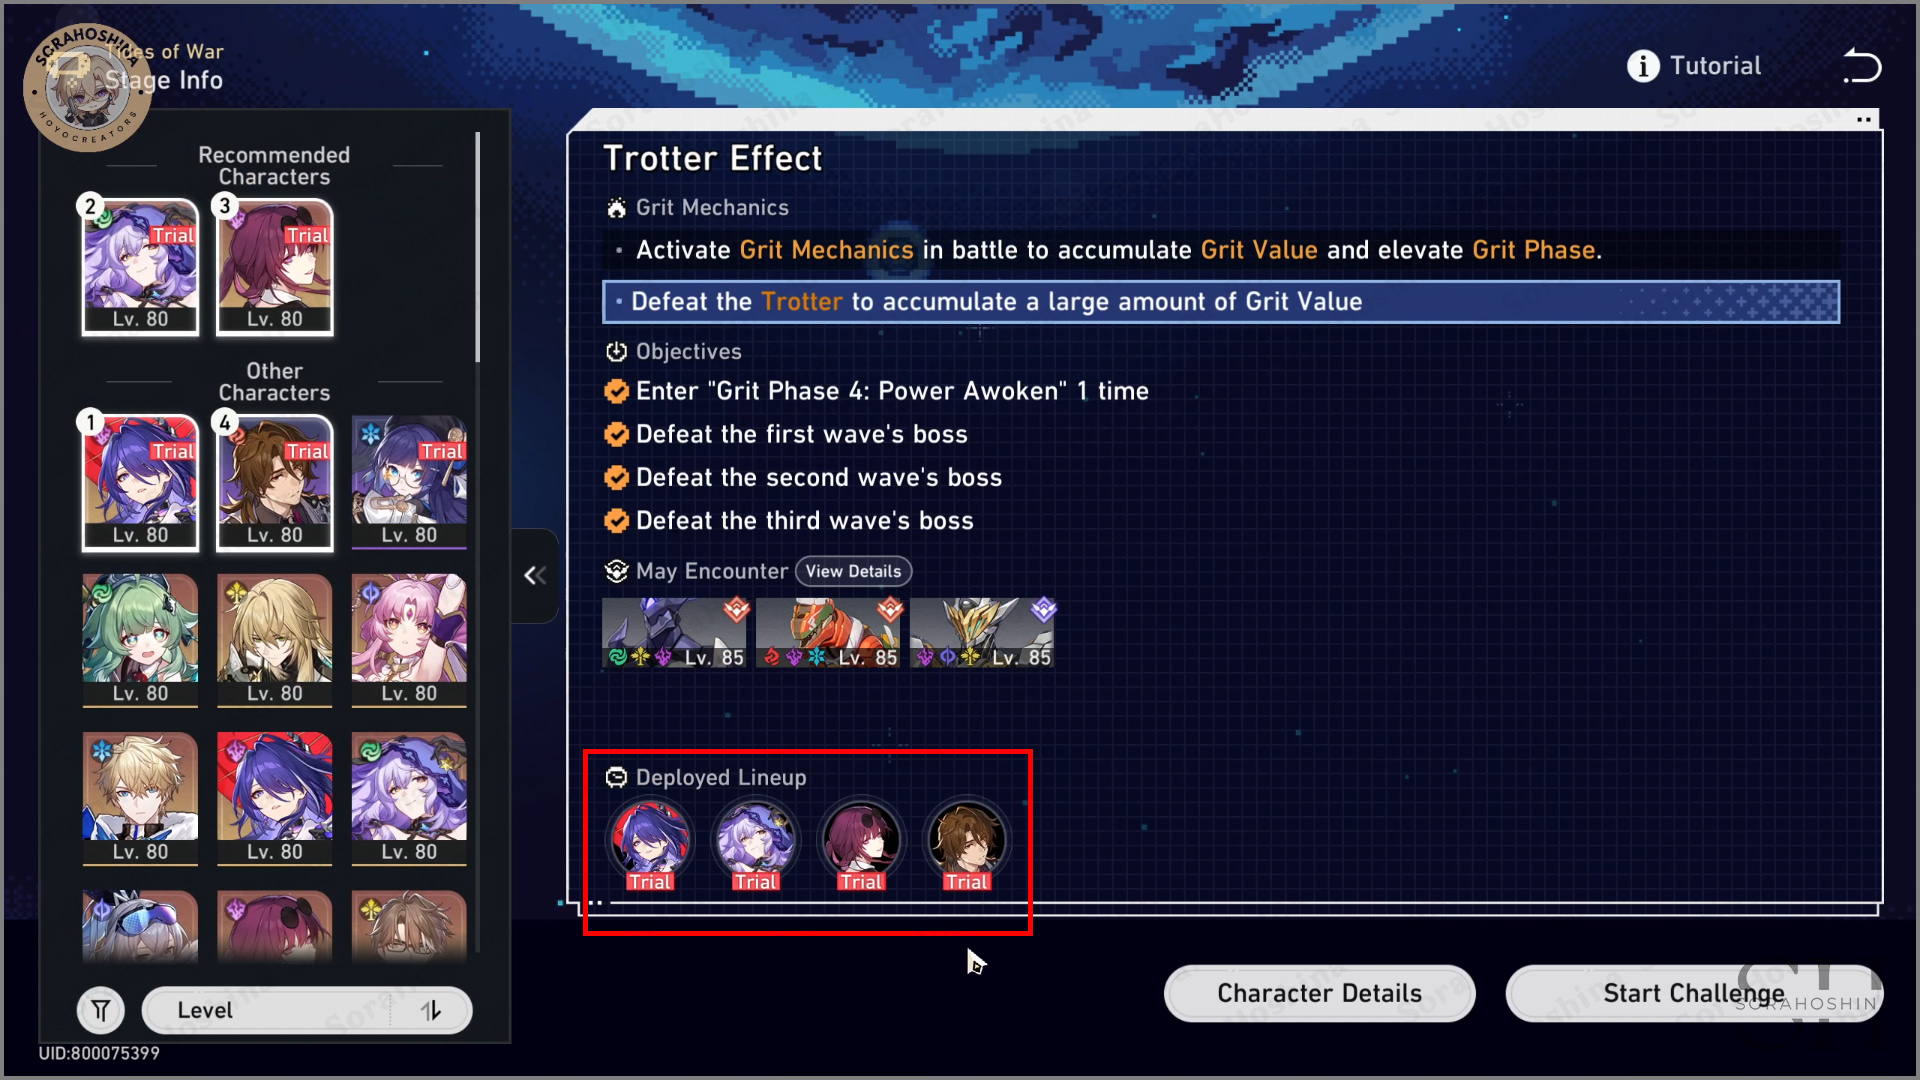
THE SELECTED TEAM:
Acheron + Black Swan + Kafka + Gallagher (You can use Pela but surviving would be tough since there will be no healer)
THE SELECTED BUFF:
1) Enduring Effect: When there are no Trotters on the battlefield, turns a non-boss target into a Trotter and inflict them with Wind Shear. When the Trotter is defeated, inflicts all enemies with a random DoT effect.
2) War of Attrition: Increases DoT taken by enemies.
Some Things to Remember

When you enter Grit Phase 4, all characters will get 100% of their Energy back (including Acheron). So, try to use all their Energy before you reach Phase 4 so you can get them all back in one swoop.
In addition, if you auto-battle the stage, they will start with Black Swan and Kafka first. That's why i suggest you manually start Acheron's Ultimate first before Black Swan and Kafka so those 2 can gather Slashed Dream for Acheron again.
In addition, if you bring Gallagher instead of Pela, you also need to manually activate Gallagher's Ultimate. Because the current auto-battle will not activate his Ultimate unless there are teammates with less than half of their HP (even when his Energy is full). This results in wasted debuff and Slashed Dream for Acheron.
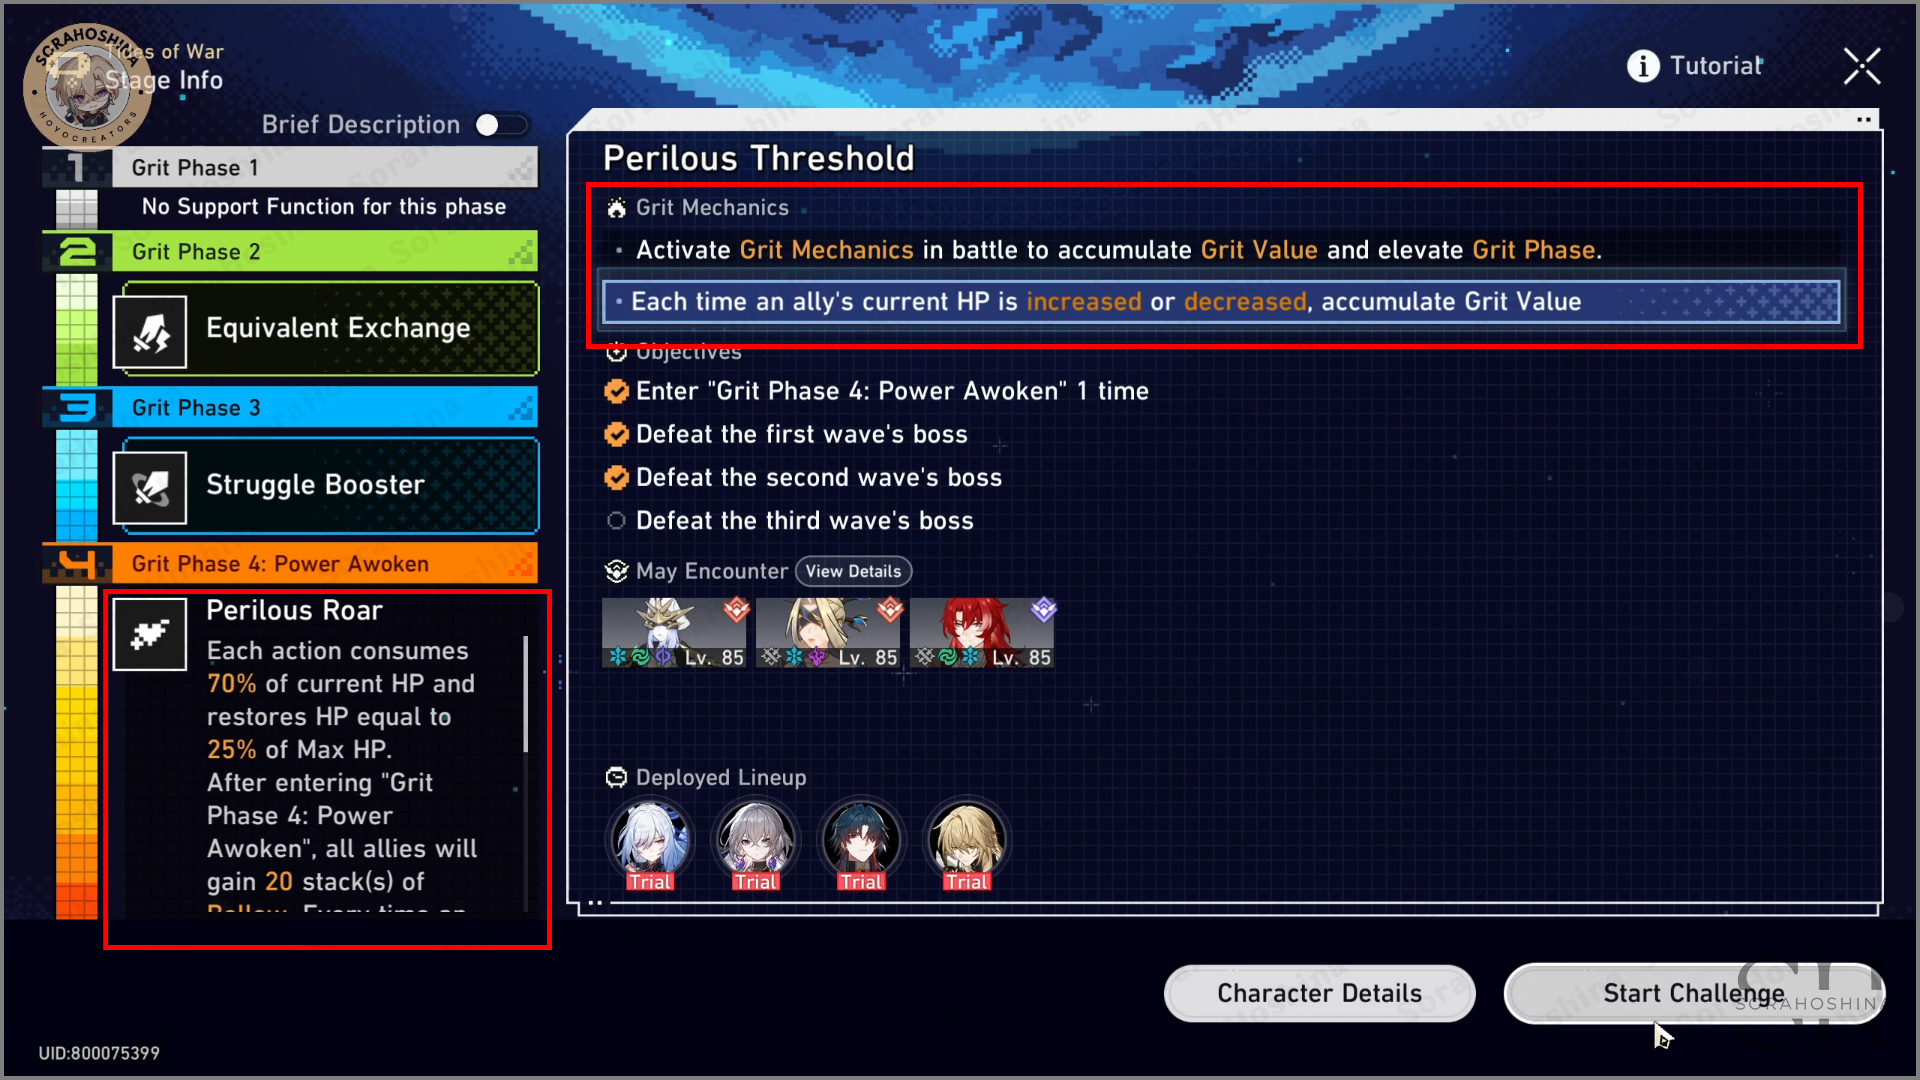
Stage 2 - Perilous Threshold
Grit Value accumulates when allies' HP increases or decreases.
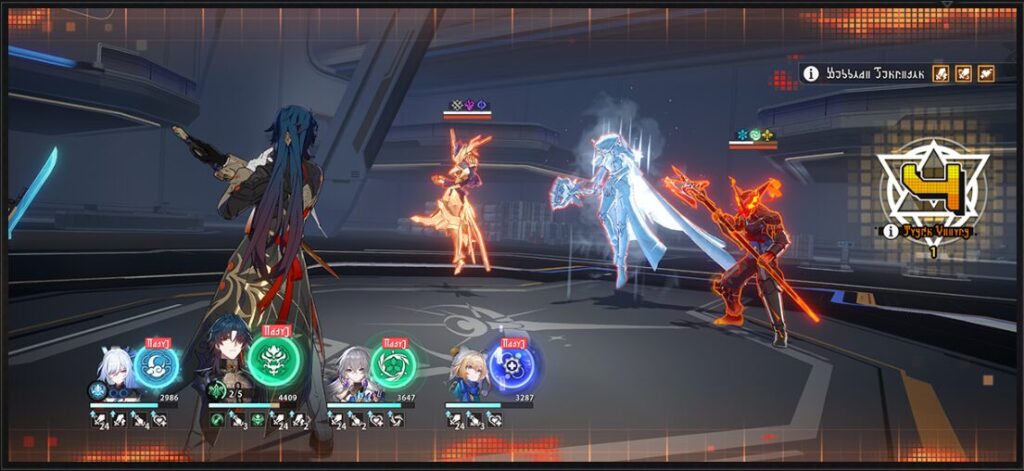
During "Grit Phase 4: Power Awoken," every 1500 of HP increase or decreases grants buffs, up to 99 stacks.
Team & Buff Recommendation
THE MECHANISM:
Increase and decrease HP to accumulate Grit Value.
GRIT PHASE 4:
If your character consumes HP, they will restore HP after that. When entering phase 4, increasing or decreasing HP by 1500 will grant Bellow stacks. Characters with Bellow stacks will have increased DMG.
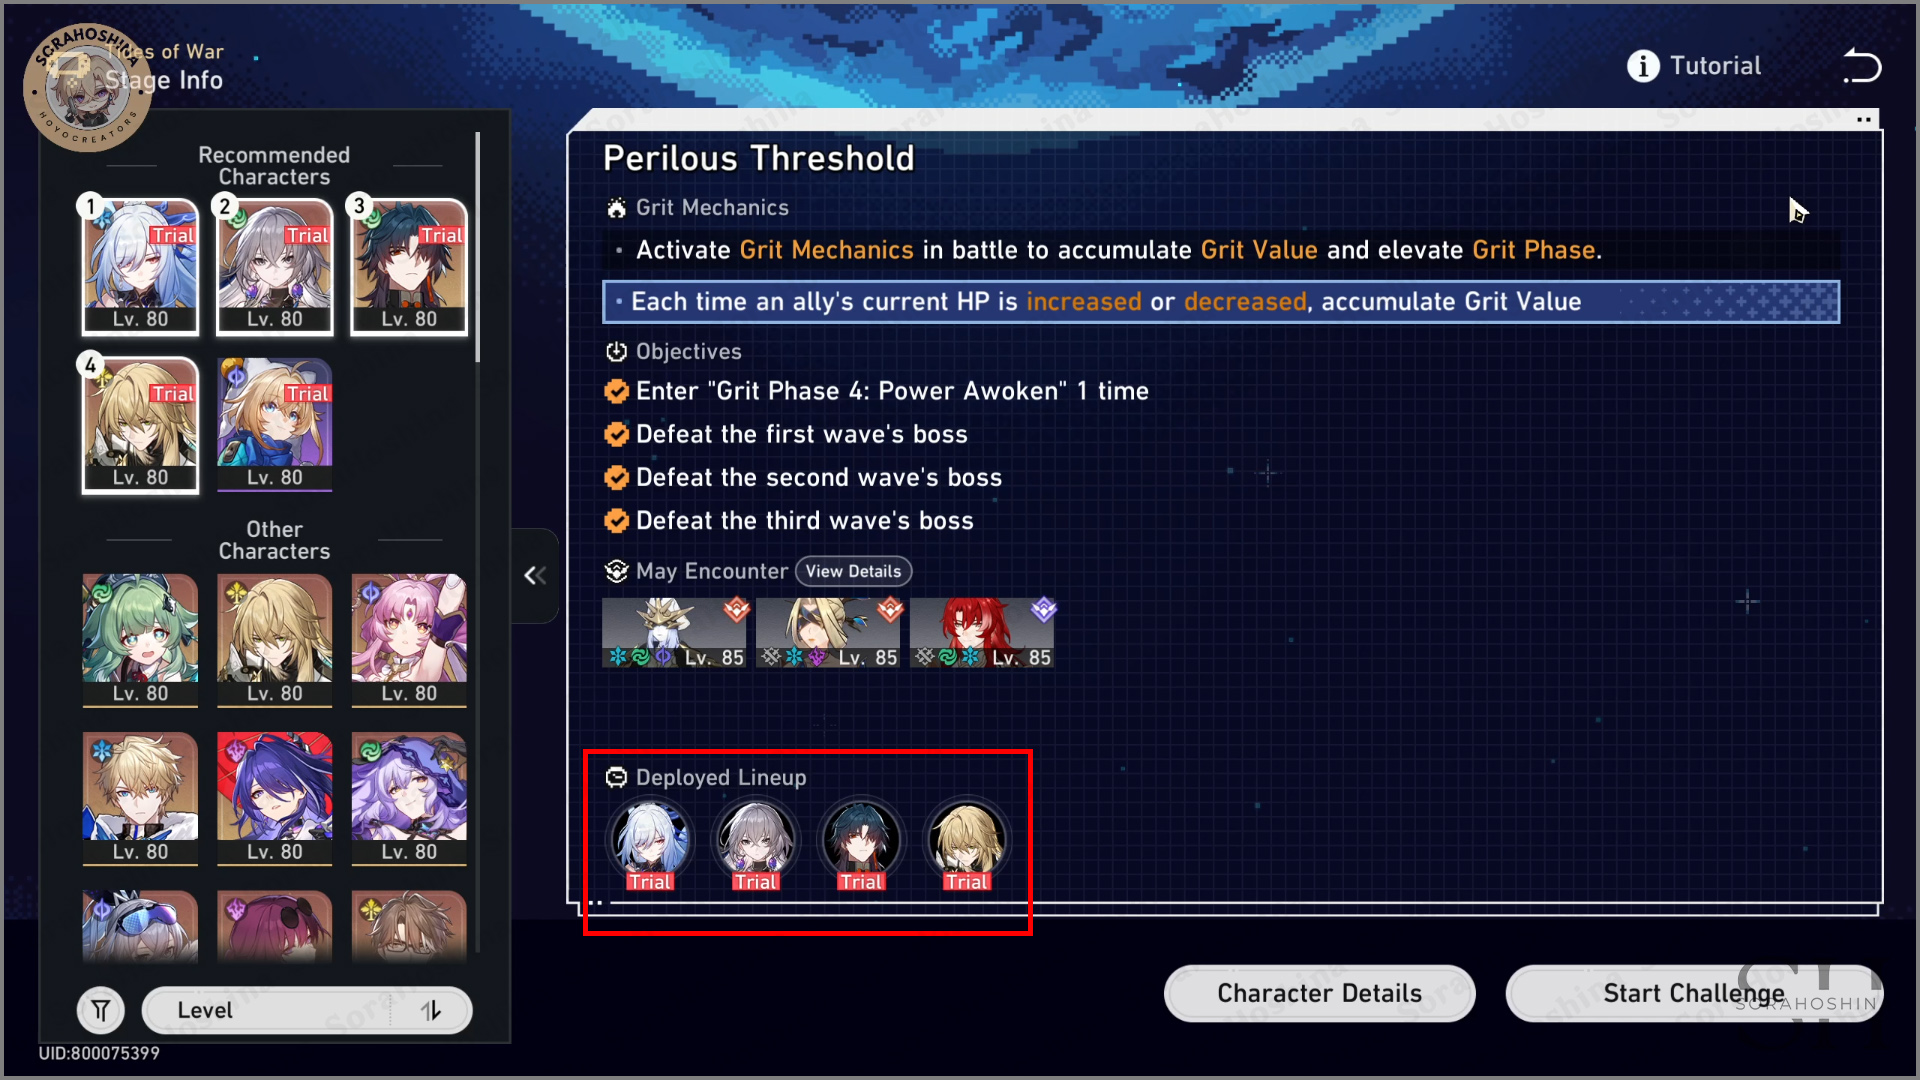
THE SELECTED TEAM:
Jingliu + Bronya + Blade + Luocha (You can replace Luocha with your other DPS if you want, it would be a tight survival issue but possible since the stage buff will restore HP back)
THE SELECTED BUFF:
1) Equivalent Exchange: At the start of the turn, consume a minor amount of HP and gains Blood Rage. Each stack of Blood Rage increases Crit Rate and Crit DMG.
2) Struggle Booster: Increases the DMG dealt by Basic ATKs and Skills.
(IMPORTANT: You can actually use Decisive Strike if you want, but beware that Struggle Booster is more for Jingliu while the Decisive Strike is for Blade)
Some Things to Remember
Sometimes, auto-battle work great, but most of the time, it's not. Bronya's AI would focus on buffing the character with the highest ATK (or so I was told). But after a bit of research, here's something about Bronya's AI:
• Favors characters with higher damage potential.
• Favors characters of damage-oriented Paths.
• Favors characters with higher current Action Value.

If you auto-battle from the start, there's a high chance that Bronya would buff Jingliu for Guardian Shadow, Blade for The Ascended, and Jingliu again for Argenti. This is just my observation and could be different for other people. I suggest you switch to Manual when it's Bronya's turn and choose the DPS you want to buff (Jingliu if you use Struggle Booster, or Blade if you use Decisive Strike).
Another instance where auto-battle goes wrong is because Luocha uses a Skill Point to heal a character. That is usually unnecessary because his Talent is more than enough to heal the whole team. Him consuming Skill Point would cause our two DPS to possibly not get to use their Skills and opt for Basic ATK (I know Blade wants his Basic ATK but what if he's not in the Hellscape state at that time?).
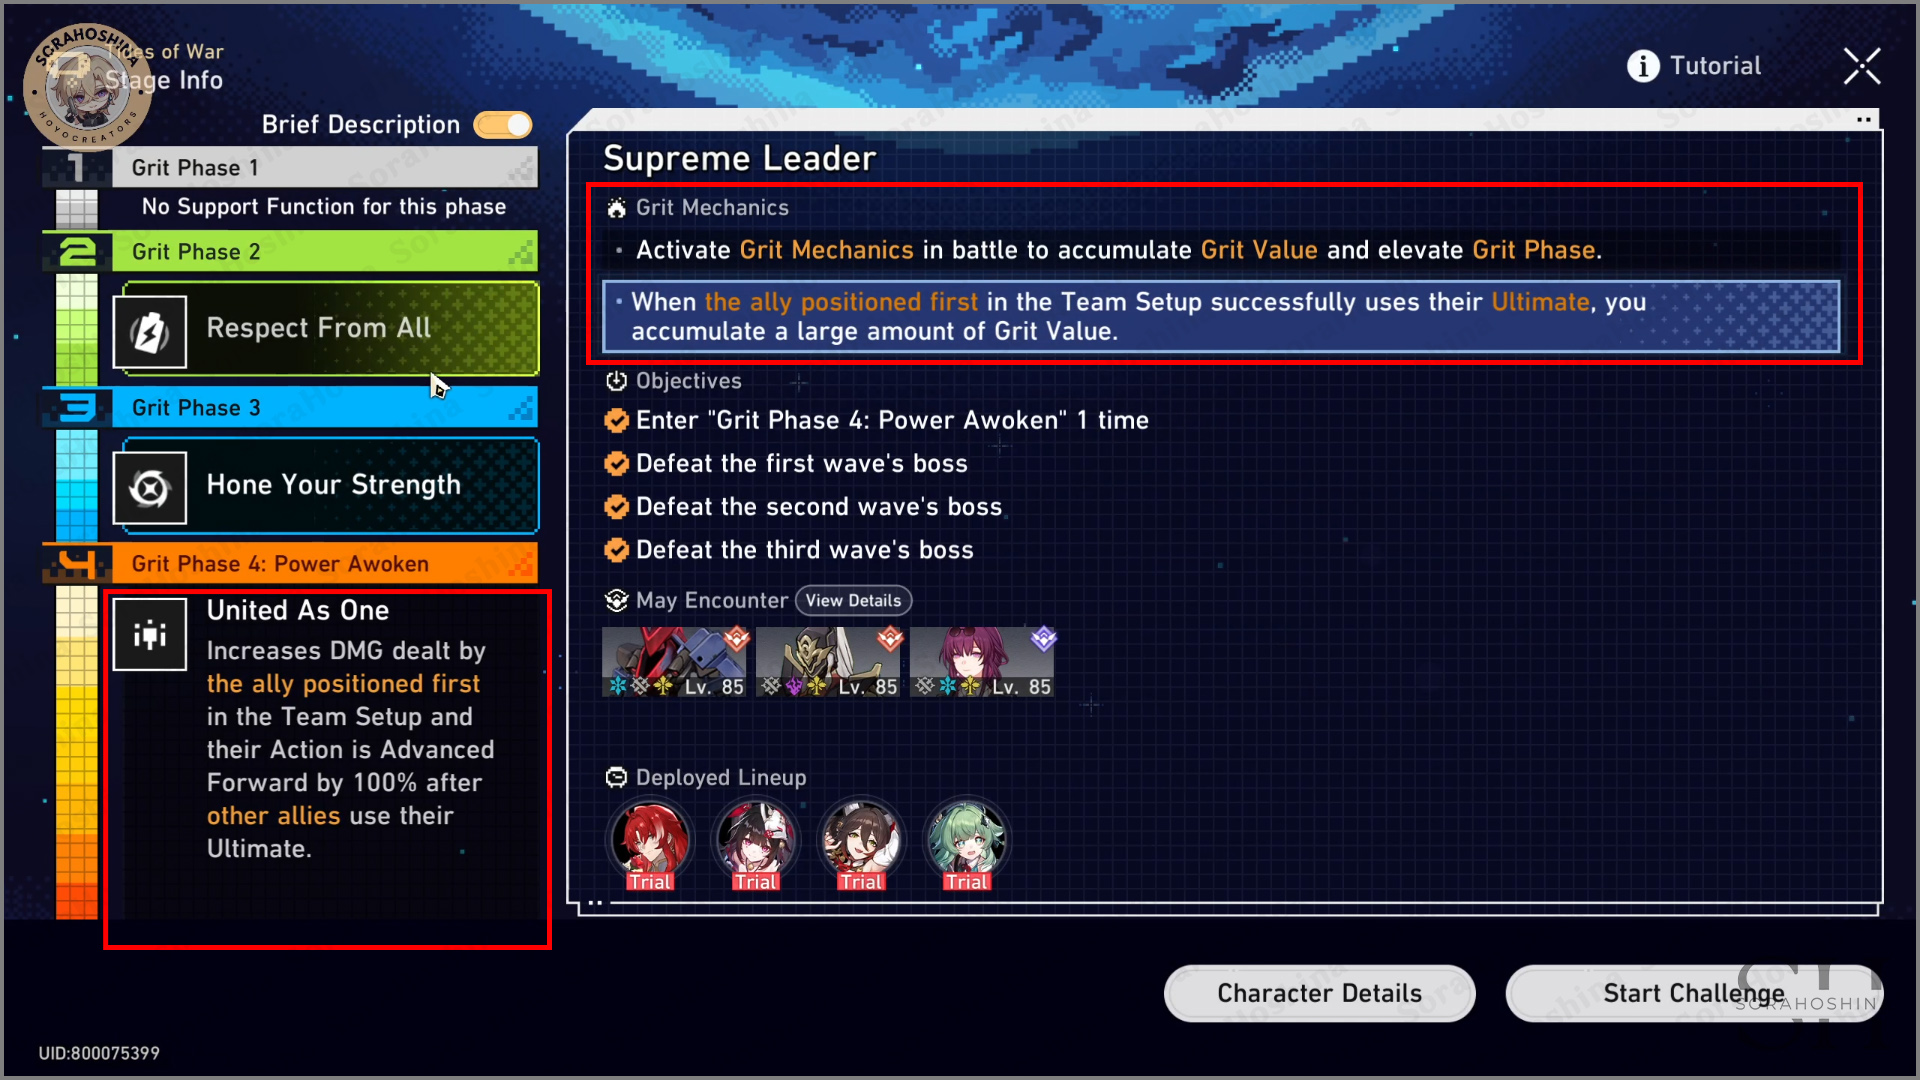
Stage 3 - Supreme Leader

When the ally positioned first in the Team Setup uses their Ultimate, accumulates Grit Value.
The ally positioned first in the Team Setup gains Energy when other allies use their Ultimates, and there is a chance that the ally positioned first will have their next attack's DMG increased.
Team & Buff Recommendation
THE MECHANISM:
When an ally in the first slot of the team uses Ultimate, gain Grit Value.
GRIT PHASE 4:
Increases DMG dealt by the ally positioned first in the Team Setup and their Action is Advanced Forward by 100% after other allies use their Ultimate.
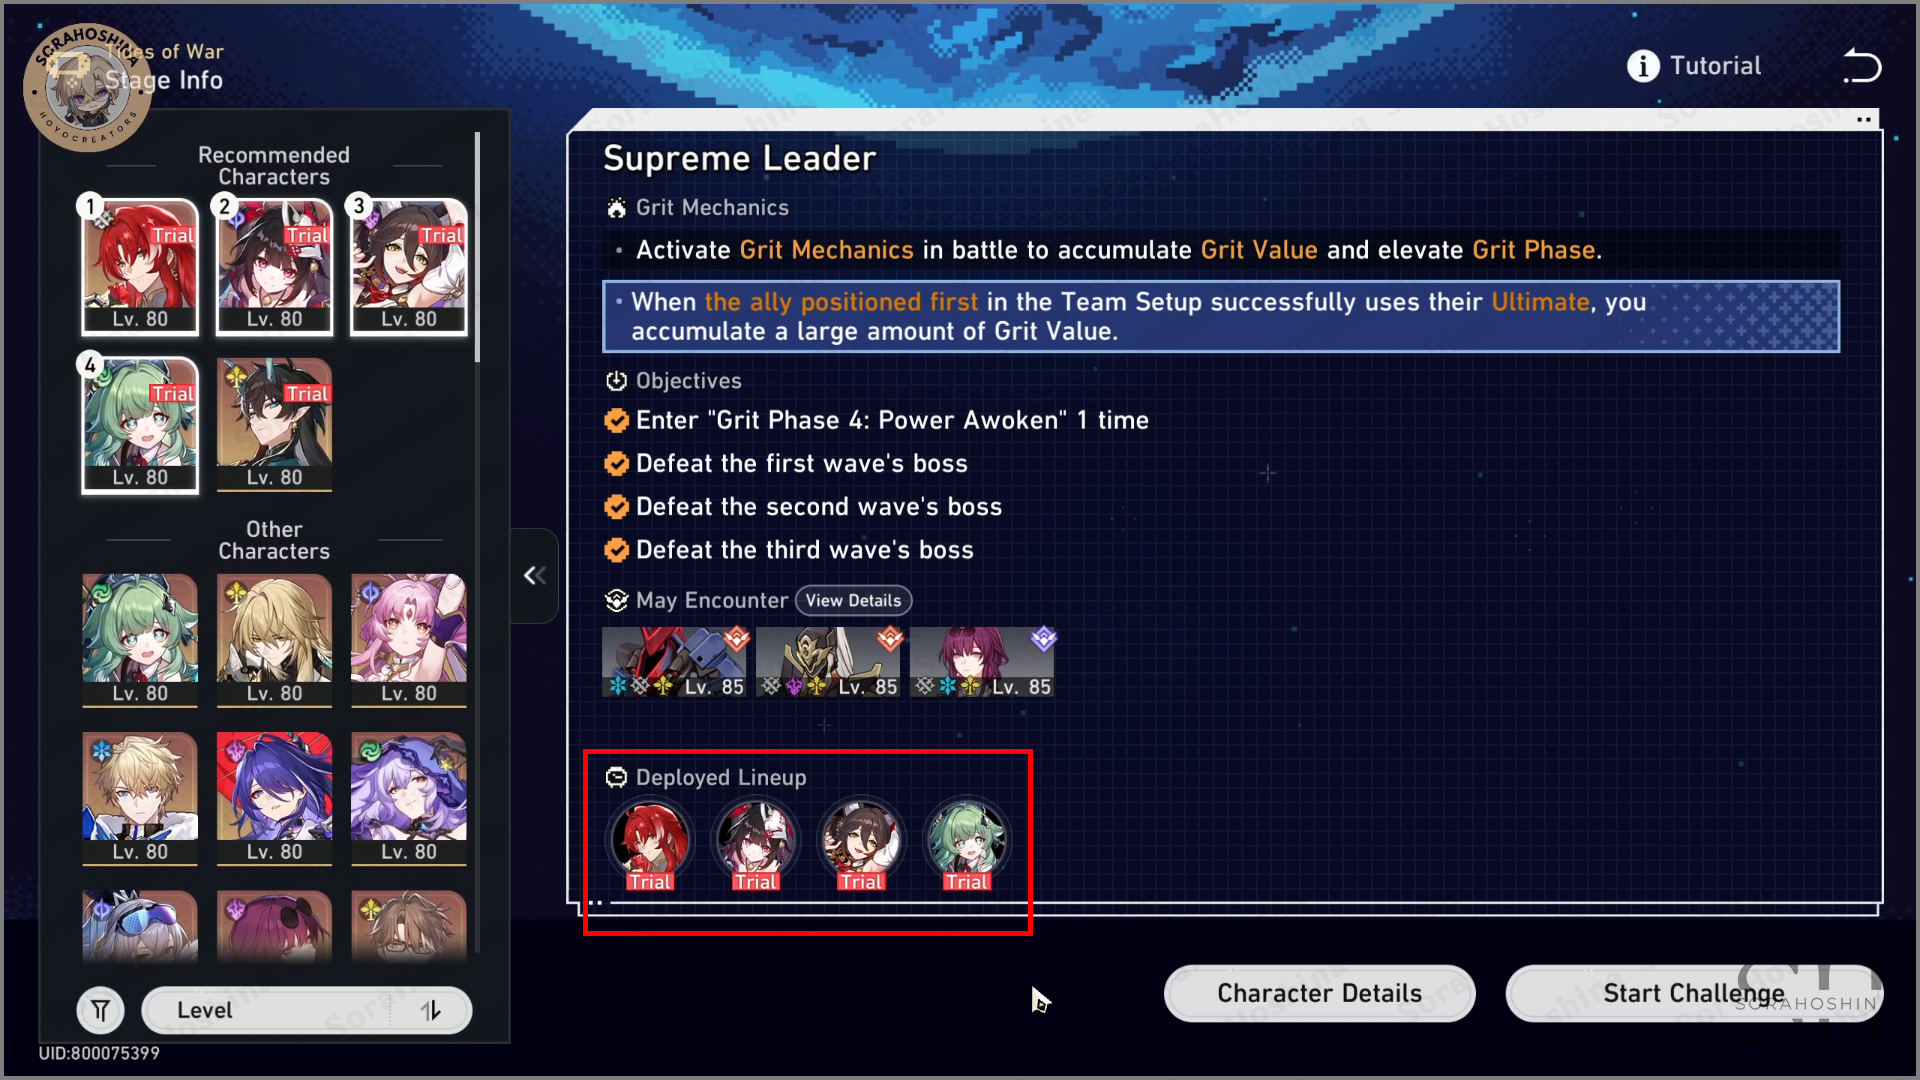
THE SELECTED TEAM:
Argenti + Sparkle + Tingyun + Huohuo (Never tried using DHIL in this stage but his Ultimate cost 140, and while it's not as pricey as Argenti's 180 Energy, it's not low either. And DHIL's main damage output isn't his Ult but his Basic ATK. BUT, by using his Ult, he can get 2 Squama Sacrosancta - his own Skill Points - so you don't have to worry about spamming Skill Points if you use him instead of Argenti)
THE SELECTED BUFF:
1) Respect From All: The ally positioned first in the Team Setup regenerates Energy when other allies use their Ultimate, and there is a chance to increase the DMG dealt by the next attack from the ally positioned first.
2) Hone Your Strength: Increases Energy Regeneration Rate.
Some Things to Remember
For the whole thing, it's best if you use the Ultimate in the order of: Sparkle > Argenti (Or Argenti > Sparkle) > Tingyun > Huohuo (If all of them have Energy, like during Grit Phase 4). Tingyun and Huohuo as the last one is obviously so Argenti can empty his Energy first before they can fill it back. Actually, the auto-battle gets the order correct most of the time so this stage is pretty safe to fully auto-battle.
Between 90 Ultimate and 180 Ultimate for Argenti, I recommend using his full 180 Ultimate because the damage is much, much higher and you can get Energy really easy in this stage because of the buff and the selected allies.
Sometimes, Argenti has almost full Energy, but then Tingyun goes and uses her Ultimate to fill the last few Energy for him, and that's a real waste of Energy in my opinion. Yeah, it can give him a damage boost, but I still think it's better to switch to manual and save Tingyun's Ultimate until Argenti uses his Ultimate first.

During or before Kafka's battle, make sure you use Huohuo's Skill to get the 2 Divine Provision stacks so your characters won't get Dominated by Kafka. I mean, they will get Dominated, but will soon recover because of the Divine Provision stack that will remove the debuff.
SS-Rank with Trial Characters
It's possible to get SS-Rank with Trial Characters only for this stage, but there are a few things you need to adjust:
1) Change the buff for Grit Phase 2 to Shared Hatred
2) Make sure Argenti is in the 1st slot and Tingyun in the 2nd slot
3) You need to manual this battle with the strategy below
So, the change here is with the Shared Hatred buff, one of Tingyun's Ultimate can fully recharge Argenti's Ultimate even when he has lower than 90 Energy (proof can be seen in the video above).
The trick here is, make sure to empty Argenti's Ultimate first by using them (it doesn't matter if he has 90 or 180 Energy, just use them). And only after that will you use Tingyun's Ultimate on him so he can fully get all his Energy back with around 150% DMG buff (courtesy of Tingyun's Ult and Shared Hatred buff). These two alone can make Argenti reach almost 1M damage without the help of Sparkle and Huohuo. Please look at my video above to see how it's done, it's not a really good showcase but hey, at least I got it!
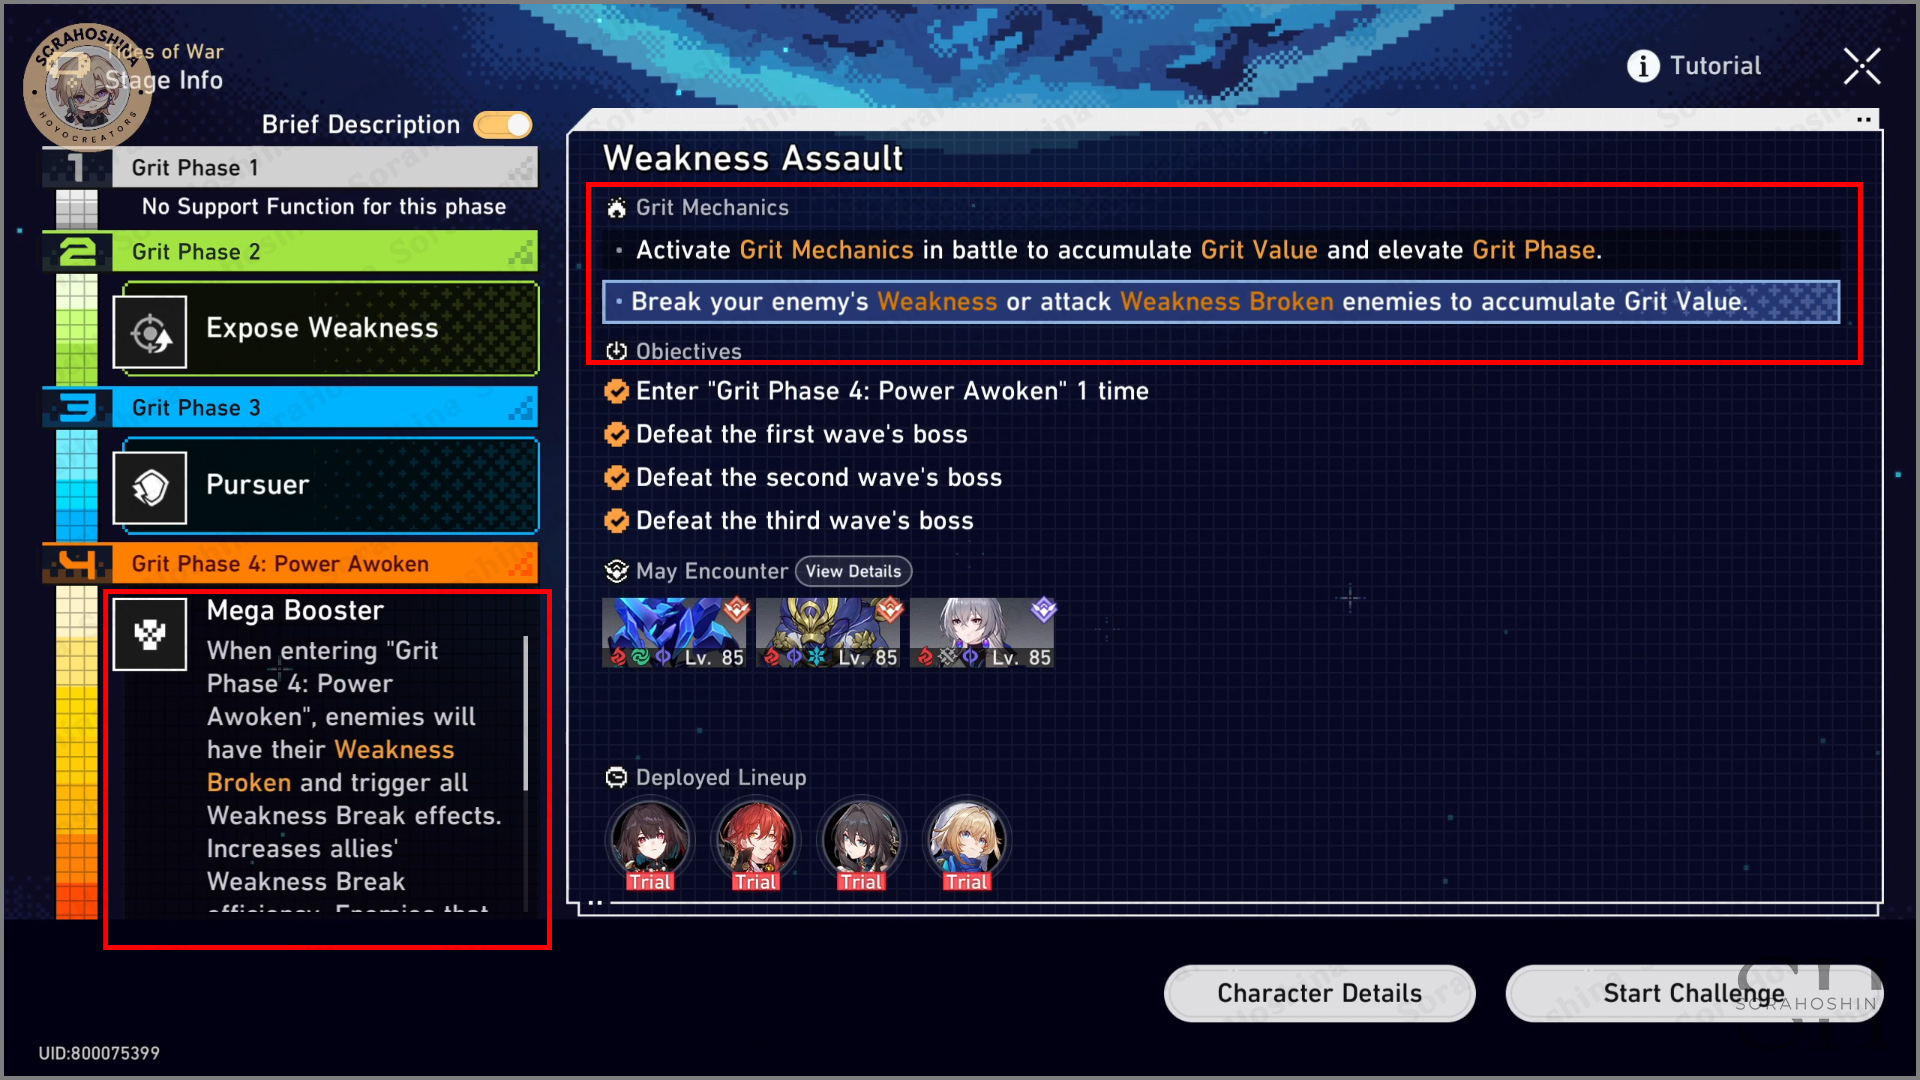
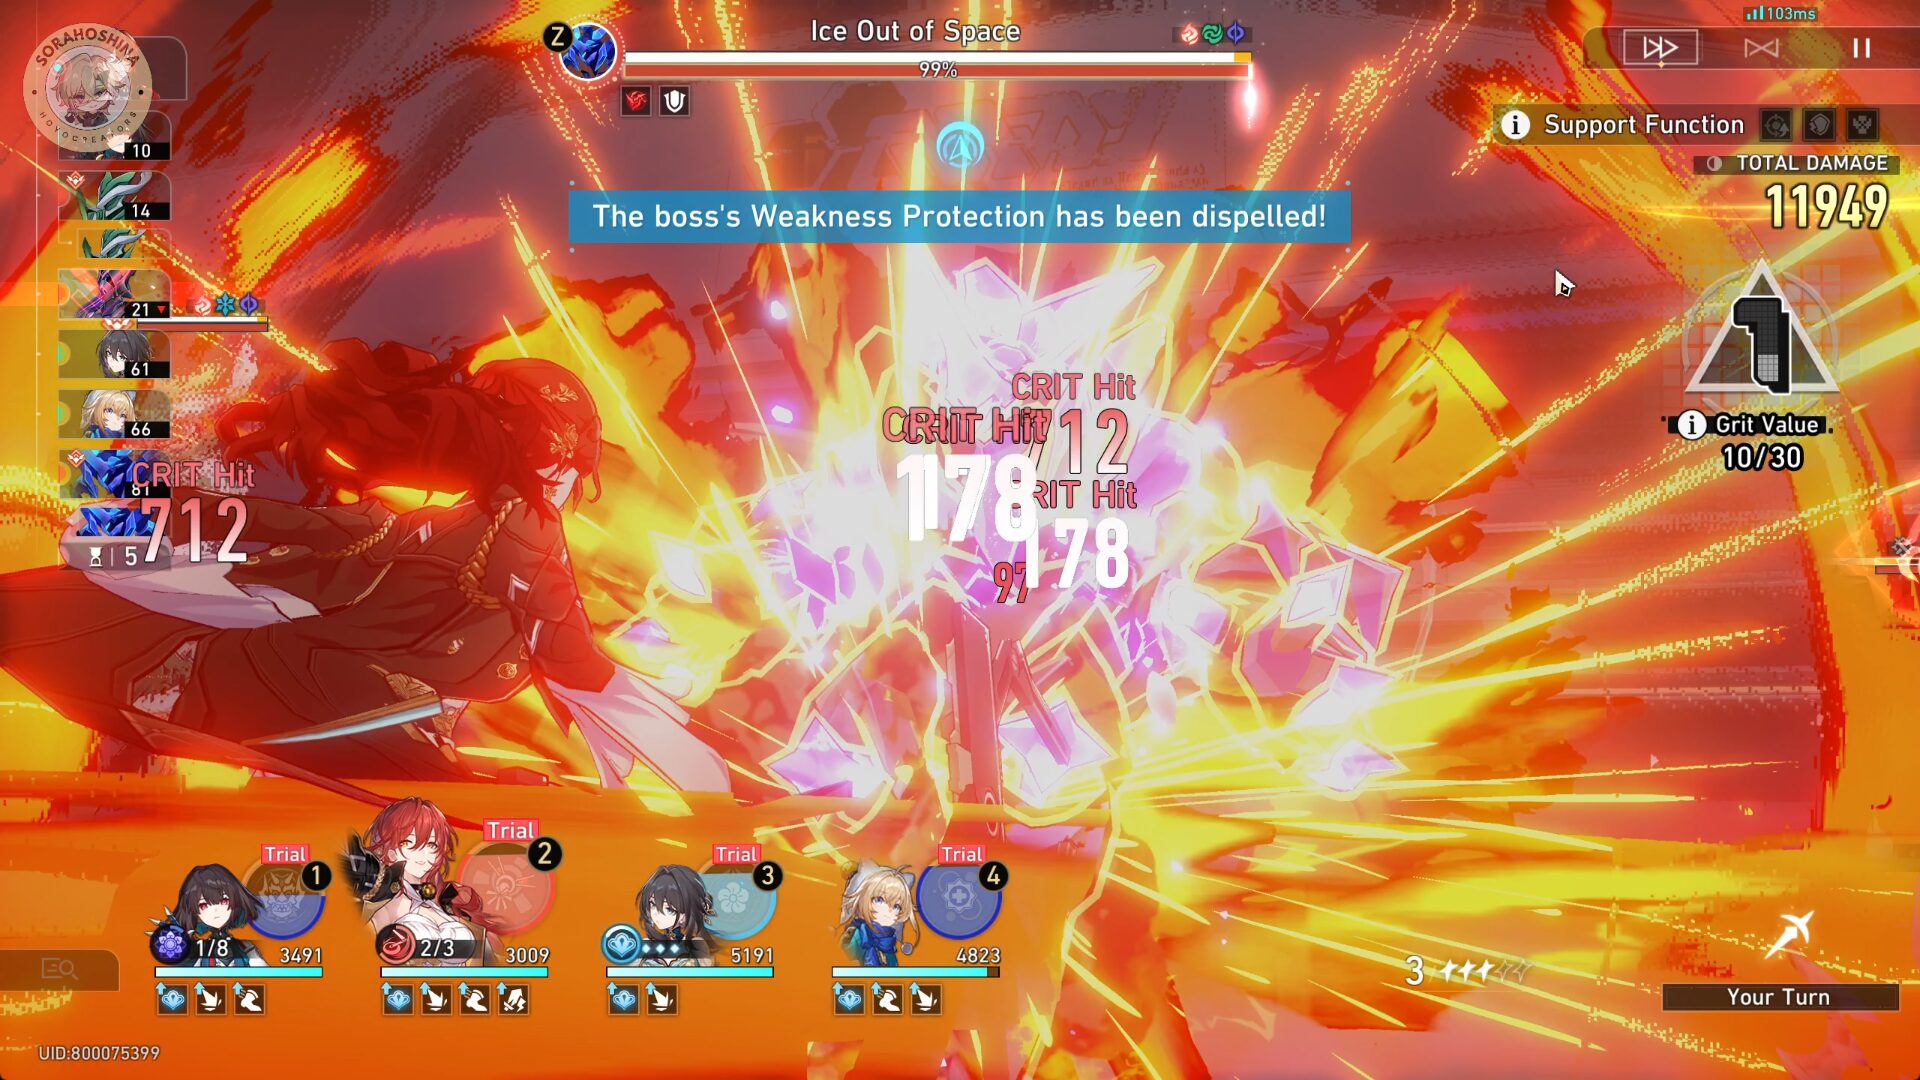
Stage 4 - Weakness Assault

Break the enemy's Weakness or attack Weakness Broken enemies to accumulate Grit Value.
Breaking an enemy's Weakness can inflict Toughness reduction on all enemies. Duriong "Grit Phase 4: Power Awoken," the enemy Boss will not have Weakness Protection. Attacking enemies in the Weakness Broken state will provide immense buffs.
Team & Buff Recommendation
THE MECHANISM:
Break an enemy's Weakness or attack Weakness Broken enemies to accumulate Grit Value.
GRIT PHASE 4:
All enemies will instantly get Weakness Broken and trigger all Weakness Break effects (All those Break damage). Increases allies' Weakness Break efficiency. Enemies that already have their Weakness Broken beforehand will receive increased damage and their action will be delayed.

THE SELECTED TEAM:
Xueyi + Himeko + Ruan Mei + Lynx
THE SELECTED BUFF:
1) Expose Weakness: Breaking any enemy's Weakness will dispel a boss's Weakness Protection. Increases all allies' Weakness Break efficiency and deals a set amount of DMG additionally to enemies that already have their Weakness Broken.
2) Pursuer: Increases DMG received by Weakness Broken enemies by 80%.
Some Things to Remember
I strongly suggest you play this battle manually and not auto-battle (you can get S-rank with Autoplay but it's pretty RNG, which is a bit harder to get compared to stage 3). First of all, each boss will have a Weakness Protection. This means your attack will NOT reduce their Toughness bar.
This is the reason I recommend using Expose Weakness for Grit Phase 2. You can dispel the boss's Weakness Protection by breaking a mob Weakness and then attack all enemies (higher damage bonus to enemies that already have their Weakness Broken).
For Ruan Mei and Lynx, if the former's buff is still there and allies are in great health, you can use their Basic Attack to hit enemies that have their respective elemental as a weakness (Ruan Mei attacking enemies with Ice Weakness, and Lynx for Quantum Weakness). This is so Xueyi can get her Karma stacks fast. That's one of your main damage outputs after all.

Lastly, you just need to be smart in conserving your Ultimate and choose the right timing before using it. Right timing, as in, make sure the boss doesn't have Weakness Protection first. Even though I said that, I'm also not that good at managing my Ultimates hah!

Actually another last thing, I would often try to always make Xueyi's Ultimate to trigger the Weaknes Break. In other words, try to skin the boss's Toughness bar with other characters, but make sure Xueyi's the one doing the finishing blow to that bar. Please look at the video above to see the example.
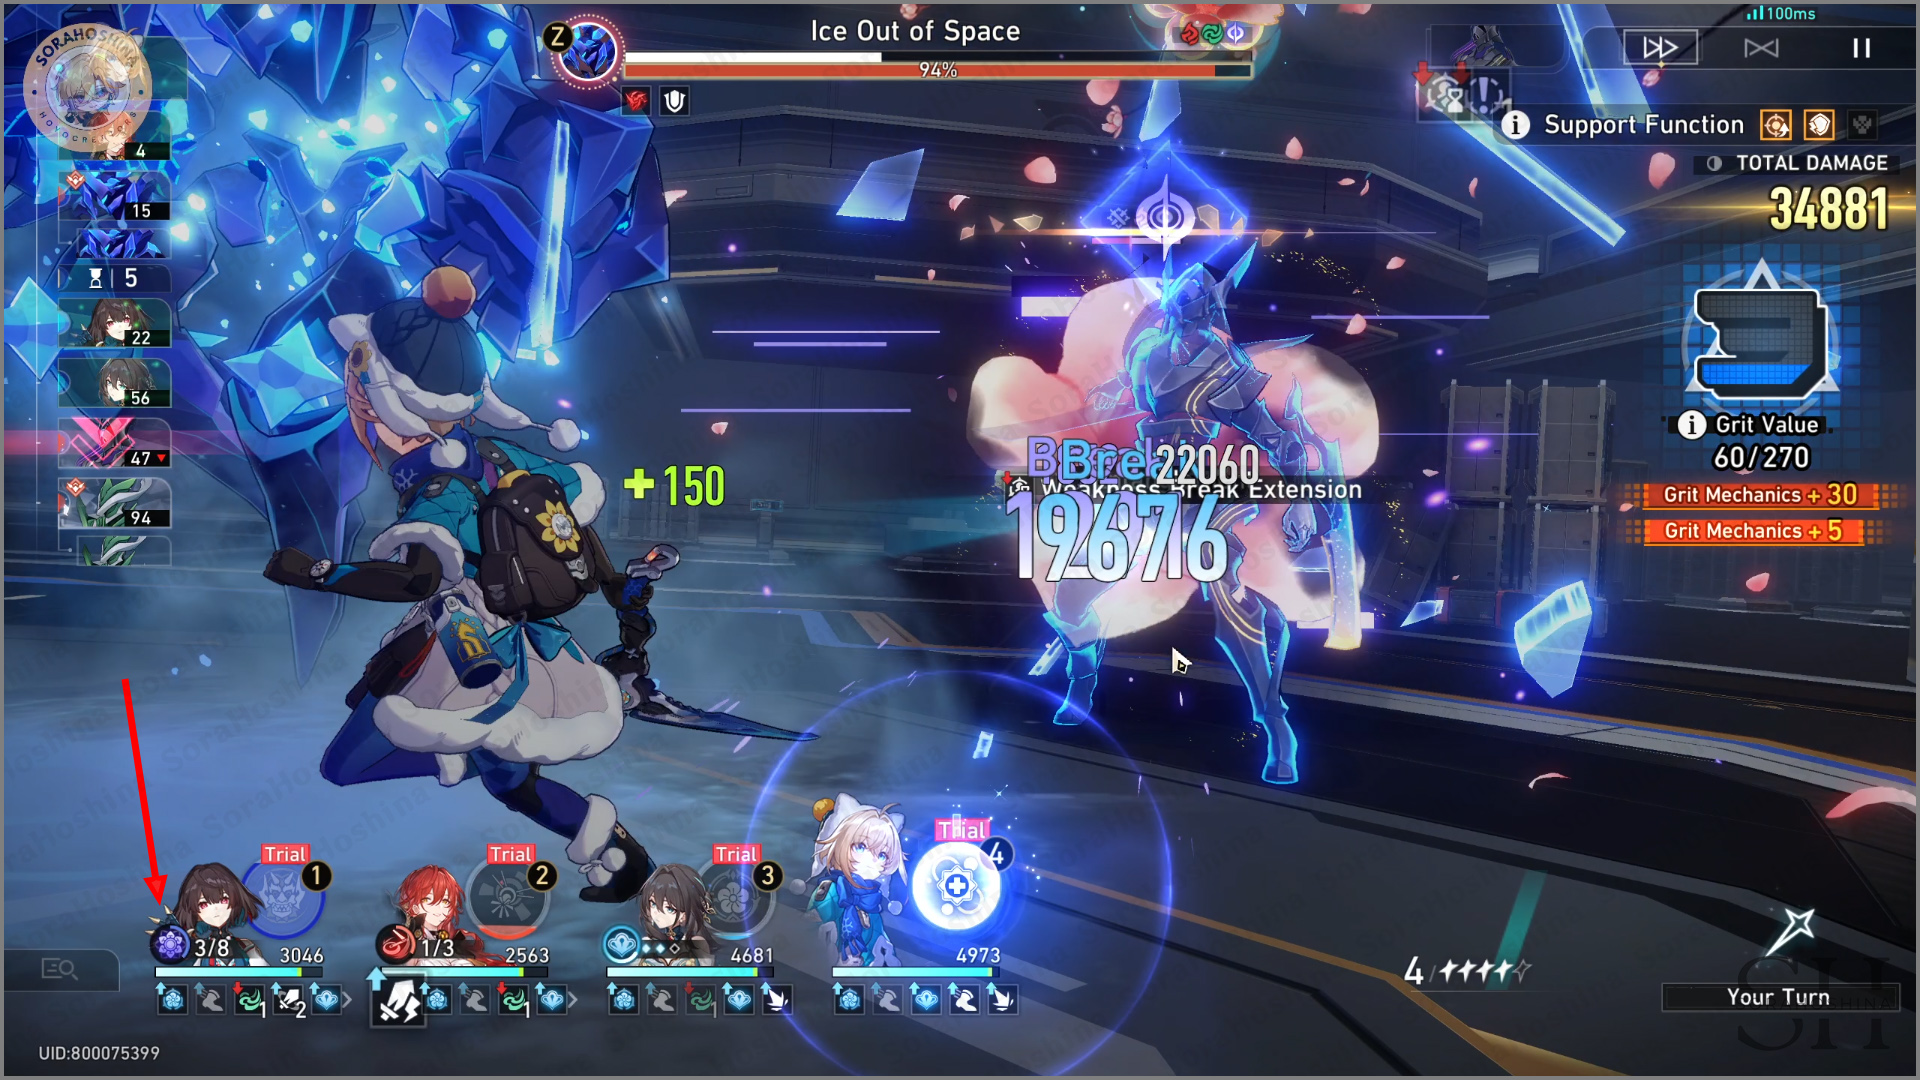
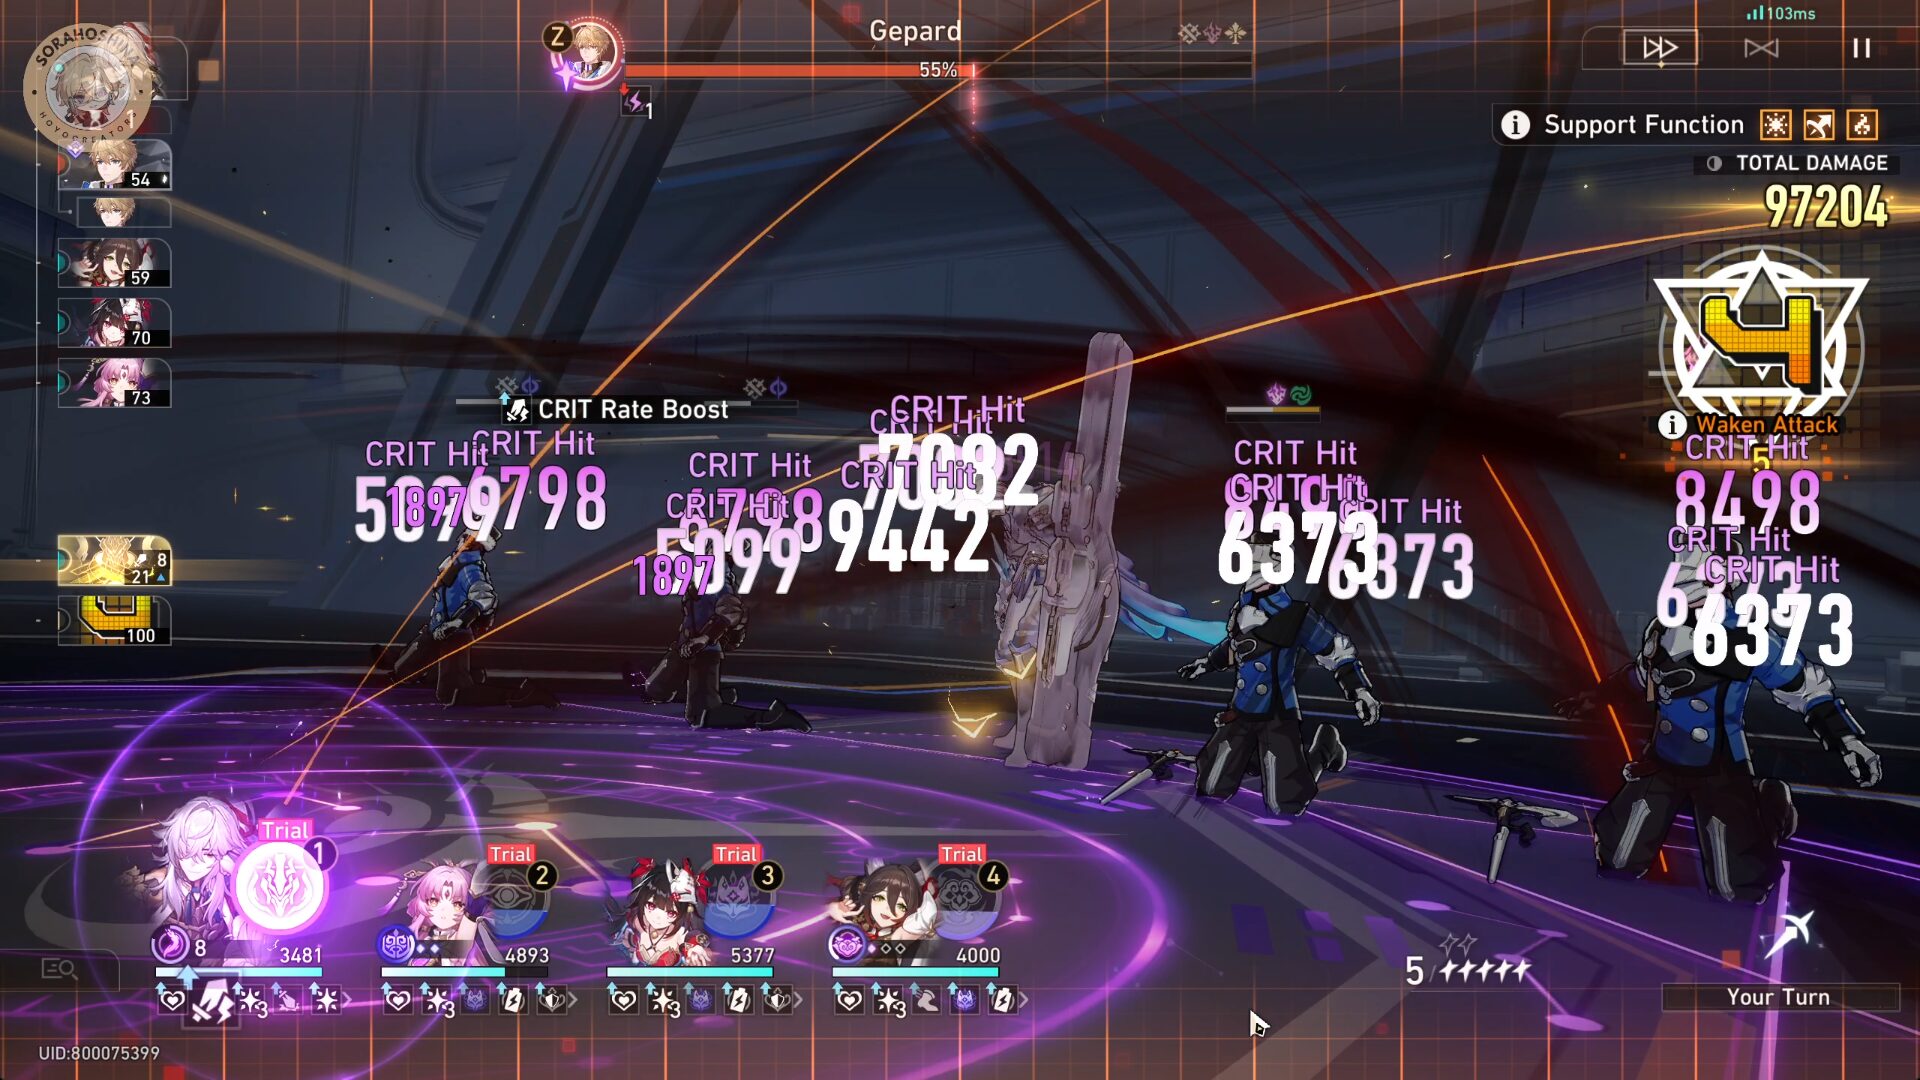
Stage 5 - Overflowing Wounds

Select a non-boss enemy with low HP and use single-target DMG ability on it. After defeating the enemy, deals single-target DMG with huge multipliers to the boss based on the Overflow DMG dealt to the defeated unit.

Use AoE abilities to attack enemies. After defeating a non-boss enemy, deals DMG with huge multipliers to the boss based on the Overflow DMG dealt in this attack.

During "Grit Phase 4: Power Awoken," non-boss enemies will have their HP drastically reduced after entering battle.
Attention: The boss' HP for this current stage is extremely high. You can use the Overflow DMG dealt when defeating non-boss enemies to deal high amount of DMG to the boss.
Team & Buff Recommendation
THE MECHANISM:
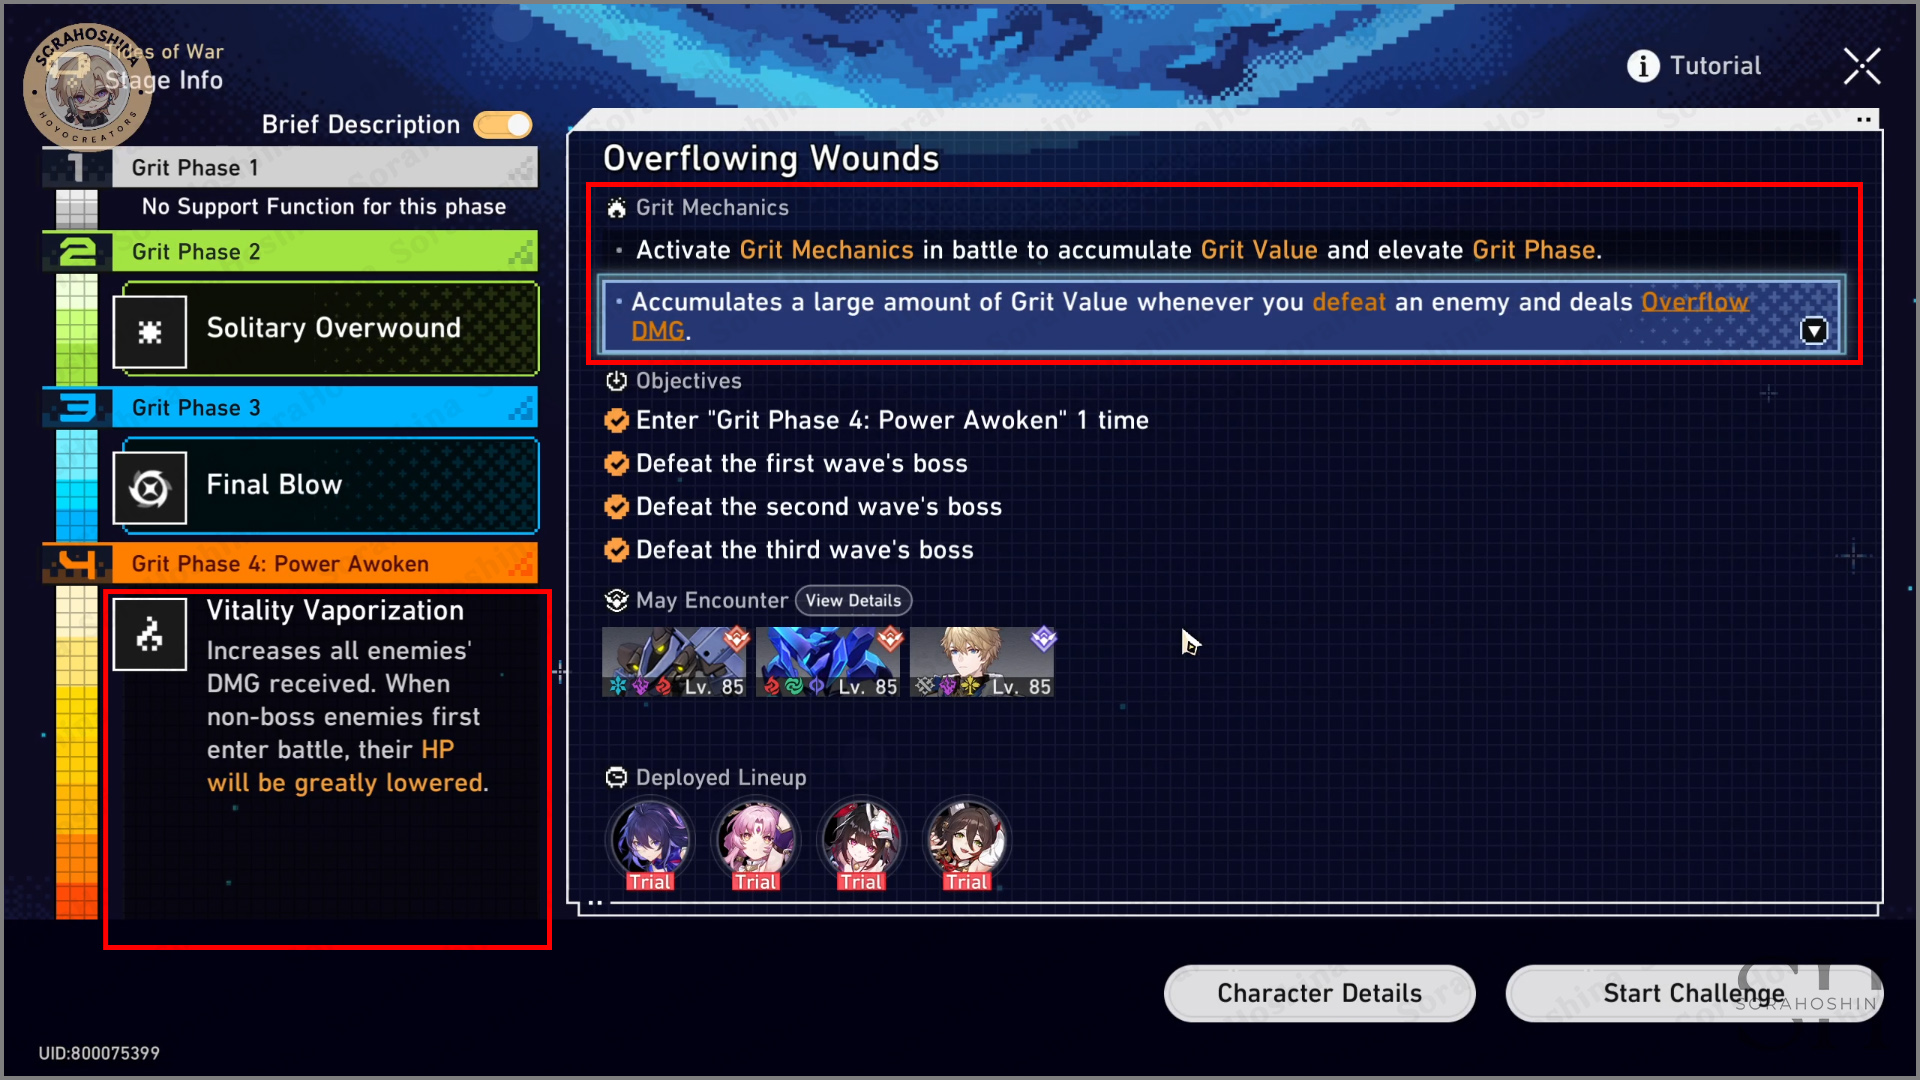
Defeat an enemy or deal Overflow DMG to accumulate Grit Value.
GRIT PHASE 4:
Increases all enemies' DMG received. When non-boss enemies first enter battle, their HP will be greatly lowered by 20% of their Max HP.
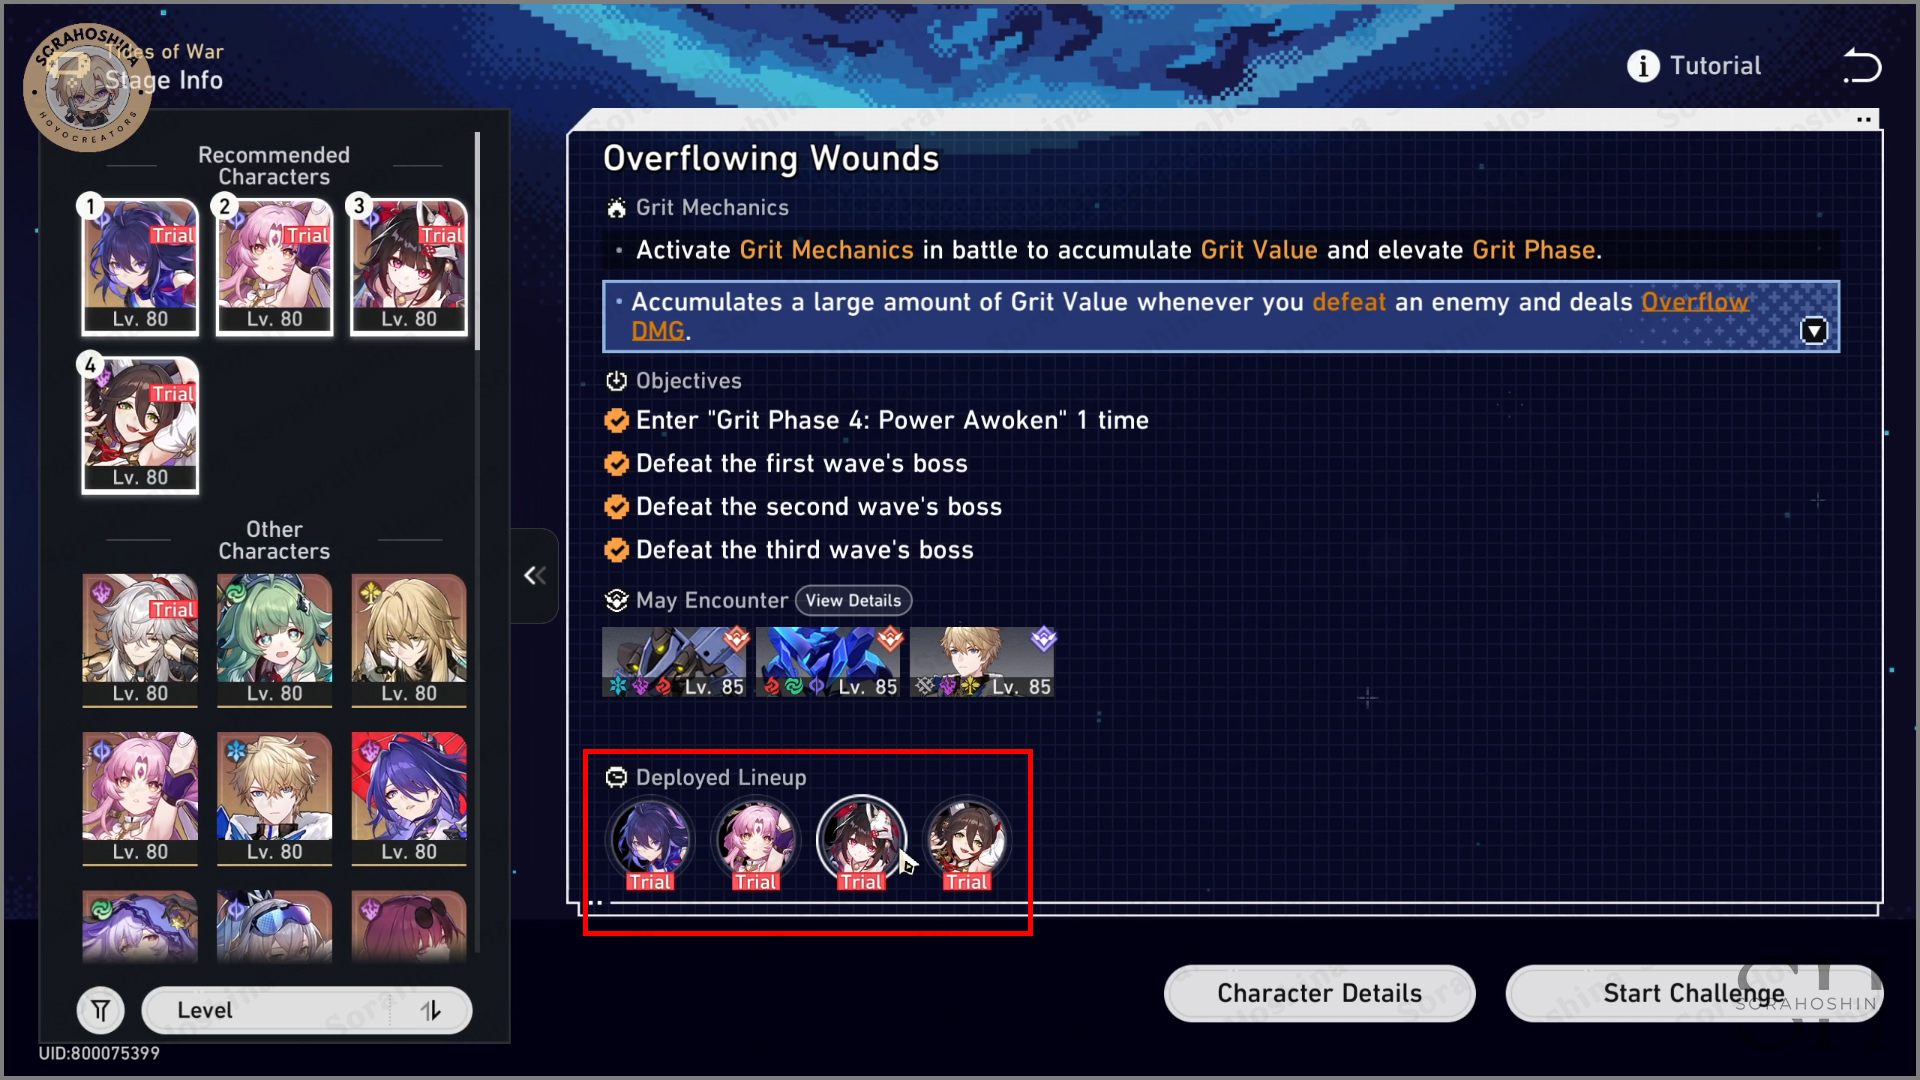
THE SELECTED TEAM (1):
Seele + Fu Xuan + Sparkle + Tingyun
THE SELECTED BUFF:
1) Solitary Overwound: When attacking and defeating a single target, deals massive Overflow DMG to the boss and minor Overflow DMG to all enemies.
2) Final Blow: Increases DMG dealt by Ultimates.
OR
THE SELECTED TEAM (2):
Jing Yuan + Fu Xuan + Sparkle + Tingyun
THE SELECTED BUFF:
1) Mass Overwound: When attacking and defeating multiple targets at once, deals massive Overflow DMG.
2) Victory Rush: Increases DMG dealt by follow-up attacks.
Some Things to Remember

A battle where I don't recommend using auto-battle (DEPENDING on which team you use) because, in this stage, you need to attack the mobs, not the boss. If you choose Seele as the main DPS and not Jing Yuan, there's a medium chance that she will attack the boss and not the mobs (especially when using Ultimate). But if you choose Jing Yuan, feel free to auto-battle it, although sometimes the AI will use JY's Normal Attack because of a lack of Skill Points.
Keep using Seele's Skill and Ultimate on mobs whether you're not in the Grit Phase 4 or inside it. Her big damage can't do much against the boss because they have an unfair amount of HP here, that's why you gotta depends on the Overflow DMG. It's like you deal so much damage to a mob that they have to die, and the remaining damage from there will be transferred to other enemies.
If you're using Jing Yuan, keep using his Skill and Ultimate to stack up Lightning Lord's bonker follow-up damage so you can automatically deal huge Overflow DMG. Although I mentioned you can auto-battle when using JY (I still recommend manual), you better supervise it too because sometimes when Lightning Lord already has 10 stacks and JY has his Ultimate enough, it's better to switch to manual to save that Ultimate until Lightning Lord finishes its 10 stacks first UNLESS Lightning-Lord's move is still far away.
Another reason why I recommend manually controlling them is that only Jing Yuan should deal the finishing blow to the enemies, and Fu Xuan's Ultimate (anything that deals AoE damage). Because you'd want to activate the Grit Phase 2 buff where it needs to be 'multiple targets' not single target. Sure, defeating a single target still accumulate Grit Value, but the loss of Overflow DMG is kinda not worth it.

If you're unlucky enough, Gepard will have time to cast a barrier on all enemies (usually on his second movement) and regardless of how big your damage is, they can withstand a single damage. So if your Lightning Lord is destined to be just after Gepard casts this barrier, you will suffer huge damage lost and a small chance to not win this before the round ends (I understand this feeling very much). If this happens, it's better to restart again and try to Weakness Break Gepard before he can put up those shields.
Stage 6 - Perpetual Exploits
After any ally performs consecutive actions, a large amount of Grit Value can be obtained. Defeating enemies or stopping enemy actions are all viable means to have allies to continue to take action.
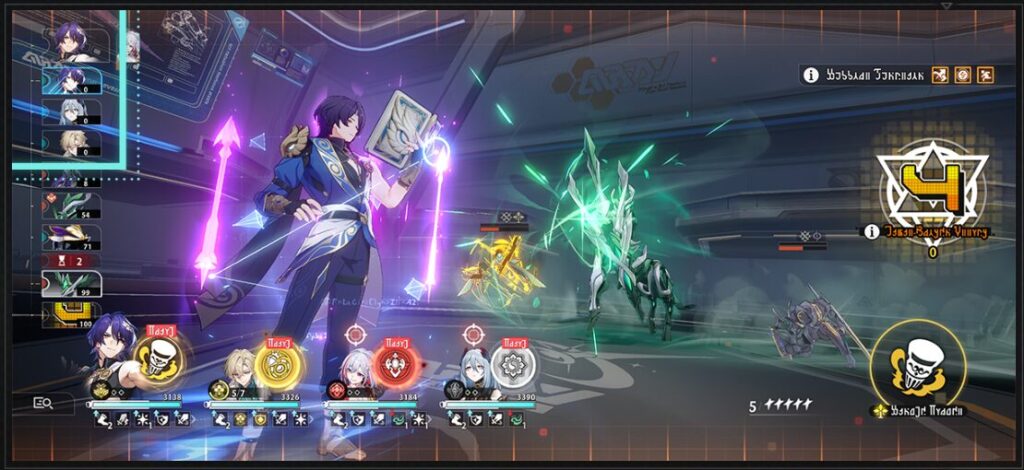
After characters cast their Ultimates, their actions are Advanced Forward by 100%. You can use Ultimates to make the same character act consecutively.
Team & Buff Recommendation
THE MECHANISM:
Perform consecutive actions to accumulates Grit Value.
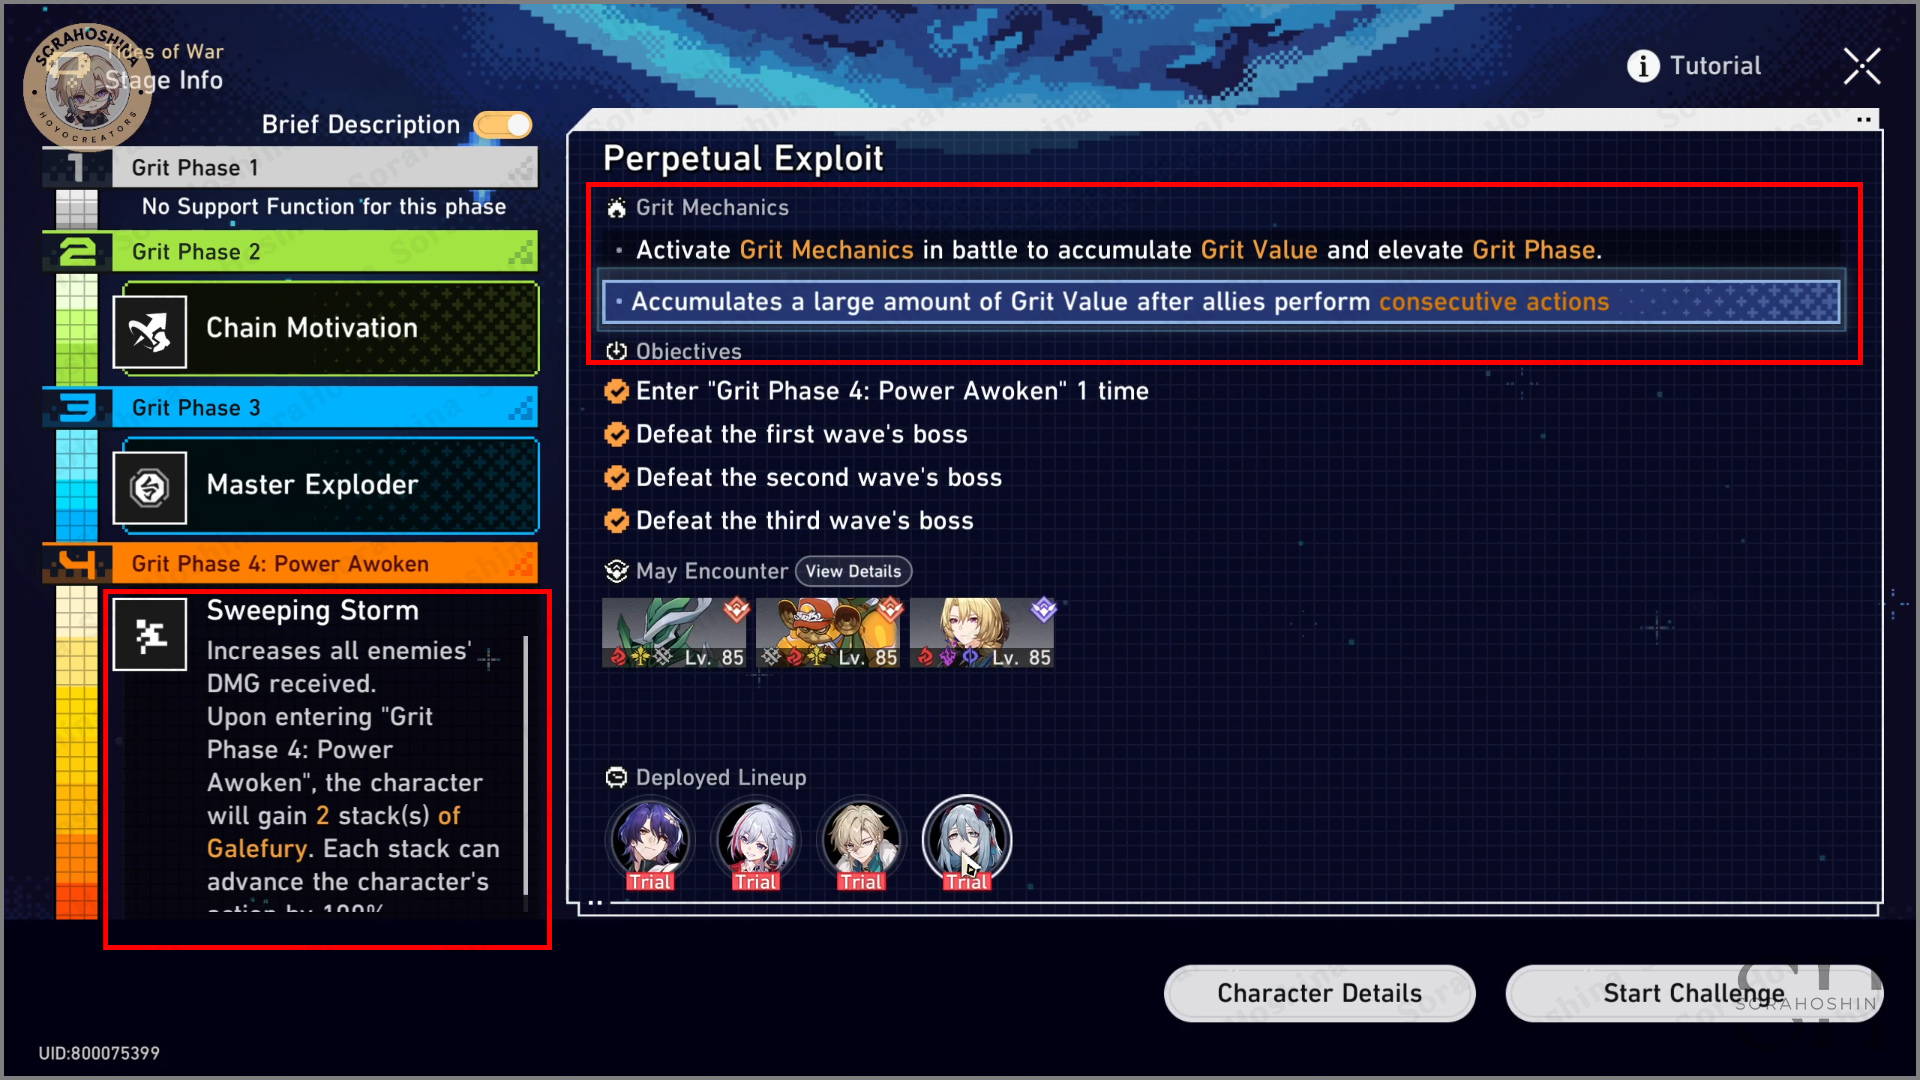
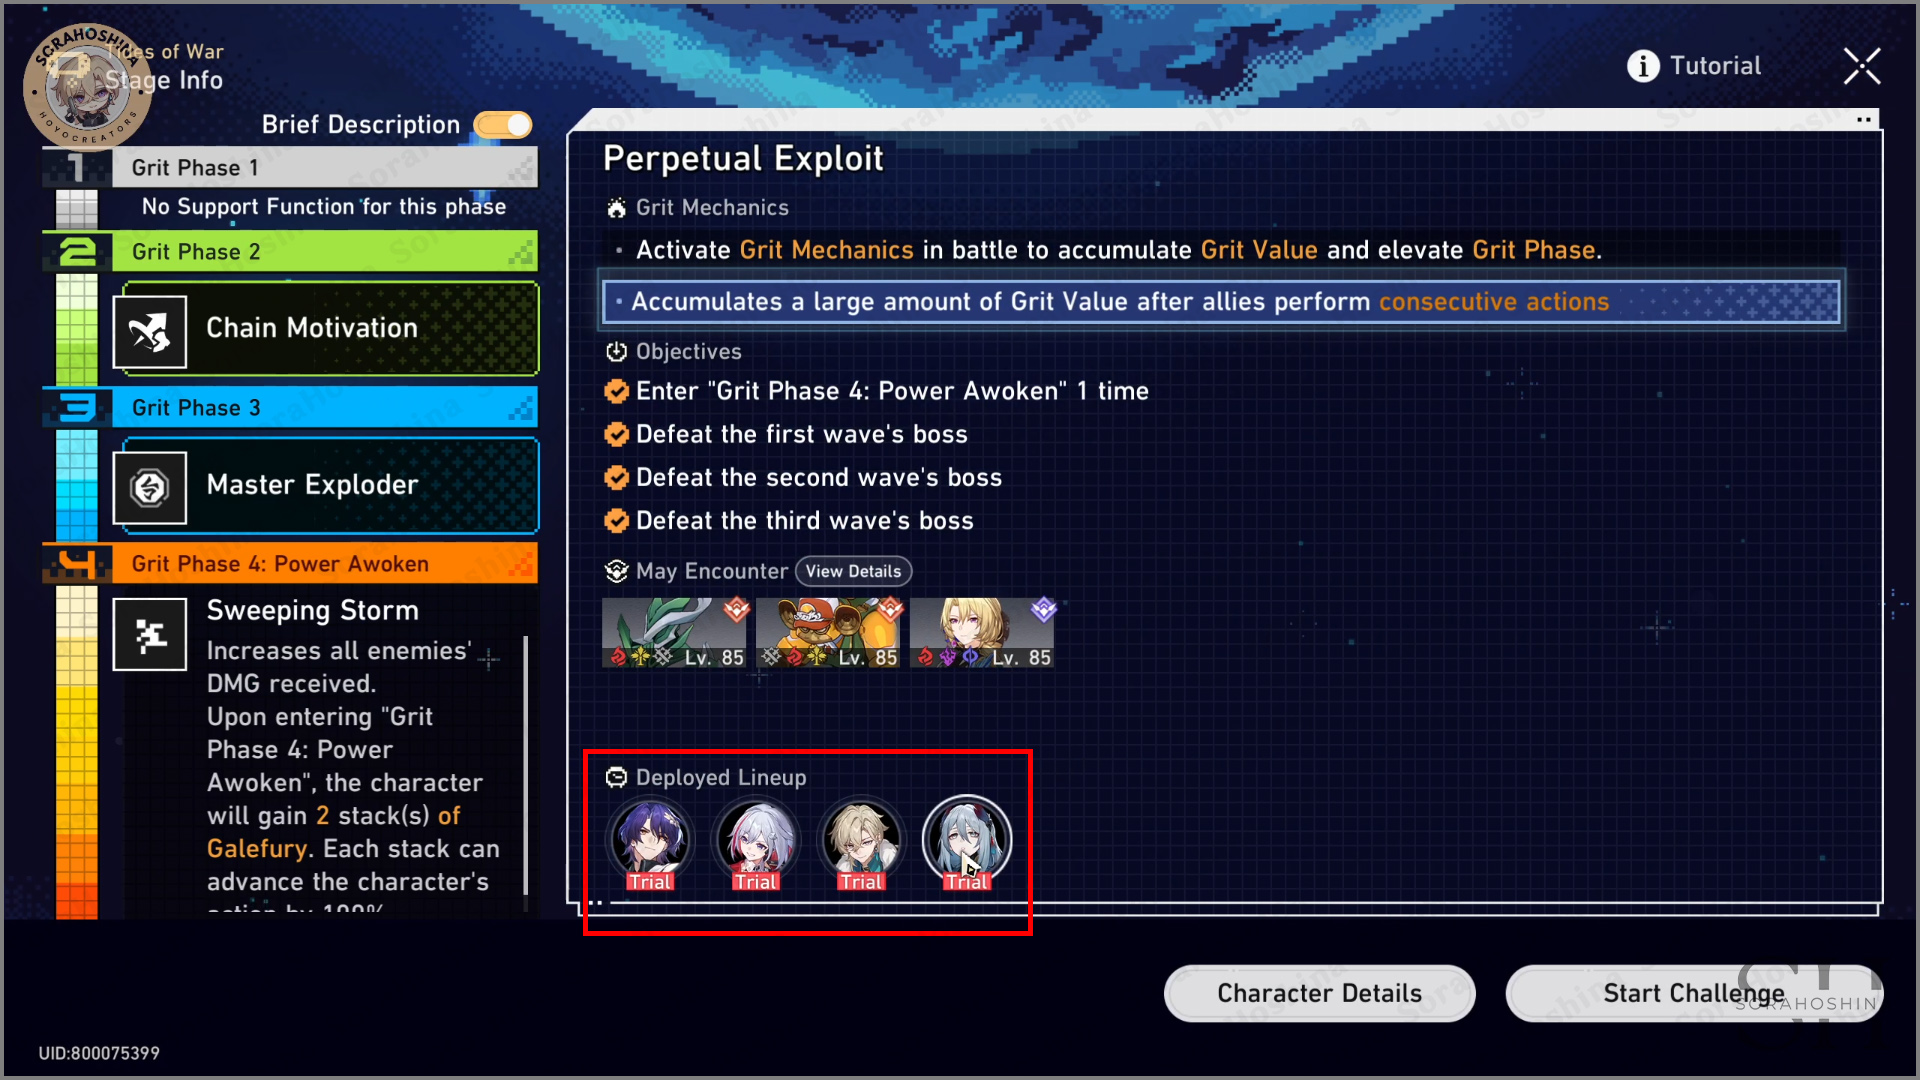
GRIT PHASE 4:
Increases all enemies' DMG received. Upon entering Phase 4, the characters will gain 2 stacks of Galefury. Each stack can advance the character's action by 100%.
THE SELECTED TEAM:
Dr. Ratio + Topaz & Numby + Aventurine + Hanya
THE SELECTED BUFF:
1) Chain Motivation: Action will be Advanced by 100% after Ultimate is cast. Additionally gains 2 / 4 / 6 / 8 / 10 / 12 Grit Value after any ally consecutively performs action or initiates follow-up attacks.
2) Master Exploder: When any ally performs an action or follow-up attack, inflict 1 stack of Detonate on the enemy boss. Attacking enemy units with Detonate will inflict Additional DMG which increases in proportion to the Detonate stacks. The stacks are cleared when an affected unit takes an action.
Some Things to Remember
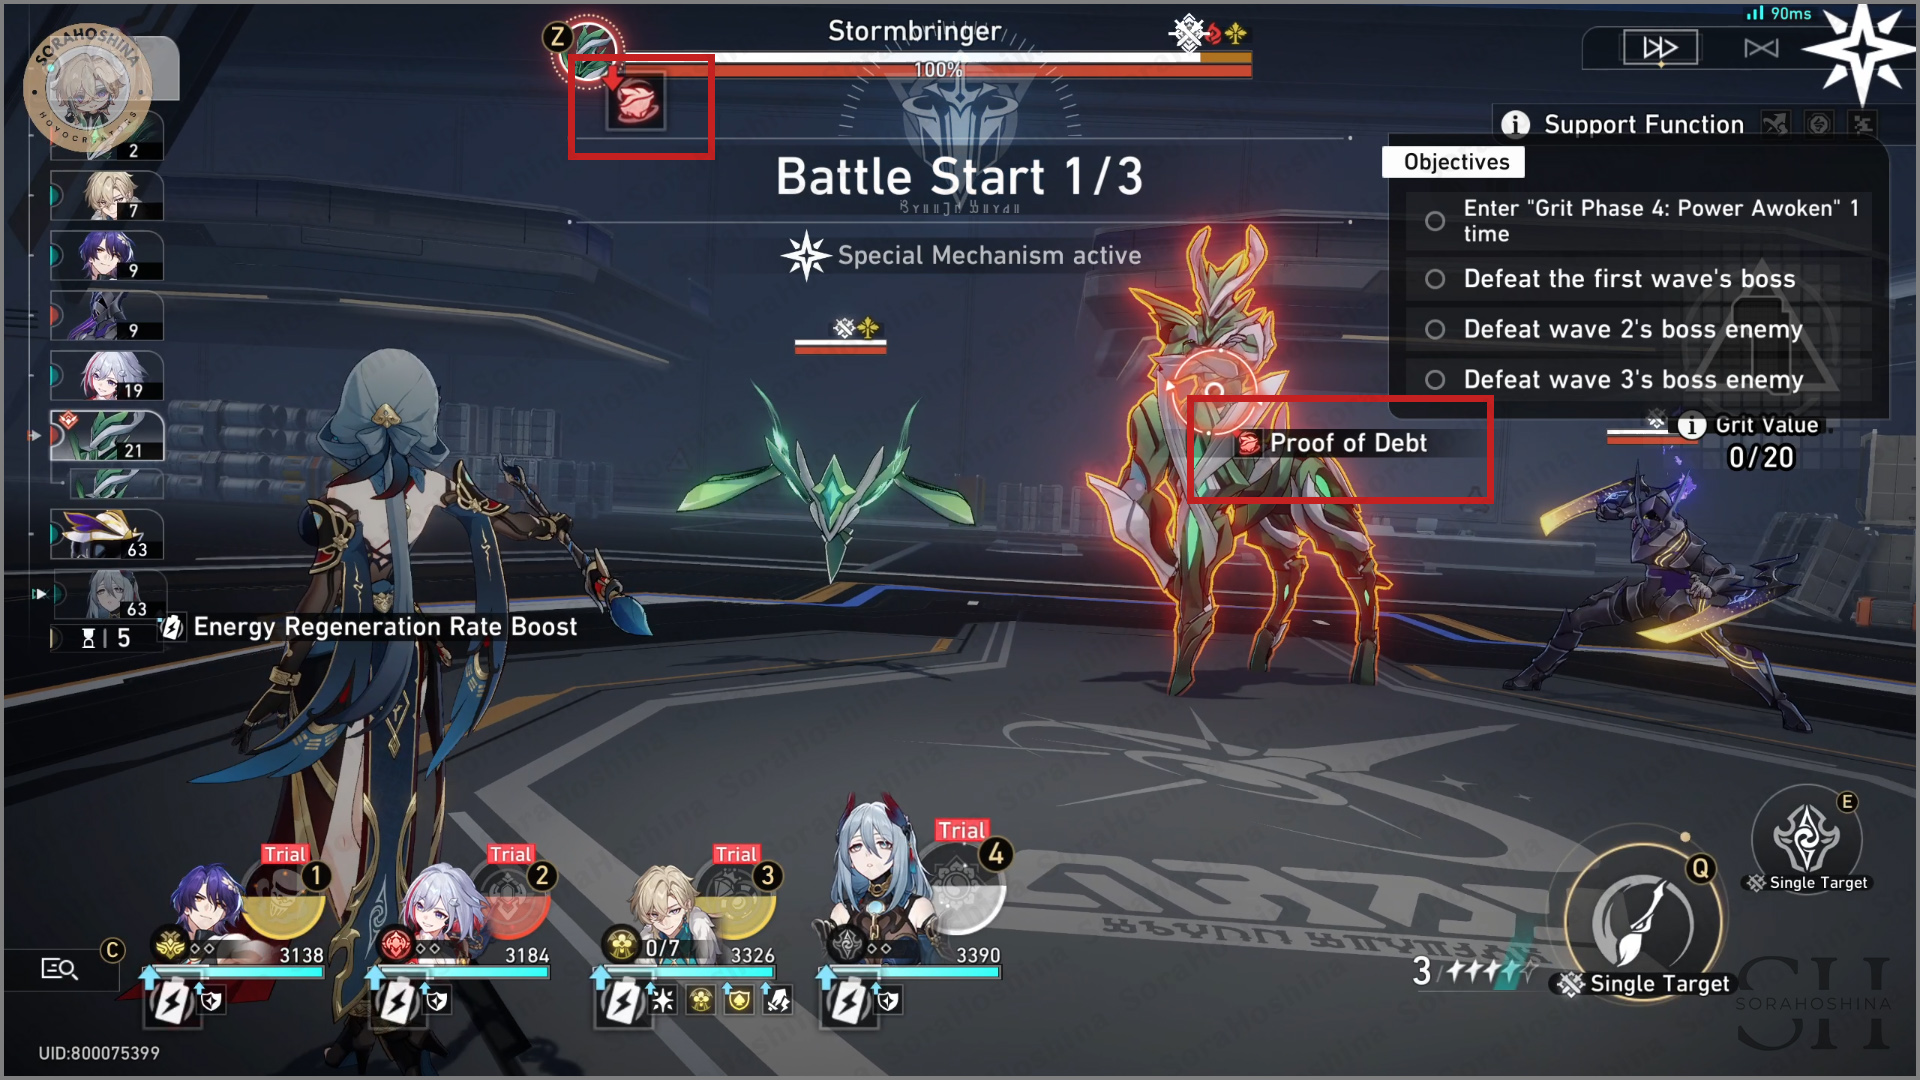
The moment Ratio attacked the mobs instead of the boss, I instantly retreated and played again but manually. But I tried once again and you CAN get S-rank (all rewards) with full auto. But I recommend interfering and always using Topaz's Skill on the boss if her Proof of Debt status wasn't on the boss. You should pay attention to this or Topaz will keep attacking the mobs with this status.
If you want to get more Grit Value, here's another tip. When each character have their Ultimate full of Energy, wait until their own turn. For example, Ratio has his Ultimate ready to be used. Wait until he is the current one to move, then use his (1) Skill for one move, then use his (2) Ultimate to trigger the Buff Phase 2 so the action will be advanced by 100%, then (3) use Skill once again. This will be counted as three consecutive actions.
Gameplay Rewards
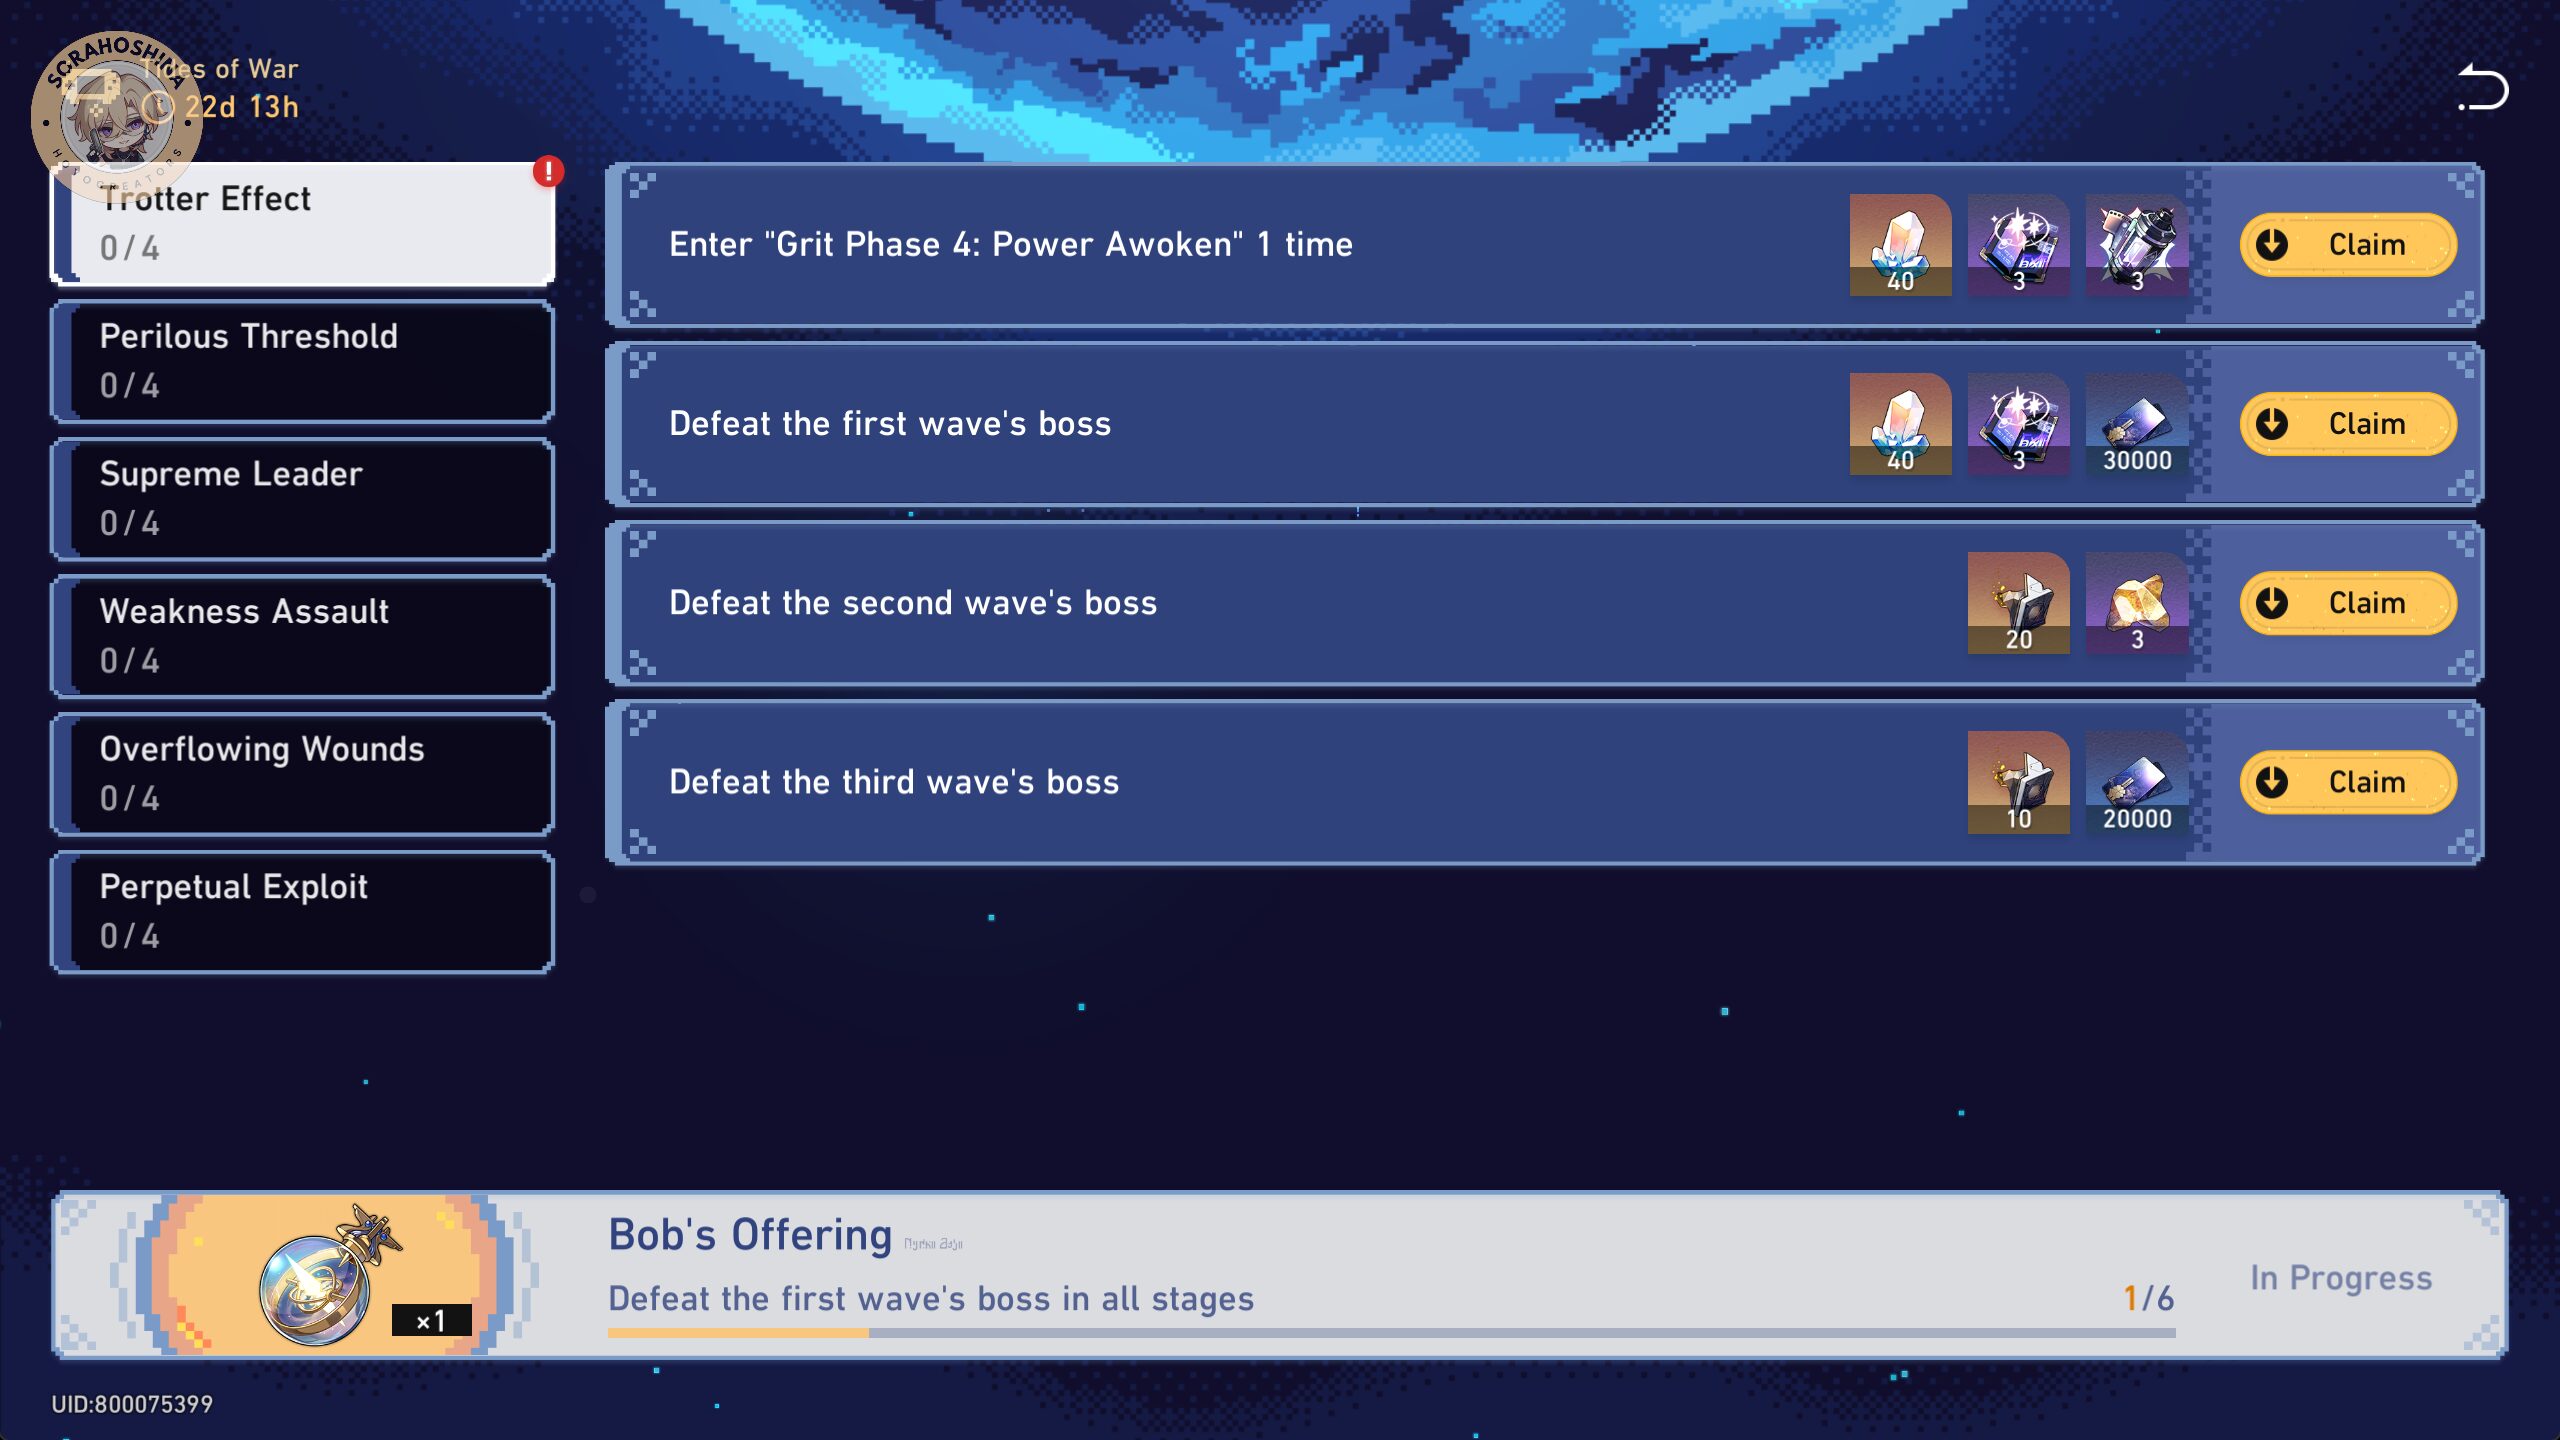
➥ Don’t forget to manually claim your rewards from the event page. By completing all the event challenges, you will get the following rewards:
- Stellar Jade x500
- Traveler's Guide x36
- Refined Aether x18
- Credits x300000
- Lost Crystal x18
- Relic Remains x180

Sora
Articles: 233More Articles

Honkai: Star Rail Stellar Shimmer Event Guide

Honkai: Star Rail Redemption Codes – July 2024

Honkai: Star Rail Version 2.3 Tier List (July 2024)

Honkai: Star Rail Jade Character Guide

Honkai: Star Rail Boothill Character Guide

Honkai: Star Rail Xueyi Character Guide

Honkai: Star Rail Misha Character Guide

Honkai: Star Rail Gallagher Character Guide

Honkai: Star Rail Ruan Mei Character Guide

Honkai: Star Rail Firefly Character Guide
Honkai: Star Rail Memory of Chaos Stage 12 Guide (V2.2 – A Song’s True Theme)

Honkai: Star Rail Memory of Chaos Stage 11 Guide (V2.2 – A Song’s True Theme)

Honkai: Star Rail Memory of Chaos Stage 10 Guide (V2.2 – A Song’s True Theme)
Honkai: Star Rail Memory of Chaos Stage 9 Guide (V2.2 – A Song’s True Theme)

Honkai: Star Rail Memory of Chaos Stage 8 Guide (V2.2 – A Song’s True Theme)
Honkai: Star Rail Memory of Chaos Stage 7 Guide (V2.2 – A Song’s True Theme)
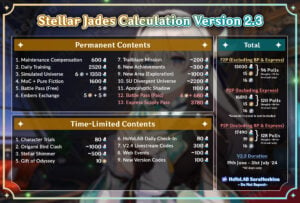
Honkai: Star Rail Stellar Jades Calculation in Version 2.3

Honkai: Star Rail Version 2.3 Special Program Livestream Overview

Honkai: Star Rail 3 New Redemption Codes from 2.3 Livestream