Table of Contents [Hide]

Alhaitham is a Dendro DPS character who uses Chisel-Light Mirrors in combat.
Alhaitham dashes forward when using his Elemental Skill and generates Chisel-Light Mirrors. While the Chisel-Light Mirrors persists, Alhaitham will obtain a Dendro infusion. When his attacks hit opponents, Chisel-Light Mirrors will unleash a coordinated attack, dealing AoE Dendro Damage.
Alhaitham's Elemental Burst creates a Particular Binding Field that deals multiple instances of AoE Dendro Damage. All existing Chisel-Light Mirrors will be consumed to increase the number of Damage instances dealt.
This guide is based on the Community Character Builds by the Genshin Helper Team.
Skills Overview
Normal Attack: Abductive Reasoning
Normal Attack
Performs up to 5 rapid strikes.
Charged Attack
Consumes a certain amount of Stamina to unleash 2 rapid sword strikes.
Plunging Attack
Plunges from mid-air to strike the ground below, damaging opponents along the path and dealing AoE DMG upon impact.
Elemental Skill: Universality: An Elaboration on Form
Rushes forward, dealing Dendro DMG to nearby opponents when the rush ends, causing a Chisel-Light Mirror to form.
Holding this skill will cause it to behave differently.
Hold
Enters Aiming Mode to adjust the direction of Alhaitham's rush attack.

Chisel-Light Mirror
When this skill is unleashed, Alhaitham will generate 1 Chisel-Light Mirror. If there are no Mirrors at this time, he will generate 1 additional Mirror. Chisel-Light Mirrors will have the following properties:
• When he possesses Chisel-Light Mirrors, Alhaitham's Normal, Charged, and Plunging Attacks will be converted to Dendro DMG. This cannot be overridden.
• When attacks of the aforementioned kinds hit opponents, the Chisel-Light Mirrors will unleash a Projection Attack that deals AoE Dendro DMG based on the number of Mirrors on the field.
• A total of 3 Chisel-Light Mirrors can exist at once.
• The Chisel-Light Mirrors will disappear one after the other over time, and will all disappear when Alhaitham leaves the field.
Chisel-Light Mirror Removal Interval: 4 seconds
Cooldown: 18 seconds
Elemental Burst: Particular Field: Fetters of Phenomena

Creates a Particular Binding Field and deals multiple instances of AoE Dendro DMG.
If Chisel-Light Mirrors exist when this ability is unleashed, all such Mirrors will be consumed and increase the number of DMG instances dealt.
2s after this ability is unleashed, if 0/1/2/3 Mirrors were consumed, Alhaitham will generate 3/2/1/0 new Mirrors in turn.
Cooldown: 18 seconds
Energy Cost: 70
Ascension 1: Four-Causal Correction
When Alhaitham's Charged or Plunging Attacks hit opponents, they will generate 1 Chisel-Light Mirror. This effect can be triggered once every 12s.
Ascension 4: Mysteries Laid Bare
Each point of Alhaitham's Elemental Mastery will increase the DMG dealt by Projection Attacks and Particular Field: Fetters of Phenomena by 0.1%.
The maximum DMG increase this way for both these abilities is 100%.
Passive Talent: Law of Reductive Overdetermination
When Alhaitham crafts Weapon Ascension Materials, he has a 10% chance to receive double the product.
TLDR / Rotation
Everything is about the Chisel-Light Mirrors. Because most of his damage output is coming from the Mirrors, you need to understand and remember how to maintain 2/3 Chisel-Light Mirrors in every rotation.
Now, if you skip all the descriptions above, here's how to get Chisel-Light Mirrors:
(1) Using Alhaitham’s Skill (if you have 0, then it will generate 2)
(2) His Ascension 1 Passive (hitting Charged or Plunging attacks to generate 1)
(3) Using Alhaitham’s Burst (spawns more if you have less when cast; if you have 0 > generate 3, if you have 3 > generate 0)
The rotation for maintaining 3 mirrors is pretty simple: start an encounter with Alhaitham’s Burst to get 3 mirrors instantly > Normal Attack until you see 2 Projections then Skill > Normal Attack until you see 2 Projections then Charged Attack > Normal Attack until all mirrors are gone > Continue attacking if necessary.
Talent Priorities

Elemental Skill > Normal Attack = Elemental Burst
Aside from generating Chisel-Light Mirrors, his Elemental Skill also deals the Projection Attack DMG. And while Alhaitham has the Mirrors, his Normal Attack will be converted to Dendro DMG - which is why it's important to upgrade this one too.
Constellations
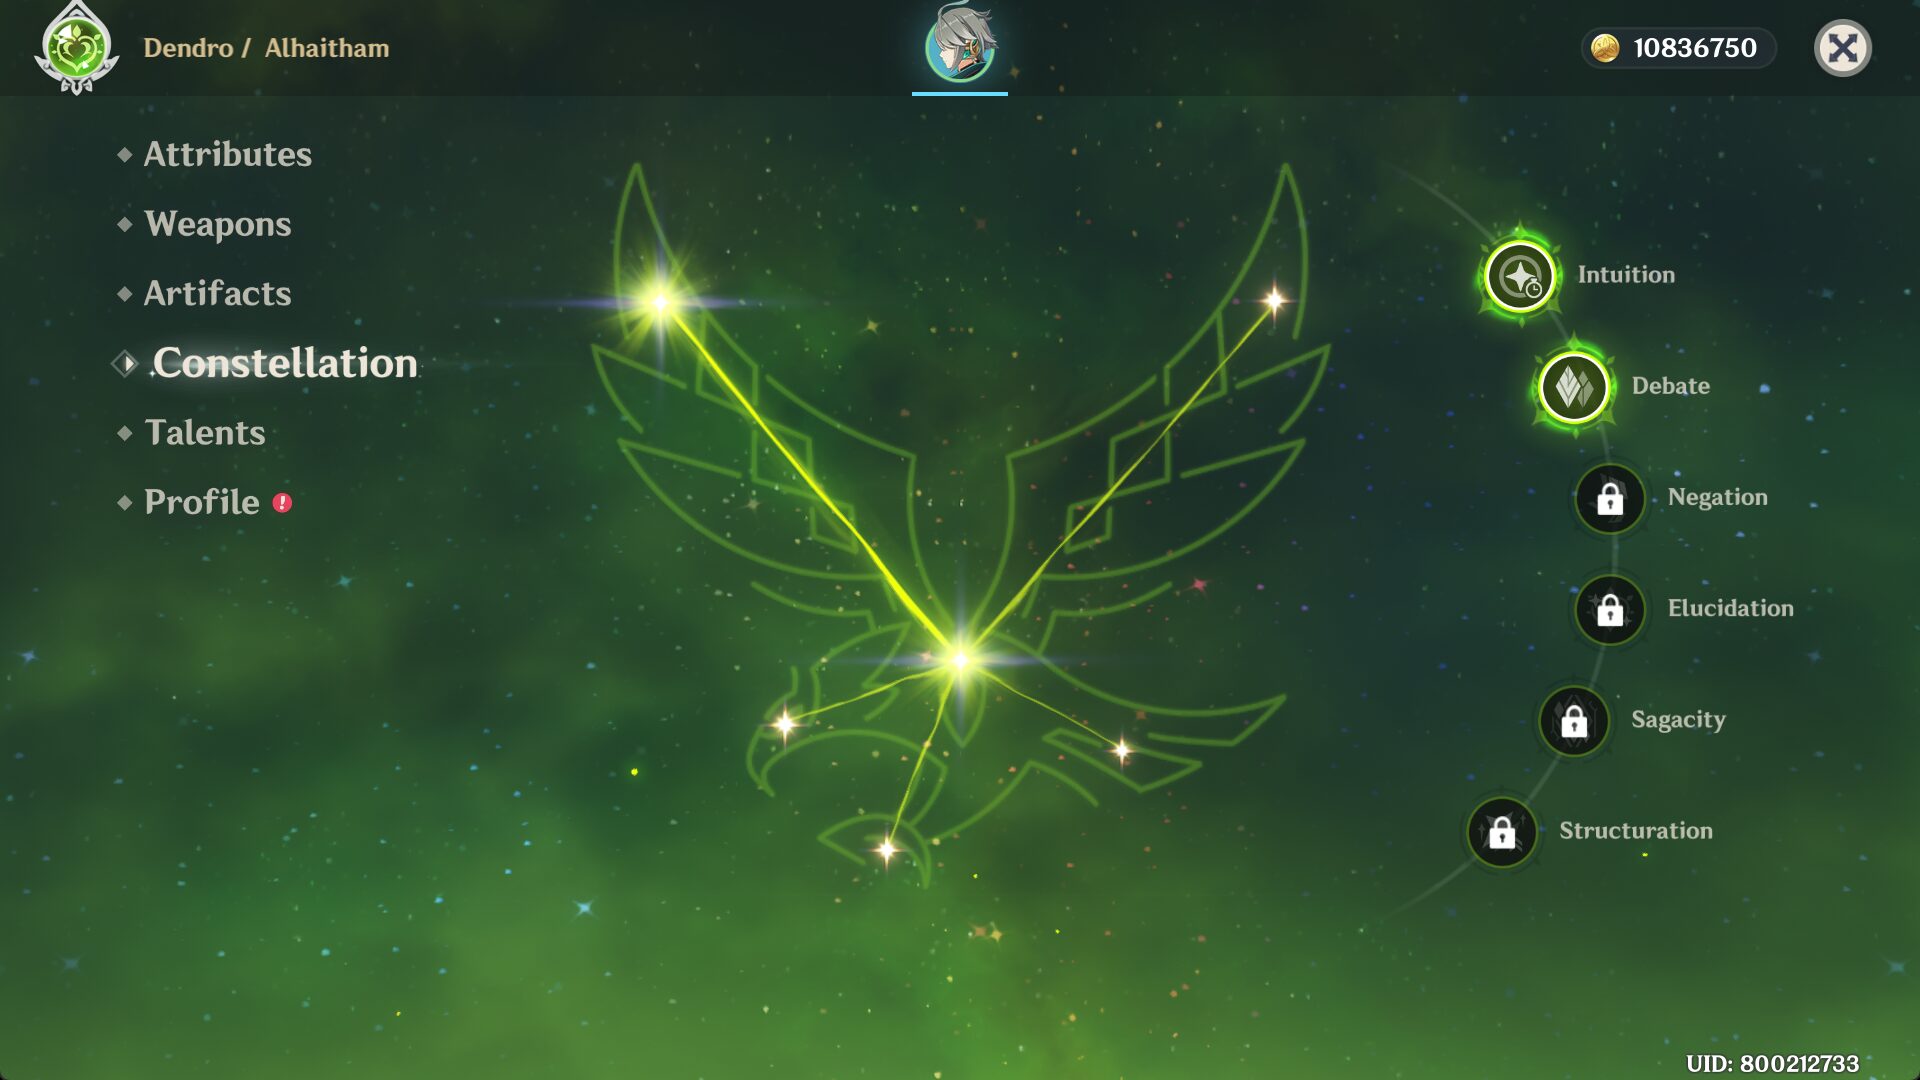
Best Constellations: C1, C2, C4 & C6
C1: Intuition ⭐
When a Projection Attack hits an opponent, Universality: An Elaboration on Form's CD is decreased by 1.2s. This effect can be triggered once every 1s.
C2: Debate ⭐
When Alhaitham generates a Chisel-Light Mirror, his Elemental Mastery will be increased by 50 for 8 seconds, max 4 stacks. Each stack's duration is counted independently. This effect can be triggered even when the maximum number of Chisel-Light Mirrors has been reached.
C3: Negation
Increases the Level of Universality: An Elaboration on Form by 3.
Maximum upgrade level is 15.
C4: Elucidation ⭐
When Particular Field: Fetters of Phenomena is unleashed, the following effects will become active based on the number of Chisel-Light Mirrors consumed and created this time around:
• Each Mirror consumed will increase the Elemental Mastery of all other nearby party members by 30 for 15s.
• Each Mirror generated will grant Alhaitham a 10% Dendro DMG Bonus for 15s.
The pre-existing duration of the aforementioned effects will be cleared if you use Particular Field: Fetters of Phenomena again while they are in effect.
C5: Sagacity
Increases the Level of Particular Field: Fetters of Phenomena by 3.
Maximum upgrade level is 15.
C6: Structuration ⭐
Alhaitham gains the following effects:
• 2 seconds after Particular Field: Fetters of Phenomena is unleashed, he will generate 3 Chisel-Light Mirrors regardless of the number of mirrors consumed.
• If Alhaitham generates Chisel-Light Mirrors when their numbers have already maxed out, his CRIT Rate and CRIT DMG will increase by 10% and 70% respectively for 6s. If this effect is triggered again during its initial duration, the duration remaining will be increased by 6s.
Recommended Weapons
- Light of Foliar Incision (5⭐)*
- Primordial Jade Cutter (5⭐)
- Mistsplitter Reforged (5⭐)
~= Haran Geppaku Futsu (5⭐)
~= Absolution (5⭐)
~=Freedom-Sworn (5⭐) - Wolf-Fang (4⭐)*
~= Iron Sting (4⭐) - Toukabou Shigure (4⭐)*
- The Black Sword (4⭐)
- Harbinger of Dawn (3⭐)*
- Xiphos' Moonlight (4⭐)*
~= Festering Desire (4⭐)

1) Light of Foliar Incision (ATK: 542 • Crit DMG: 88.2%)
CRIT Rate is increased by 4~8%. After Normal Attacks deal Elemental DMG, the Foliar Incision effect will be obtained, increasing DMG dealt by Normal Attacks and Elemental Skills by 120~240% of Elemental Mastery. This effect will disappear after 28 DMG instances or 12s. You can obtain Foliar Incision once every 12s.
Note: This weapon prefers EM sands even in situations with fewer or no Spread procs such as in Bloom/Burgeon/Hyperbloom teams.
2) Primordial Jade Cutter (ATK: 542 • Crit Rate: 44.1%)
HP increased by 20~40%. Additionally, provides an ATK Bonus based on 1.2~2.4% of the wielder's Max HP.
3) Mistsplitter Reforged (ATK: 674 • Crit DMG: 44.1%)
Gain a 12~24% Elemental DMG Bonus for all elements and receive the might of the Mistsplitter's Emblem. At stack levels 1/2/3, Mistsplitter's Emblem provides a 8/16/28~16/32/56% Elemental DMG Bonus for the character's Elemental Type. The character will obtain 1 stack of Mistsplitter's Emblem in each of the following scenarios: Normal Attack deals Elemental DMG (stack lasts 5s), casting Elemental Burst (stack lasts 10s); Energy is less than 100% (stack disappears when Energy is full). Each stack's duration is calculated independently.
4) Wolf-Fang (ATK: 510 • Crit Rate: 27.6%)
DMG dealt by Elemental Skill and Elemental Burst is increased by 16~32%. When an Elemental Skill hits an opponent, its CRIT Rate will be increased by 2~4%. When an Elemental Burst hits an opponent, its CRIT Rate will be increased by 2~4%. Both of these effects last 10s separately, have 4 max stacks, and can be triggered once every 0.1s.
Note: At [R5], this weapon performs similarly to Haran Geppaku Futsu and Mistsplitter Reforged.

5) Toukabou Shigure (ATK: 510 • Elemental Mastery: 165)
After an attack hits opponents, it will inflict an instance of Cursed Parasol upon one of them for 10s. This effect can be triggered once every 15s. If this opponent is defeated during Cursed Parasol's duration, Cursed Parasol's CD will be refreshed immediately. The character wielding this weapon will deal 16~32% more DMG to the opponent affected by Cursed Parasol.
Note: This ranking assumes single-target situations, in AoE situations it starts falling behind weapons such as Iron Sting and Blackcliff Longsword.

6) The Black Sword (ATK: 510 • Crit Rate: 27.6%)
Increases DMG dealt by Normal and Charged Attacks by 20~40%.
Additionally, regenerates 60~100% of ATK as HP when Normal and Charged Attacks score a CRIT Hit. This effect can occur once every 5s.
7) Harbinger of Dawn (ATK: 401 • Crit DMG: 46.9%)
When HP is above 90%, increases CRIT Rate by 14~28%.
Note: If you can maintain near perfect uptime on its passive this weapon will perform similarly to weapons like Haran Geppaku Futsu.

8) Xiphos' Moonlight (ATK: 510 • Elemental Mastery: 165)
The following effect will trigger every 10s: The equipping character will gain 0.036~0.072% Energy Recharge for each point of Elemental Mastery they possess for 12s, with nearby party members gaining 30% of this buff for the same duration. Multiple instances of this weapon can allow this buff to stack. This effect will still trigger even if the character is not on the field.
Note: These weapons can perform similarly to The Black Sword in teams where you have higher Energy Recharge requirements or want to burst every rotation.
Recommended Artifacts
- Gilded Dreams (4)*
- Deepwood Memories (2) / Emblem of Severed Fate (2) / +80 EM set (2)
[Choose Two]* - Marechaussee Hunter (4)
- Deepwood Memories (4)

1) Gilded Dreams
2-Piece Bonus: Increases Elemental Mastery by 80.
4-Piece Bonus: Within 8s of triggering an Elemental Reaction, the character equipping this will obtain buffs based on the Elemental Type of the other party members. ATK is increased by 14% for each party member whose Elemental Type is the same as the equipping character, and Elemental Mastery is increased by 50 for every party member with a different Elemental Type. Each of the aforementioned buffs will count up to 3 characters. This effect can be triggered once every 8s. The character who equips this can still trigger its effects when not on the field.

2) Deepwood Memories (2) / Emblem of Severed Fate (2) / +80 EM set (2)
[Choose Two]*
Note: These split set options can actually perform similarly to Gilded Dreams (4) or even surpass it in situations where you have higher Energy Recharge requirements or want to burst every rotation. Or even if they just have better substat rolls on them.

3) Marechaussee Hunter
2-Piece Bonus: Normal and Charged Attack DMG +15%.
4-Piece Bonus: When current HP increases or decreases, CRIT Rate will be increased by 12% for 5s. Max 3 stacks.
Note: Best-in-Slot option (for personal damage) in Furina teams or Nilou Bloom teams without Kirara.

4) Deepwood Memories
2-Piece Bonus: Dendro DMG Bonus +15%
4-Piece Bonus: After Elemental Skills or Bursts hit opponents, the targets' Dendro RES will be decreased by 30% for 8s. This effect can be triggered even if the equipping character is not on the field.
Main & Sub Stats Priority
| Artifact Main Stats | Artifact Sub Stats |
|---|---|
| Sands - Elemental Mastery / ATK% Goblet - Dendro DMG Circlet - Crit Rate / DMG Regarding Mainstat Priorities: Usually in Quicken/Quickbloom teams Alhaitham leans towards Elemental Mastery sands (roughly 5% or so difference usually). But in Bloom/Burgeon/Hyperbloom teams with, fewer to no Spread reactions, he skews more towards ATK% sands (unless you're using Light of Foliar Incision). Or even Energy Recharge sands if you're trying to burst every rotation for increased Dendro seed generation in those teams. | Energy Recharge* (Until Requirement) Crit Rate / DMG Elemental Mastery** ATK% Certain quicken teams can run little to no Energy Recharge and simply burst every other rotation without a dps loss ** If you're running under 200 Elemental Mastery this substat has priority over Crit |
Team Compositions
Quicken Team
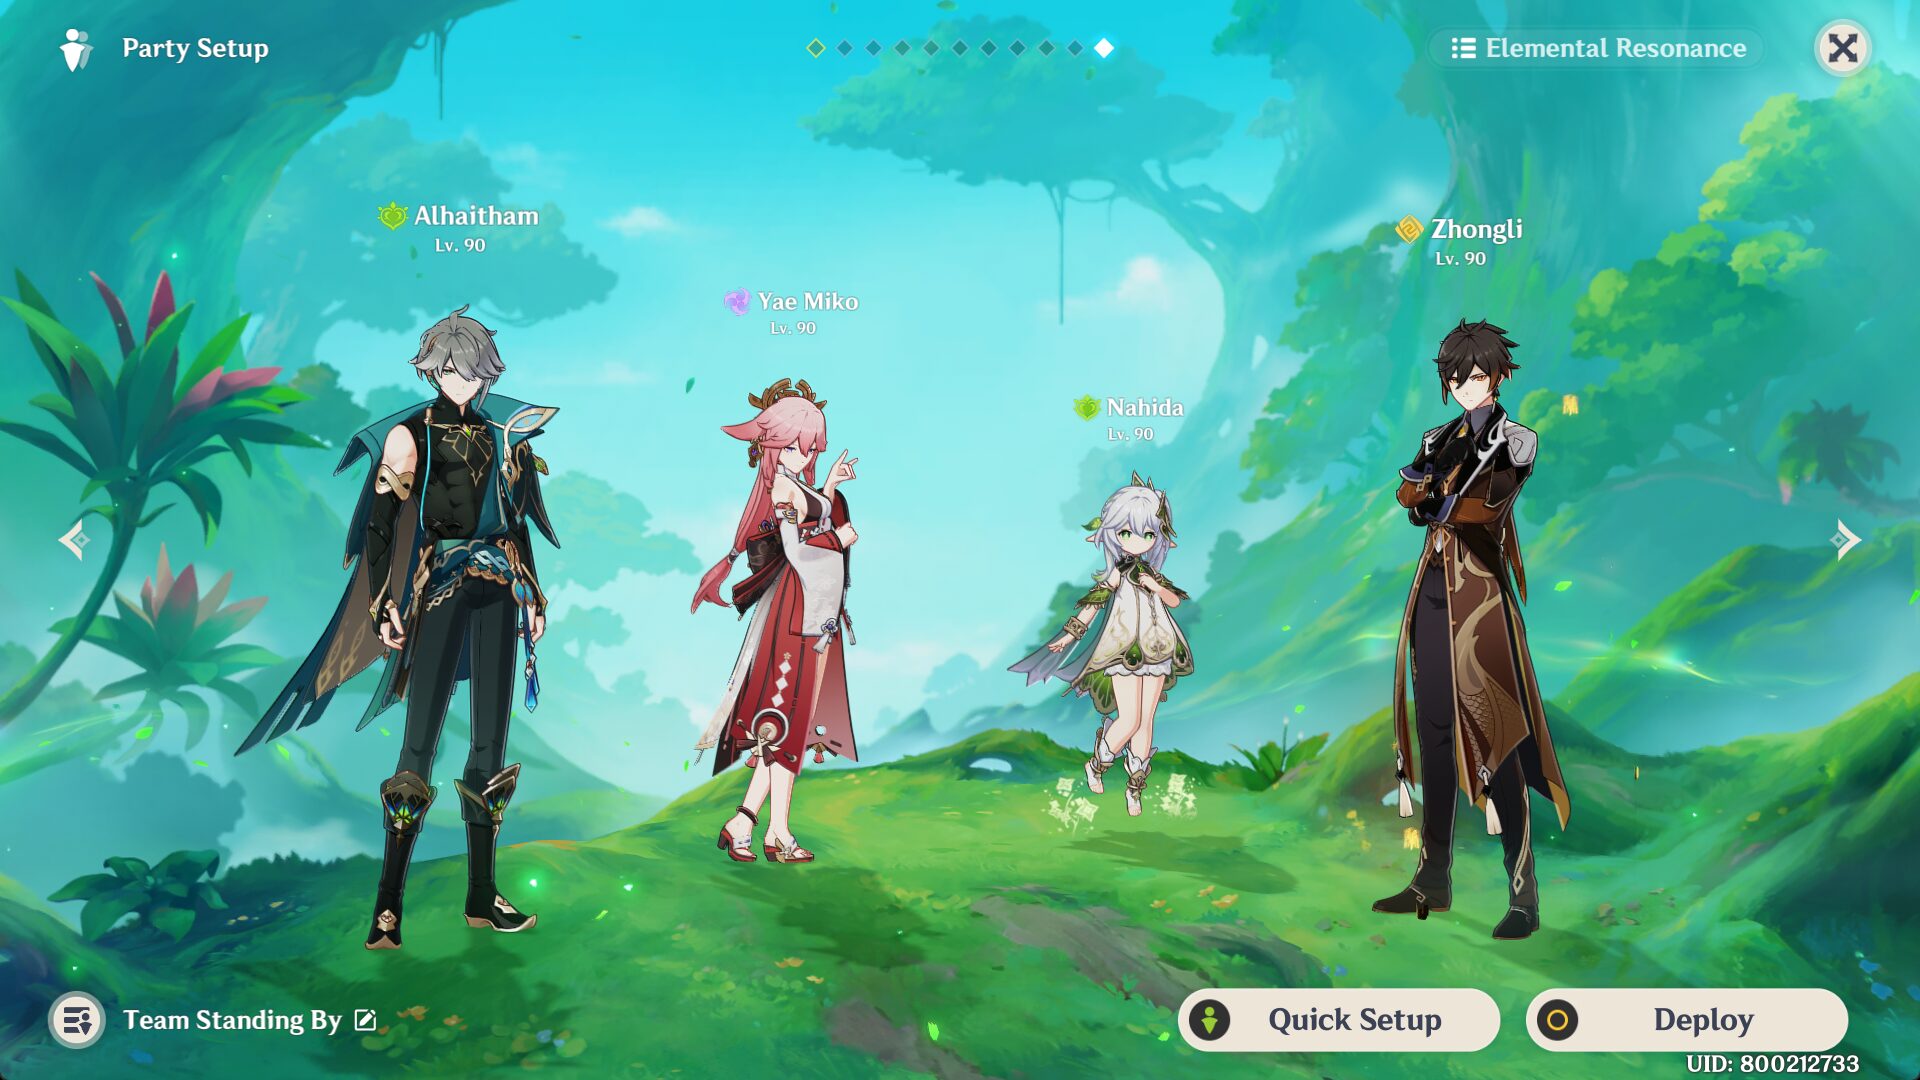
Alhaitham: Main DPS
Yae Miko / Fischl: Electro off-field application
Nahida: Dendro off-field application
Zhongli / Kirara / Baizhu: Shielder + Elemental RES Shredder for Zhongli
Hyperbloom Team
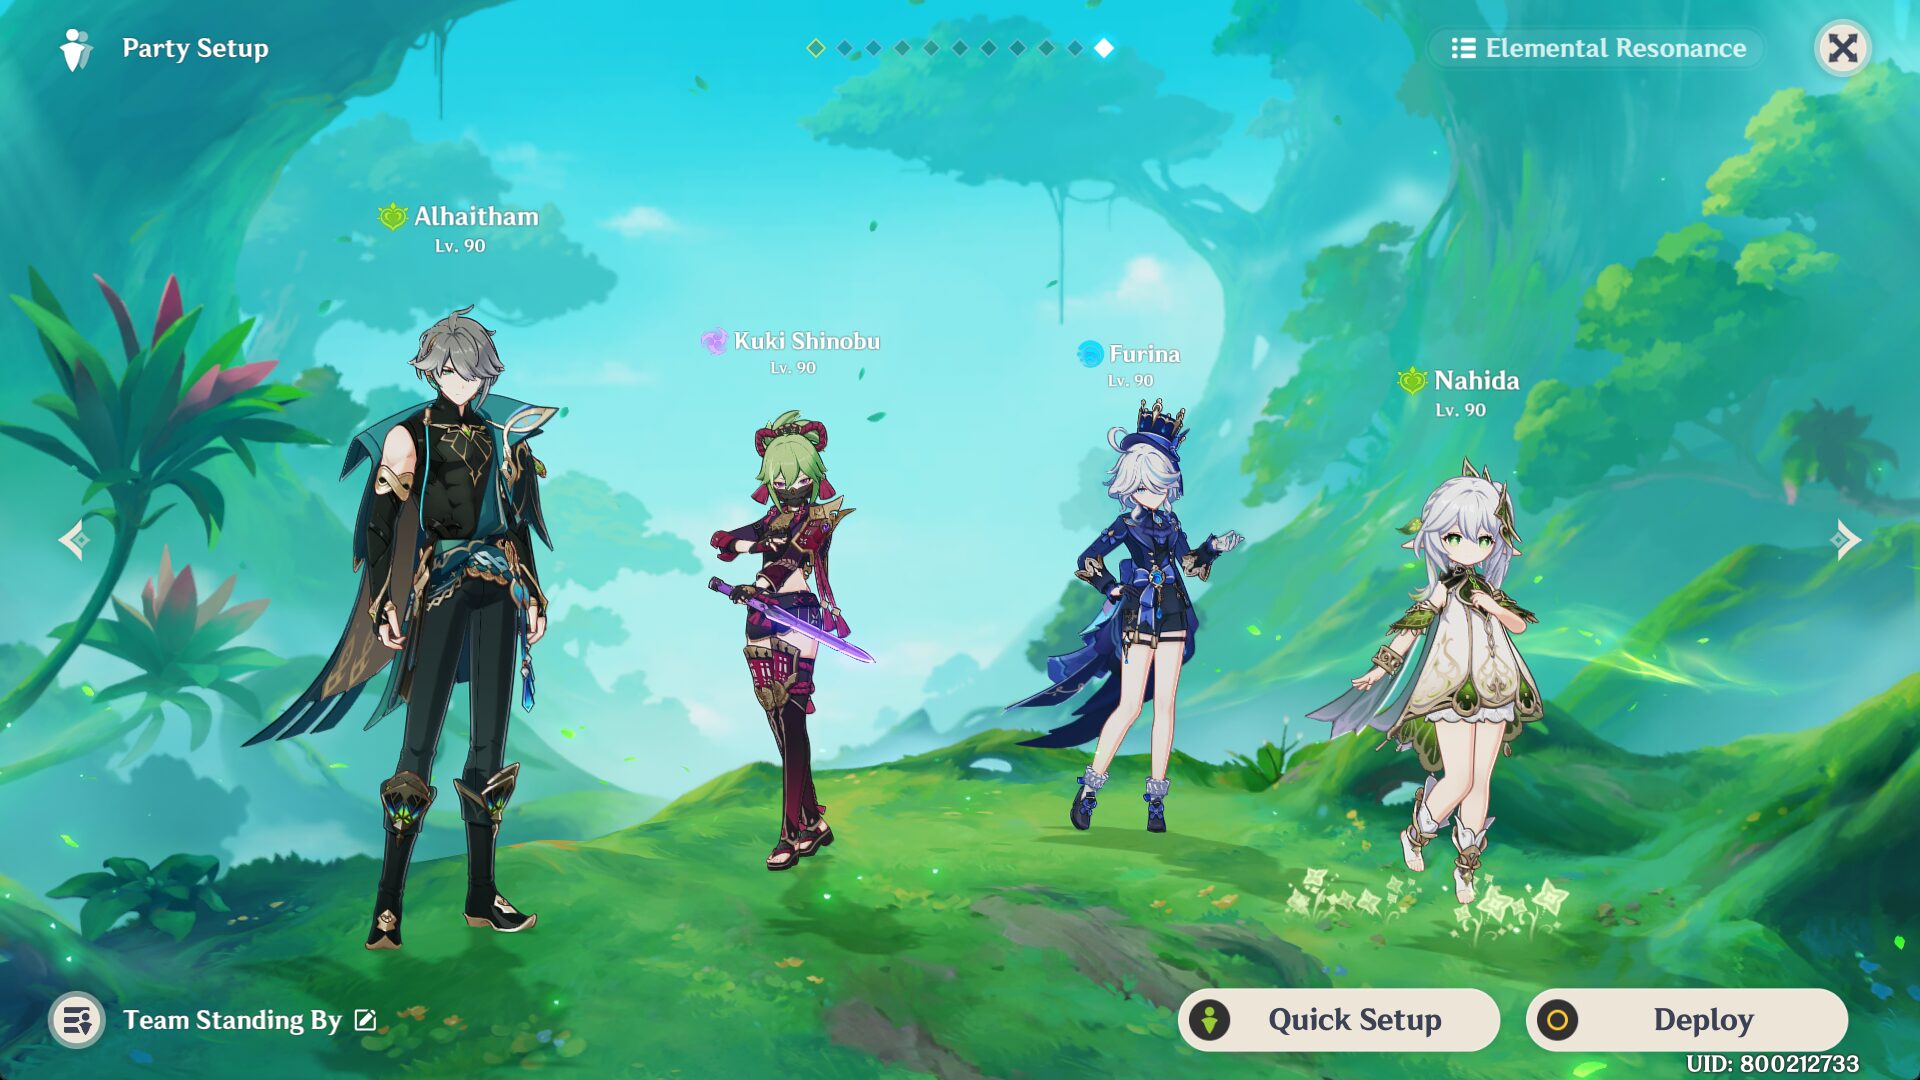
Alhaitham: Main DPS
Kuki Shinobu: Electro off-field application + Healer + Hyperbloom trigger
Furina: Hydro off-field application
Nahida: Dendro off-field application
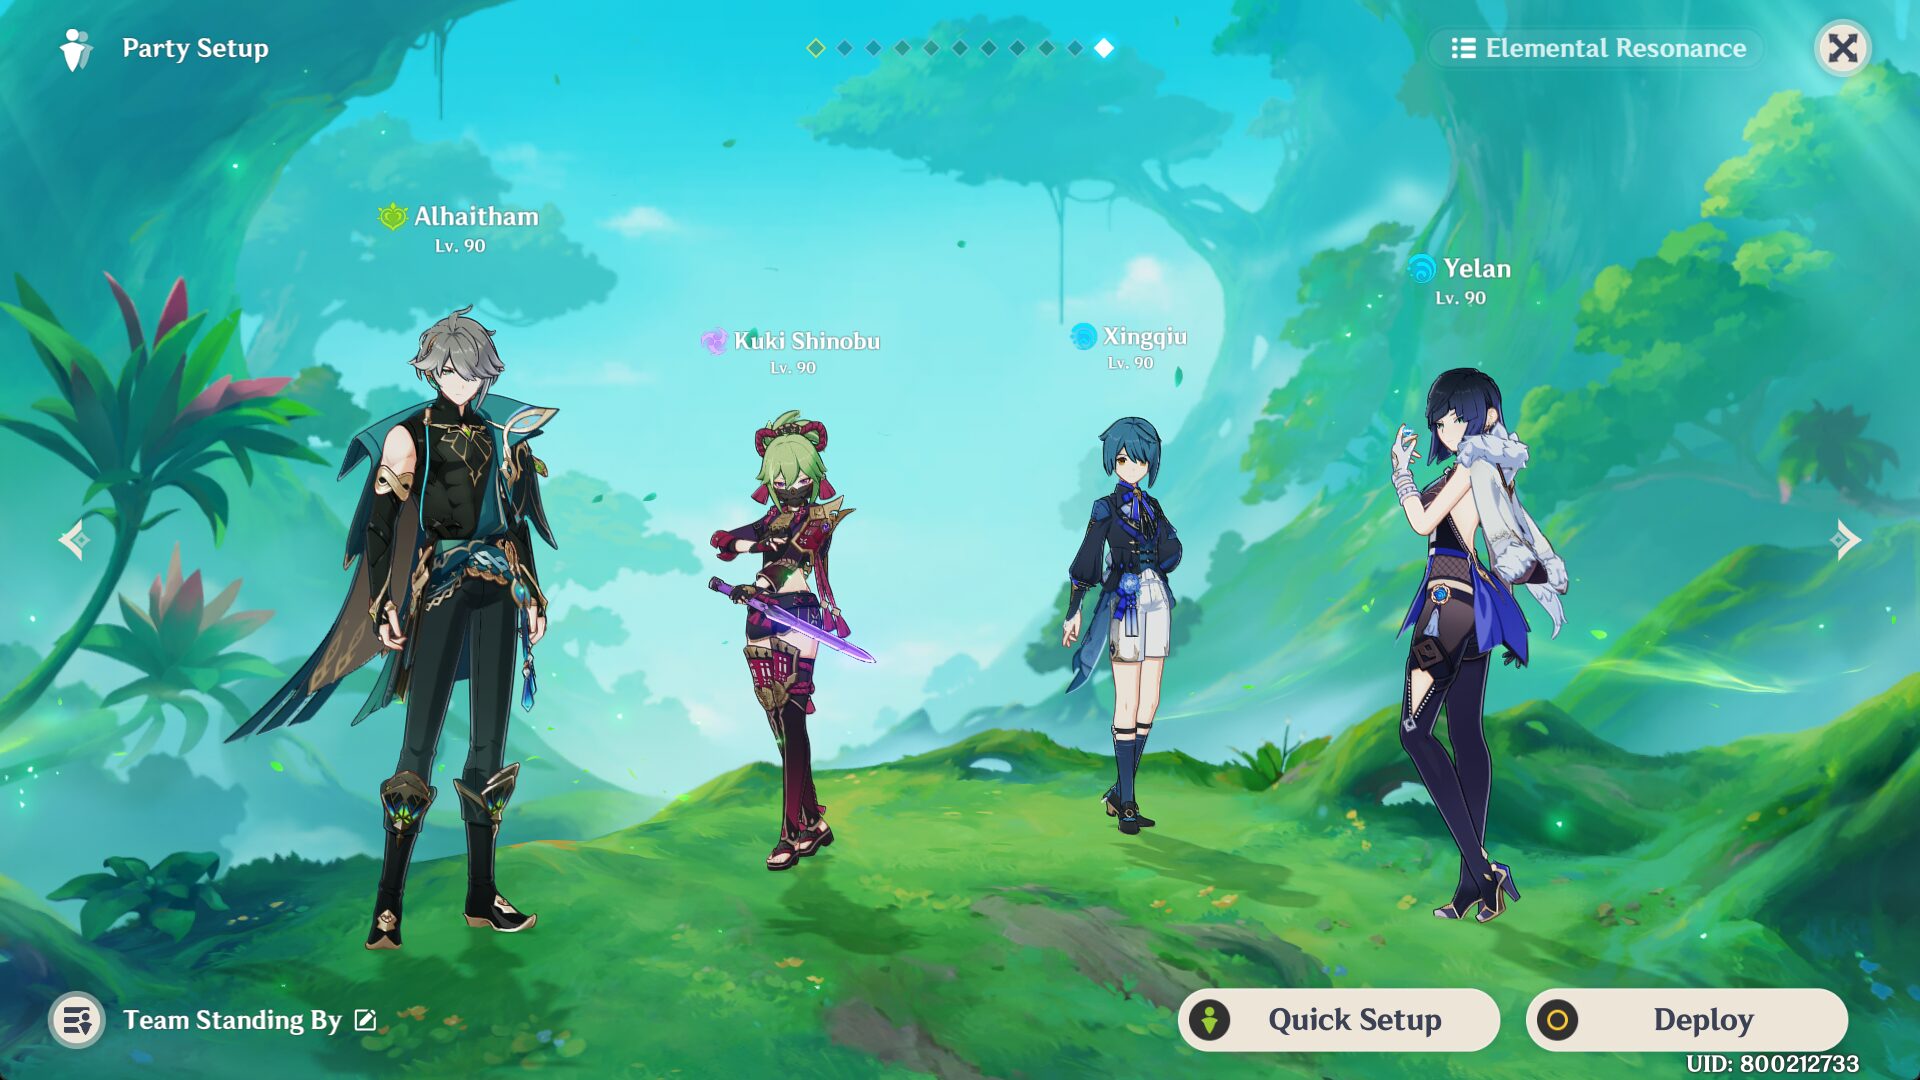
OR THE USUAL
Alhaitham: Main DPS
Kuki Shinobu: Electro off-field application + Healer + Hyperbloom trigger
Xingqiu: Hydro off-field application
Yelan: Hydro off-field application
Burgeon Team
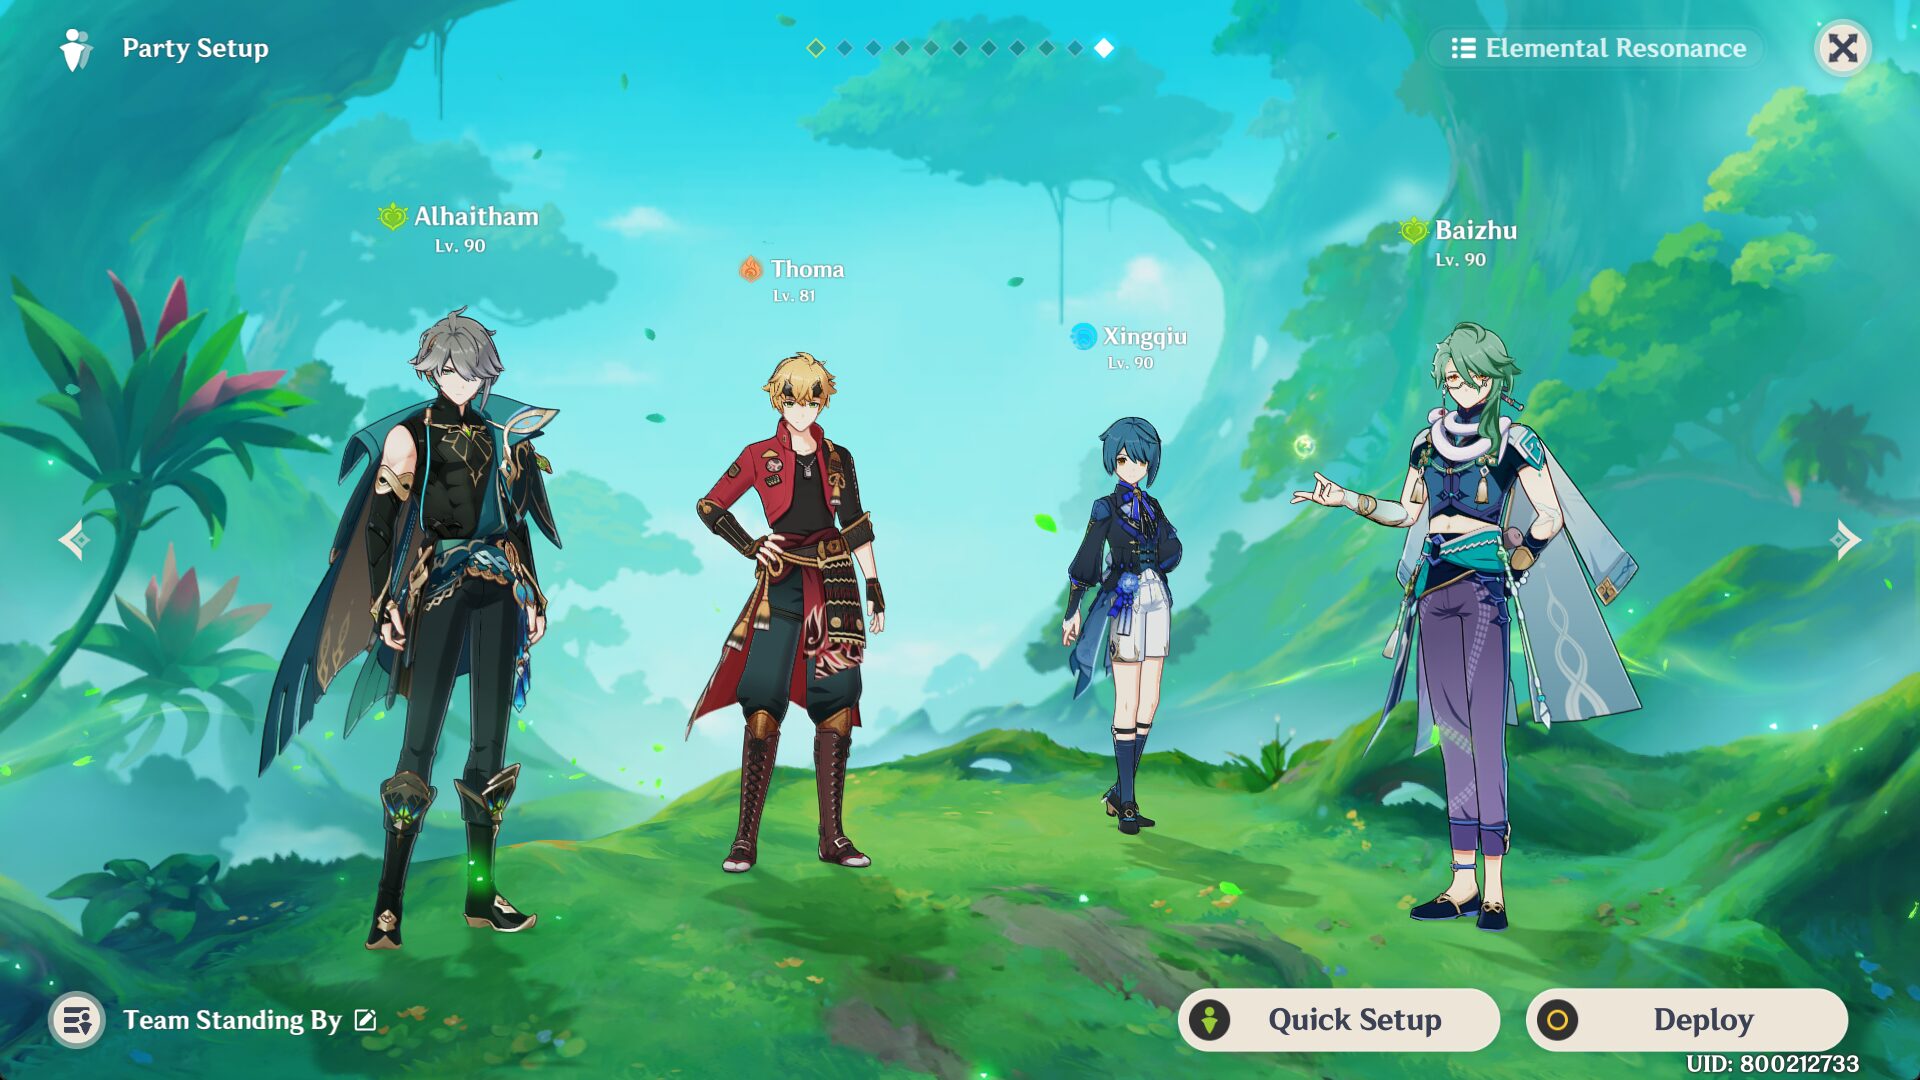
Alhaitham: Main DPS
Thoma: Pyro off-field application + Shielder + Burgeon trigger
Xingqiu / Yelan: Hydro off-field application
Baizhu / Kokomi: Healer/Shielder
Bounty Bloom Team
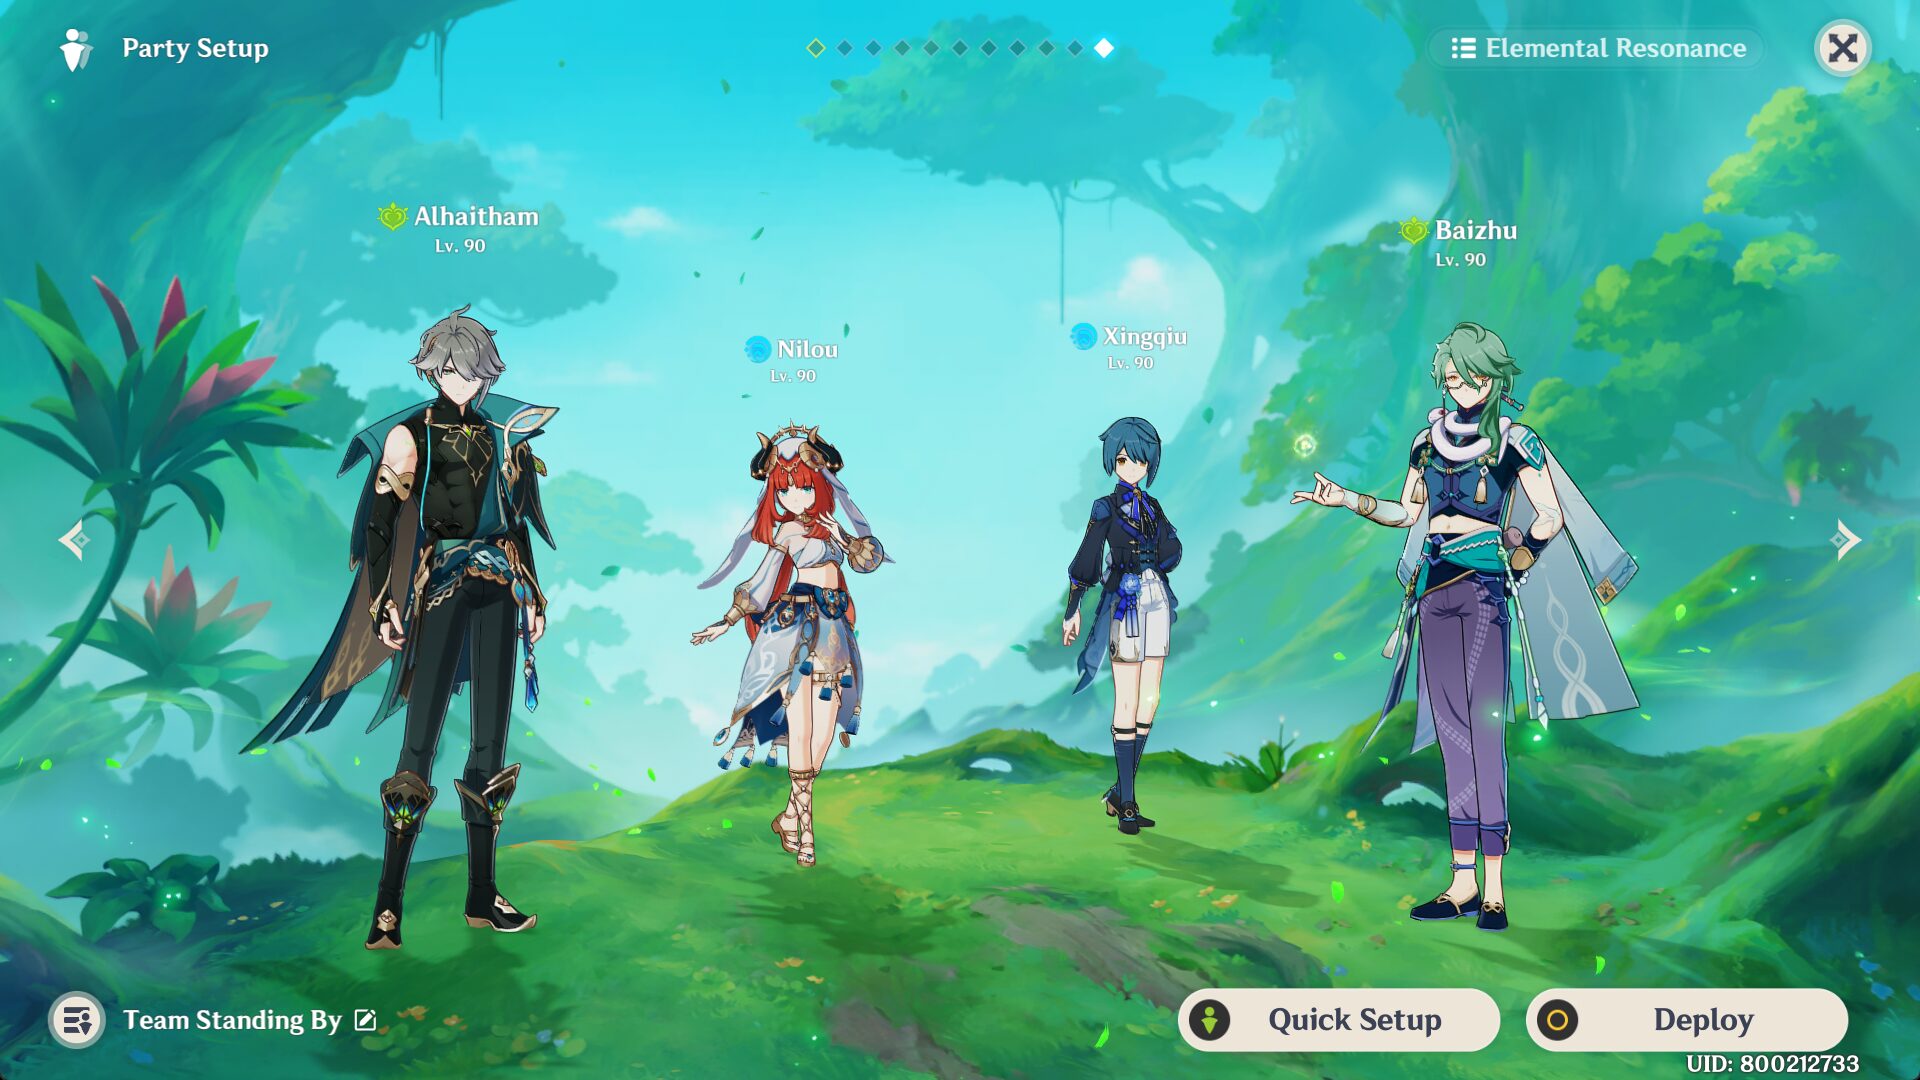
Alhaitham: Main DPS
Nilou: Hydro to trigger Bounty Bloom (not replaceable)
Xingqiu / Yelan: Hydro off-field application
Baizhu / Kirara / Yaoyao: Healer/Shielder