Table of Contents

Faruzan is a support character who can increase Anemo DMG dealt by party members. Faruzan's Elemental Skill enhances her next Aiked Shot, and this enhanced shot applies a "Pressurized Collapse" effect to characters, monsters, or the location hit. This creates a vortex that pulls in enemies and deals damage to them.
With her Elemental Burst, Faruzan deploy a "Dazzling Polyhedron" that moves along a certain path, and provide and Anemo Damage Bonus to all nearby team members. It also releases a Whirleind Pulse periodically and decreases Anemo Resistance of nearby opponents.
This guide is based on the Community Character Builds by the Genshin Helper Team.
Skills Overview
Normal Attack: Parthian Shot

Normal Attack
Performs up to 4 consecutive shots with a bow.
Charged Attack
Performs a more precise Aimed Shot with increased DMG.
While aiming, mighty winds will accumulate on the arrowhead. A fully charged wind arrow will deal Anemo DMG.
Plunging Attack
Fires off a shower of arrows in mid-air before falling and striking the ground, hitting opponents along the path and dealing AoE DMG upon impact.
Elemental Skill: Wind Realm of Nasamjnin

Faruzan deploys a polyhedron that deals AoE Anemo DMG to nearby opponents. She will also enter the Manifest Gale state.
While in the Manifest Gale state, Faruzan's next fully charged shot will consume this state and will become a Hurricane Arrow that contains high-pressure currents. This arrow deals Anemo DMG based on the DMG of a fully charged Aimed Shot from "Normal Attack: Parthian Shot."
Manifest Gale Duration: 18 seconds
Cooldown: 6 seconds
Pressurized Collapse
The Hurricane Arrow will apply a Pressurized Collapse effect to the opponent or character hit. This effect will be removed after a short delay, creating a vortex that deals AoE Anemo DMG and pulls nearby objects and opponents in. If the Hurricane Arrow does not hit any opponent or character, it will create a Pressurized Collapse effect at its point of impact.
The vortex DMG is considered Elemental Skill DMG.
Elemental Burst: The Wind's Secret Ways
Faruzan deploys a Dazzling Polyhedron that unleashes a Whirlwind Pulse and deals AoE Anemo DMG.
While the Dazzling Polyhedron persists, it will continuously move along a triangular path. Once it reaches each corner of that triangular path, it will unleash 1 more Whirlwind Pulse.
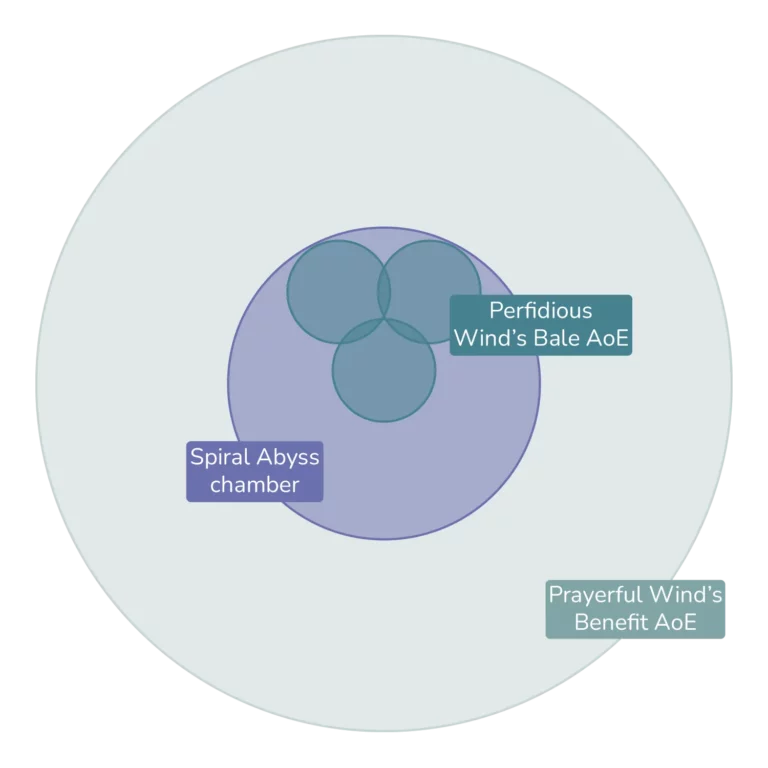
Whirlwind Pulse
• When the Whirlwind Pulse is unleashed, it will apply Perfidious Wind's Bale to nearby opponents, decreasing their Anemo RES.
• The Whirlwind Pulse will also apply Prayerful Wind's Benefit to all nearby party members when it is unleashed, granting them an Anemo DMG Bonus.
Ascension 1: Impetuous Flow
When Faruzan is in the Manifest Gale state created by Wind Realm of Nasamjnin, the amount of time taken to charge a shot is decreased by 60%, and she can apply The Wind's Secret Ways' Perfidious Wind's Bale to opponents who are hit by the vortex created by Pressurized Collapse.
Ascension 4: Lost Wisdom of the Seven Caverns
When characters affected by Elemental Burst's Prayerful Wind's Gift deal Anemo DMG using Normal, Charged, Plunging Attacks, Elemental Skills, or Elemental Bursts to opponents, they will gain the Hurricane Guard effect: This DMG will be increased based on 32% of Faruzan's Base ATK. 1 instance of Hurricane Guard can occur once every 0.8s. This DMG Bonus will be cleared after Prayerful Wind's Benefit expires or after the effect is triggered once.
Passive Talent: Tomes Light the Path
Gains 25% more rewards when dispatched on a Sumeru Expedition for 20 hours.
TLDR / Rotation

(Highly recommended in most scenarios) For funneling particles to Faruzan:
Skill --> Charged Shot --> Burst
By using the Skill and Charged Shot right before Burst allows Faruzan to gain the particles created by the Pressurized Collapse effect.

For funneling particles to other units:
Skill --> Burst --> Charged Shot
In contrast, if you use Charged Shot to activate the Pressurized Collapse right before swapping characters, this allows your next character to gain the particles created.
At C6 bear in mind, that the Charged shot portion of the rotation no longer becomes necessary since your burst will start activating the Pressurized Collapses instead.
Talent Priorities
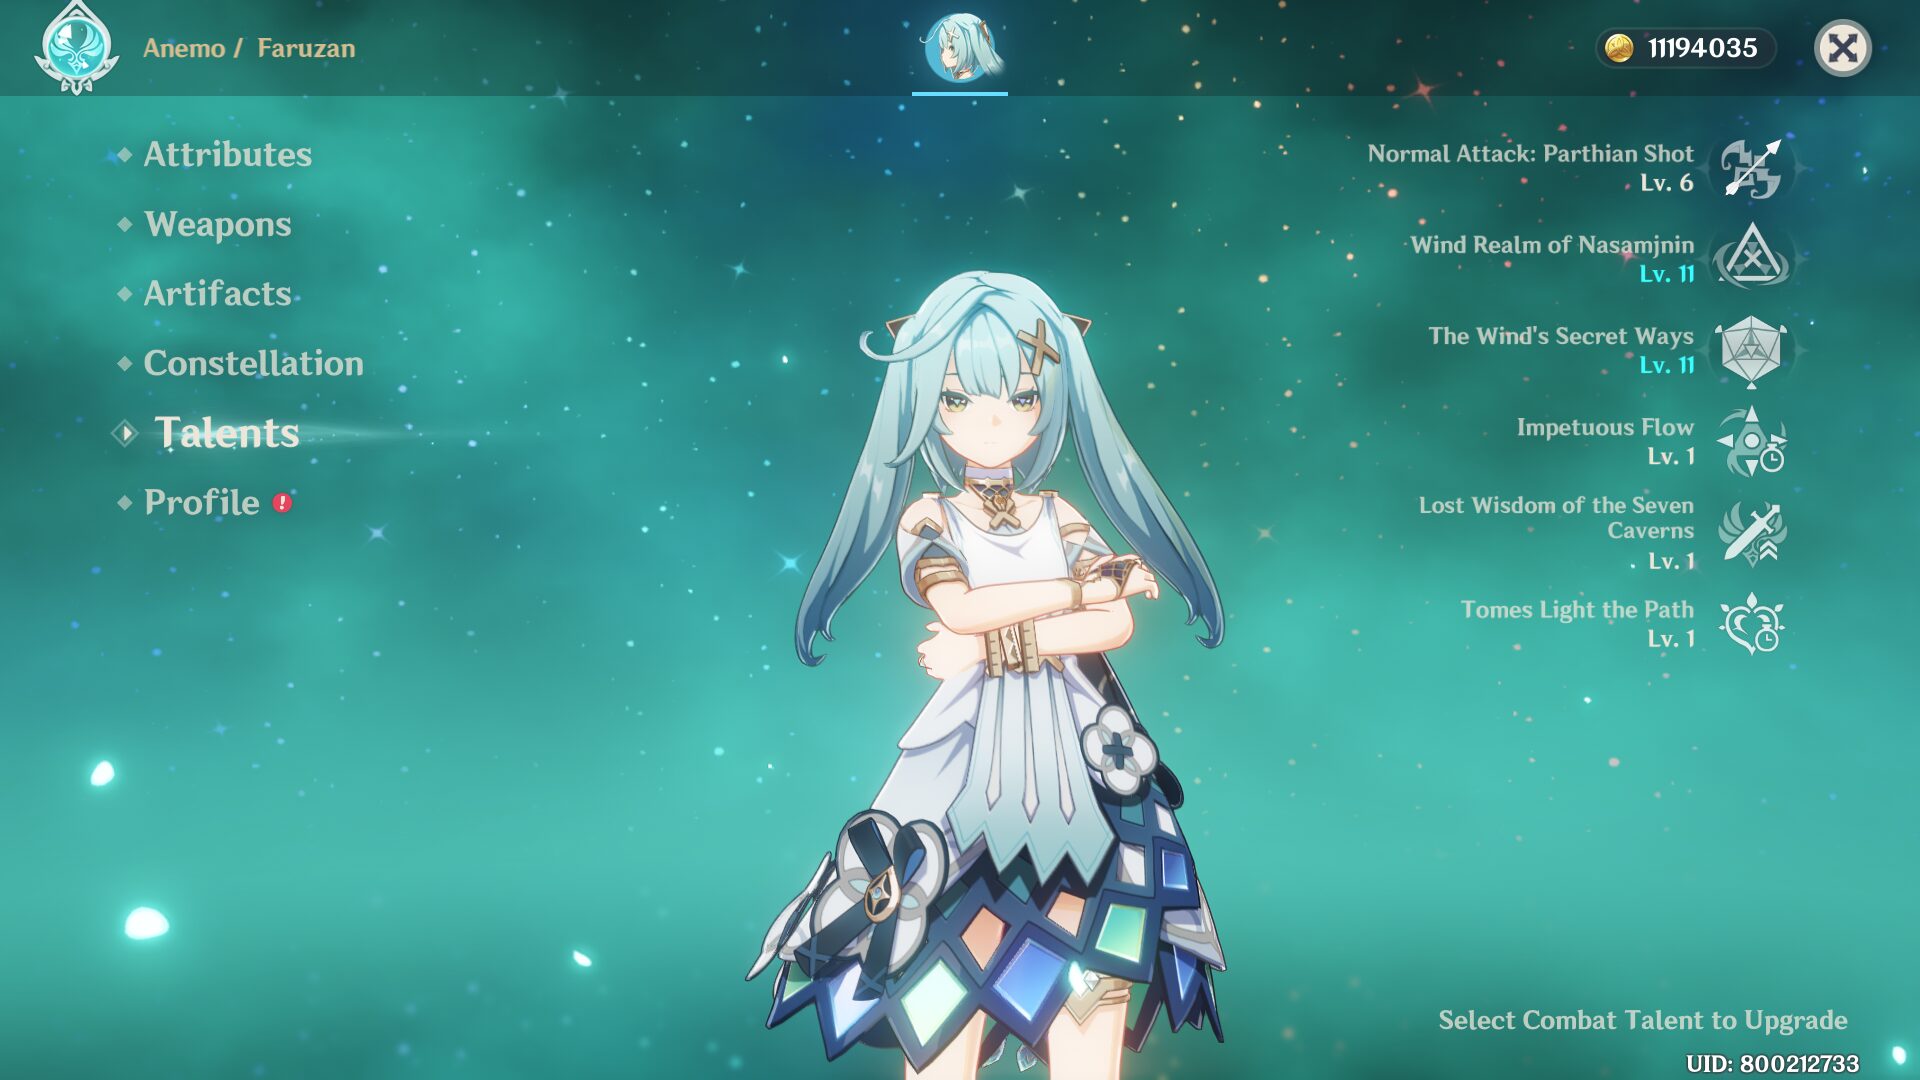
Burst > Skill > Normal Attack
Constellations

Best Constellations: C2, C4 & C6
C1: Truth by Any Means
Faruzan can fire off a maximum of 2 Hurricane Arrows using fully charged Aimed Shots while under the effect of a single Manifest Gale created by Wind Realm of Nasamjnin.
C2: Overzealous Intellect ⭐
The duration of the Dazzling Polyhedron created by The Wind's Secret Ways is increased by 6s.
C3: Spirit-Orchard Stroll
Increases the Level of Wind Realm of Nasamjnin by 3.
Maximum upgrade level is 15.
C4: Divine Comprehension ⭐
The vortex created by Pressurized Collapses will restore Energy to Faruzan based on the number of opponents hit: If it hits 1 opponent, it will restore 2 Energy for Faruzan. Each additional opponent hit will restore 0.5 more Energy for Faruzan.
A maximum of 4 Energy can be restored to her per vortex.
C5: Wonderland of Rumination
Increases the Level of The Wind's Secret Ways by 3.
Maximum upgrade level is 15.
C6: The Wondrous Path of Truth ⭐
Characters affected by The Wind's Secret Ways' Prayerful Wind's Benefit have 40% increased CRIT DMG when they deal Anemo DMG. When the active character deals DMG while affected by Prayerful Wind's Benefit, they will apply Pressurized Collapse to the opponent damaged. This effect can be triggered once every 3s. This CD is shared between all party members.
Recommended Weapons
- Favonius Warbow (4⭐)
- Elegy for the End (5⭐)*
- End of the Line (4⭐)
- Fading Twilight (4⭐)
~= Sacrificial Bow (4⭐)*

1) Favonius Warbow (ATK: 454 • Energy Recharge: 61.3%)
CRIT Hits have a 60/70/80/90/100% chance to generate a small amount of Elemental Particles, which will regenerate 6 Energy for the character. Can only occur once every 12/10.5/9/7.5/6s.

2) Elegy for the End (ATK: 608 • Energy Recharge: 55.1%)
A part of the "Millennial Movement" that wanders amidst the winds. Increases Elemental Mastery by 60/75/90/105/120. When the Elemental Skills or Elemental Bursts of the character wielding this weapon hit opponents, that character gains a Sigil of Remembrance.
This effect can be triggered once every 0.2s and can be triggered even if said character is not on the field. When you possess 4 Sigils of Remembrance, all of them will be consumed and all nearby party members will obtain the "Millennial Movement: Farewell Song" effect for 12s. "Millennial Movement: Farewell Song" increases Elemental Mastery by 100/125/150/175/200 and increases ATK by 20/25/30/35/40%. Once this effect is triggered, you will not gain Sigils of Remembrance for 20s. Of the many effects of the "Millennial Movement," buffs of the same type will not stack.
Note: Usually only a better option at higher constellation levels such as [C6] where her energy needs can be met without Favonius passive particles.

3) End of the Line (ATK: 510 • Energy Recharge: 45.9%)
Triggers the Flowrider effect after using an Elemental Skill, dealing 80/100/120/140/160% ATK as AoE DMG upon hitting an opponent with an attack. Flowrider will be removed after 15s or after causing 3 instances of AoE DMG. Only 1 instance of AoE DMG can be caused every 2s in this way. Flowrider can be triggered once every 12s.

4) Fading Twilight (ATK: 565 • Energy Recharge: 30.6%)
Has three states, Evengleam, Afterglow, and Dawnblaze, which increase DMG dealt by (6/10/14)/(7.5/12.5/17.5)/(9/15/21)/(10.5/17.5/24.5)(12/20/28)% respectively. When attacks hit opponents, this weapon will switch to the next state. This weapon can change states once every 7s. The character equipping this weapon can still trigger the state switch while not on the field.
Recommended Artifacts
- Viridescent Venerer (4)
~= Noblesse Oblige (4)* - Emblem of Severed Fate (4)*
- Golden Troupe (4)*
~= Tenacity of the Millelith (4)* - Emblem of Severed Fate (2) / +20% ER set (2)

1) Viridescent Venerer
2-Piece Bonus: Anemo DMG Bonus +15%
4-Piece Bonus: Increases Swirl DMG by 60%. Decreases opponent's Elemental RES to the element infused in the Swirl by 40% for 10s.

2) Emblem of Severed Fate
2-Piece Bonus: Energy Recharge +20%
4-Piece Bonus: Increases Elemental Burst DMG by 25% of Energy Recharge. A maximum of 75% bonus DMG can be obtained in this way.
Note: This set will give Faruzan her best personal damage output, assuming the team is already running Viridescent Venerer (4). Also if you're willing to invest more time farming substats it can potentially give you more Energy Recharge than running The Exile (2).

3) Golden Troupe
2-Piece Bonus: Increases Elemental Skill DMG by 20%.
4-Piece Bonus: Increases Elemental Skill DMG by 25%. Additionally, when not on the field, Elemental Skill DMG will be further increased by 25%. This effect will be cleared 2s after taking the field.
Note: This set is better than Emblem of Severed Fate (4) if Faruzan is C6 because of the pressurized collapse damage.

4) Emblem of Severed Fate (2) / +20% ER set (2)
Main & Sub Stats Priority
| Artifact Main Stats | Artifact Sub Stats |
|---|---|
| Sands - Energy Recharge Goblet - Anemo DMG Circlet - Crit Rate / DMG | Energy Recharge Crit Rate* Crit DMG ATK% Flat ATK *Only assumes higher priority than Crit DMG when using Favonius Warbow |
Team Compositions
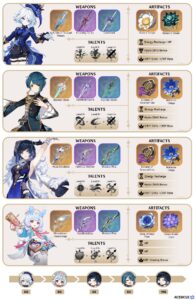
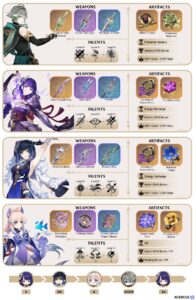
Anemo Hypercarry Team 1

Faruzan: Buffer
Wanderer: Main DPS
Yun Jin: Normal ATK Buffer
Bennett: Healer + Buffer
Anemo Hypercarry Team 2

Faruzan: Buffer
Xiao: Main DPS
Xianyun: Plunging ATK Buffer
Furina: Sub-DPS + Buffer

Sora
Articles: 233More Articles

Genshin Impact Codes – July 2024
Sigewinne Team Compositions

Genshin Impact: Version 4.7 Tier List (July 2024)

Genshin Impact: Sigewinne Quick Character Guide
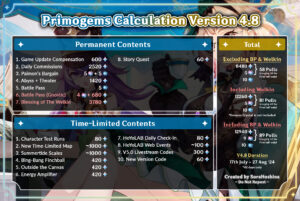
Genshin Impact: Primogems Calculation Version 4.8
Arlecchino Team Compositions

Baizhu Team Compositions
Wanderer Team Compositions
Alhaitham Team Compositions

Genshin Impact: Spiral Abyss V4.7 Floor 12 Complete Guide

Genshin Impact: Spiral Abyss V4.7 Floor 11 Complete Guide

Genshin Impact: Thoma Quick Character Guide

Genshin Impact: Sethos Quick Character Guide

Genshin Impact: Alhaitham Quick Character Guide

Genshin Impact: Clorinde Quick Character Guide

Genshin Impact: Primogems Calculation Version 4.7

Genshin Impact 4.7 Special Program Livestream Overview

3 New Redemption Codes from 4.7 Special Program

Genshin Impact 4.7 Livestream Countdown