Table of Contents
Raiden Shogun is a DPS slash support character who can enhance her party's Elemental Burst DMG.
With her Elemental Skill, she can increase the Elemental Burst DMG of all party members and trigger coordinated attacks. After unleashing an Elemental Burst, the Raiden Shogun will wield her tachi in battle for a short duration and restore Elemental Energy of all party members.
This guide is based on the Community Character Builds by the Genshin Helper Team.
Skills Overview
Normal Attack: Origin
Normal Attack
Performs up to 5 consecutive spear strikes.
Charged Attack
Consumes a certain amount of Stamina to perform an upward slash.
Plunging Attack
Plunges from mid-air to strike the ground below, damaging opponents along the path and dealing AoE DMG upon impact.
Elemental Skill: Transcendence: Baleful Omen

The Raiden Shogun unveils a shard of her Euthymia, dealing Electro DMG to nearby opponents, and granting nearby party members the Eye of Stormy Judgment.
Eye of Stormy Judgment
- When characters with this buff attack and deal DMG to opponents, the Eye will unleash a coordinated attack, dealing AoE Electro DMG at the opponent's position.
- Characters who gain the Eye of Stormy Judgment will have their Elemental Burst DMG increased based on the Energy Cost of the Elemental Burst during the Eye's duration.
The Eye can initiate one coordinated attack every 0.9s per party.
Coordinated attacks generated by characters not controlled by you deal 20% of the normal DMG.
Cooldown: 10 seconds
Elemental Burst: Secret Art: Musou Shinsetsu

Gathering truths unnumbered and wishes uncounted, the Raiden Shogun unleashes the Musou no Hitotachi and deals AoE Electro DMG, using Musou Isshin in combat for a certain duration afterward. The DMG dealt by Musou no Hitotachi and Musou Isshin's attacks will be increased based on the number of Chakra Desiderata's Resolve stacks consumed when this skill is used.
Musou Isshin Duration: 7 seconds
Cooldown: 18 seconds
Energy Cost: 90
Musou Isshin
While in this state, the Raiden Shogun will wield her tachi in battle, while her Normal, Charged, and Plunging Attacks will be infused with Electro DMG, which cannot be overridden. When such attacks hit opponents, she will regenerate Energy for all nearby party members. Energy can be restored this way once every 1s, and this effect can be triggered 5 times throughout this skill's duration.
While in this state, the Raiden Shogun's resistance to interruption is increased, and she is immune to Electro-Charged reaction DMG.
While Musou Isshin is active, the Raiden Shogun's Normal, Charged, and Plunging Attack DMG will be considered Elemental Burst DMG.
The effects of Musou Isshin will be cleared when the Raiden Shogun leaves the field.

Chakra Desiderata
When nearby party members (excluding the Raiden Shogun herself) use their Elemental Bursts, the Raiden Shogun will build up Resolve stacks based on the Energy Cost of these Elemental Bursts.
The maximum number of Resolve stacks is 60.
The Resolve gained by Chakra Desiderata will be cleared 300s after the Raiden Shogun leaves the field.
Ascension 1: Wishes Unnumbered
When nearby party members gain Elemental Orbs or Particles, Chakra Desiderata gains 2 Resolve stacks.
This effect can occur once every 3s.
Ascension 4: Enlightened One
Each 1% above 100% Energy Recharge that the Raiden Shogun possesses grants her:
0.6% greater Energy restoration from Musou Isshin
0.4% Electro DMG Bonus.
Passive Talent: All-Preserver
Mora expended when ascending Swords and Polearms is decreased by 50%.
Talent Priorities

Hyperbloom: Skill only
DPS: Burst > Skill
*Typically Raiden only uses her Skill for Hyperbloom, so leveling Burst is not necessary.
Constellations

Best Constellations: C2, C3, C4 & C6
C1: Ominous Inscription
Chakra Desiderata will gather Resolve even faster. When Electro characters use their Elemental Bursts, the Resolve gained is increased by 80%. When characters of other Elemental Types use their Elemental Bursts, the Resolve gained is increased by 20%.
C2: Steelbreaker
While using Musou no Hitotachi and in the Musou Isshin state applied by Secret Art: Musou Shinsetsu, the Raiden Shogun's attacks ignore 60% of opponents' DEF.
C3: Shinkage Bygones
Increases the Level of Secret Art: Musou Shinsetsu by 3.
Maximum upgrade level is 15.
C4: Pledge of Propriety
When the Musou Isshin state applied by Secret Art: Musou Shinsetsu expires, all nearby party members (excluding the Raiden Shogun) gain 30% bonus ATK for 10s.
C5: Shogun's Descent
Increases the Level of Transcendence: Baleful Omen by 3.
Maximum upgrade level is 15.
C6: Wishbearer
While in the Musou Isshin state applied by Secret Art: Musou Shinsetsu, attacks by the Raiden Shogun that are considered part of her Elemental Burst will decrease all nearby party members' (but not including the Raiden Shogun herself) Elemental Burst CD by 1s when they hit opponents.
This effect can trigger once every 1s, and can trigger a total of 5 times during the state's duration.
Role 1: Hyperbloom
In this build, Raiden is used as a Hyperbloom trigger unit in a Dendro team. She is one of the best units in the game for this role. Bringing greater energy particle generation, a faster rate of seed triggering, and a team ult buff in exchange for reduced team flexibility compared to another top Hyperbloom triggering unit like Kuki.
In terms of playstyle, Hyperbloom Raiden typically only uses her Skill and then swaps characters. Try to ensure it's always active for Hyperbloom triggering.
Recommended Weapons for Hyperbloom
- Dragon's Bane (4✩)
- Moonpiercer (4✩)
- Kitain Cross Spear (4✩)
1) Dragon's Bane (ATK: 454 • Elemental Mastery: 221)
[Refinement 1] Increases DMG against opponents affected by Hydro or Pyro by 20%.

2) Moonpiercer (ATK: 565 • Elemental Mastery: 110)
[Refinement 5] After triggering Burning, Quicken, Aggravate, Spread, Bloom, Hyperbloom, or Burgeon, a Leaf of Revival will be created around the character for a maximum of 10s. When picked up, the Leaf will grant the character 32% ATK for 12s. Only 1 Leaf can be generated this way every 20s. This effect can still be triggered if the character is not on the field.

3) Kitain Cross Spear (ATK: 565 • Elemental Mastery: 110)
[Refinement 1] Increases Elemental Skill DMG by 6%. After Elemental Skill hits an opponent, the character loses 3 Energy but regenerates 3 Energy every 2s for the next 6s. This effect can occur once every 10s. Can be triggered even when the character is not on the field.
Recommended Artifacts for Hyperbloom
- Flower of Paradise Lost (4)
- Gilded Dreams (4)
- +80 EM set (2) / +80 EM set (2)*

1) Flower of Paradise Lost
2-Piece Bonus: Increases Elemental Mastery by 80.
4-Piece Bonus: The equipping character's Bloom, Hyperbloom, and Burgeon reaction DMG are increased by 40%. Additionally, after the equipping character triggers Bloom, Hyperbloom, or Burgeon, they will gain another 25% bonus to the effect mentioned prior. Each stack of this lasts 10s. Max 4 stacks simultaneously. This effect can only be triggered once per second. The character who equips this can still trigger its effects when not on the field.

2) Gilded Dreams
2-Piece Bonus: Increases Elemental Mastery by 80.
4-Piece Bonus: Within 8s of triggering an Elemental Reaction, the character equipping this will obtain buffs based on the Elemental Type of the other party members. ATK is increased by 14% for each party member whose Elemental Type is the same as the equipping character, and Elemental Mastery is increased by 50 for every party member with a different Elemental Type. Each of the aforementioned buffs will count up to 3 characters. This effect can be triggered once every 8s. The character who equips this can still trigger its effects when not on the field.

3) +80 EM set (2) / +80 EM set (2)*
Note: In a team with one other Electro unit it's only 1 substat roll behind Gilded Dreams (4) (3-4 substat rolls behind in a team with no other Electro units) therefore you can usually just use the set with the most Elemental Mastery substat rolls on it.
| Artifact Main Stats | Artifact Sub Stats |
|---|---|
| Sands - Elemental Mastery Goblet - Elemental Mastery Circlet - Elemental Mastery | Elemental Mastery* ATK% Energy Recharge Crit Rate/ DMG *EM is essentially your only priority |
Role 2: DPS
Raiden's Elemental Burst damage depends on her team's energy consumption before her Burst, and her Burst restores a comfortable amount of energy for her team (which is further amplified by her passive). This is especially convenient for teams that don't conflict with her element and want the energy provision. (i.e. Eula, Electro, National teams, etc.).
Start your rotation with Raiden's Elemental Skill.
Burst combo :
- Burst > N4E + 3N4D (Recommended for general use)
- Burst > 3N3C + N1C (Recommended with Attack Speed)
*N = Normal Attack, C = Charged Attack, D = Dash, E = Elemental Skill
The Attack Speed combo can theoretically be performed without Attack Speed, but with very little room for error.
3N3C + N2C and 4N3C are other potential combos, the former being more difficult to perform and the latter requiring Attack Speed.
Recommended Weapons for DPS
- Engulfing Lightning (5✩)
- Staff of Homa (5✩)
~= Primordial Jade Winged-Spear (5✩)
~= Staff of the Scarlet Sands (5✩)* - Calamity Queller (5✩)
- "The Catch" (4✩) [R5]
~= Skyward Spine (5✩)* - Vortex Vanquisher (5✩)
- Deathmatch (4✩)*
- Wavebreaker's Fin (4✩)*
- Lithic Spear (4✩)*
- Favonius Lance (4✩)*
- Prototype Starglitter (4✩)
This list assumes the average across a variety of buffs.

1) Engulfing Lightning (ATK: 608 • Energy Recharge: 55.1%)
[Refinement 1] ATK increased by 28% of Energy Recharge over the base 100%. You can gain a maximum bonus of 80% ATK. Gain 30% Energy Recharge for 12s after using an Elemental Burst.

2) Staff of Homa (ATK: 608 • Crit Damage: 66.2%)
[Refinement 1] HP increased by 20%. Additionally, provides an ATK Bonus based on 0.8% of the wielder's Max HP. When the wielder's HP is less than 50%, this ATK bonus is increased by an additional 1% of Max HP.

3) Calamity Queller (ATK:741 • ATK: 16.5%)
[Refinement 1] Gain 12% All Elemental DMG Bonus. Obtain Consummation for 20s after using an Elemental Skill, causing ATK to increase by 3.2% per second. This ATK increase has a maximum of 6 stacks. When the character equipped with this weapon is not on the field, Consummation's ATK increase is doubled.

4) "The Catch" (ATK: 510 • Energy Recharge: 45.9%)
[Refinement 5] Increases Elemental Burst DMG by 32% and Elemental Burst CRIT Rate by 12%.

5) Vortex Vanquisher (ATK: 608 • ATK: 49.6%)
[Refinement 1] Increases Shield Strength by 20%. Scoring hits on opponents increases ATK by 4% for 8s. Max 5 stacks. Can only occur once every 0.3s. While protected by a shield, this ATK increase effect is increased by 100%.

6) Deathmatch (ATK: 454 • Crit Rate: 36.8%)
[Refinement 1] If there are at least 2 opponents nearby, ATK is increased by 16% and DEF is increased by 16%. If there are fewer than 2 opponents nearby, ATK is increased by 24%.
Note: With refinements, Deathmatch becomes a very competitive option with some of the strong non-Engulfing 5* options, especially in single-target situations. Even at low refinement against a single enemy it is similar to R5 The Catch in terms of performance.

7) Wavebreaker's Fin (ATK: 620 • ATK: 13.8%)
[Refinement 1] For every point of the entire party's combined maximum Energy capacity, the Elemental Burst DMG of the character equipping this weapon is increased by 0.12%. A maximum of 40% increased Elemental Burst DMG can be achieved this way.
Note: At [R5], this weapon is competitive with the strong non-Engulfing 5* options, depending on your total team burst cost.

8) Lithic Spear (ATK: 565 • ATK: 27.6%)
[Refinement 1] For every character in the party who hails from Liyue, the character who equips this weapon gains 7% ATK increase and a 3% CRIT Rate increase. This effect stacks up to 4 times.
Note: The ranking for this weapon assumes 1 stack on its passive.

9) Favonius Lance (ATK: 565 • Energy Recharge: 30.6%)
[Refinement 5] CRIT Hits have a 100% chance to generate a small amount of Elemental Particles, which will regenerate 6 Energy for the character. Can only occur once every 6s.
Note: In teams where Raiden's damage is less potent, this weapon gains a lot of value for its ability to further regenerate team Energy.

10) Prototype Starglitter (ATK: 510 • Energy Recharge: 45.9%)
[Refinement 5] After using an Elemental Skill, increases Normal and Charged Attack DMG by 16% for 12s. Max 2 stacks.
Recommended Artifacts for DPS
- Emblem of Severed Fate (4)
- Noblesse Oblige (2) / Thundering Fury (2) / +18% ATK set (2) / Emblem of Severed Fate (2) [Choose Two]
- Tenacity of the Millelith (4)*

1) 4-Pc Emblem of Severed Fate
2-Piece Bonus: Energy Recharge +20%
4-Piece Bonus: Increases Elemental Burst DMG by 25% of Energy Recharge. A maximum of 75% bonus DMG can be obtained in this way.

2) Noblesse Oblige (2) / Thundering Fury (2) / +18% ATK set (2) / Emblem of Severed Fate (2) [Choose Two]

3) Tenacity of the Millelith
2-Piece Bonus: HP +20%
4-Piece Bonus: When an Elemental Skill hits an opponent, the ATK of all nearby party members is increased by 20% and their Shield Strength is increased by 30% for 3s. This effect can be triggered once every 0.5s. This effect can still be triggered even when the character who is using this artifact set is not on the field.
Note: This set acts as a low investment support oriented set. Raiden is an excellent Tenacity of the Millelith (4) holder since her Elemental Skill has 100% uptime and procs very easily. Do note that if your Raiden is equipping this set, then she will sacrifice her personal damage.
| Artifact Main Stats | Artifact Sub Stats |
|---|---|
| Sands - Energy Recharge / ATK%* Goblet - Electro DMG / ATK%* Circlet - Crit Rate / DMG Raiden's main stat priority for Sands and Goblet entirely depends on the substats, whether she has external buffs, and which weapon she is running. Using an optimizer/calculator would be the best way to work out your optimal setup. | Crit Rate / DMG ATK% Energy Recharge Elemental Mastery Flat ATK |
Team Compositions
National Team

Raiden Shogun: Main DPS
Xingqiu: Sub-DPS
Xiangling: Sub-DPS
Bennett: Buffer + Healer
Raiden Hypercarry Team

Raiden Shogun: Main DPS
Kujou Sara: Buffer
Kaedehara Kazuha: Elemental RES Shred // Chevreuse: Buffer for Overload
Bennett: Buffer + Healer
Hyperbloom Team
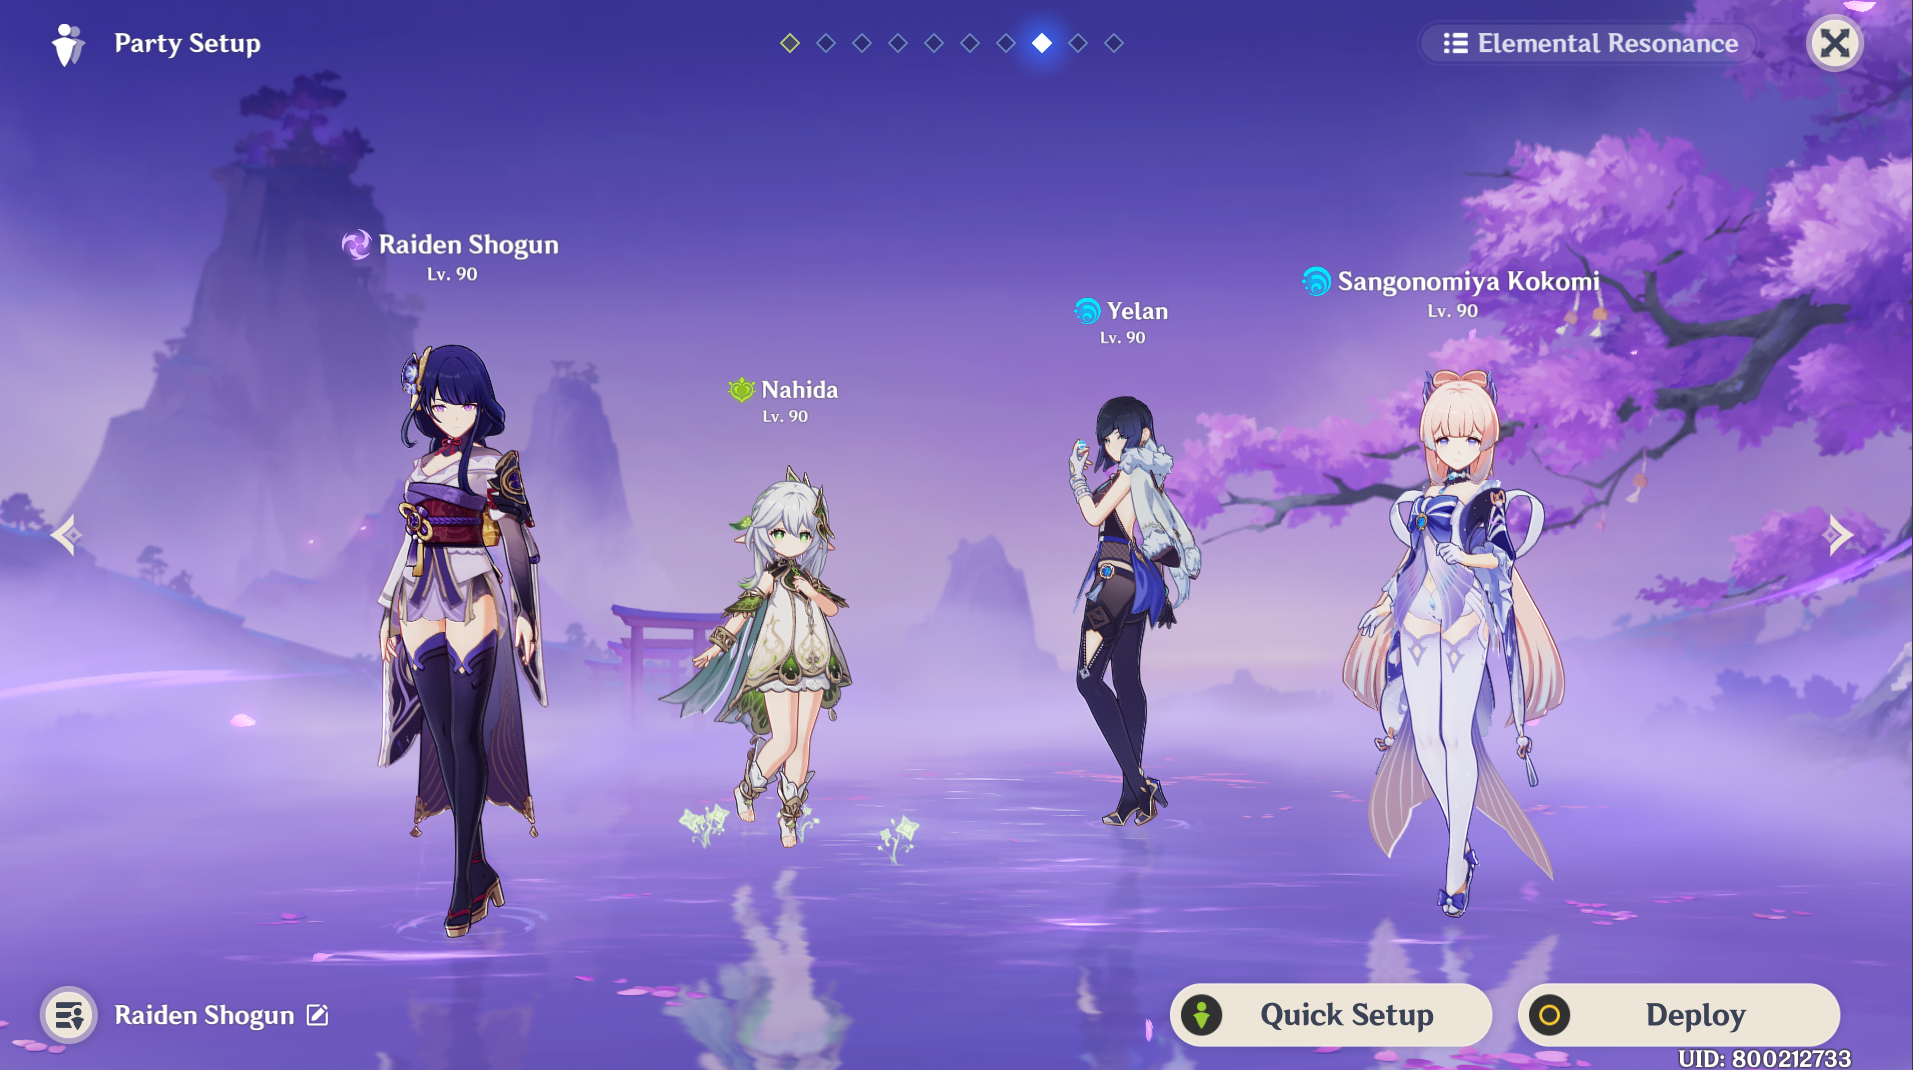
Raiden Shogun: Main DPS
Nahida: Dendro Applicator + Sub-DPS
Yelan: Sub-DPS // Kaedehara Kazuha: Elemental RES Shred
Sangonomiya Kokomi: Buffer + Healer

Sora
Articles: 327More Articles

Genshin Impact: Reminiscent Regimen: Thrill Event Guide
Genshin Impact: Spiral Abyss V5.1 Floor 12 Complete Guide

Genshin Impact: Spiral Abyss V5.1 Floor 11 Complete Guide

Genshin Impact: Xilonen Quick Character Guide
Xilonen Team Compositions
Genshin Impact: Talent Level-Up Materials Chart (Updated V5.1)

Genshin Impact: All New Achievements in Version 5.1

Genshin Impact: Envisaged Echoes Keqing Guide

Genshin Impact: Envisaged Echoes Zhongli Guide
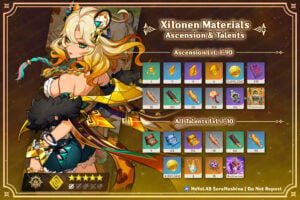
Genshin Impact: Xilonen Ascension and Talent Materials

Genshin Impact Codes – October 2024

Genshin Impact: Brilliant Chrysanthemum Route & Farming Guide

Genshin Impact: Saurian Claw Succulent Route & Farming Guide
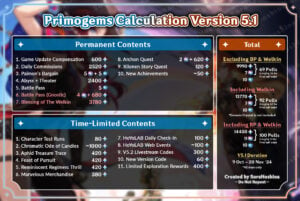
Genshin Impact: Primogems Calculation Version 5.1

Genshin Impact: Imaginarium Theater Version 5.0 October Guide

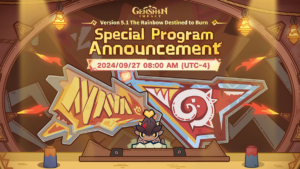
Genshin Impact 5.1 Special Program Livestream Overview
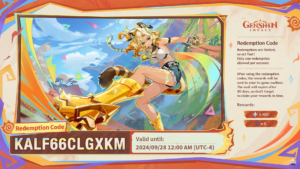
3 New Redemption Codes from 5.1 Special Program
Genshin Impact 5.1 Livestream Countdown

Genshin Impact: Version 5.0 Tier List (September 2024)