Table of Contents [Hide]
- All Quests in Genshin Impact Version 5.2
- 1) The Wingless One of Tlalocan (Tribal Chronicle)
- 2) The Night Before The Trial (Tribal Chronicle)
- 3) Guns and Wings (Tribal Chronicle)
- 4) Calling from the Masters of the Night-Wind (Tribal Chronicle)
- 5) Legendary "Color" (Tribal Chronicle)
- 6) Lost Traveler in the Ashen Realm (Quest Chain)
- 7) Open Your Heart to Me
- 8) Sauro-Vet's Dilemma
- 9) The Mystery of Tecoloapan Beach
- 10) Dancin' in the Moonlight
- 11) Come Fly With Me
- 12) Stand by Me
- 13) From One Case to Another (Quest Chain)
- 14) The Lone Isle Named Night
- 15) Stones, Coconuts, and Dragon Traffickers
- 16) Friends of Fire and Water
- 17) A Saurian Returns to the Nest
- 18) Charge Forward! Go, Go, Go!
- 19) Molting Season
- 20) Every Aspect of a Warrior
- 21) Twisted Extension
We're back with many new sub-areas in Natlan, Genshin Impact! As always, the new area comes with new quests. This guide will list out where and how to get all the quests in Natlan version 5.2. Remember that this guide does not include the new Archon Quest.
This content comes from the Creator Experience server.
Please refresh the page if some of the images are broken.
All Quests in Genshin Impact Version 5.2
1) The Wingless One of Tlalocan (Tribal Chronicle)
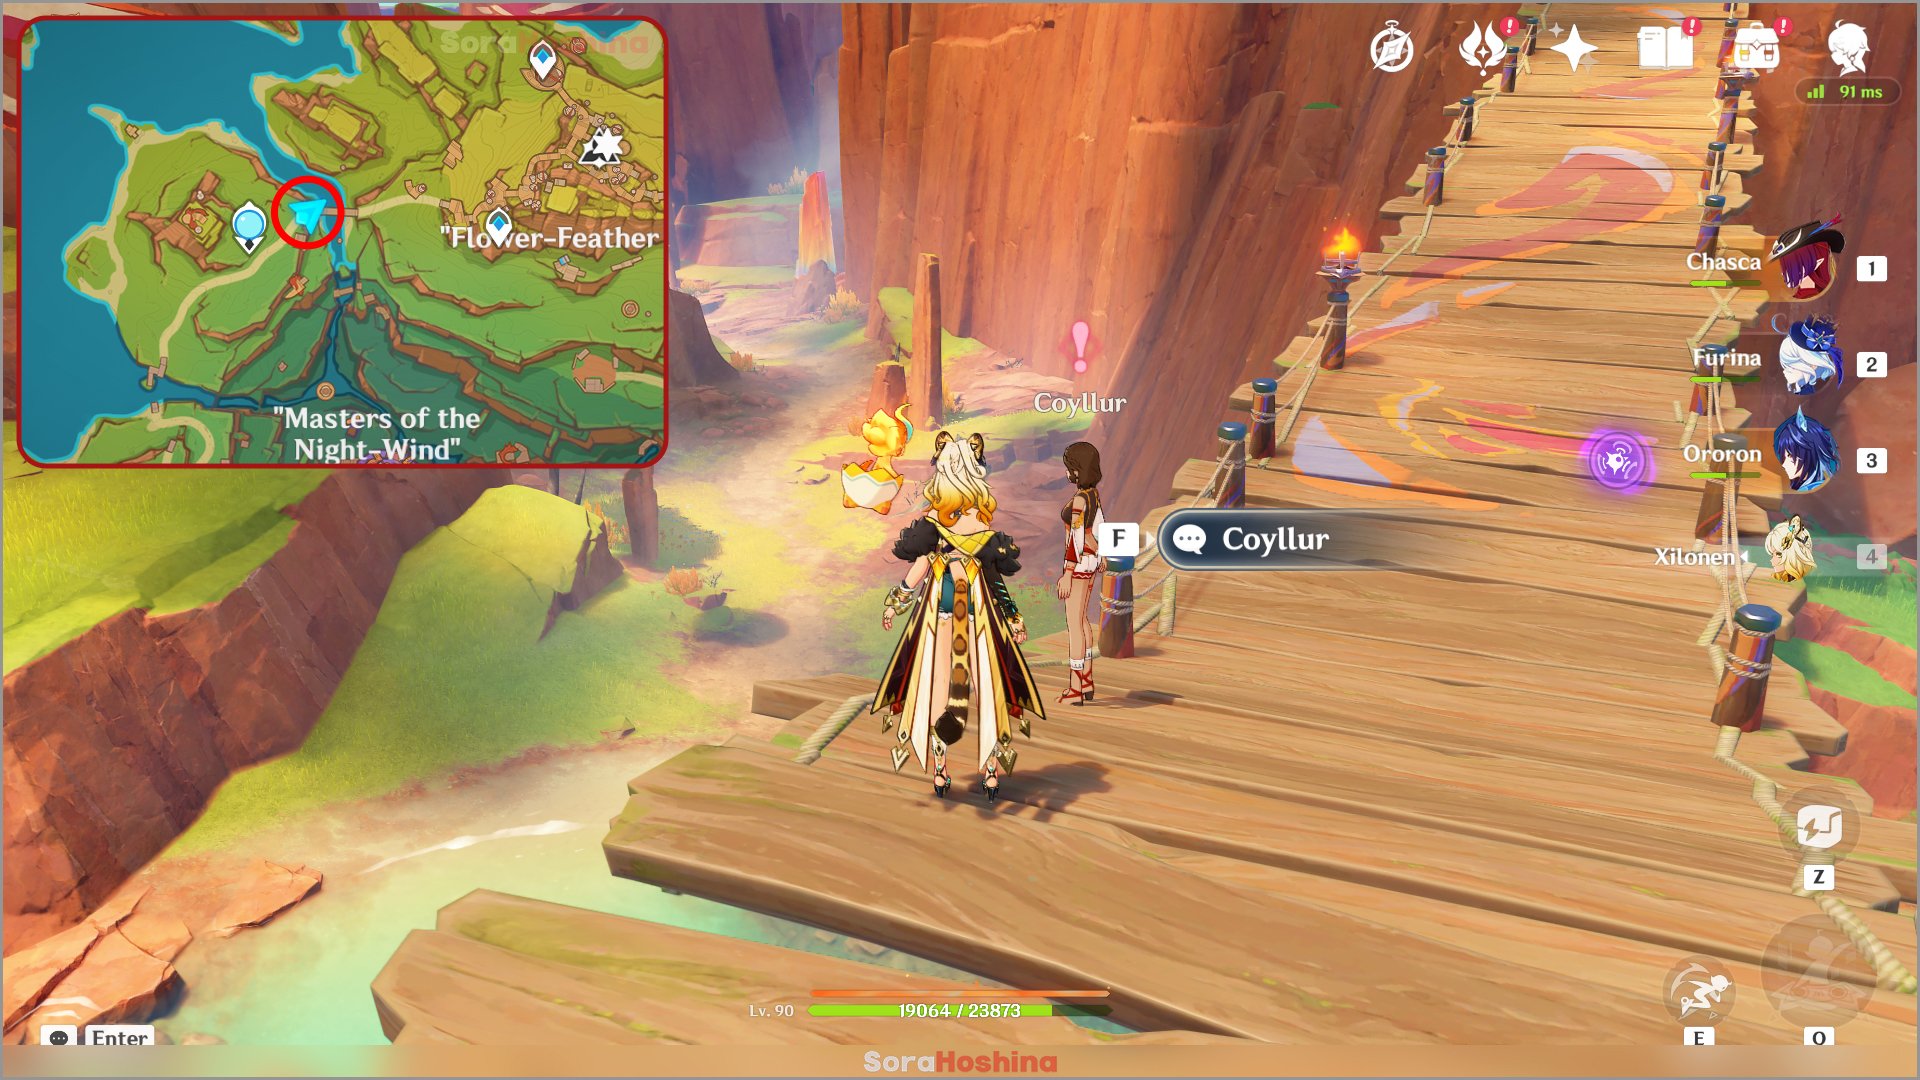
Teleport to the Statue of the Seven in Quahuacan Cliff and head in the direction of the Flower-Feather Clan. On the bridge to the clan, there is someone singing/crying. Approach her to start the quest and you will meet Chasca. There's a lot of talking but no puzzles so you shouldn't have any difficulty completing them.
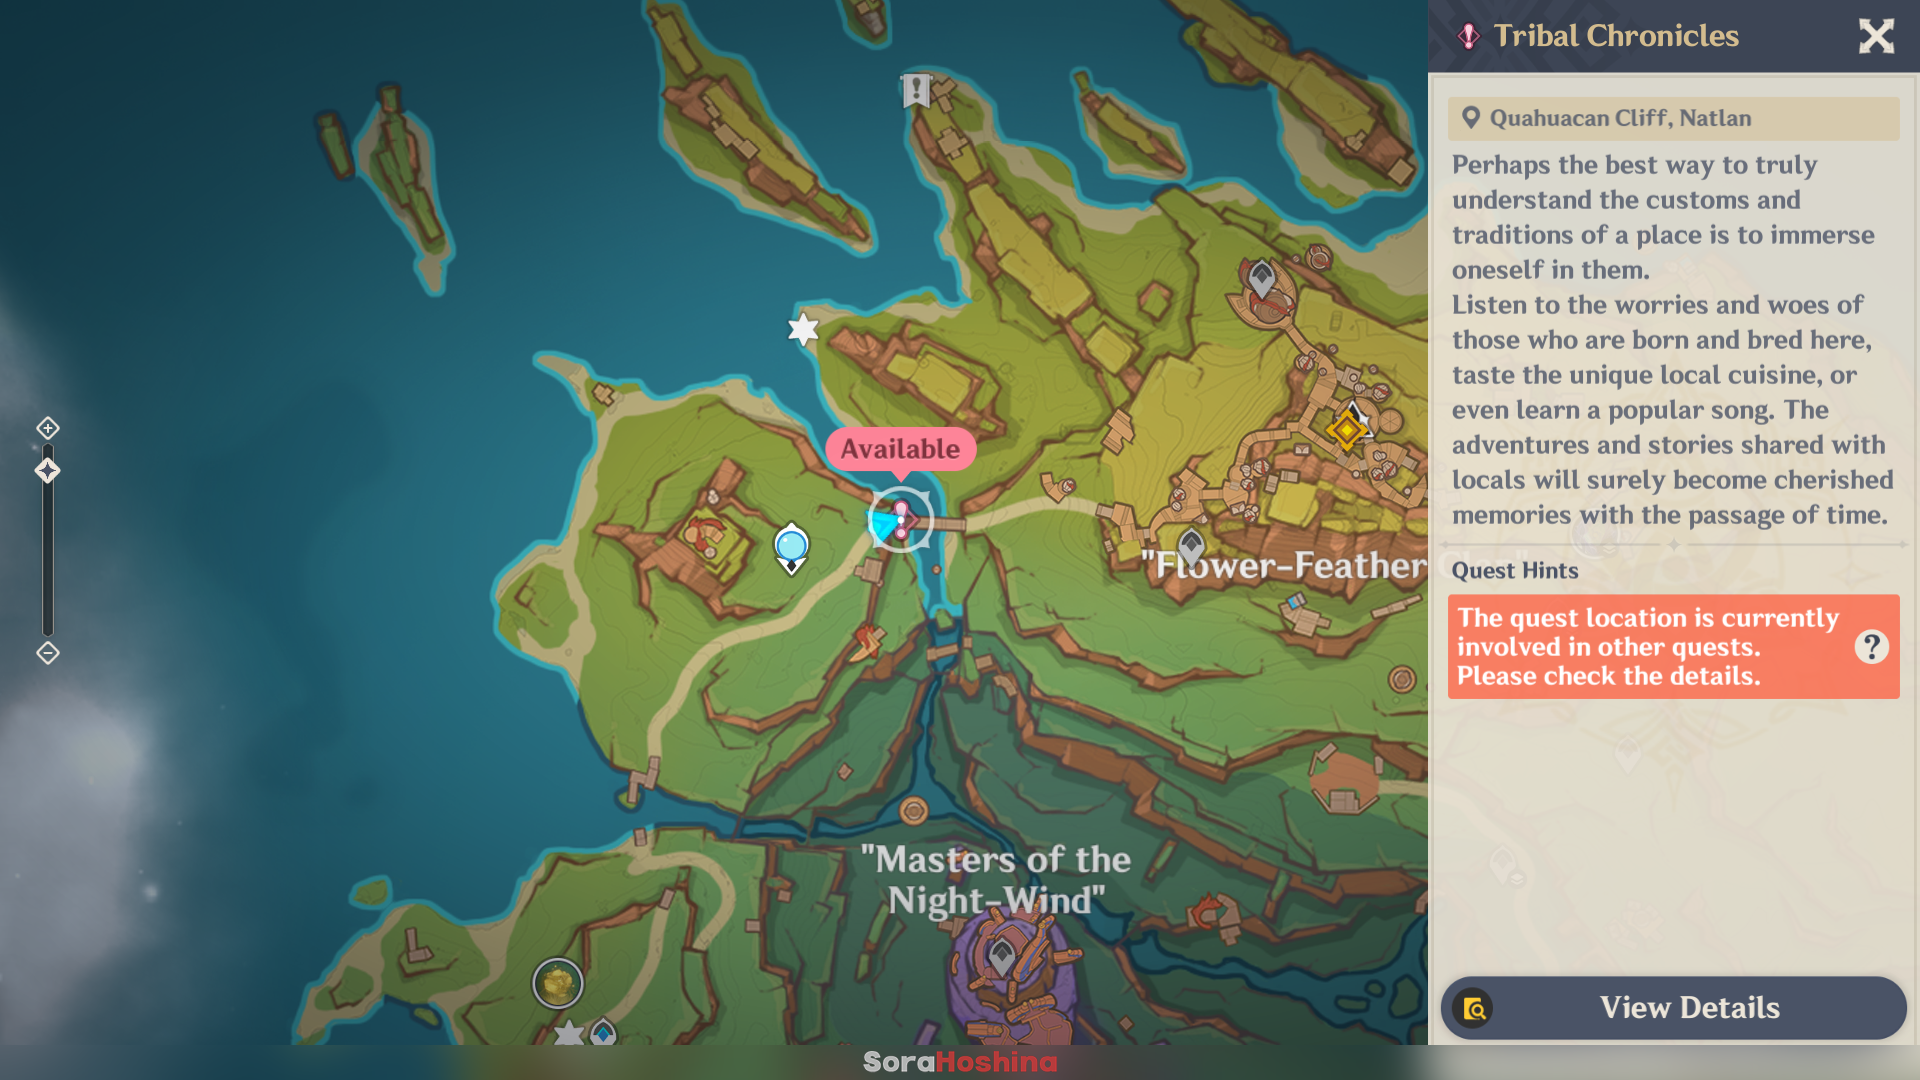
If the icon is there but the NPC isn't, then it may be because the NPC is involved in other quests, namely the latest Archon Quest Chapter V: Interlude. So try to start that quest first, or finish it completely, before returning here.
2) The Night Before The Trial (Tribal Chronicle)
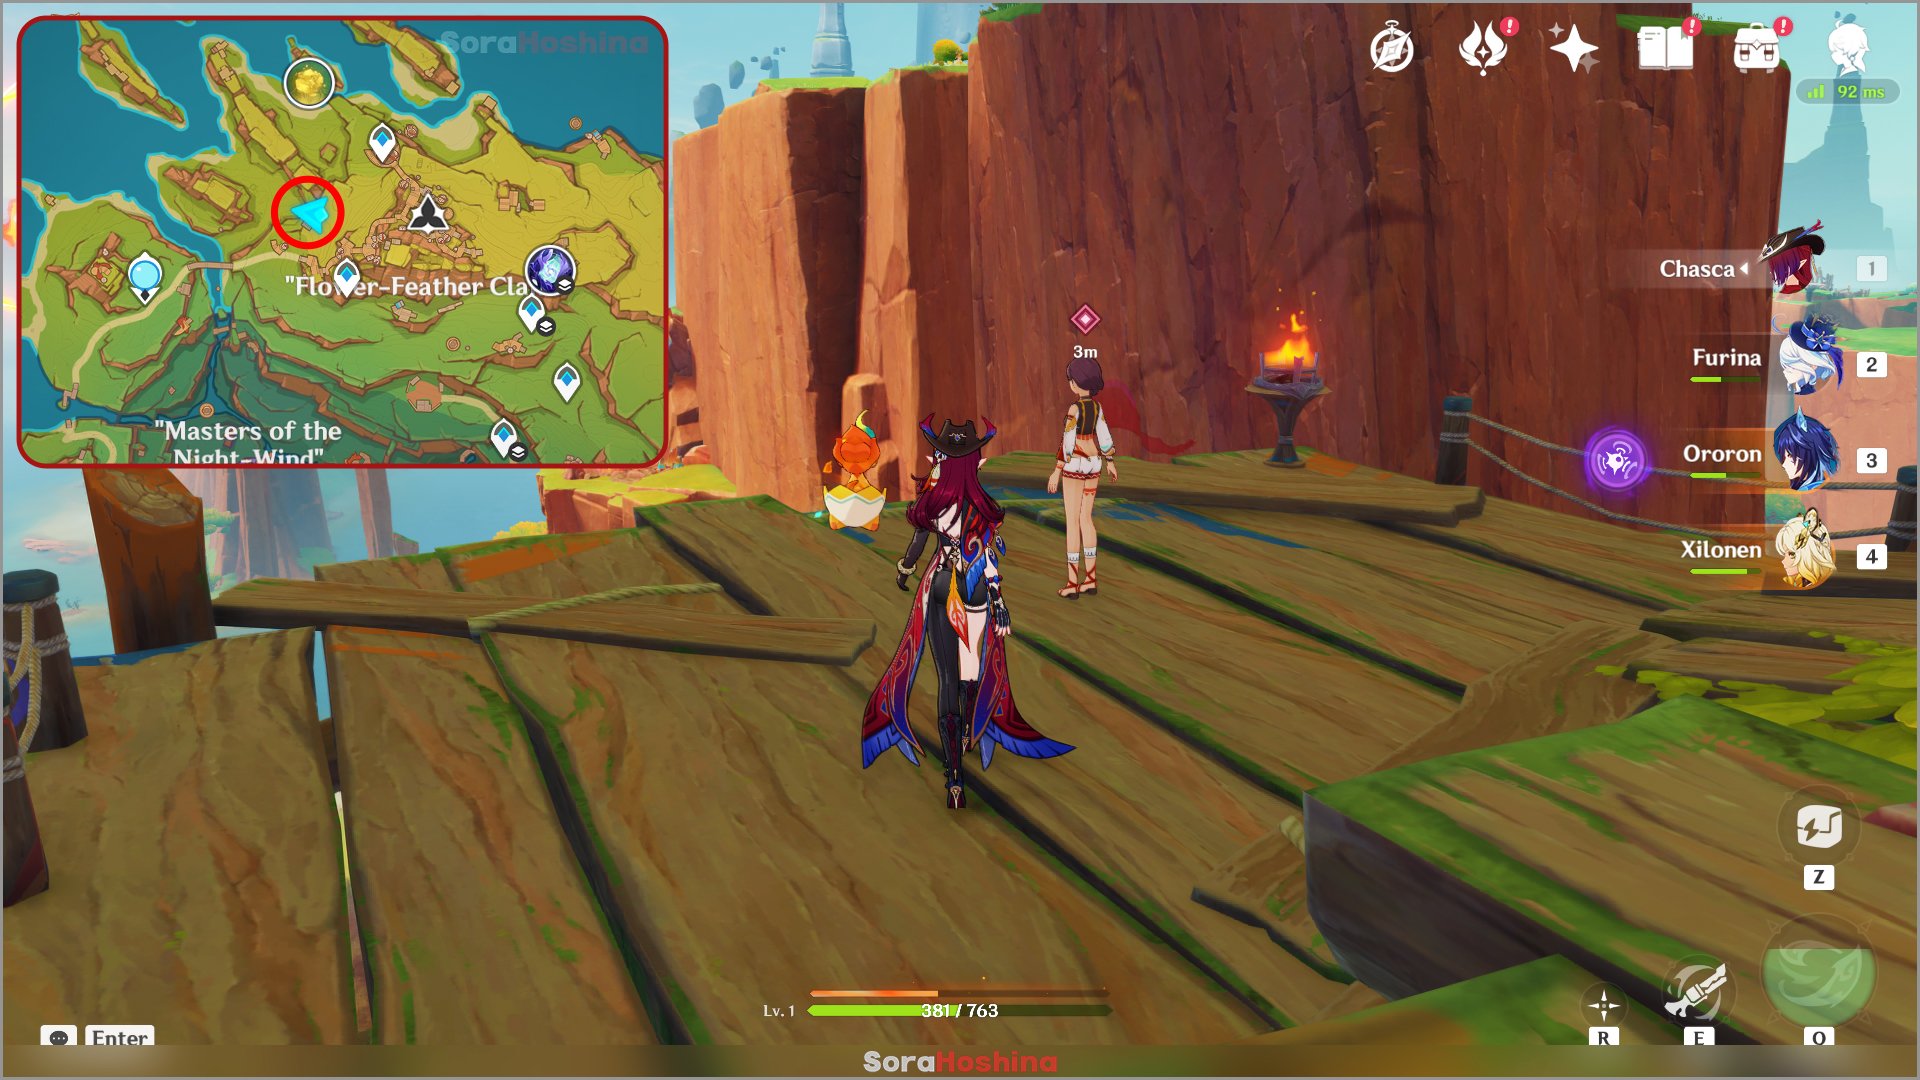
You can unlock this quest automatically after completing the previous quest 'The Wingless One of Tlalocan.' Go to the trial site directly west of the Flower Feather Clan Reputation NPC. There's a bit of puzzles here so if you're having trouble, look at the guide below.

There are 4 obstructions you need to clear out at this trial site. Not in order, the first one is with Cautious Investigator NPC where you need to destroy the breakable rock. But after that, you need to destroy an enemy beneath the rock. There's a bomb beside the rock, so you can use that too if you don't have other options (like no Geo or claymore character in your team right now).

The second one is with Doubtful and Confused Investigator NPCs. All you need to do is destroy the circled rock in the image above using a Tepetlisaurus.


The third one is with the Bold Investigator. For this one, you need to summon a balloon (carrying a bomb) by calling to the NPC. Then, drop the balloon by attacking it with a bow character right on top of the spout that you need to hit.

Last one is with the Curious Investigator. For this one, you can see the 3 shining spots near her. You have Trial Chasca so use her Skill > Hold Basic ATK to hit all the shining spots at the same time. After that, complete the gliding challenge to proceed with the quest.
3) Guns and Wings (Tribal Chronicle)
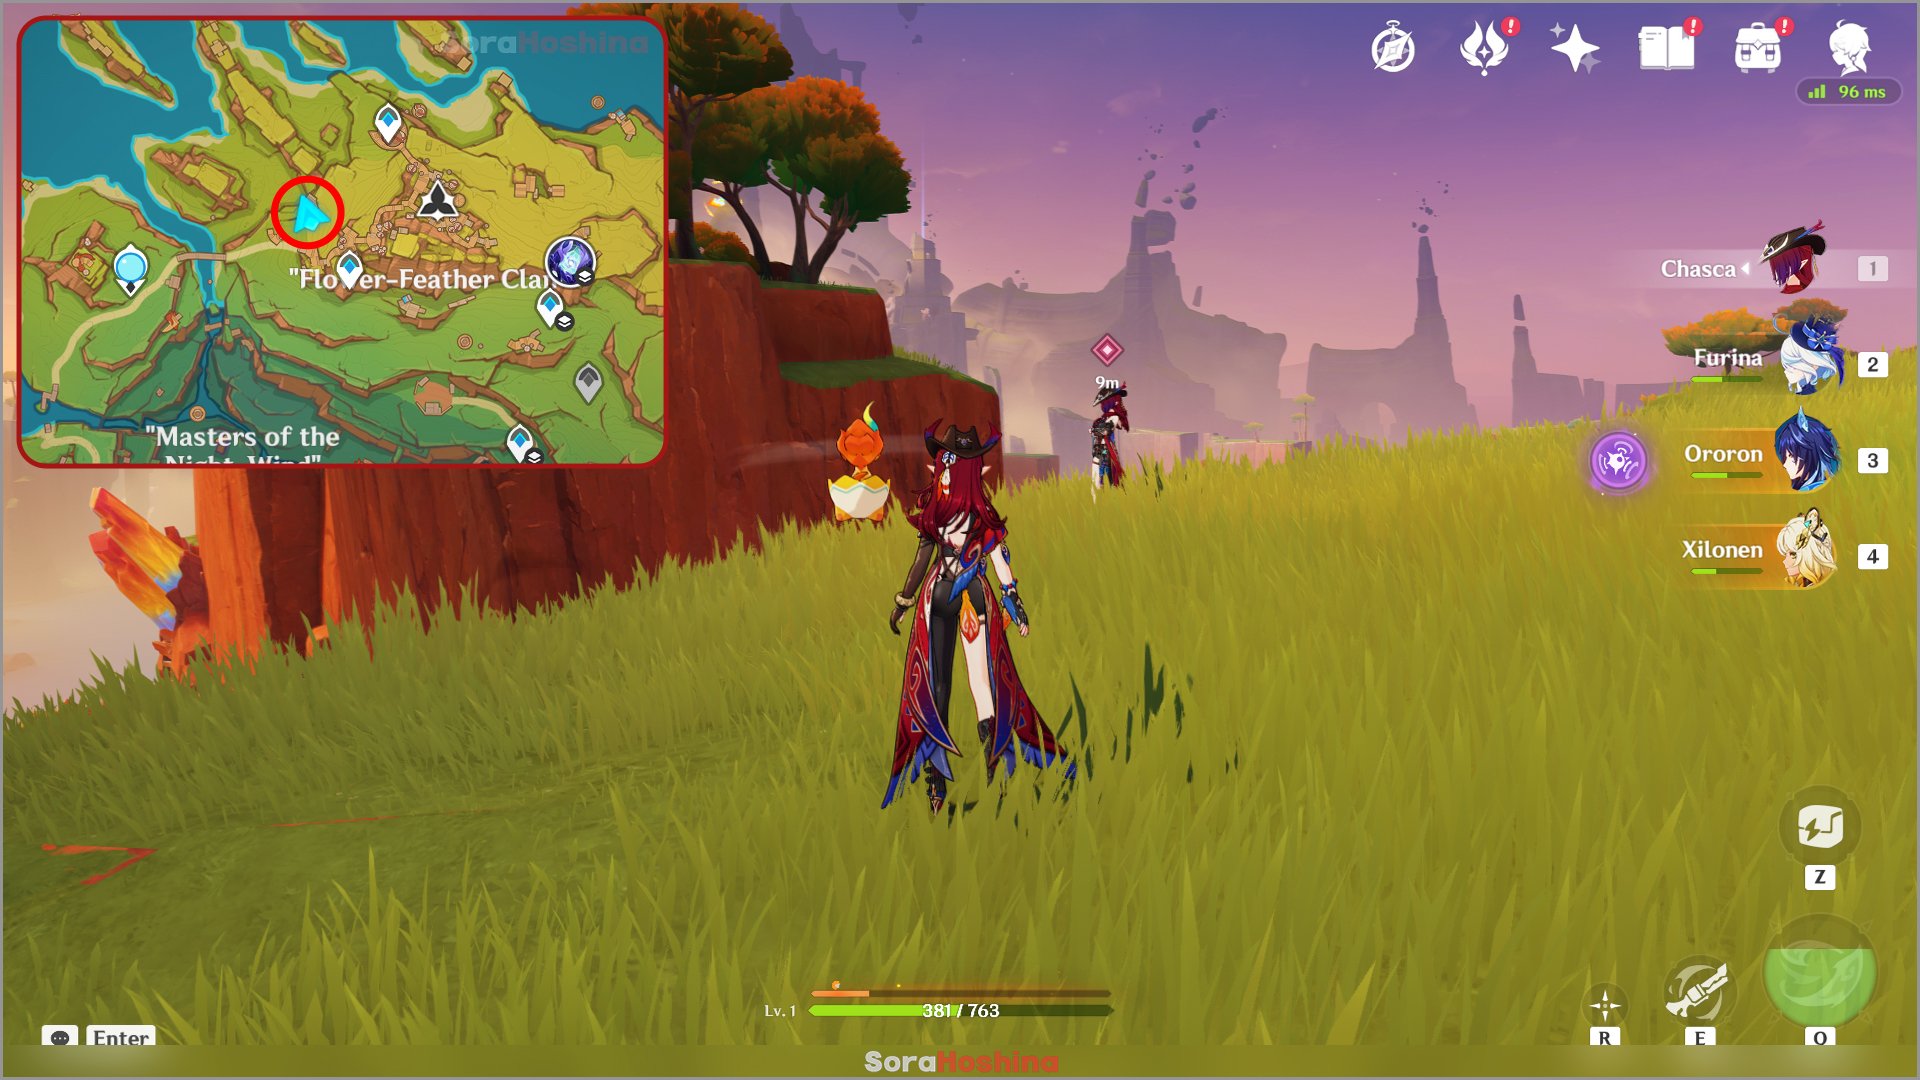
This quest can be counted as Chasca's Story Quest and you can only unlock it after completing the 2 Tribal Chronicles of Flower-Feather Clan 'The Wingless One of Tlalocan' and 'The Night Before The Trial.'
4) Calling from the Masters of the Night-Wind (Tribal Chronicle)
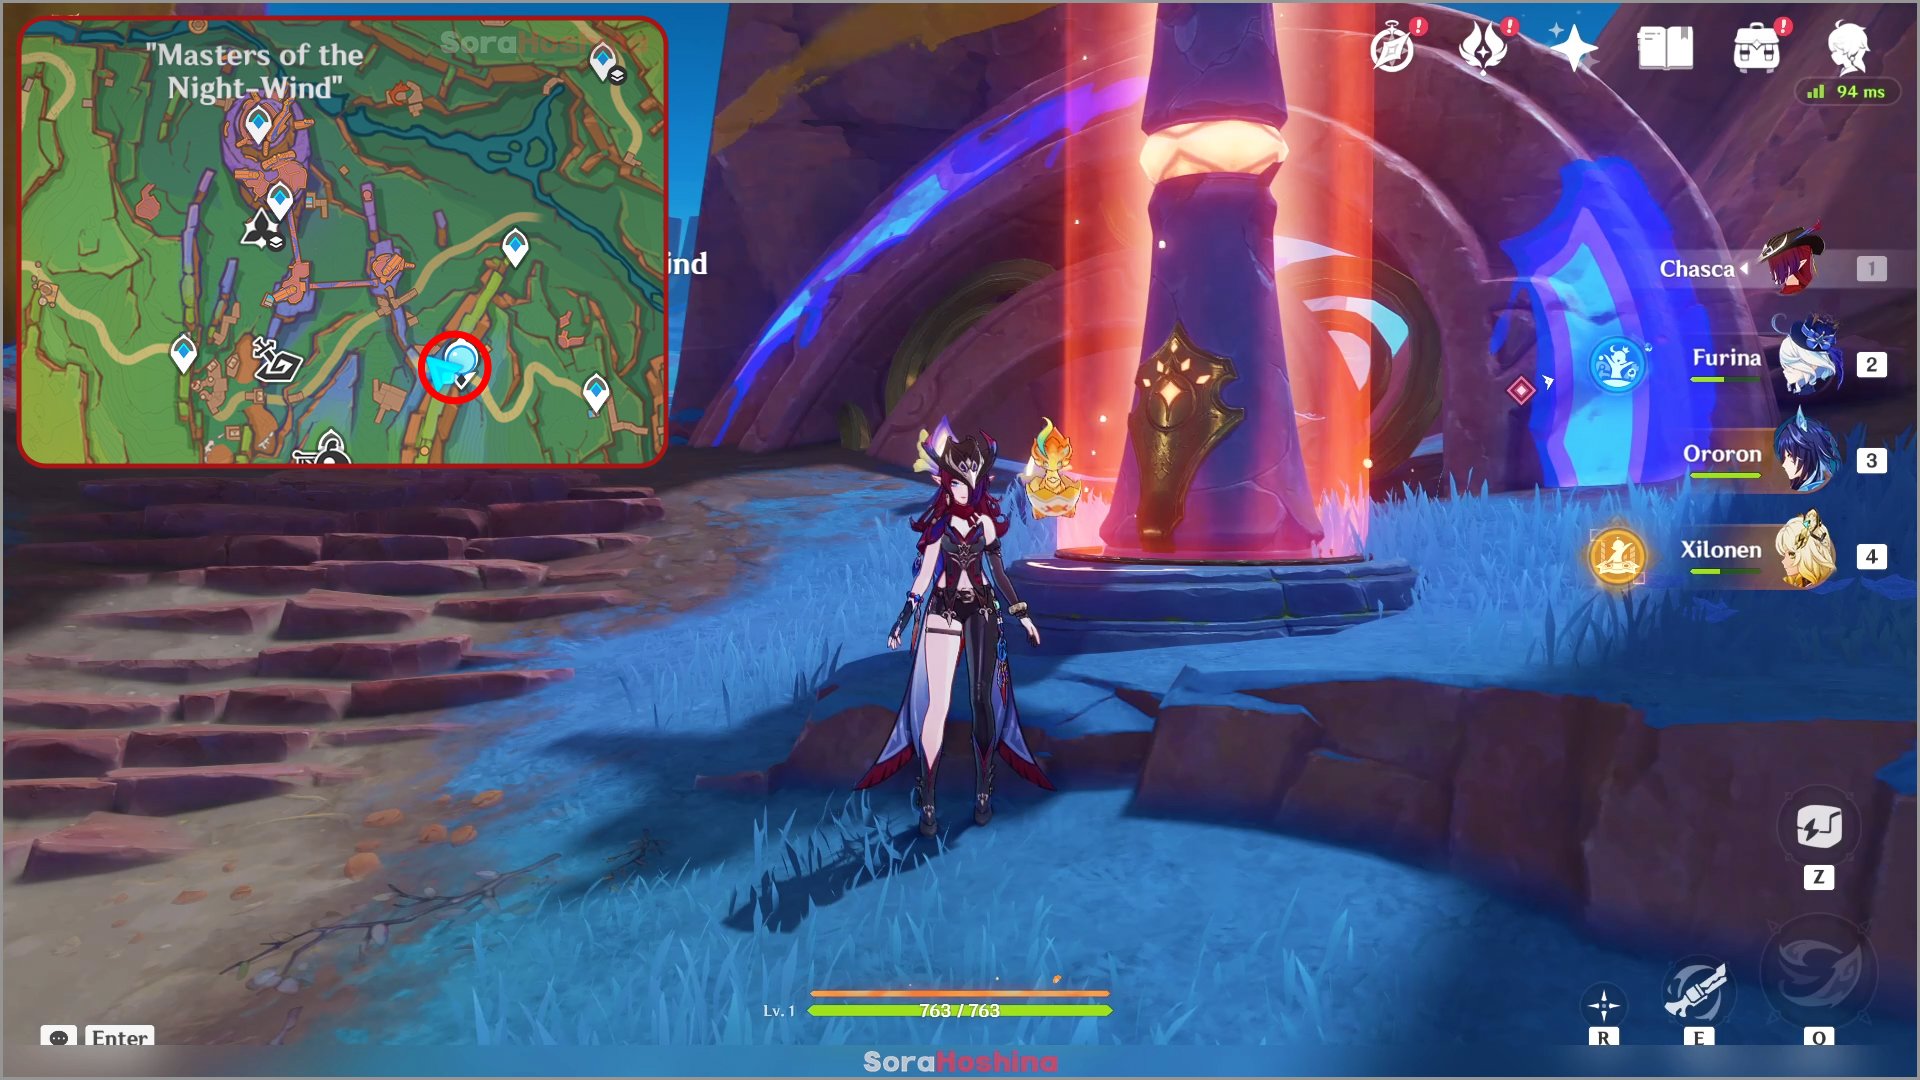
Go to the Statue of the Seven in Tezvatepetonco Range and you will immediately get this quest. The cute little Iktomisaur will lead you to the Master of the Night-Wind's tribal settlement. This quest is full of puzzles but can be solved with Iktomisaur's power.

When you first got teleported and need to explore for 3 clues. After getting the clues (marked with quest navigation), you need to indwell an Iktomisaur and use its skill to scan the triangle symbol.
Stand in front of the navigated location, indwell an Iktomisaur and use Elemental Sight on the wall (it was actually mentioned and zoomed-in when talking to Paimon after you complete finding all clues).
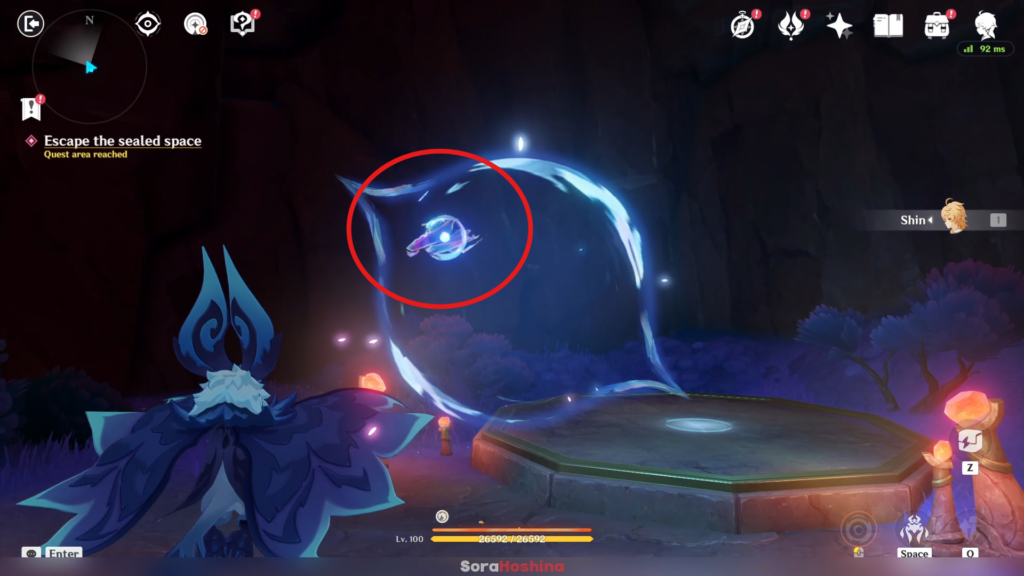

Inside the hidden area, use Iktomisaur's special skill once again on the neon splash at the wall. Then, tap E to spawn the exit. After that, you will complete the quest and get the next one.
5) Legendary "Color" (Tribal Chronicle)
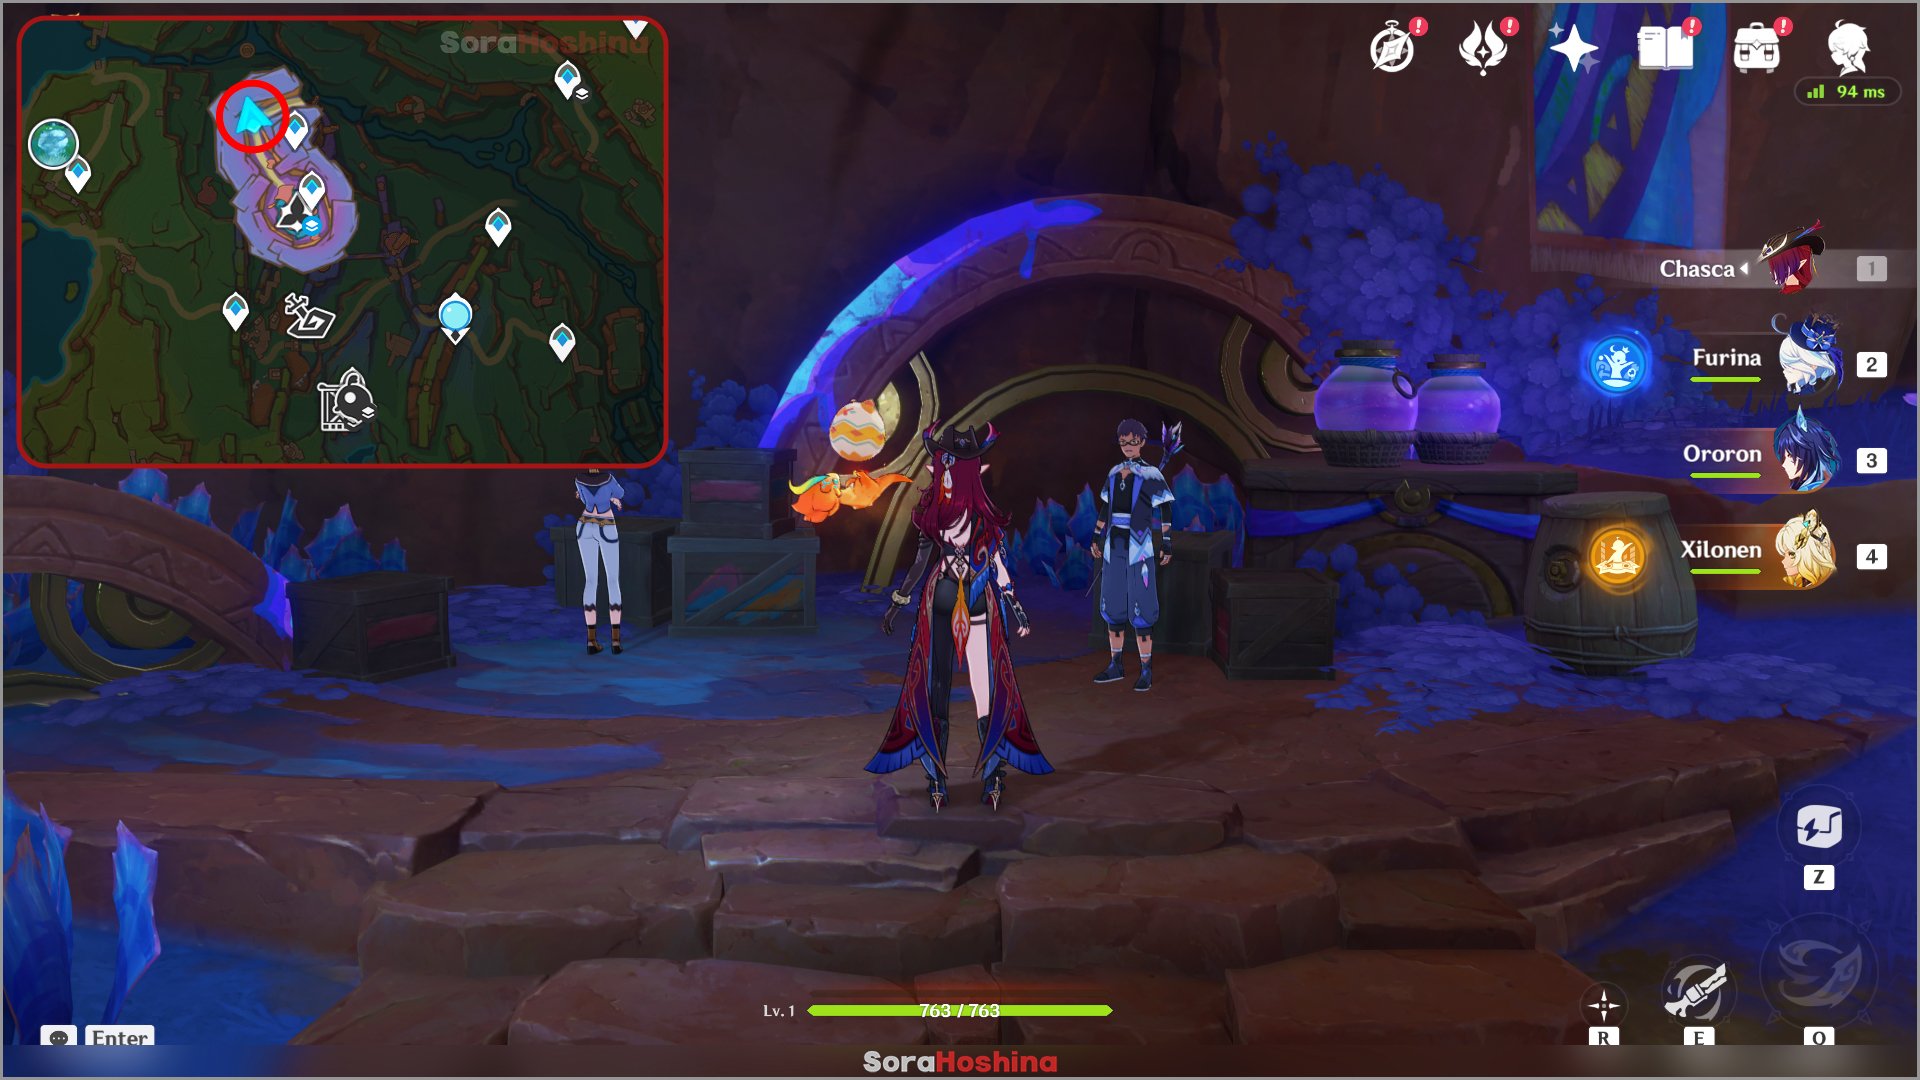
You can unlock this quest automatically after completing the previous quest 'Calling from the Masters of the Night-Wind.' When you complete the pre-requisite quest, just head north from there and you will meet the NPC that will lead you to the next location.
In this quest, you need to find 3 dyes, which look like Seelies. Indwell an Iktomisaur and use the Special Elemental Sight to see the special dye. After that, just continue with the navigation until the end.
6) Lost Traveler in the Ashen Realm (Quest Chain)
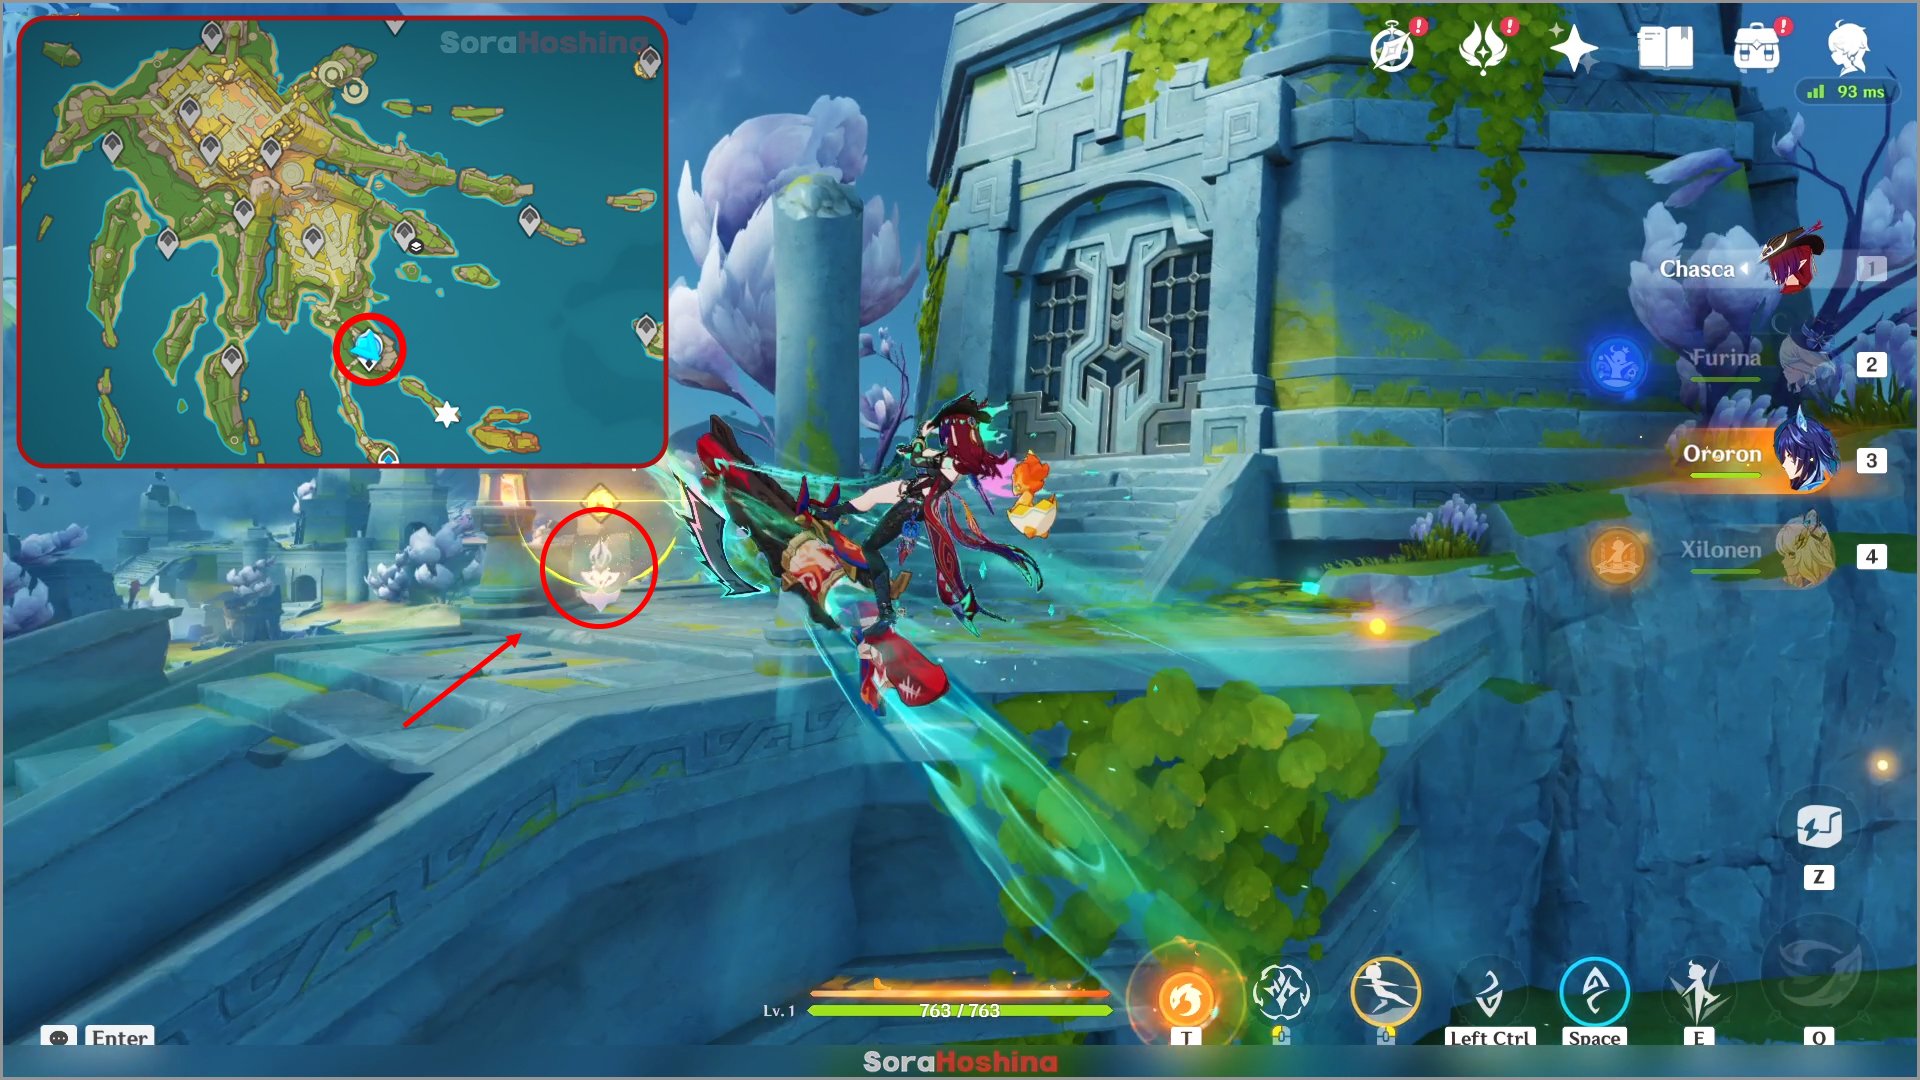
Go to the Statue of the Seven in Ochkanatlan and you can see it's locked behind a gate. Indwell the Iktomisaur nearby or have Ororon in your party.
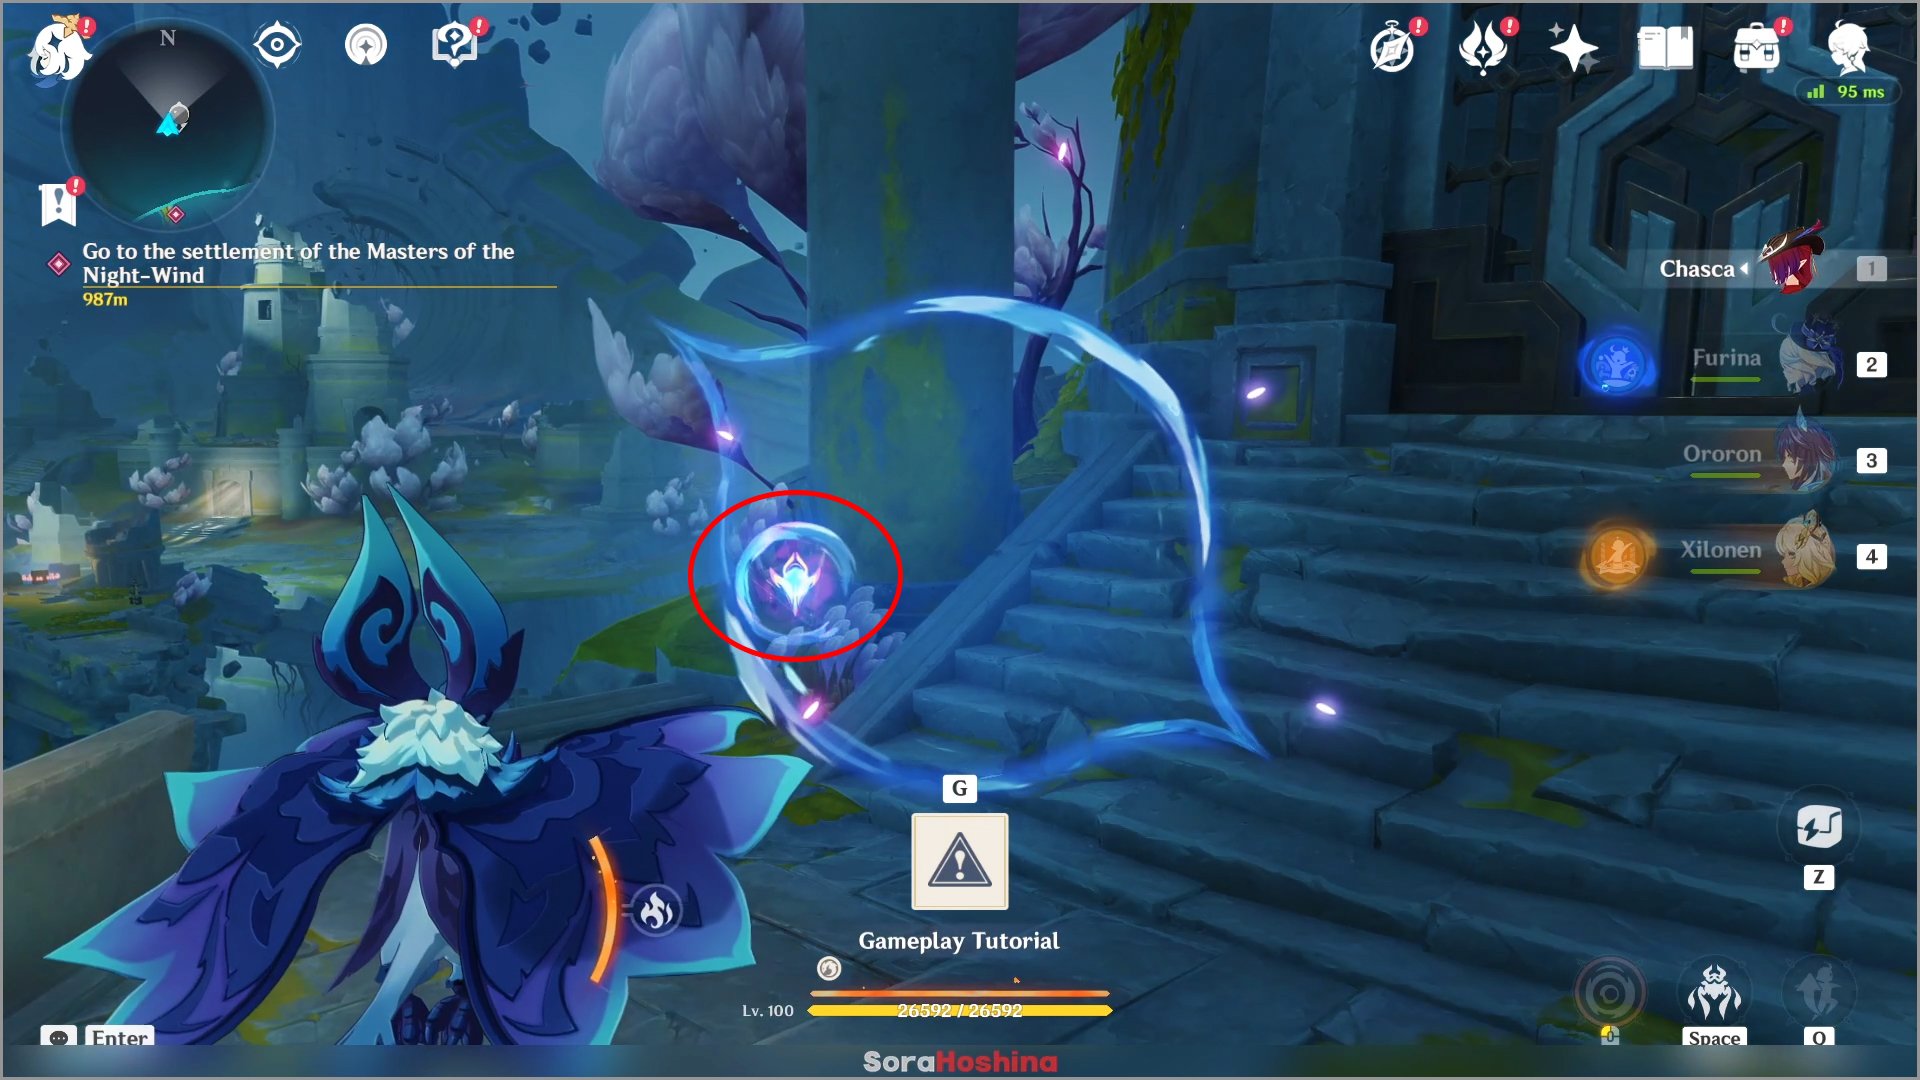
Use Iktomisaur's special sight (left-click mouse) or Ororon's Aimed Shot to scan the sigil near the gate. Once you got it, there will be a purple ring around your Iktomisaur/Ororon. That purple ring will allow you to jump higher.

Jump until you reach the second floor and you can see a hole. Enter the hole and your Saurian companion will appear and lead you to the third floor.

There is a switch on the third floor. Start the switch it to start the quest. Reminder that this is a quest chain so expect it to take a few hours to complete. Check out the full guide for this whole quest here: Lost Traveler in the Ashen Realm Quest Chain Guide
7) Open Your Heart to Me
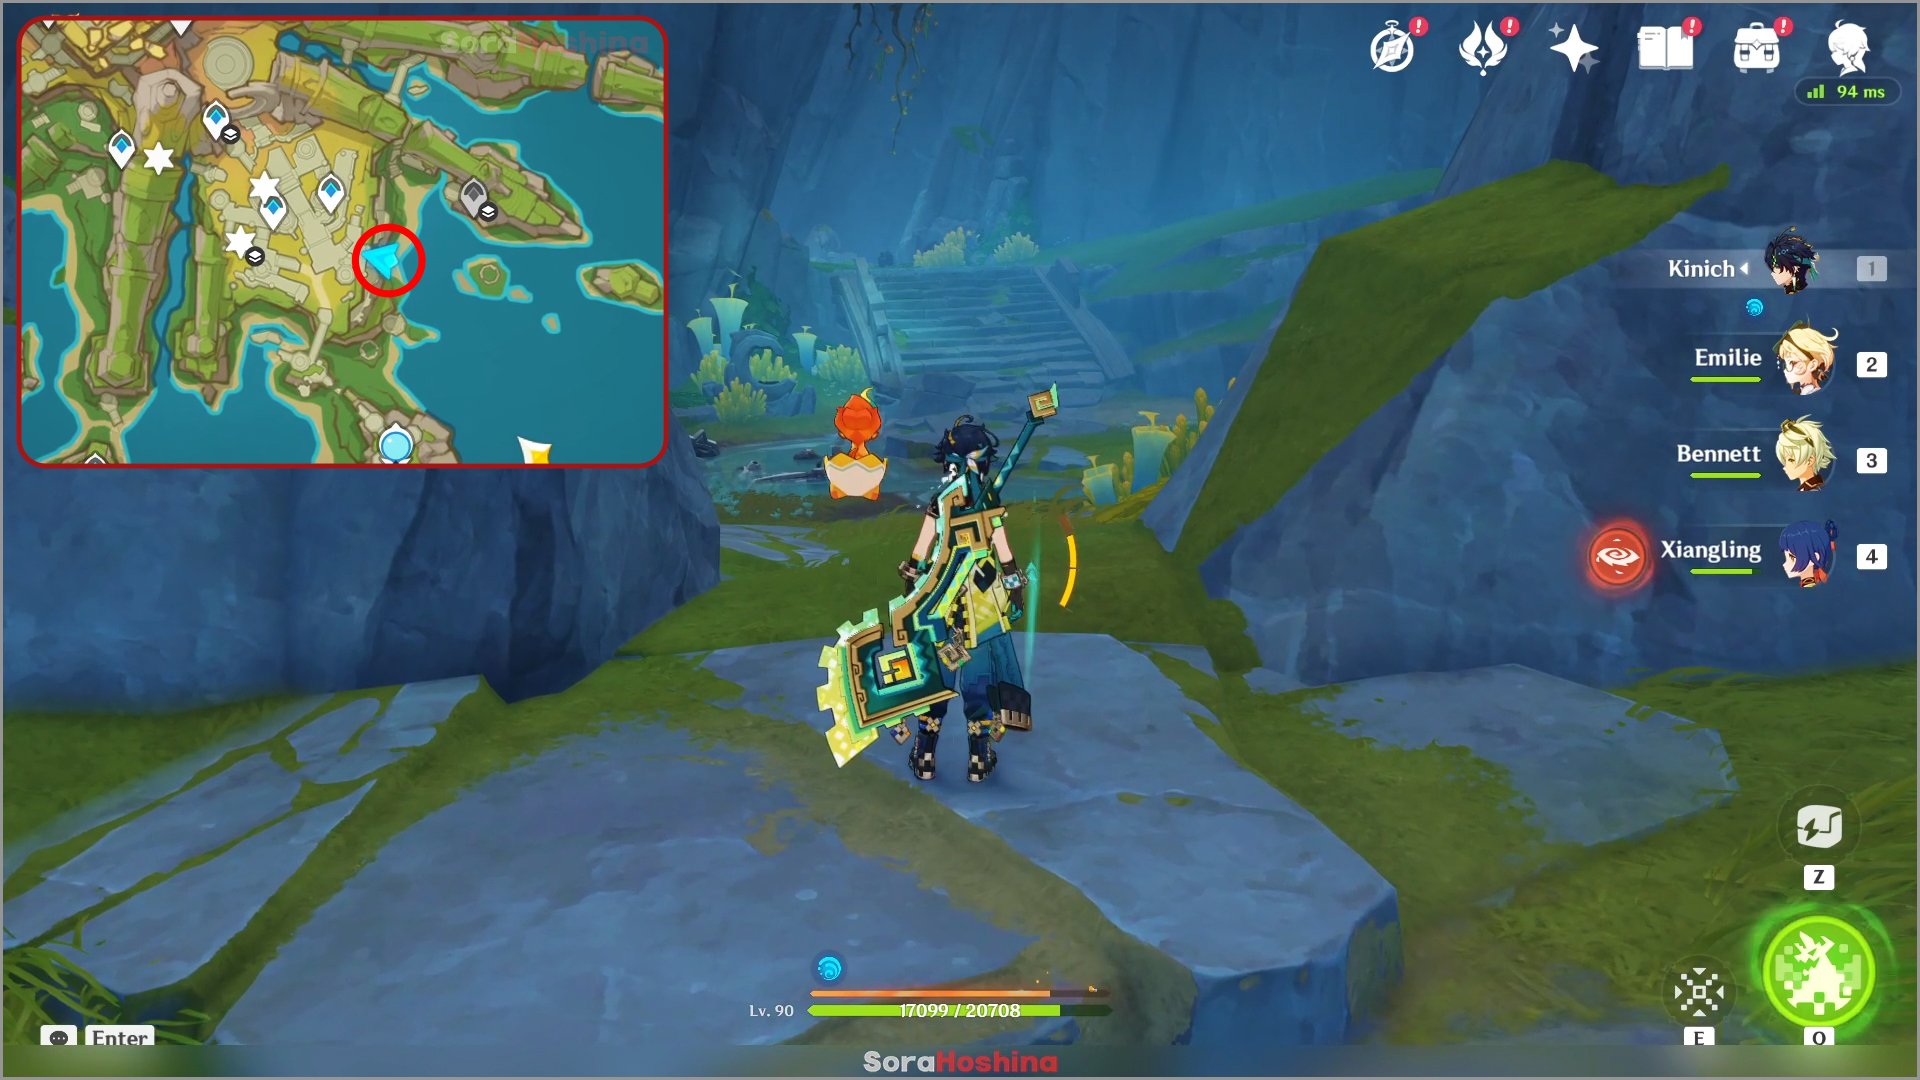
This quest is only available after you complete the whole Lost Traveler in the Ashen Realm Quest Chain. After you're done, go to an opening to a cave southeast of Ochkanatlan.
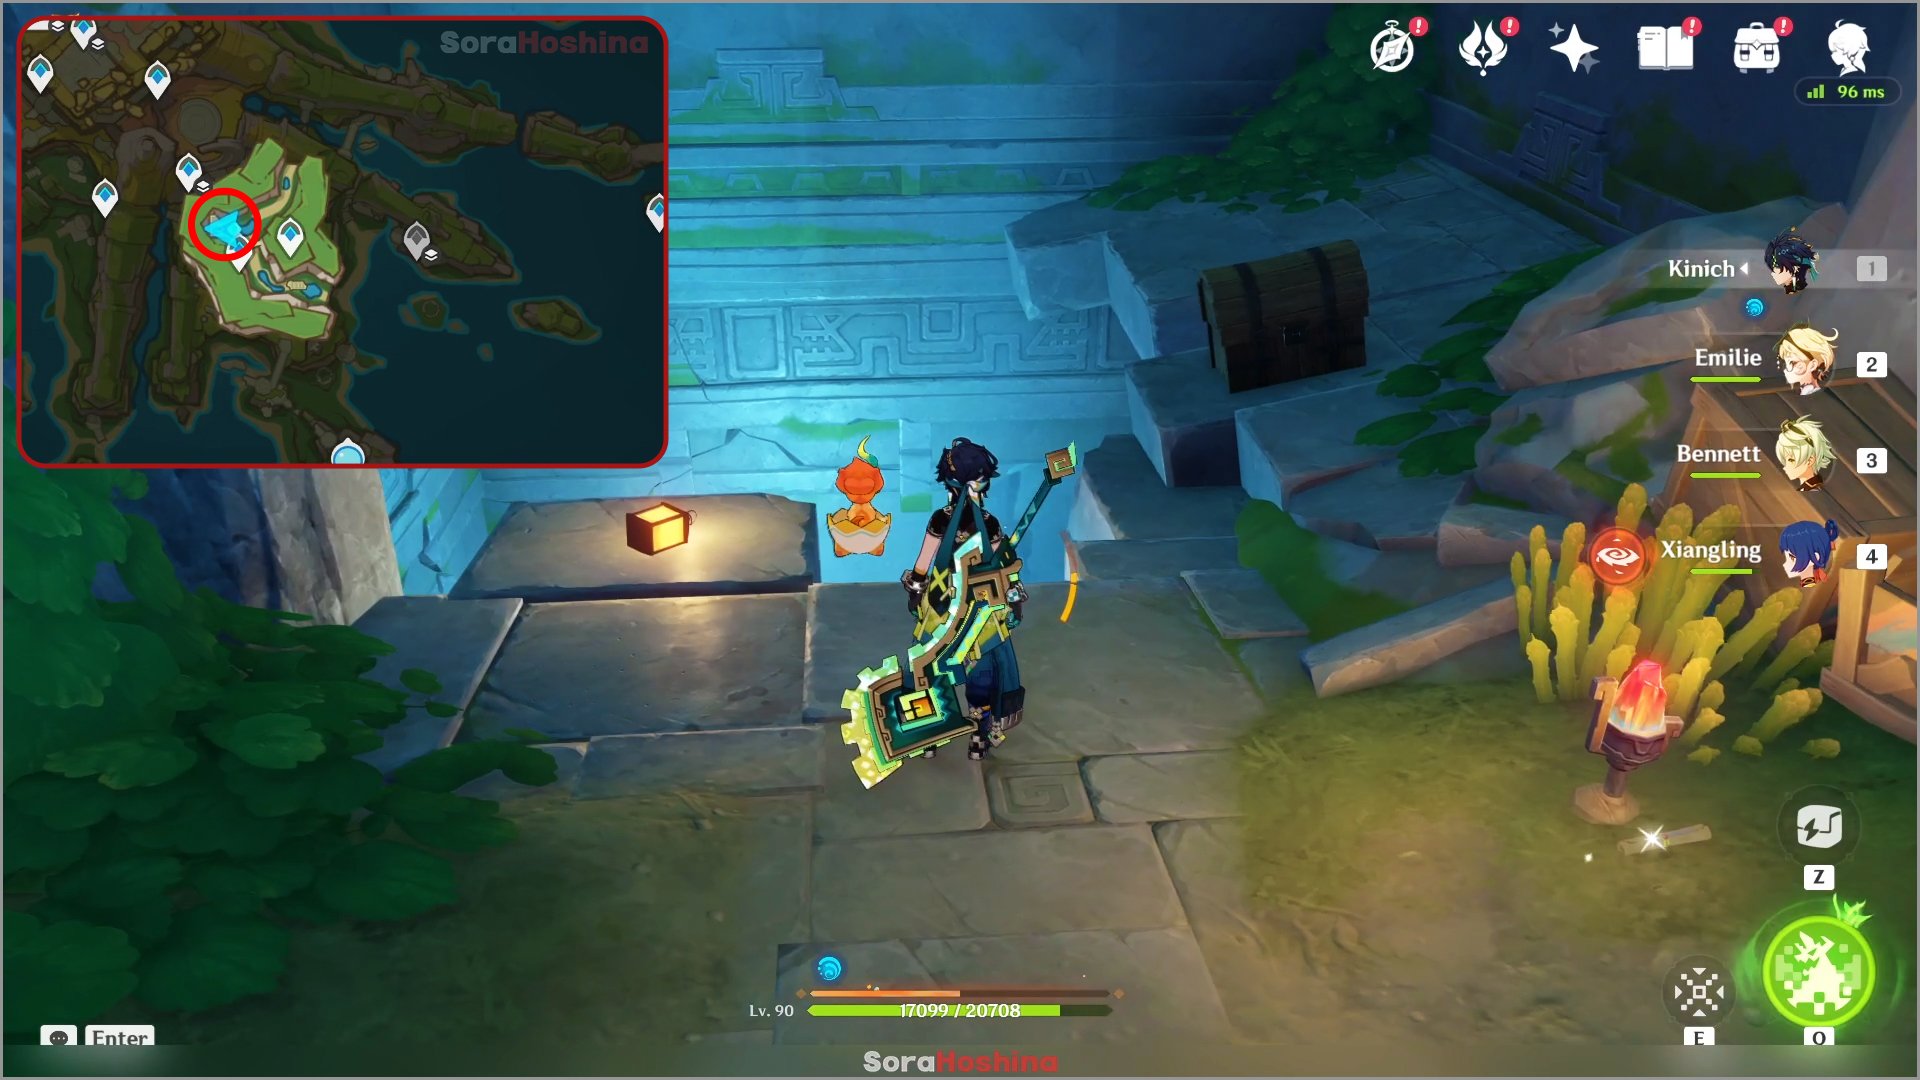
Inside the cave, go to the west and you can find an opening. Enter that opening and you will find a puzzle. Complete a series a puzzle in this cave and you will start the quest. Check out the full guide for this whole quest here: Open Your Heart to Me Quest Guide
8) Sauro-Vet's Dilemma
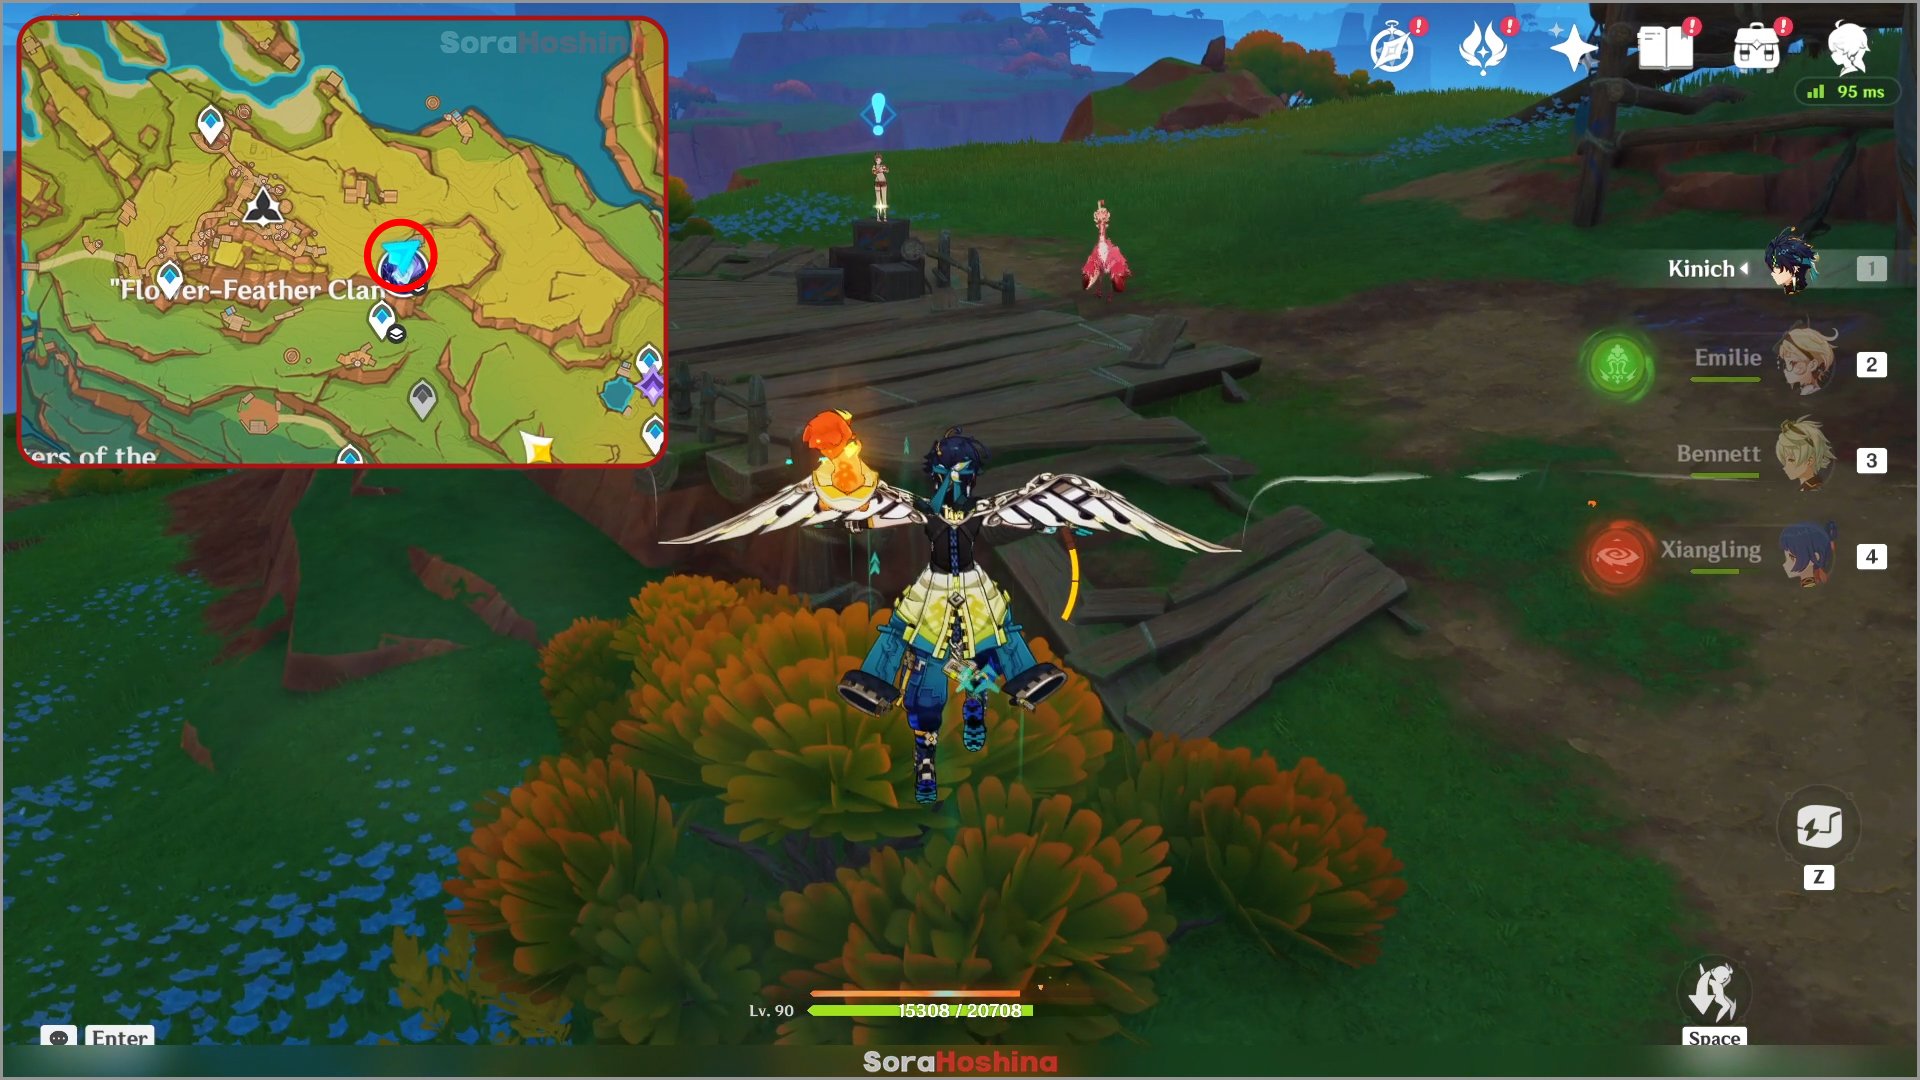
Teleport to the Reputation NPC in Flower-Feather Clan and head southeast towards the Tenebrous Papilla icon. There, you can find a lady NPC and an agitated Qucusaur. In this quest, you need to chase after the Qucusaur and feed it medicine. There are two types of medicine and you can choose to give it any one of those. By the end, you will get the achievement [It's Not Much, But It's A Start...].
9) The Mystery of Tecoloapan Beach
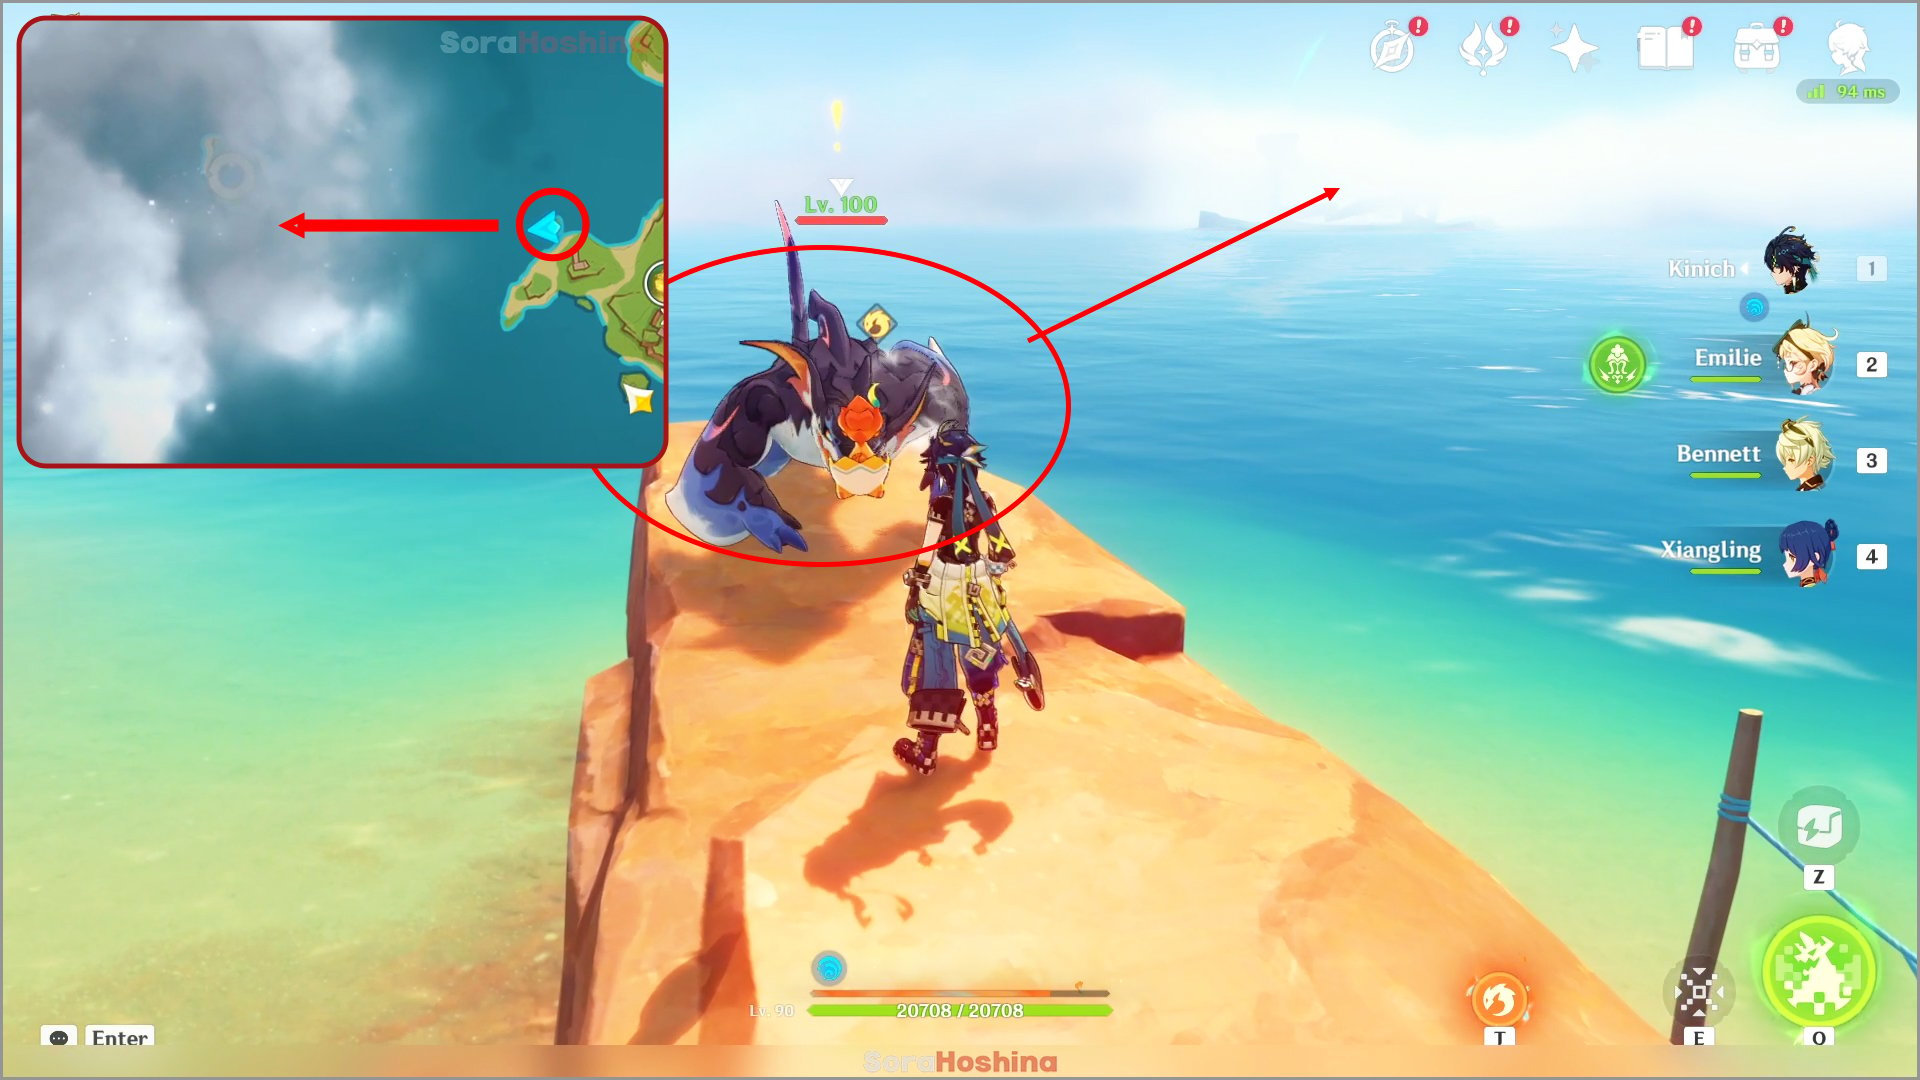
To start this quest, you need to indwell a Koholasaurus far west of Masters of the Night Wind and swim across the sea to reach the foggy island. Once you reach there, a voice will appear and you can start the quest. You need to unveil the secrets of the island within the fog. Check out the full guide for this whole quest here: The Mystery of Tecoloapan Beach Quest Guide
10) Dancin' in the Moonlight
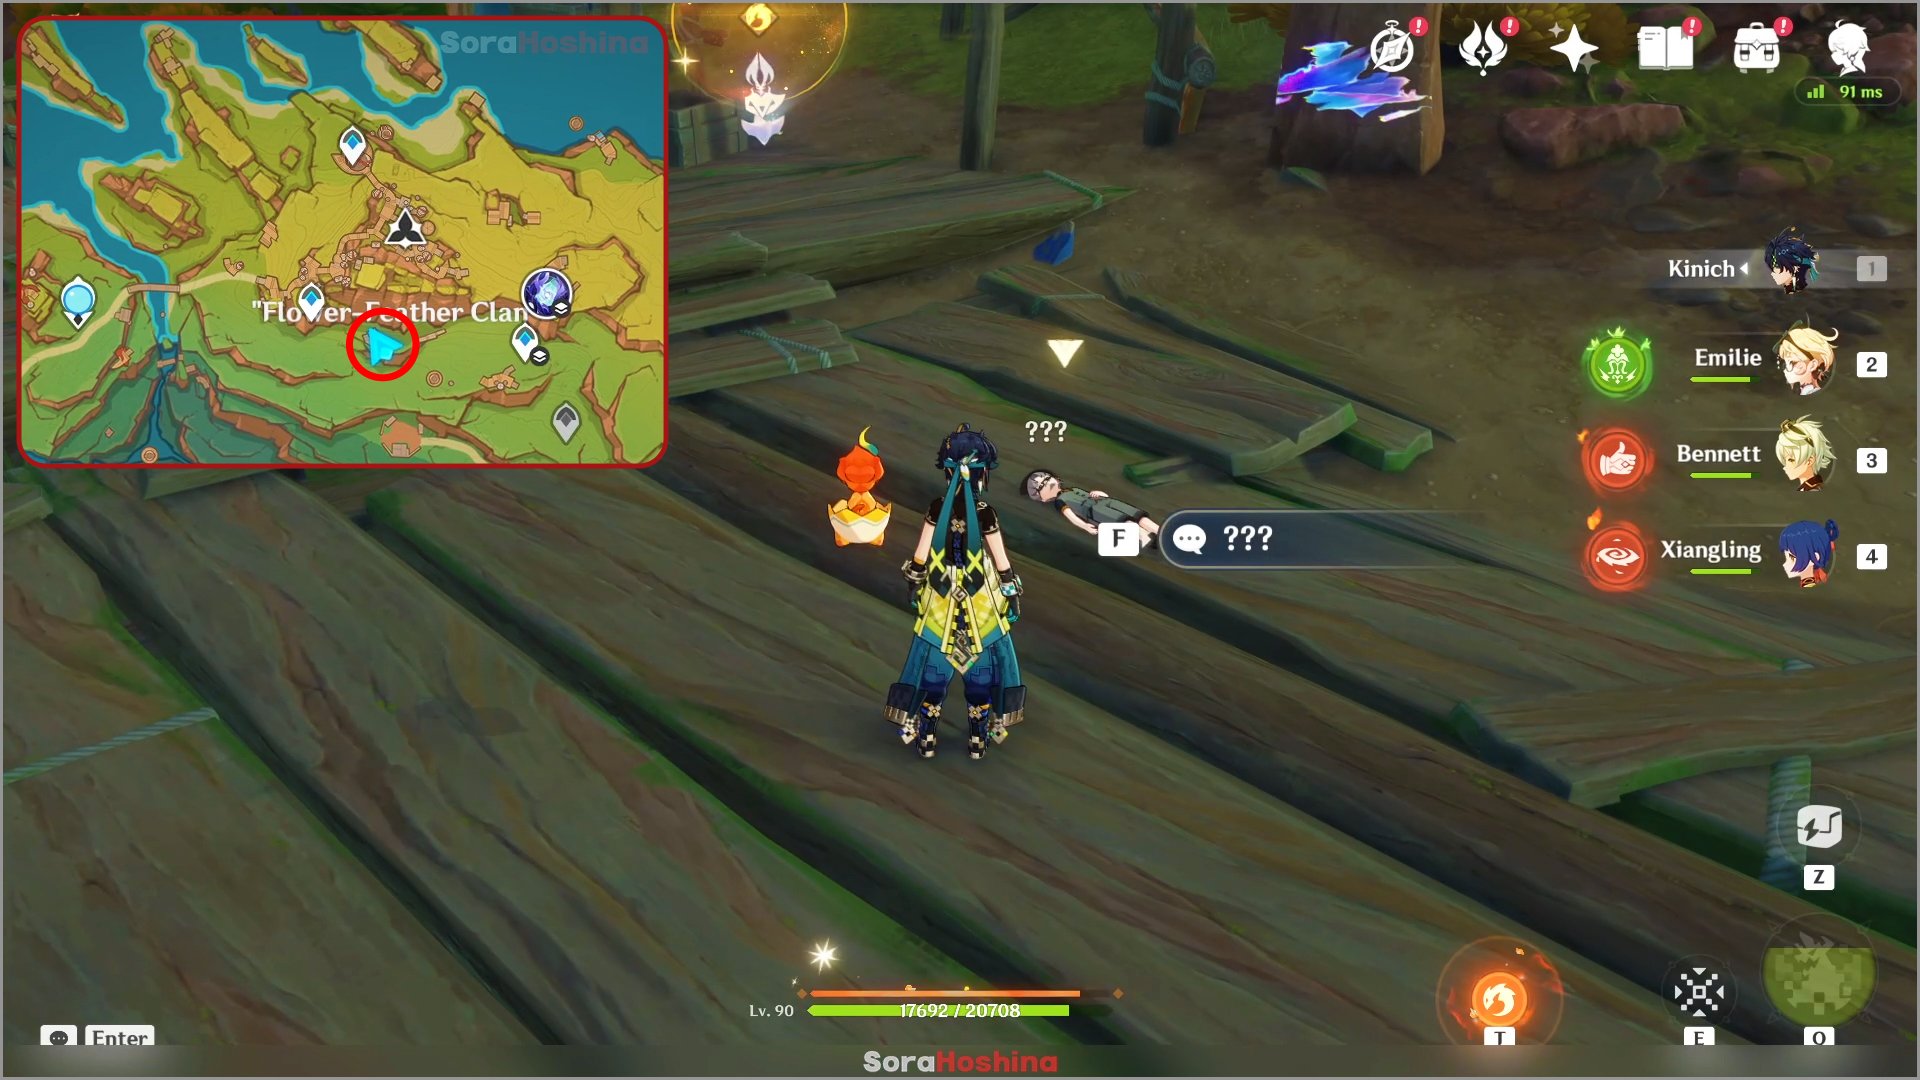
Teleport to the waypoint in Flower-Feather Clan and head east towards the lower platform. You can see a small NPC laying down on the ground asking for water.

Indwell a nearby Iktomisaurus and scan the Nightspirit Graffiti on the rock. Hold E to place the Nightspirit Body (a Hydro ember) near the boy and destroy it to make it rain. After that, you will start the quest.
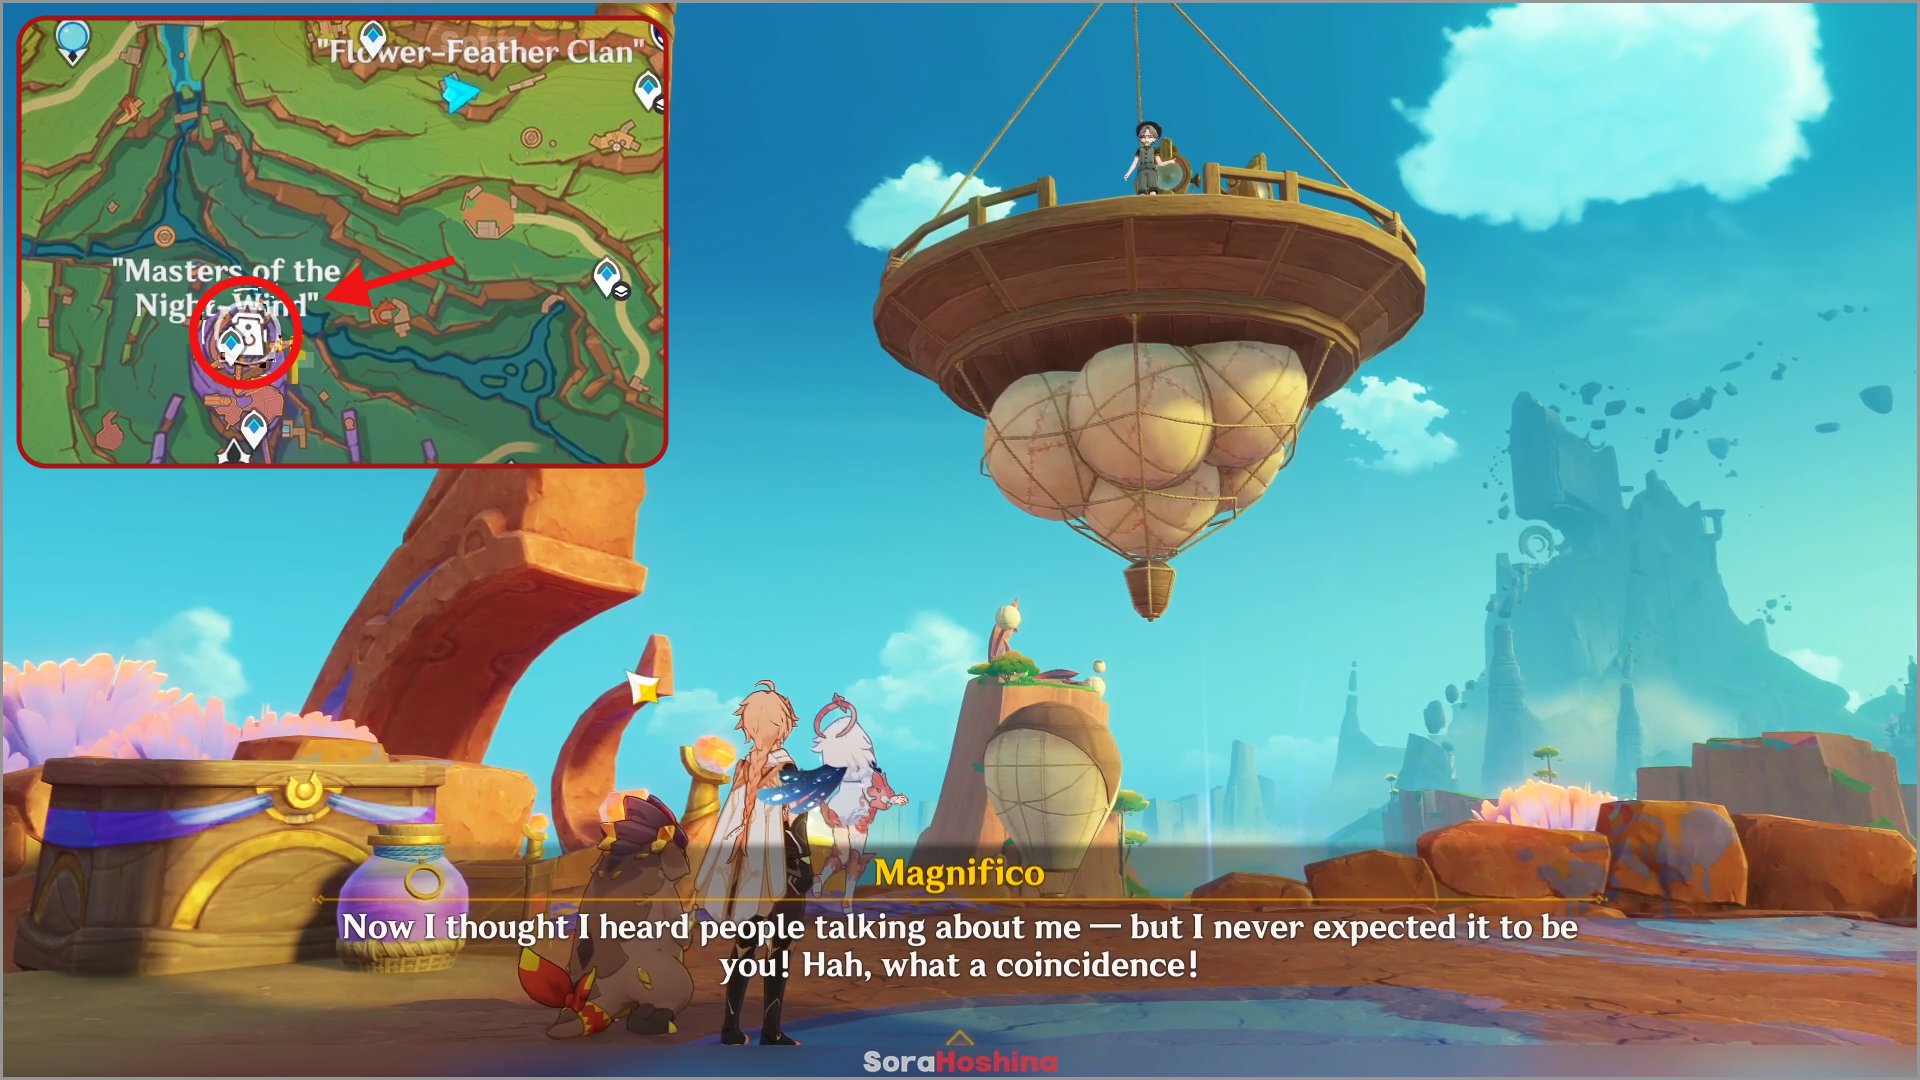
After completing the previous quest 'Dancin' in the Moonlight', open your map and you can see Magnifico's Photo Spot. Teleport to Masters of the Night Wind to continue the quest.
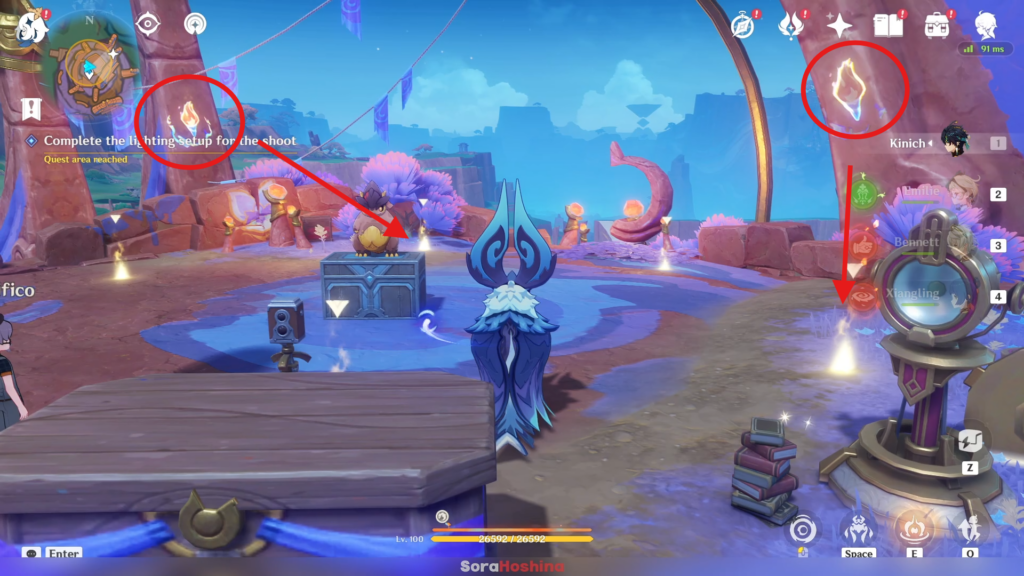
When Magnifico wants 2 light sources, use Iktomisaur to scan the torch Nightspirit Graffiti and place them on the two spot above.
11) Come Fly With Me
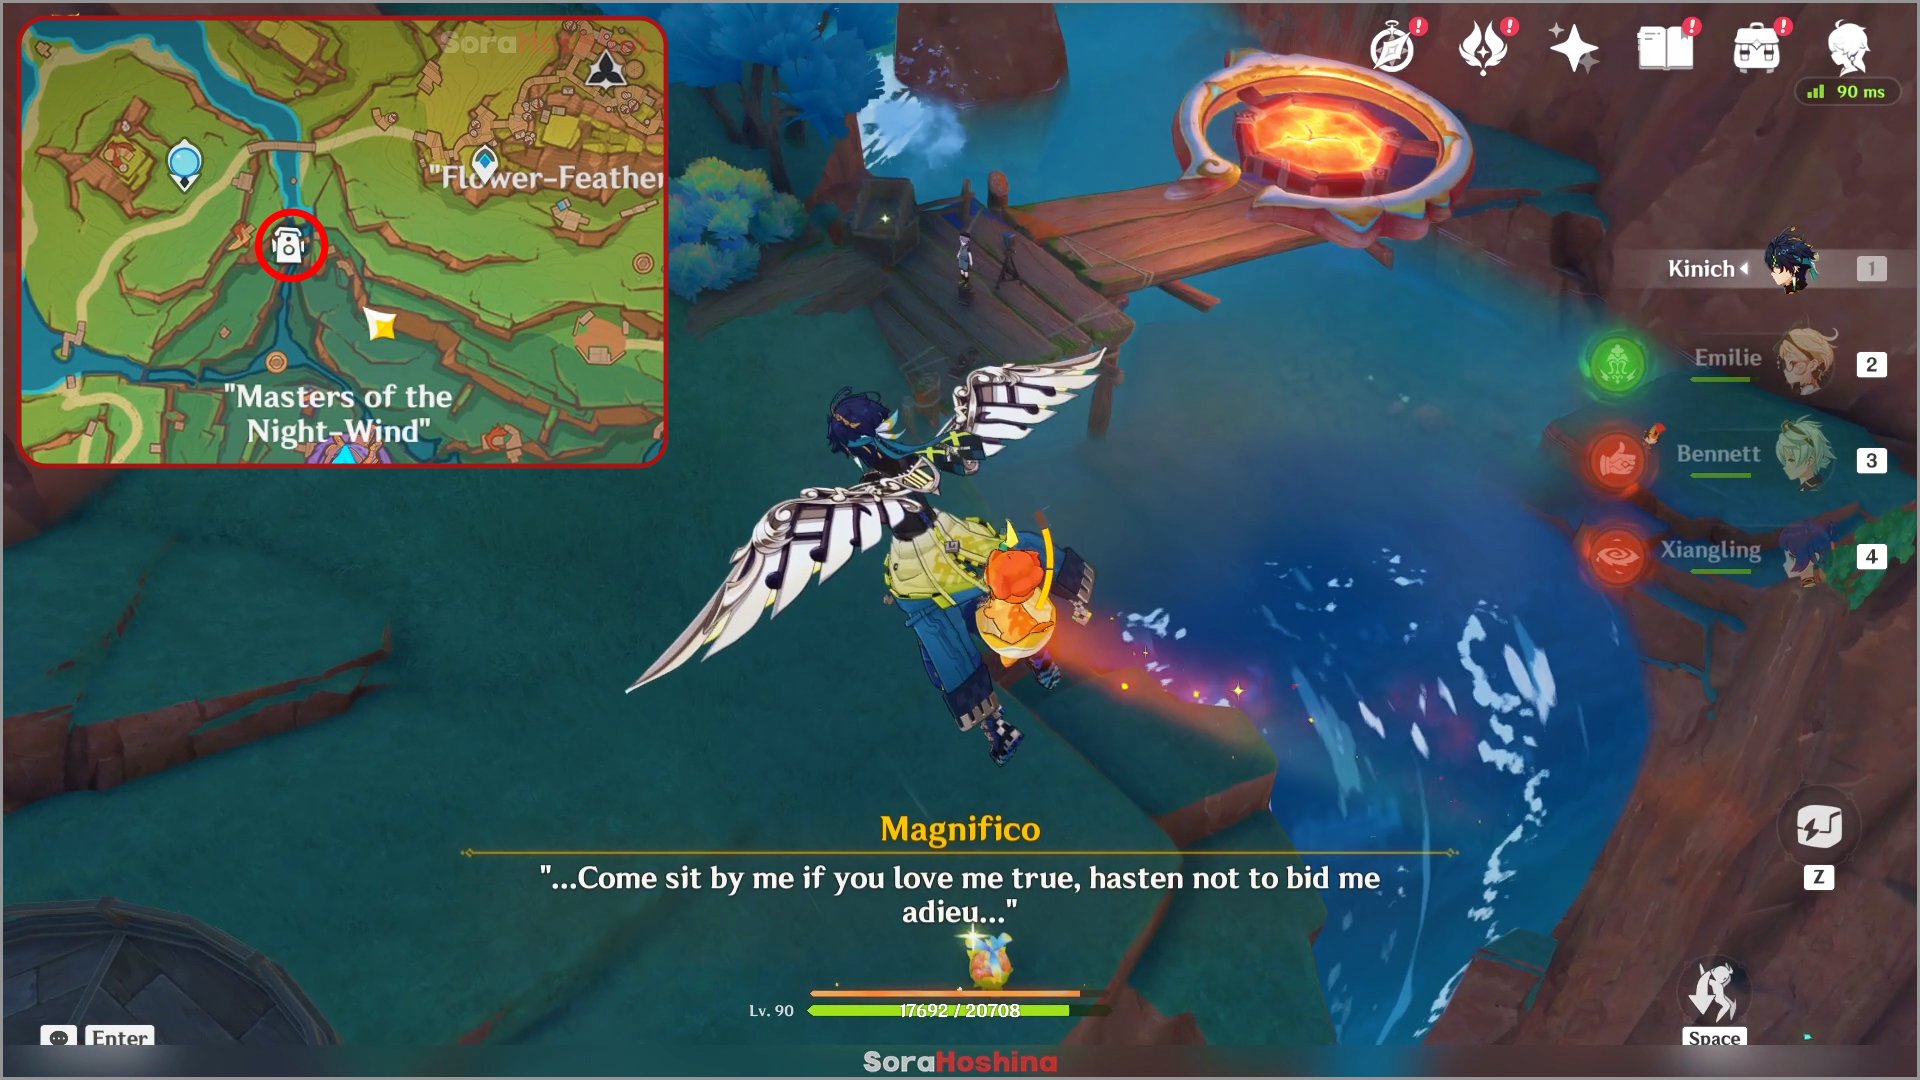
This quest is the continuation of 'Dancin' in the Moonlight' so make sure to complete that first. You can find Magnifico's Photo Spot southeast of S7 in Quahuacan Cliff.

This time, it's a bit difficult if you didn't read what he wants in the first place. In short, once Magnifico finishes his countdown to 1, you need to dive down to the huge orange circle on the waterfall. That's all for this quest.
12) Stand by Me
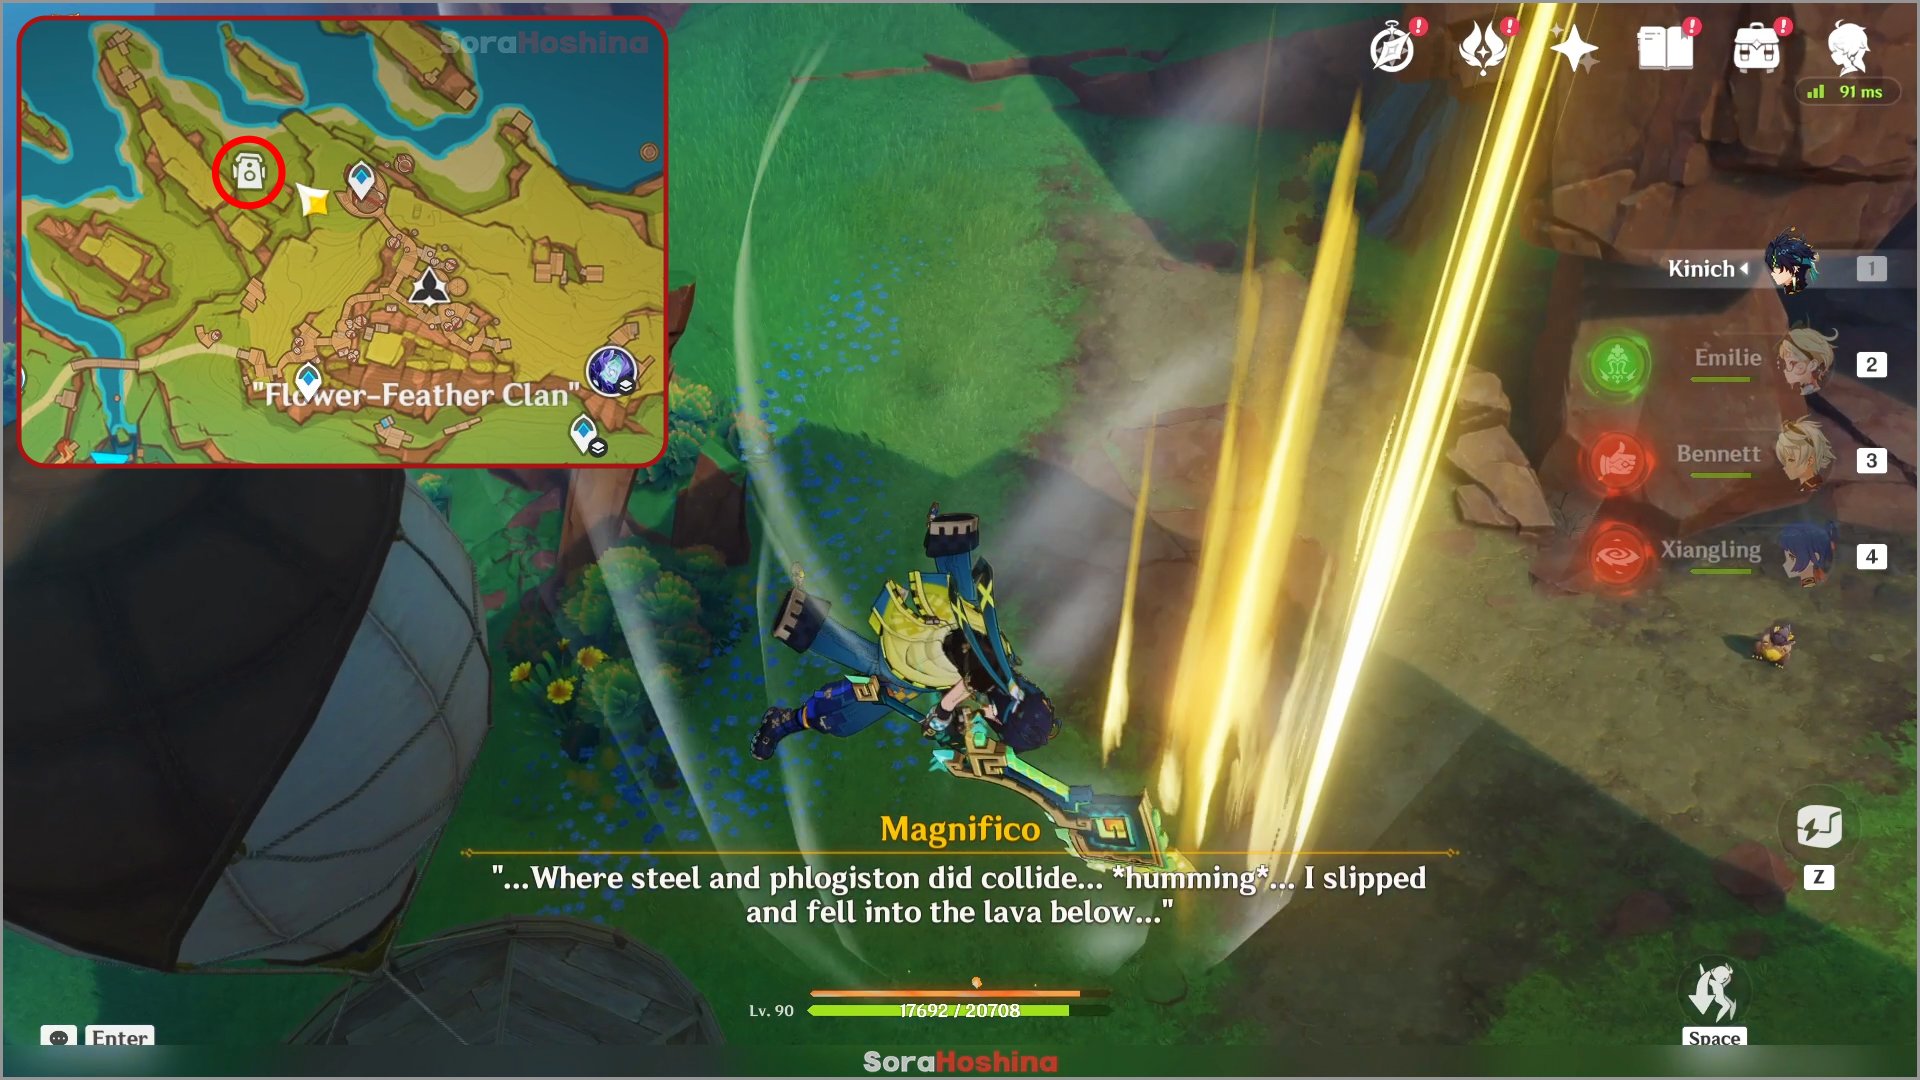
This quest is the continuation of 'Come Fly With Me' so make sure to complete that first. You can find Magnifico for the last time northwest of Flower-Feather Clan.

You need to indwell and Tepetlisaur and go to the marked spots until you reach the one on top of the rock. After that, defeat some mobs and you will complete the quest and get the [Till Moss Grows Forth].
13) From One Case to Another (Quest Chain)
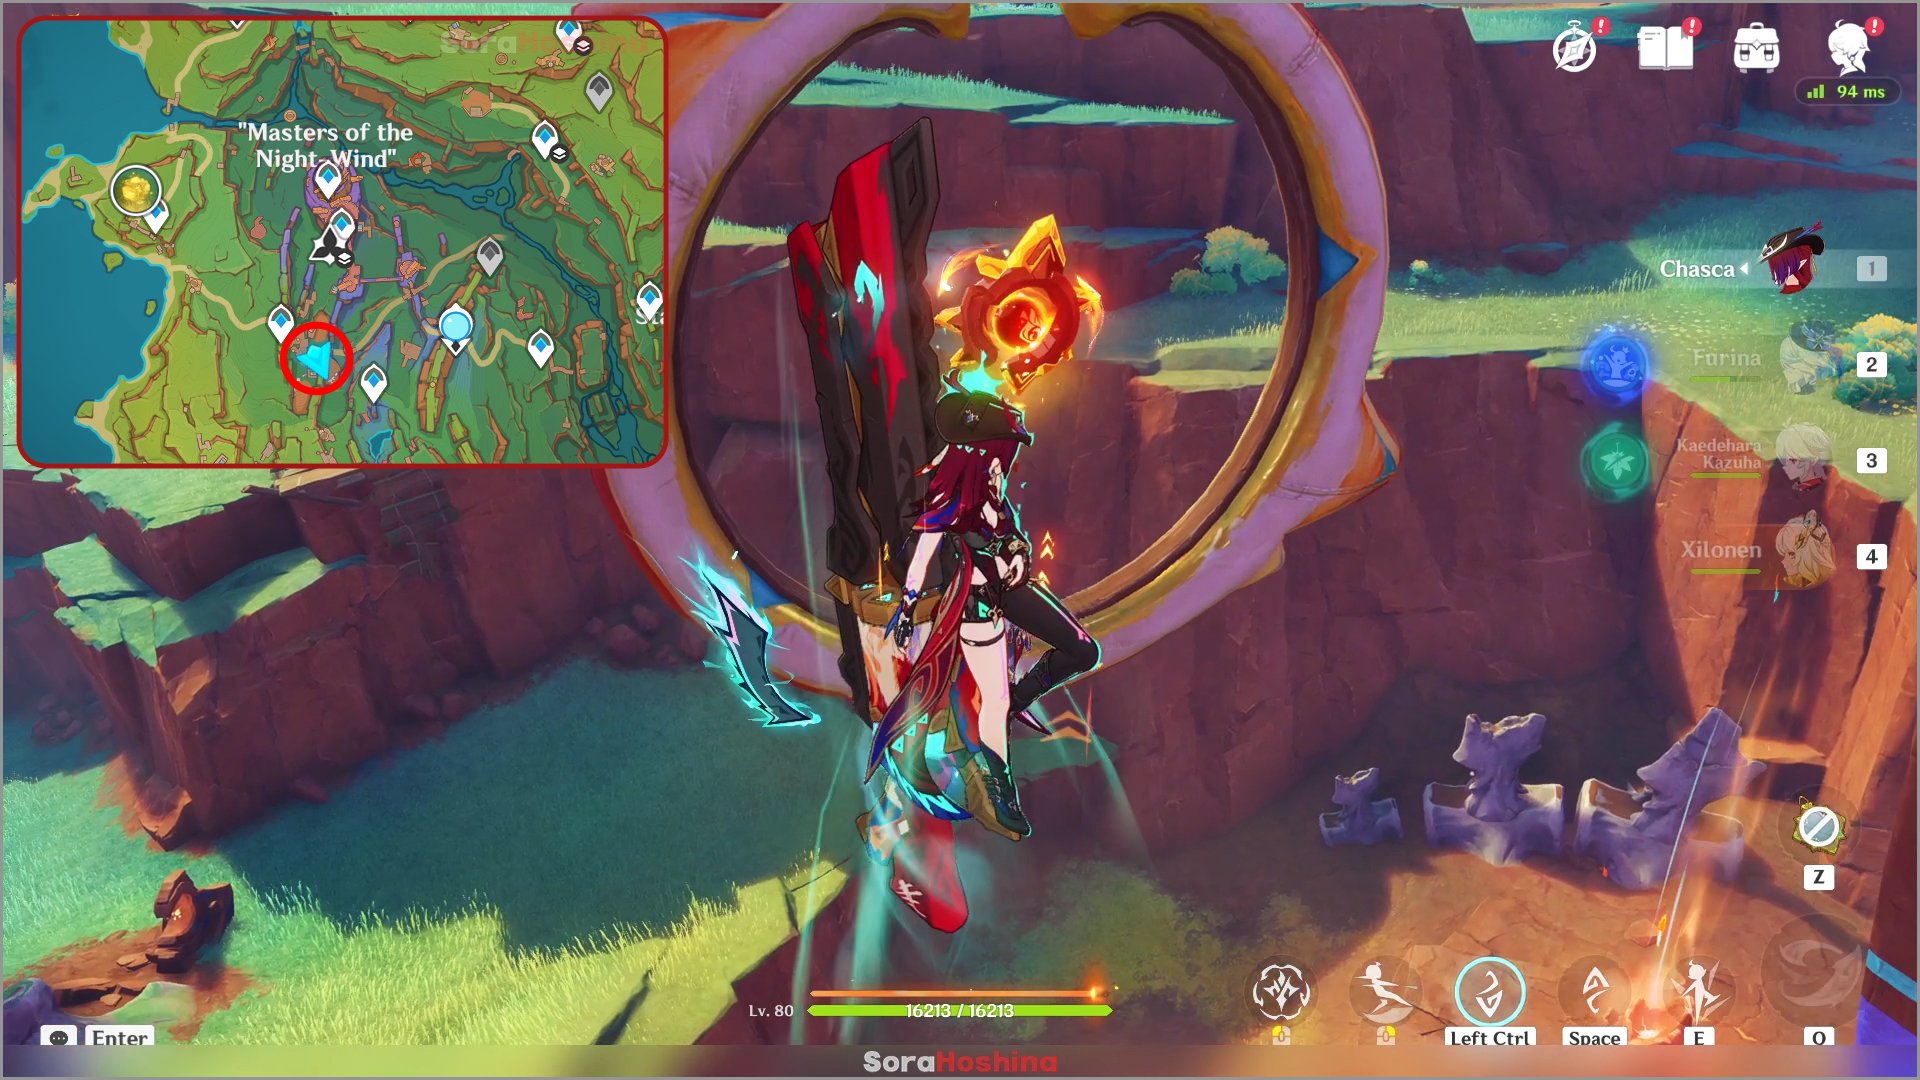
Teleport to the south waypoint of Masters of the Night-Wind and head to the marked area. There, use a Qucusaur or Chasca to fly through the wind that contain a Pyroculus. After that, the quest will starts. Although this is a quest chain, you will get the next one automatically and each of them is pretty short. The quests are:
1) Incidents Are Ever Sudden
2) Beat the Clock: 24 Hours (given automatically after completing the previous one).
3) An Air Race and an Alibi (given automatically after completing the previous one).
4) Farewell, Final Saurus Cracker (given automatically after completing the previous one).
Keep in mind that if you didn't get the second and third quest immediately, it has something to do with Chasca's Story Quest (the third Tribal Chronicle in Flower-Feather Clan. Complete or at least progress further in Chasca's quest and after that, you will get the continuation. Speaking from experience.
14) The Lone Isle Named Night
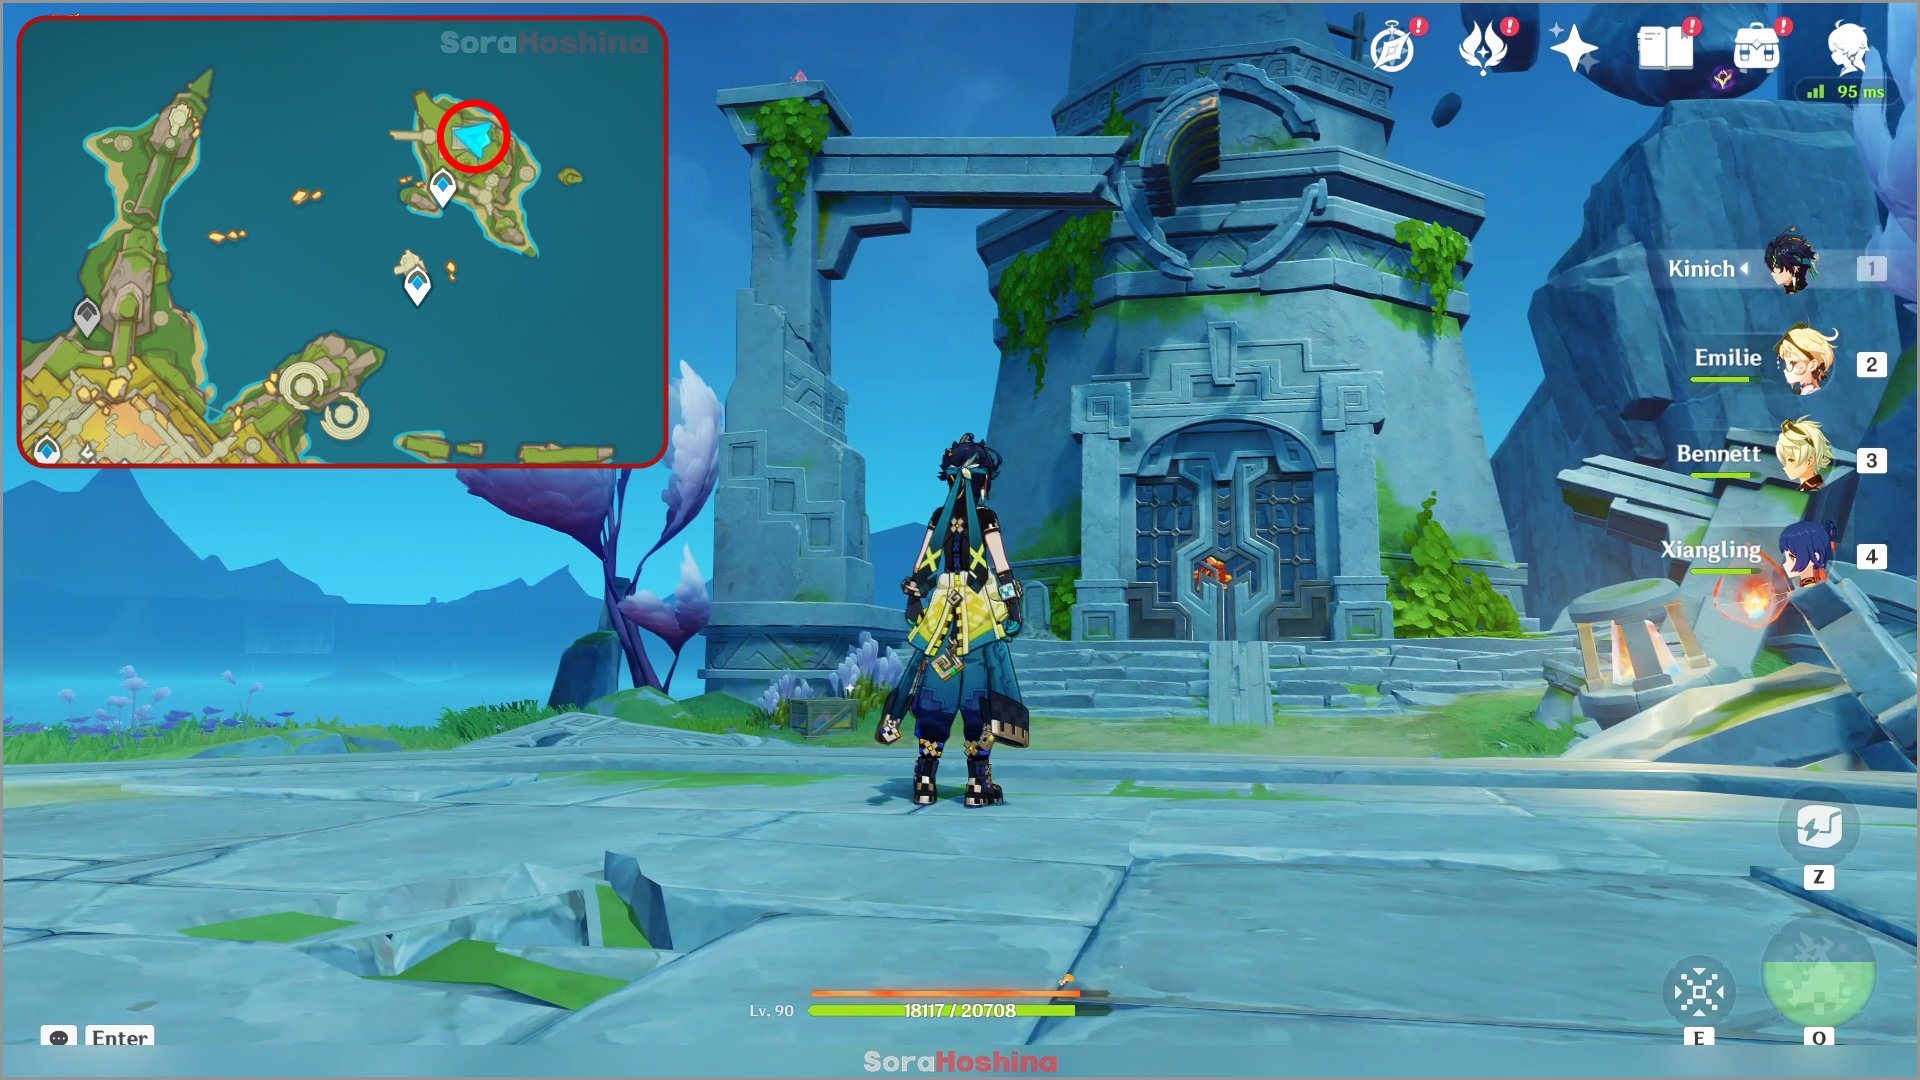
To start this quest, you need to complete a puzzle. The puzzle (and the quest) is located in a small island northeast of Ochkanatlan. Once you reach there, you can see the circle-looking item (called Ancient Inscribed Ring) on top of the gate. You need to make sure all the semi-circle parts moves to complete the circle before using Iktomisaur's power to scan them.
Read the full guide here to complete the quest: The Lone Isle Named Night Quest Guide
15) Stones, Coconuts, and Dragon Traffickers
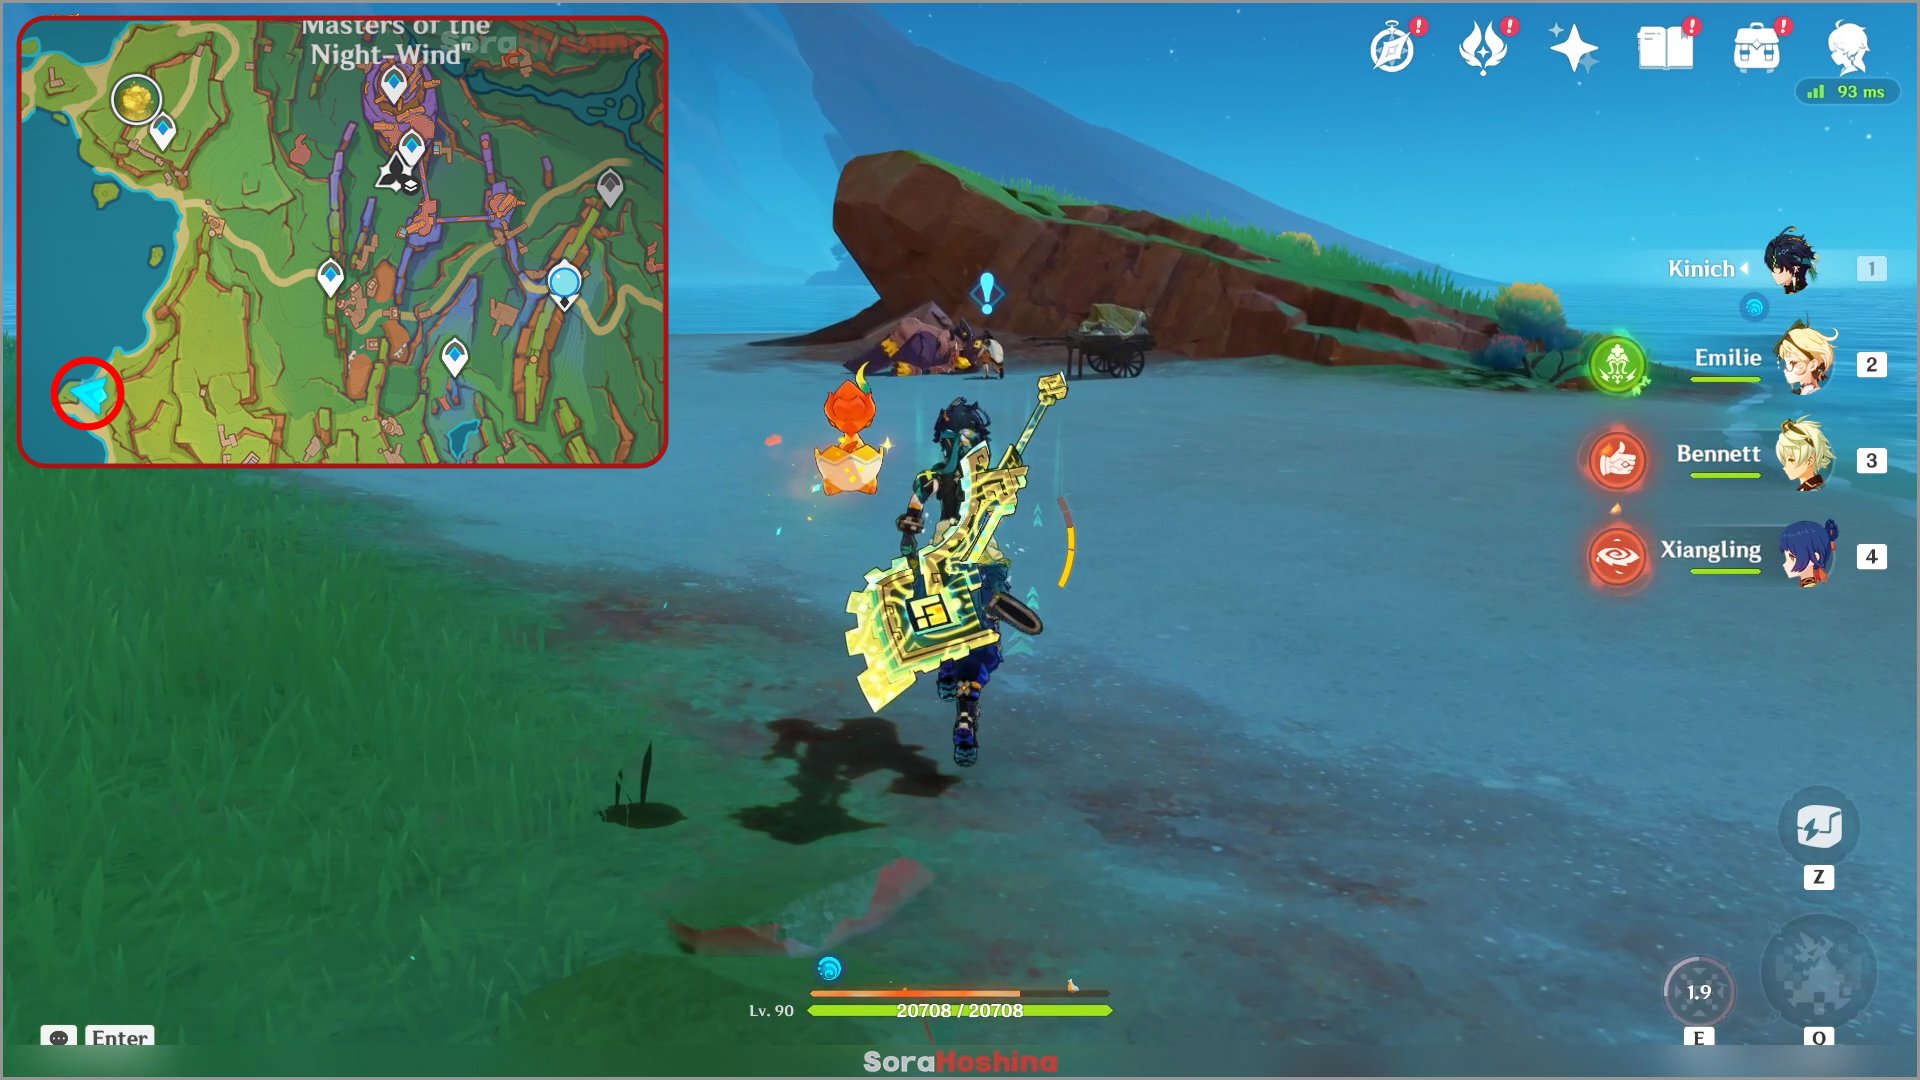
Teleport to the waypoint west of Masters of the Night-Wind and head southwest by the sea where you can see a male NPC with an injured Saurian. In this quest, you need to find a Saurian traffickers and defeat them.

At the trafficker's camp, you need to choose the right action in order to continue quest. The right order is:
1) Open the iron cage
2) Blow up the Explosive Barrel
3) Open the Saurian Cart
After that, just follow the quest navigation and you will complete the quest and get the achievement [Cat Food for Prawn Guns].
16) Friends of Fire and Water
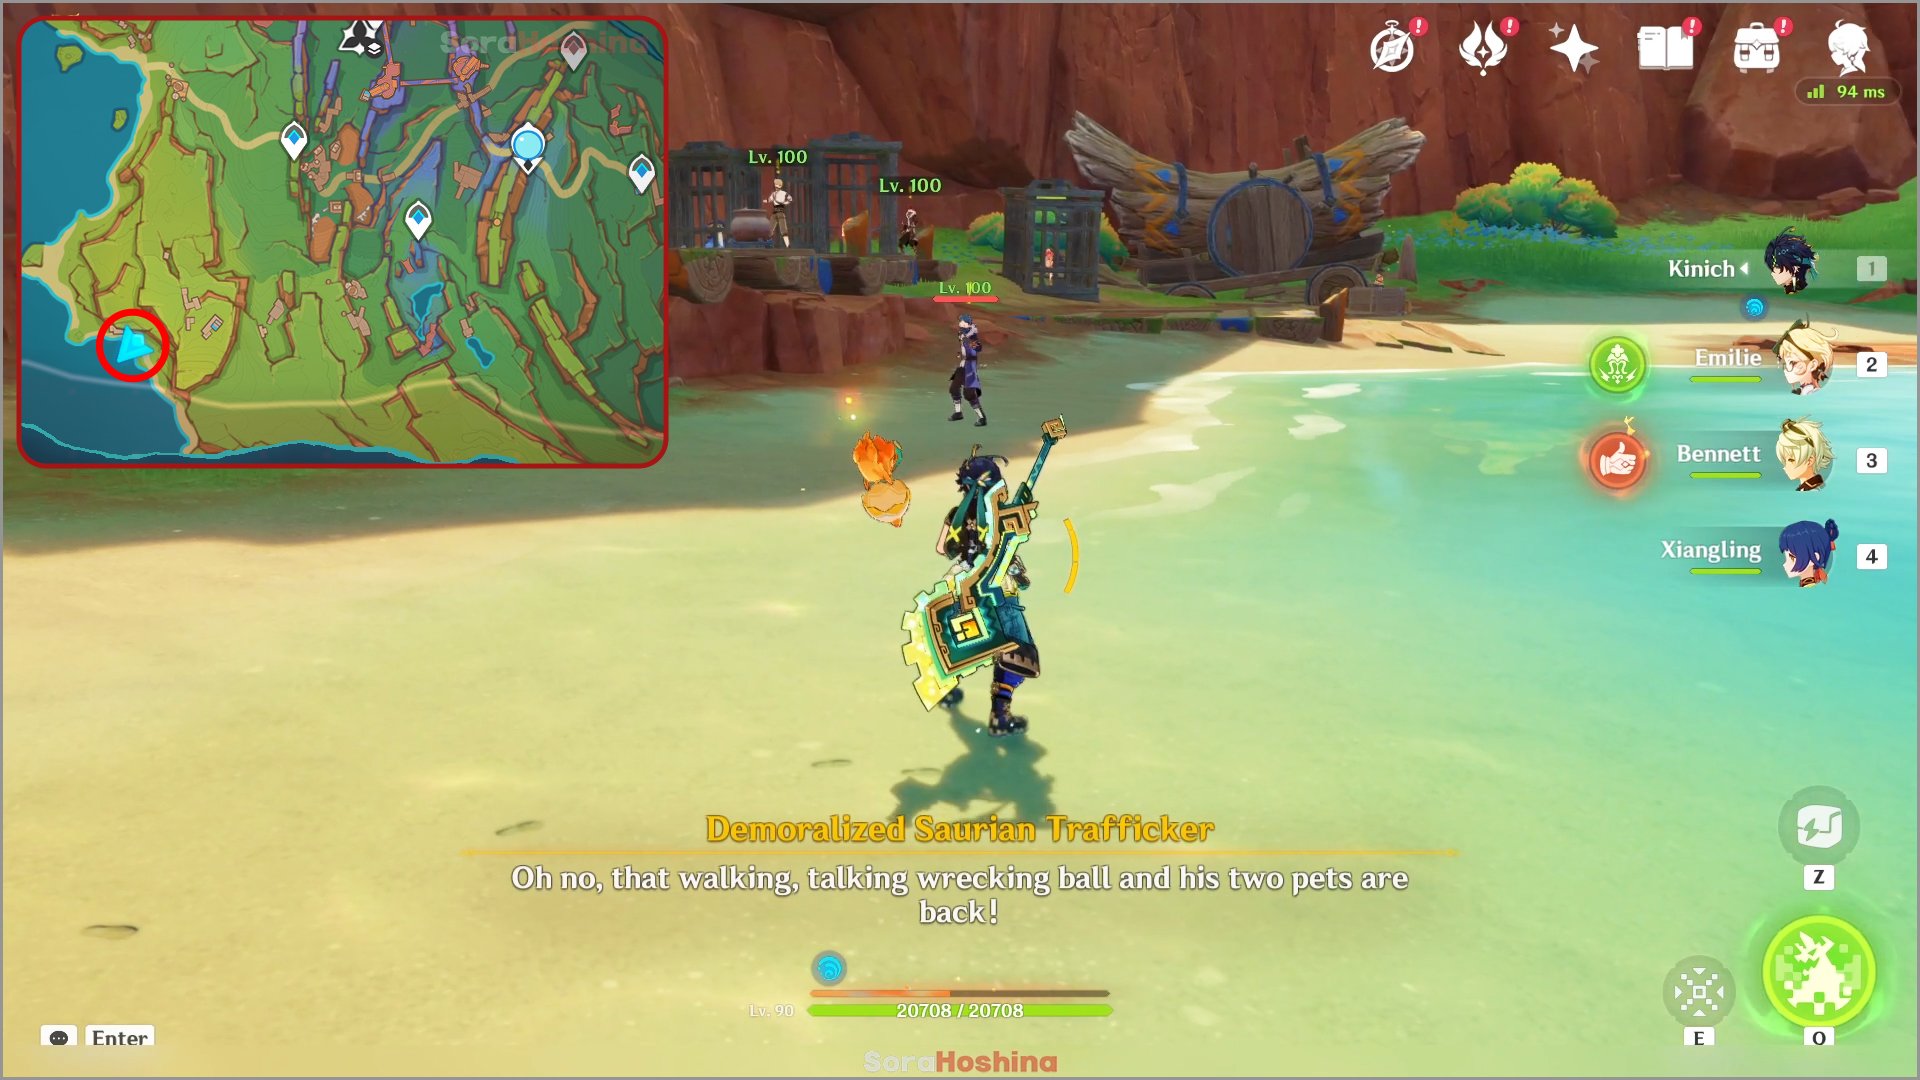
An extremely short quest and a continuation of the previous quest 'Stones, Coconuts, and Dragon Traffickers'. You can find this quest on the shore far southwest of Masters of the Night-Wind. All you have to do is defeat the enemies again and unlock all 3 cages. Yes, there are 3 and the last one is the Saurian Cart with the door closed (some will probably missed this).

Cook and feed the Blubberbeast before releasing it to the sea to complete the quest and get an achievement [Would Fontaine Beasts Eat Natlan Fish?]
17) A Saurian Returns to the Nest
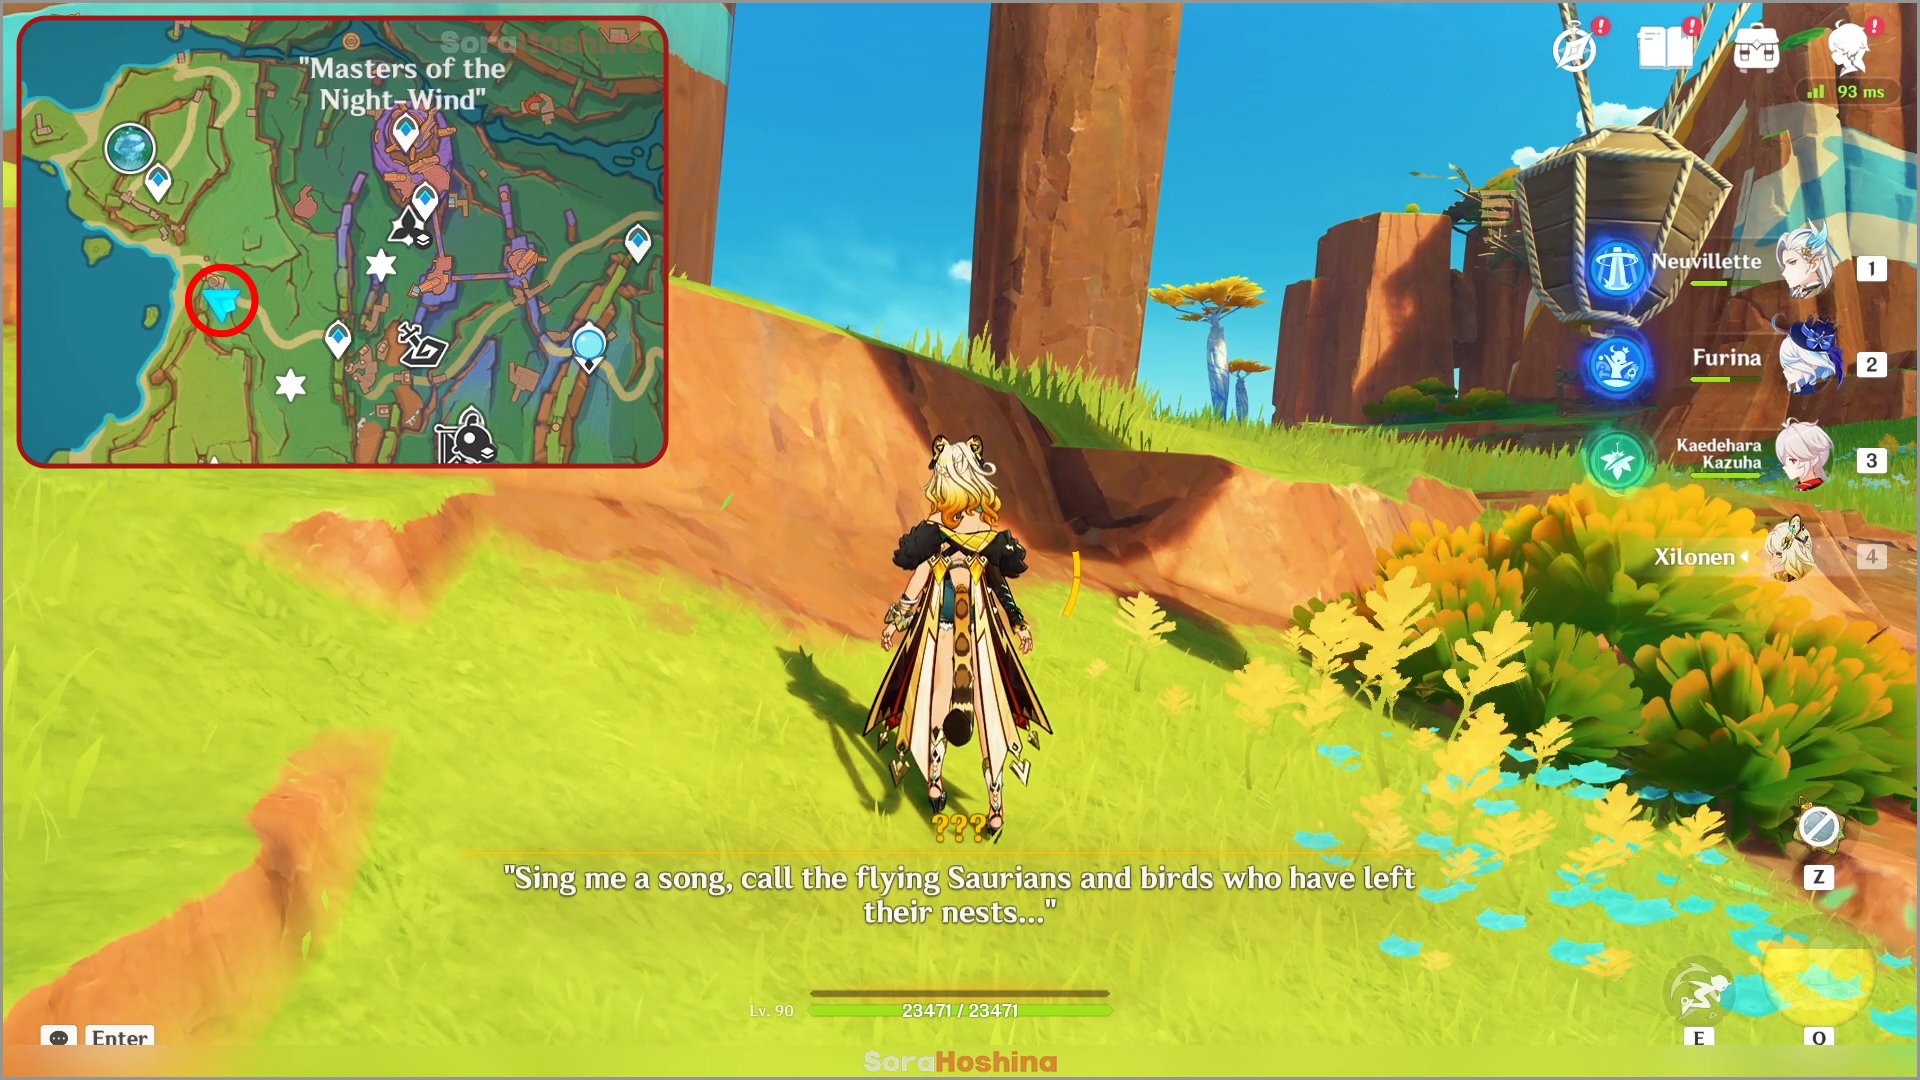
Teleport to waypoint south of Masters of the Night-Wind and walk to the northwest until you see a huge mountain near the sea (spot that I circled in the image above). Once you reach there, you will notice someone singing.
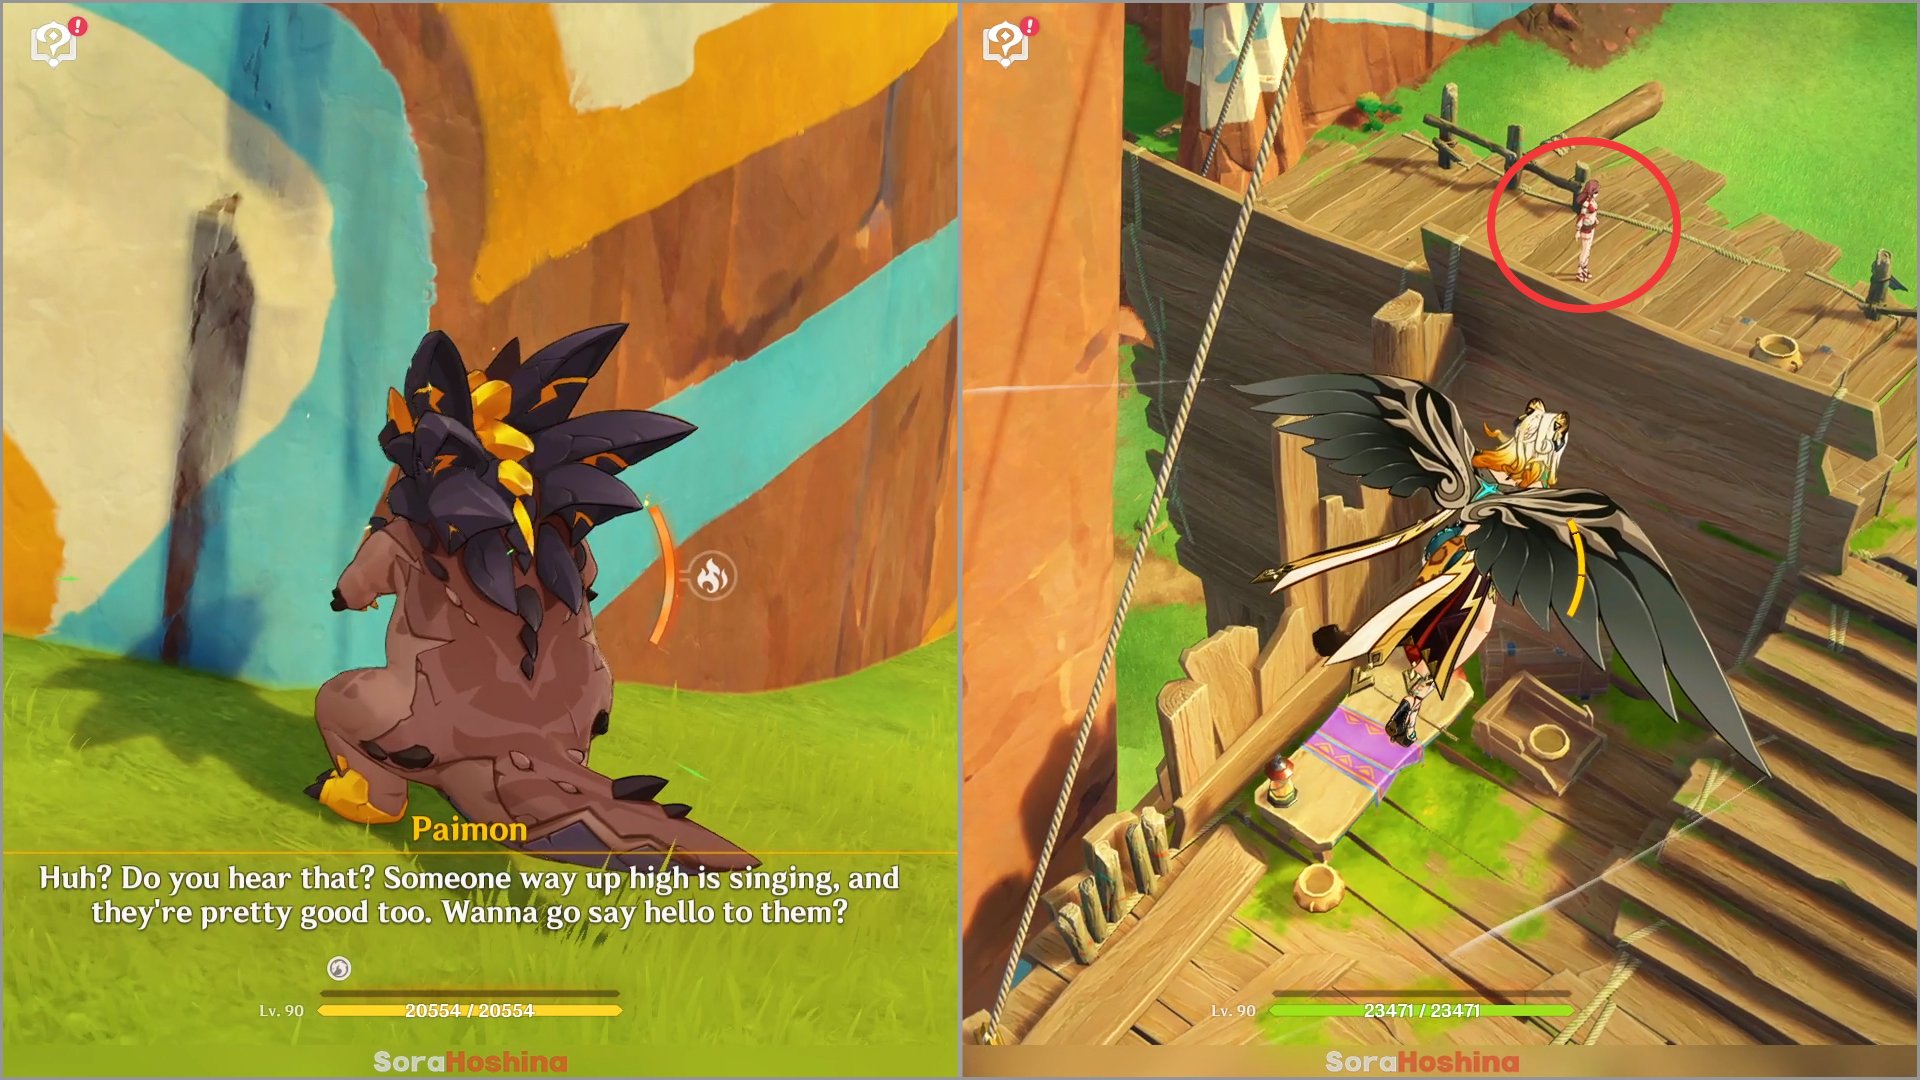
Then, Paimon will mention someone way up high is singing. Enter a Tepetlisaurus nearby (or use Xilonen/Kachina) to climb up the mountain to the top. Up there, you can see a lady NPC and if you approach her, you will get this quest.

The quest itself is not that hard. All you need to do is indwell a Qucusaurus and complete the flying challenge. Don't worry about the blue transparent birds and do your best to control the birds (really easy once you get the hang of it). Collect Challenge Coins to get the highest rank to unlock all treasure chests.
18) Charge Forward! Go, Go, Go!
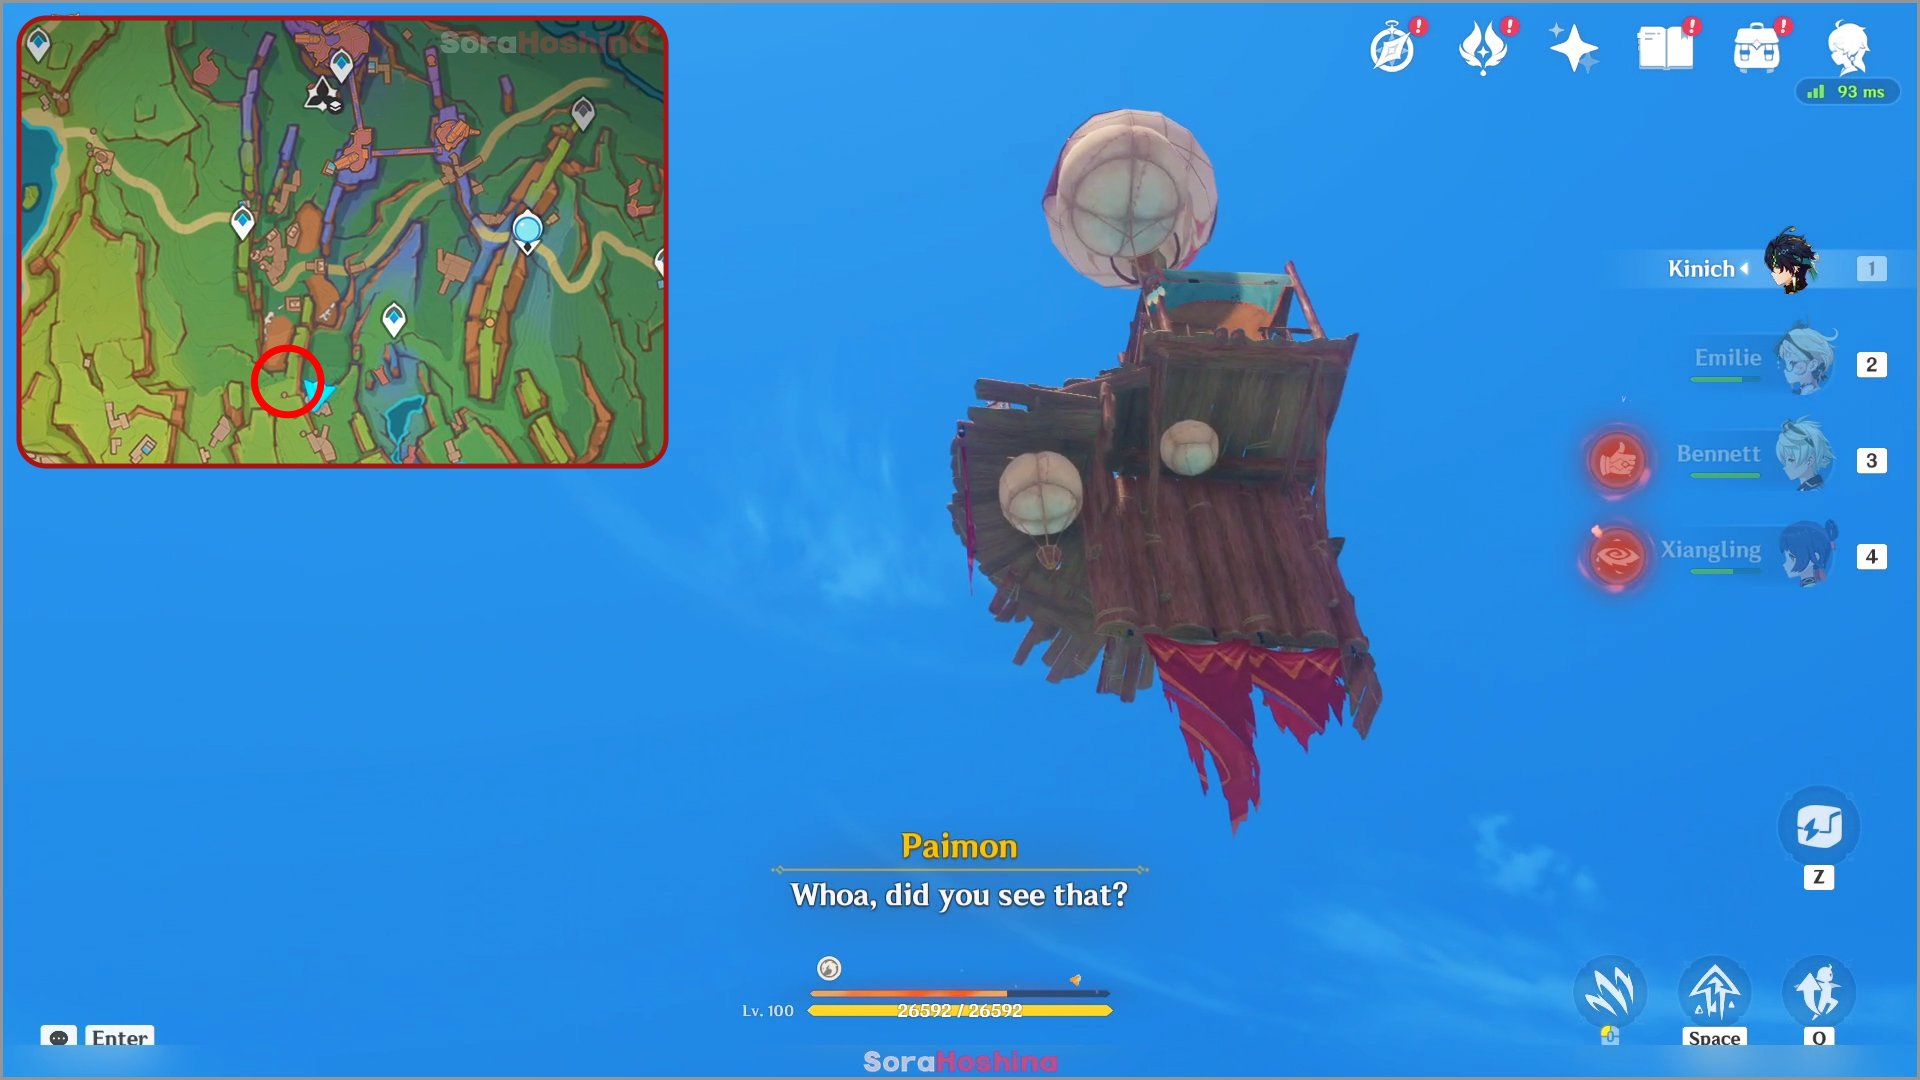
Teleport to the waypoint south of Masters of the Night-Wind and head south until you reach the marked location above. Once you reach the spot, Paimon will mention about a floating house above and how to reach it. To do this, you need to blow two horns in the right order.
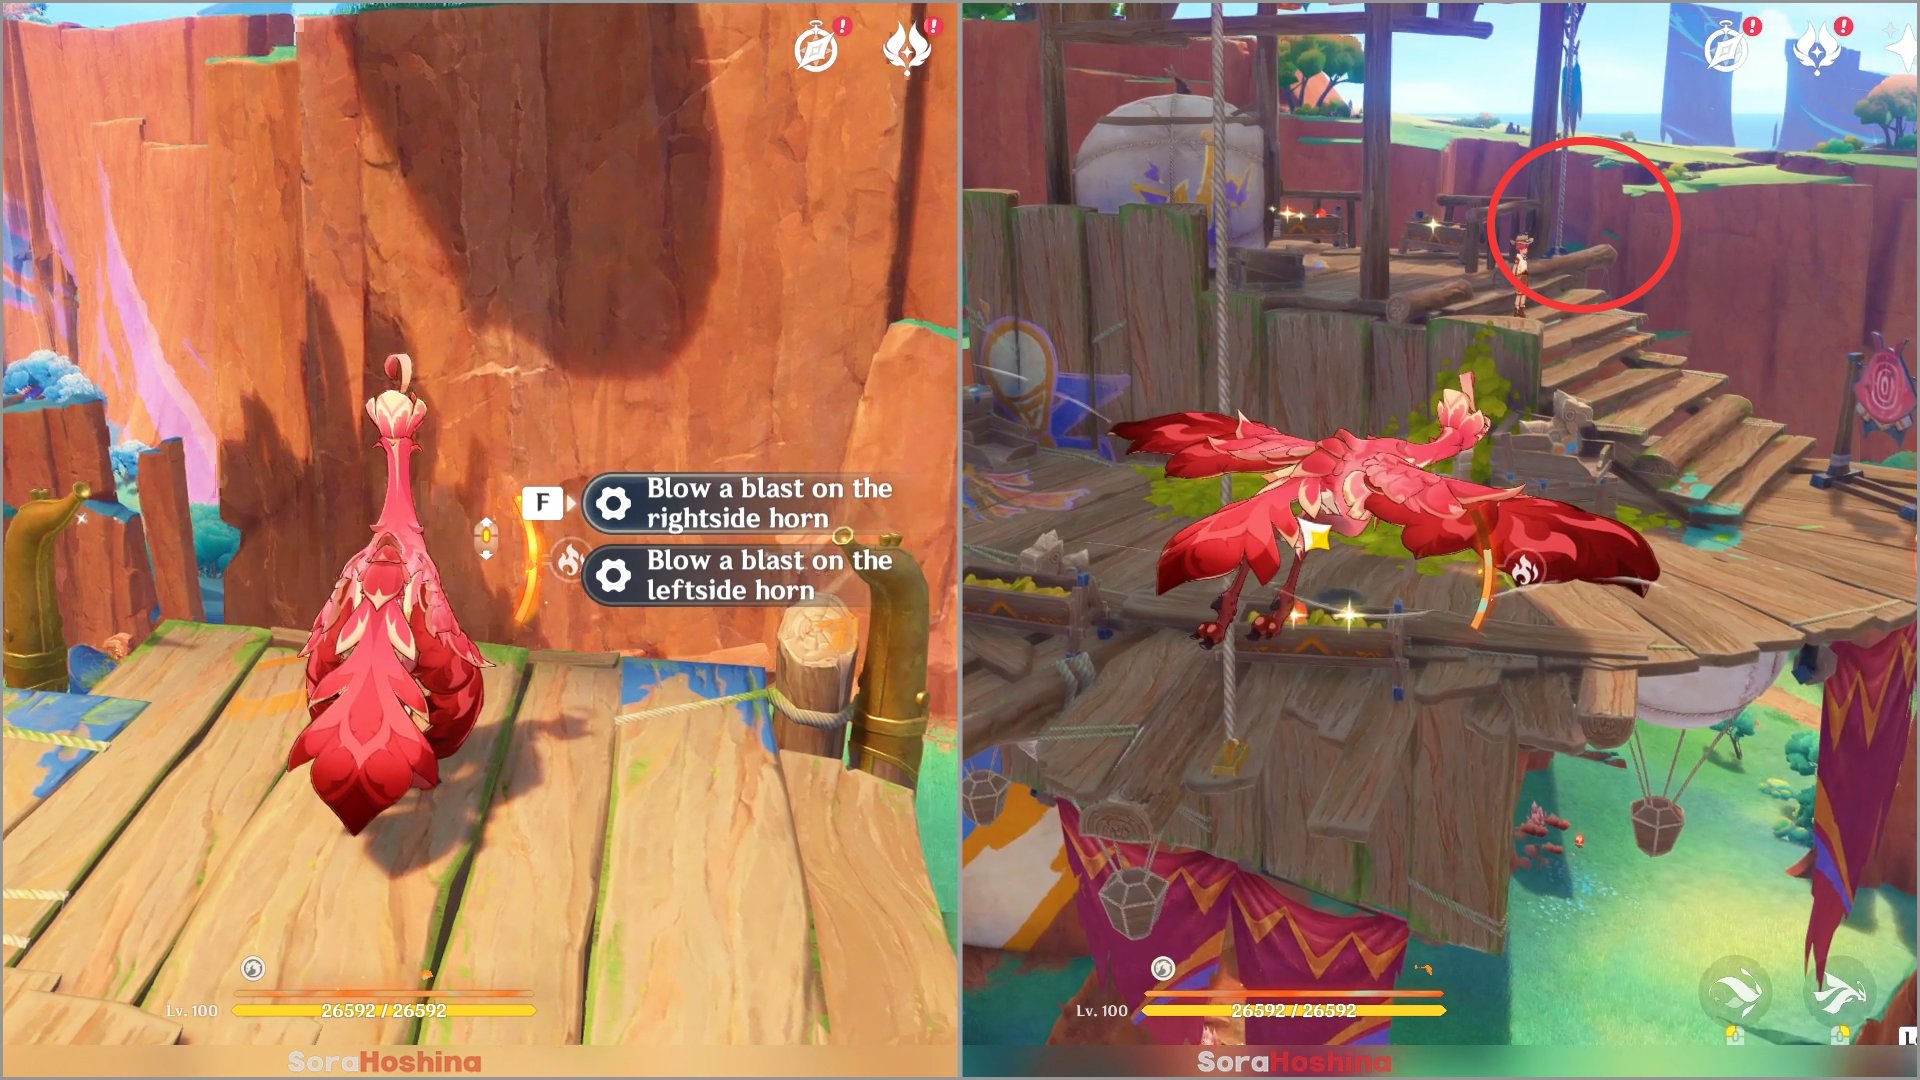
The 2 huge horns are like in the image above, it's very near to the previous spot where you Paimon mentioned about the house. The right order is: left > right > left > right. A wind current will appear and you can glide above to reach the house. Complete the gliding challenge to complete the quest.
19) Molting Season
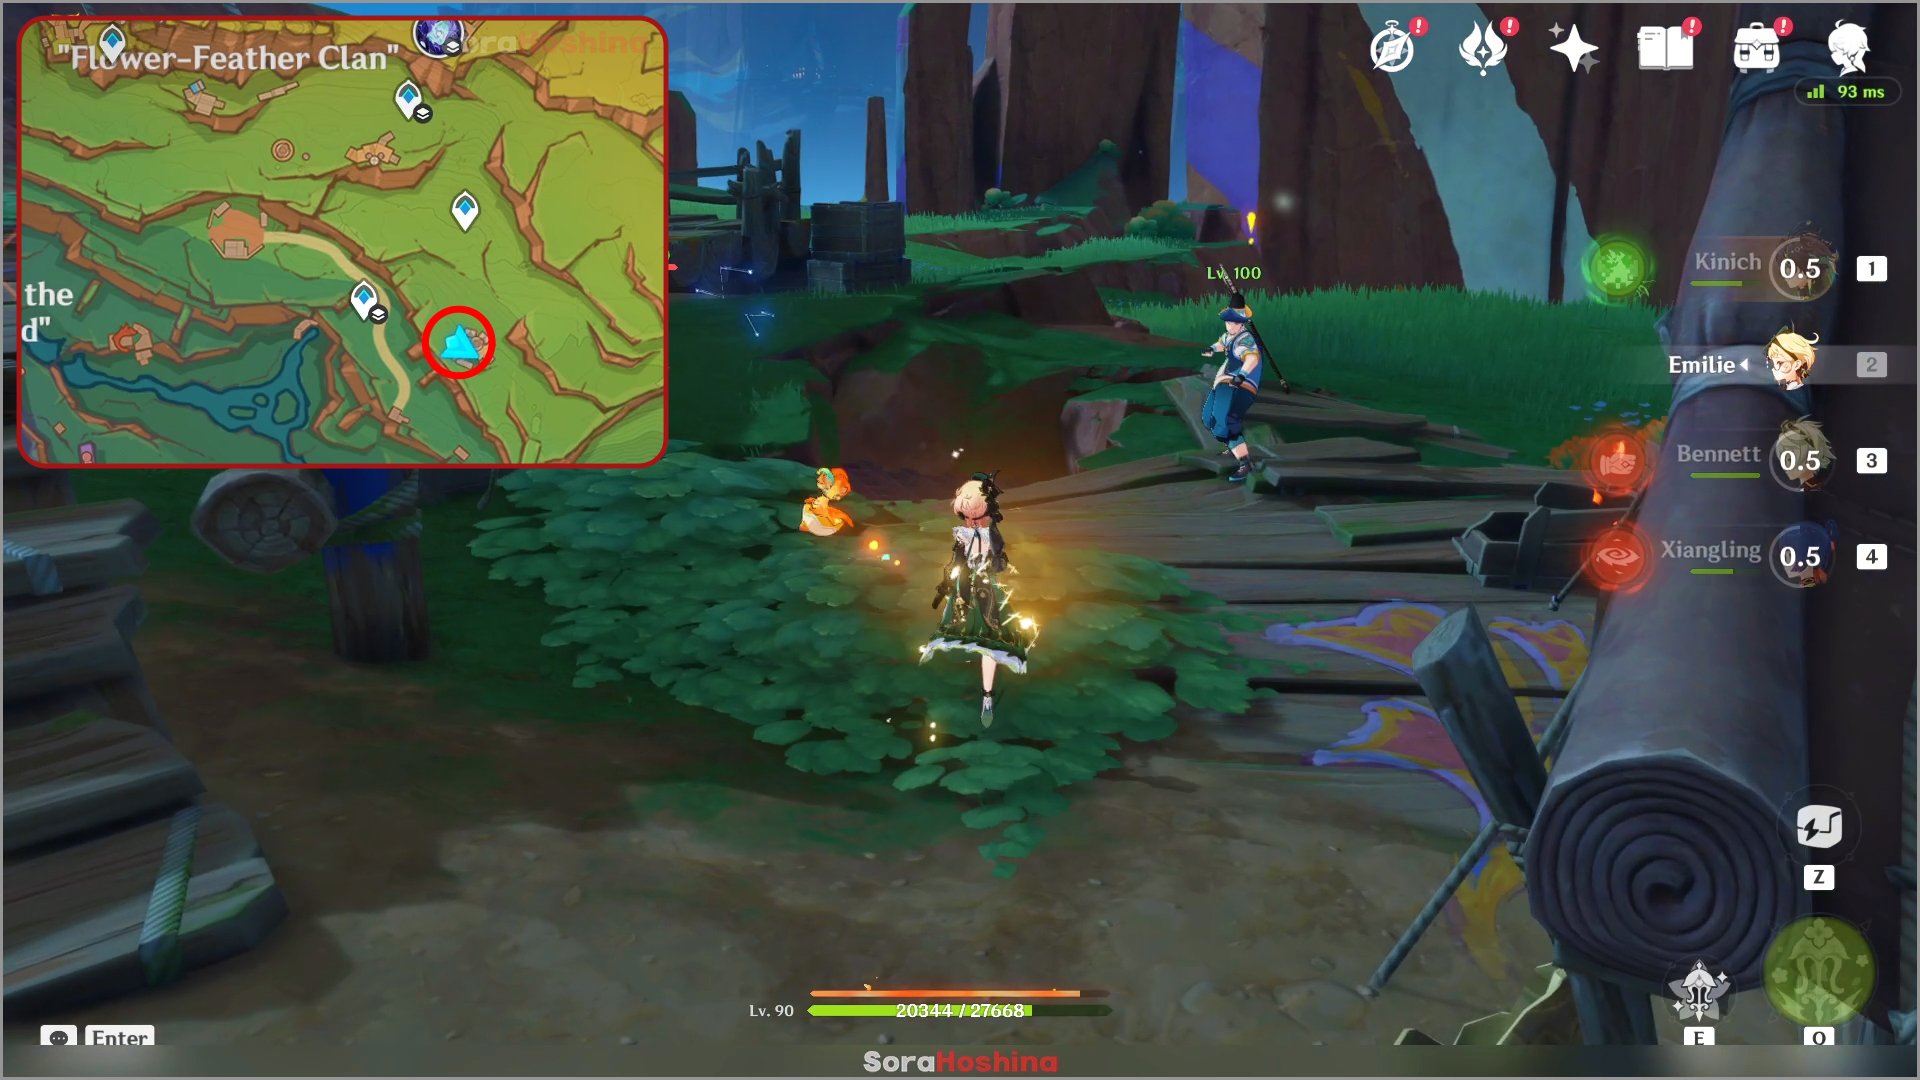
Teleport to the waypoint southeast of Flower-Feather Clan and head south towards a voice of Angry Saurian Trafficker. Defeat them to talk to the voice locked under the gate.

Indwell a Qucusaur and talk to the Qucusaur under the tent. It will show us the shortcut (a Phlogiston Wind Tunnel on the tent beside it) to the cellar where Acomitl is. Once you talk to Acomitl, complete the gliding challenge to complete the quest.
20) Every Aspect of a Warrior

You can only get this quest after completing the previous 3 quests: 'A Saurian Returns to the Nest', 'Charge Forward! Go, Go, Go!', 'Molting Season'. After that, you will get this quest automatically. Complete the gliding challenge to complete the quest.
21) Twisted Extension
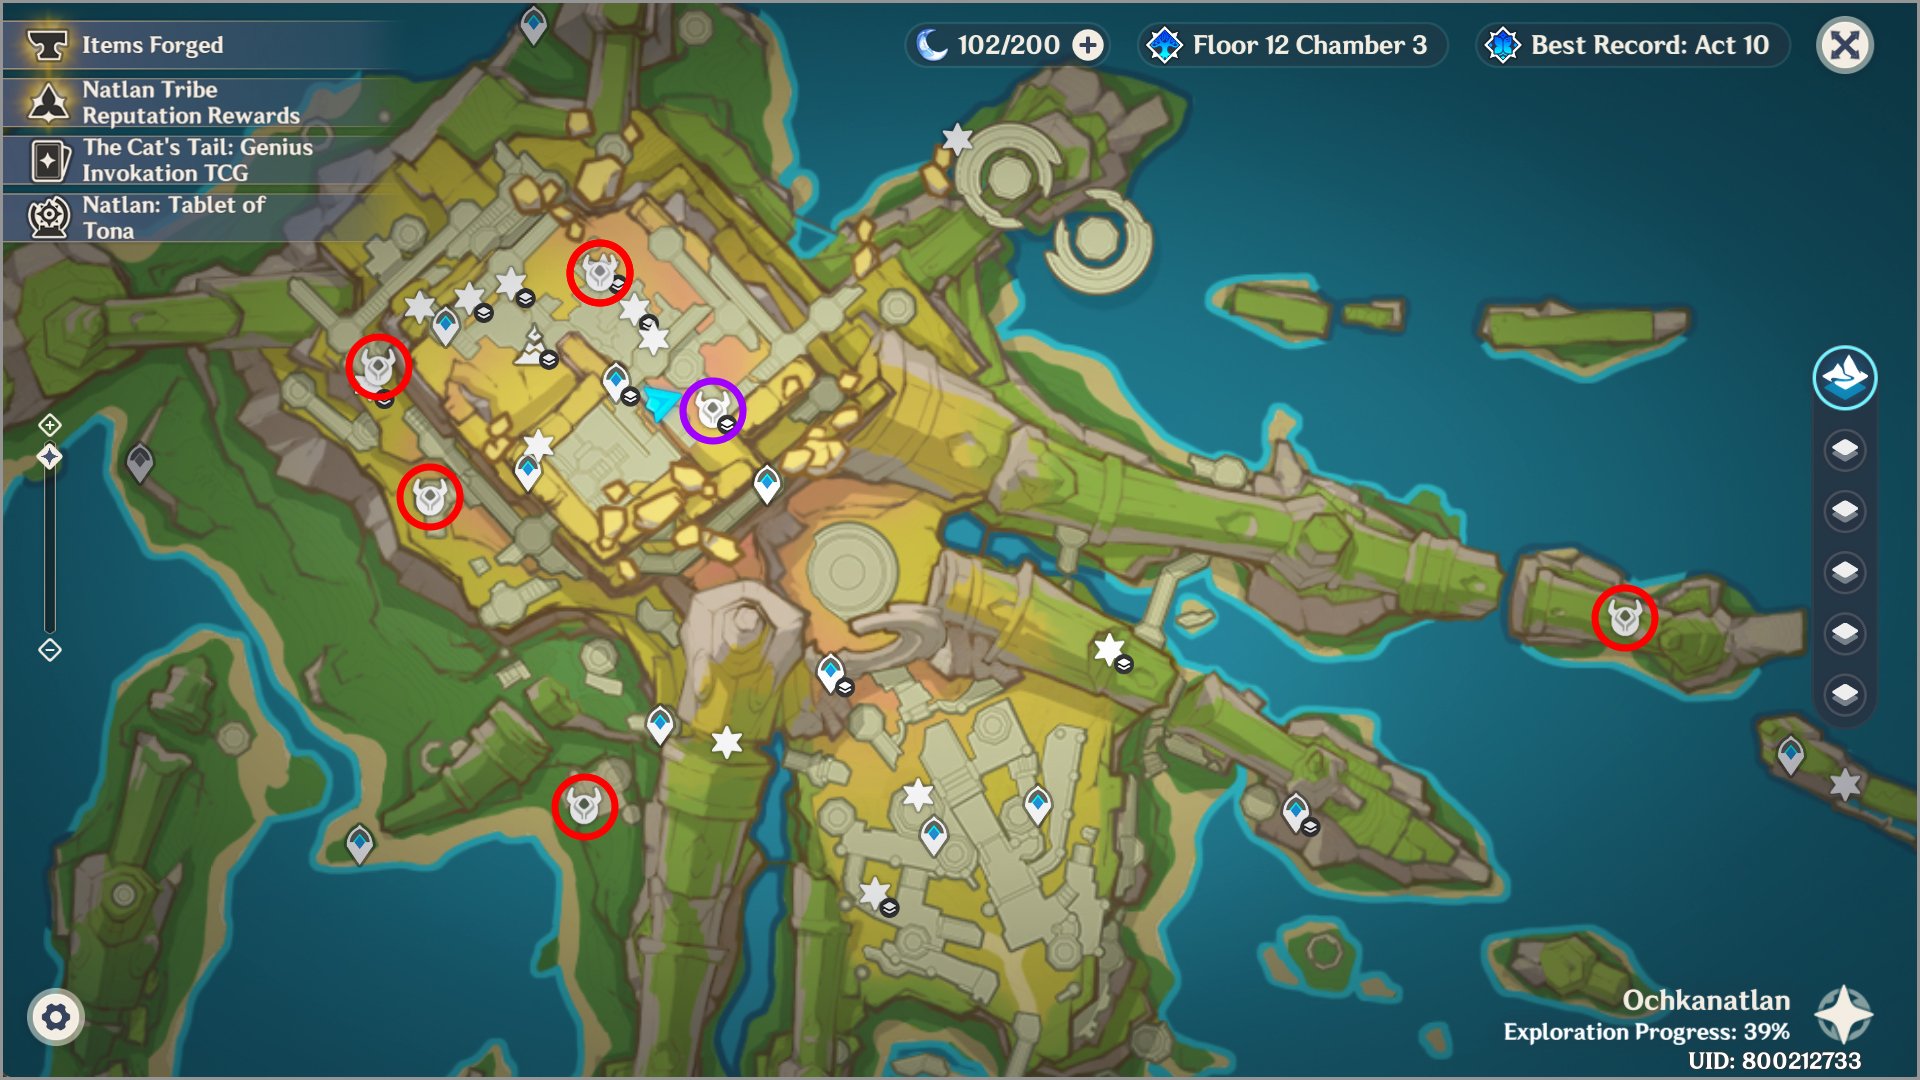
First of all, go to the 5 different spots (red circle) above and defeat all Mimiflora enemies where Quenin appear to help you. Once you're with that, go to the underground area (purple circle) and read Quenin's diary to get this quest.
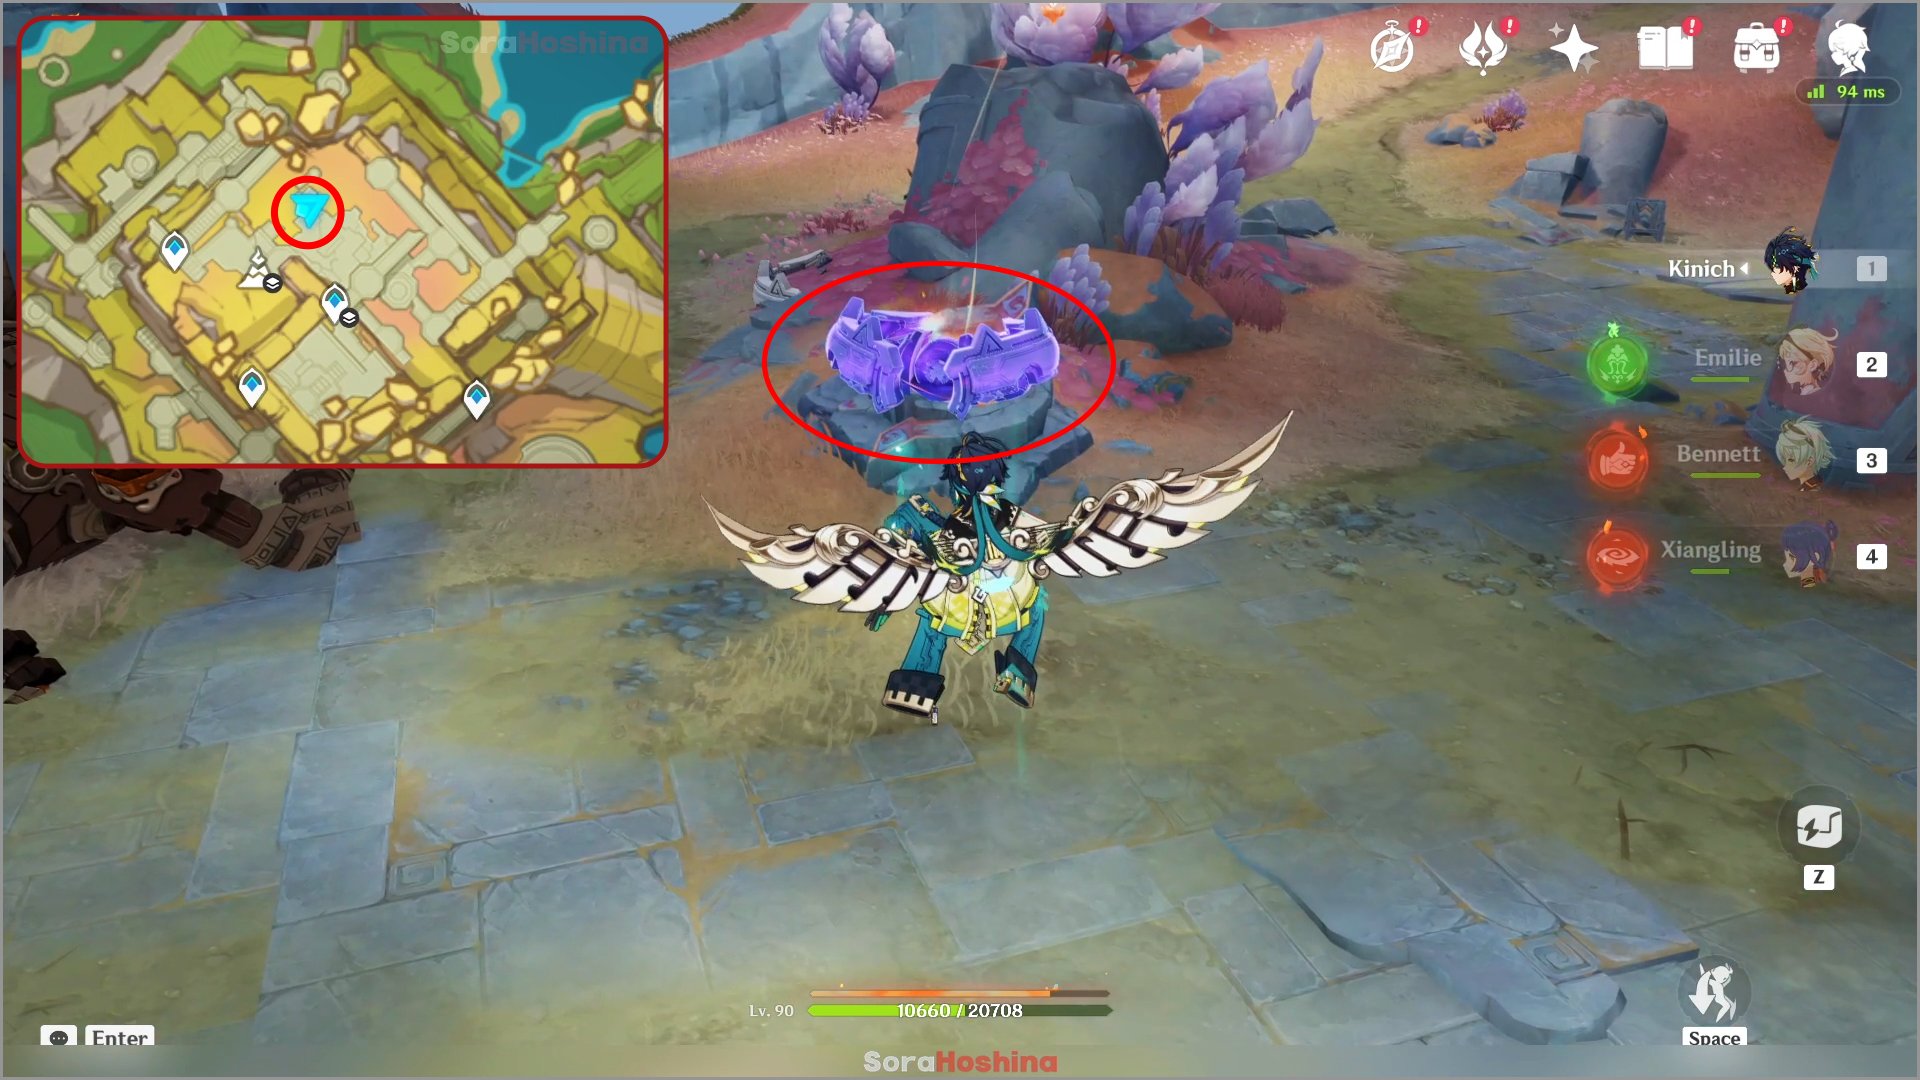
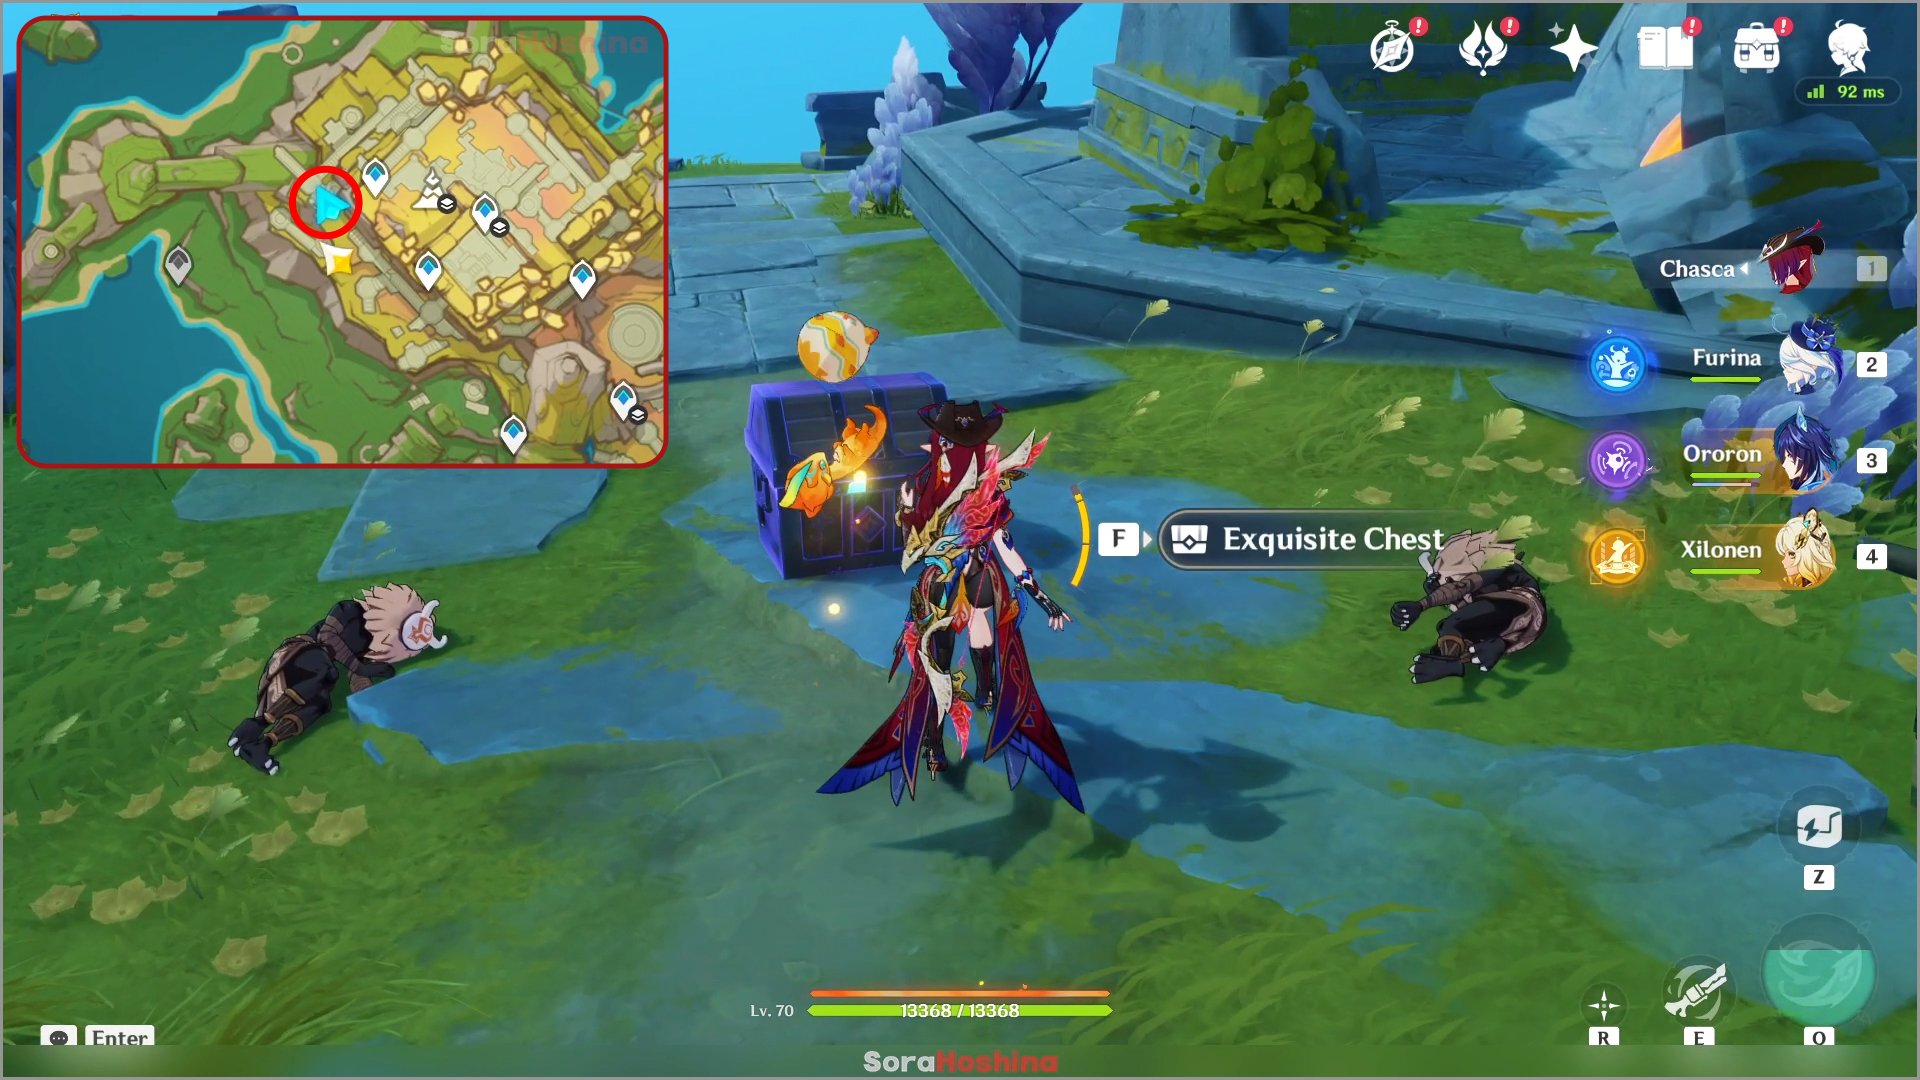
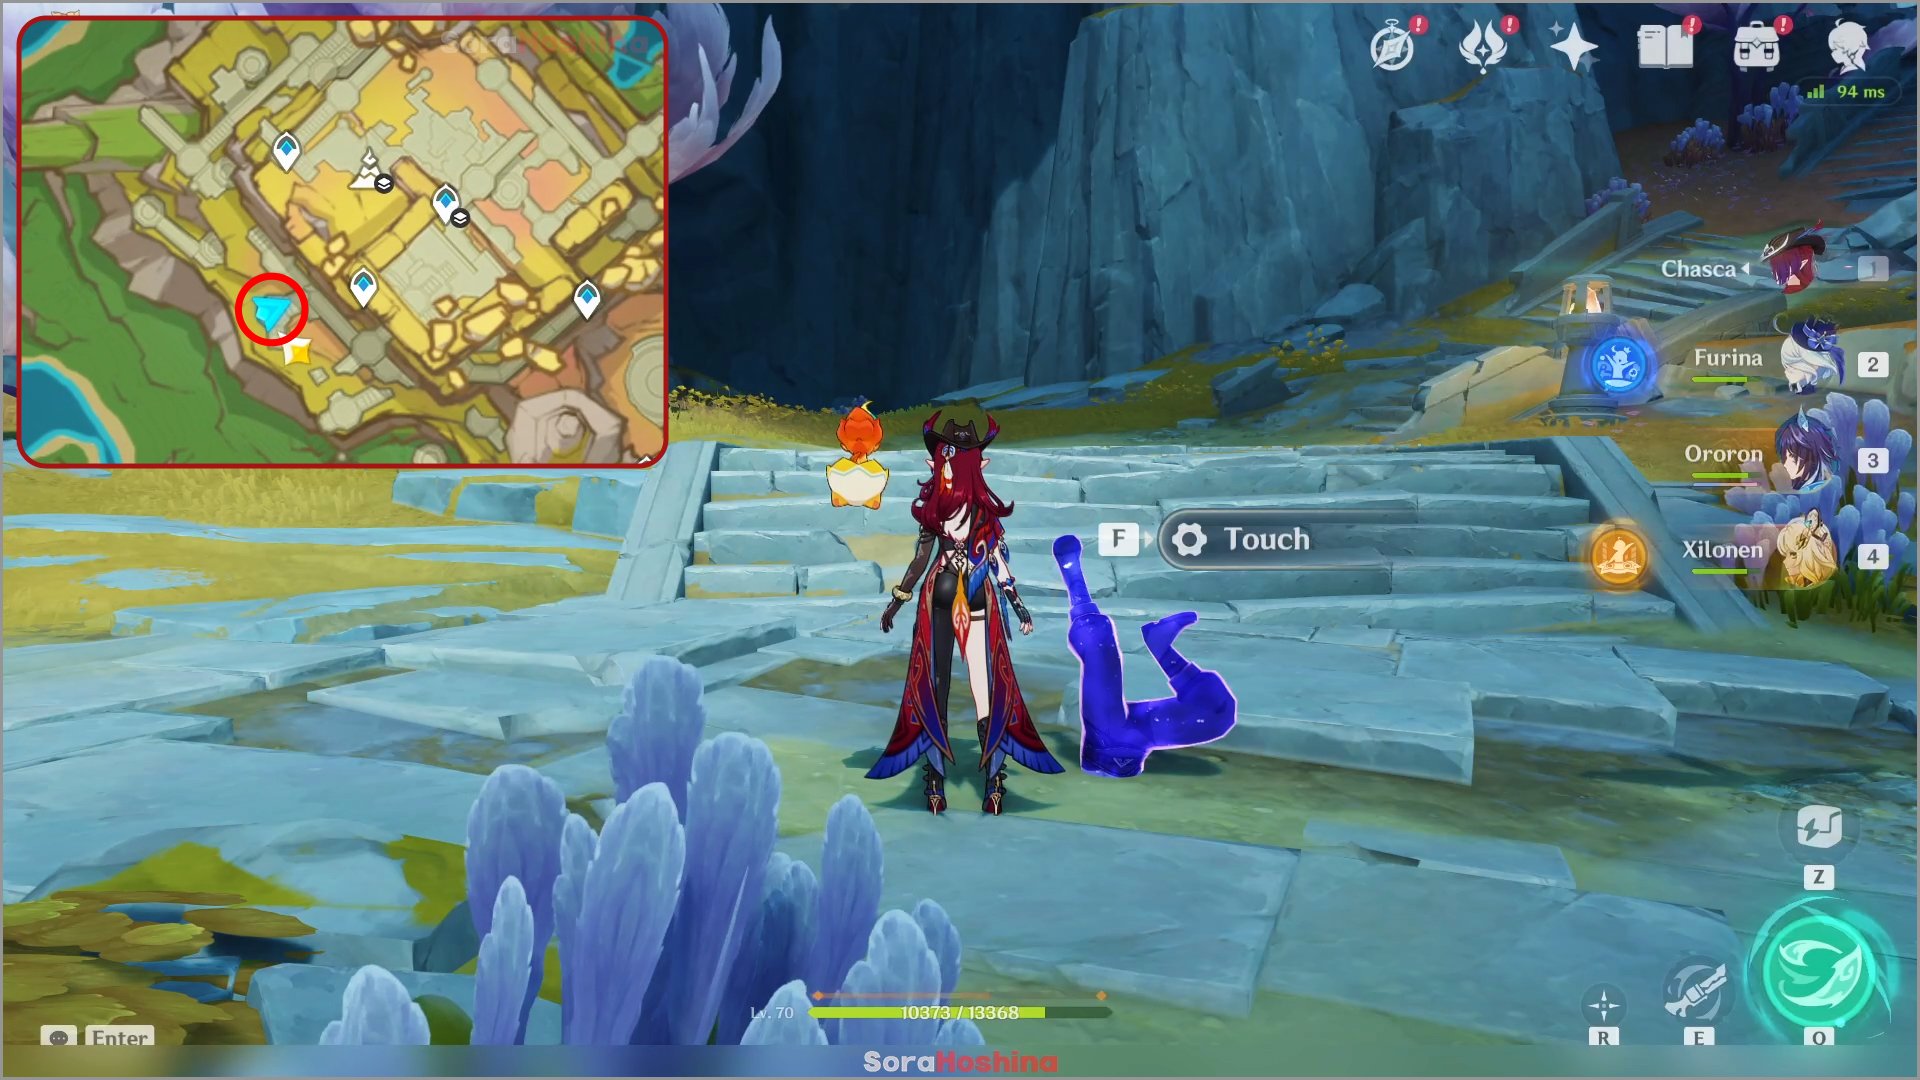
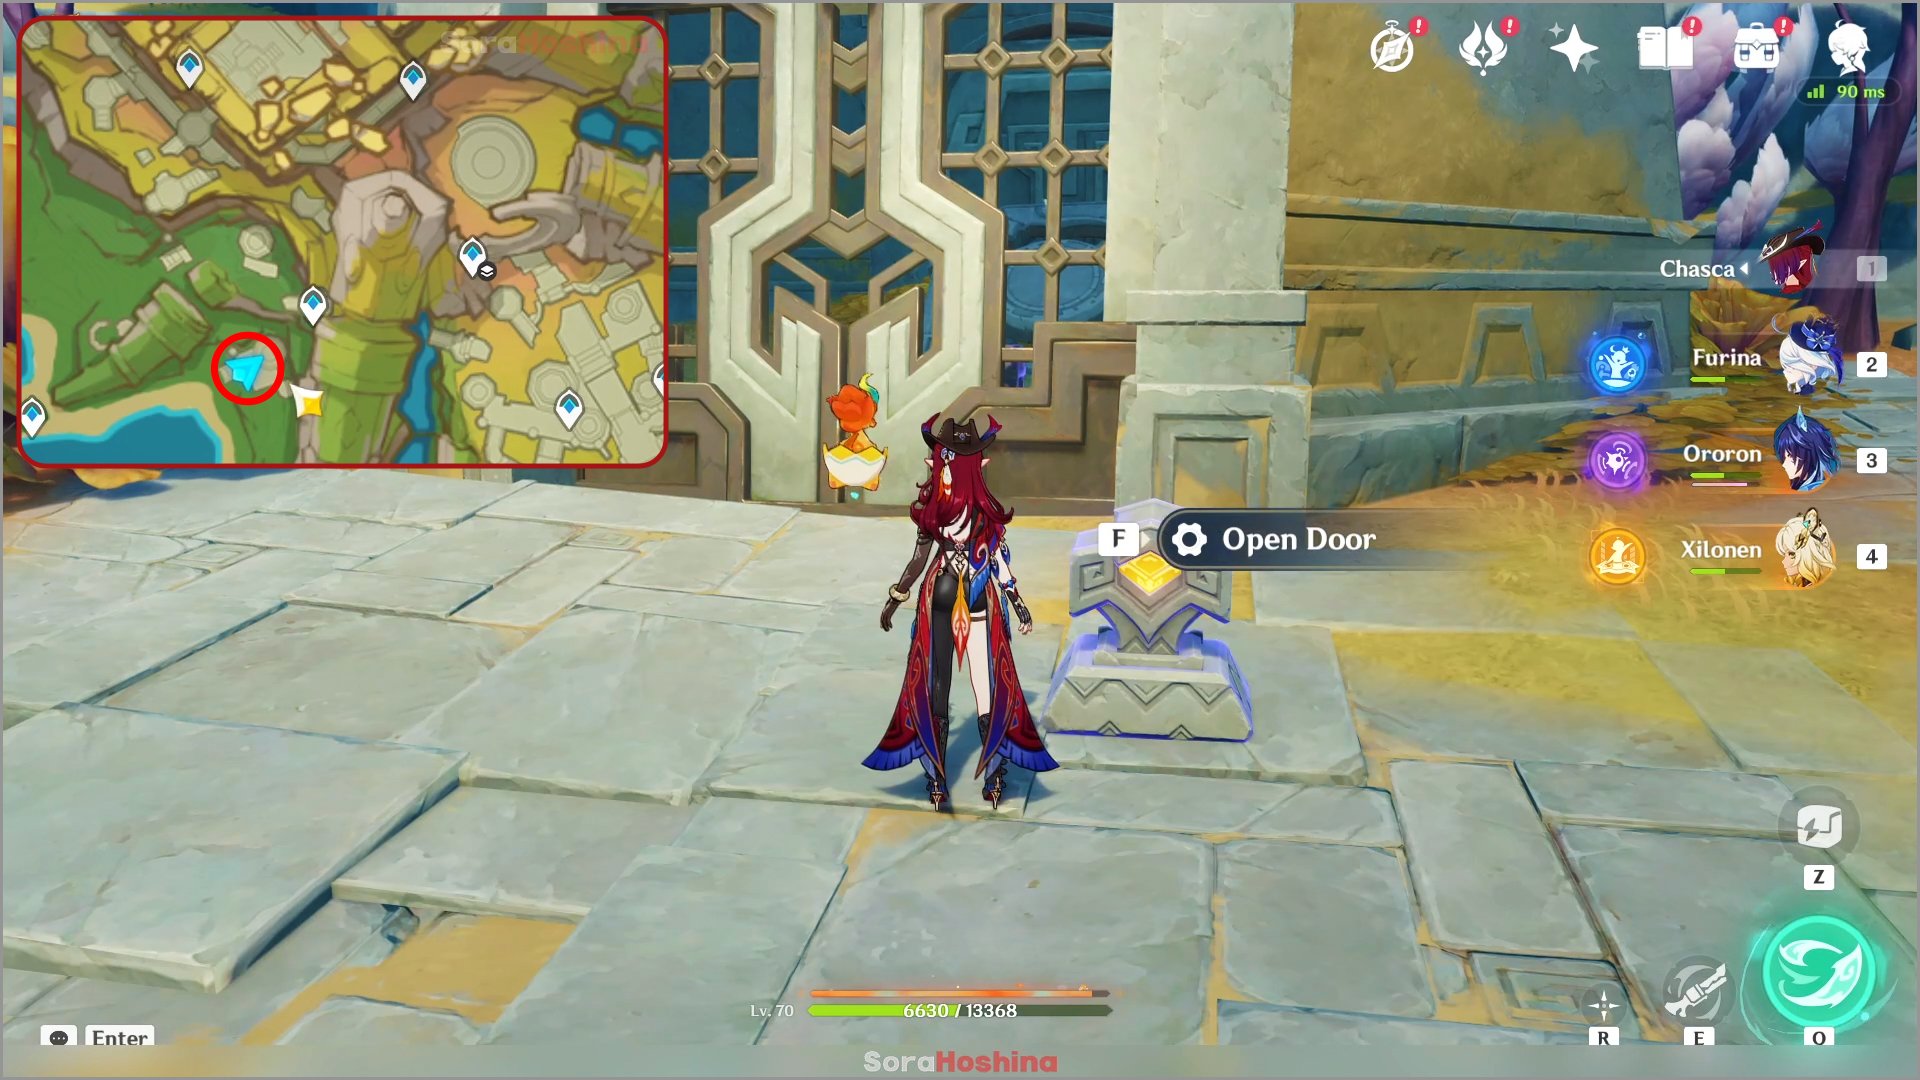
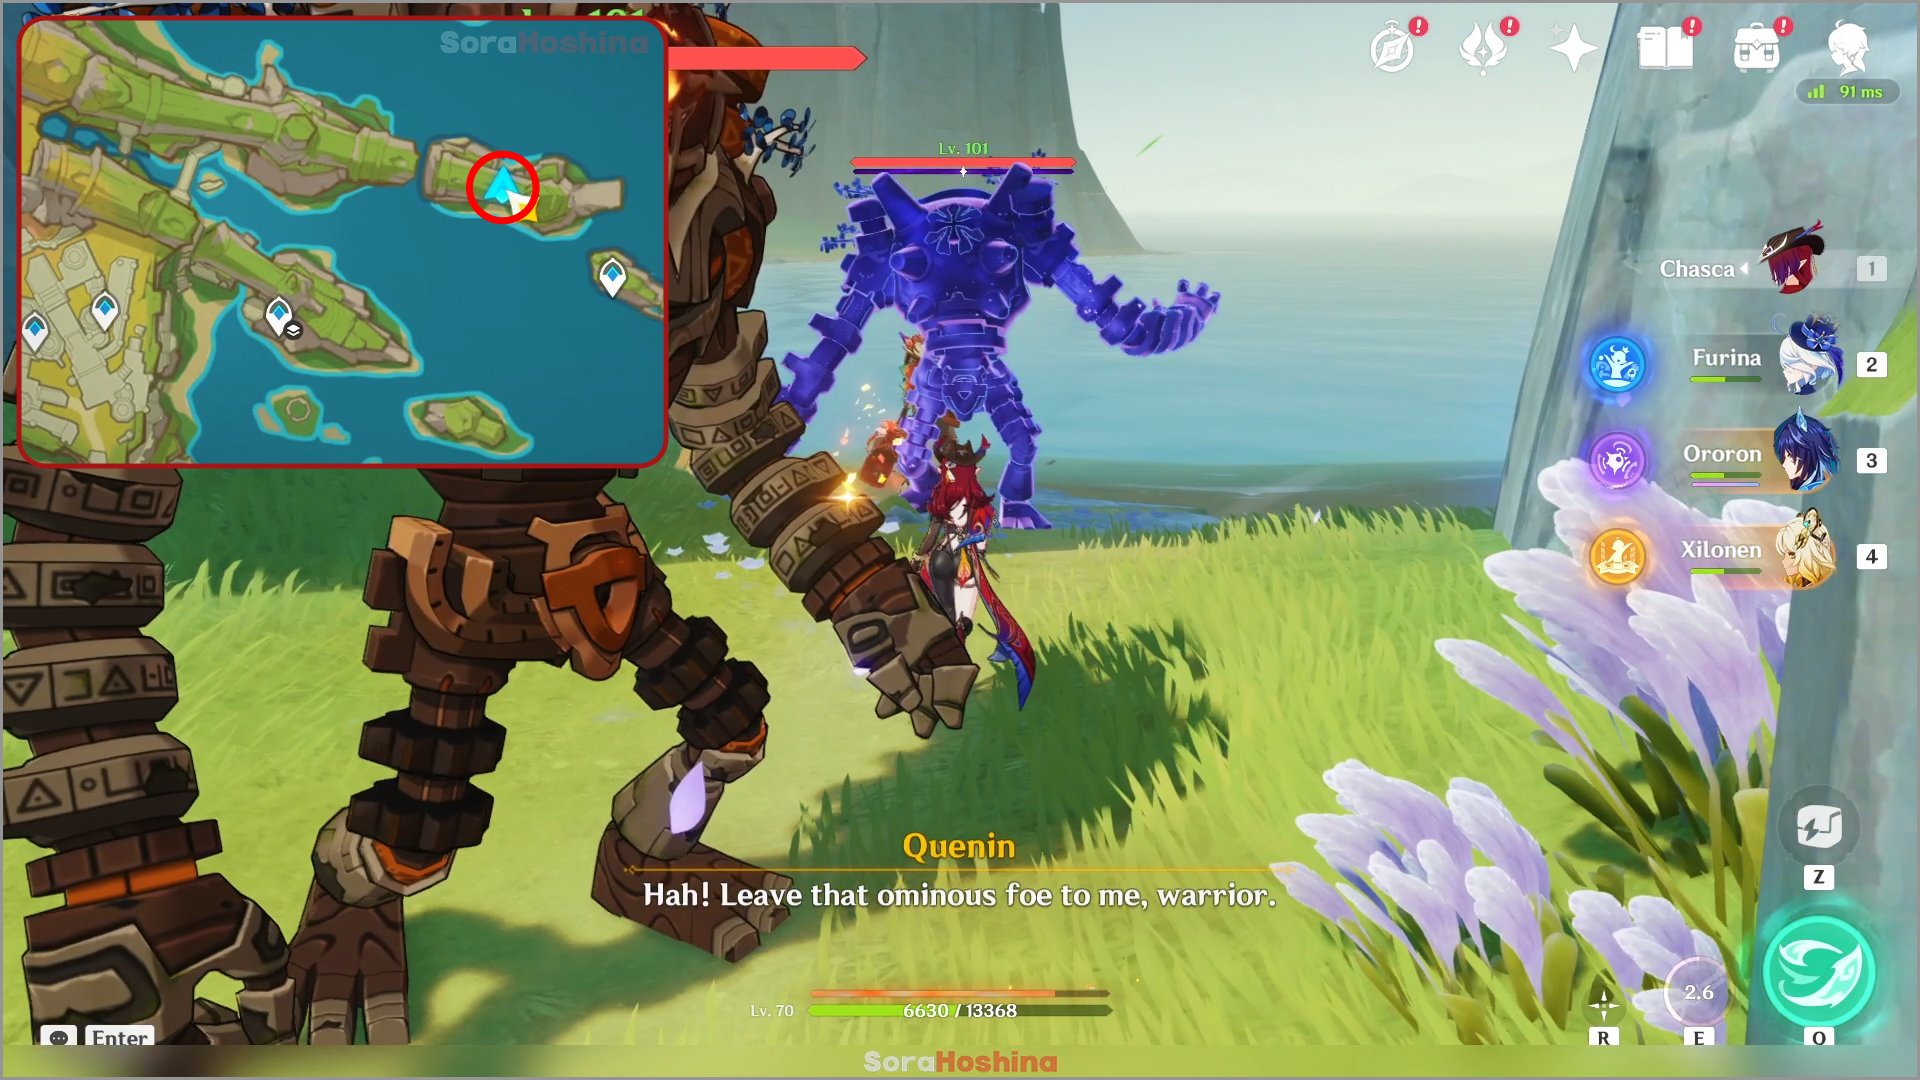
You can refer to the images above for the location and enemies you can expect to fight.
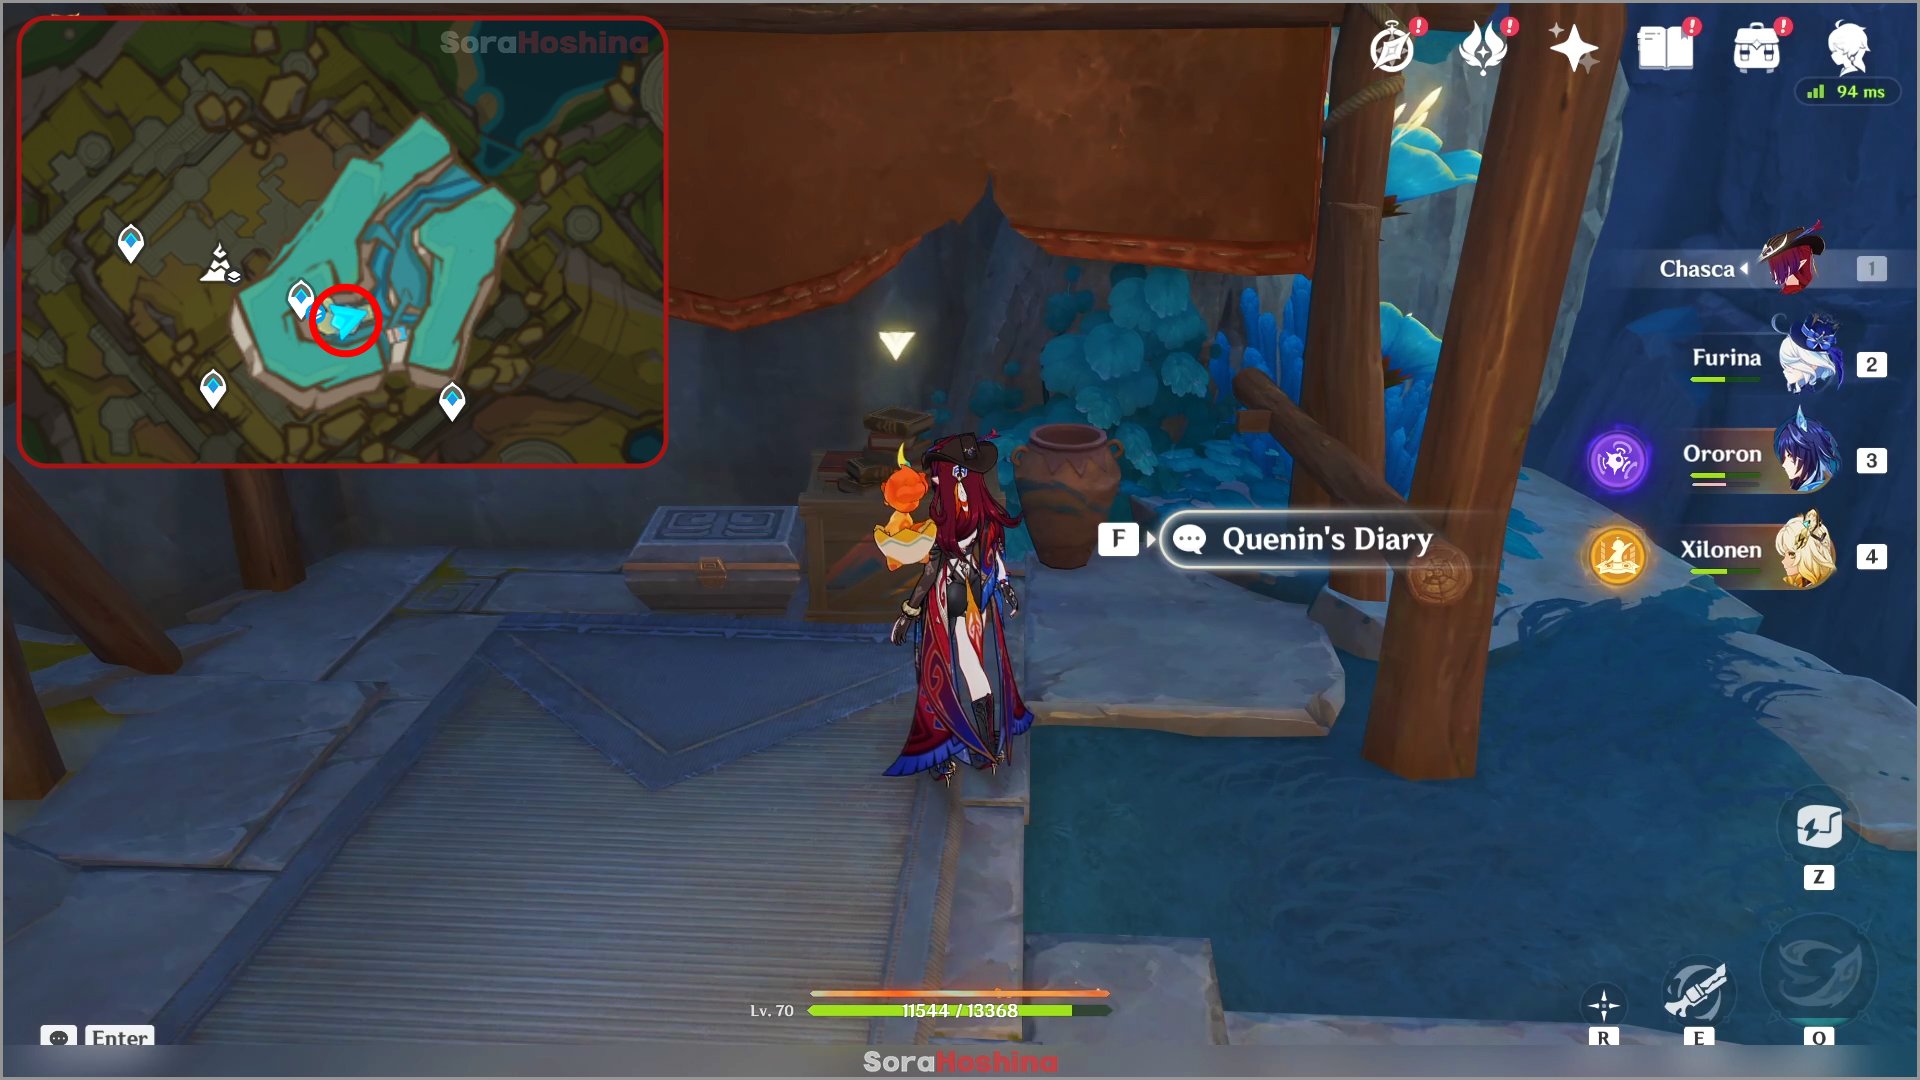
After defeating all enemies in the 5 spots above, head to Canyon of Dark Currents waypoint and go to a small camp with Quenin's Diary. Once you read it, the quest will start. All you have to do is destroy a breakable wall and defeat an enemy.
