
Table of Contents [Hide]
- Event Overview
- Search for Lost Spirits
- Evil Banisher
- Restoring Fragmented Records
- Event Rewards

The Masters of the Night-Wind are unique among the tribes of Natlan, having mastered all kings of mysterious methods of communicating with the world. In this adventure about clairvoyance, perhaps you will be able to draw back a corner of the night wind's curtain...
This content comes from the Creator Experience server.
Event Overview
Event Gameplay Duration
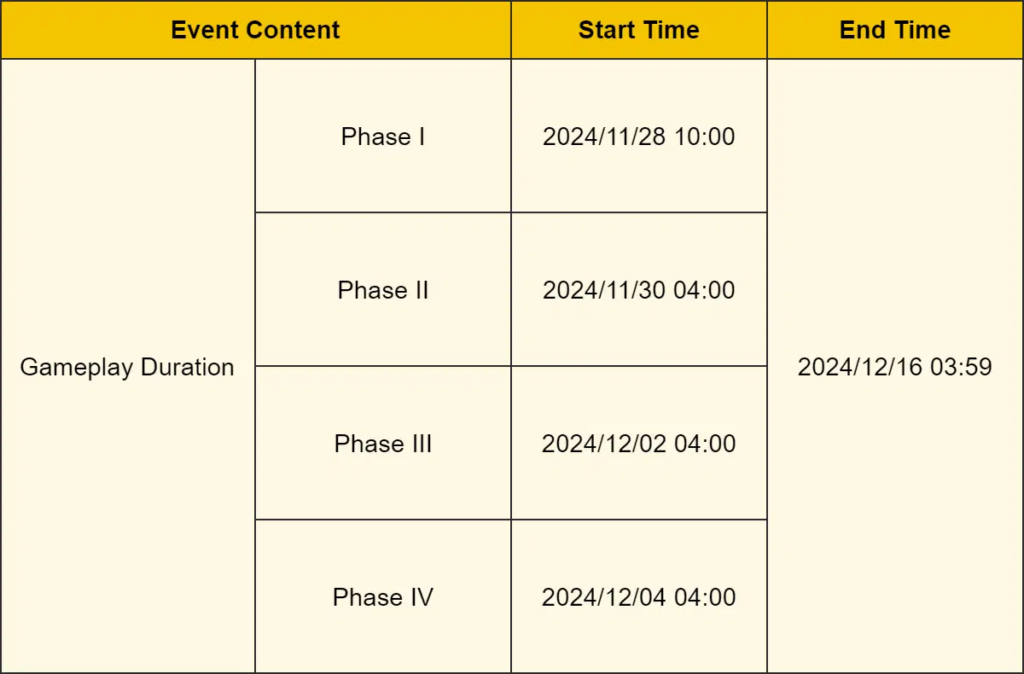
Eligibility
➥ Adventure Rank 20 or above
➥ And complete Archon Quest Prologue: Act III "Song of the Dragon and Freedom"
※ Complete Archon Quest Chapter V: Act IV "The Rainbow Destined to Burn" first to get the best experience from this event.
Event Overview
➥ During the event, the following gameplay modes will unlock in sequence: "Search for Lost Spirits," "Evil Banisher," and "Restoring Fragmented Records."
➥ In the "Search for Lost Spirits" gameplay, the scattered Roaming Spirits will avoid nearby characters. Travelers must work with other players and use this behavior to drive the Roaming Spirits to the Spirithub and accumulate Spirit Count.
➥ In the "Evil Banisher" gameplay, Travelers must banish opponents that are disrupting the rite by completing all Banishing Rite objectives and obtain Banishing Aura in order to finish the battle more efficiently.
➥ In the "Restoring Fragmented Records" gameplay, Travelers must place the fragments in the area in a specific order and position, and adjust the relative positions of the layers, using overlapping, blocking, and other methods to restore the overall picture to the target state.
➥ Complete the event's various gameplay modes to gain Incense Crystals. Reach a certain amount of Incense Crystals to obtain Calamity of Eshu (Sword), Primogems, Crown of Insight, event-exclusive Weapon Refinement Materials, and other rewards.
Search for Lost Spirits
1) Spirit Gathering: Triumphal Return
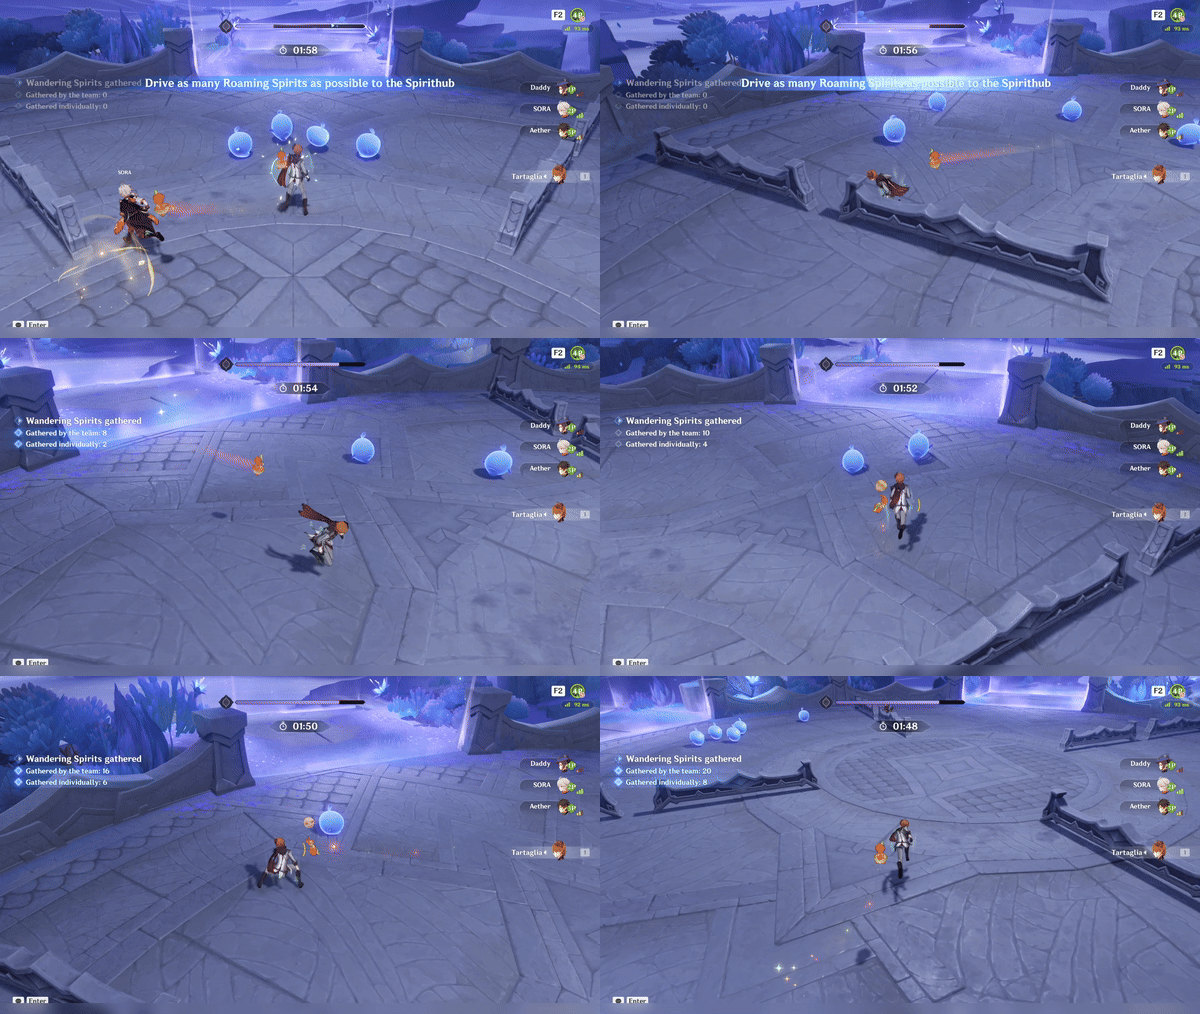
During the "Search for Lost Spirits" challenge, the scattered Roaming Spirits will stay away from nearby characters. So what you need to do is chase after them from behind so they will enter the Spirithub (the purple boxes) to accumulate Spirit Count.
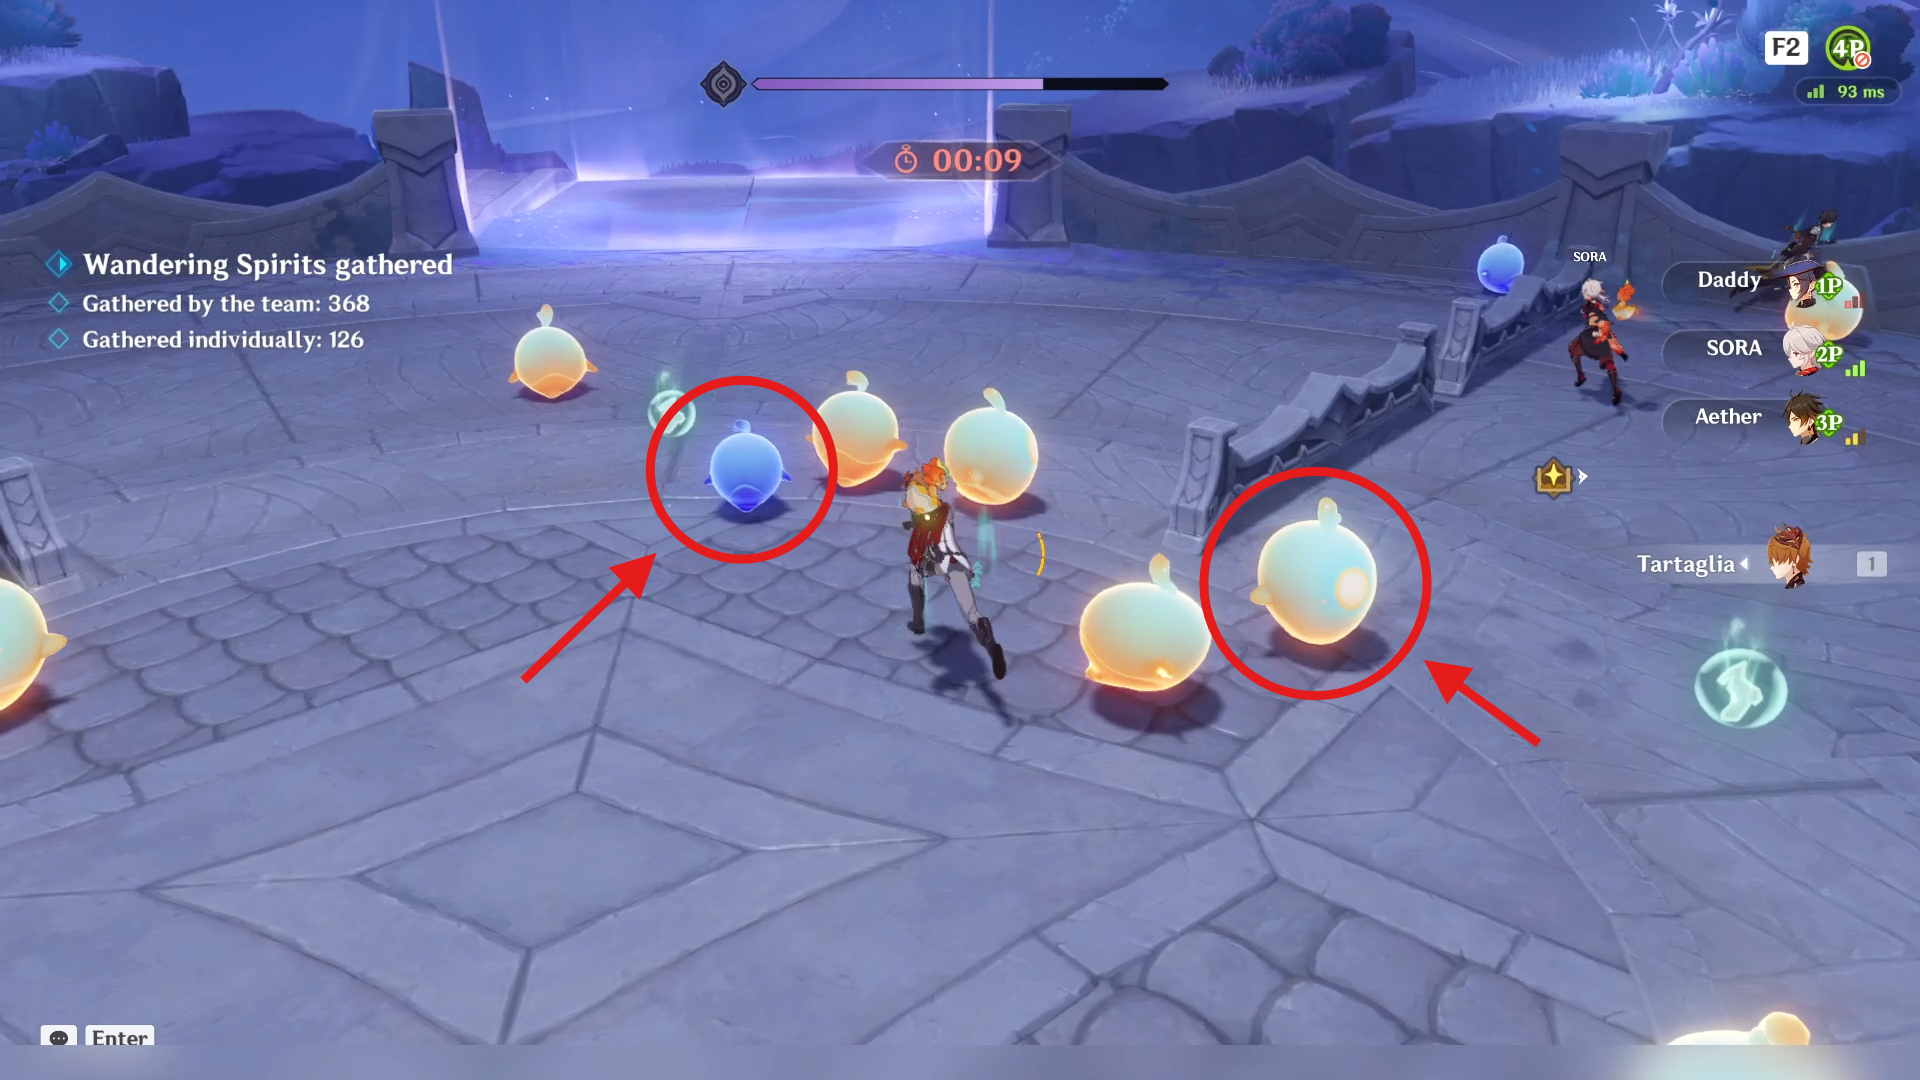
There are 2 types of spirit, the normal one (blue color) and the Shining Spirit (orange color). When you successfully gather a "Shining Spirit," you will receive more Spirit Count.
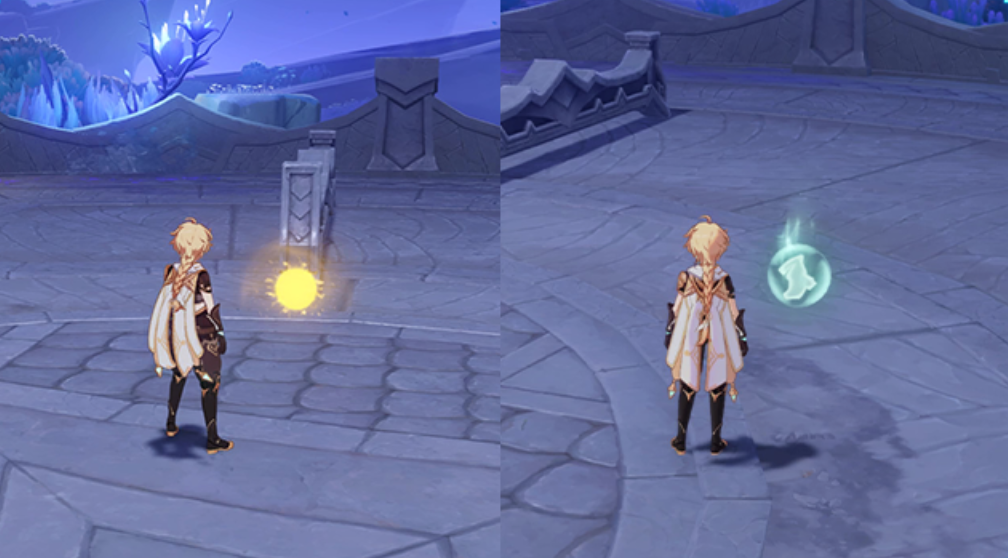
Spiritgathering Buffs will appear within the area at intervals. Pick them up to increase your Movement SPD (the green shoe icon) or restore Stamina (the glowing yellow orb) to characters.

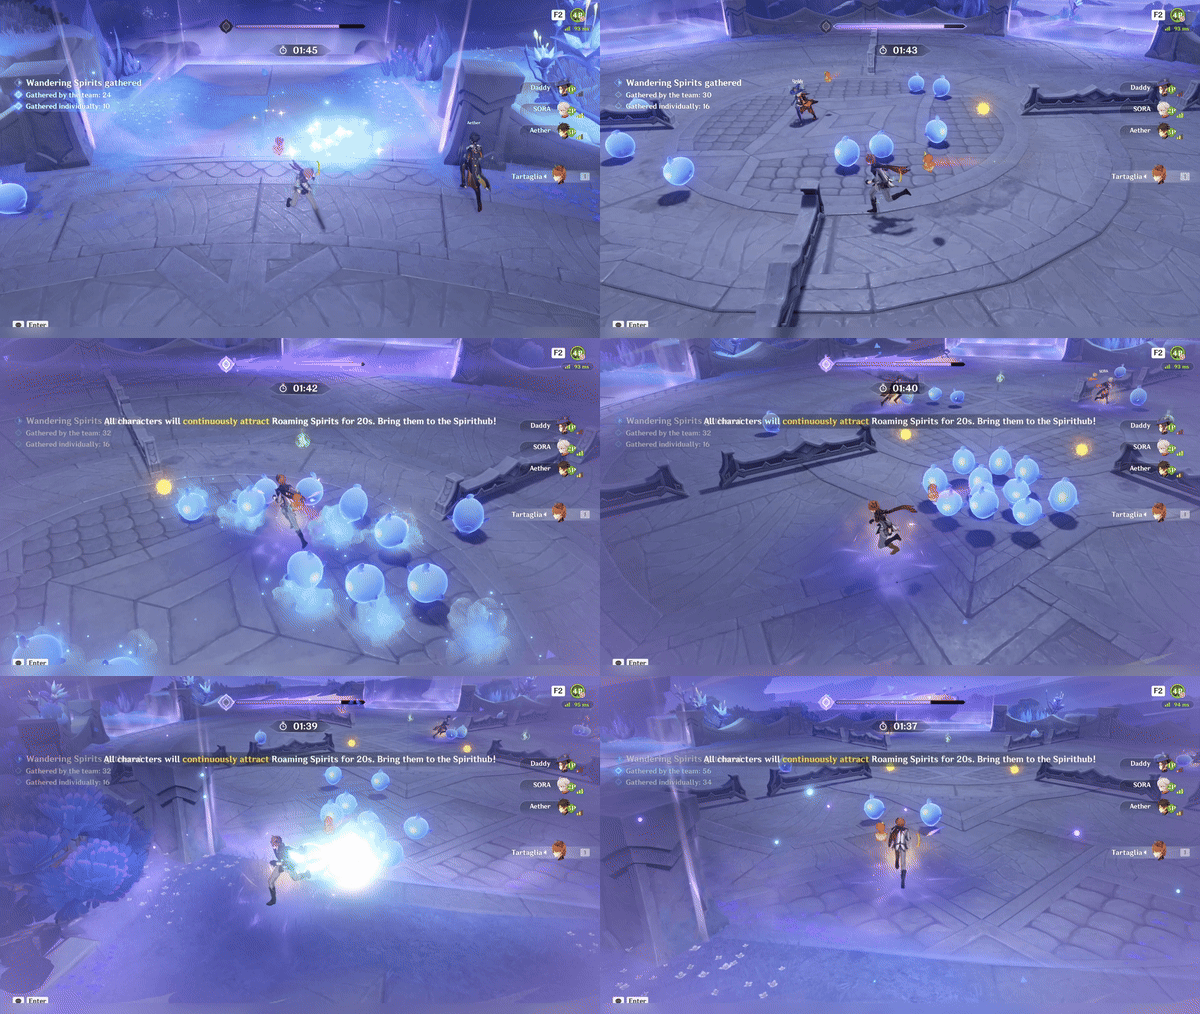
When a party member receives a Spiritgathering Buff, the party's Spiritcall Value will increase. When the Spiritcall Value reaches the maximum, a Spiritcall Moment will be triggered:
For 20s, all characters will continuously attract Roaming Spirits. This effect is useful for bringing Roaming Spirits to Spirithubs.
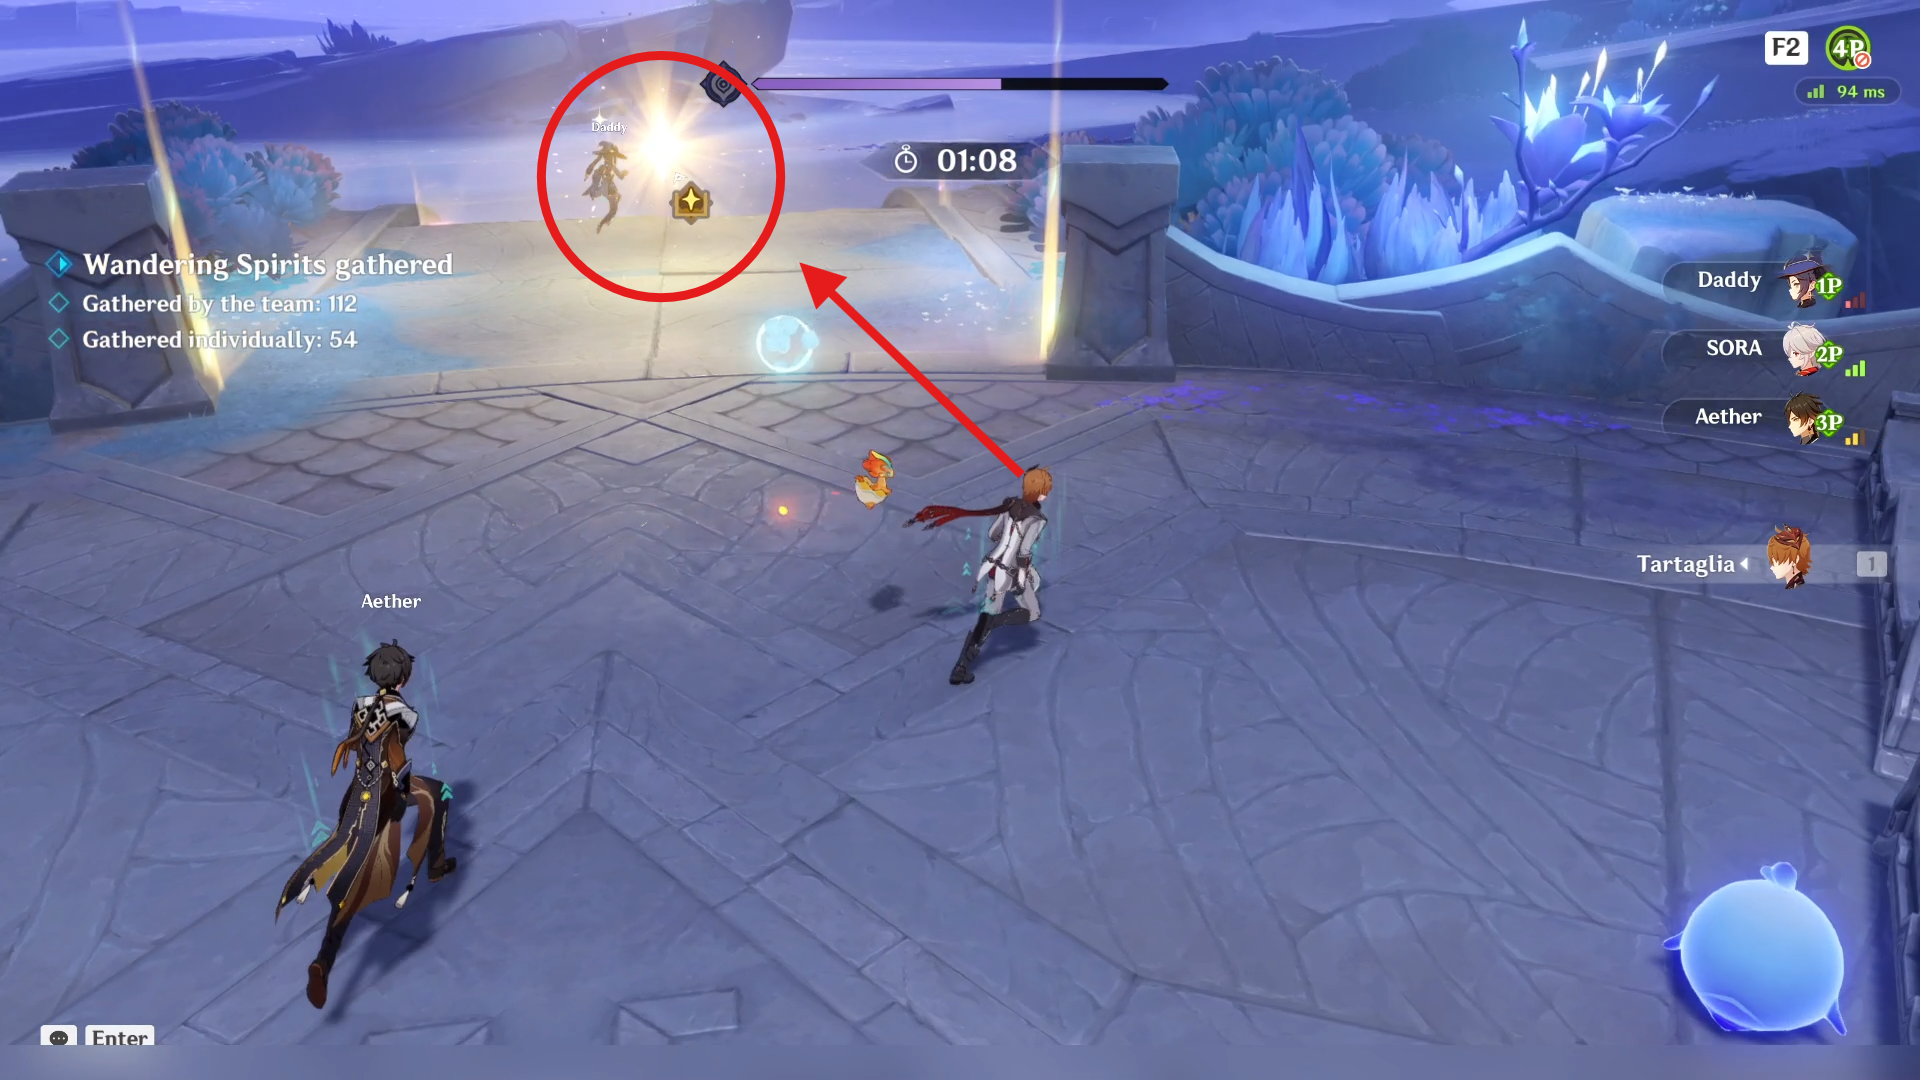
While gathering Wandering Spirits, a golden Splendiferous Spirithub will appear at intervals. Drive the Wandering Spirits into the Splendiferous Spirithub to accumulate double the Spirit Count.
2) Spirit Gathering: Shackle Spirits
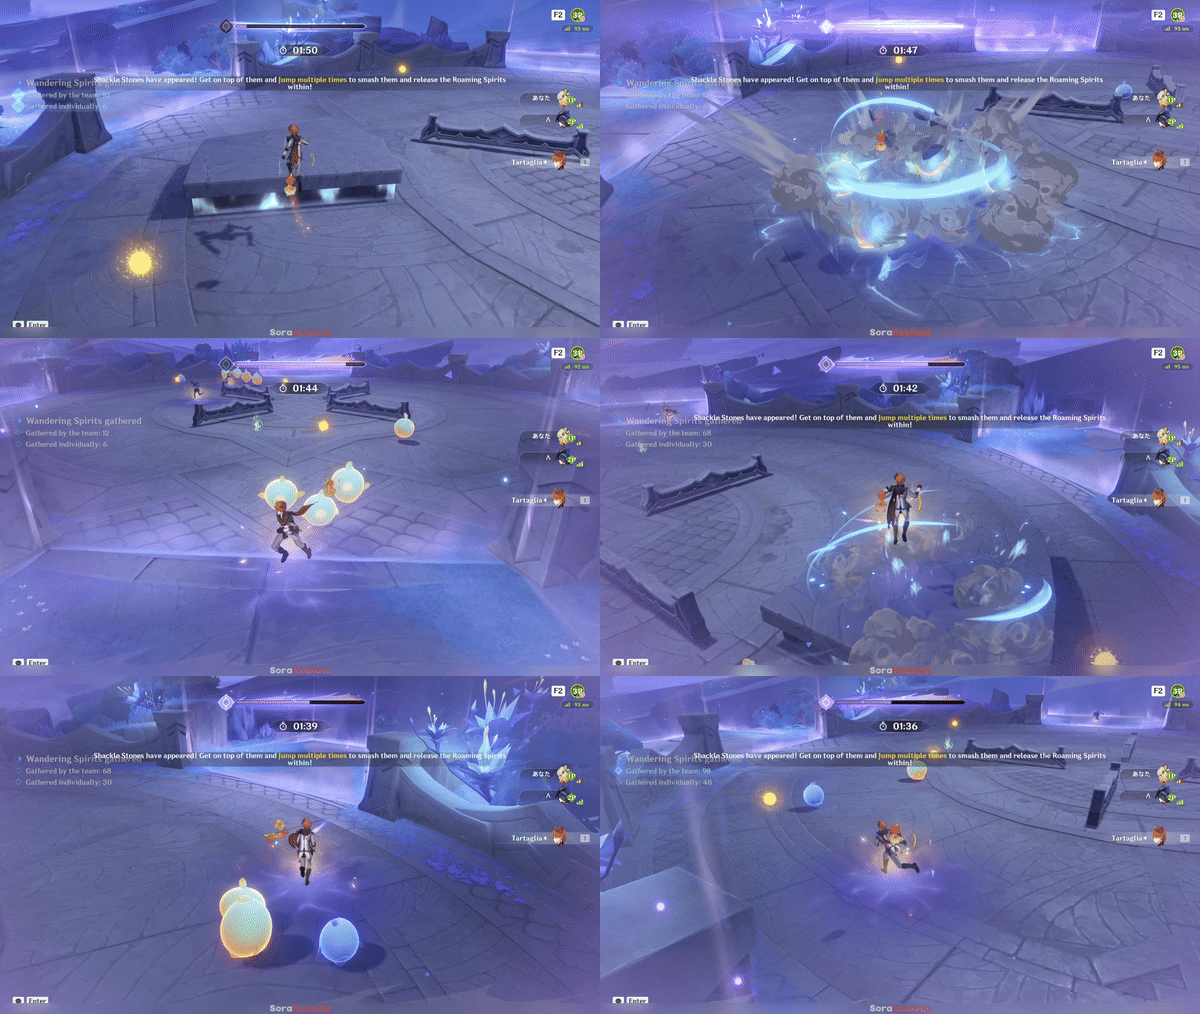
In this stage, when gathering spirits, Shackle Stones will periodically appear. Jumping on a Shackle Stone multiple times will break it, and free the Roaming Spirit within.
3) Spirit Gathering: Driving Storm
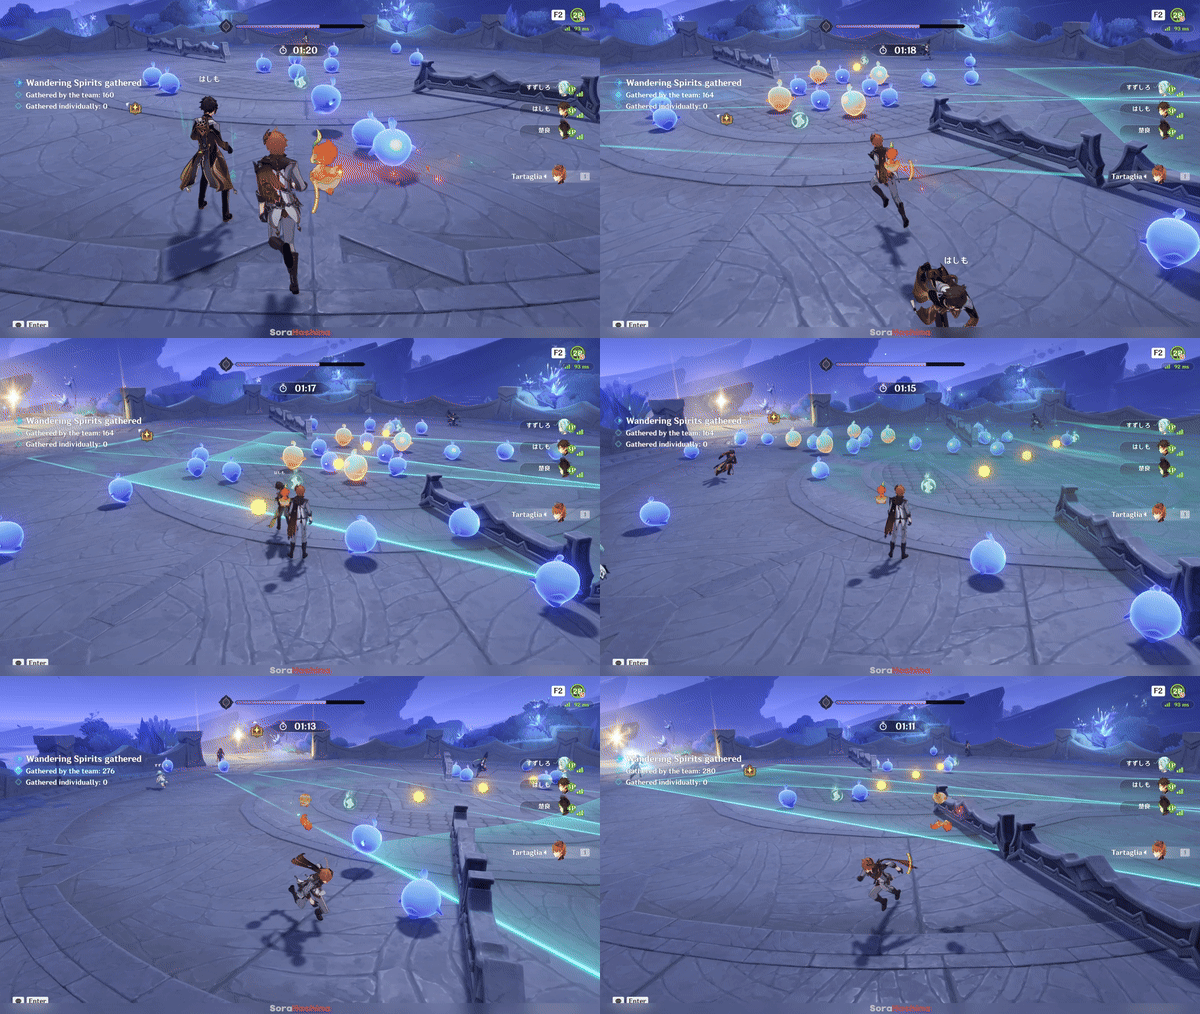
While gathering spirits, Driving Storm will appear at intervals in the area. Observer the storm's direction and use it to swiftly push Roaming Spirits into the Spirithub and gather them more efficiently.
4) Spirit Gathering: Phenomenal Convergence
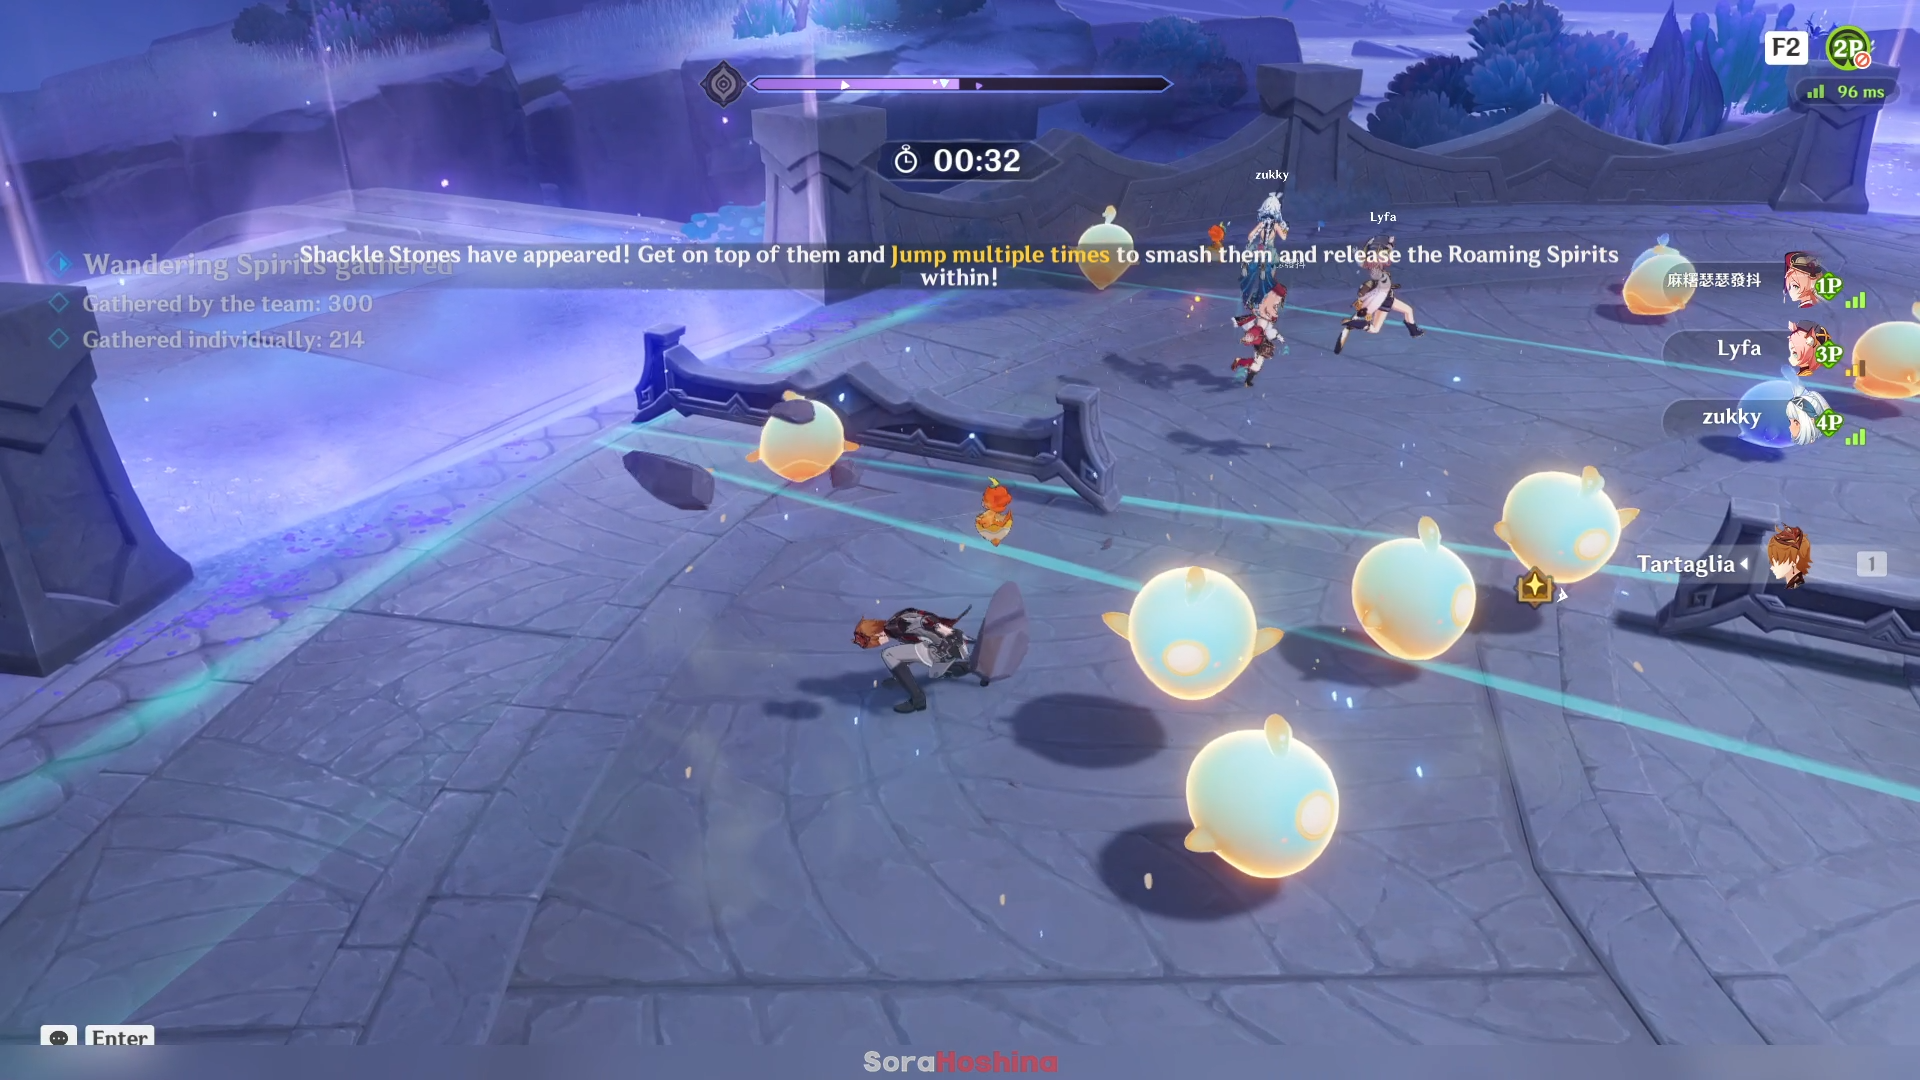
Splendiferous Spirithubs (golden spirithub that provides double points), Shackle Stones (that breaks after you jump on it), and Driving Storms will all appear in this stage. Pay close attention to your surroundings and be flexible in your responses, and you might find yourself gathering up a veritable windfall of Roaming Spirits.
Evil Banisher
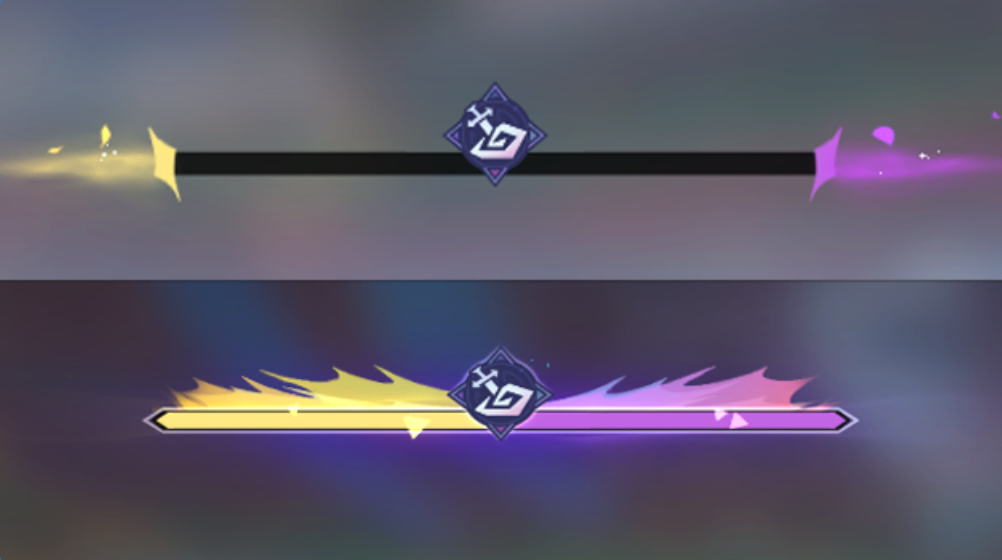
In "Evil Banisher" challenges, completing all Banishing Rite objectives will award you with Banishing Aura, dealing AoE DMG to opponents.

While Banishing Aura is active, you will not be able to accumulate progress toward Banishing Rites. Once the blessing expires, you can continue completing objectives and once again obtain Banishing Aura.
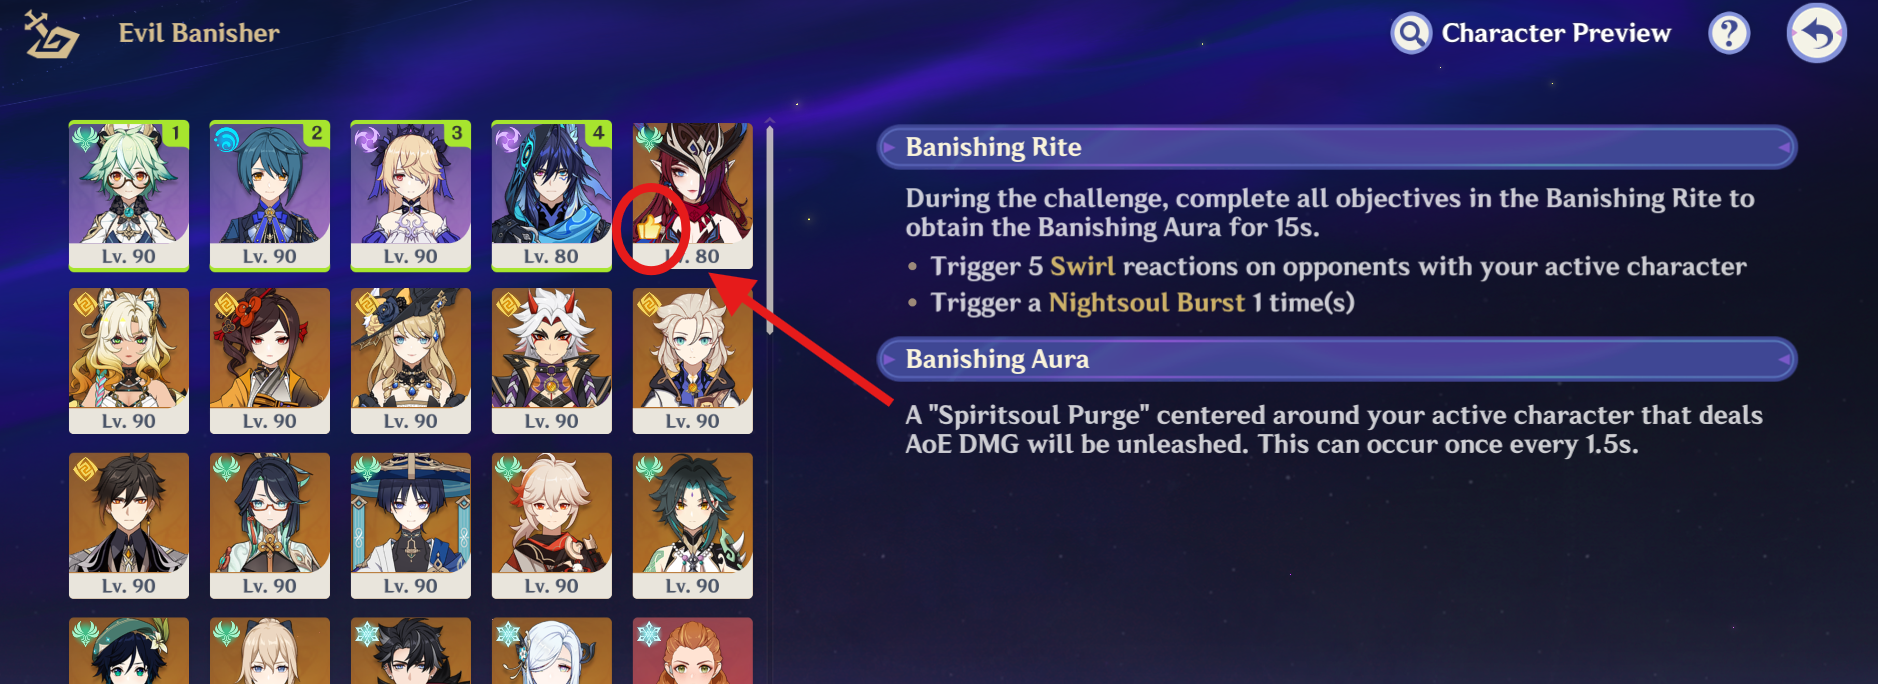
There are no trial characters for this event, but there are recommended characters. If you have said character, they will be marked with a 👍 icon.
1) Tempest of the Night Realm
Monster List
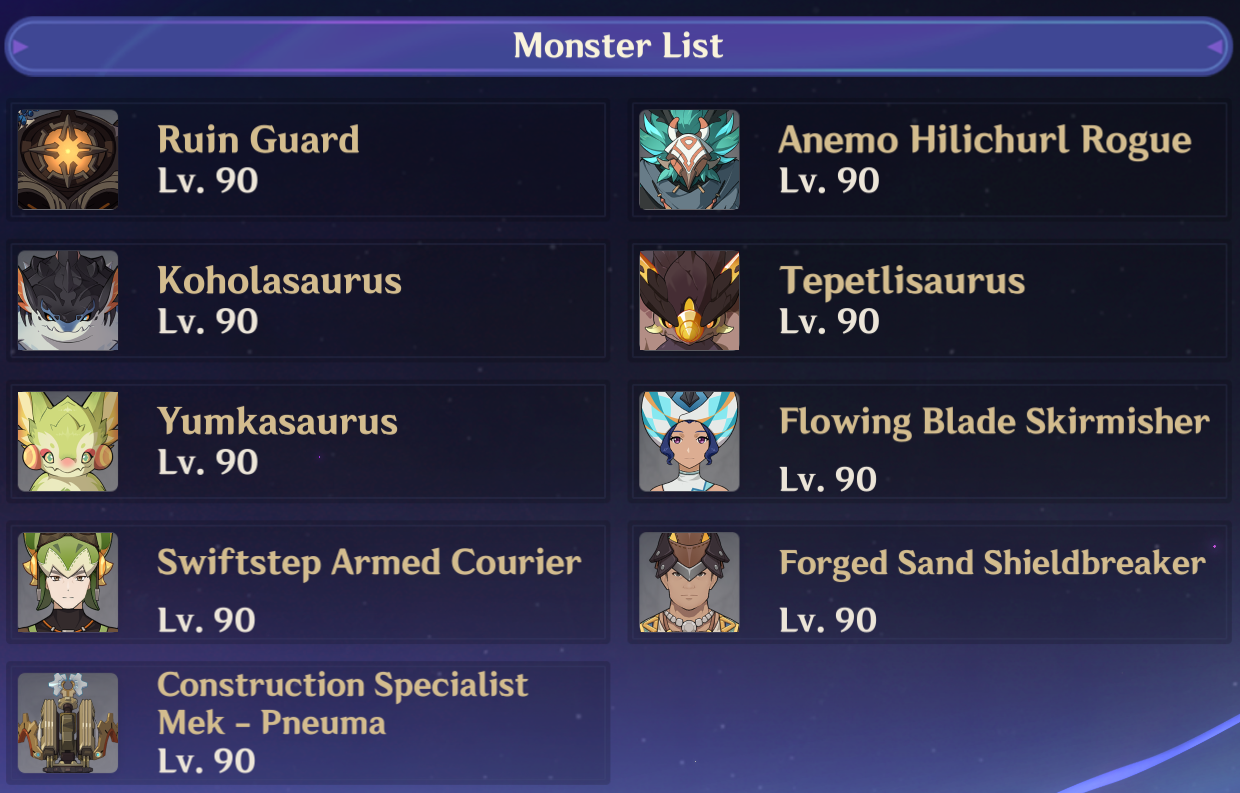
Recommended Party

| Banishing Rite | During the challenge, complete all objectives in the Banishing Rite to obtain the Banishing Aura for 15 seconds. - Trigger 5 Swirls on opponents with your active character. - Trigger a Nightsoul Burst 1 times. |
| Banishing Aura | A "Spiritsoul Purge" centered around your active character that deals AoE DMG will be unleashed. This can occur once every 1.5s. |
Triggering a Swirl requires an Anemo + Swirlable element. So make sure those 2 are in the party. Then, in the Nightsoul Burst part; only the Natlan character can achieve this.
Best Team: Chasca + Furina + Xiangling + Ororon
F2P Team: Sucrose + Xingqiu + Fischl + Ororon
Others: Ayato + Fischl + Ororon + Kazuha
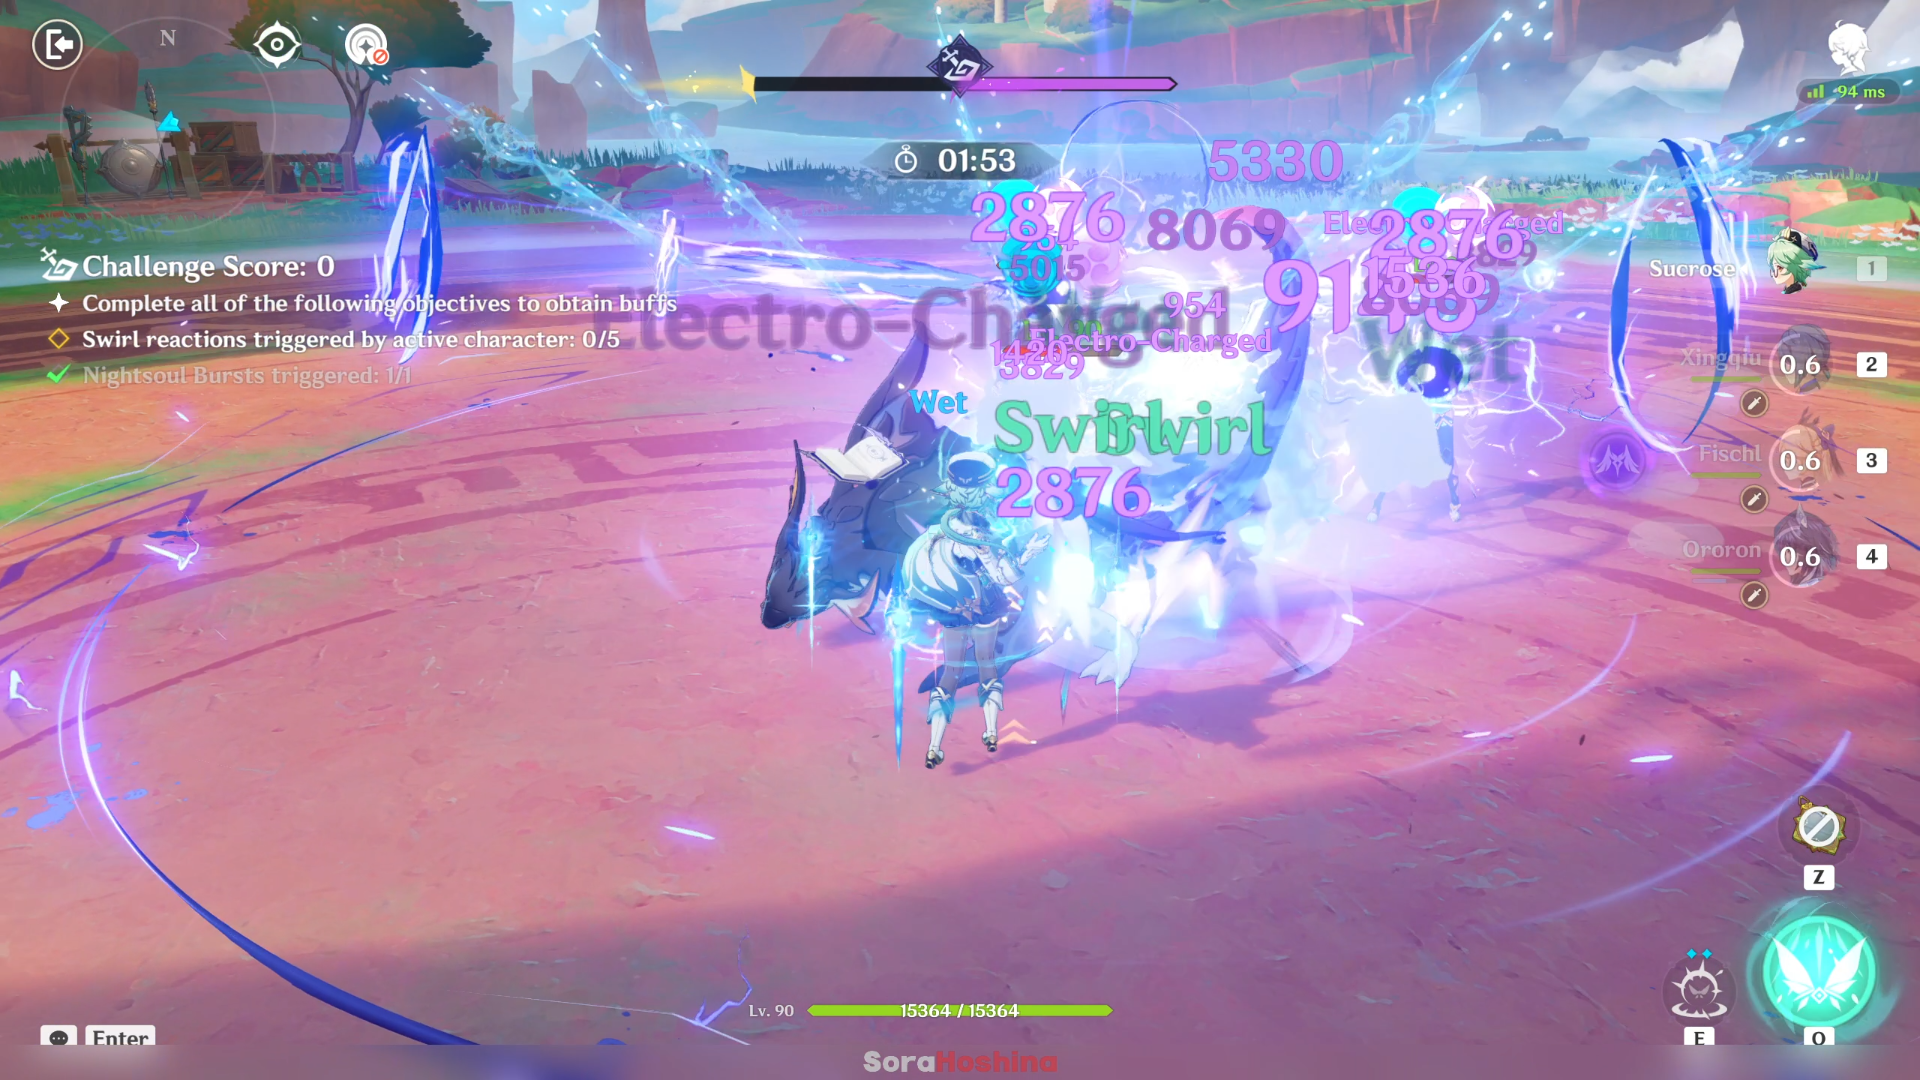
1) In this stage, make sure you inflict swirlable element on the enemies before using Anemo to trigger Swirl. Trigger Swirl 5 times to complete the objective in triggering the Banishing Rites. This one is easy to understand.
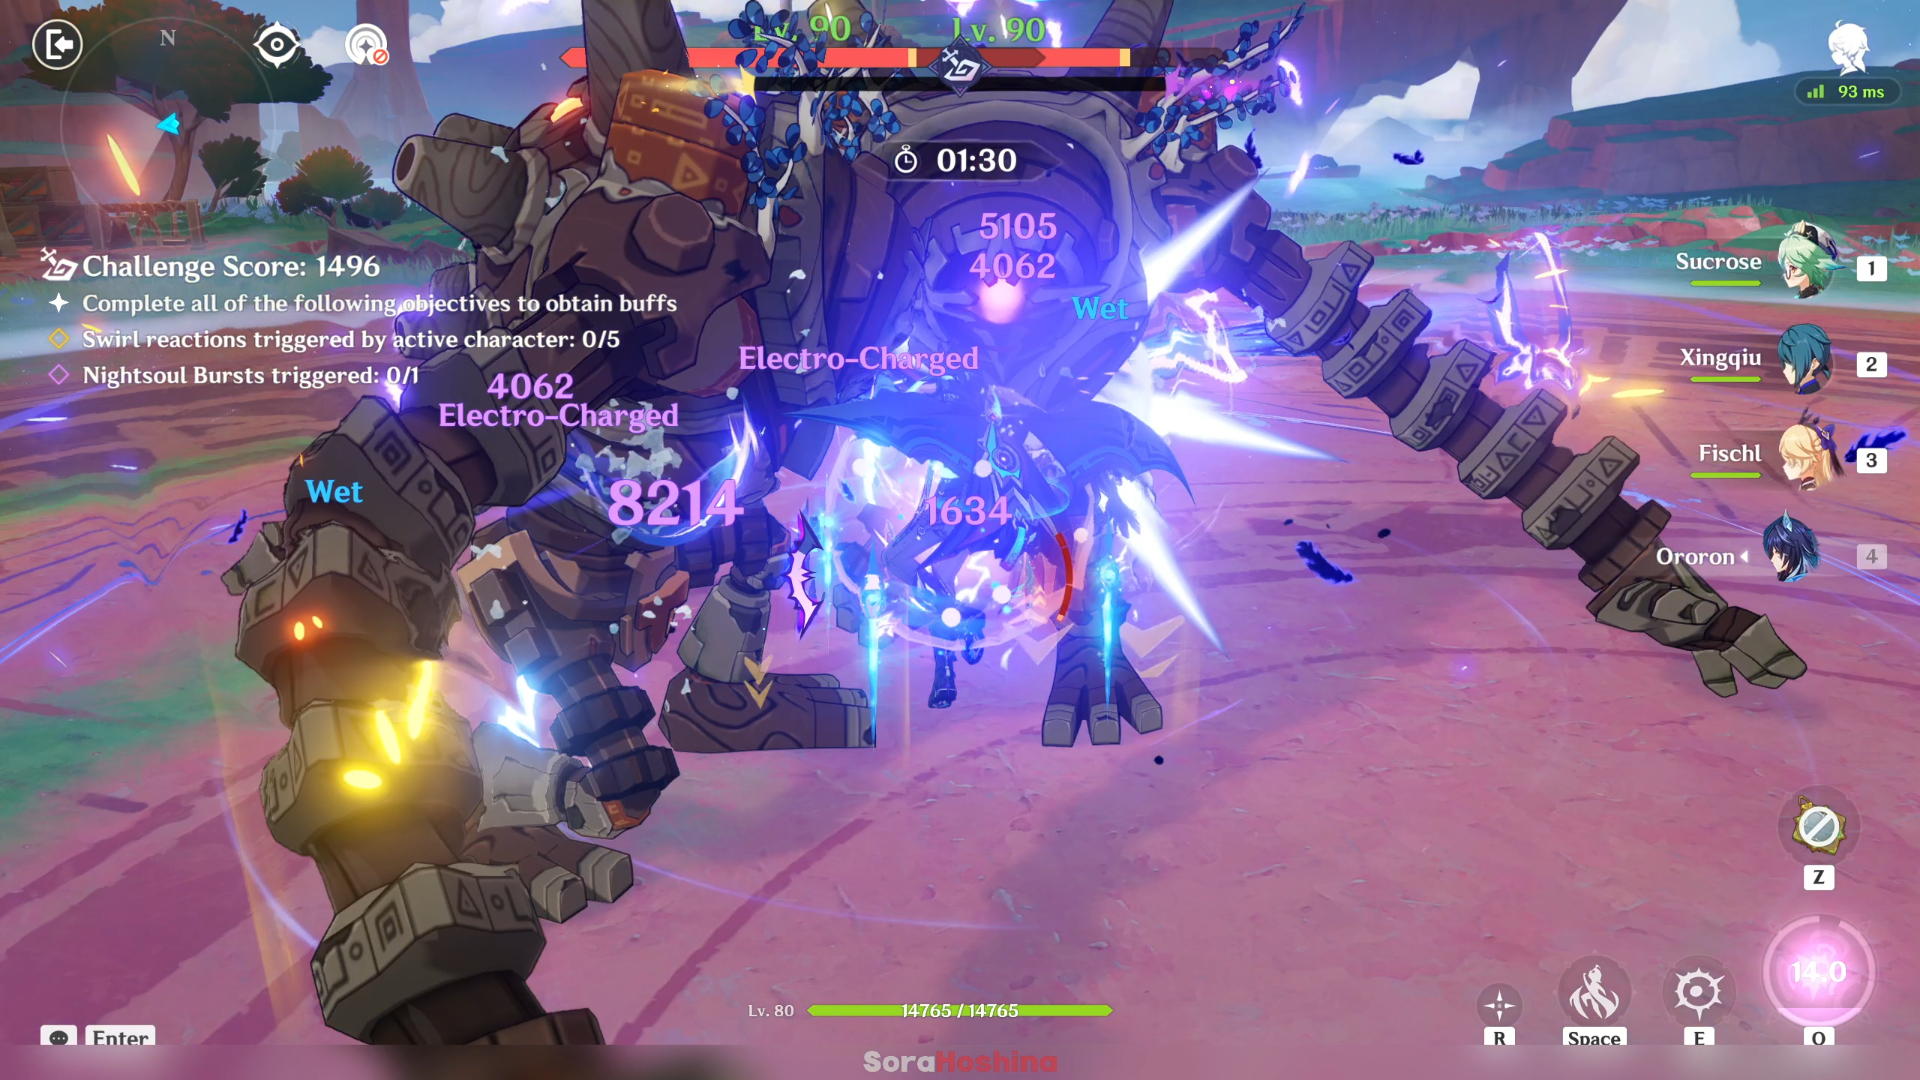
2) The hard one is the Nightsoul Burst. This kind of Burst can only be triggered by Natlan character so if you don't bring any of them, it's impossible to trigger it. Each Natlan character also have different method to trigger their Nightsoul Burst so read their skill set to understand it.
Everyone will get free Kachina by completing the Archon Quest so if you don't have any other Natlan characters, bring Kachina. But reminder that her Skill may interrupt your Swirl.
Video Showcase
2) Calamitous Tide
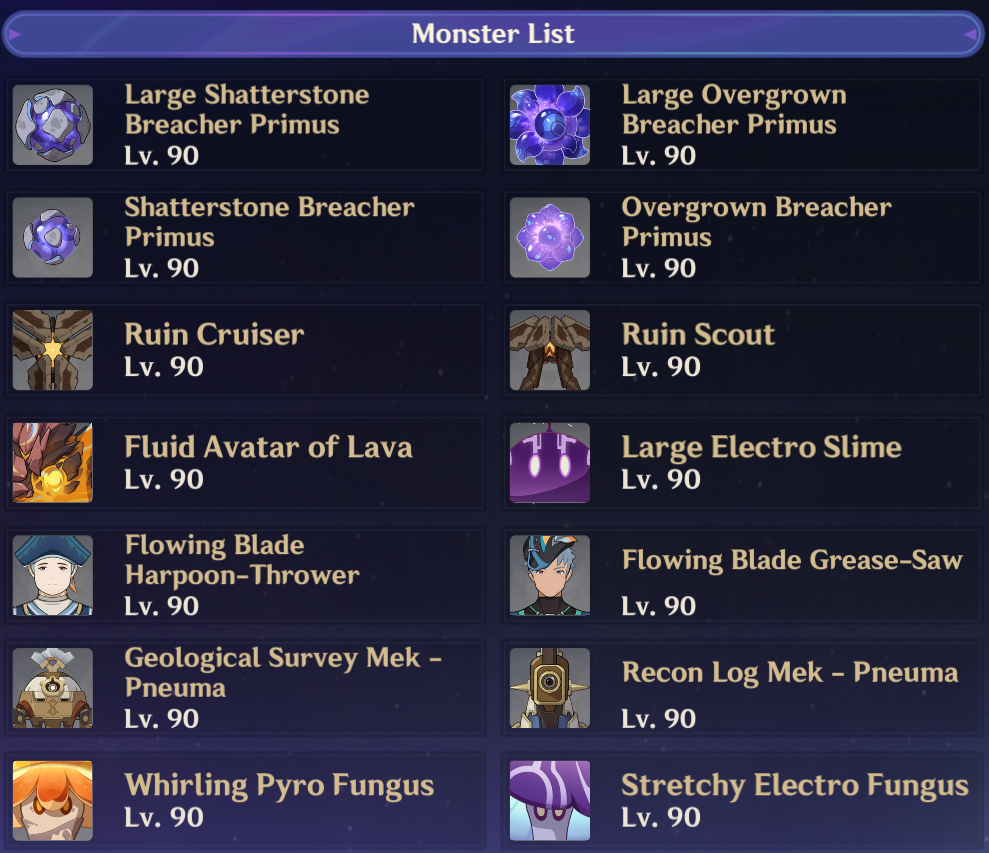
Monster List
Recommended Party

| Banishing Rite | During the challenge, complete all objectives in the Banishing Rite to obtain the Banishing Aura for 15 seconds. - Deal Hydro DMG to opponents 12 times. - Deal Charged Attack DMG to opponents 8 times. |
| Banishing Aura | A "Spiritsoul Purge" centered around your active character that deals AoE DMG will be unleashed. This can occur once every 1.5s. |
Neuvillette is the best character for this stage. The reason I specifically mention this is because the 2 requirements only fit him and no other characters. But that doesn't mean other teams can't complete it. Sure, it's a bit harder than just blasting everything with the Sovereign Dragon, but we can.
Best Team: Neuvillette + Furina + Flex + Flex
F2P Team: Sethos + Xingqiu + Barbara + Fischl
Others: Tartaglia + Bennett + Xiangling + Xilonen
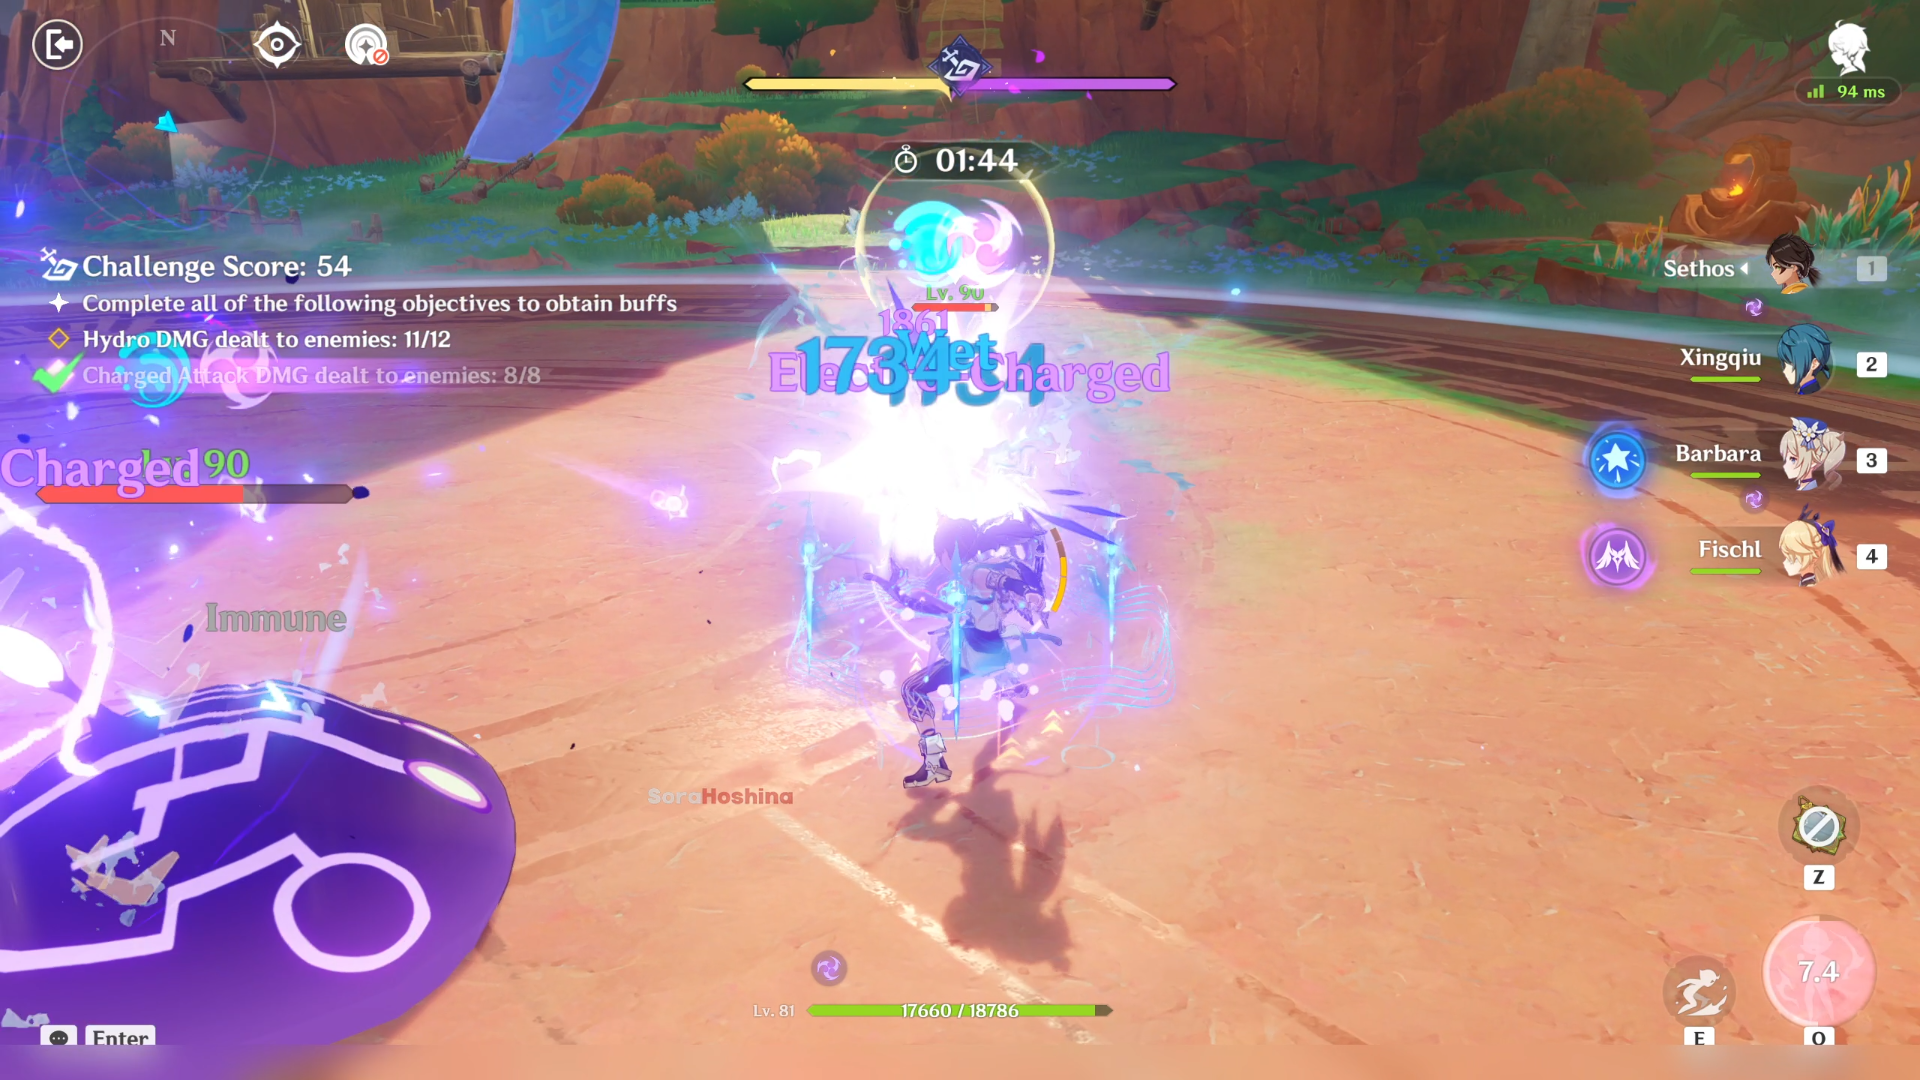
1) Stage 2 focuses on Hydro with a Charged Attack on-field DPS. Of the two, Neuvillette fits both categories the best, but you can put Hydro off-fielders with any of the game's Charged Attackers (like Sethos or Tartaglia) if you don't have Neuvillette.
2) Barbara and Xingqiu are great Hydro off-fielders so use their Skill and Burst first before swapping to your Charged ATK DPS and spam their Charged attacks to fulfill both objectives in triggering the Banishing Rite.
Video Showcase
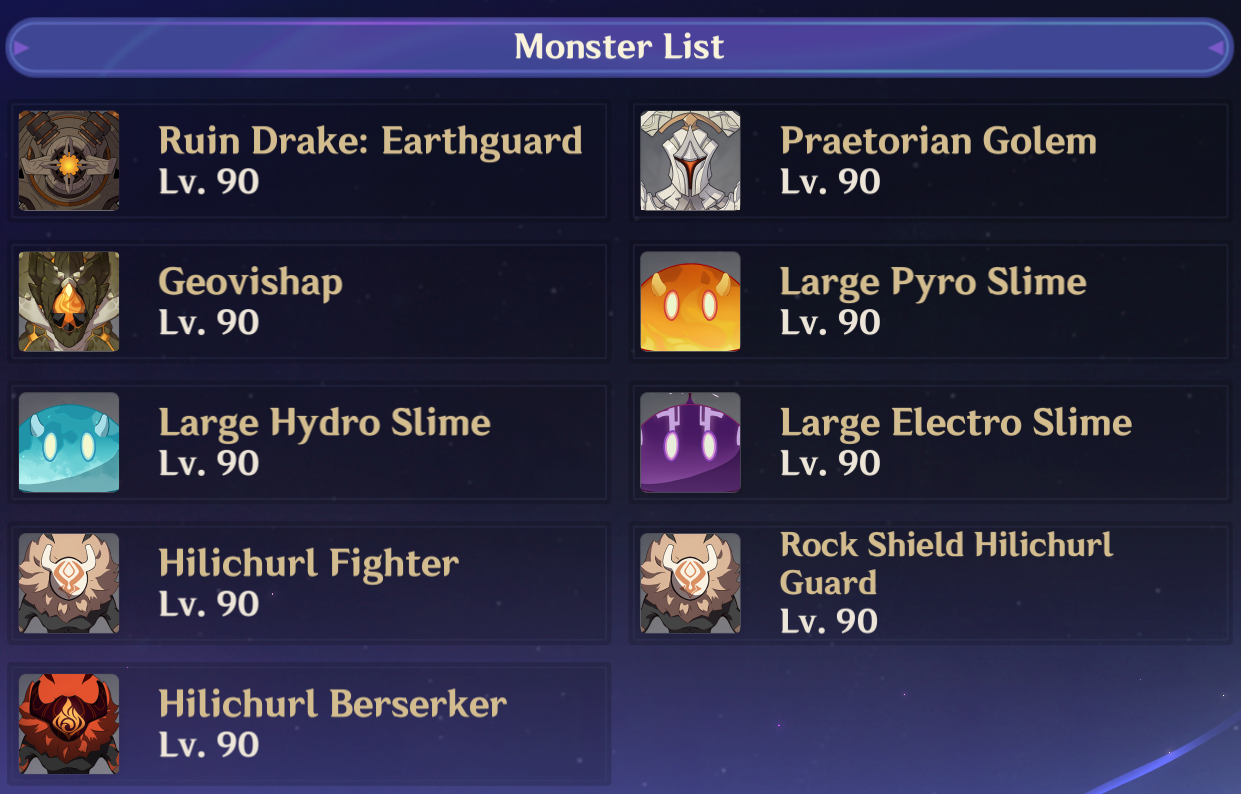
3) Fury of the Mountains
Monster List
Recommended Party

| Banishing Rite | During the challenge, complete all objectives in the Banishing Rite to obtain the Banishing Aura for 15 seconds. - Trigger 8 Crystallize reactions on opponents. - Deal Elemental Skill DMG to opponents 9 times. |
| Banishing Aura | A "Spiritsoul Purge" centered around your active character that deals AoE DMG will be unleashed. This can occur once every 1.5s. |
Triggering a Crystallize requires Geo + Swirlable element. So make sure those 2 are in the party. Then, bring along a character who leaves their Elemental Skill that deals damage even when they're not on the field (aka off-field DPS like Fischl and Kachina). Example: By summoning Oz, each of Oz's attacks are counted as 1 Elemental Skill DMG.
Best Team: Navia + Chiori + Bennett + Xiangling
F2P Team: Noelle + Kachina + Xingqiu + Fischl
Others: Arataki Itto + Albedo + Gorou + Fischl
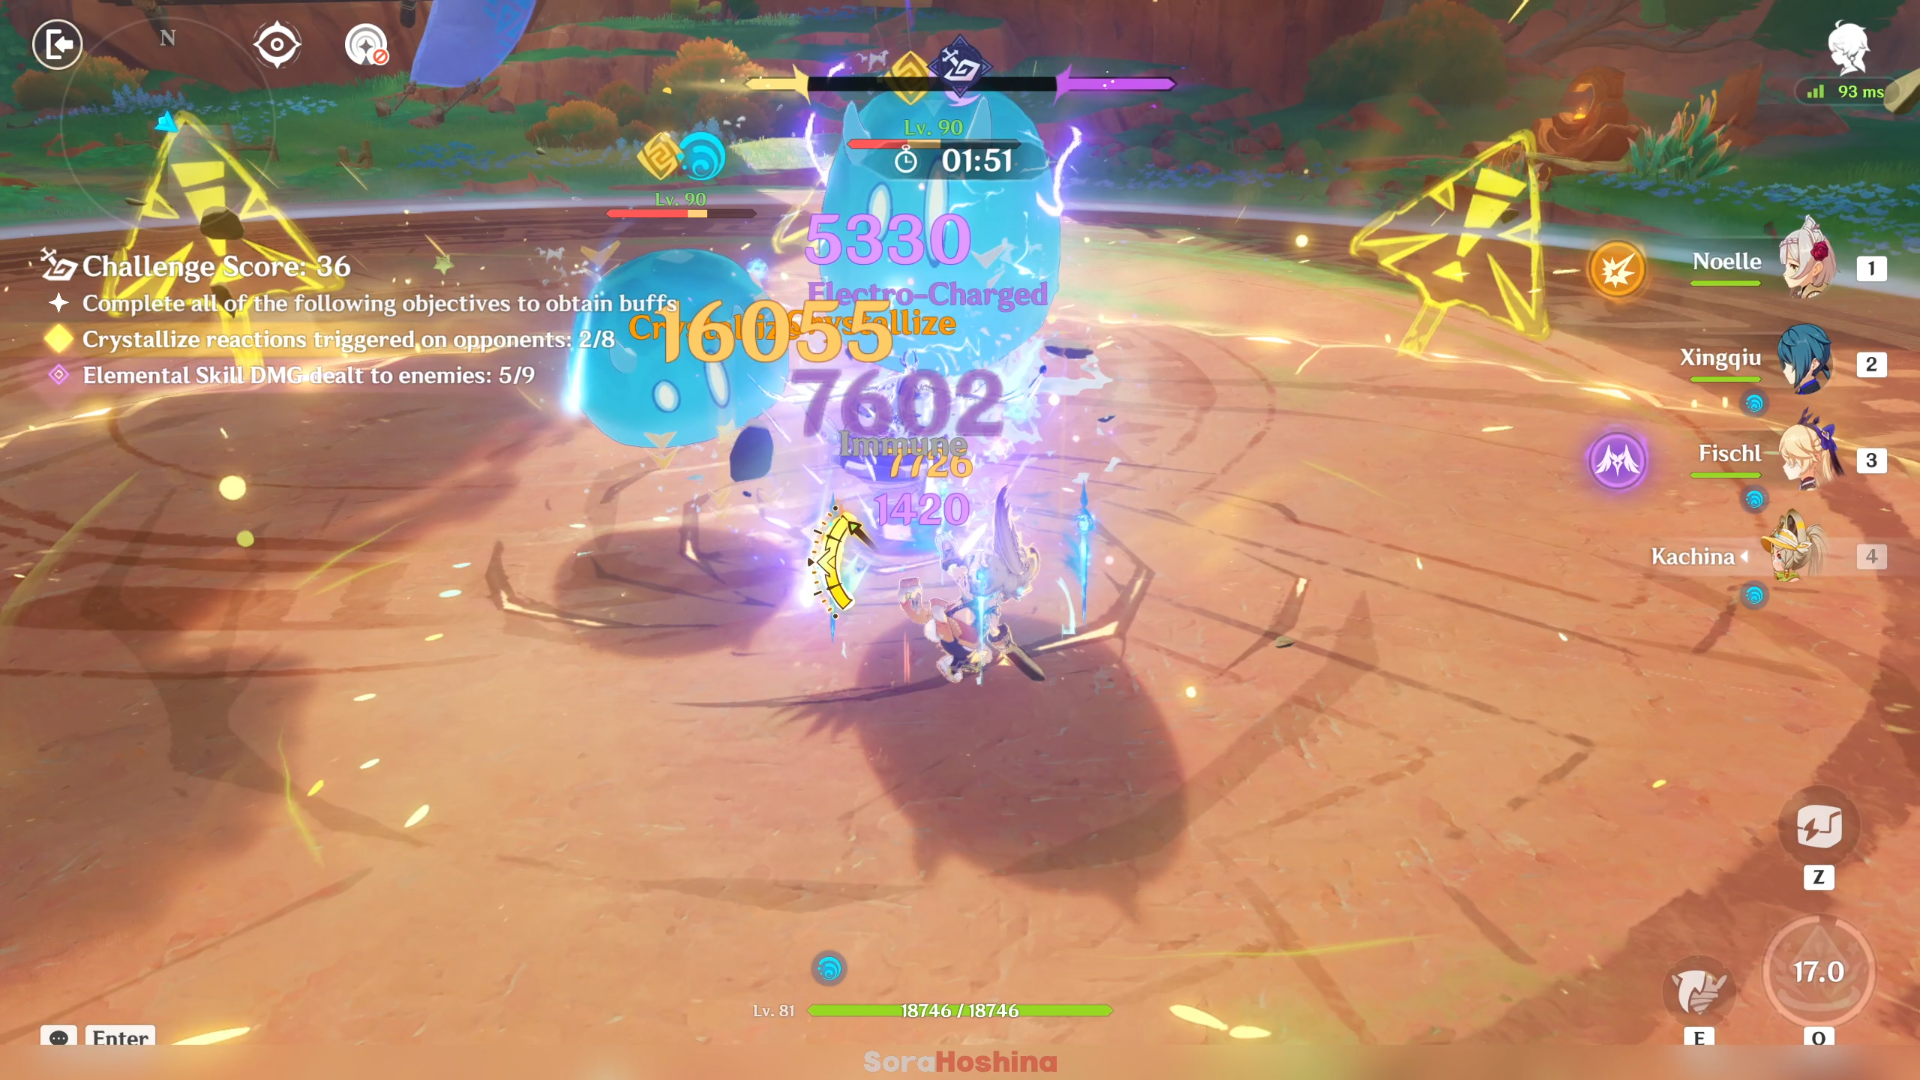
1) Some enemies are easy to Crystallized like attacking the Slimes with Geo to instantly trigger Crystallize, or attacking the Golem (with Geo shield) with swirlable elements. You'll need to trigger Crystallize 8 times so it's best if your main DPS is a Geo character.
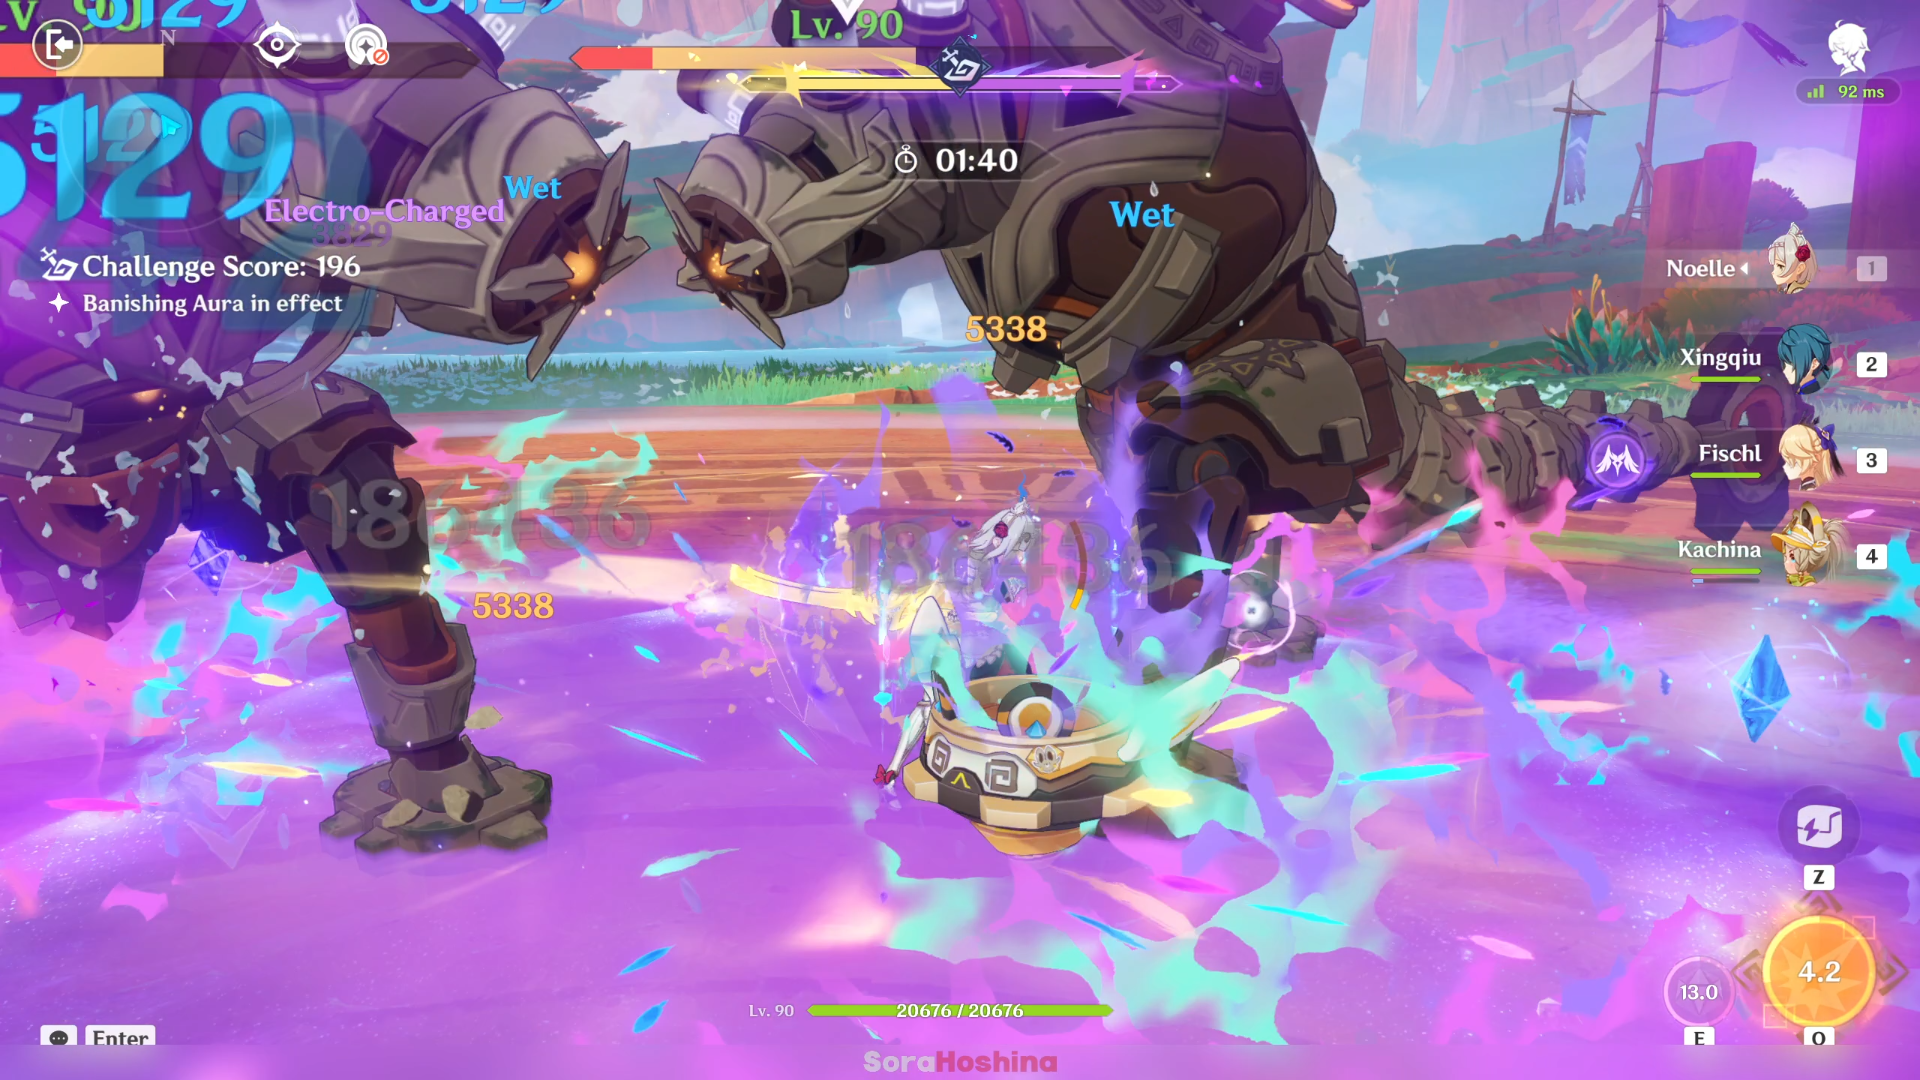
2) For the second objective, you'll need to deal Elemental Skill damage to enemies 9 times. Generally, Elemental Skill have a long cooldown so you can't use them back to back. But the best method here is to leave Elemental Skill that will stay on the field and deal damage to enemies even when the summoner leaves the field (like Fischl's Oz and Kachina's Turbo Twirly).
Video Showcase
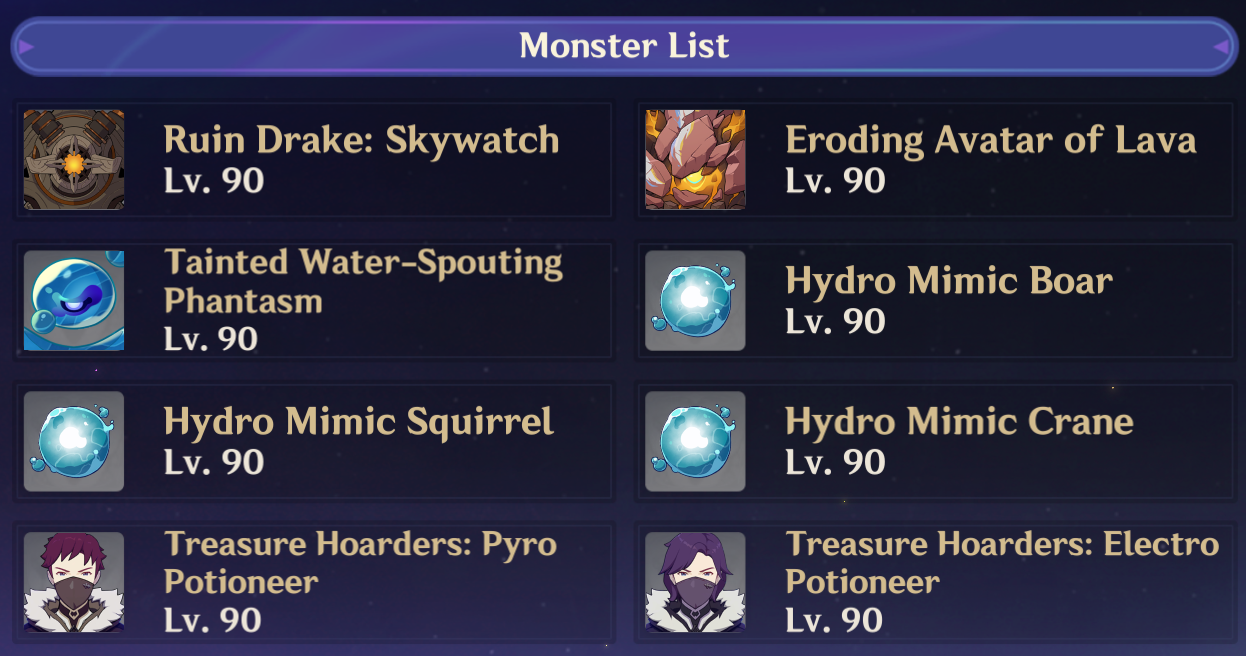
4) Fires of Retribution
Monster List
Recommended Party

| Banishing Rite | During the challenge, complete all objectives in the Banishing Rite to obtain the Banishing Aura for 15 seconds. - Deal Charged Attack DMG to opponents 6 times. - Active character deals Pyro DMG to opponents 9 times. |
| Banishing Aura | A "Spiritsoul Purge" centered around your active character that deals AoE DMG will be unleashed. This can occur once every 1.5s. |
Bring along a DPS that often relies on Charged ATK so you can charge Banishing Rite faster. In addition, even better if said character deals Pyro DMG.
Best Team: Hu Tao + Yelan/Xingqiu + Kazuha + Xilonen
F2P Team: Yanfei + Xingqiu + Bennett + Xiangling
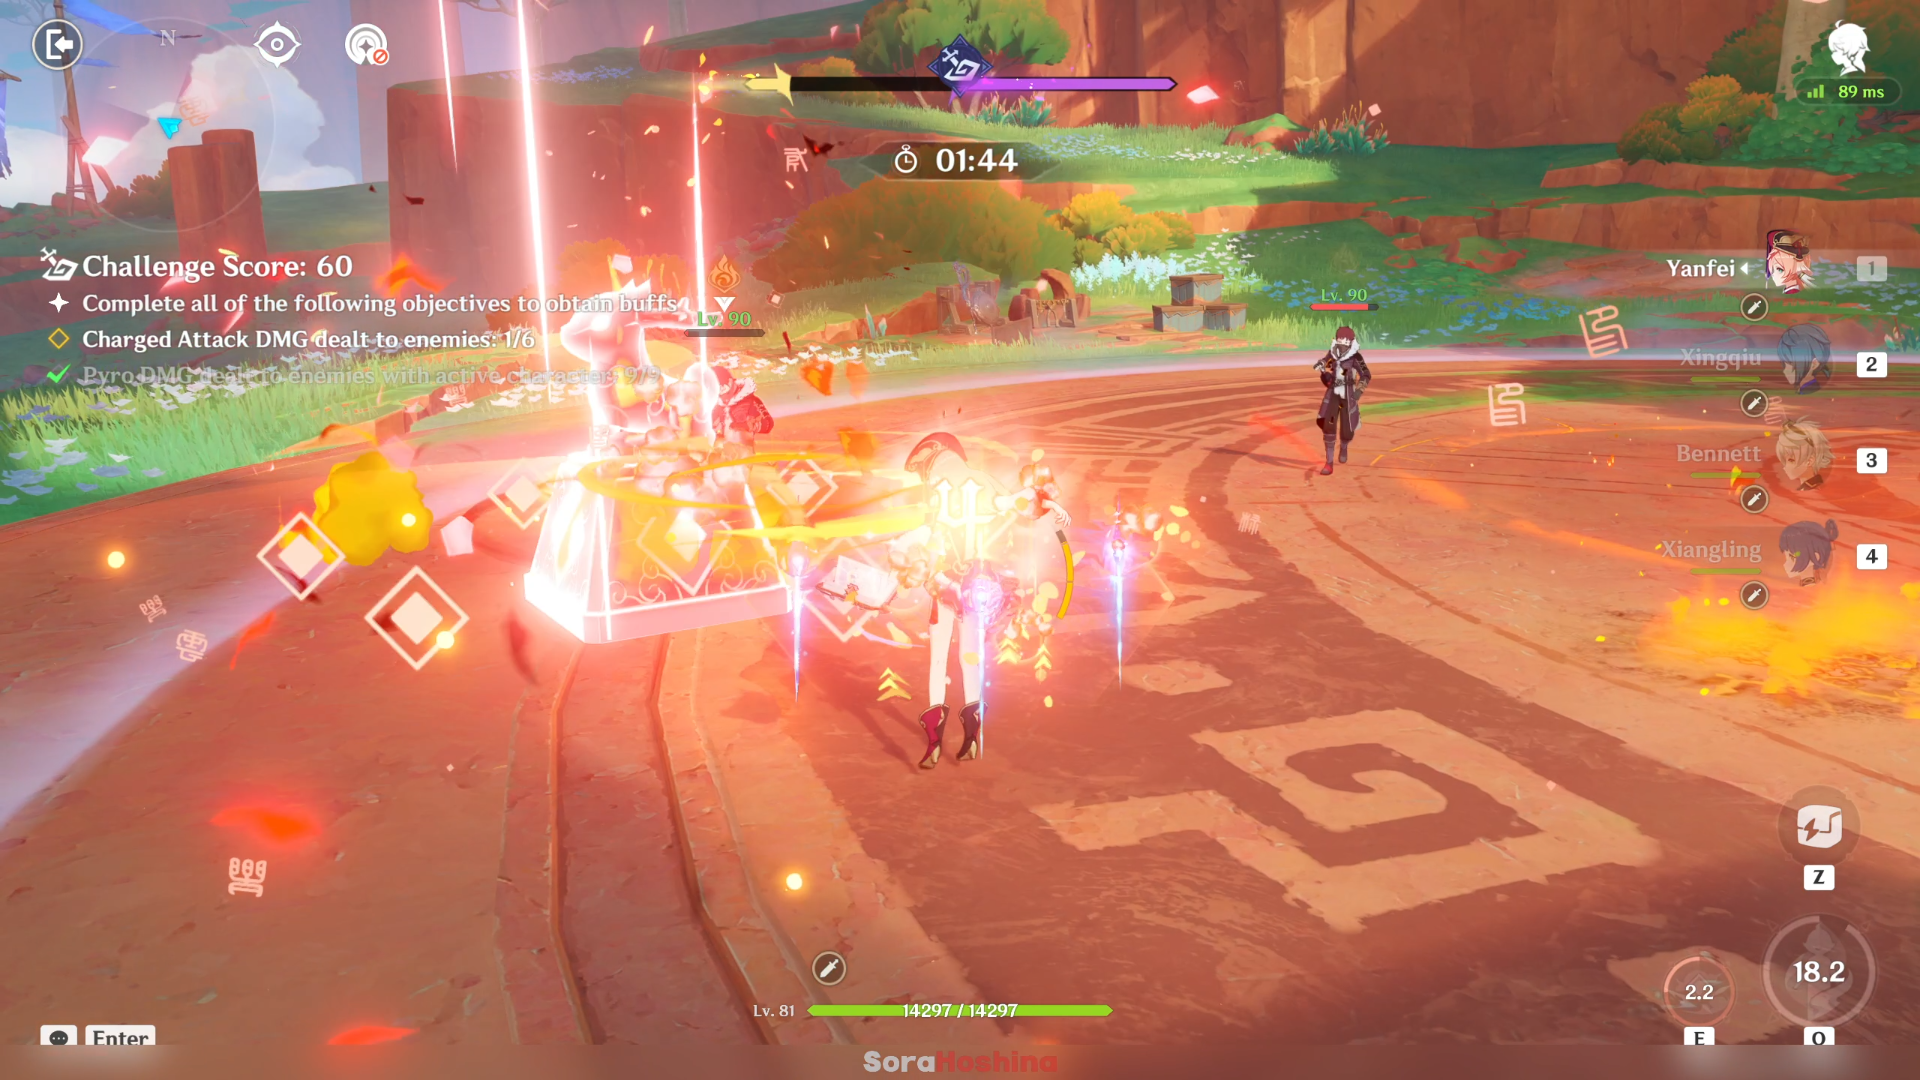
1) This stage is pretty spartan because they want the active character to deal Pyro damage and it's best if your active character also deals Charged Attack. If you forgot, dealing Charged ATK will deplete your stamina so you can't spam Charged ATK continuously.
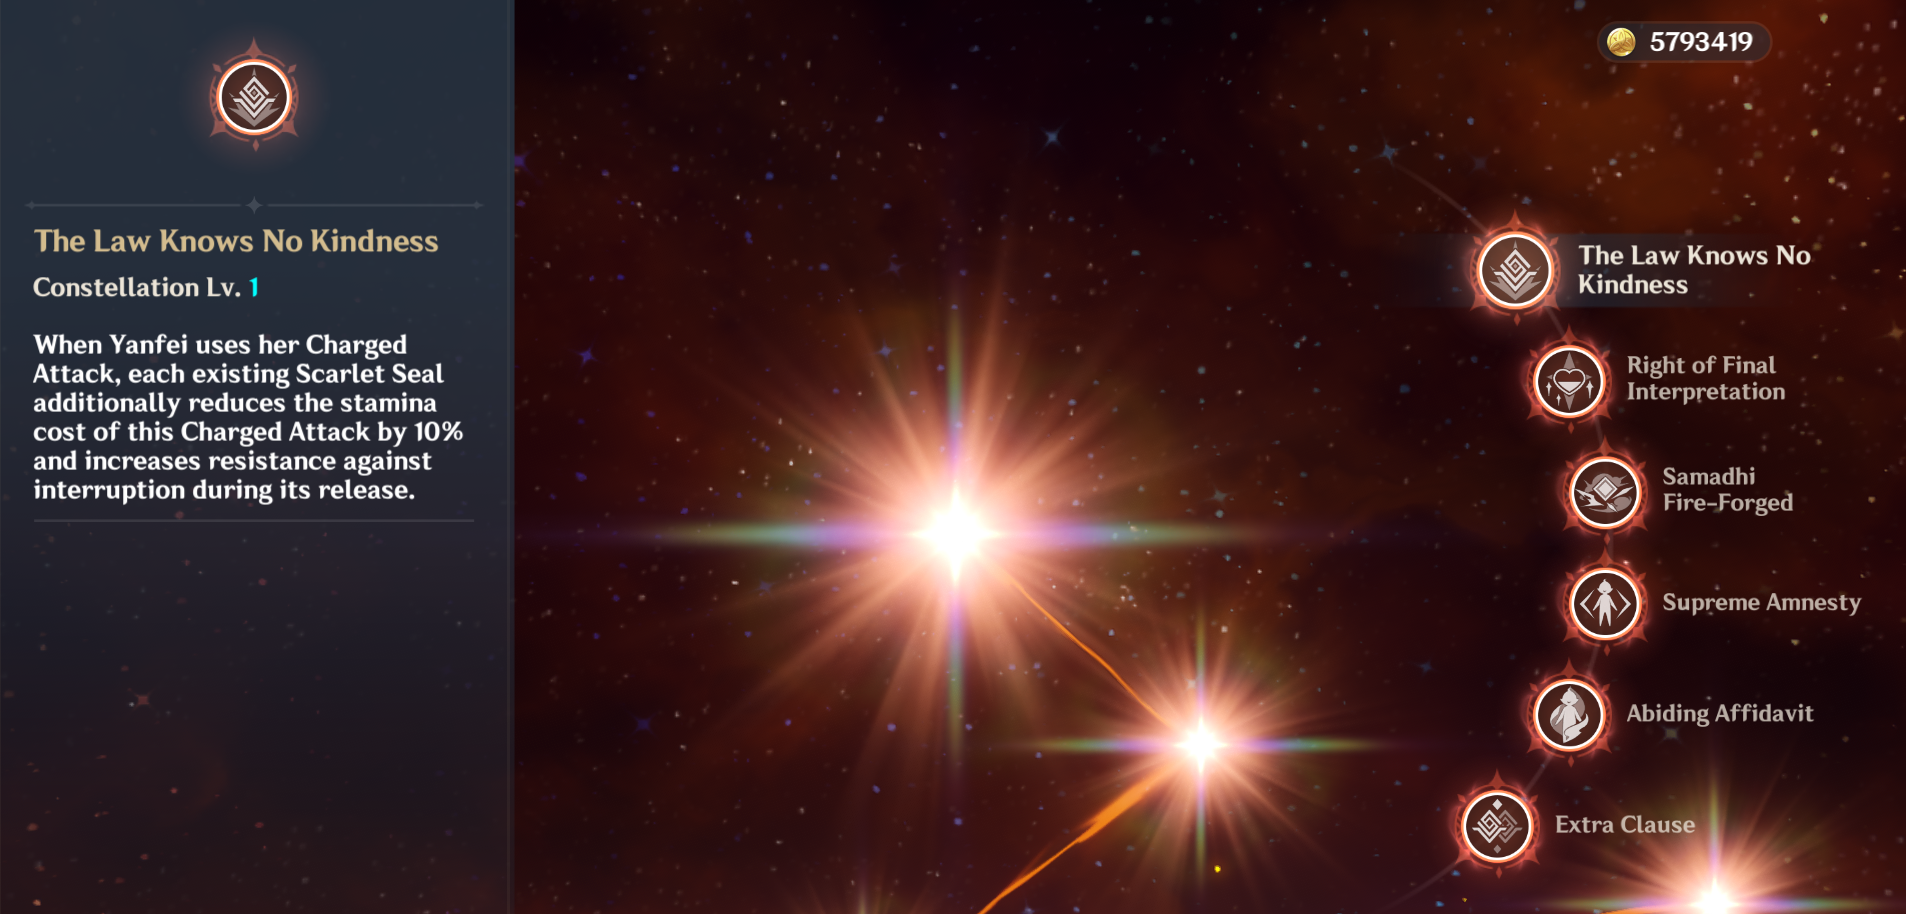
2) Aside from Hu Tao who's main damage output is from her Charged ATK, the second best character would be Yanfei C1 that reduce the stamina cost of her Charged ATK. If you don't have both of them, you'll need to constantly swap your characters (1 for pyro attack and 1 for charged attack) which will consume time and hinder you from triggering Banishing Rite often.
Video Showcase
Restoring Fragmented Records
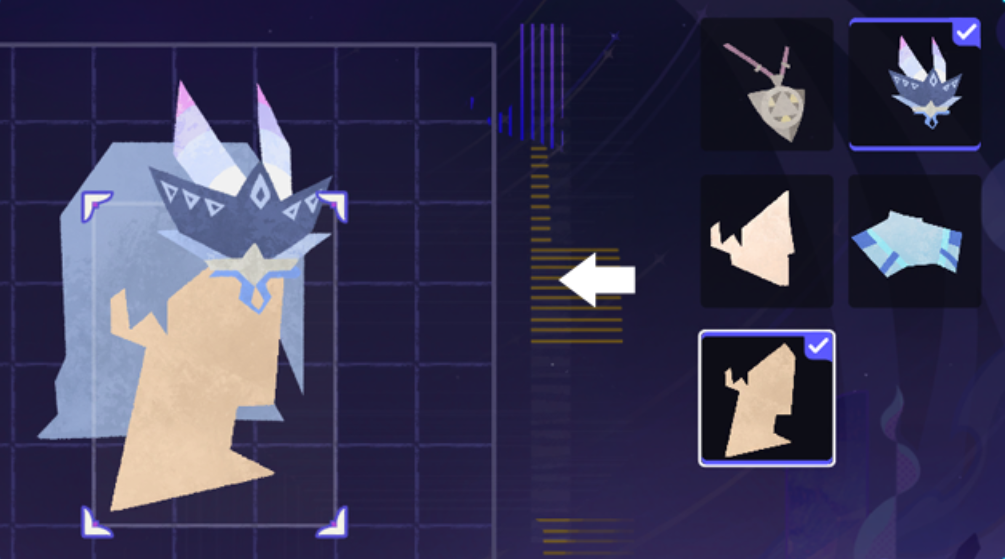
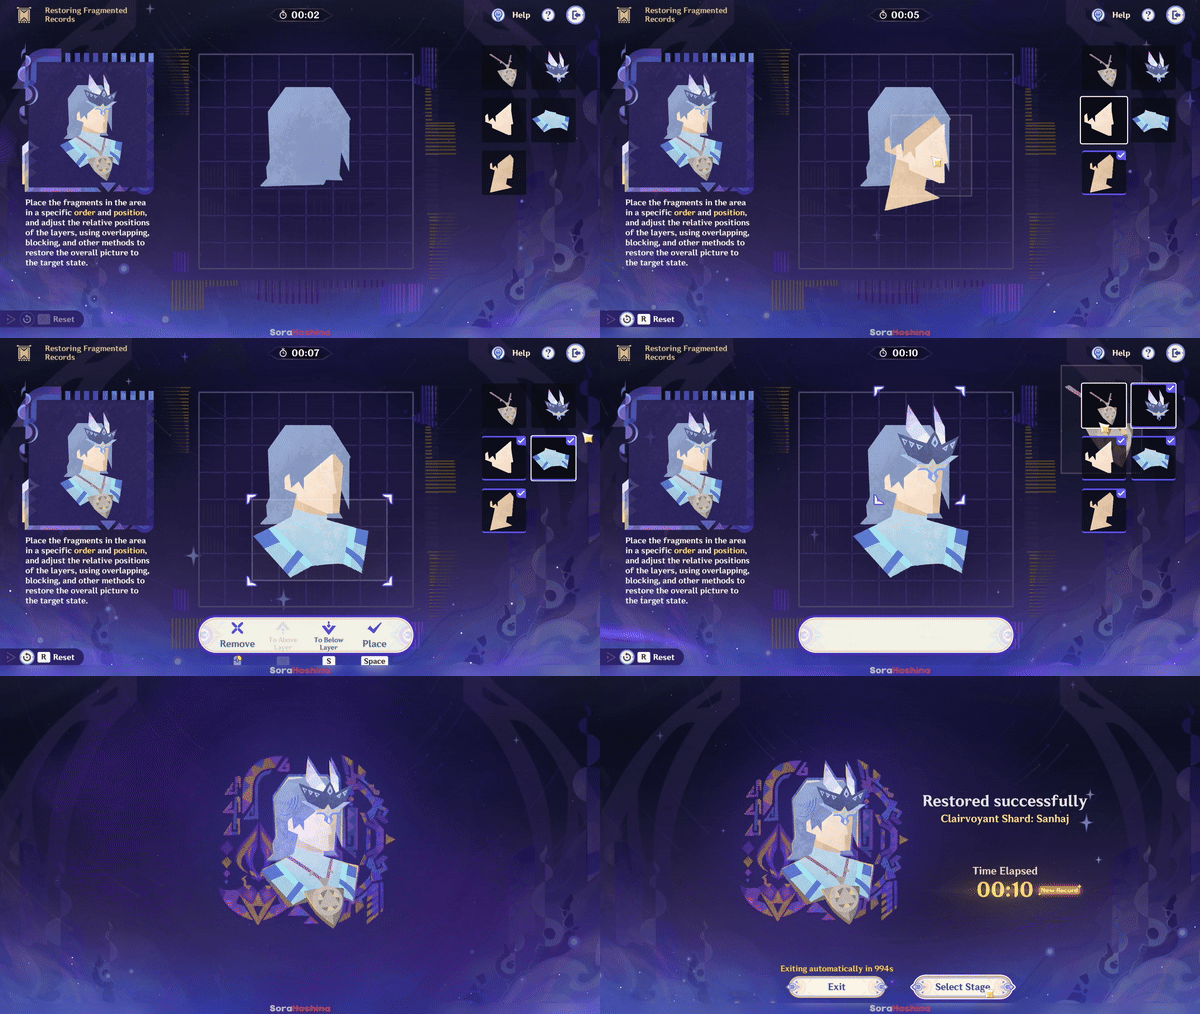
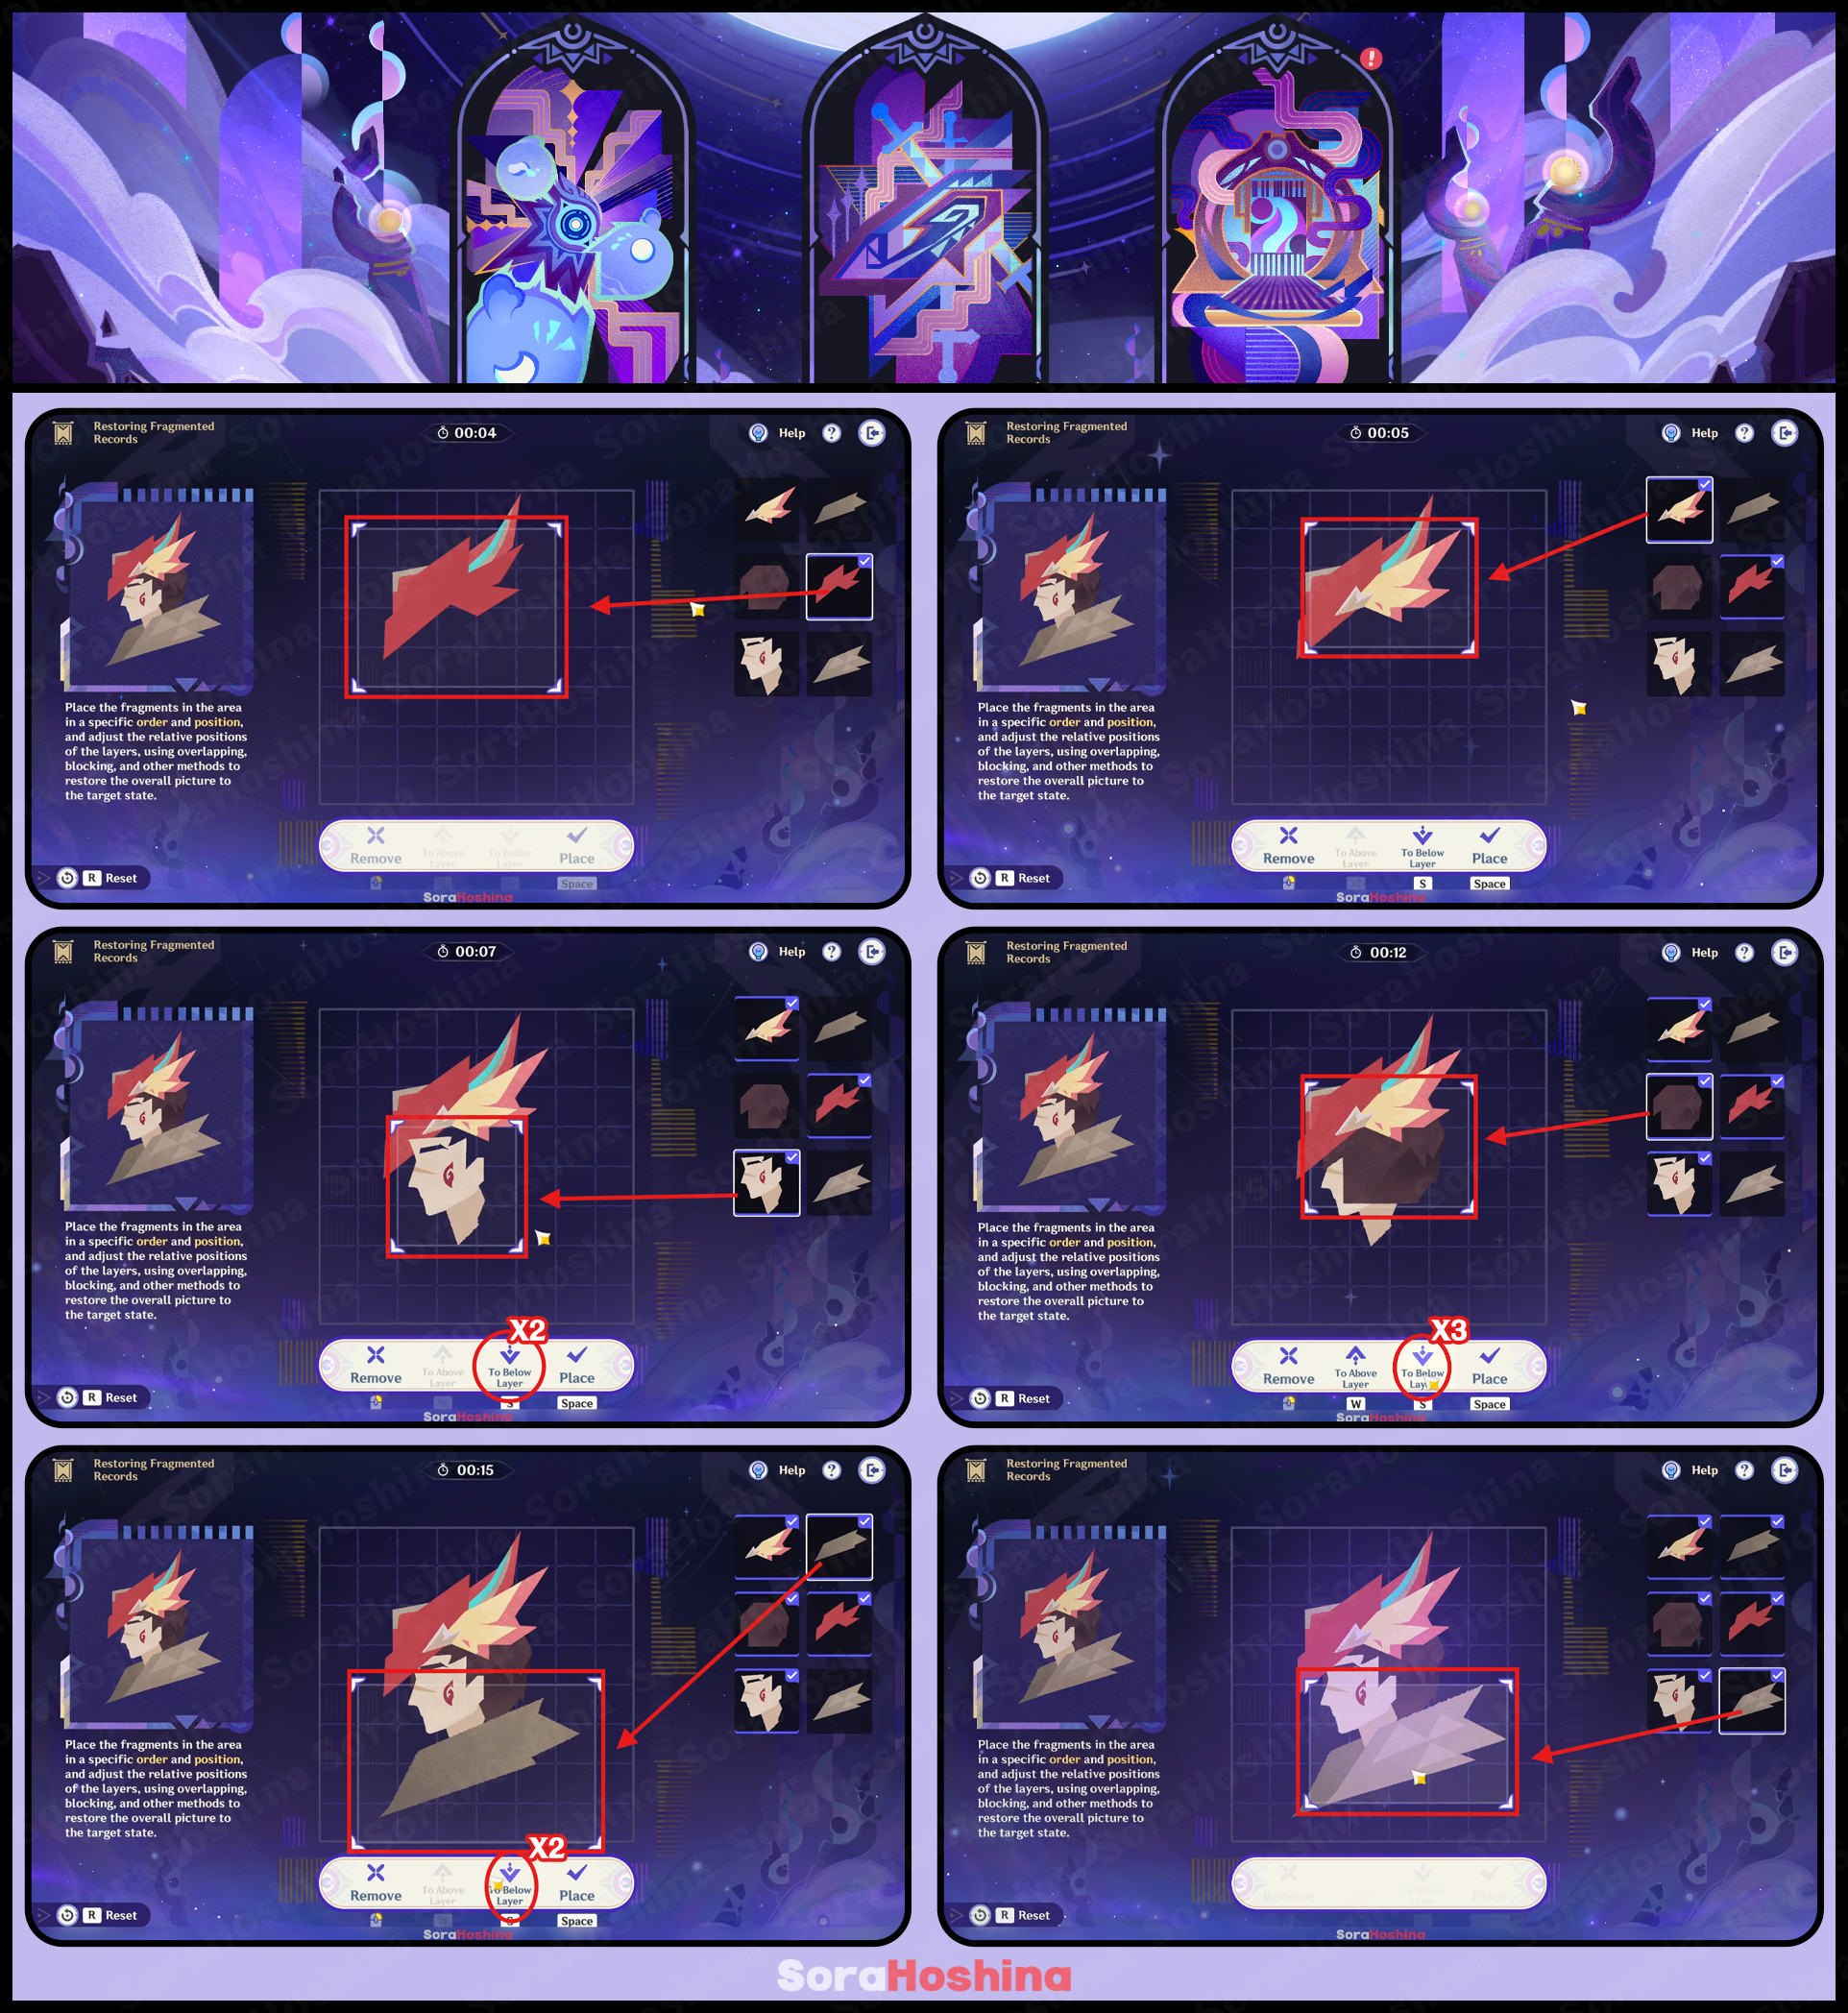
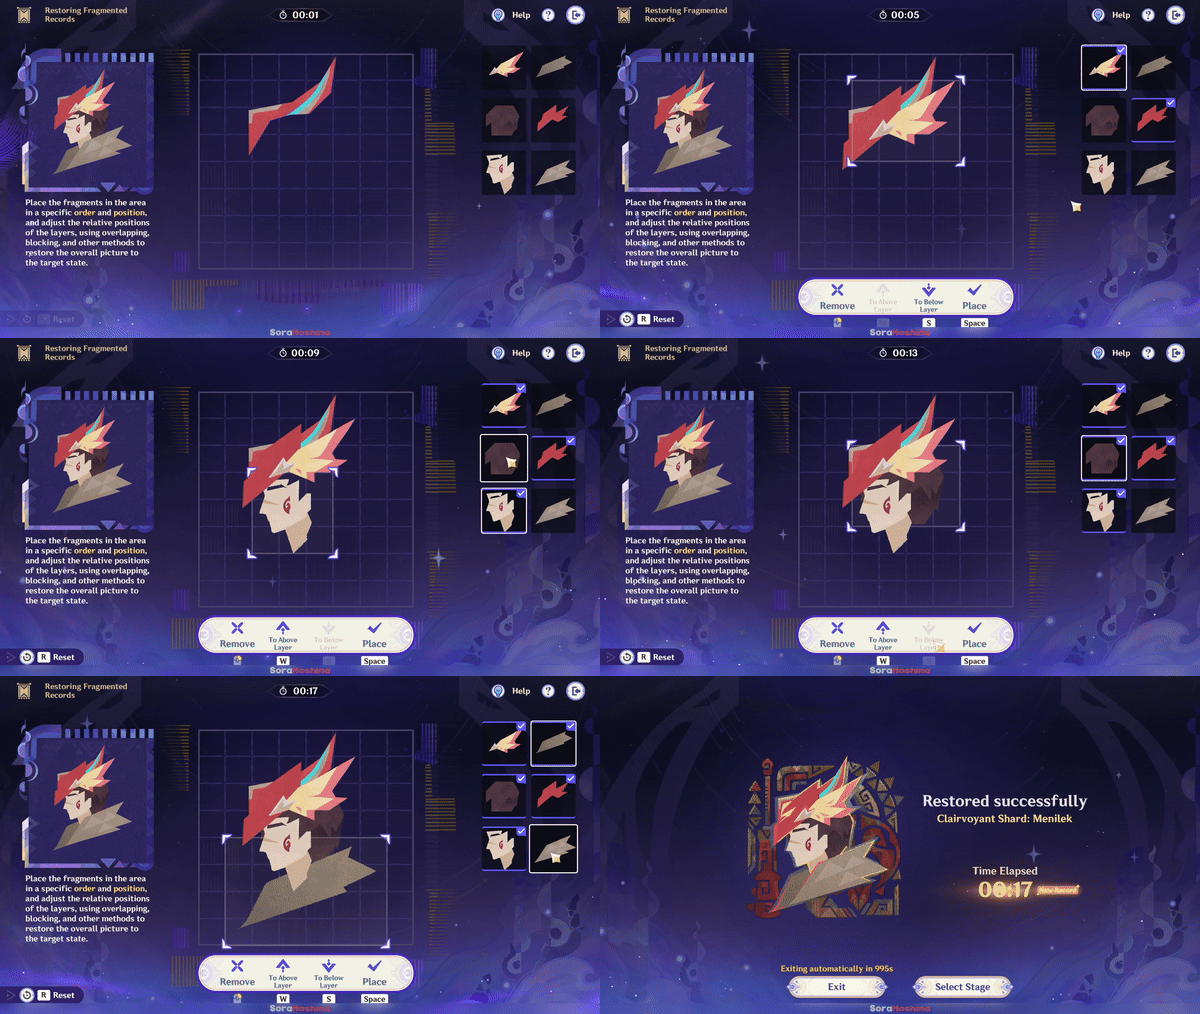
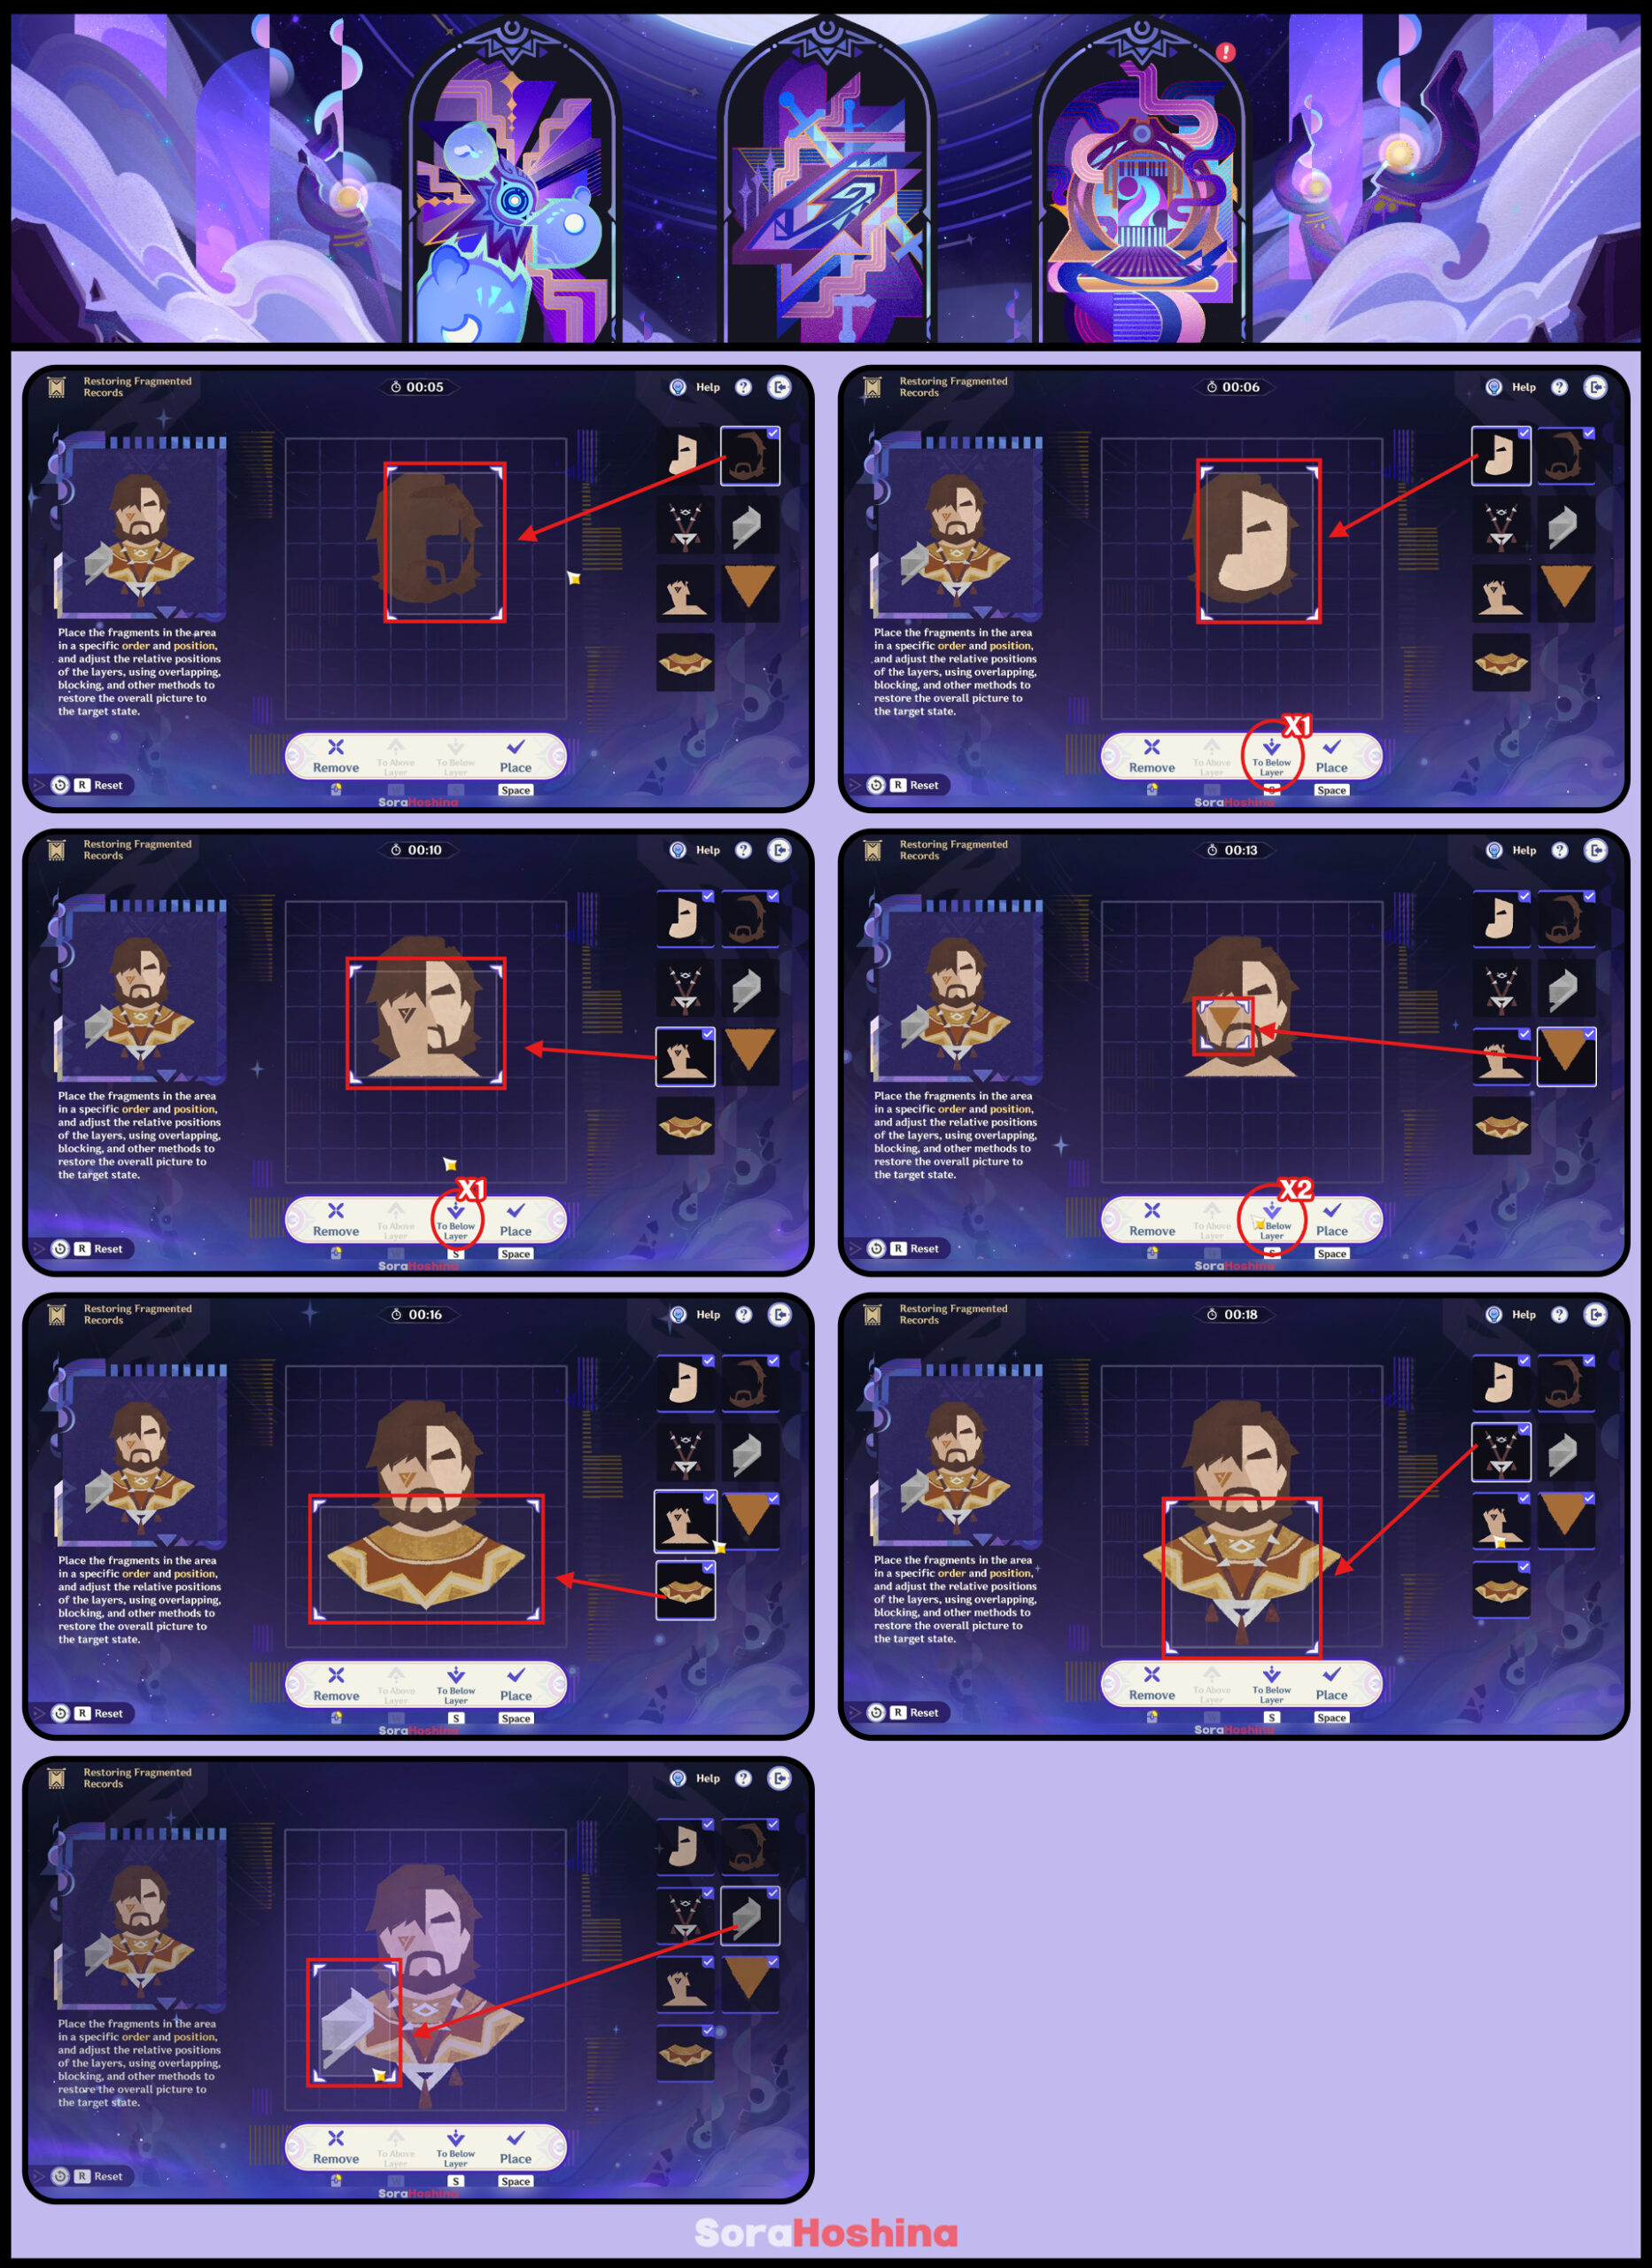
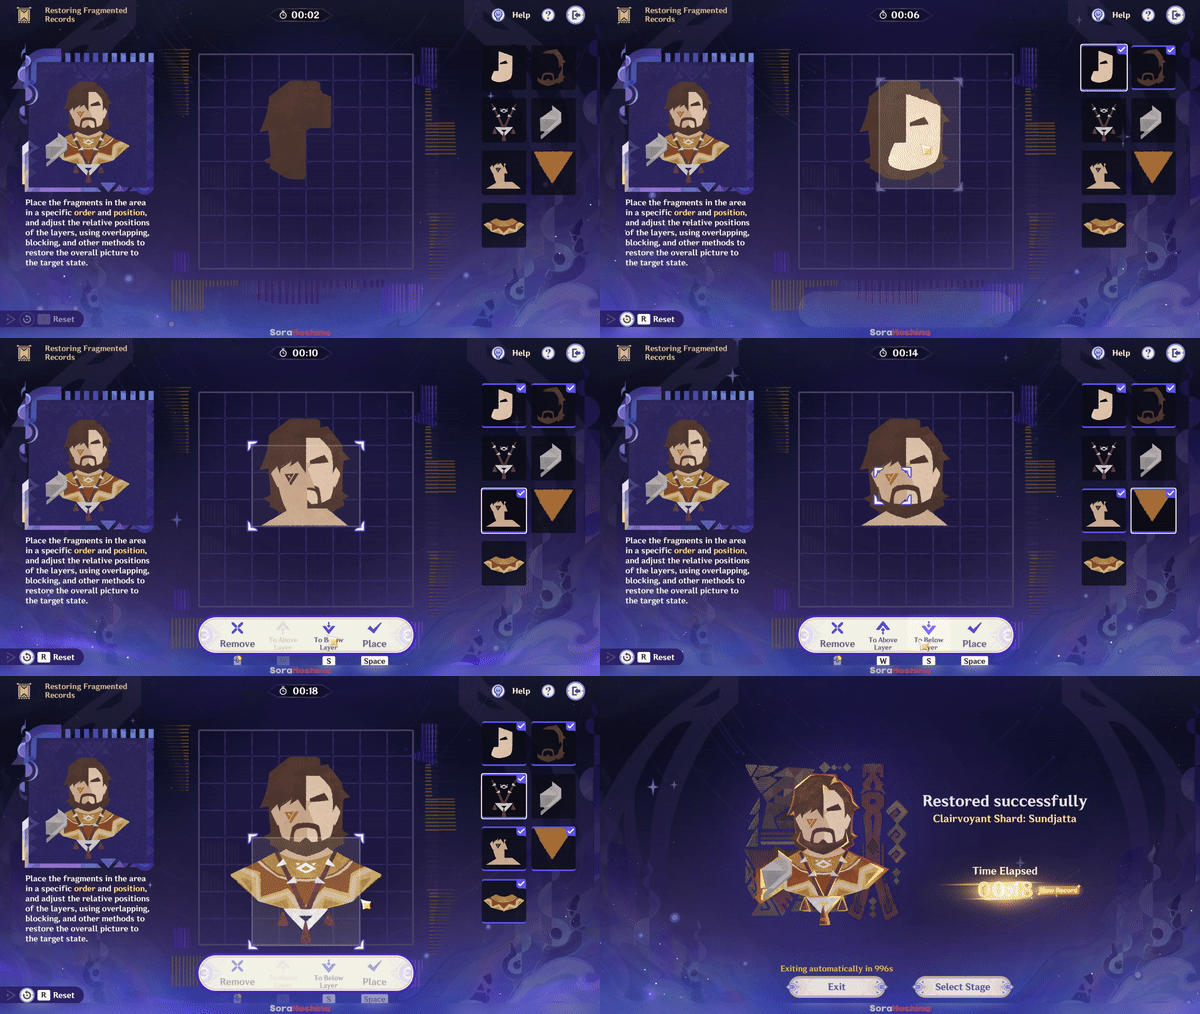
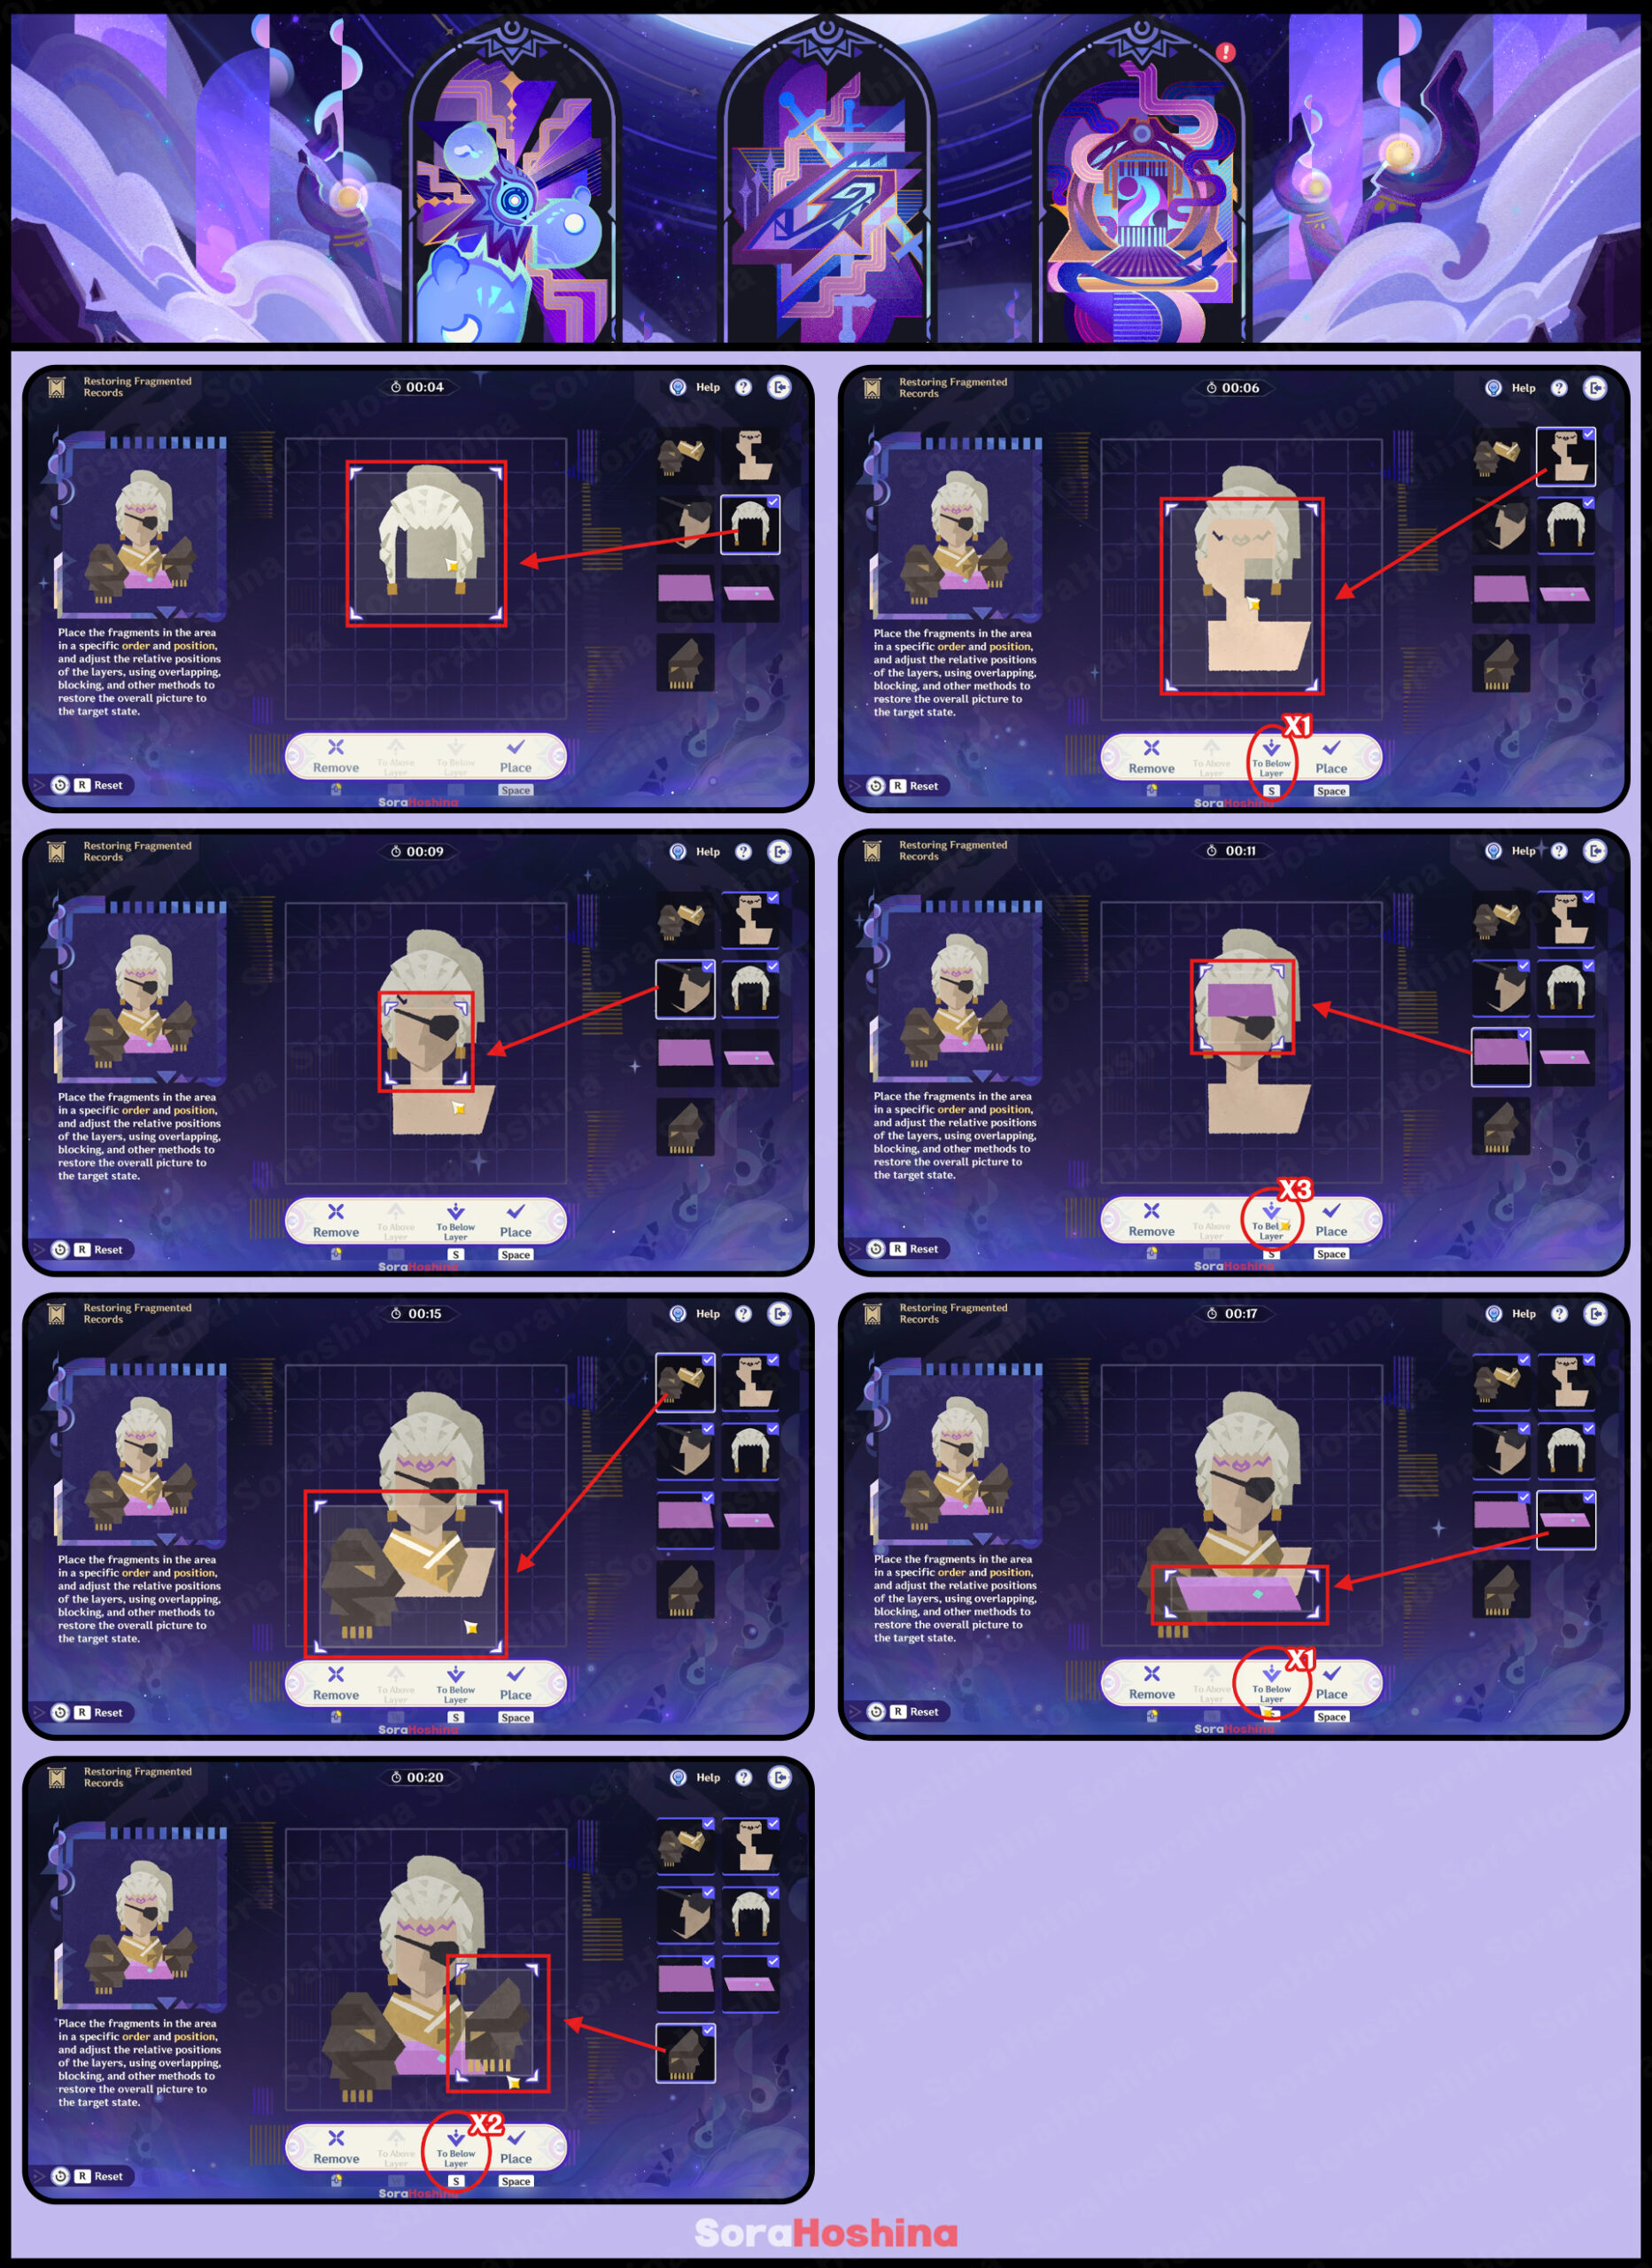
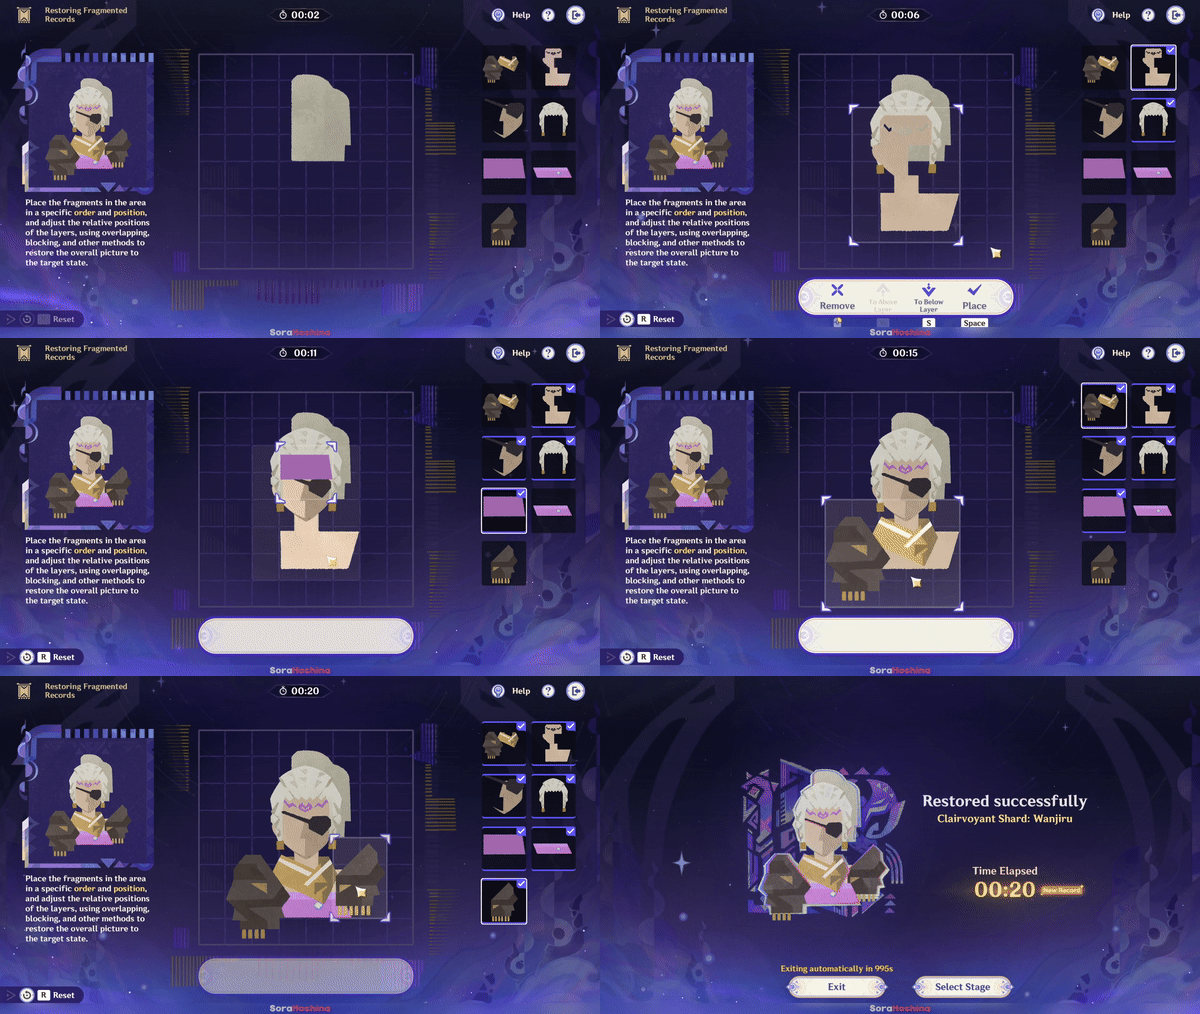
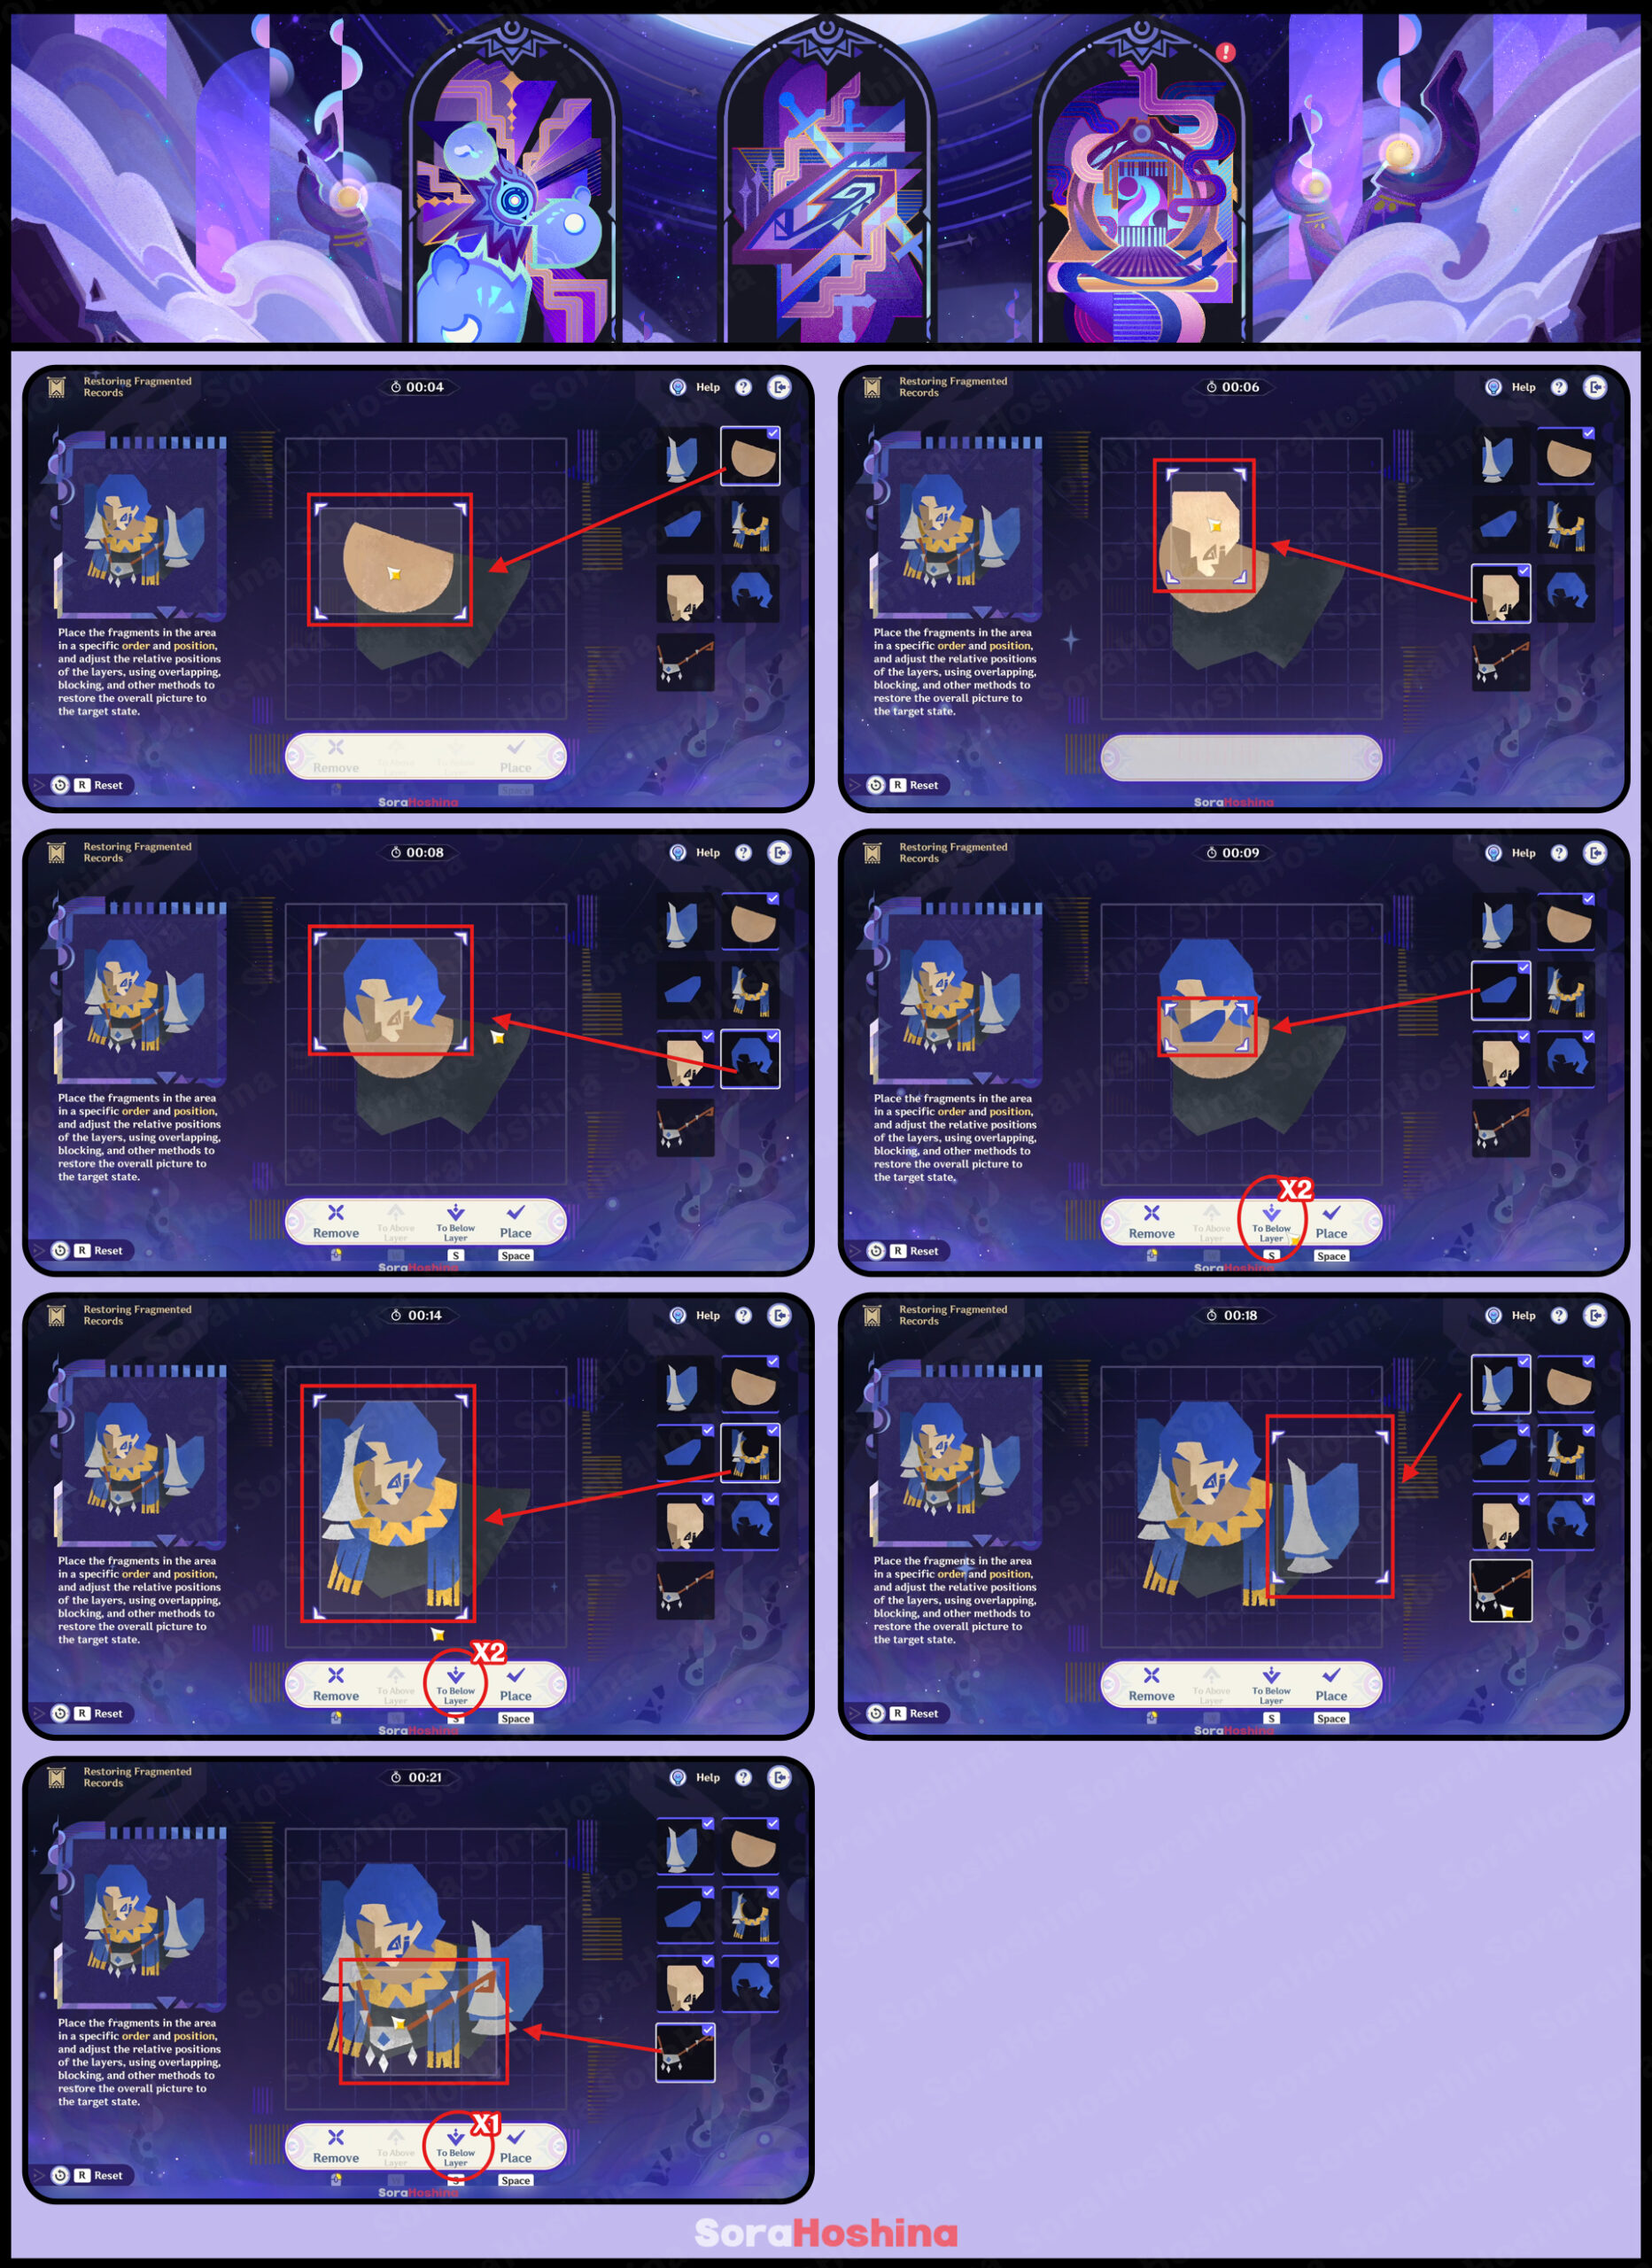
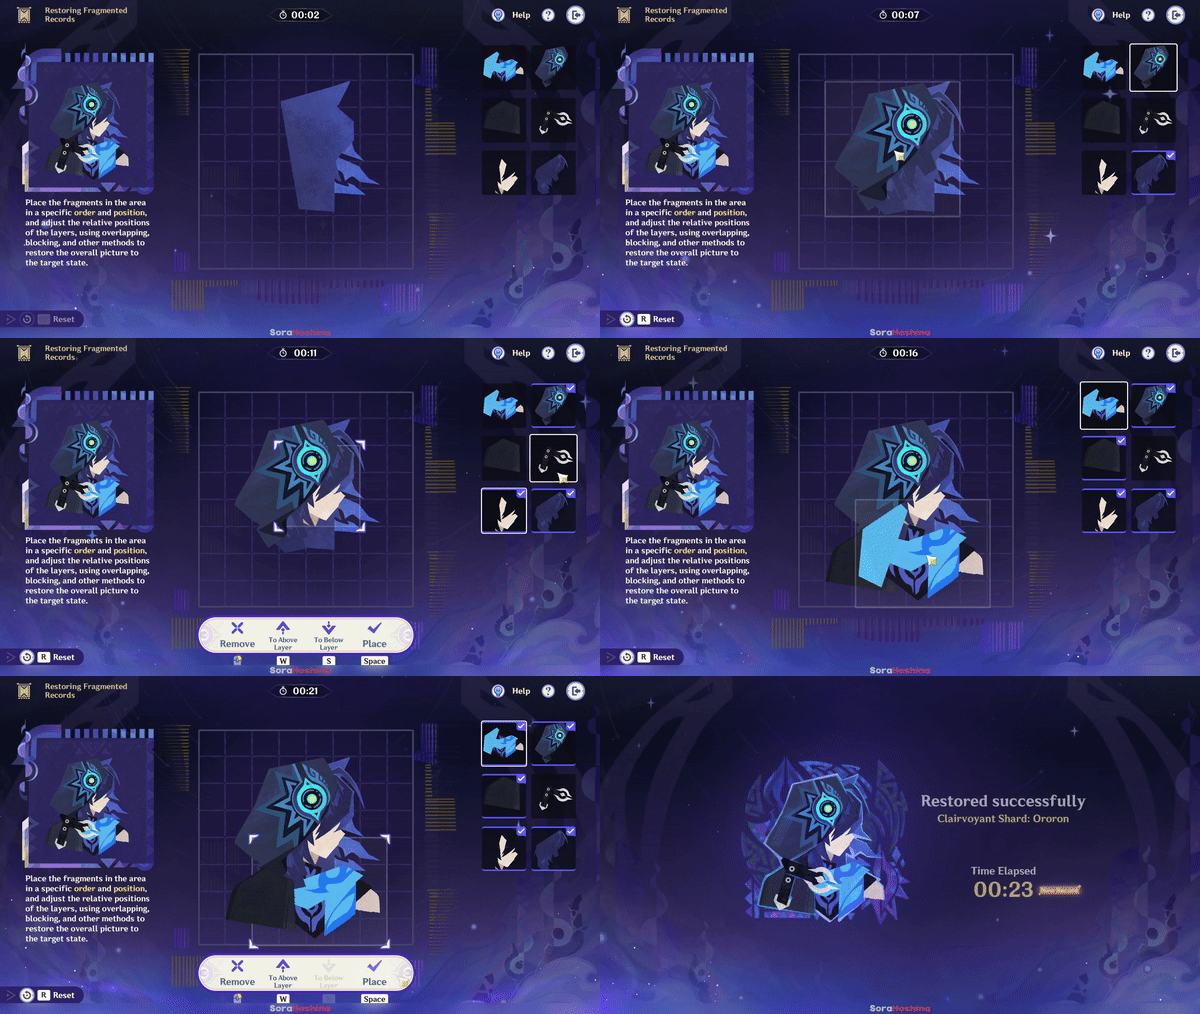
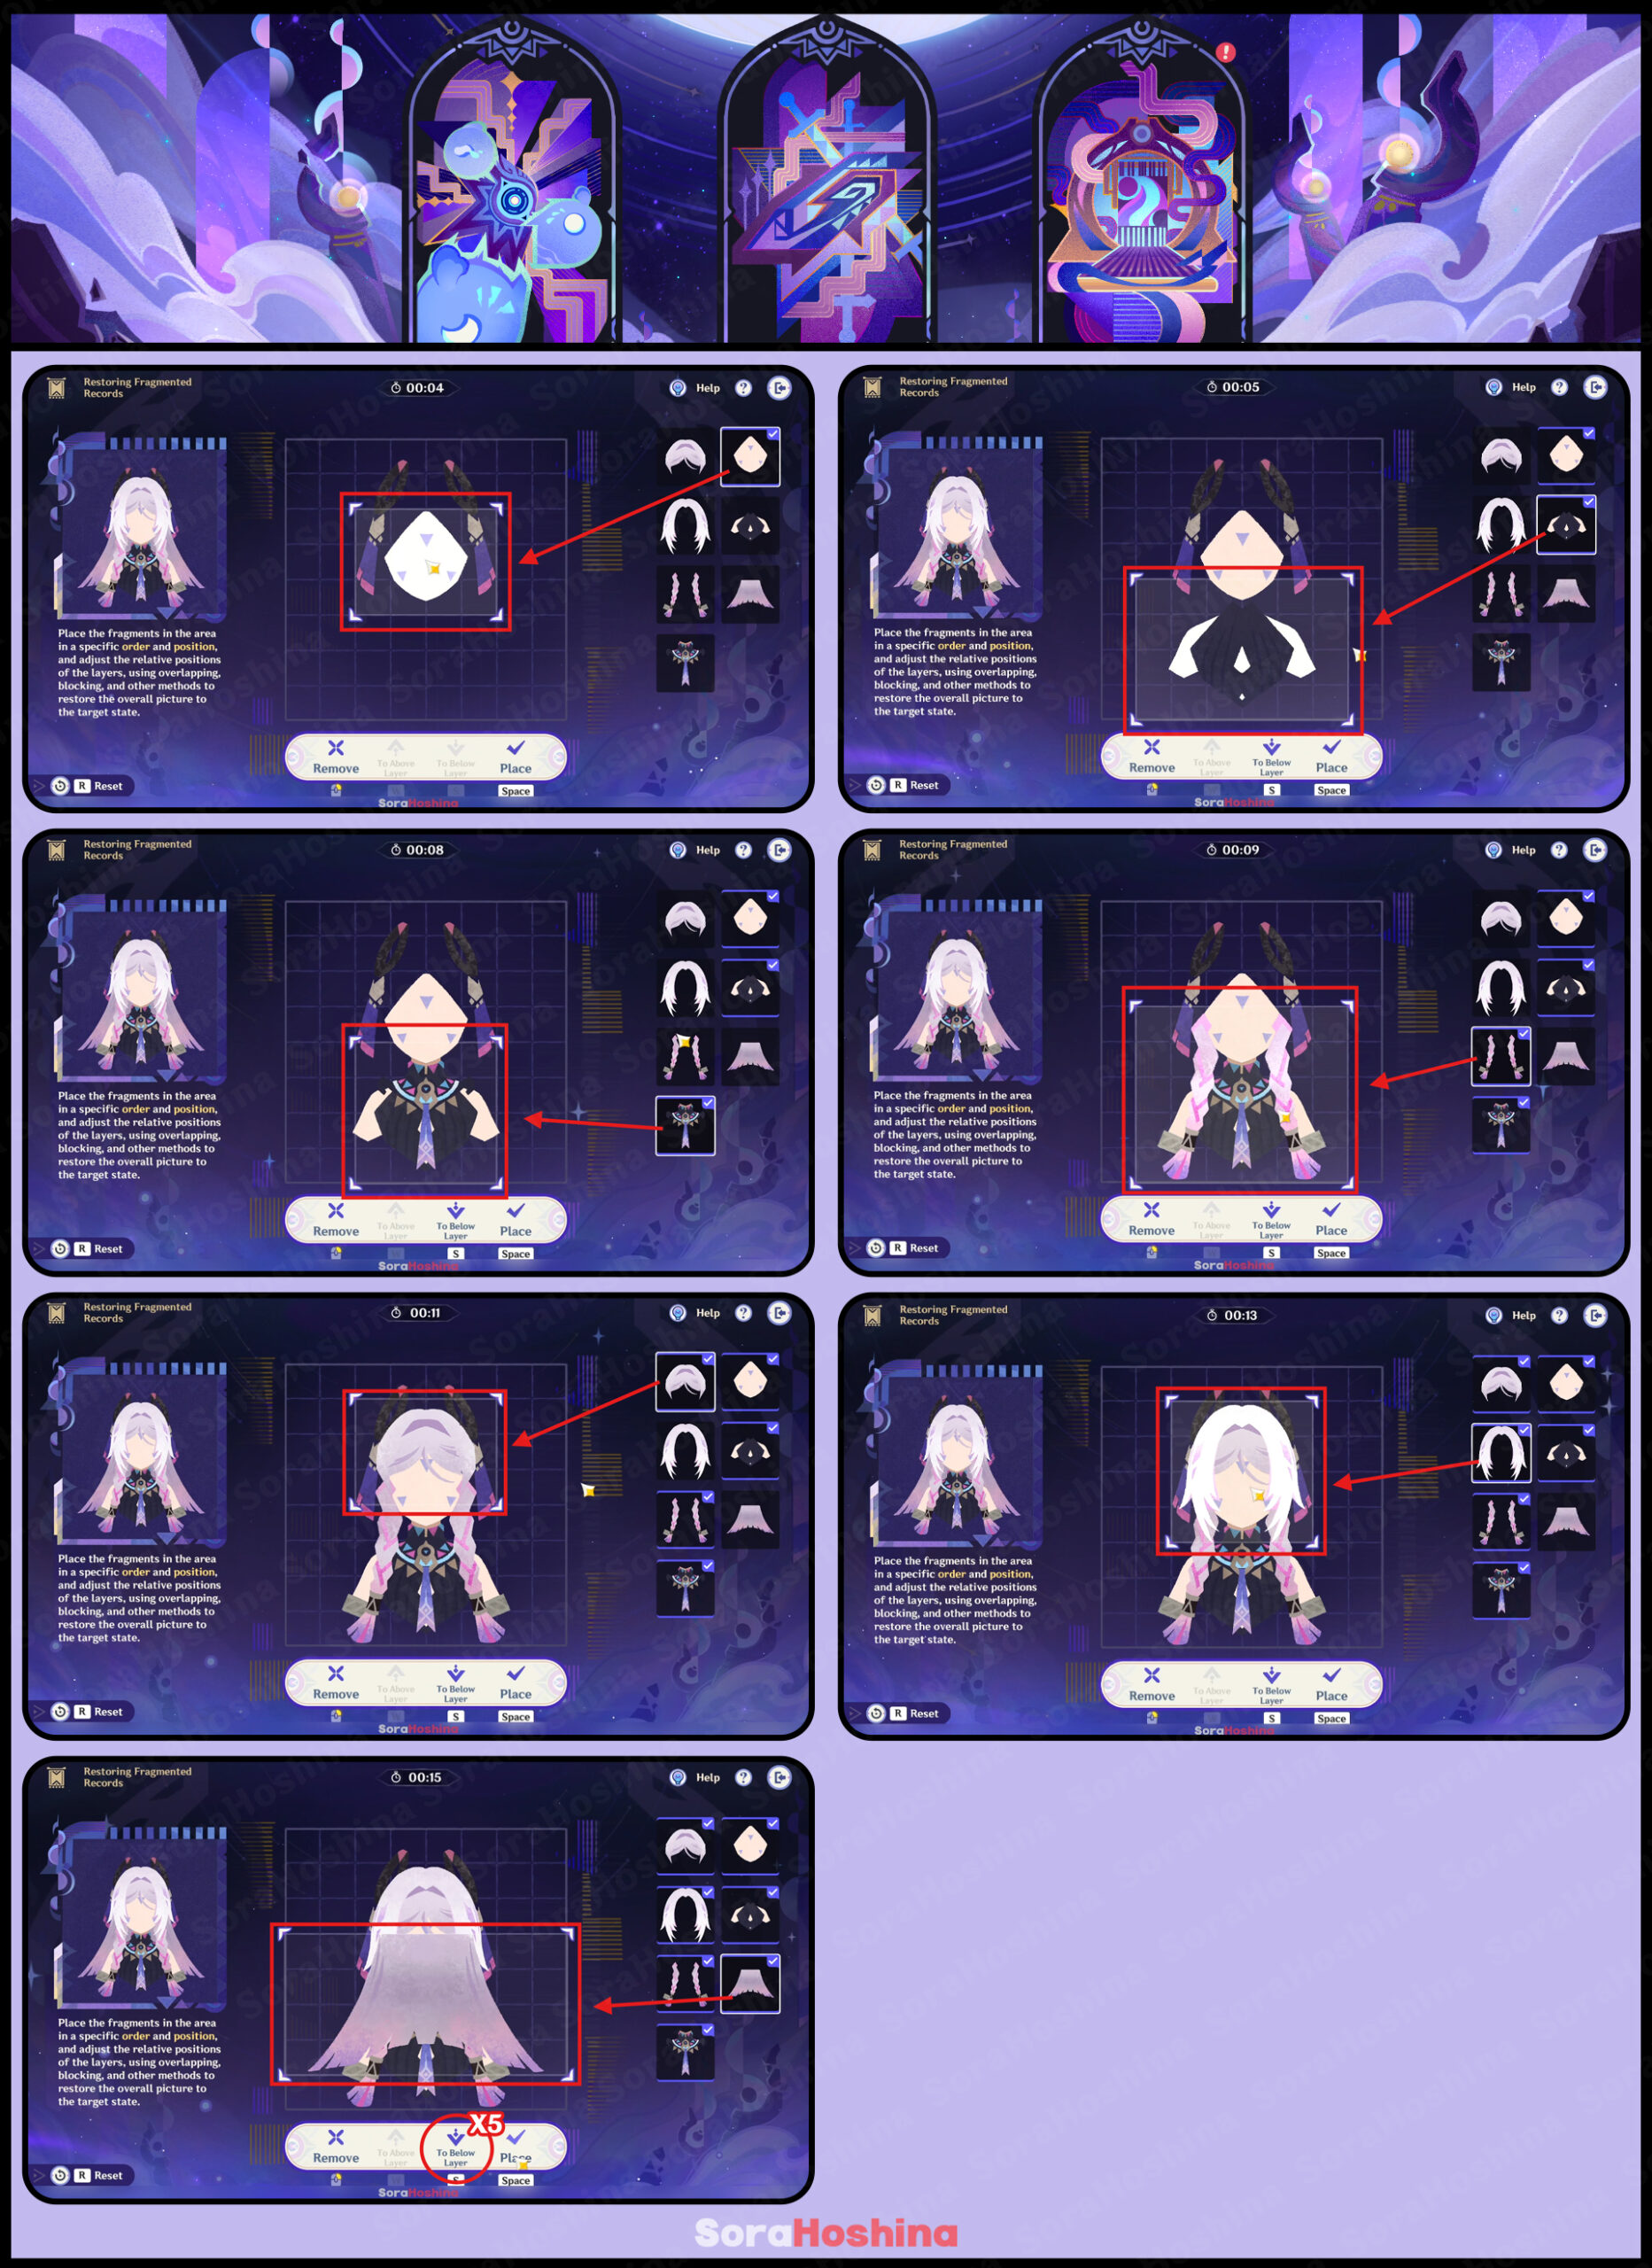
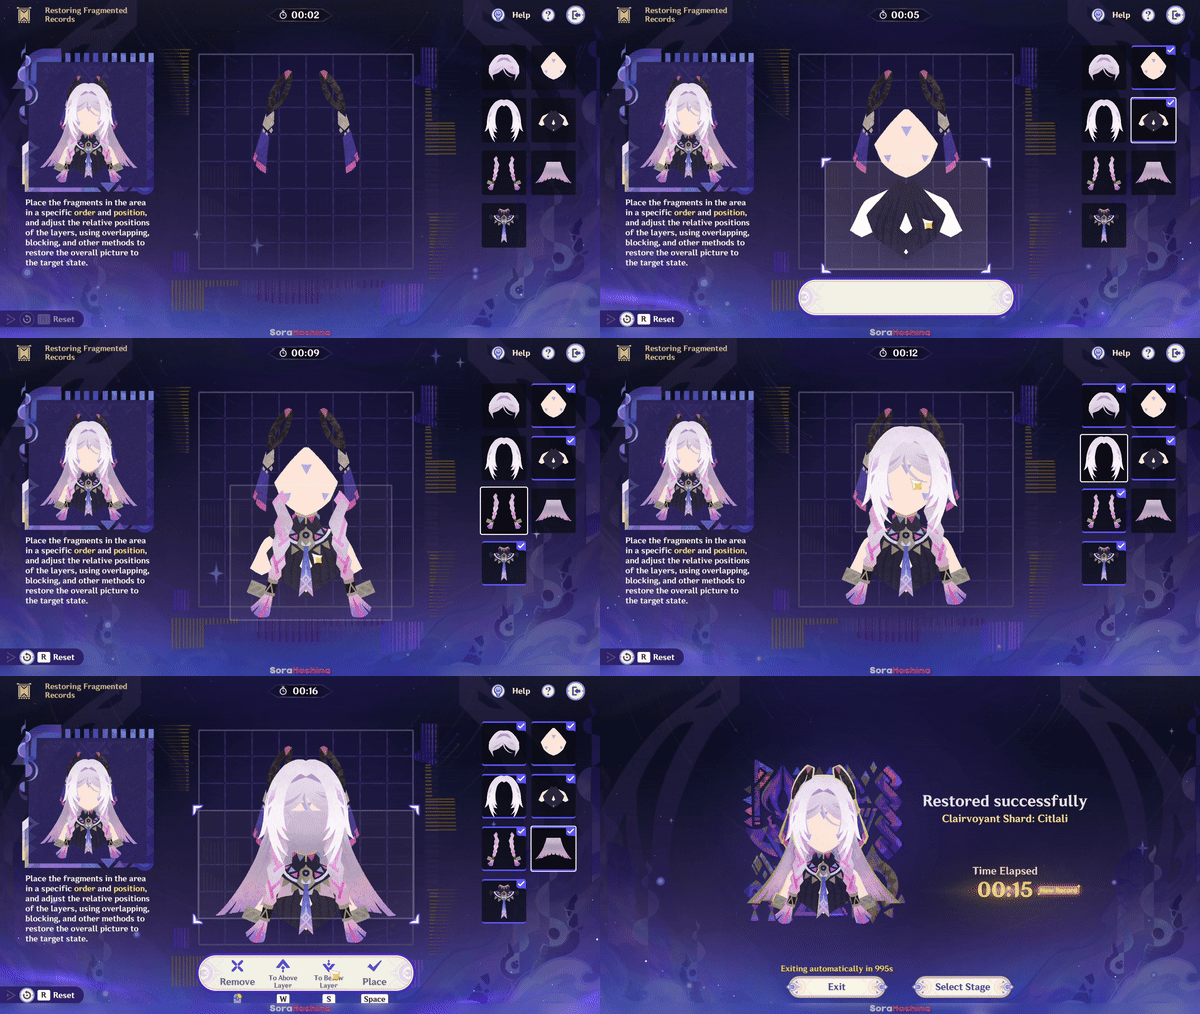
Place the fragments in the area in a specific order and position, and adjust the relative positions of the layers, using overlapping, blocking, and other methods to restore the overall picture to the target state.
1) Clairvoyant Shard: Sanhaj
Static Guide
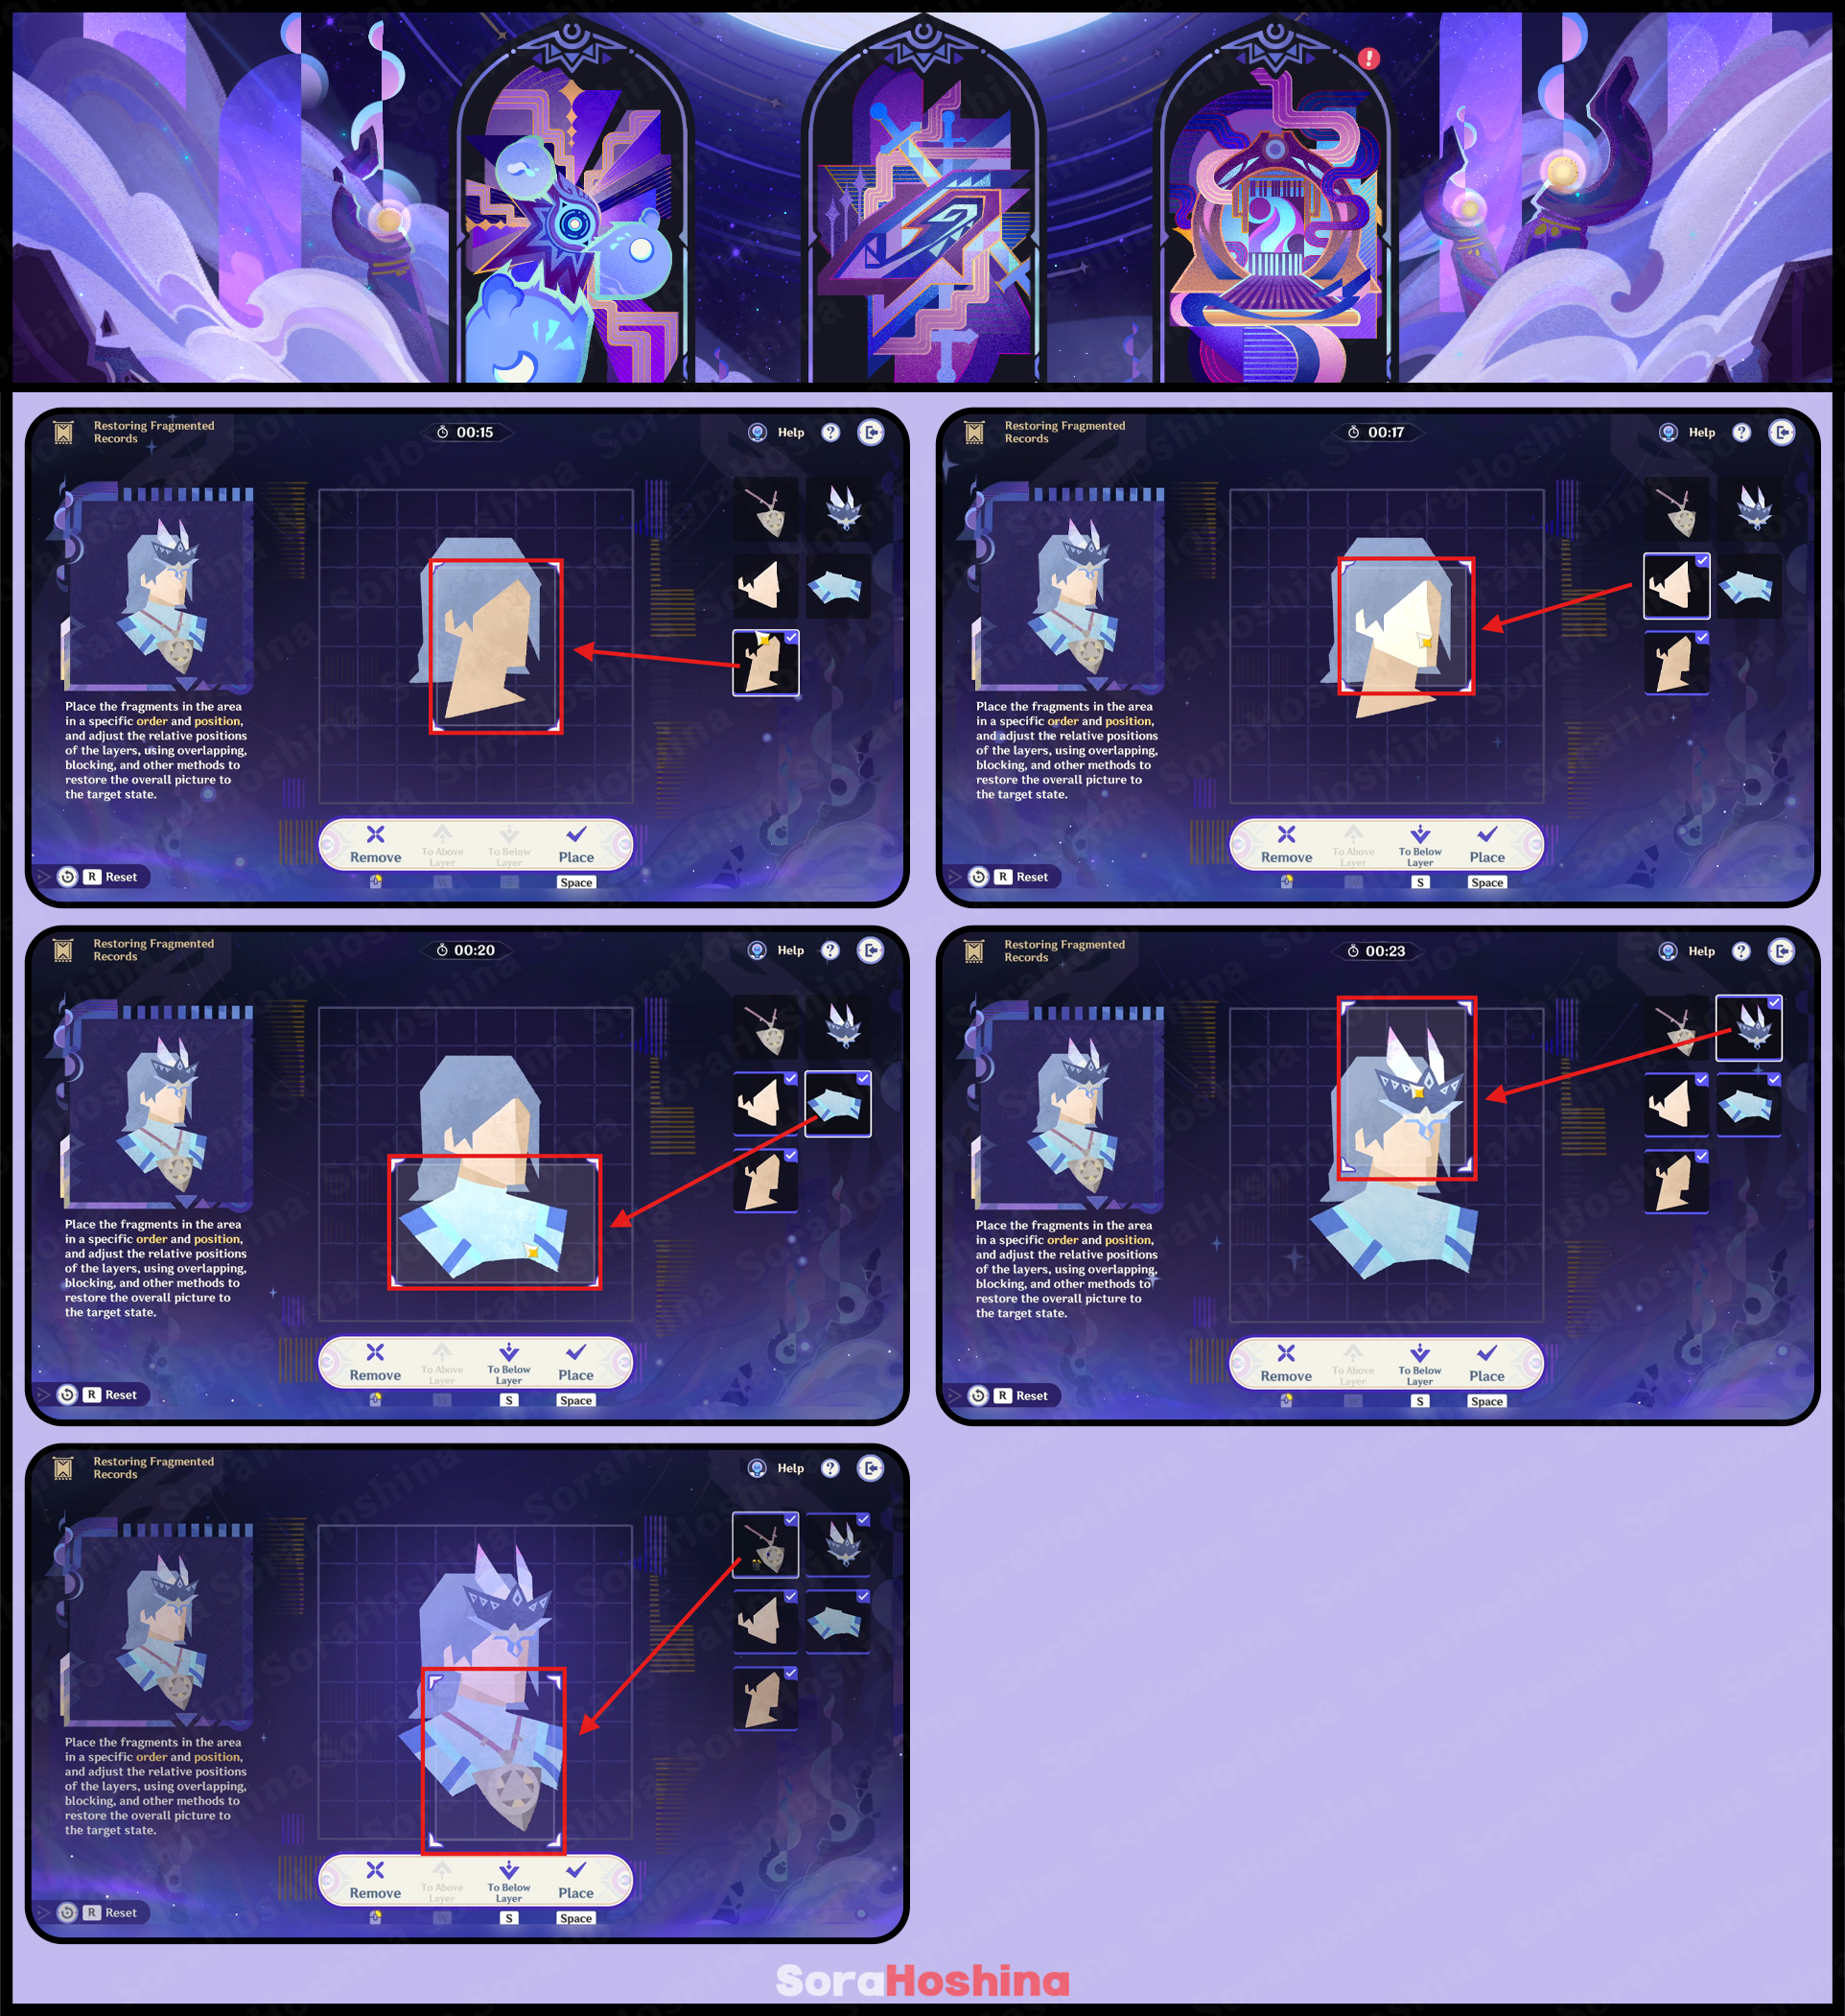
GIF Guide
2) Clairvoyant Shard: Menilek
Static Guide
GIF Guide
3) Clairvoyant Shard: Sundjatta
Static Guide
GIF Guide
4) Clairvoyant Shard: Wanjiru
Static Guide
GIF Guide
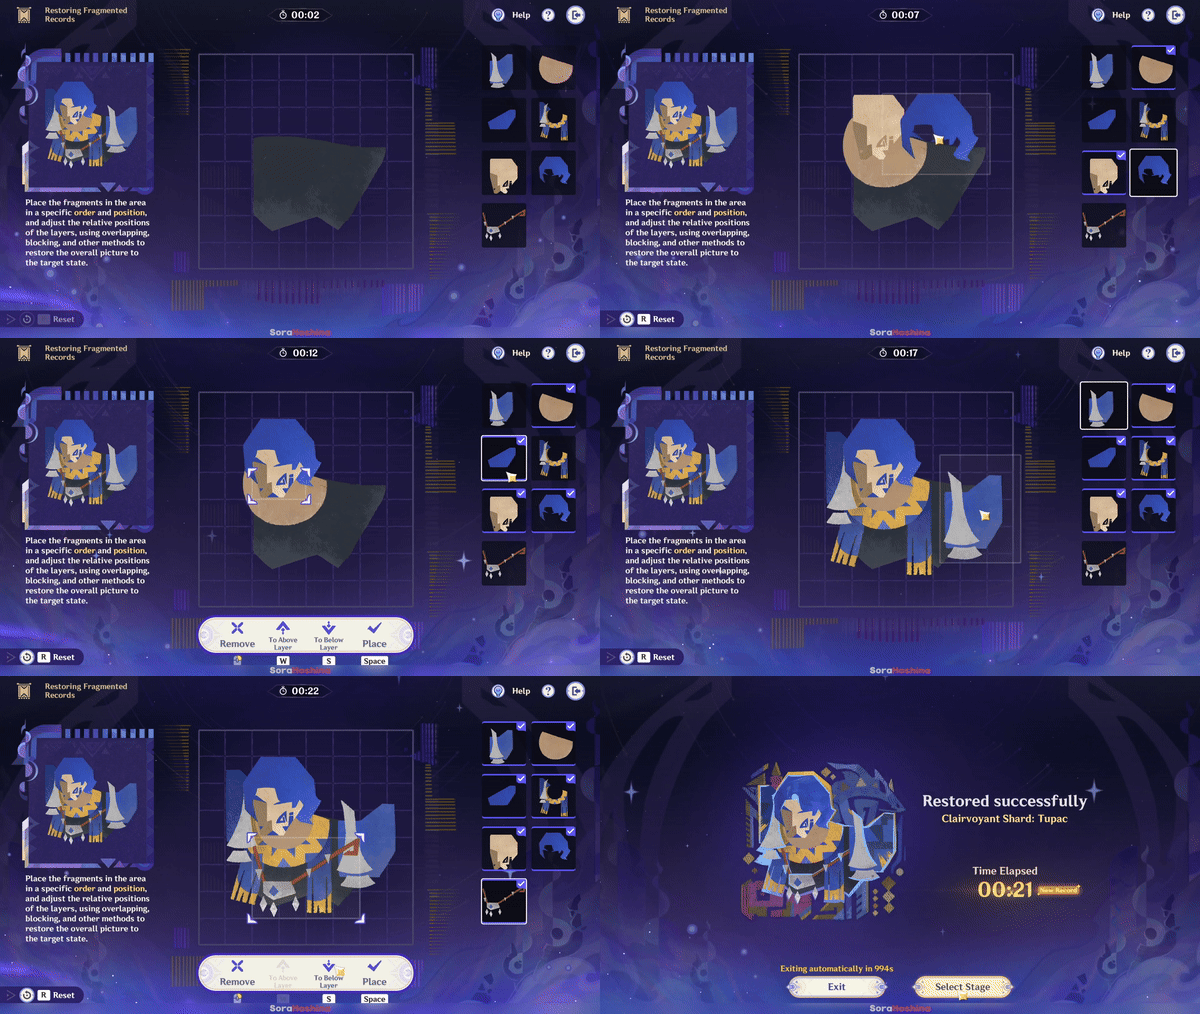
5) Clairvoyant Shard: Tupac
Static Guide
GIF Guide
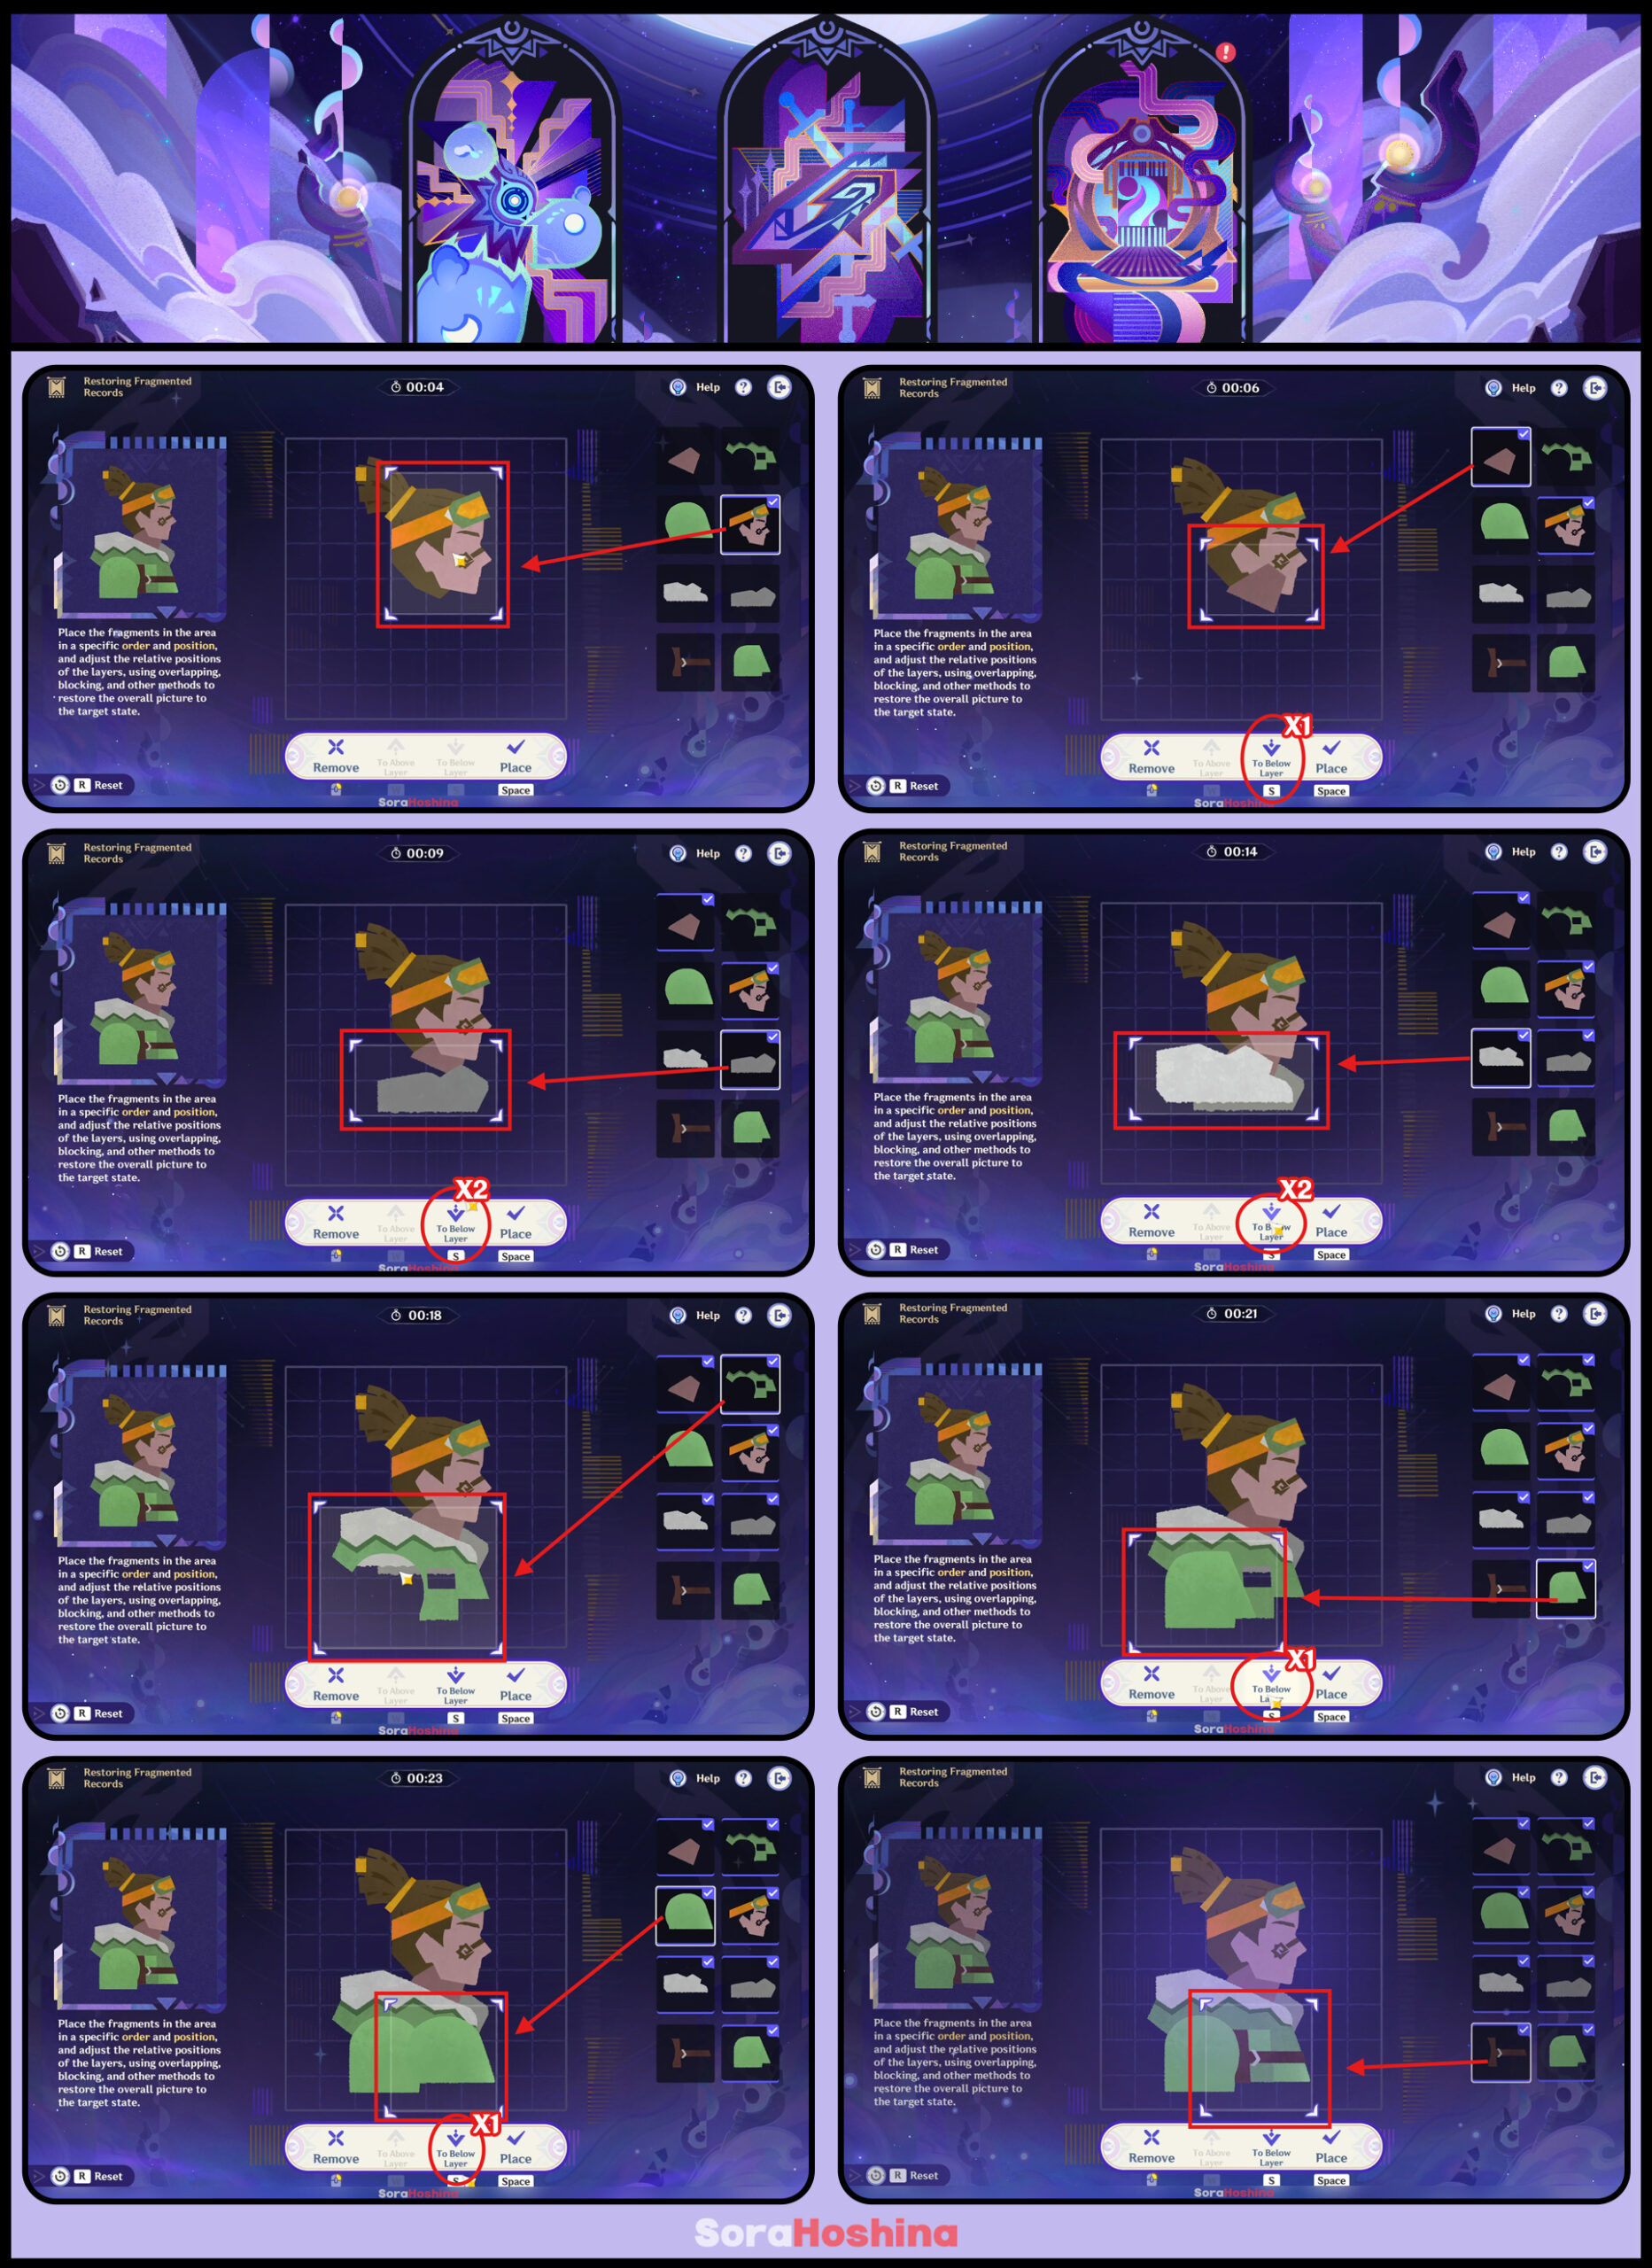
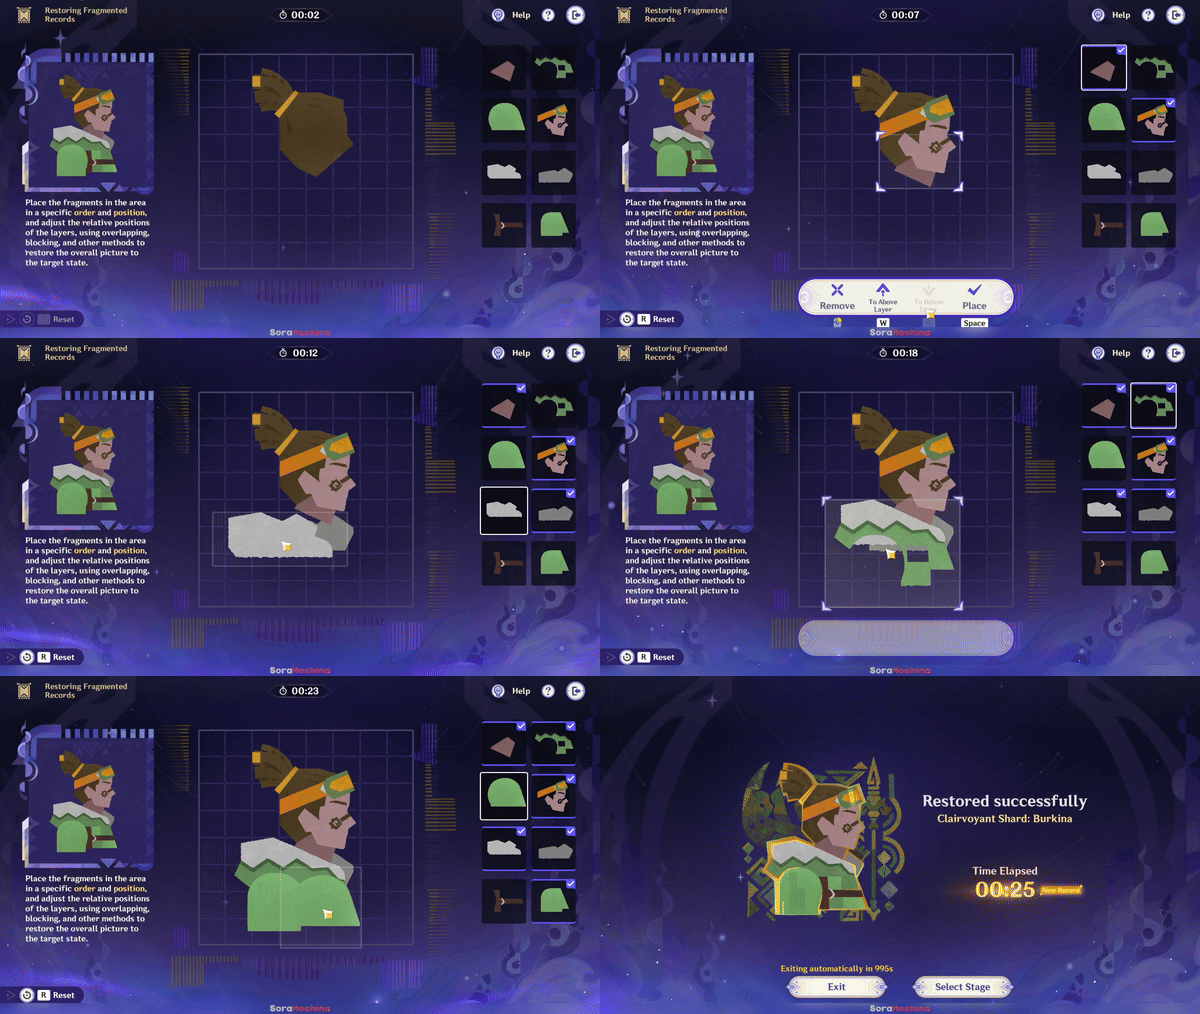
6) Clairvoyant Shard: Burkina
Static Guide
GIF Guide
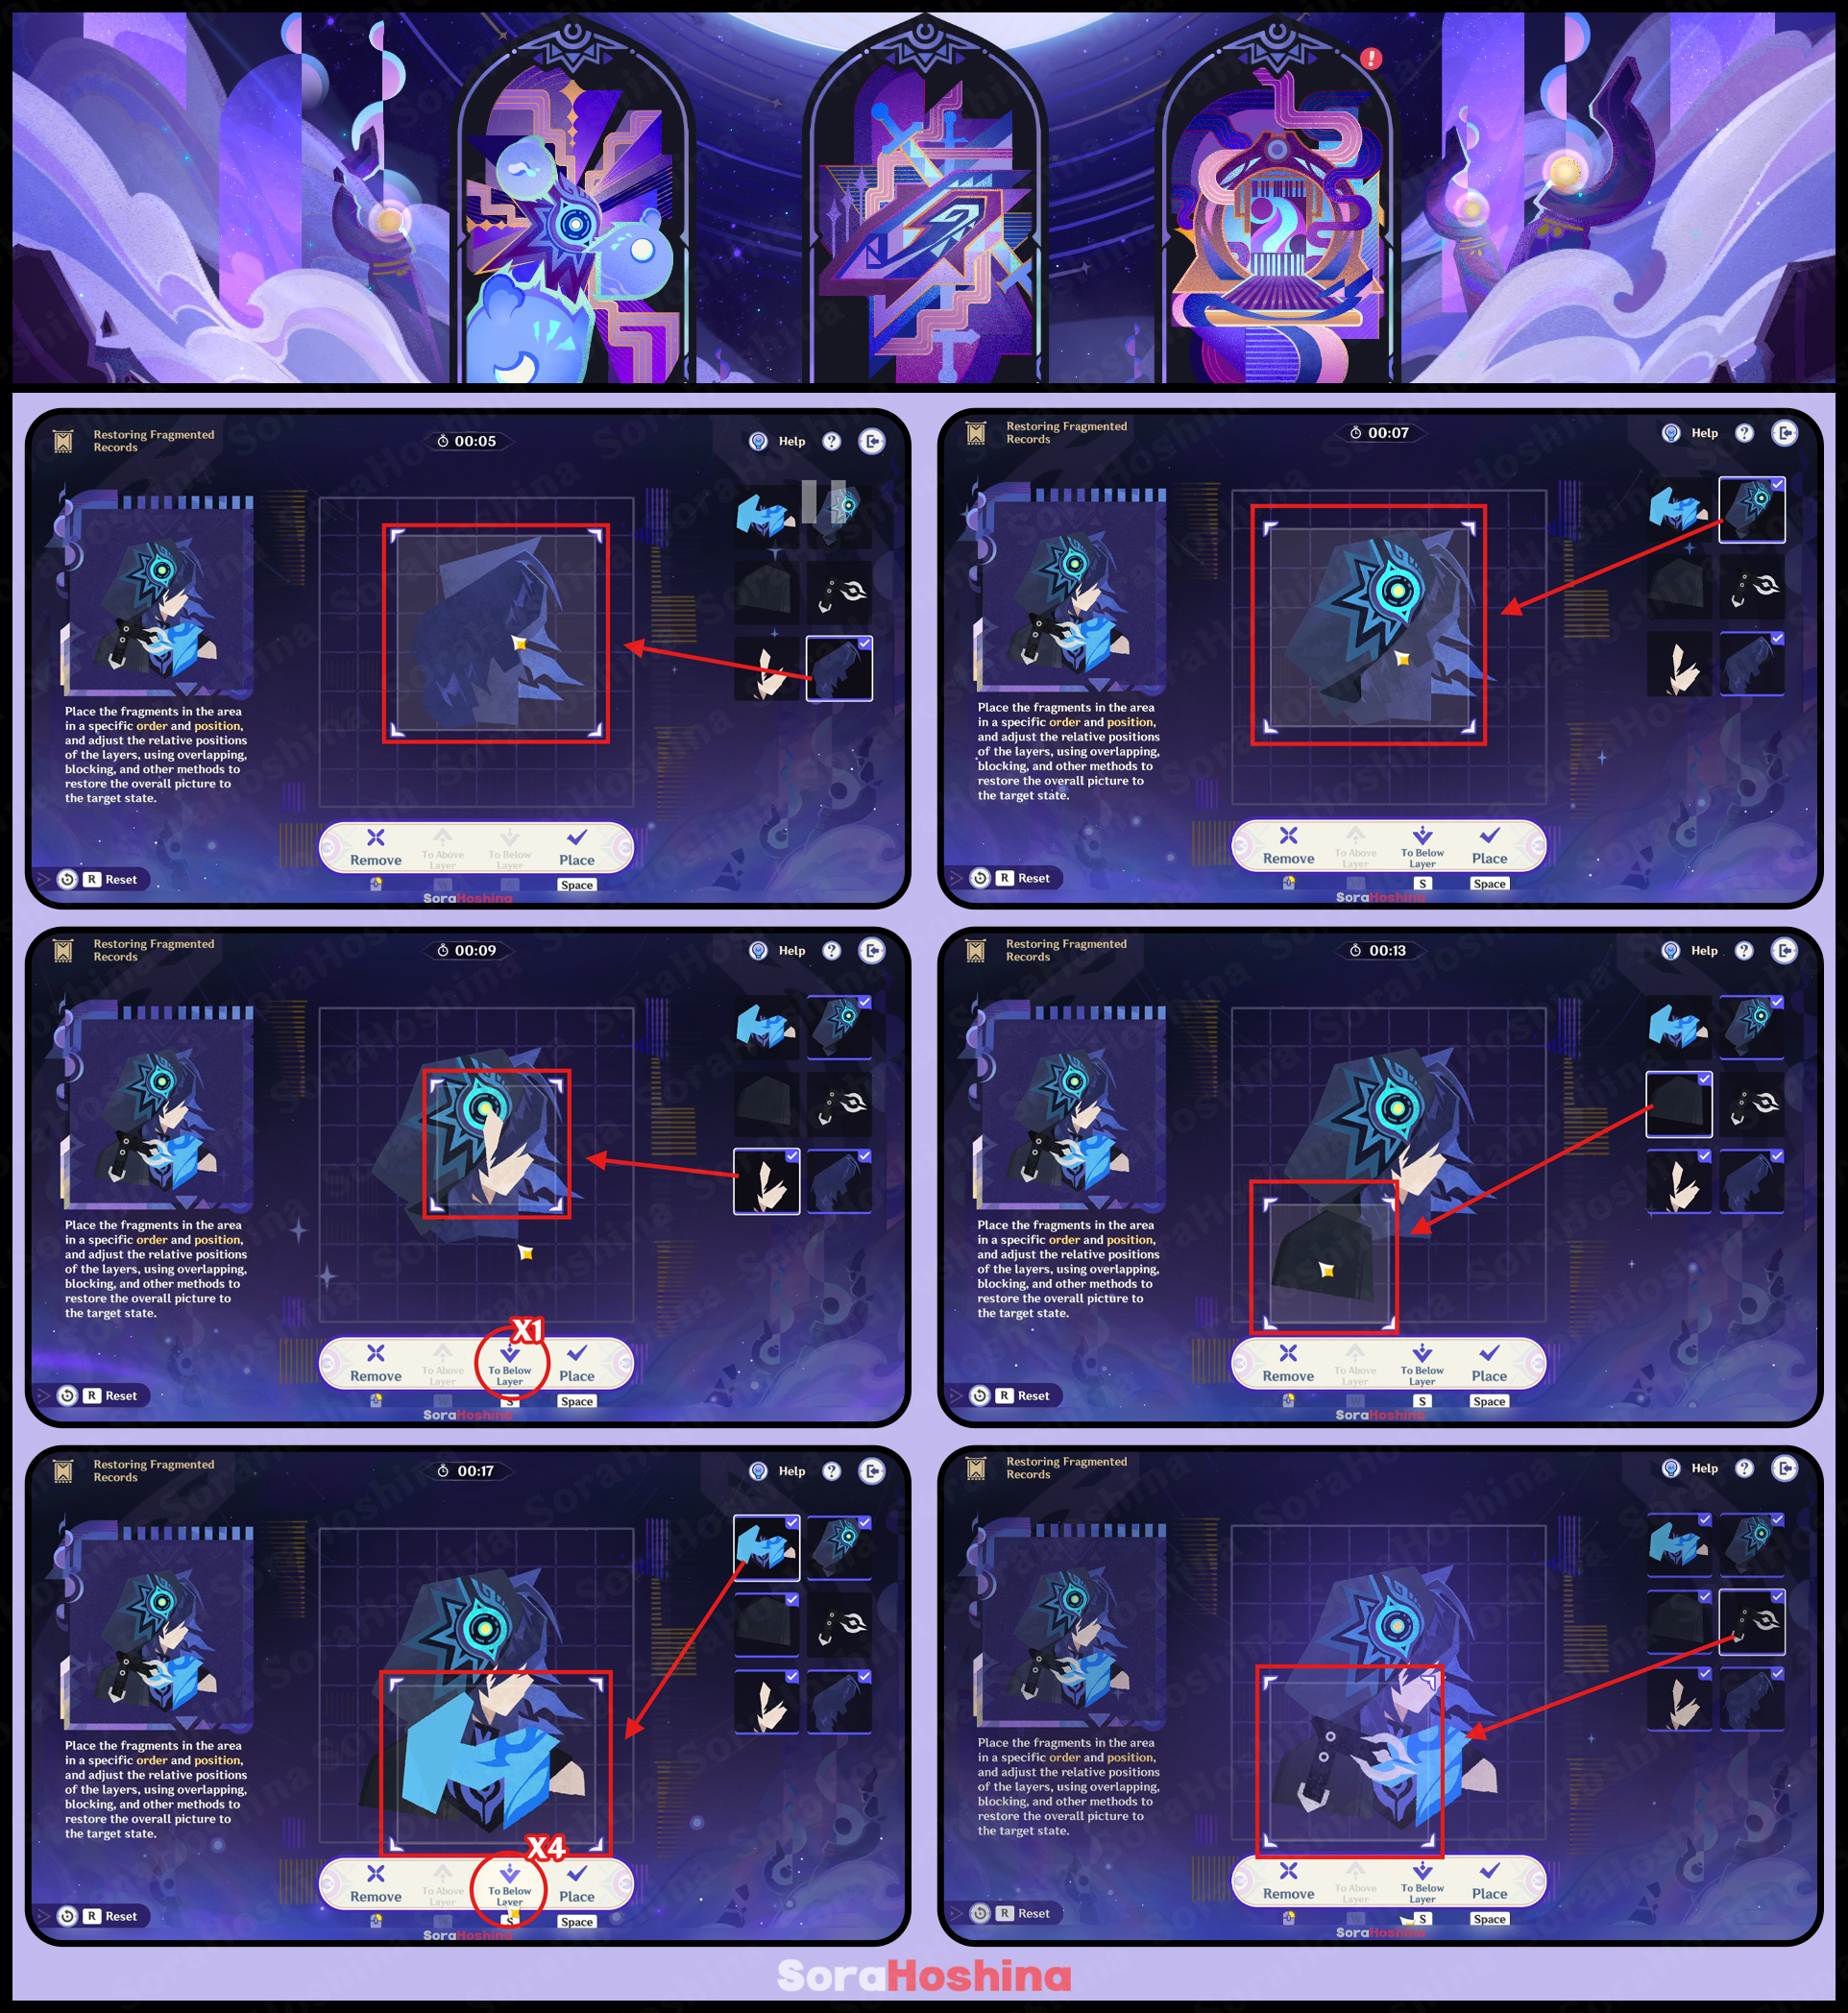
7) Clairvoyant Shard: Ororon
Static Guide
GIF Guide
8) Clairvoyant Shard: Citlali
Static Guide
GIF Guide
Event Rewards
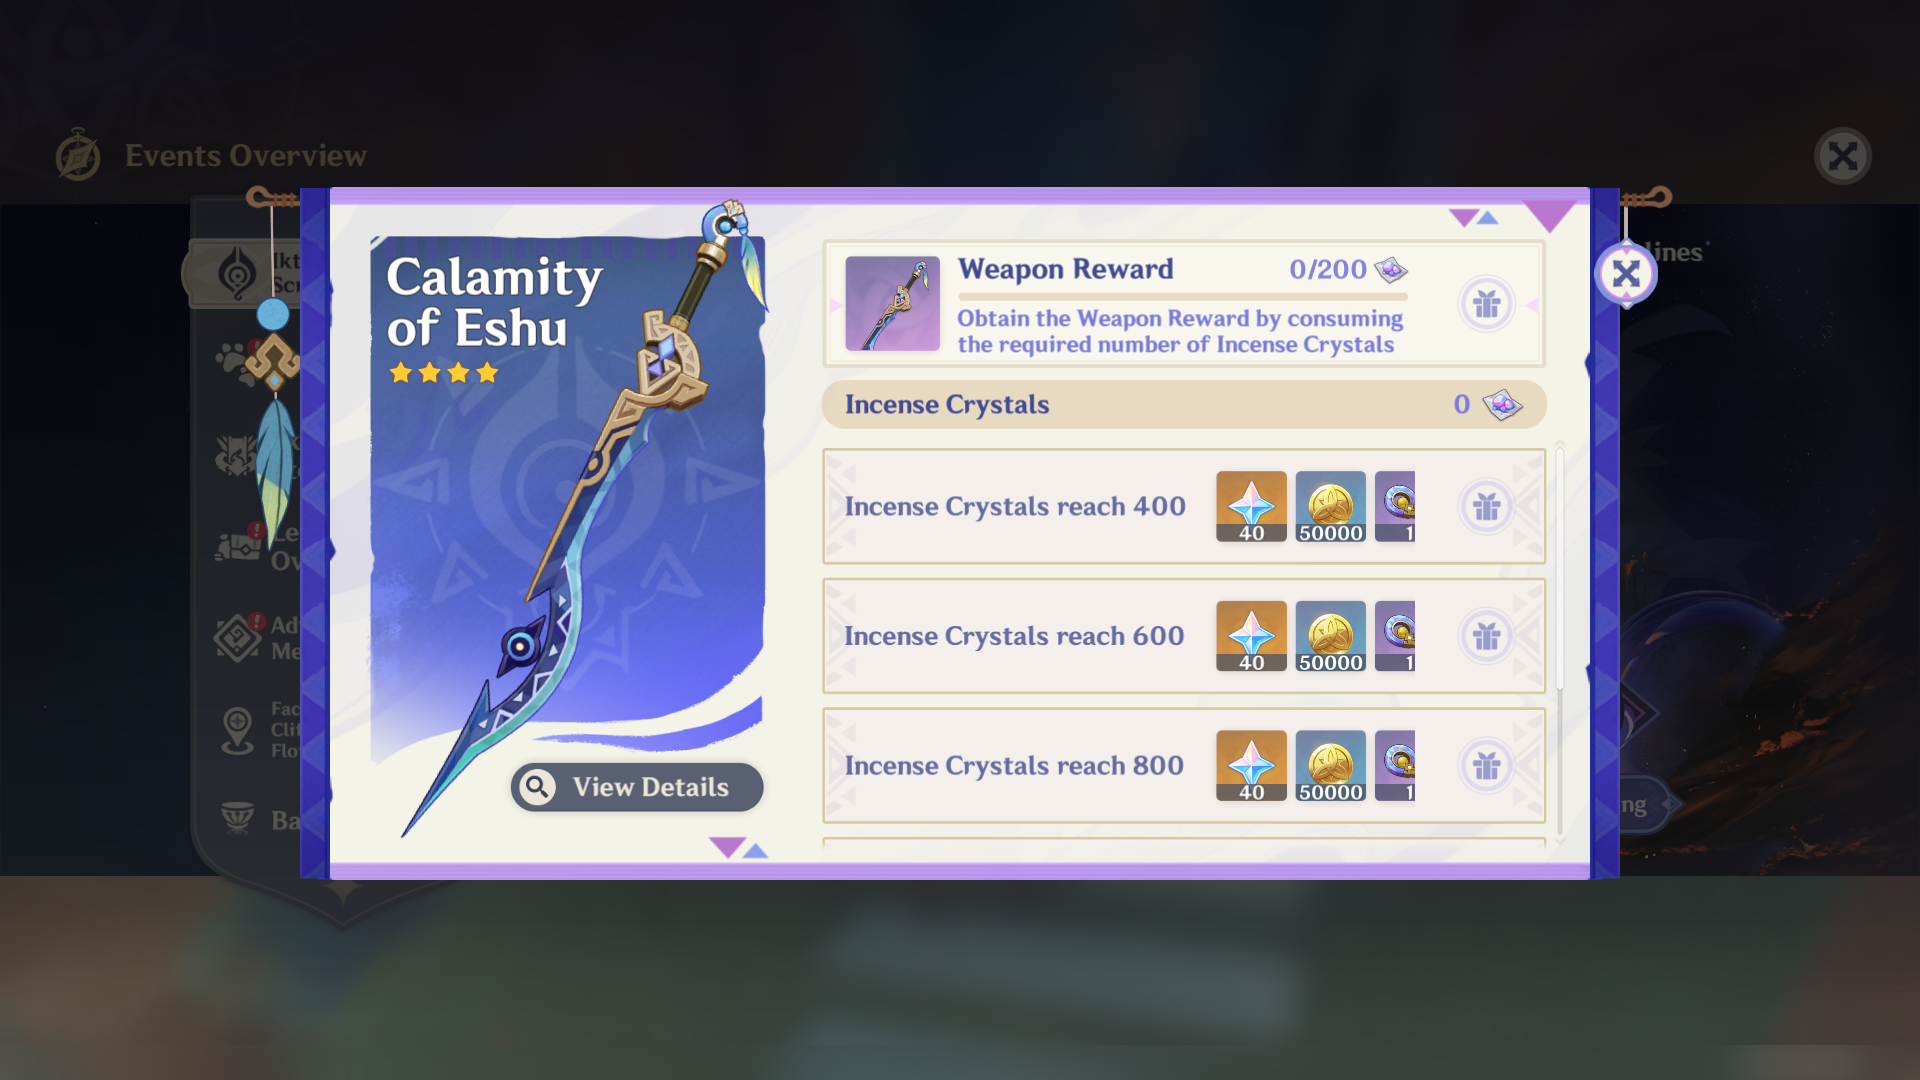
➥ Don’t forget to manually claim your rewards from the event page. By completing all the event challenges, you will get the following rewards:

- Calamity of Eshu x 1
- Primogem x 880
- Mora x 640000
- Shuttle of Odara x 4
- Crown of Insight x 1
- Incense Crystal x 1200
- Hero's Wit x 35
- Blazing Sacrificial Heart's Resolve x 6
- Delirious Demeanor of the Sacred Lord x 6
- Night-Wind's Mystic Augury x 6
- Sanctifying Essence x 6
- Guide to Contention x 12
- Guide to Kindling x 12
- Mystic Enhancement Ore x 60
- Guide to Conflict x 12
- Sanctifying Unction x 12


