
Table of Contents [Hide]
A new quest chain is available in Ochkanatlan, a new sub-area in Natlan region. We're back to find more about our little Saurian companion while also discovering new friend. Follow this guide to complete all the puzzles within the Lost Traveler in the Ashen Realm quest.
Vaulting the Wall or Morning Mist
Go to Ochkanatlan
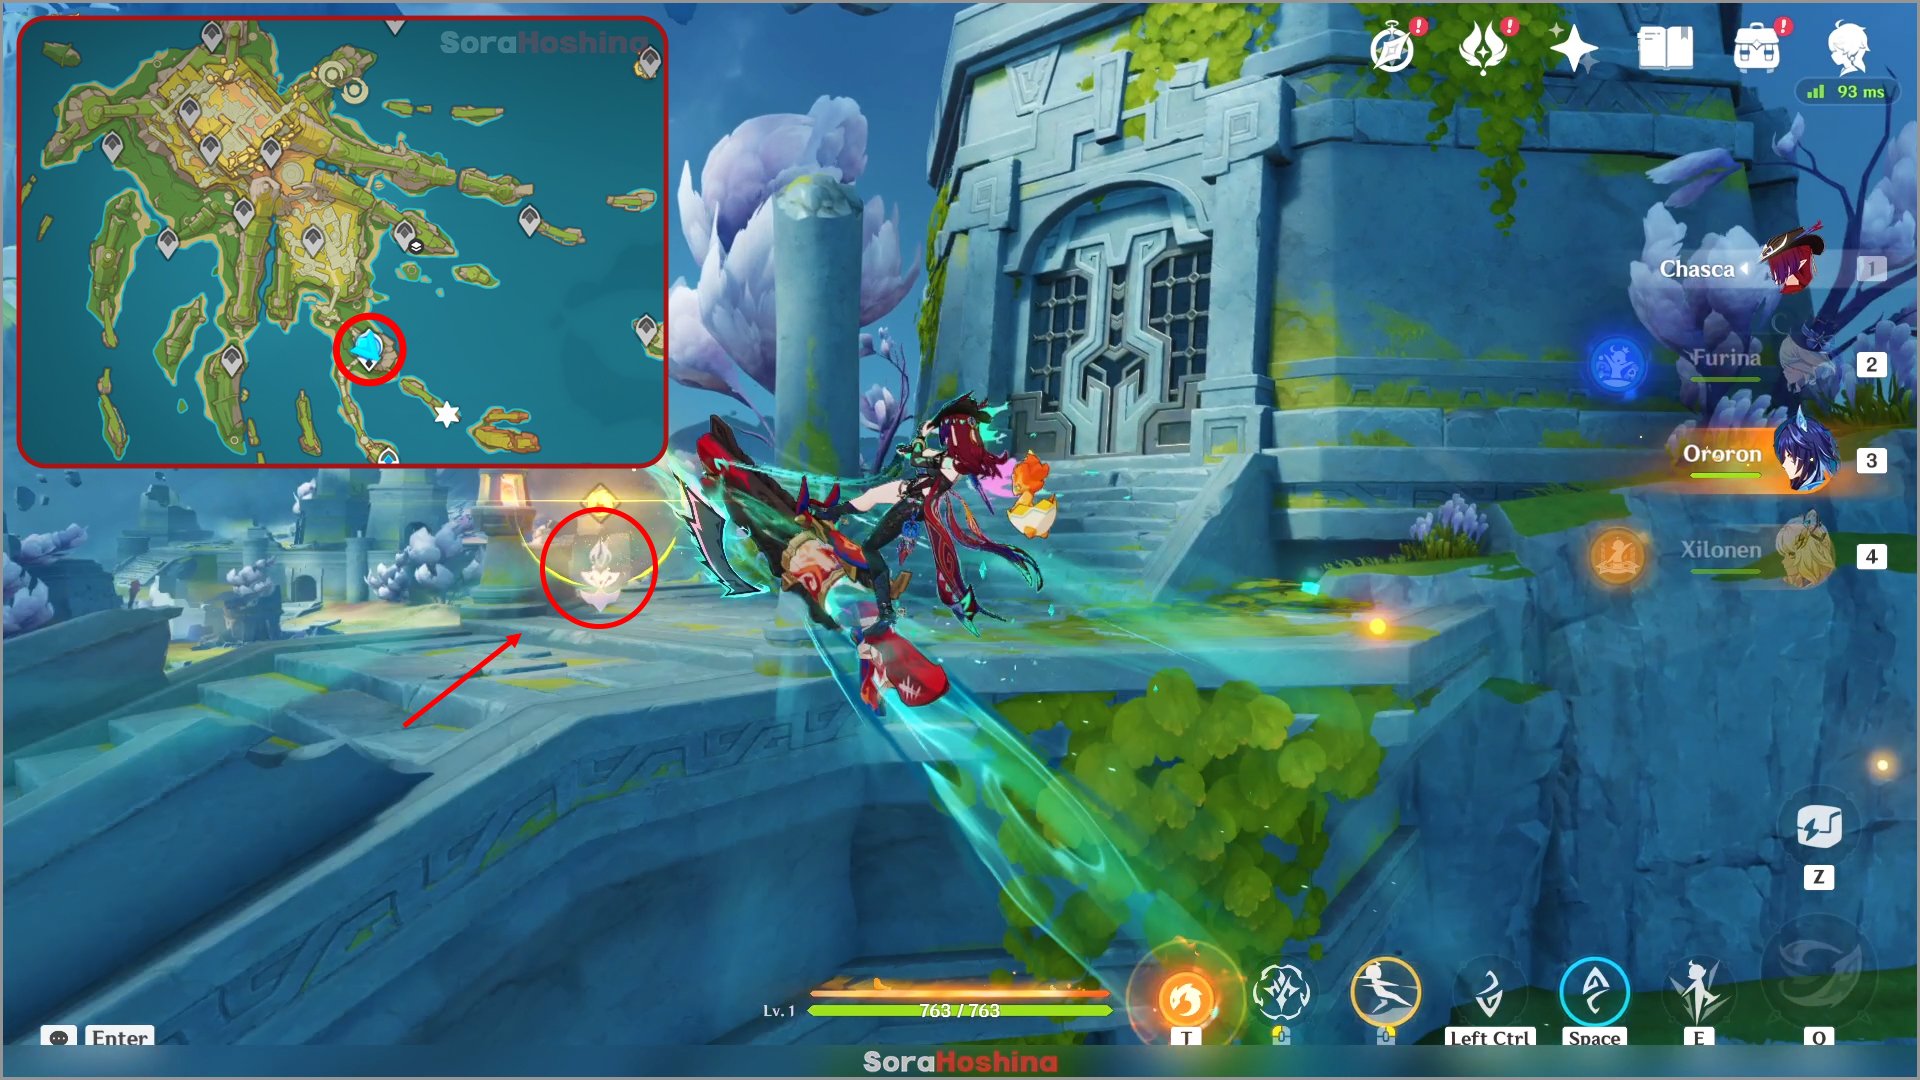
Go to the Statue of the Seven in Ochkanatlan and you can see it's locked behind a gate. Indwell the Iktomisaur nearby or have Ororon in your party.
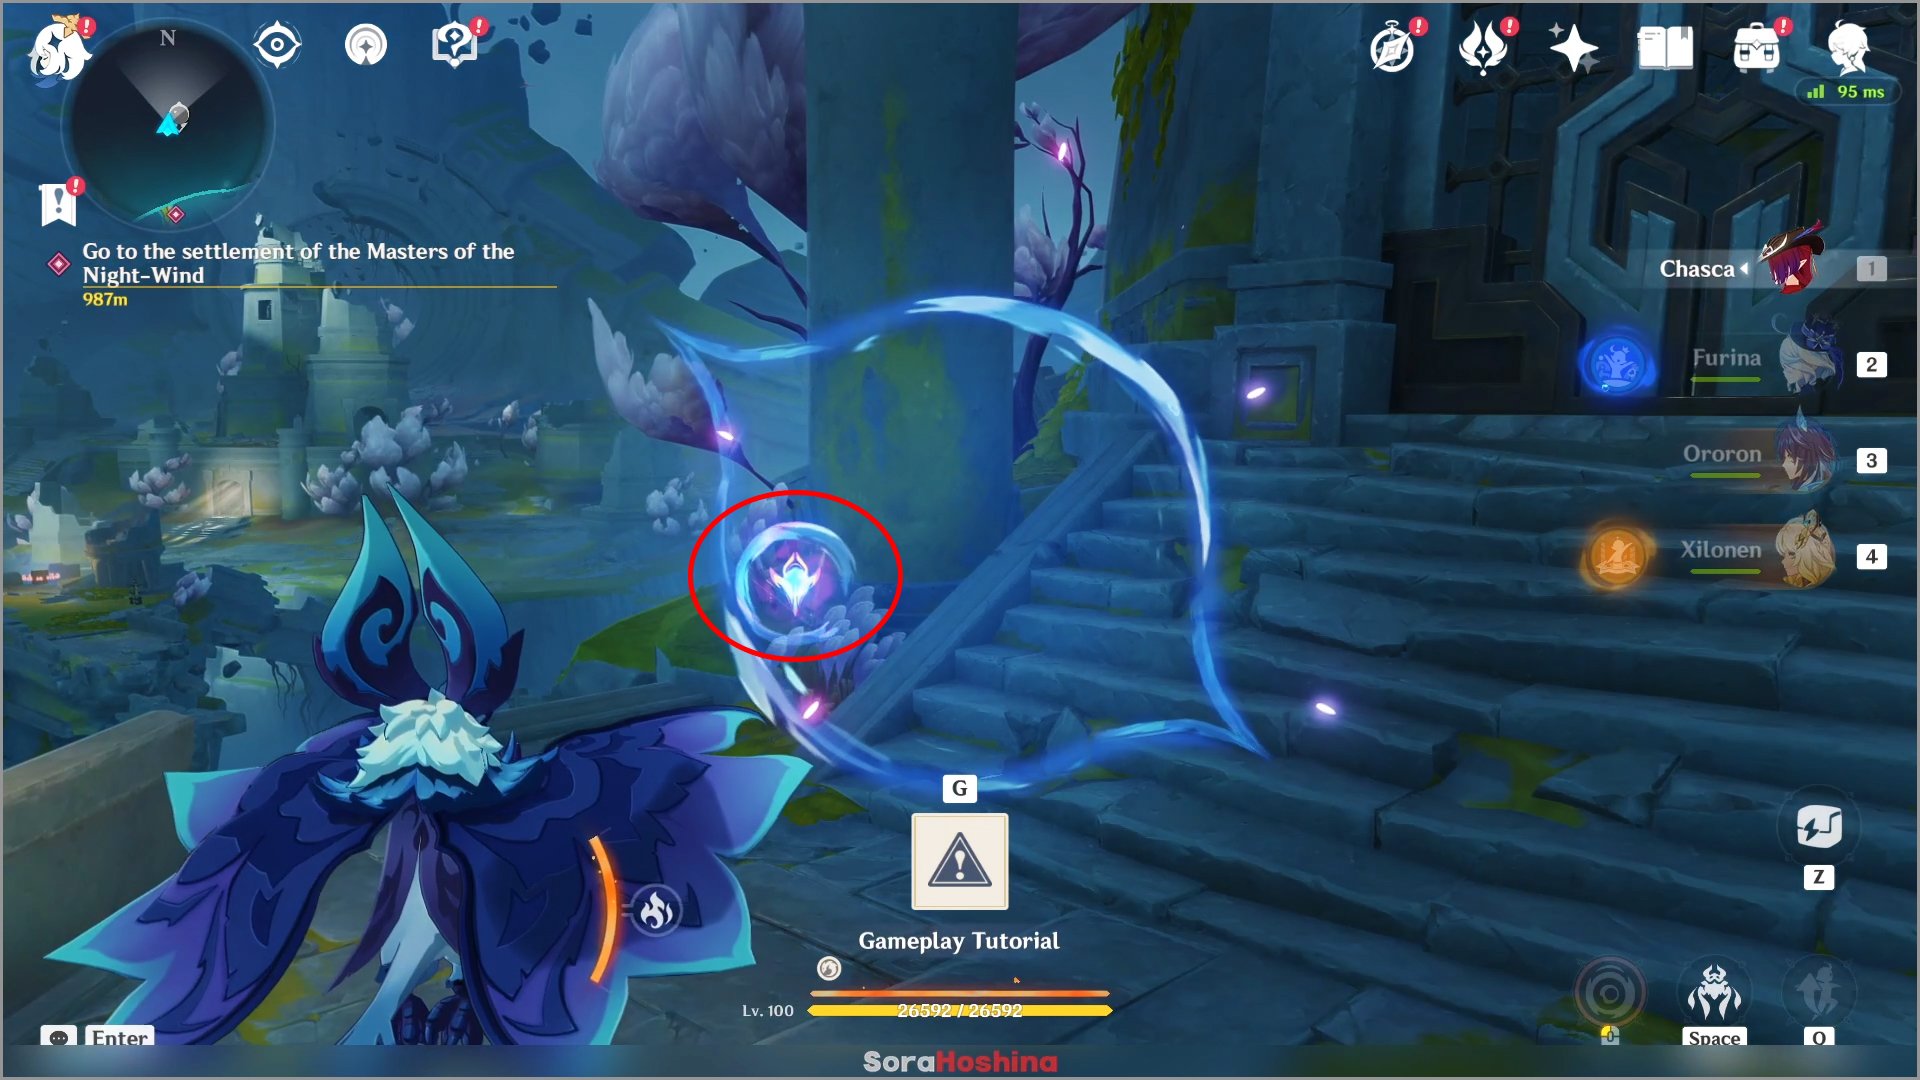
Use Iktomisaur's special sight (left-click mouse) or Ororon's Aimed Shot to scan the sigil near the gate. Once you got it, there will be a purple ring around your Iktomisaur/Ororon. That purple ring will allow you to jump higher.
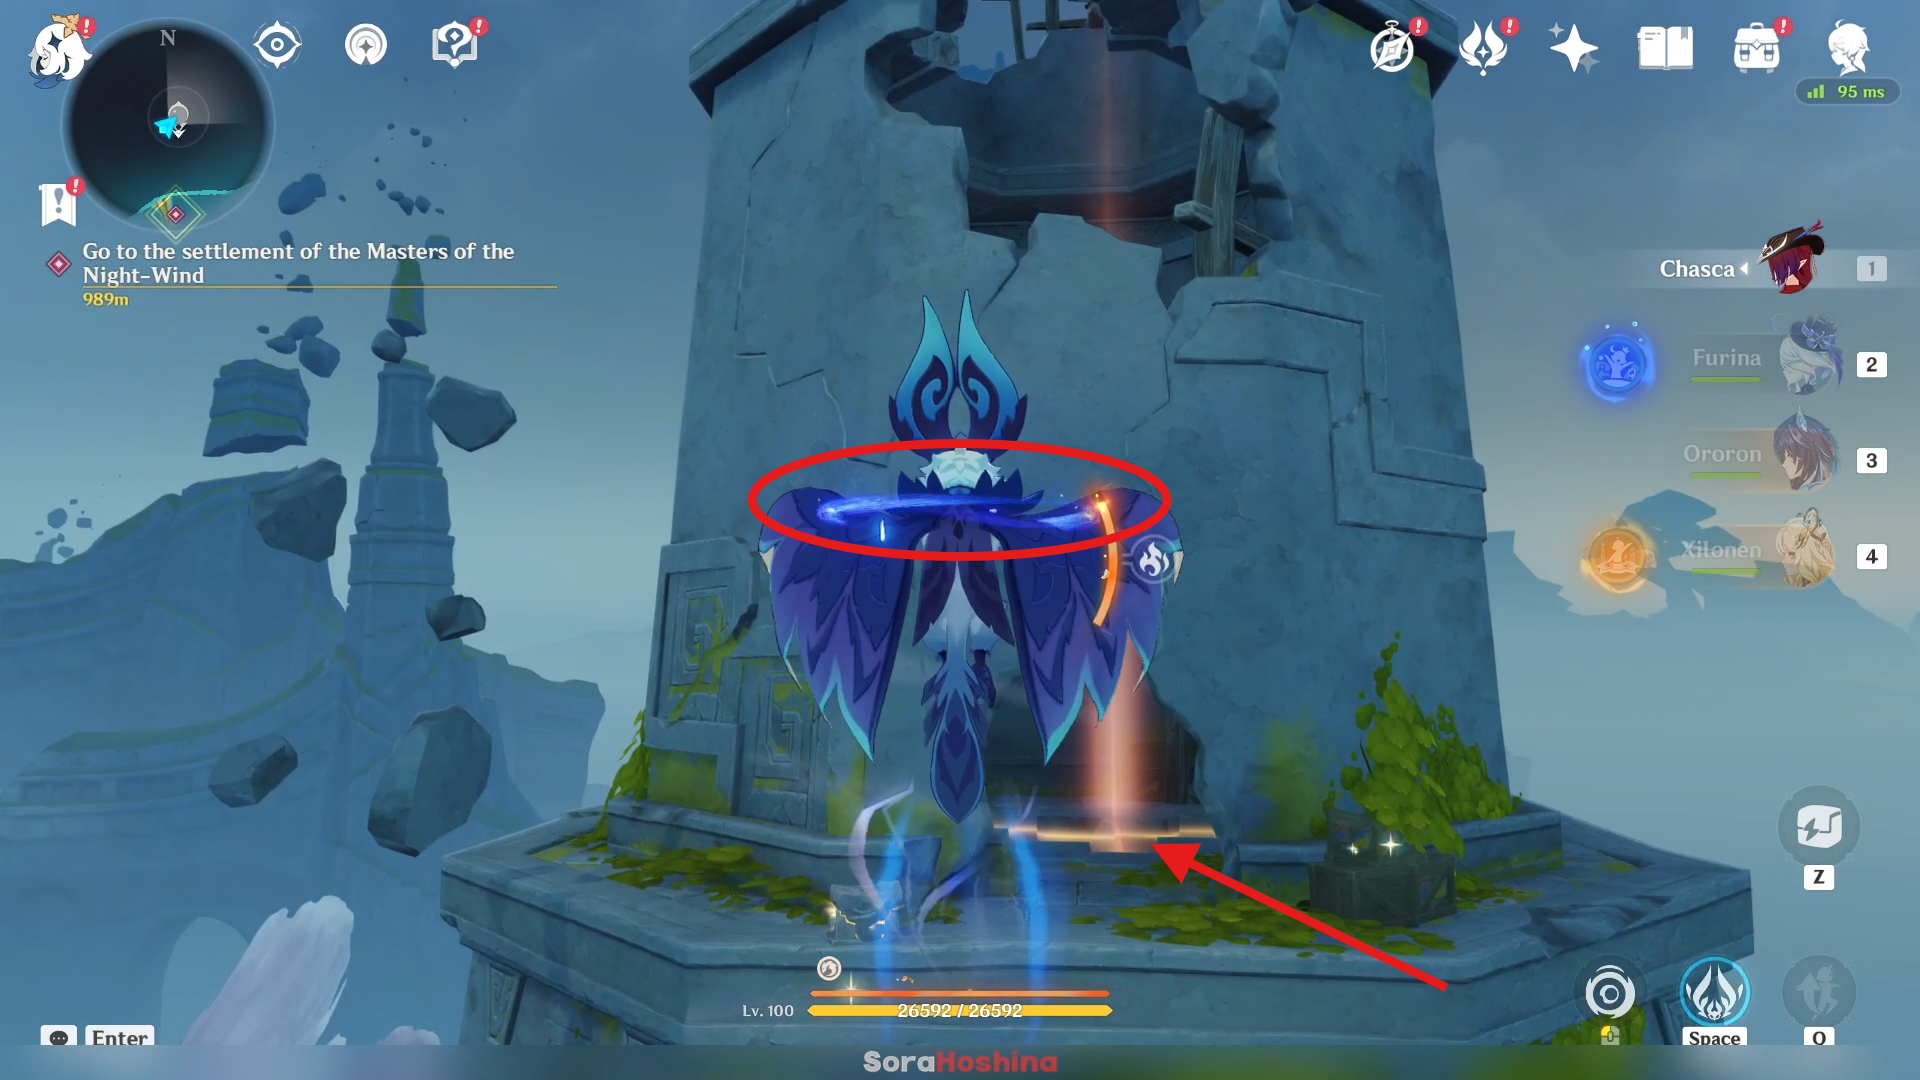
Jump until you reach the second floor and you can see a hole. Enter the hole and your Saurian companion will appear and lead you to the third floor.
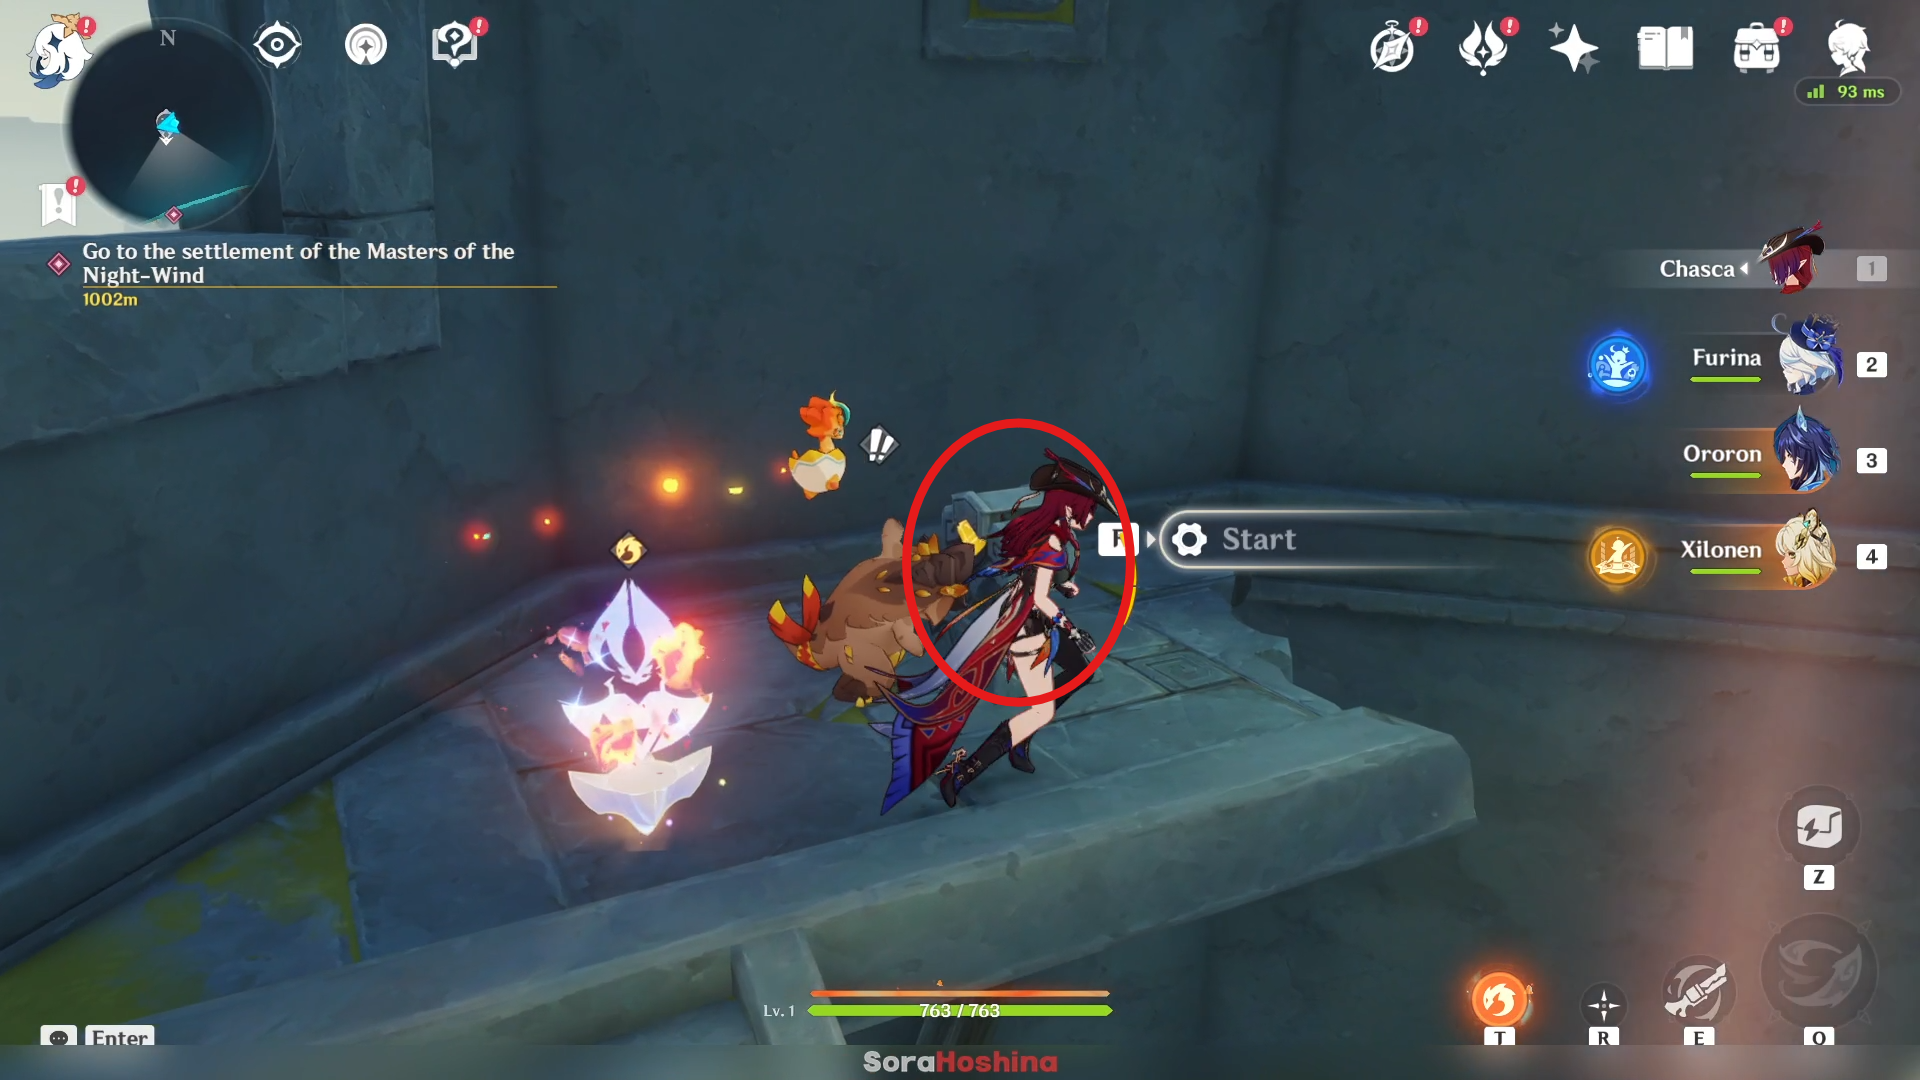
There is a switch on the third floor. Start the switch it to start the quest.
Keep exploring Ochkanatlan
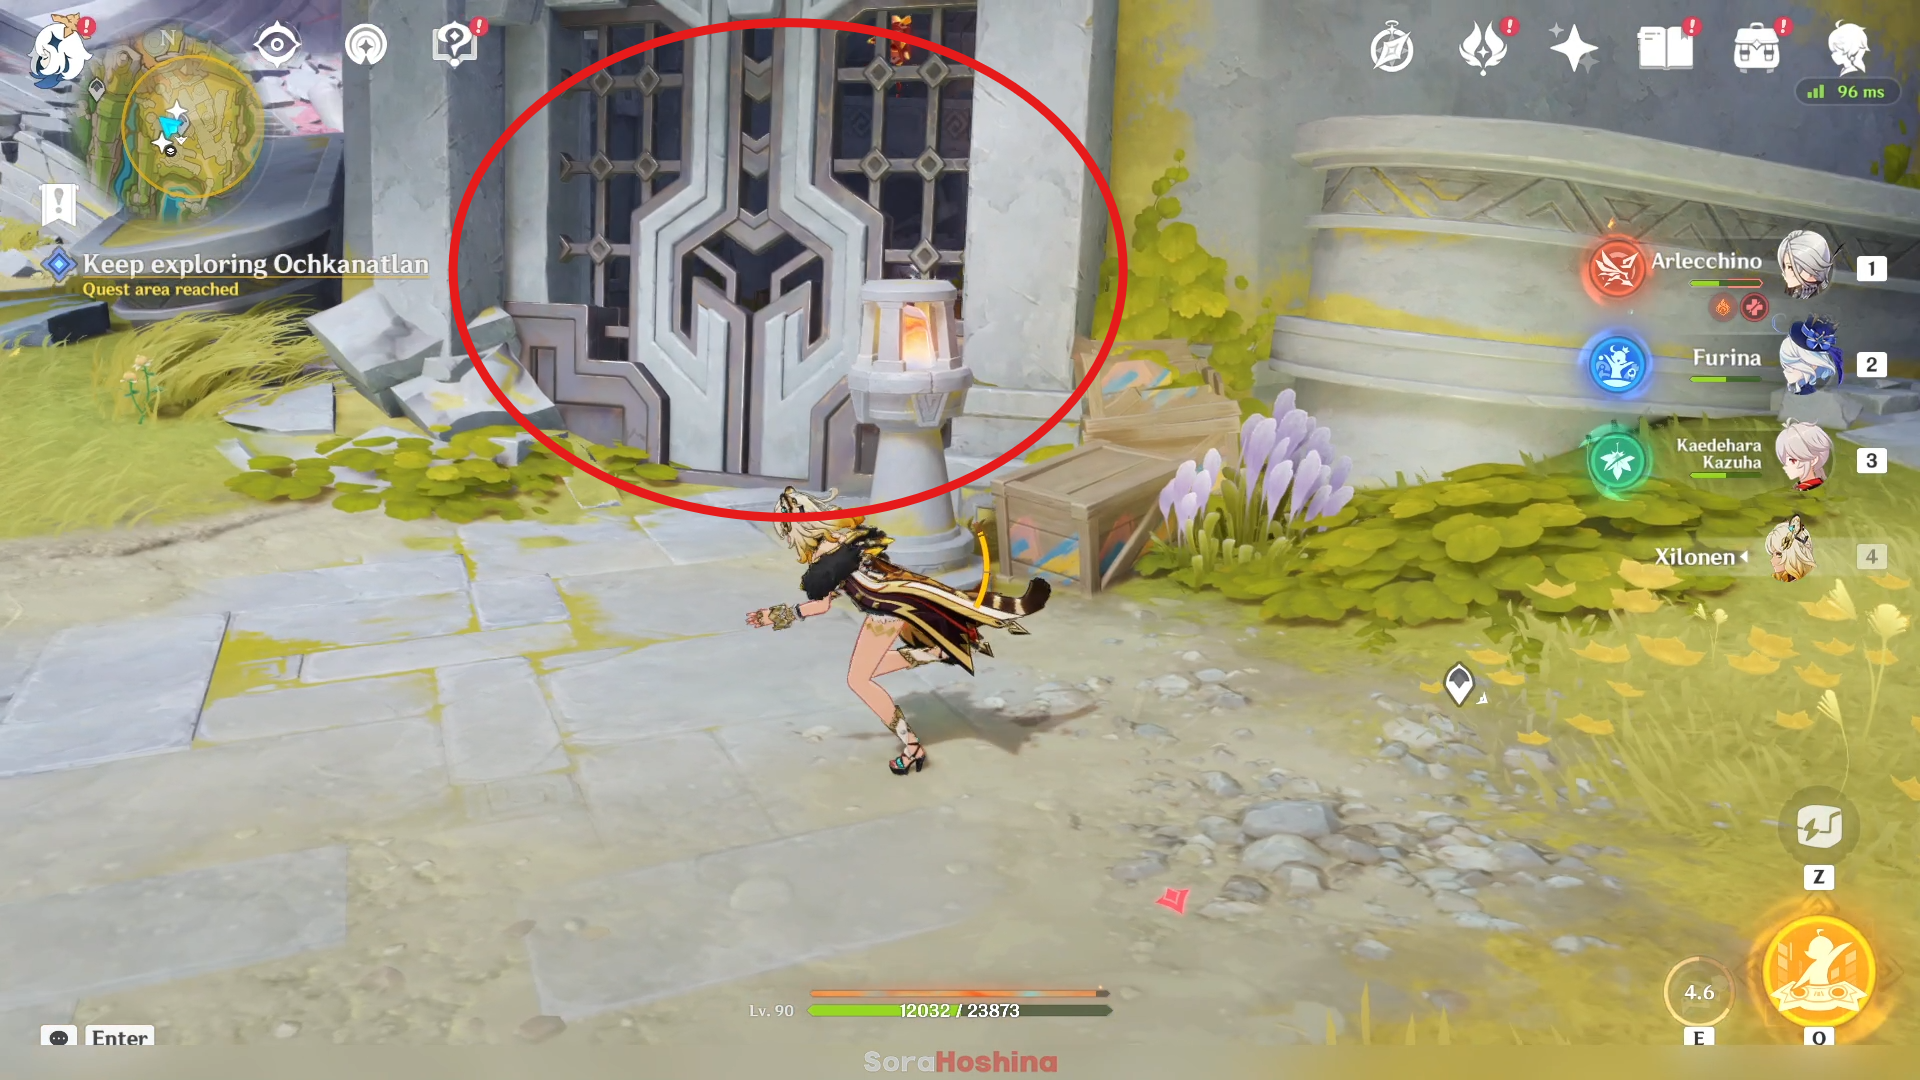
The area that were circled is pretty big but all you need to do is to go to a locked door like in the image above. You can see a Pyroculus inside that door. Once you approach it, the door will open by itself and you will continue the quest.
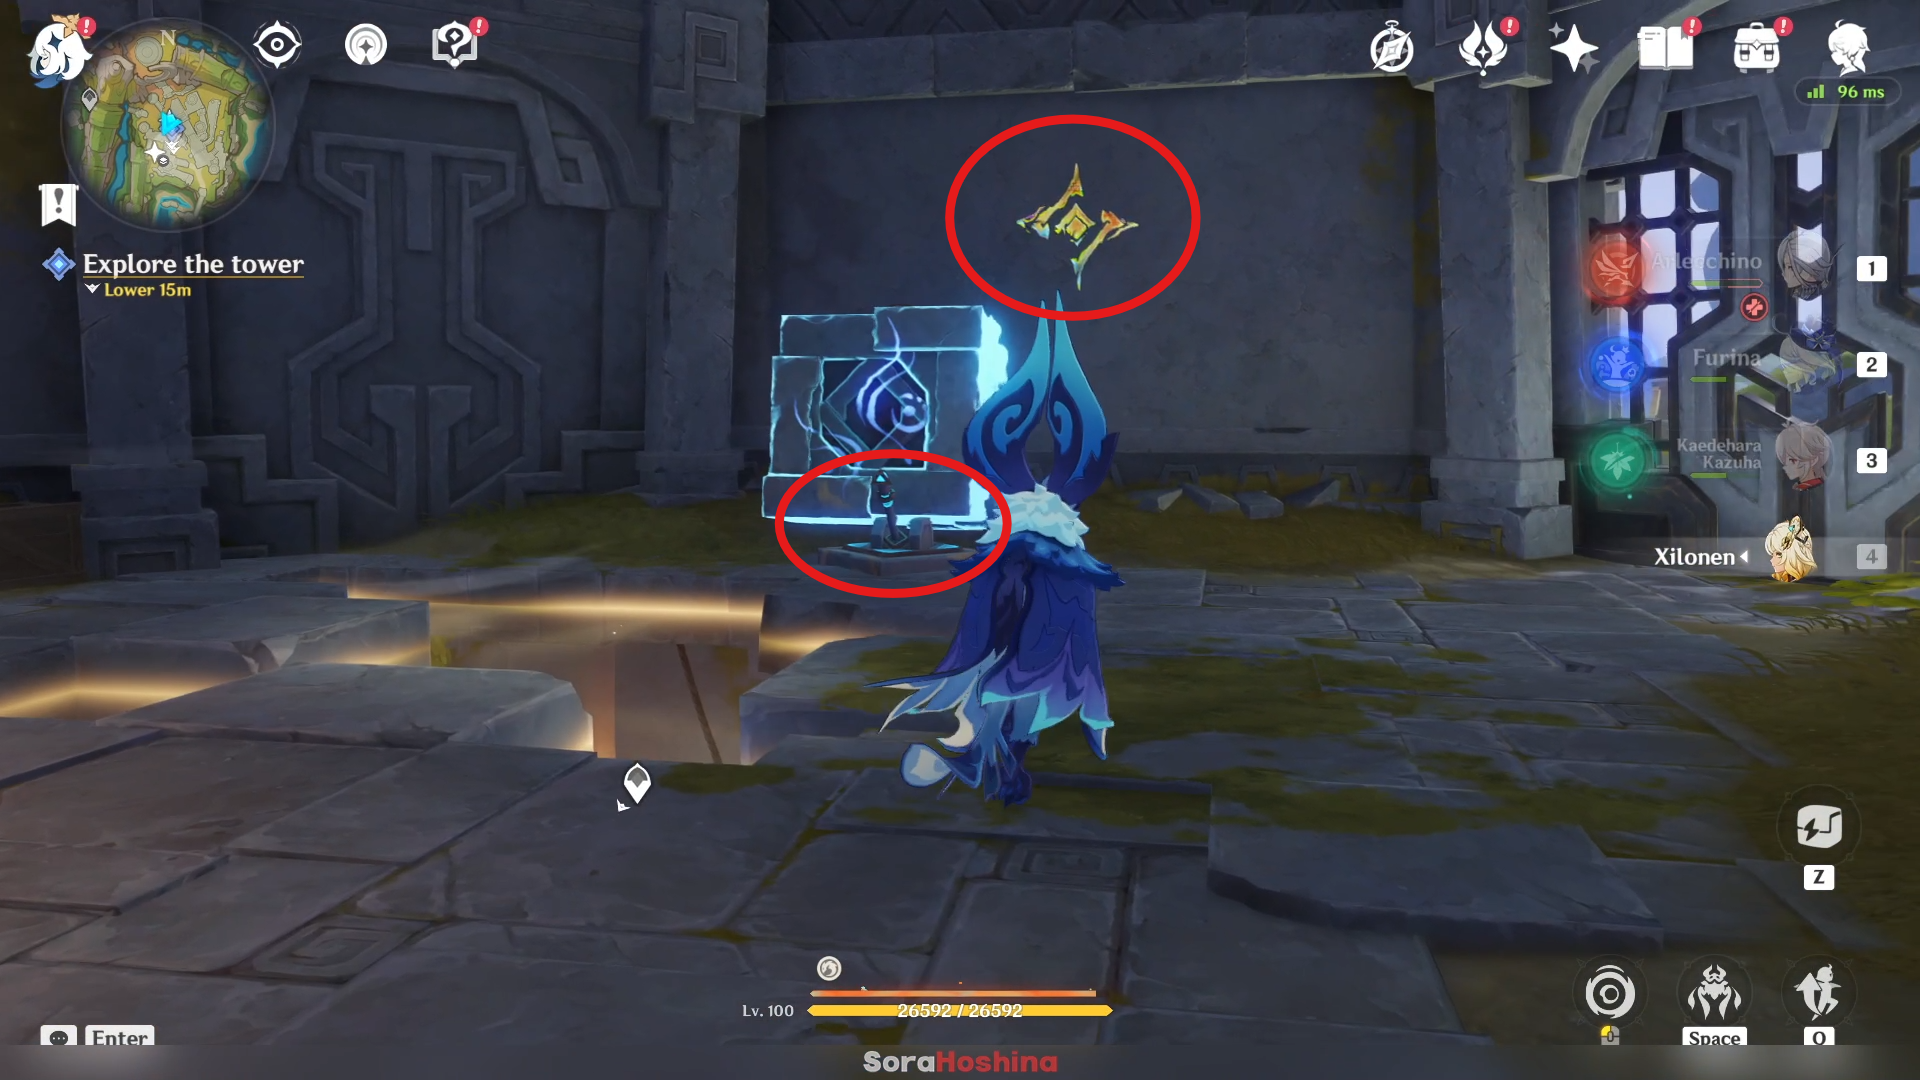
Inside the room, indwell an Iktomisaur (or use Ororon) and absorb the Nightspirit Graffiti on the wall (hold right-click mouse). This will make the box disappear and you can activate the switch. There will be a lot of mechanism like these so remember it!
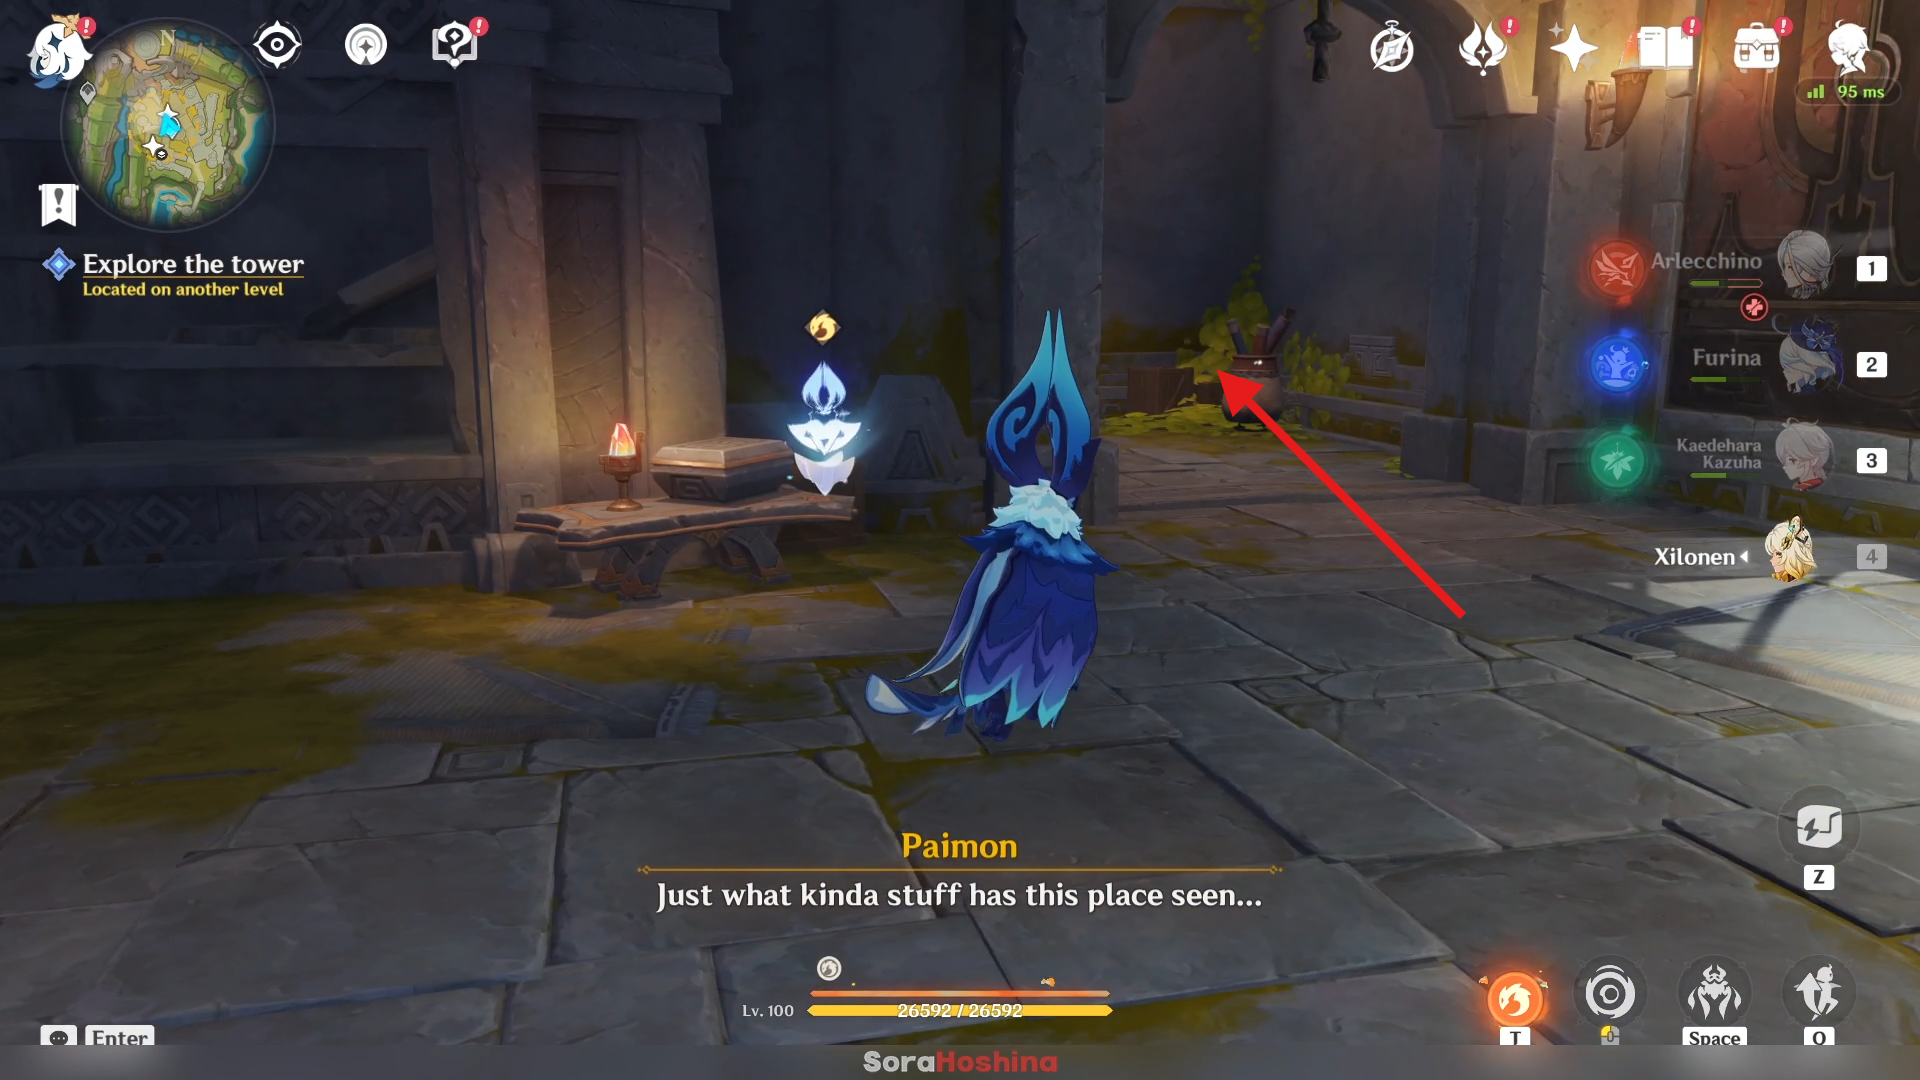
Once you reach further inside, go to the next room, don't approach the gate with Abyss residual near it. That gate will open later in the quest.
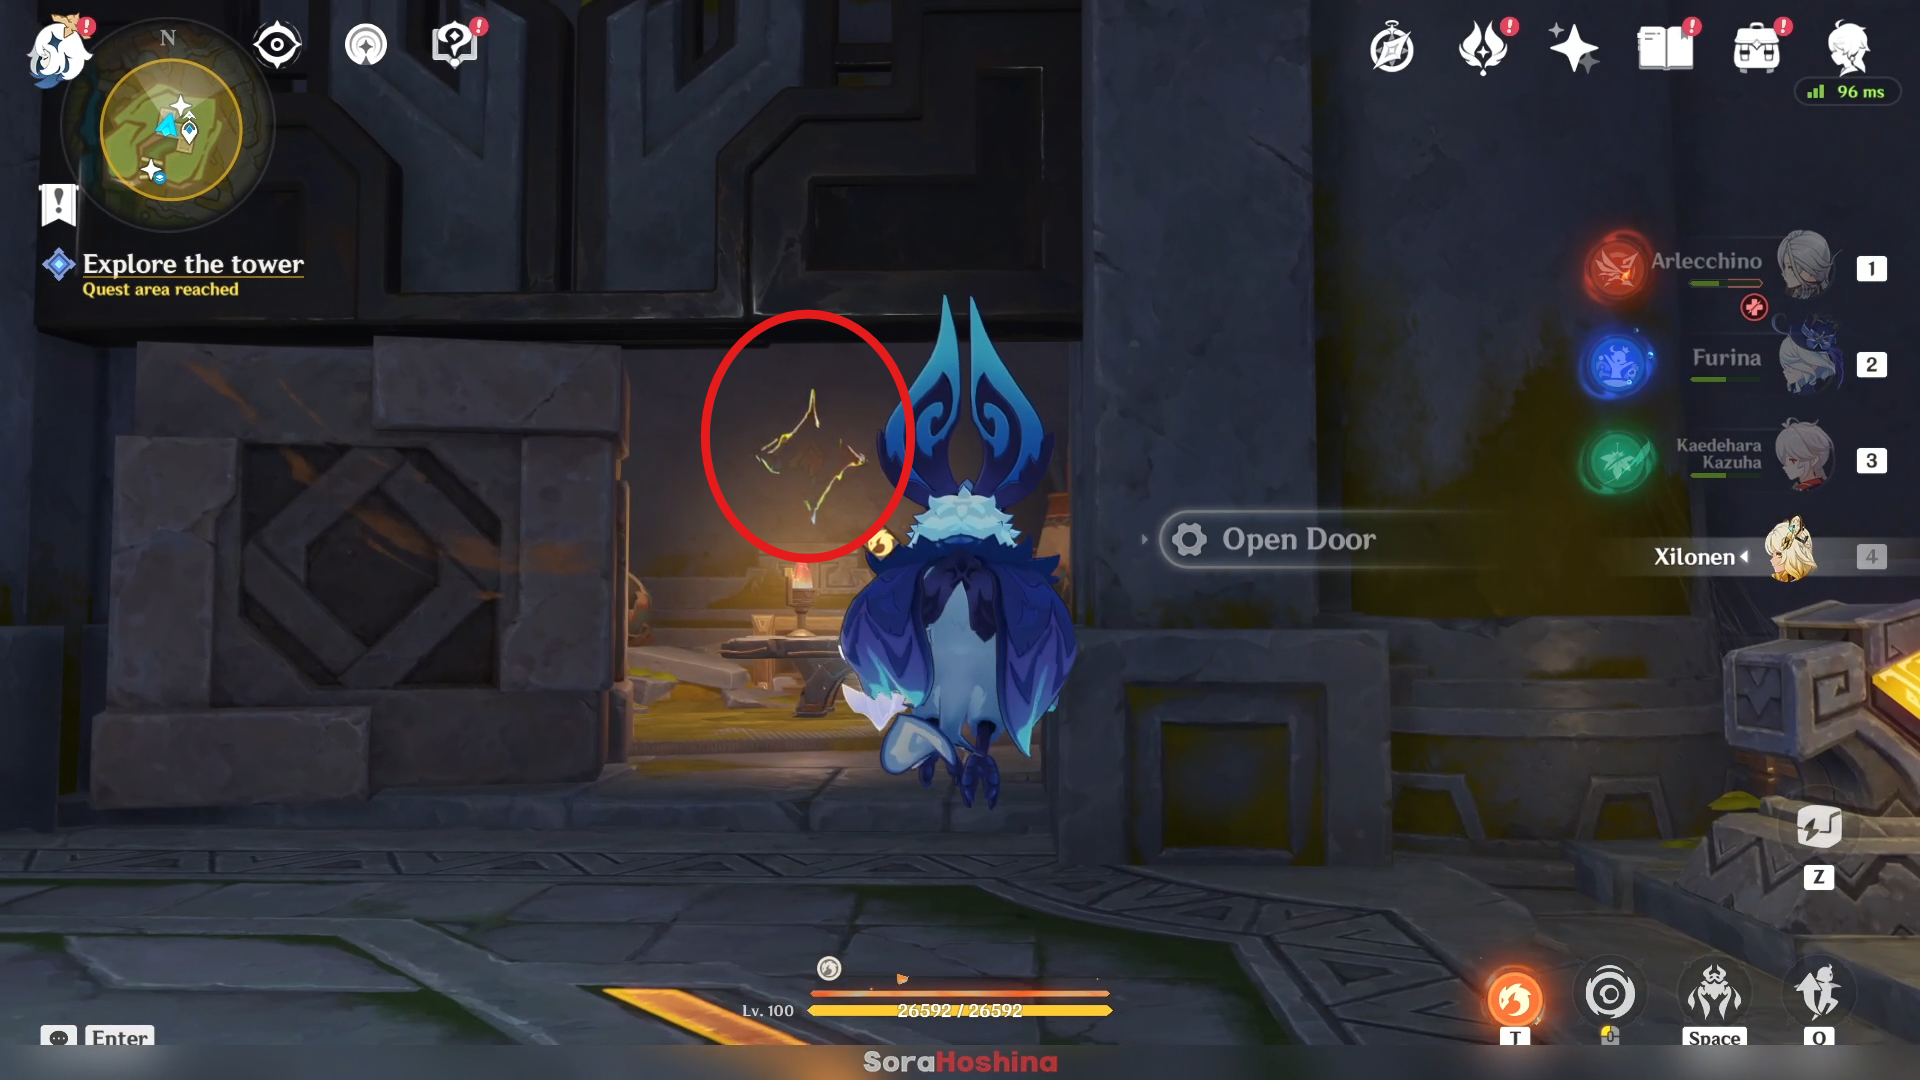
The puzzle repeat again. Use Iktomisaur to absorb the graffiti (remember, hold right-click mouse) behind a gate that have a small opening. This will let you gain a box (officially it's called Nightspirit Bodies).
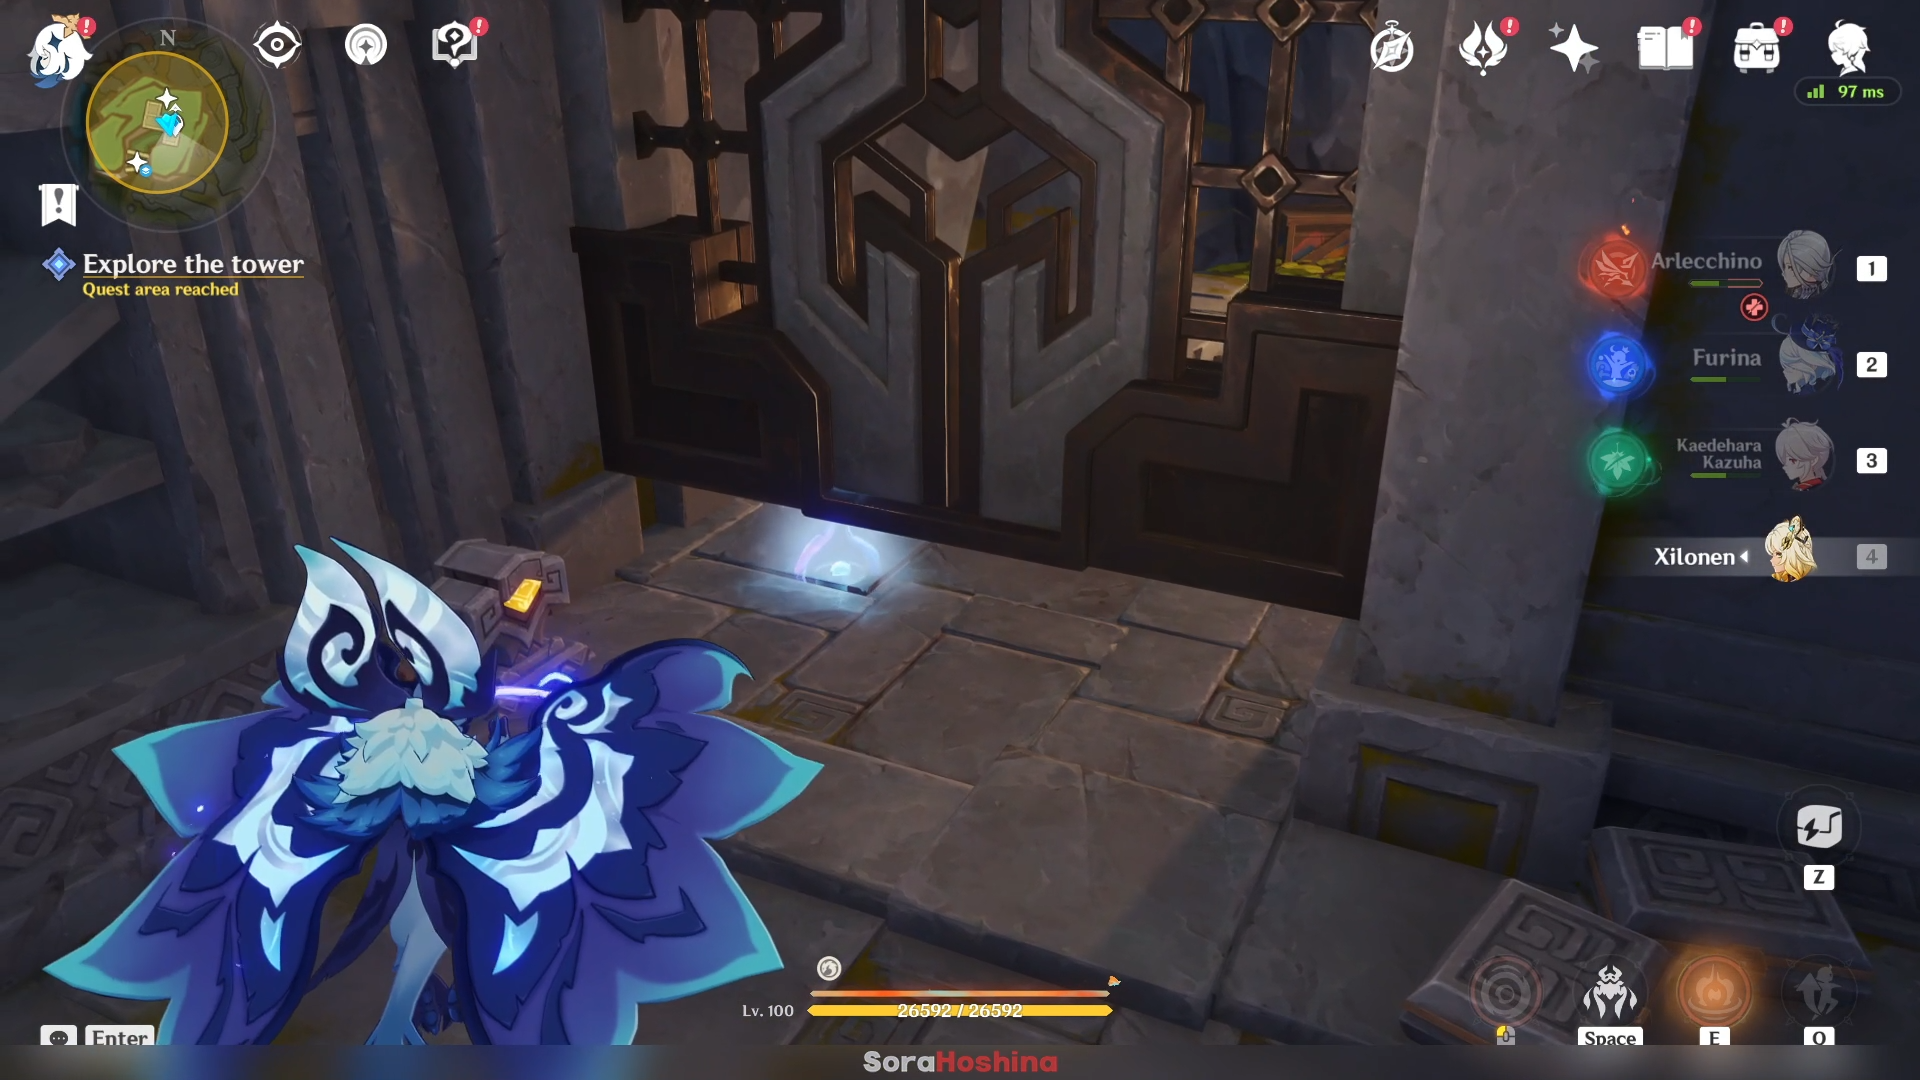
Then, hold E and place the box under another gate that were fully closed. This will allow you to pass through this gate.
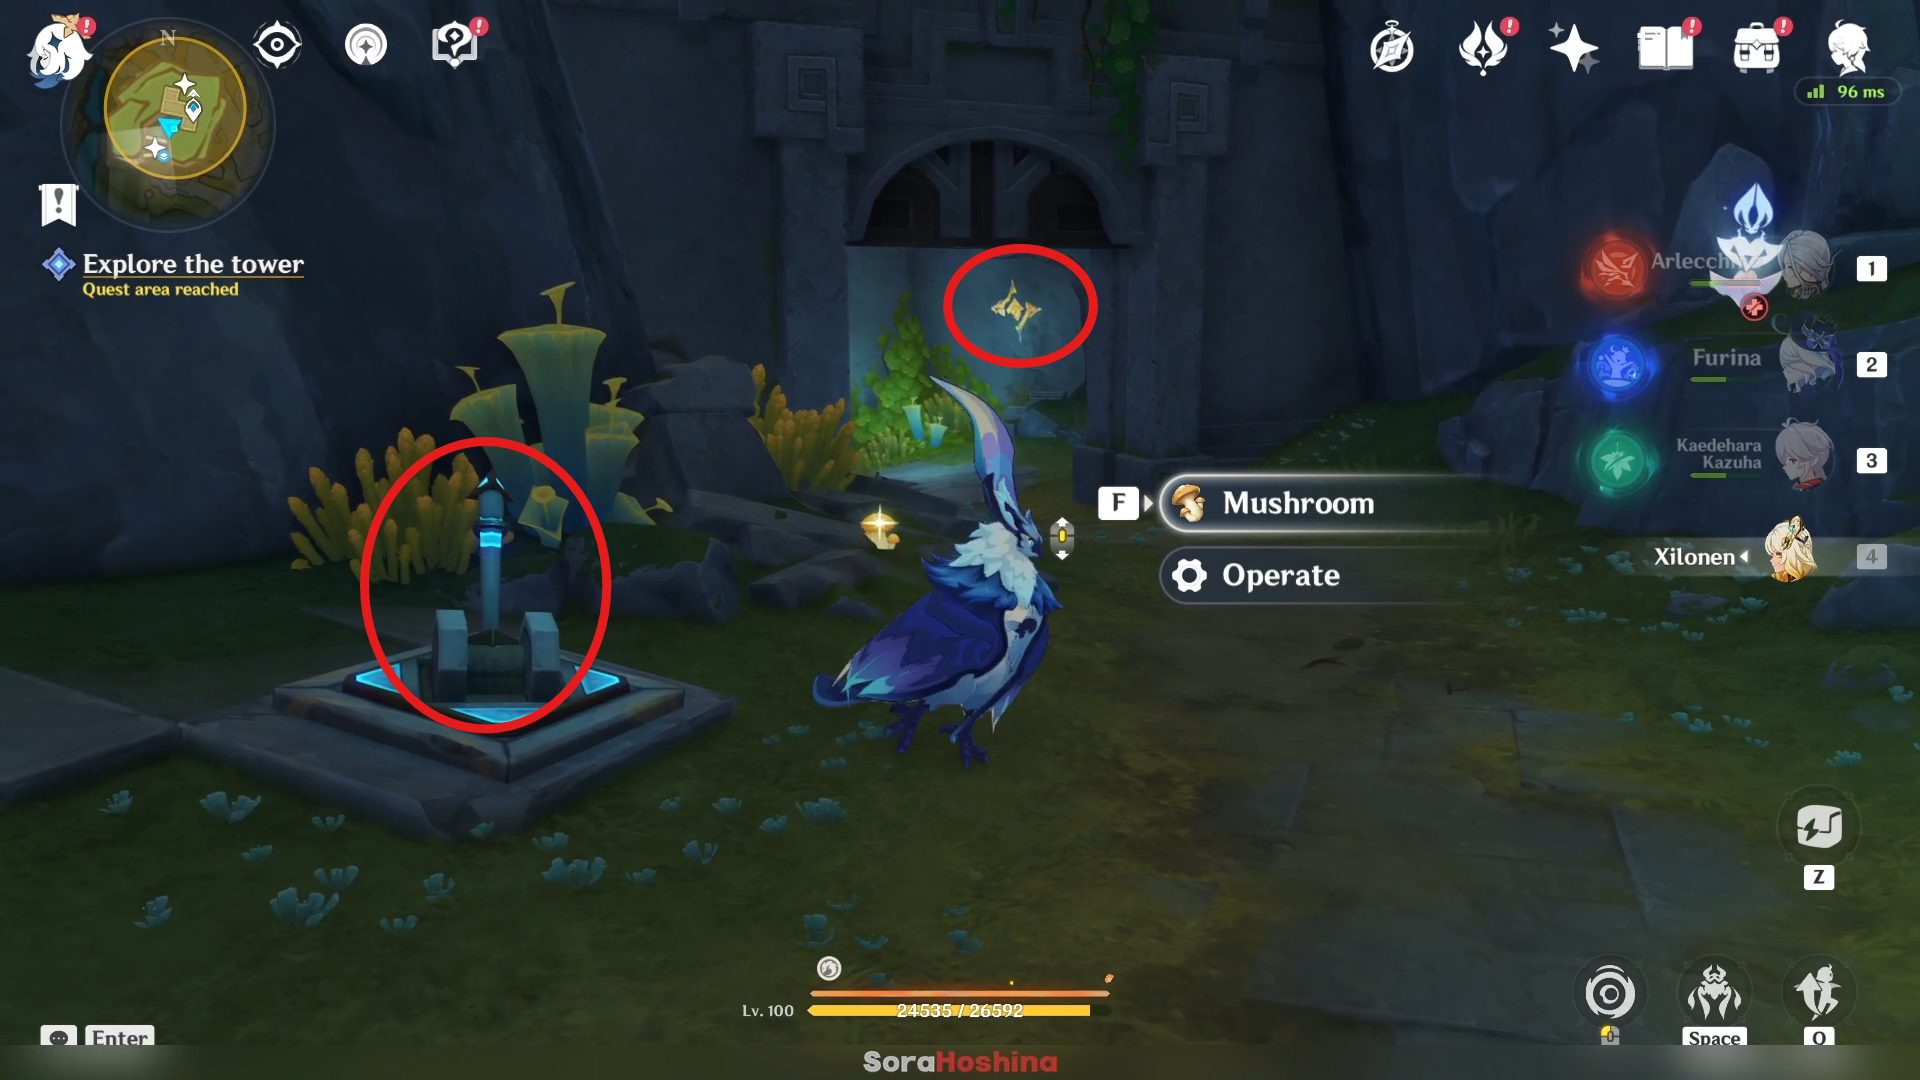
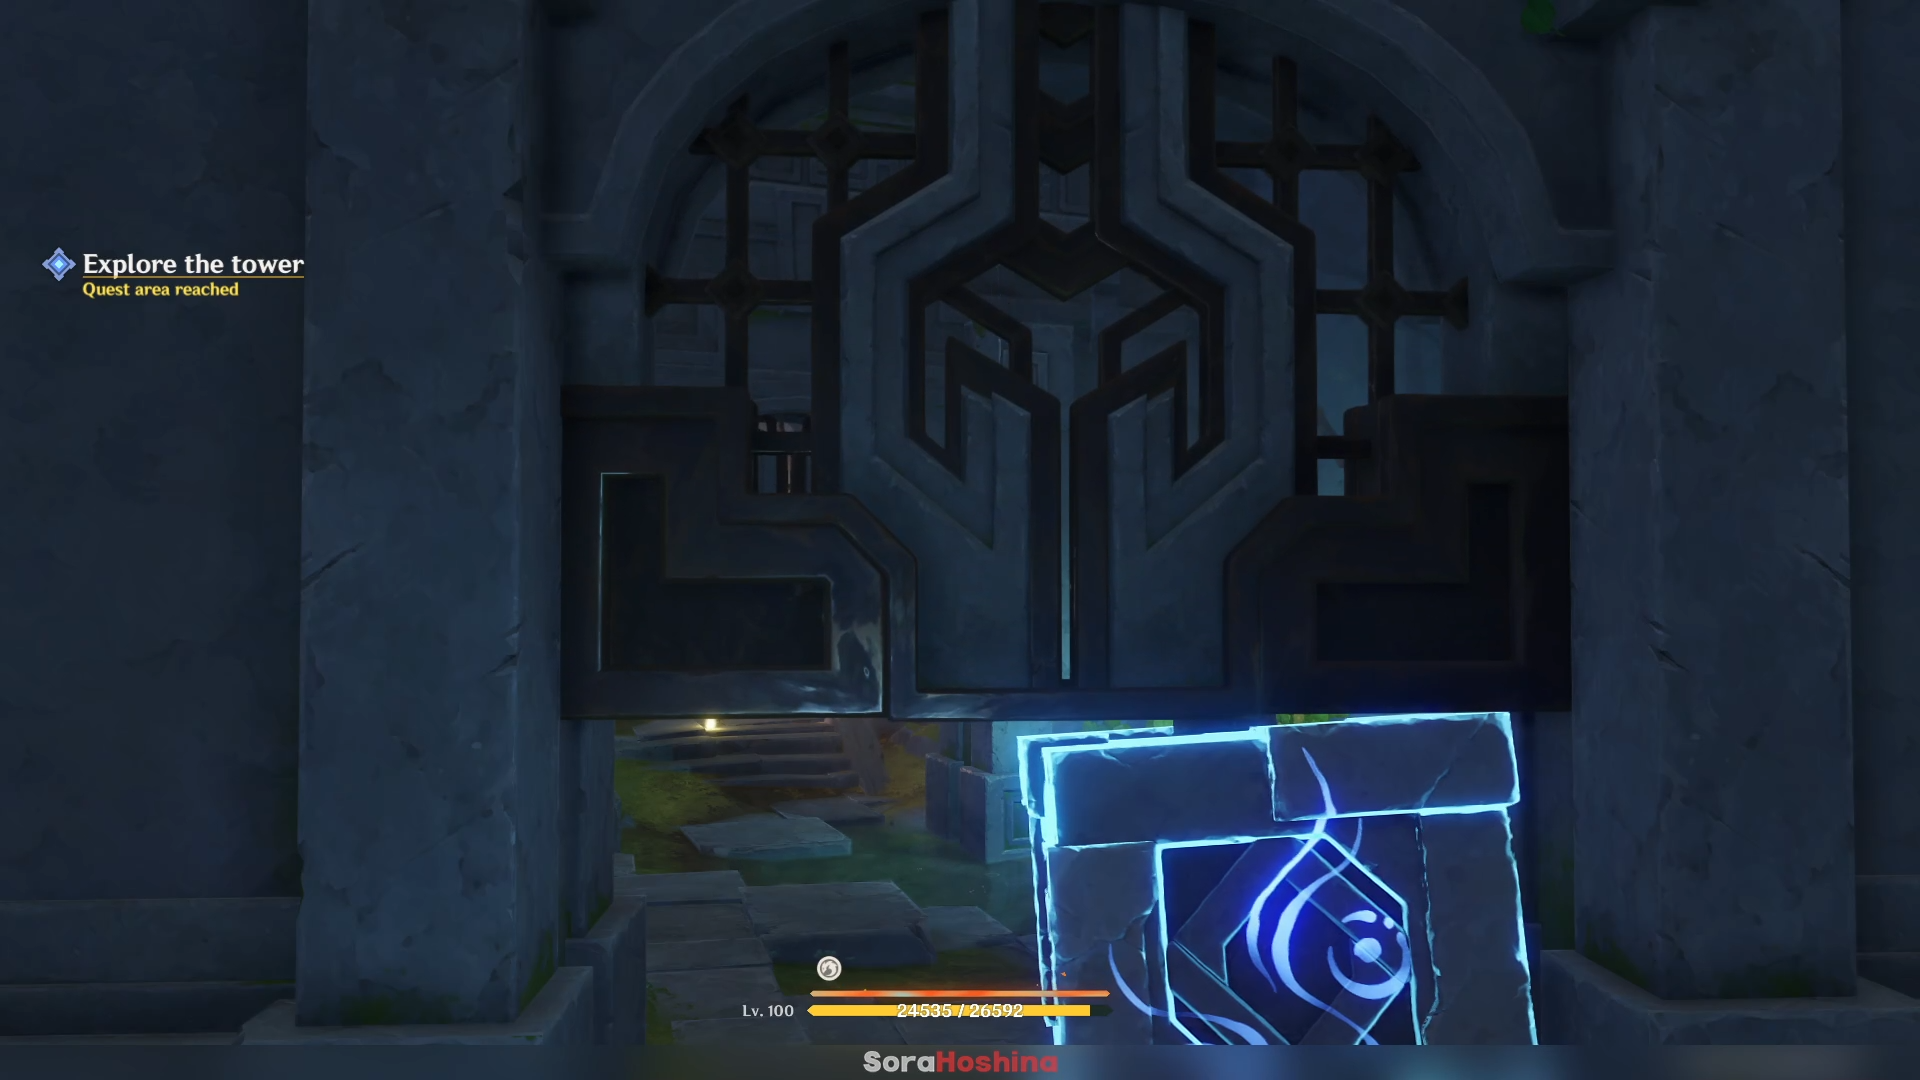
Head deeper and you will get another same puzzle. There are 2 doors here and the switch will open only one door (if one door is opened, the other will be closed).
(1) Absorb the graffiti before the second door
(2) Place the box under the first door
(3) Operate the switch to close the first door and open the second door
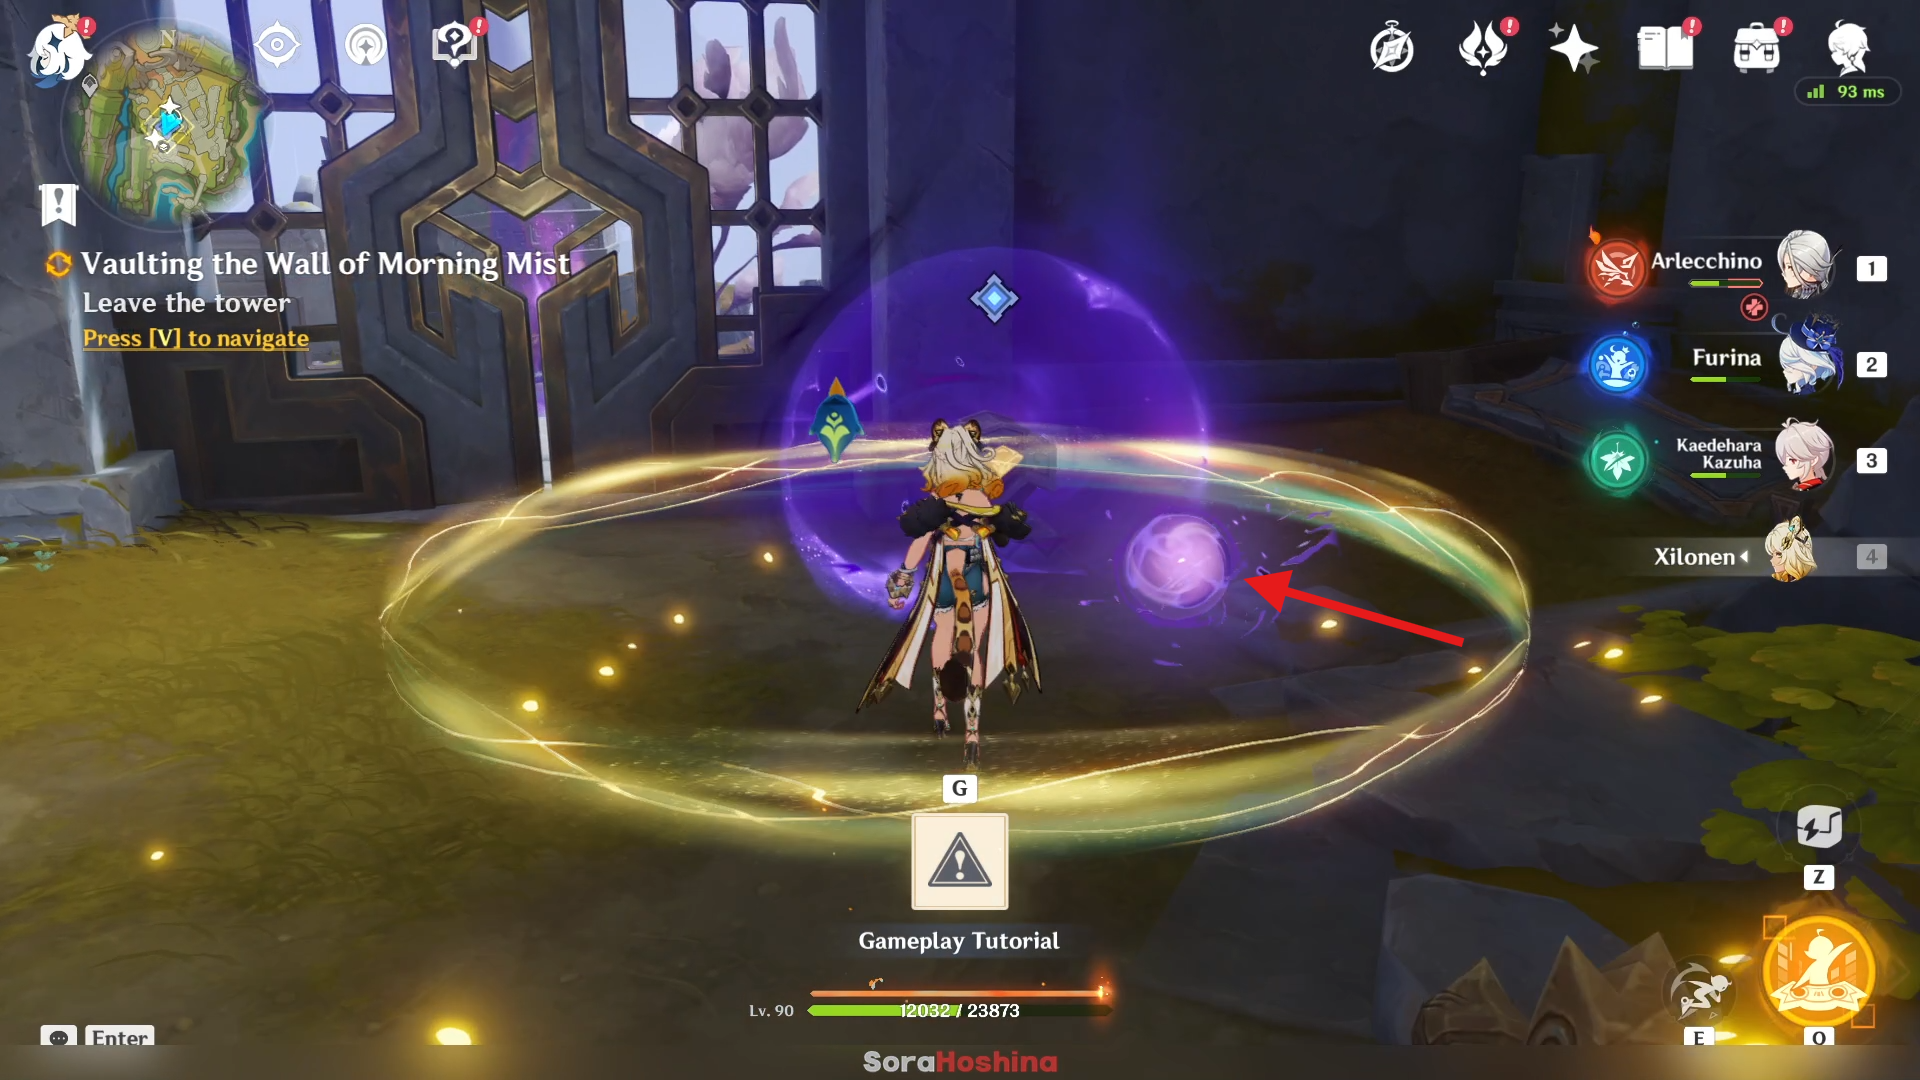
After encountering Bona and Cocouik, the small creature will now help you with the Abyss residue at the gate from before. Simply approach the Abyss residue so it will stay inside the Ring of Light AoE and it will disappear.
Explore Ashflow Street and collect Secret Source Scraps
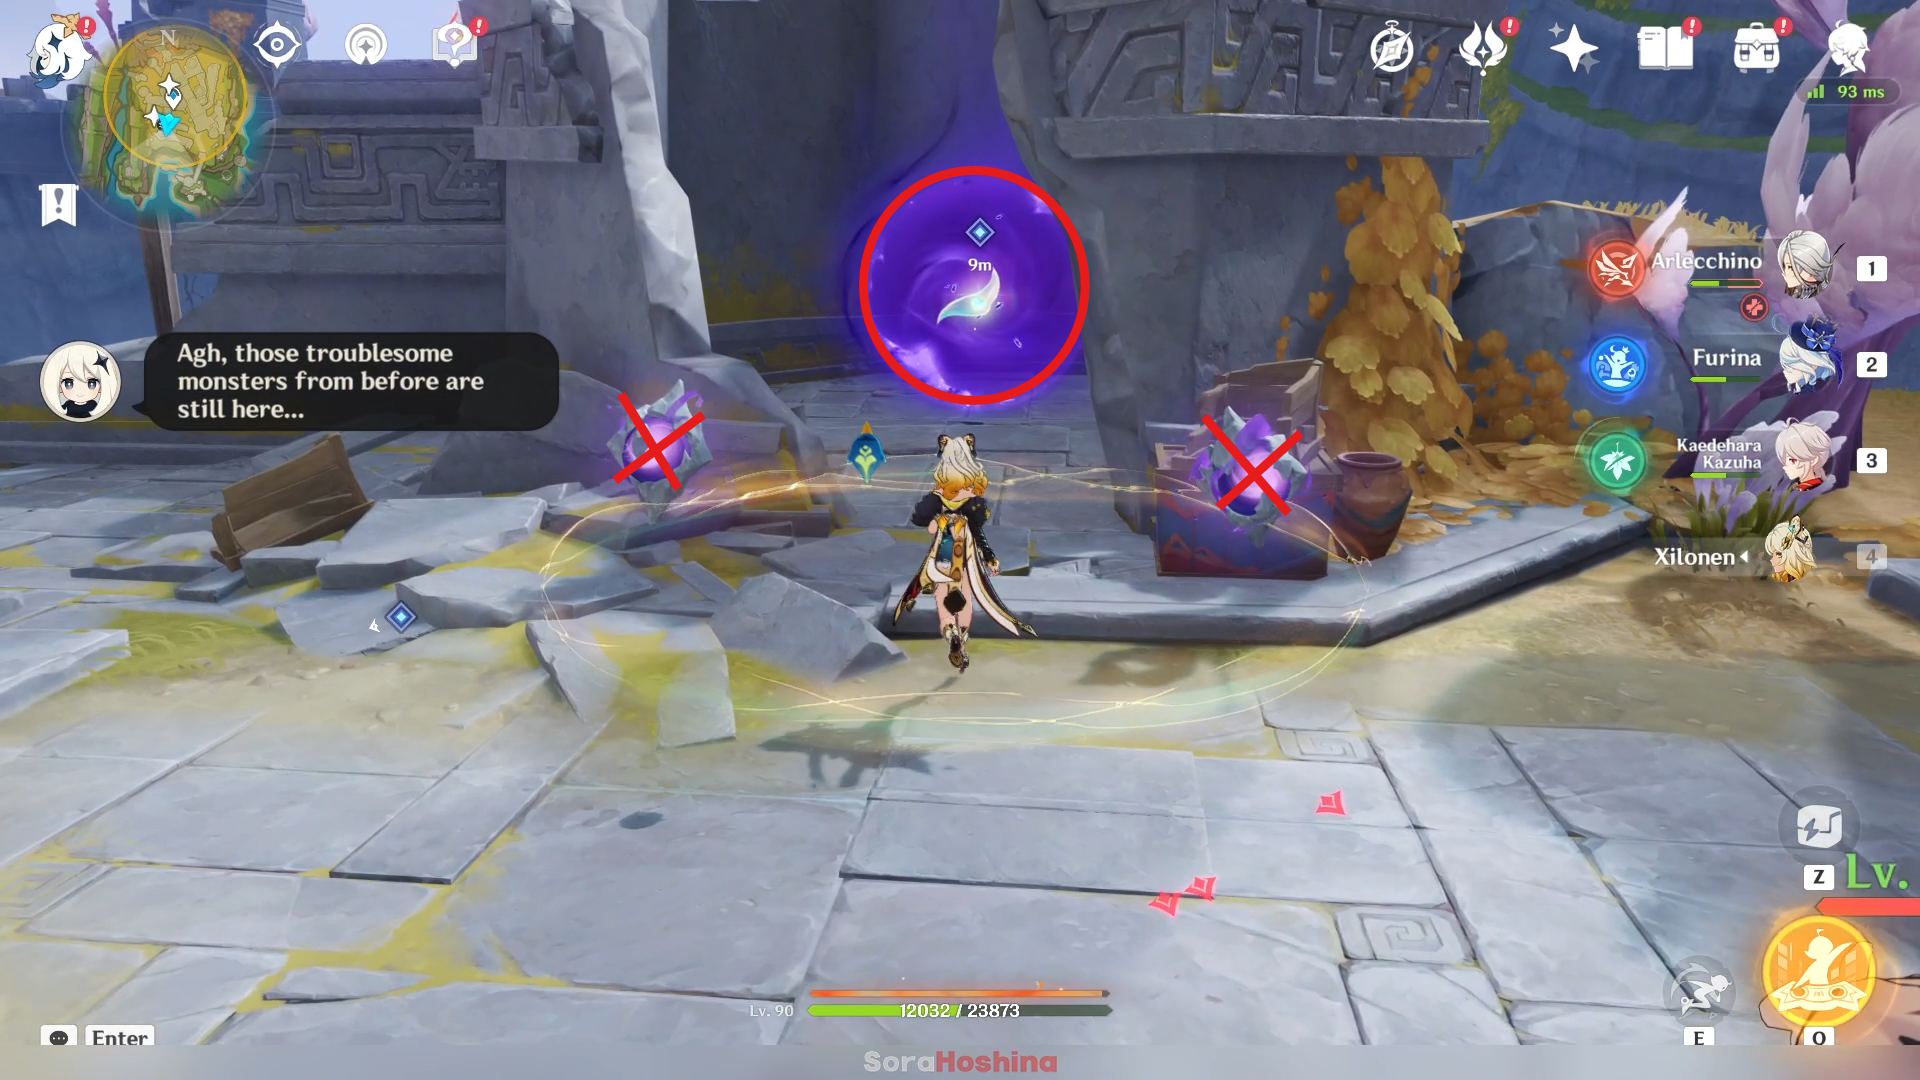
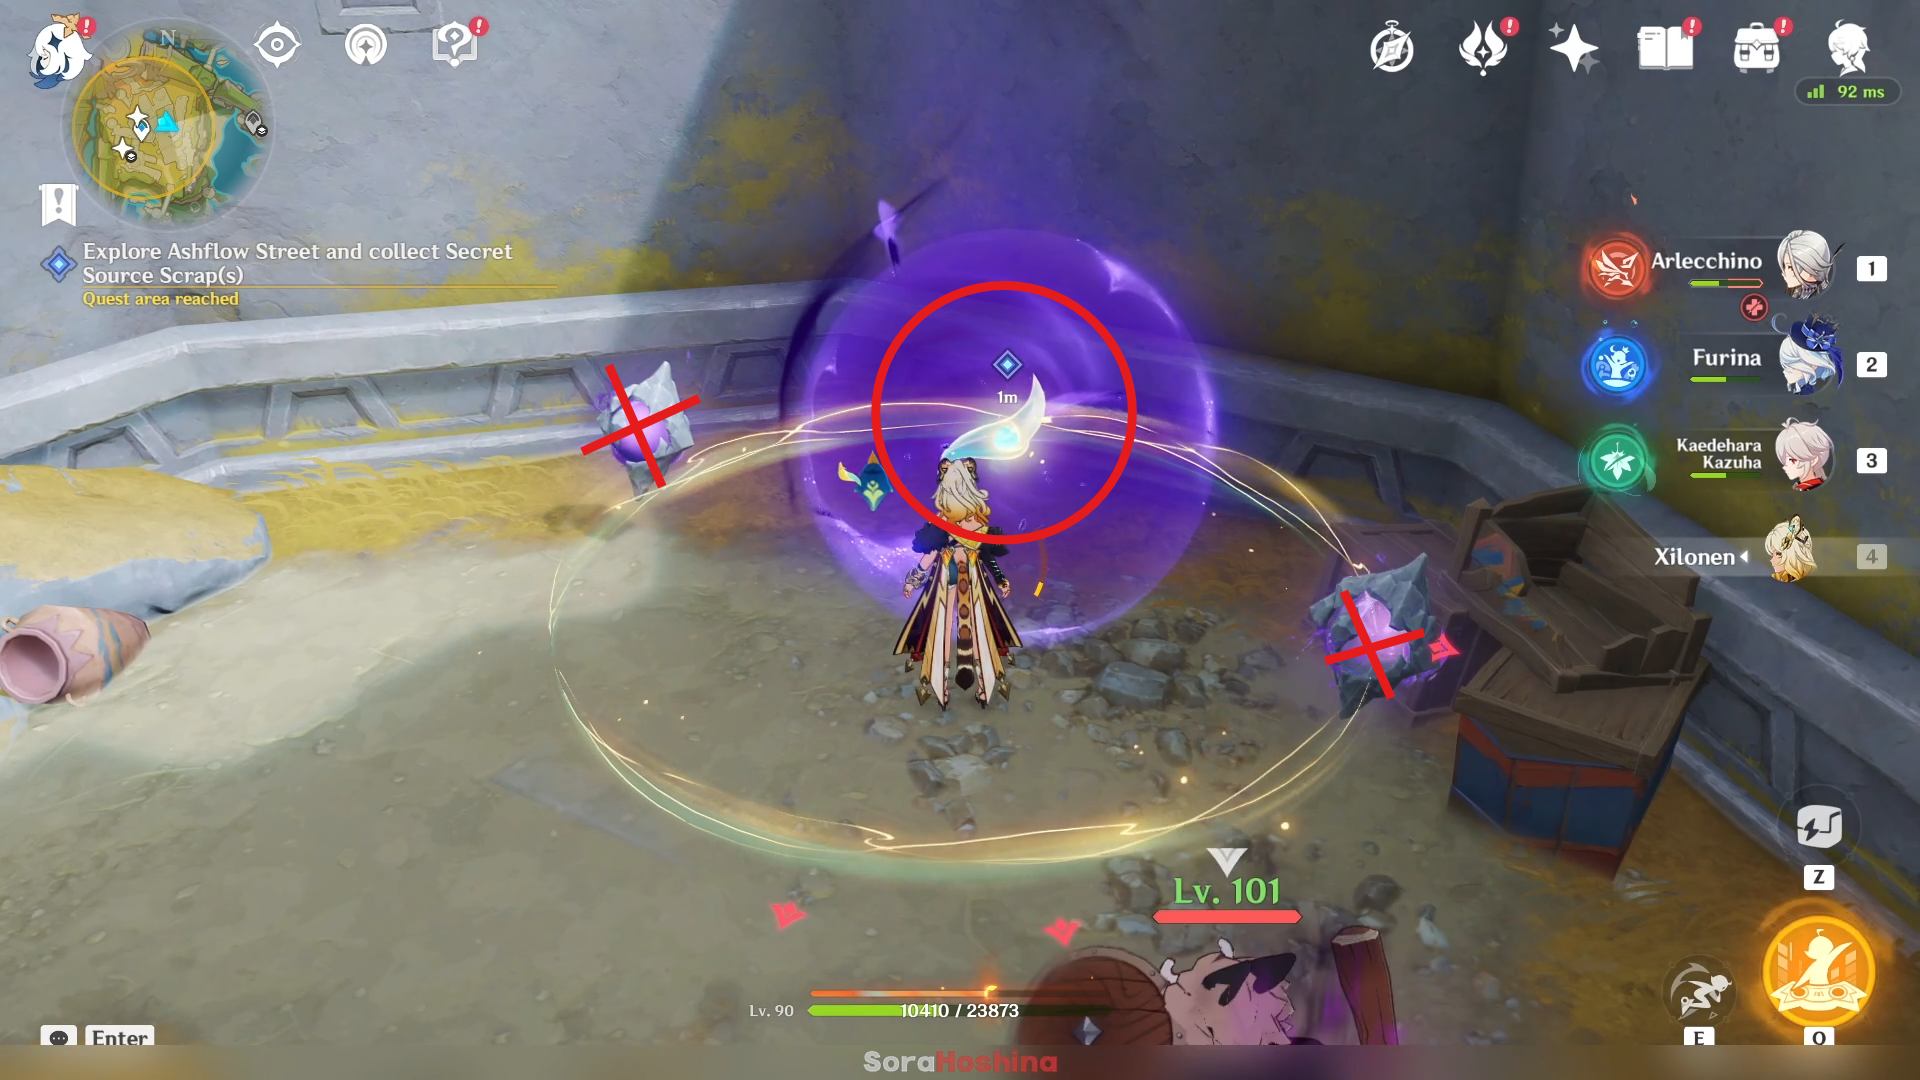
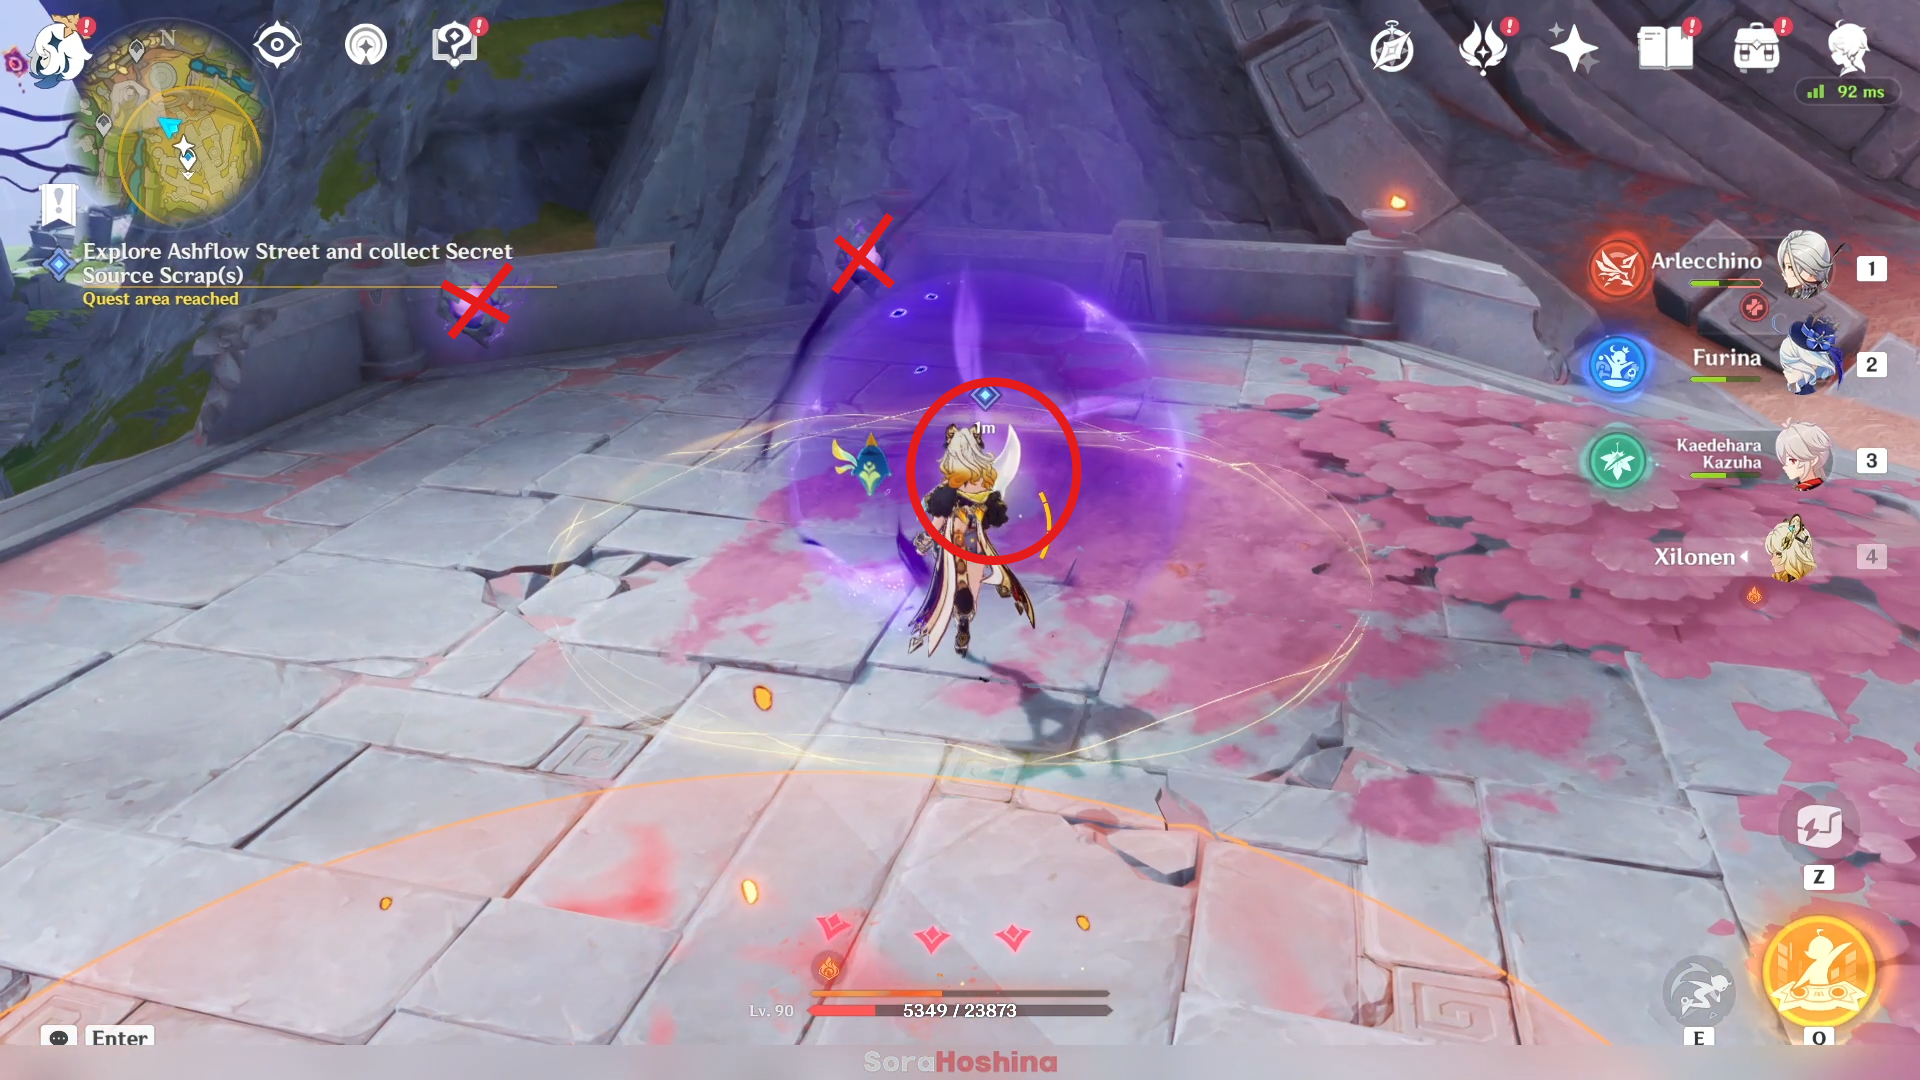
There are 3 Secret Source Scraps and all of them will be marked by the quest navigation so don't worry about being lost. But just in case, I will include all 3 of them in the images above. Remember that you need to make the Abyss residue near the Scraps disappear first before you can collect them.
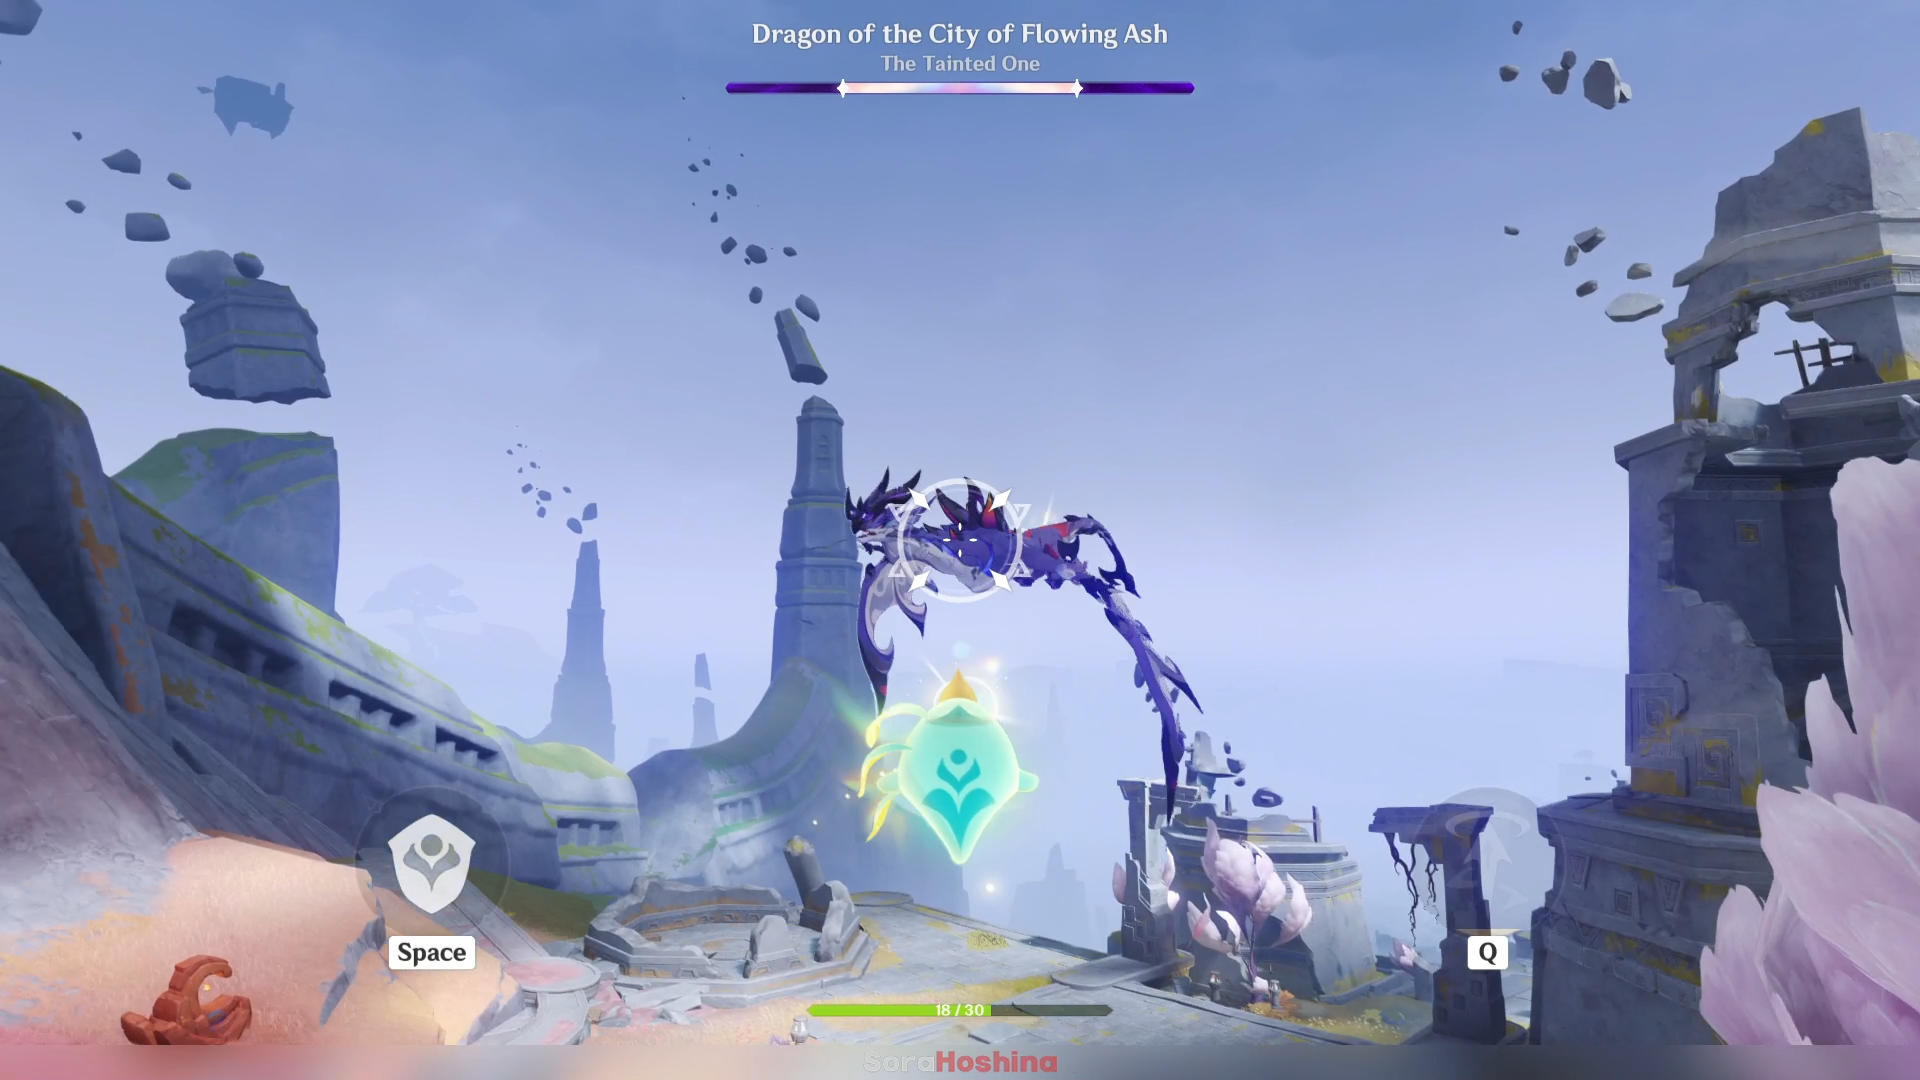
When facing the evil dragon, shoot the dragon by aiming Cocouik and when the ultimate is ready, don't forget to press Q.
Track the evil dragon down
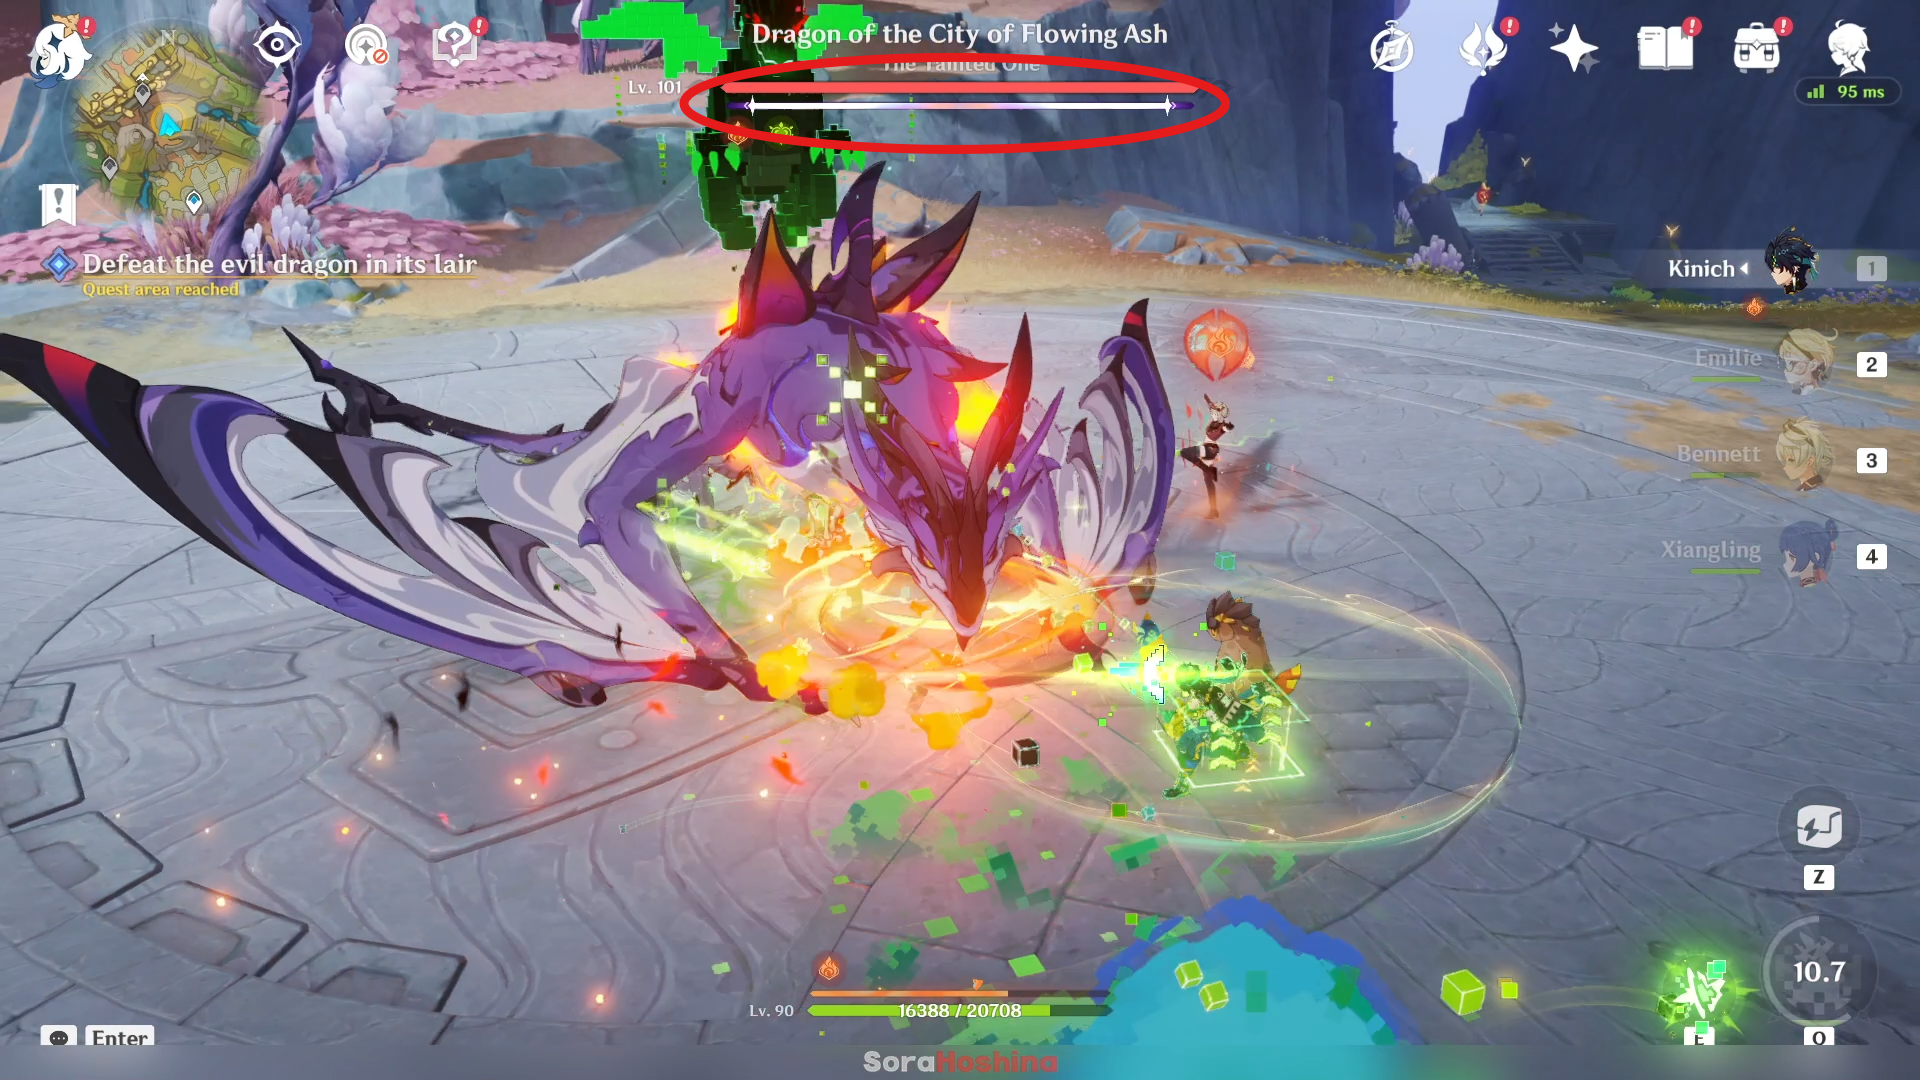
When they said 'track', honestly its just a few feet from the previous spot. Anyway, you need to defeat it. It's best if you bring at least one Natlan character because this dragon has a Void Ward (the white bar under HP bar). To fill that, you need to use a certain number of elemental attacks. Nightsoul-aligned elemental attacks will break the Ward more effectively.
Adventure in the Last of Mists
Find the Altar of Primal Flame
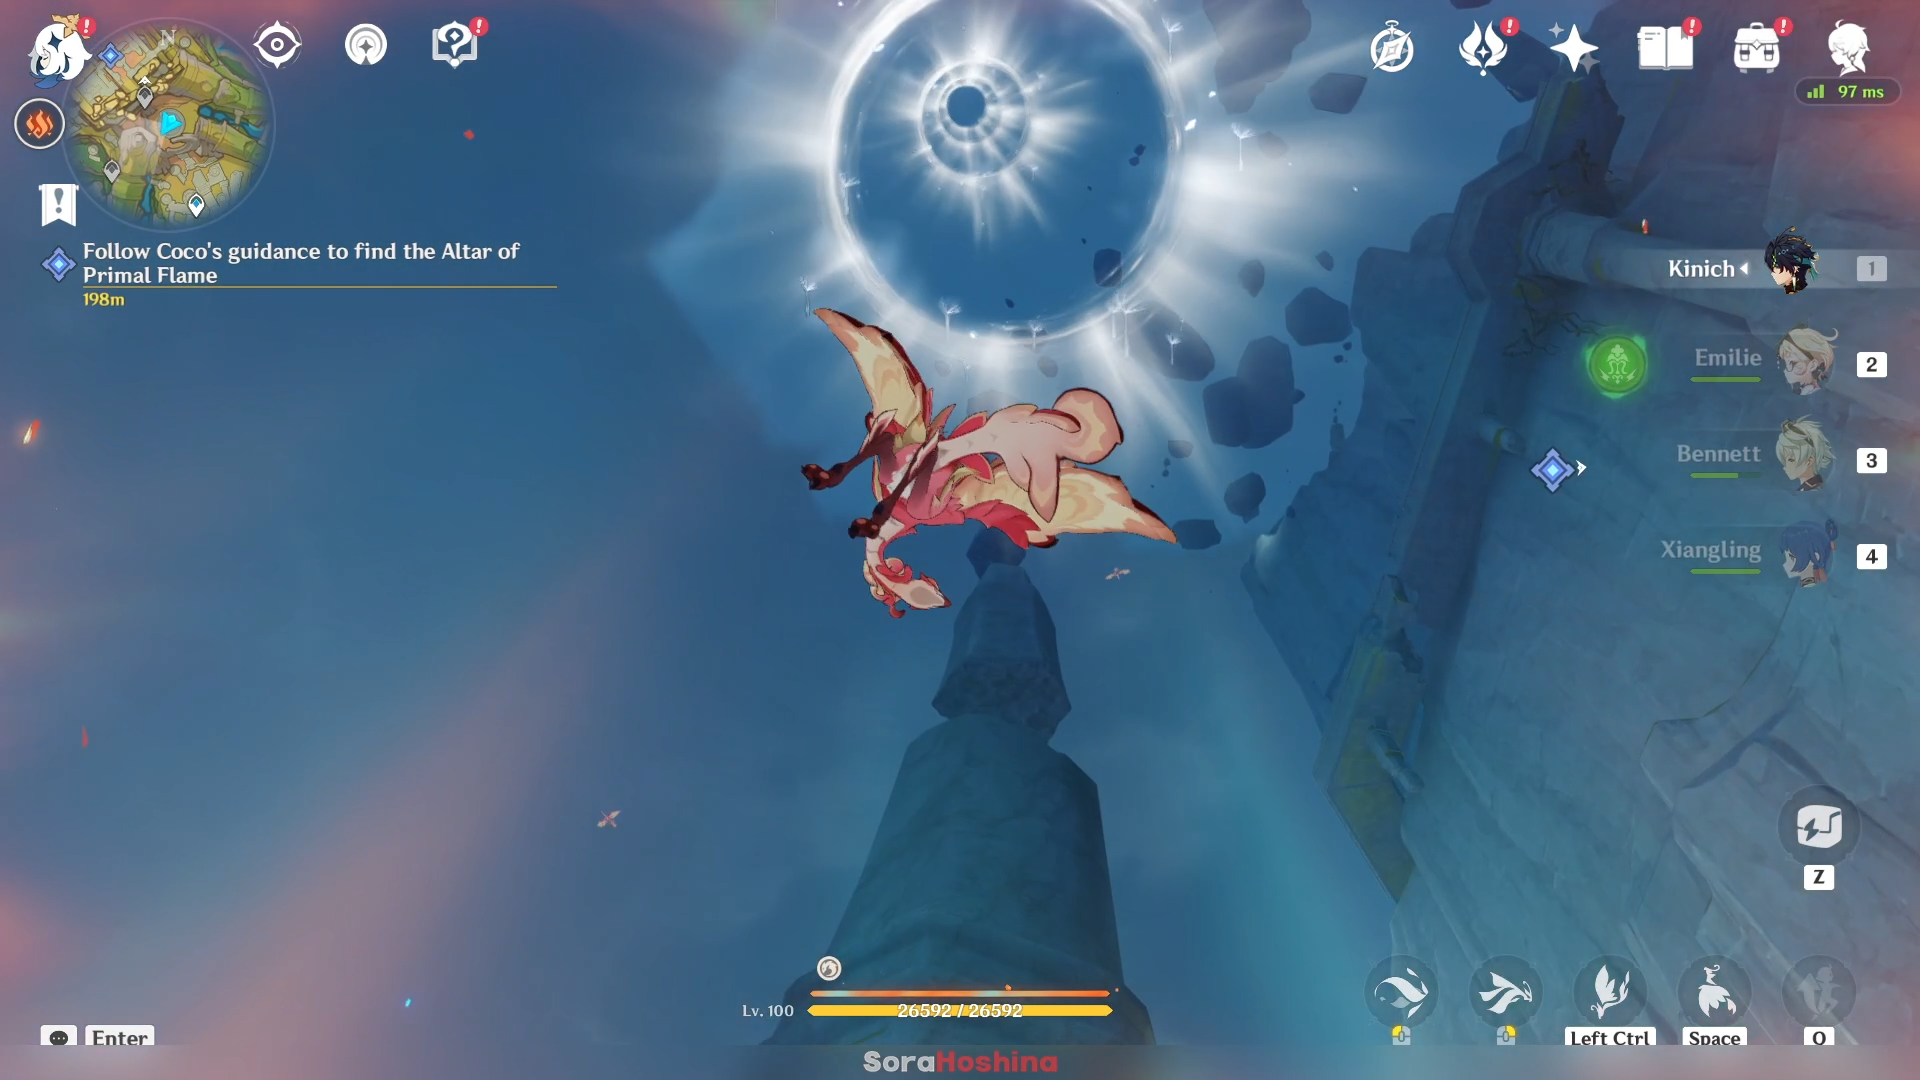
Indwell a Qucusaur and glide with the wind to reach a new area. There, just follow the quest navigation until you reach an altar.
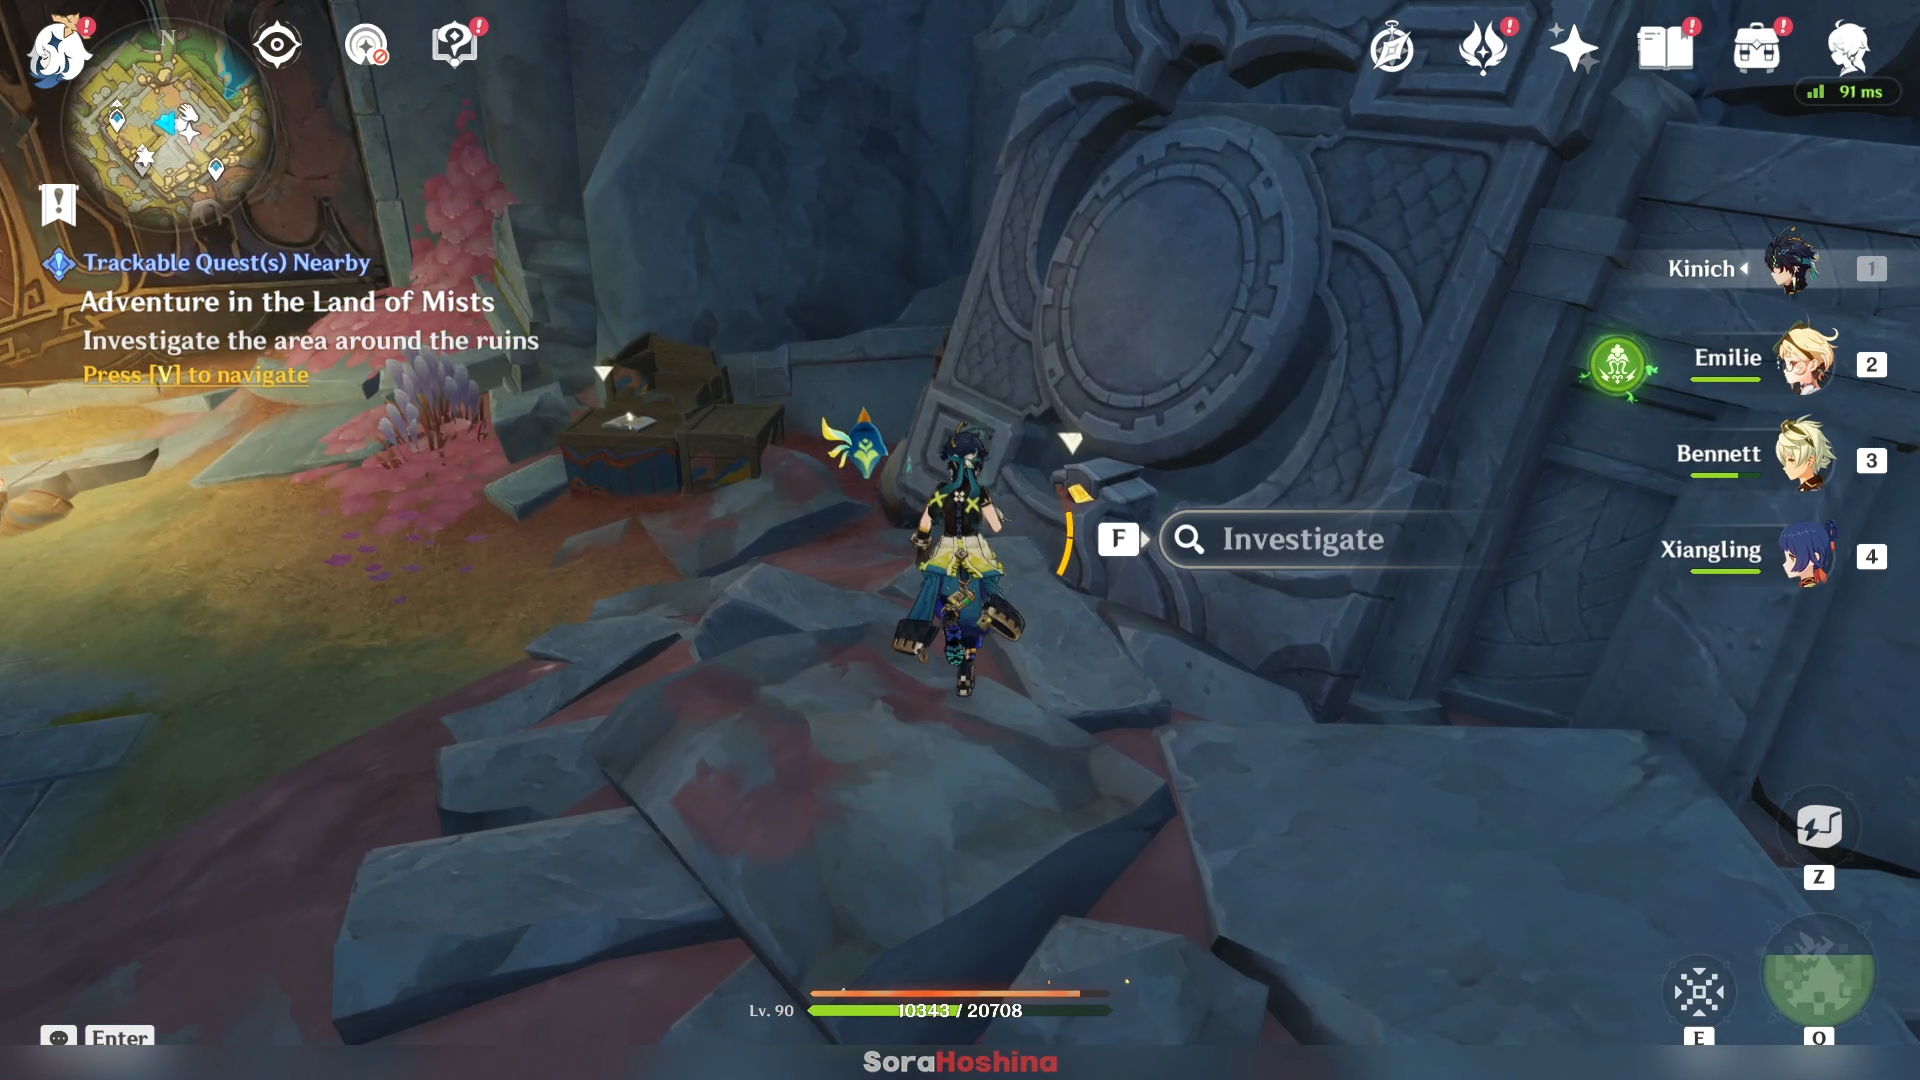
Progress through the quest by investigating the switch that were block by a big stone. Don't worry because after talking to Bona again, your Saurian companion will help remove the stone.
Palace of the Vision Serpent
Enter the ruins
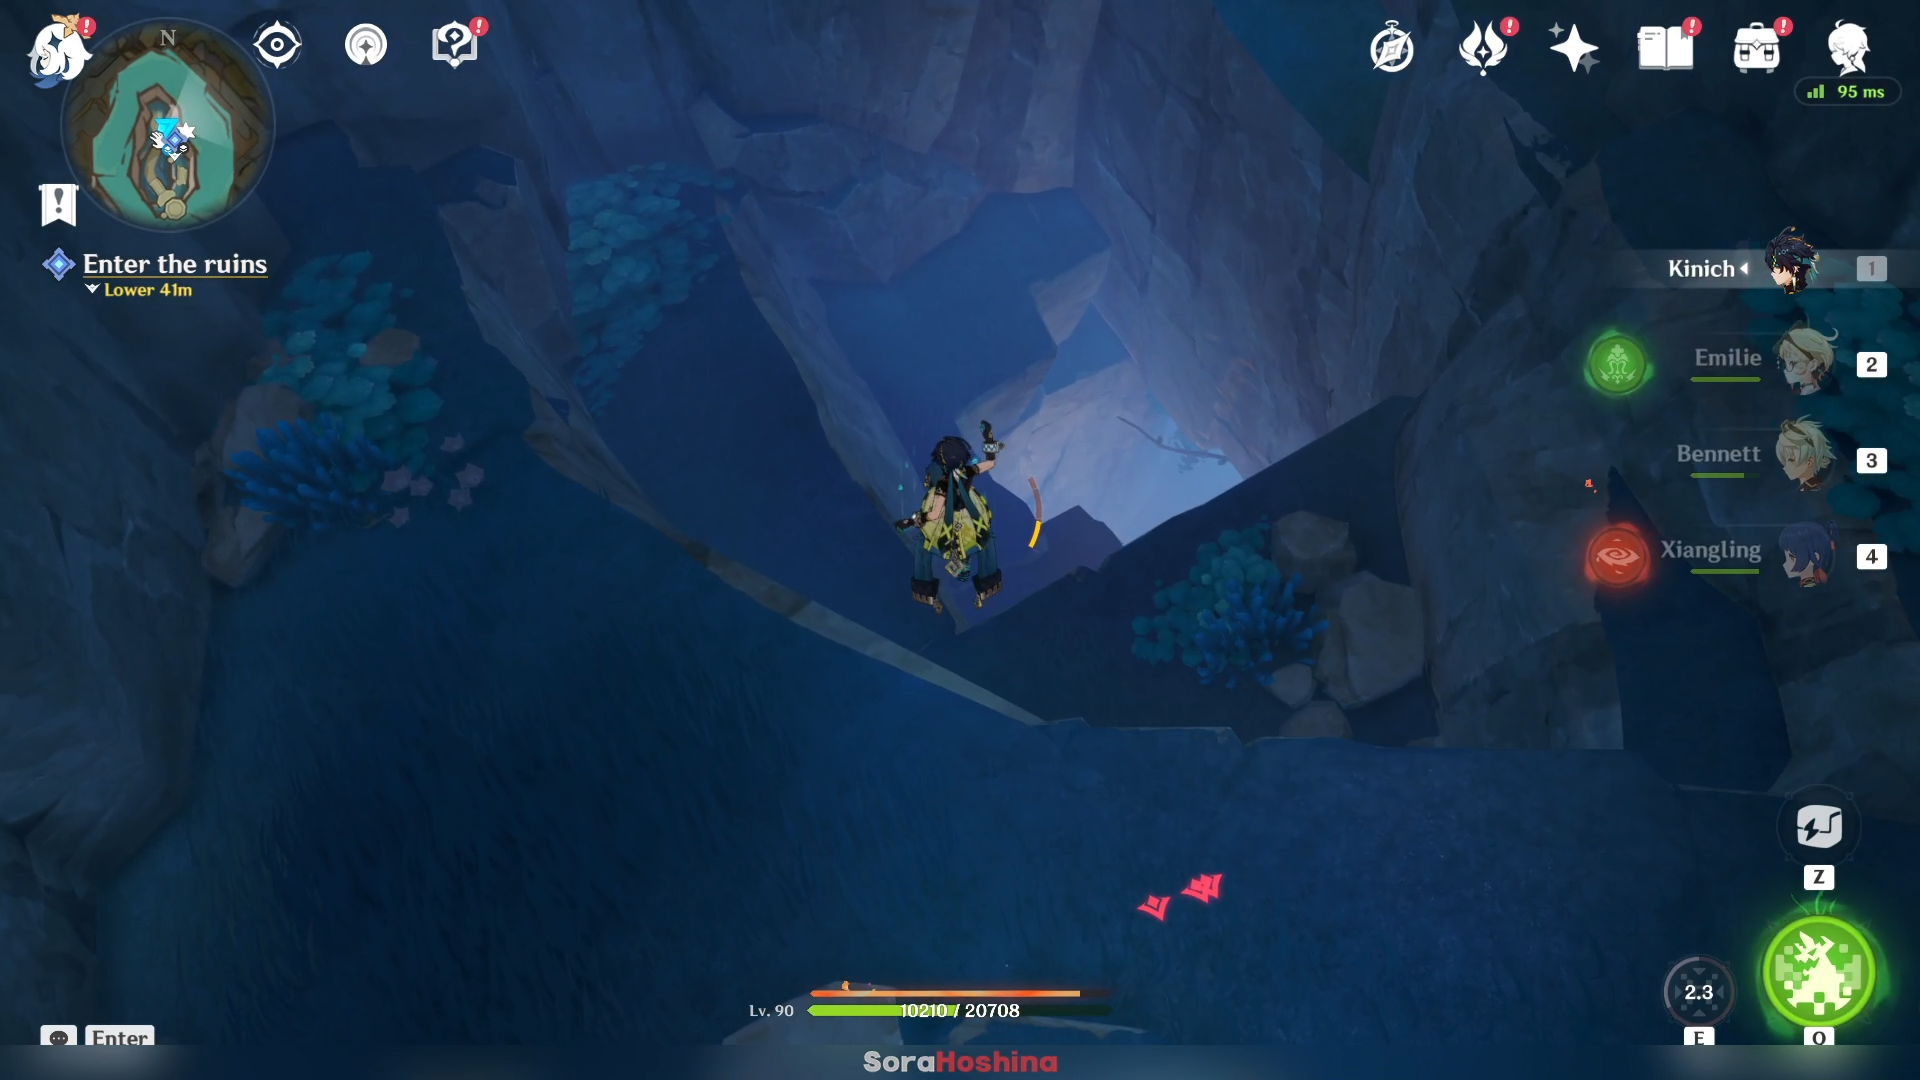
The ruin is really big but for now, all you need to do is going down to the quest navigated area. There, you will find a new mechanism and puzzle.
Approach the suspicious core
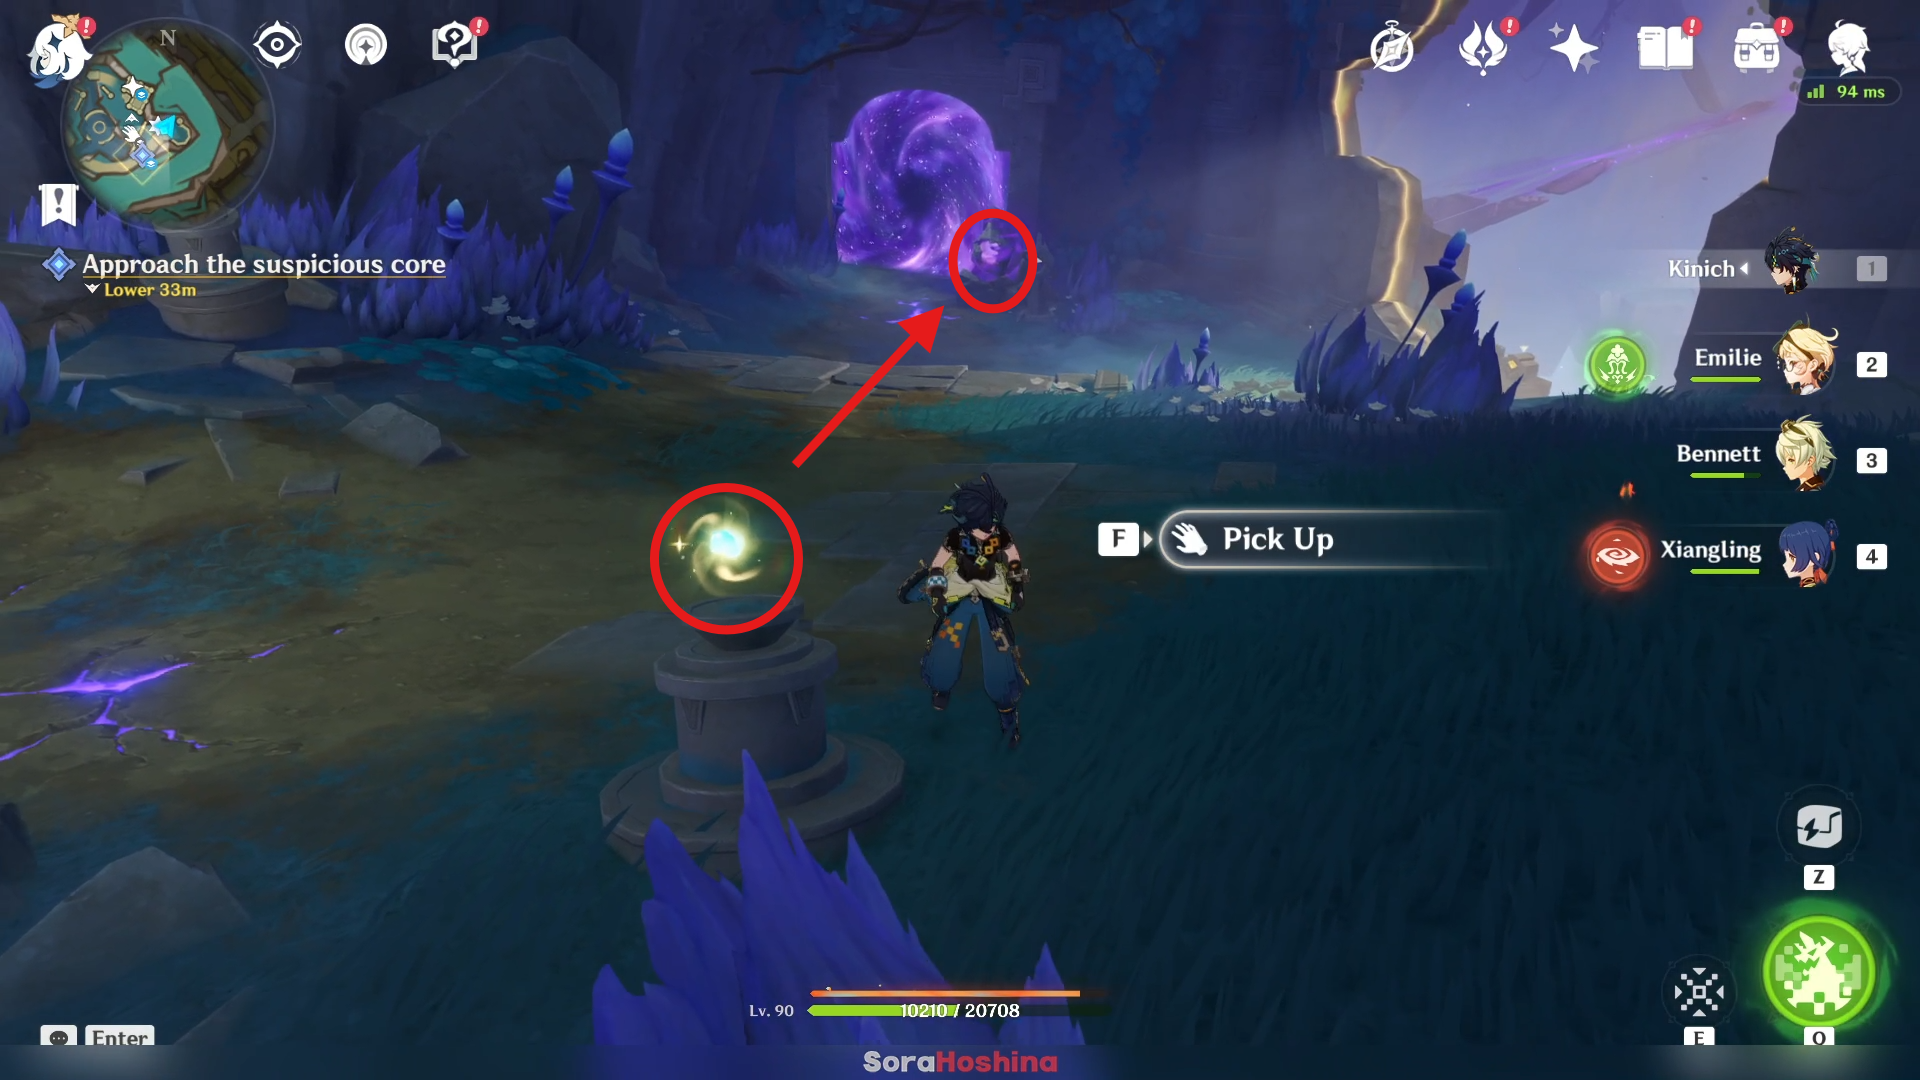
After the puzzle starts, approach the shining thing on the small altar (called Radiant Fragment) and place it to the Radiant Pillar.
Notes: Some Radiant Pillar need 1 or 2 Radiant Fragments for it to function. This puzzle will be repeated many times so remember this!
Clear the Abyssal corruption out
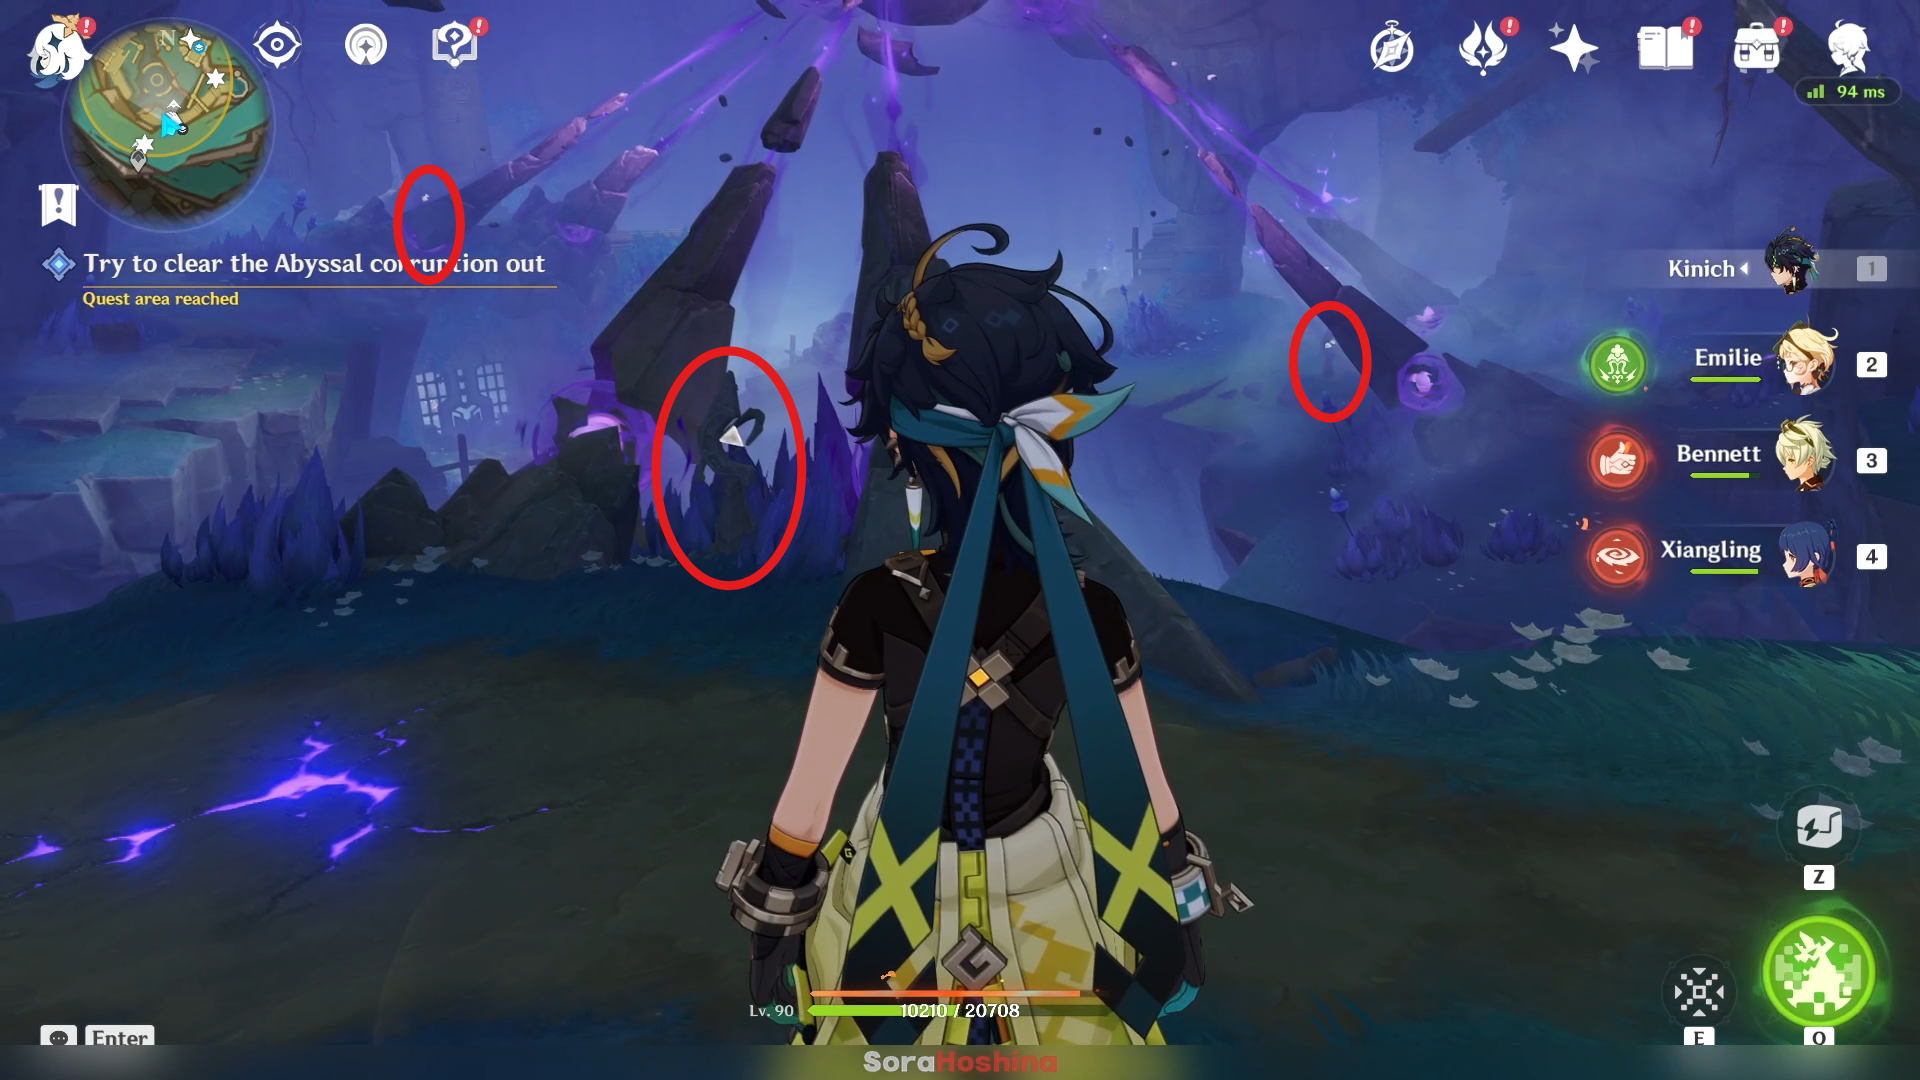
After you complete the introduction puzzle from earlier, go further into the ruin and you will find this location. See those spiky rocks? All of those are Abyssal Blight that you need to suppress. There are 3 spots and in each spot, you need to complete puzzle to get the Radiant Fragments for their own Radiant Pillar.
First Malignant Abyssal Blight
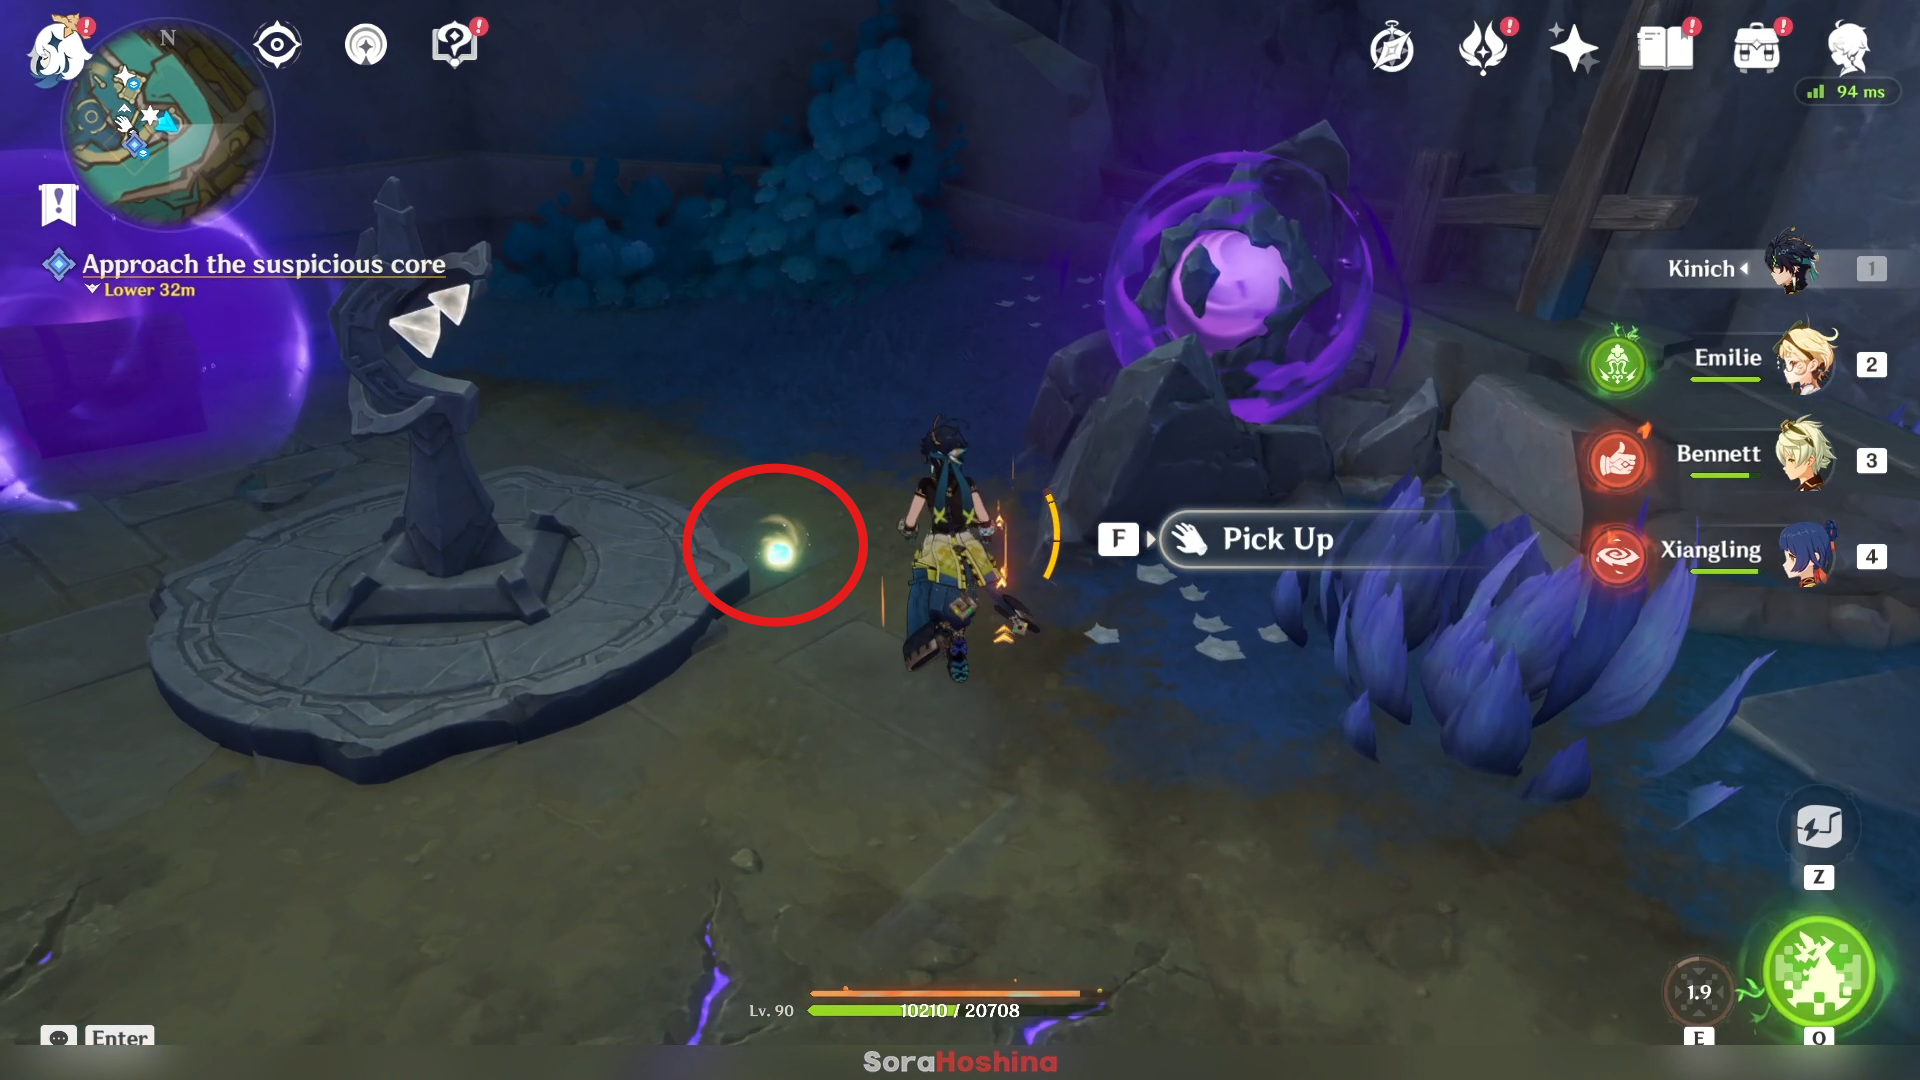
For the first one, go back to the previous spot where you get your first Radiant Fragment. Nearby there, you can find another Radiant Fragment on the ground. Pick it up.
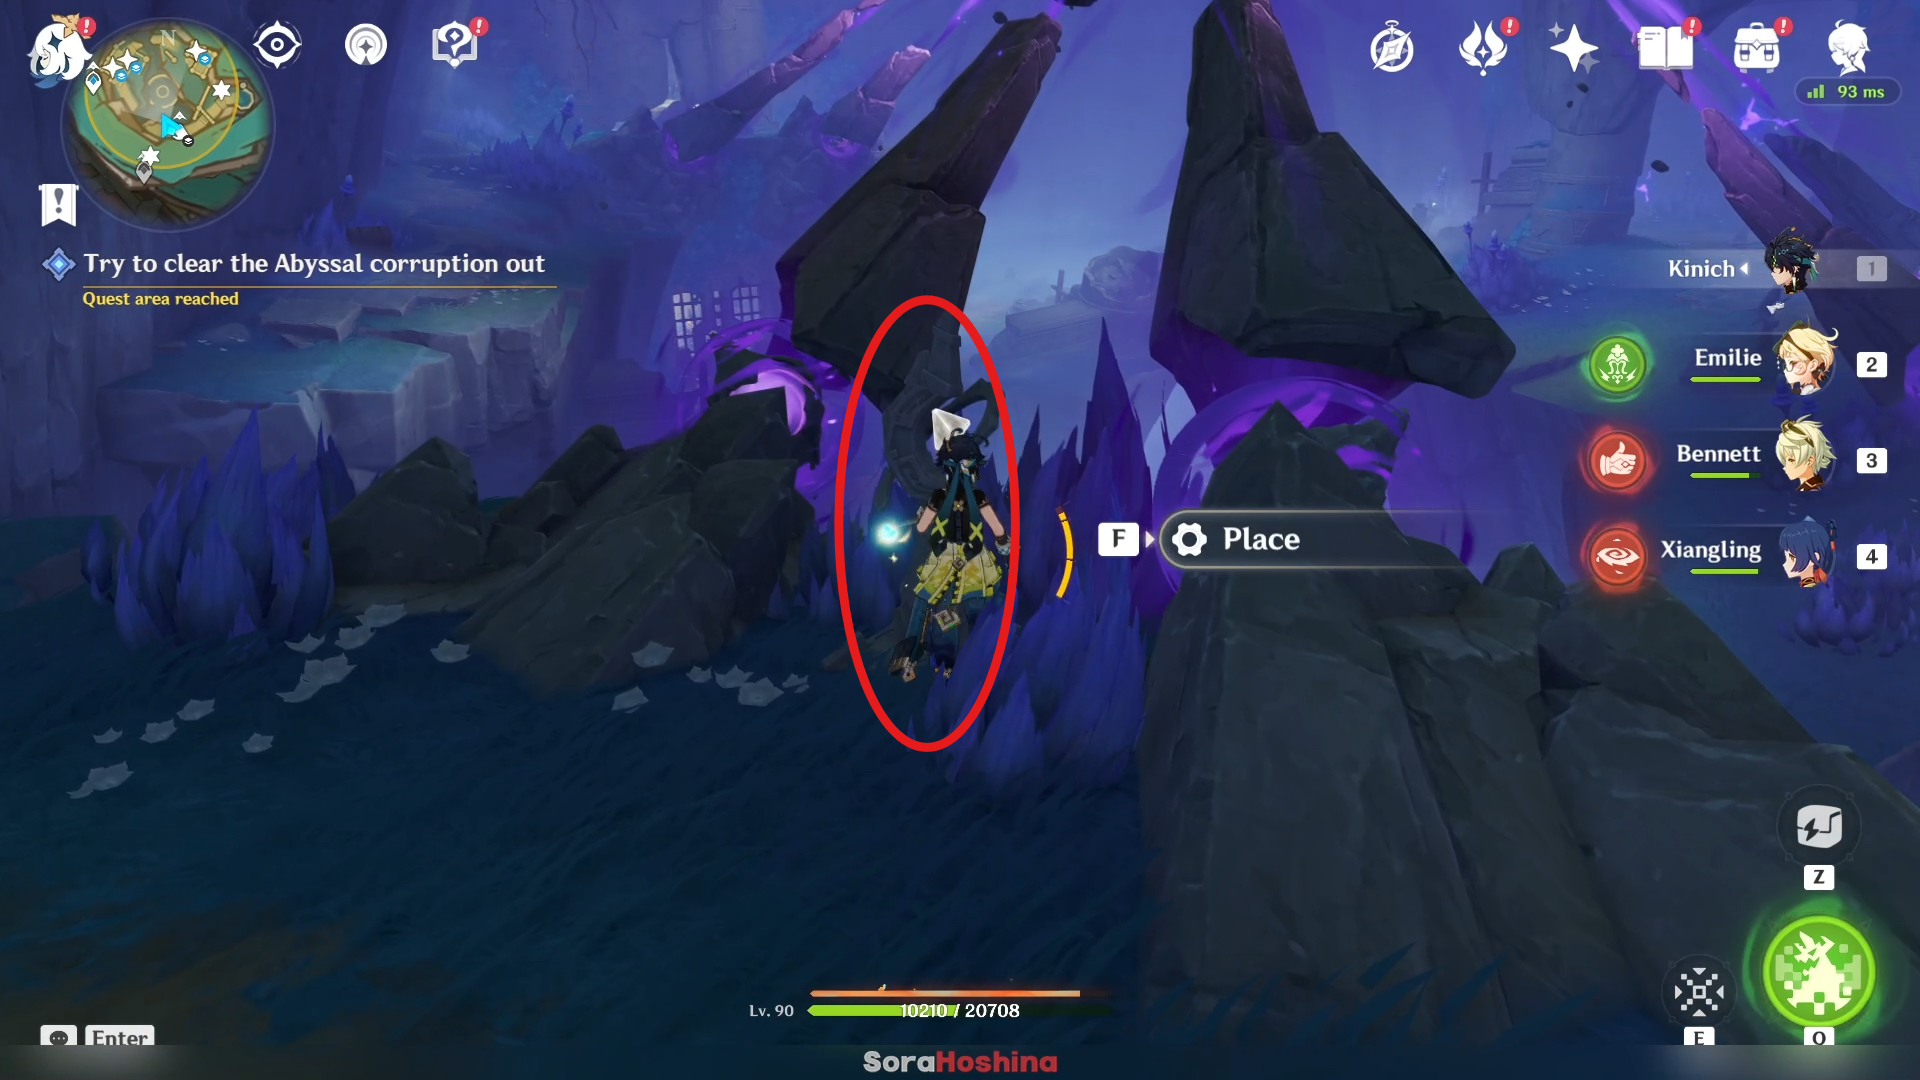
Place it on the Radiant Pillar here to solve the first puzzle.
Second Malignant Abyssal Blight
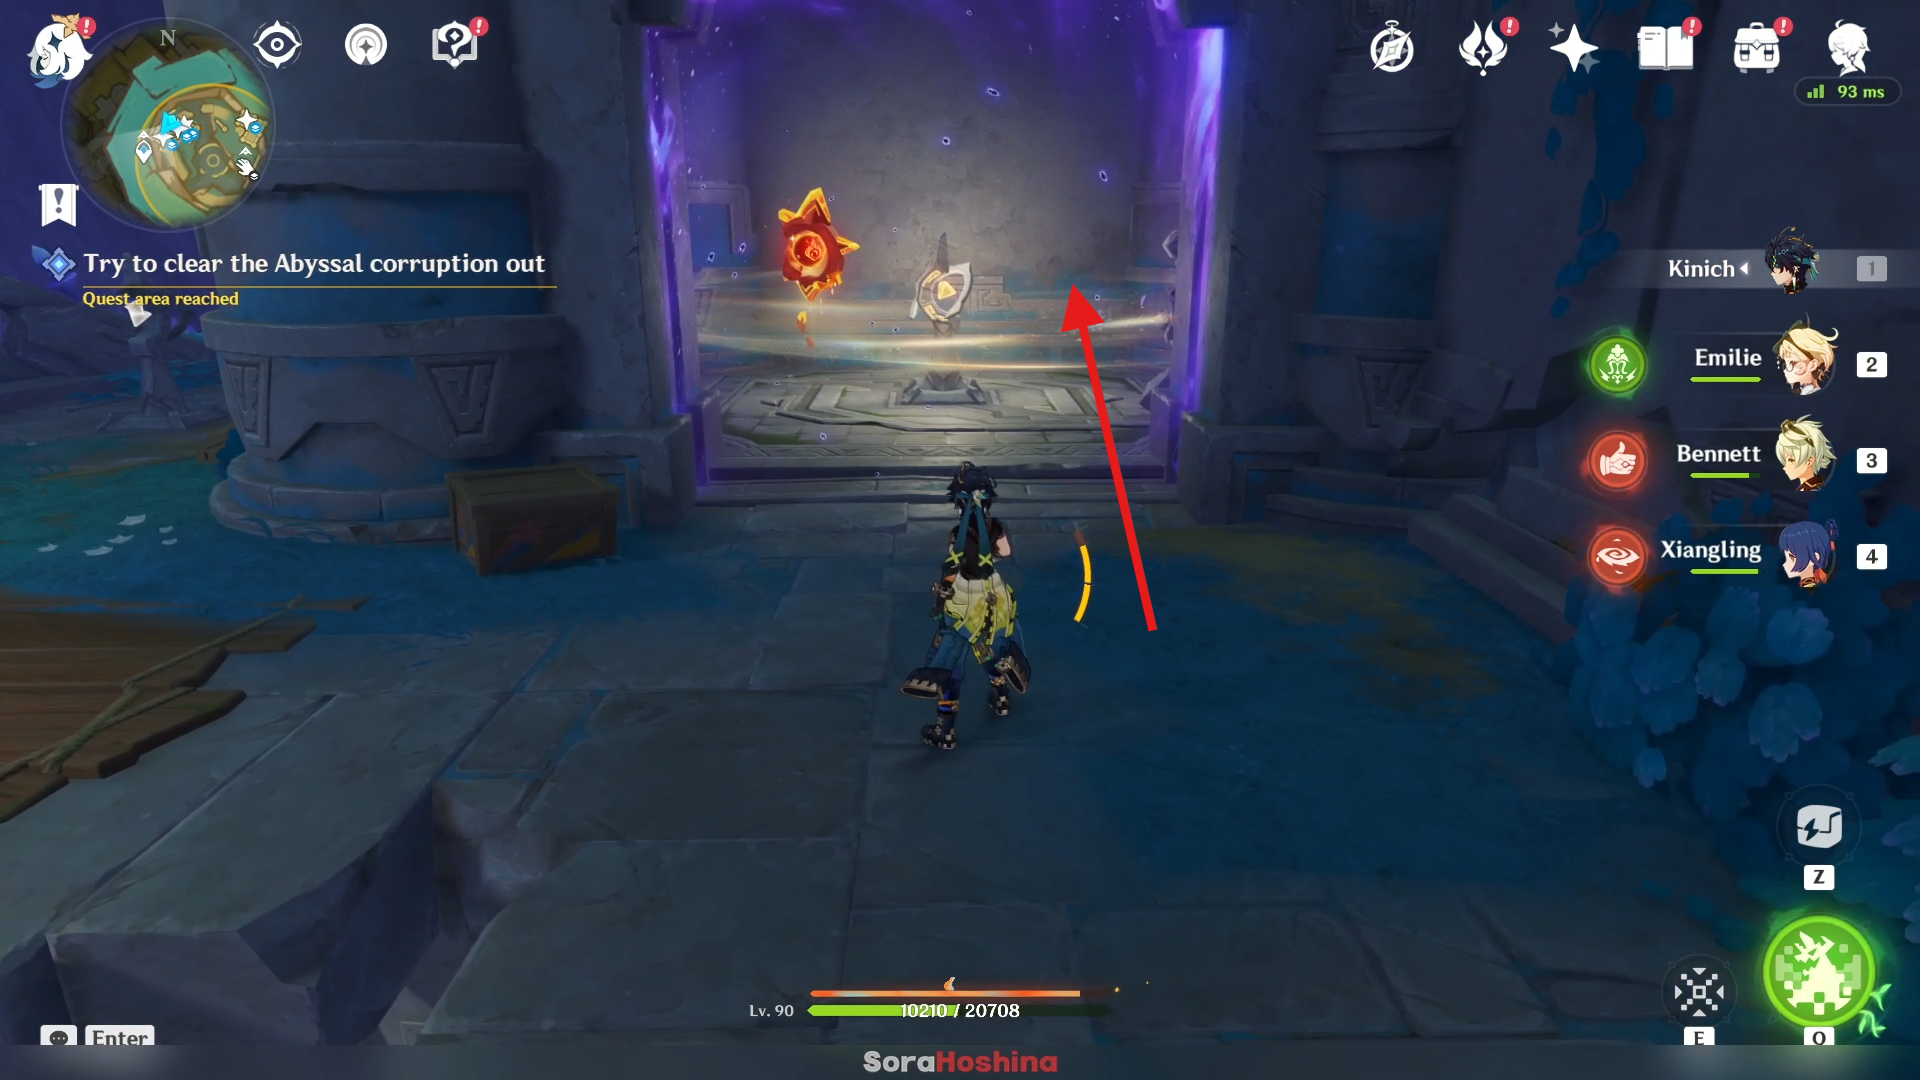
For the second one, you can see a Radiant Fragment inside the Radiant Pillar like in the image above. Enter the room, activate the elevator first, and then extract the Radiant Fragment.
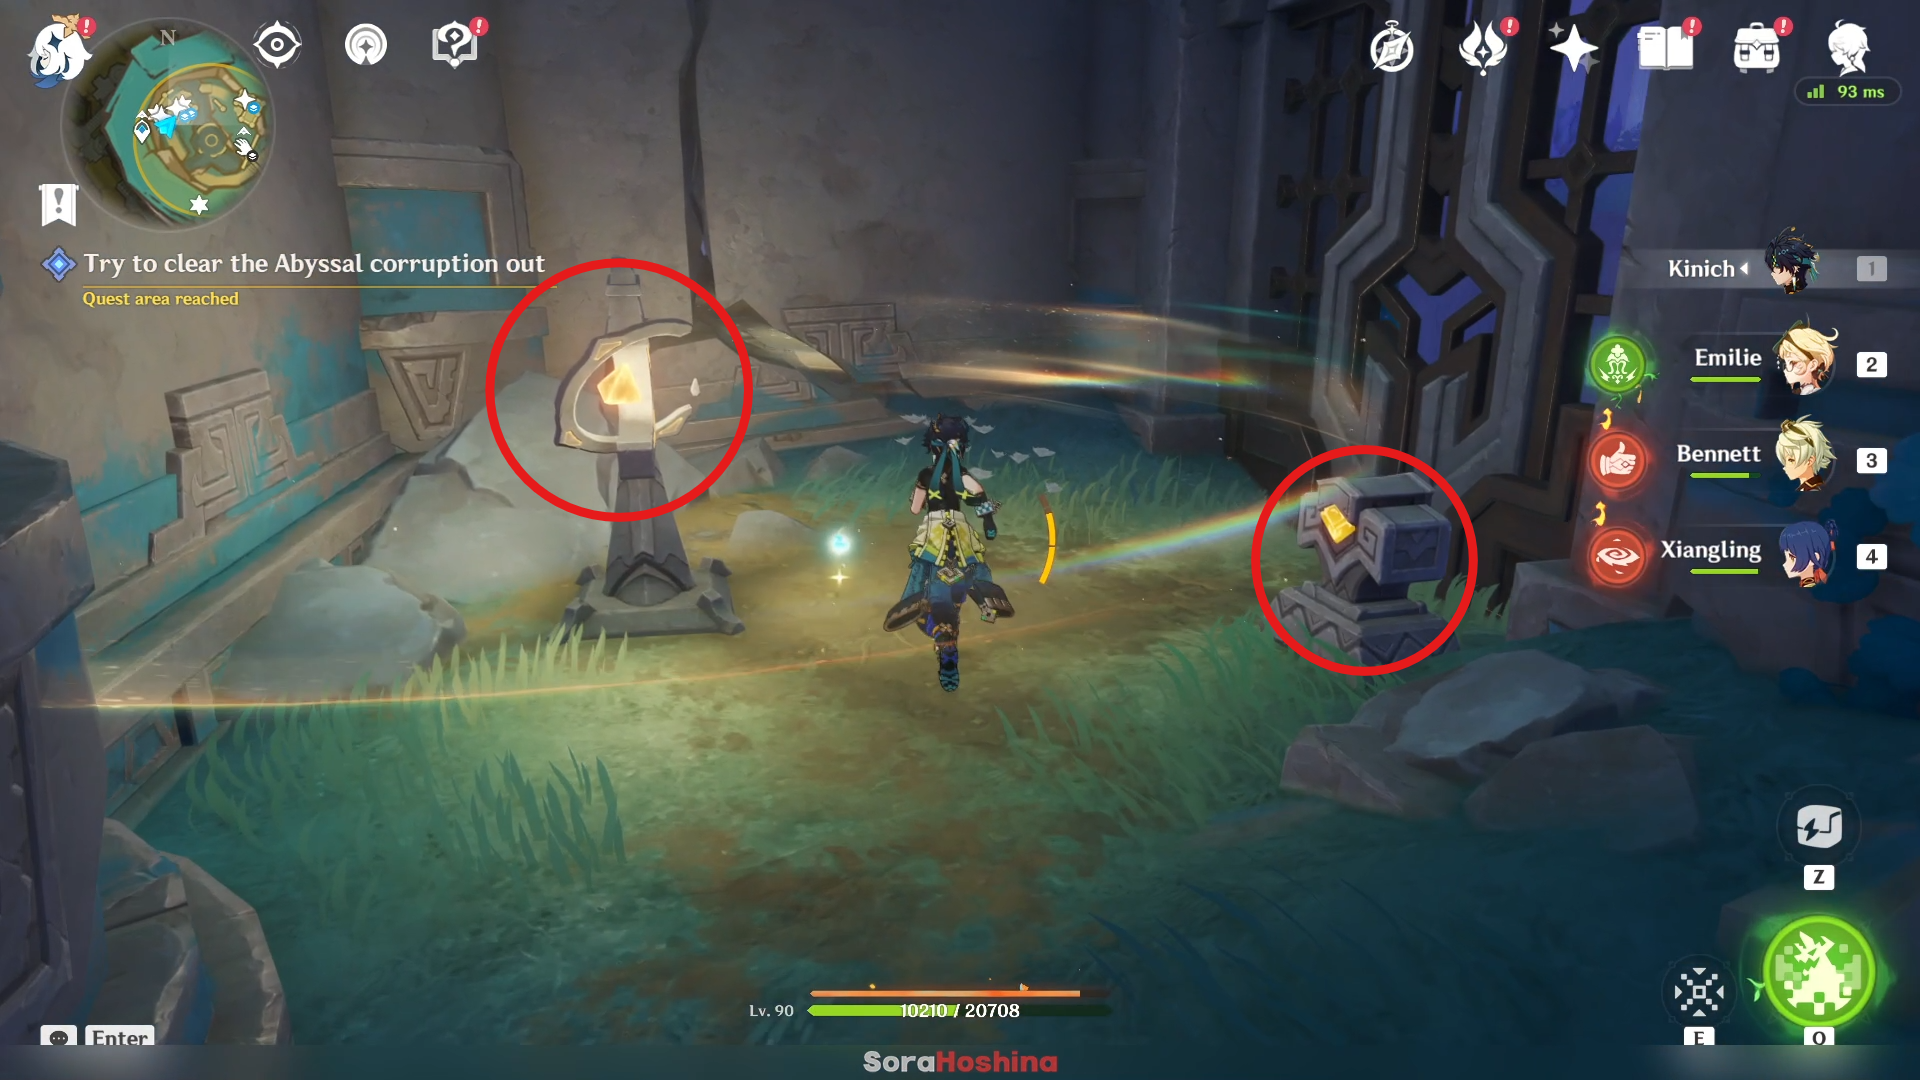
You will go downstairs and keep walking until you find another Radiant Fragment. Open the gate with the mechanism.
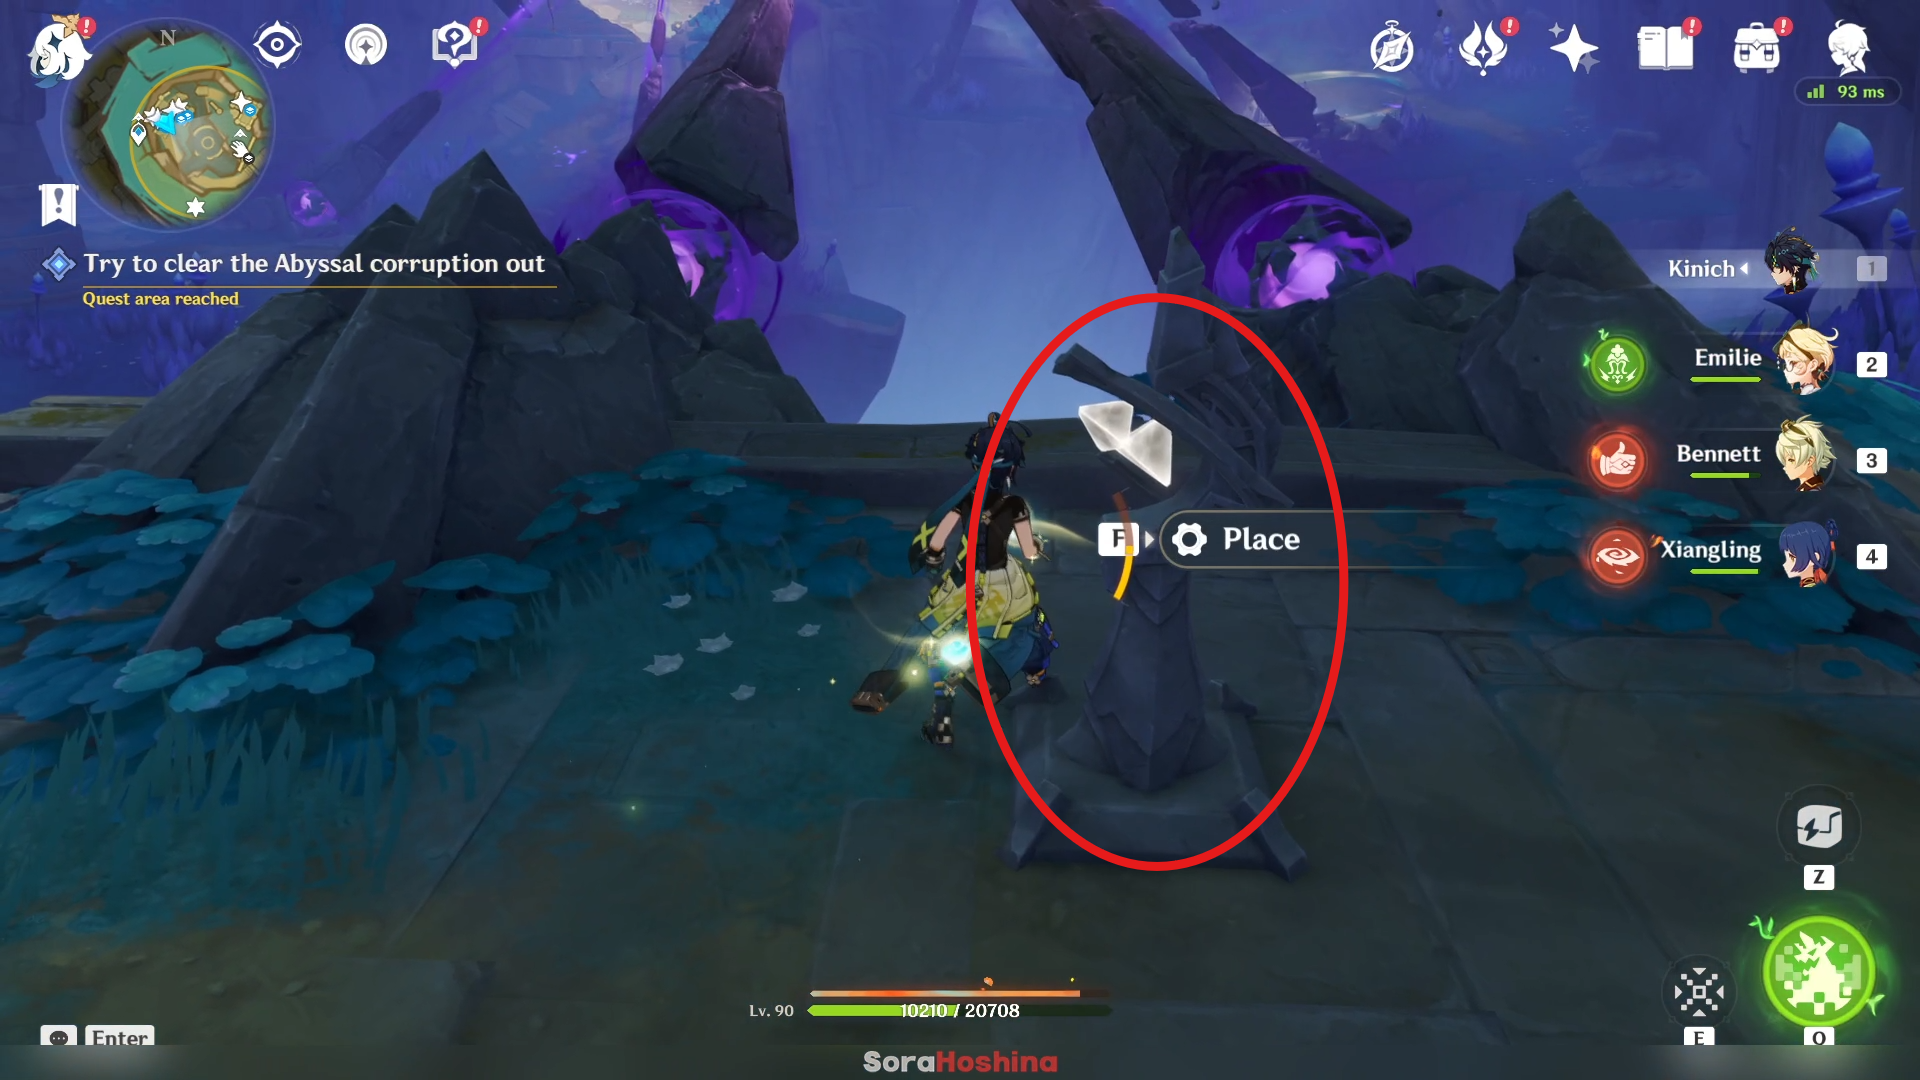
Climb back up and place the 2 Radiant Fragments in the specific Radiant Pillar here.
Third Malignant Abyssal Blight
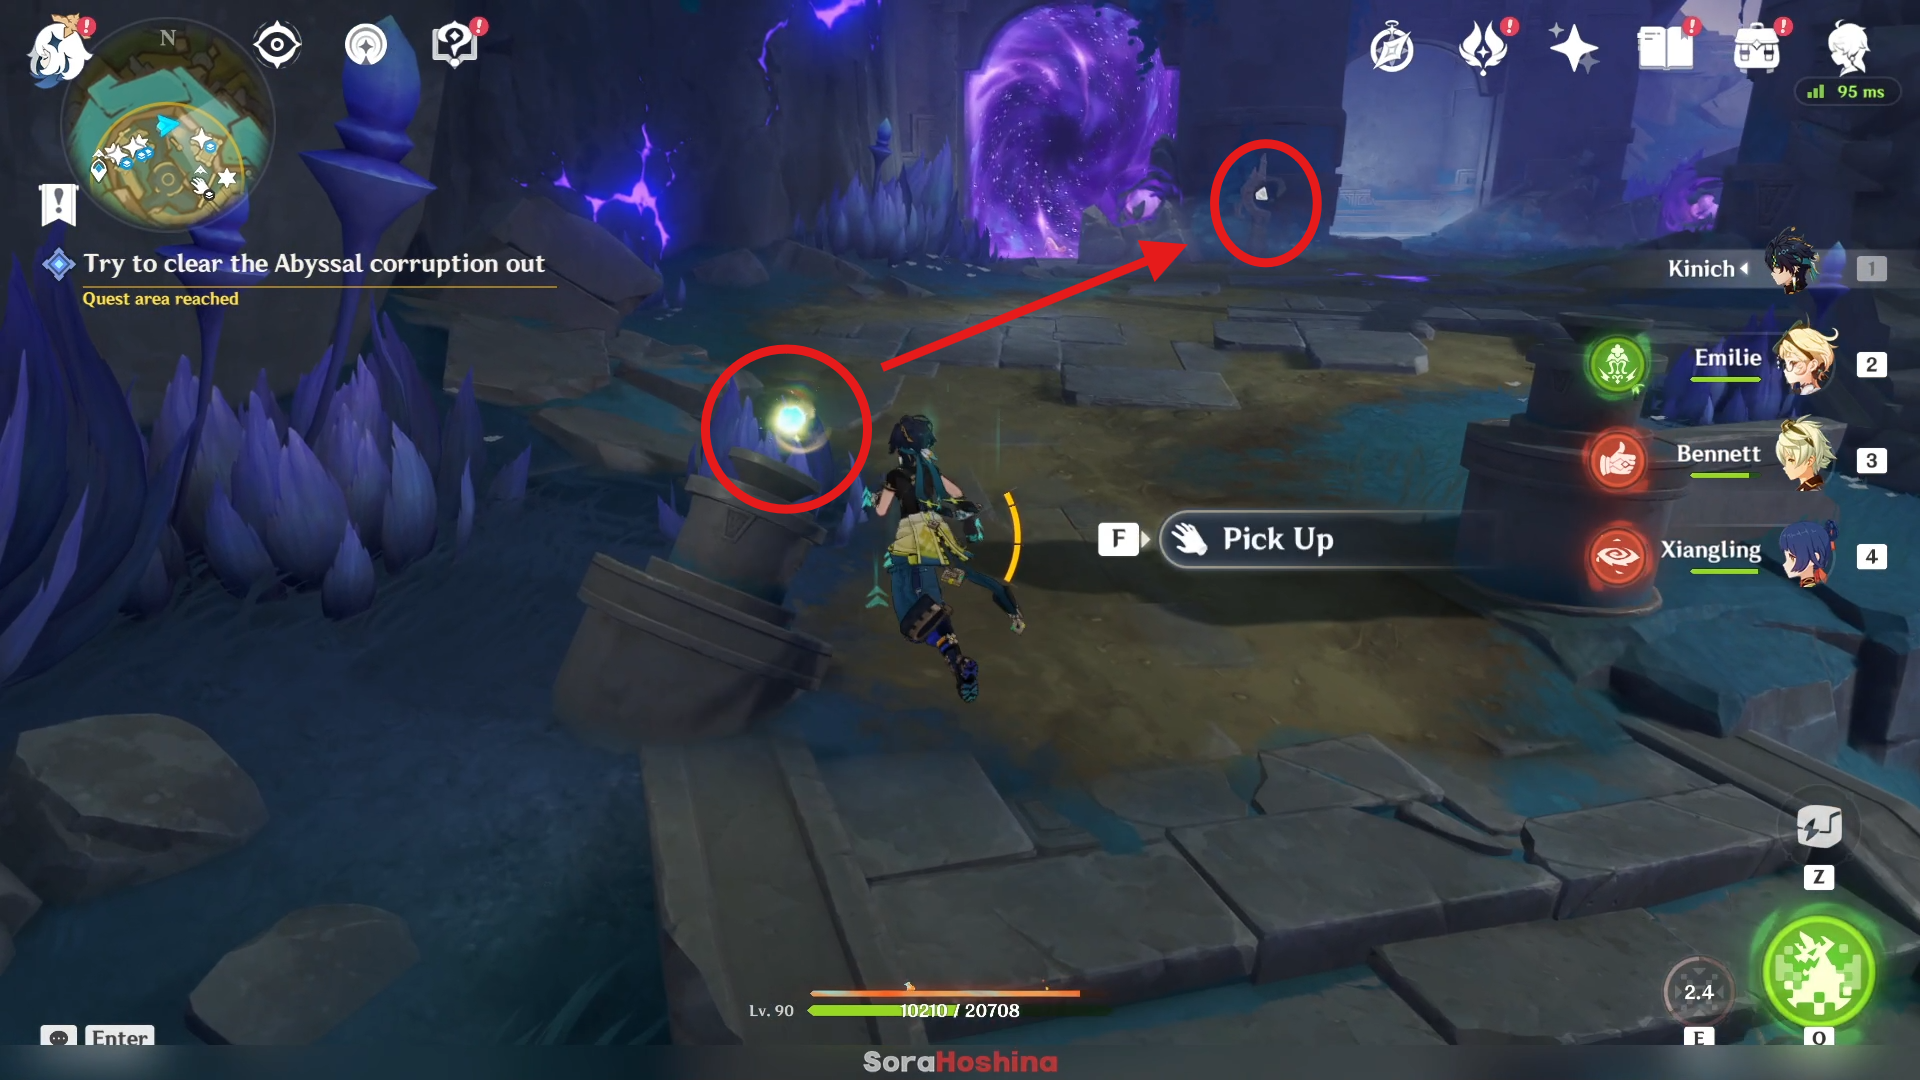
For the last puzzle, take the Radiant Fragment that were placed on a small altar and place it in the Radiant Pillar nearby. The vortex will disappear and you can go in there.
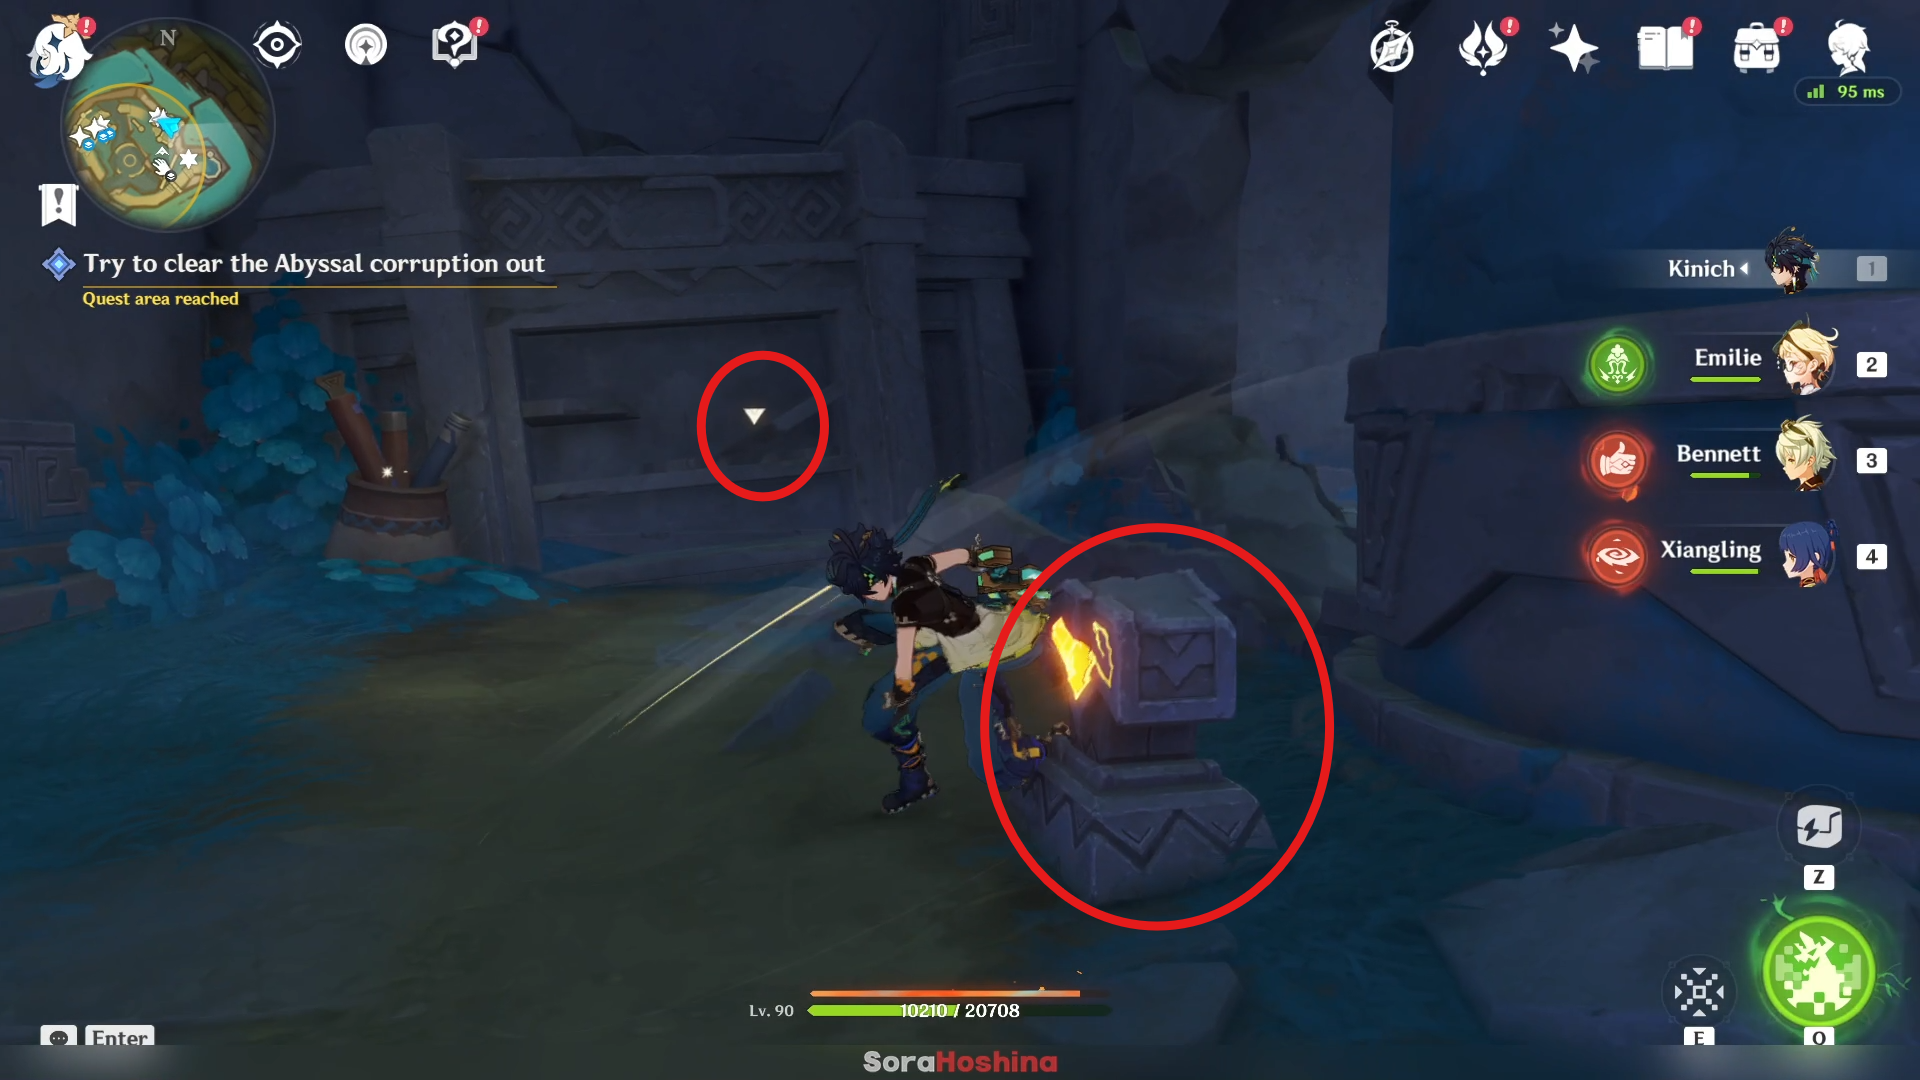
Once you're down there, take the Rust-Spotted Key on the cabinet before activating the elevator to get back up.
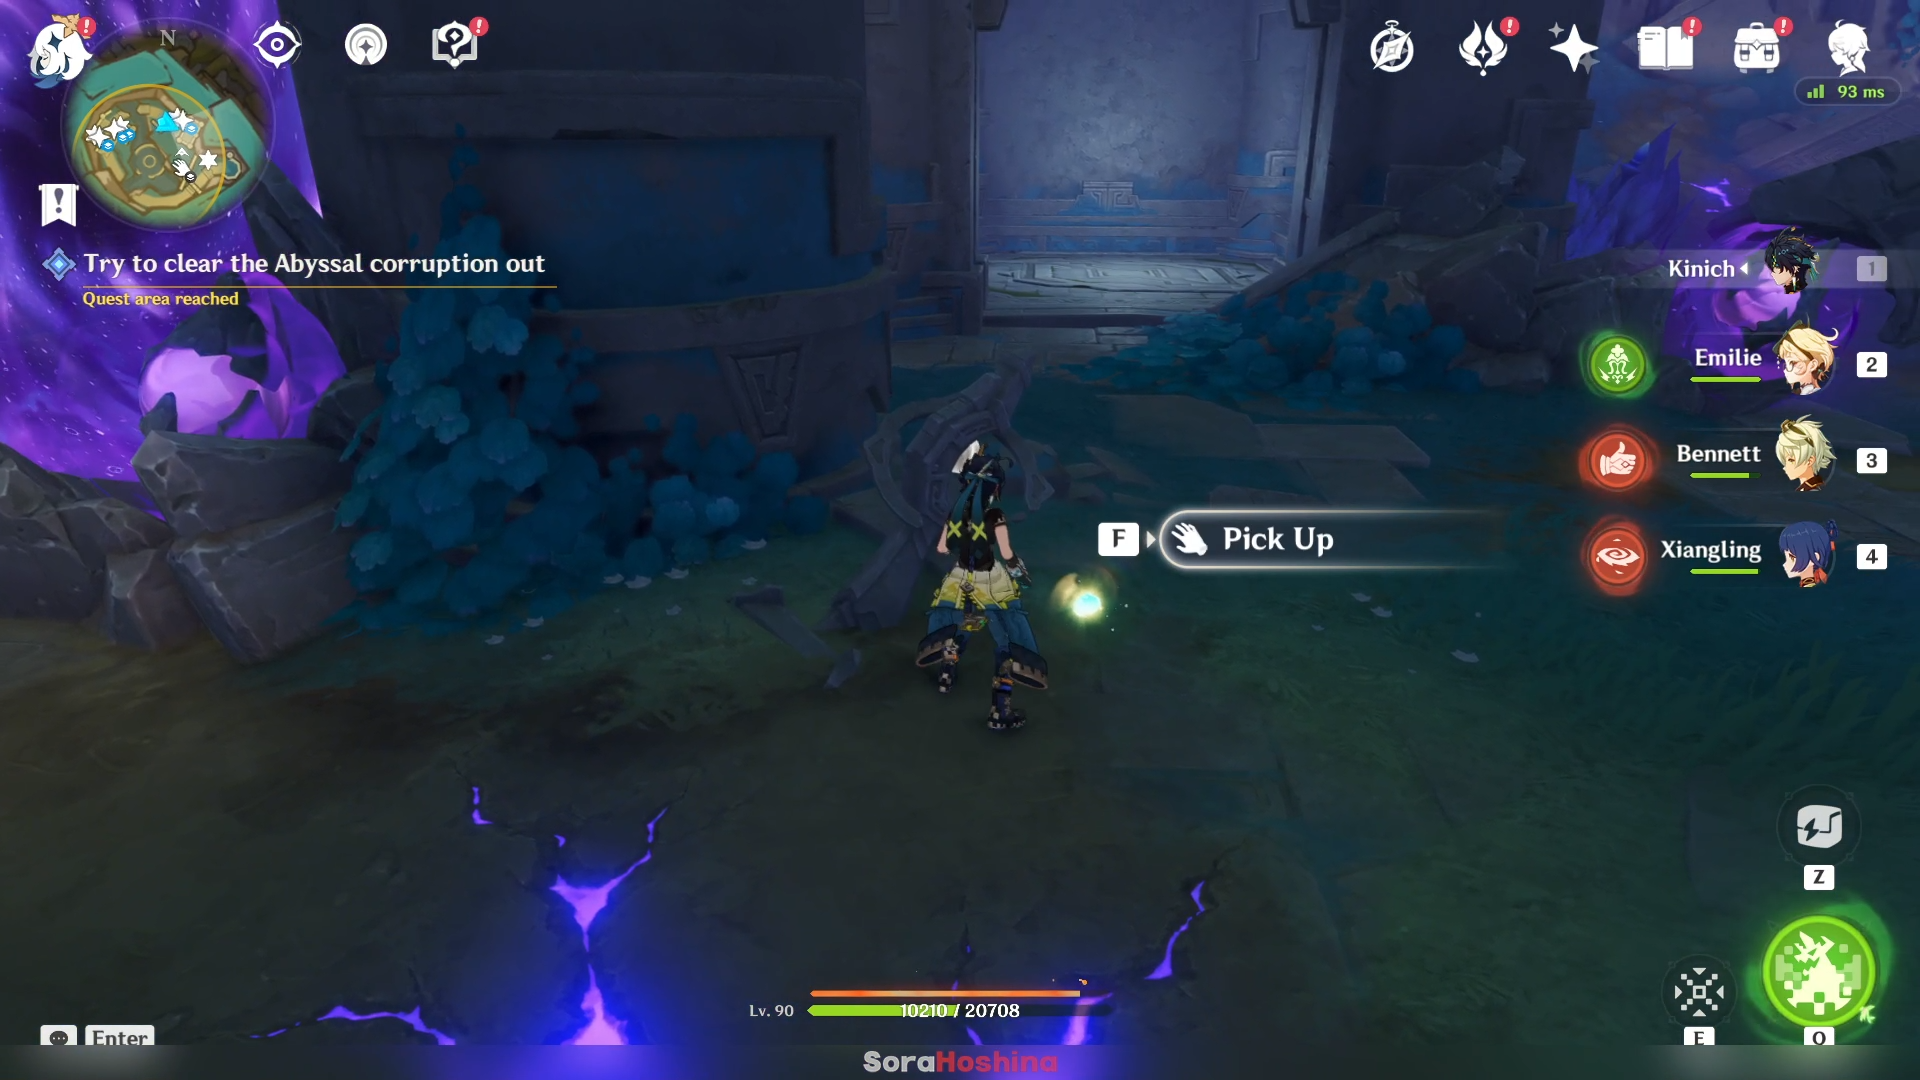
Once you're up there, pick up the previous Radiant Fragment that you already put in a pillar (a Hilichurl broke this pillar down).
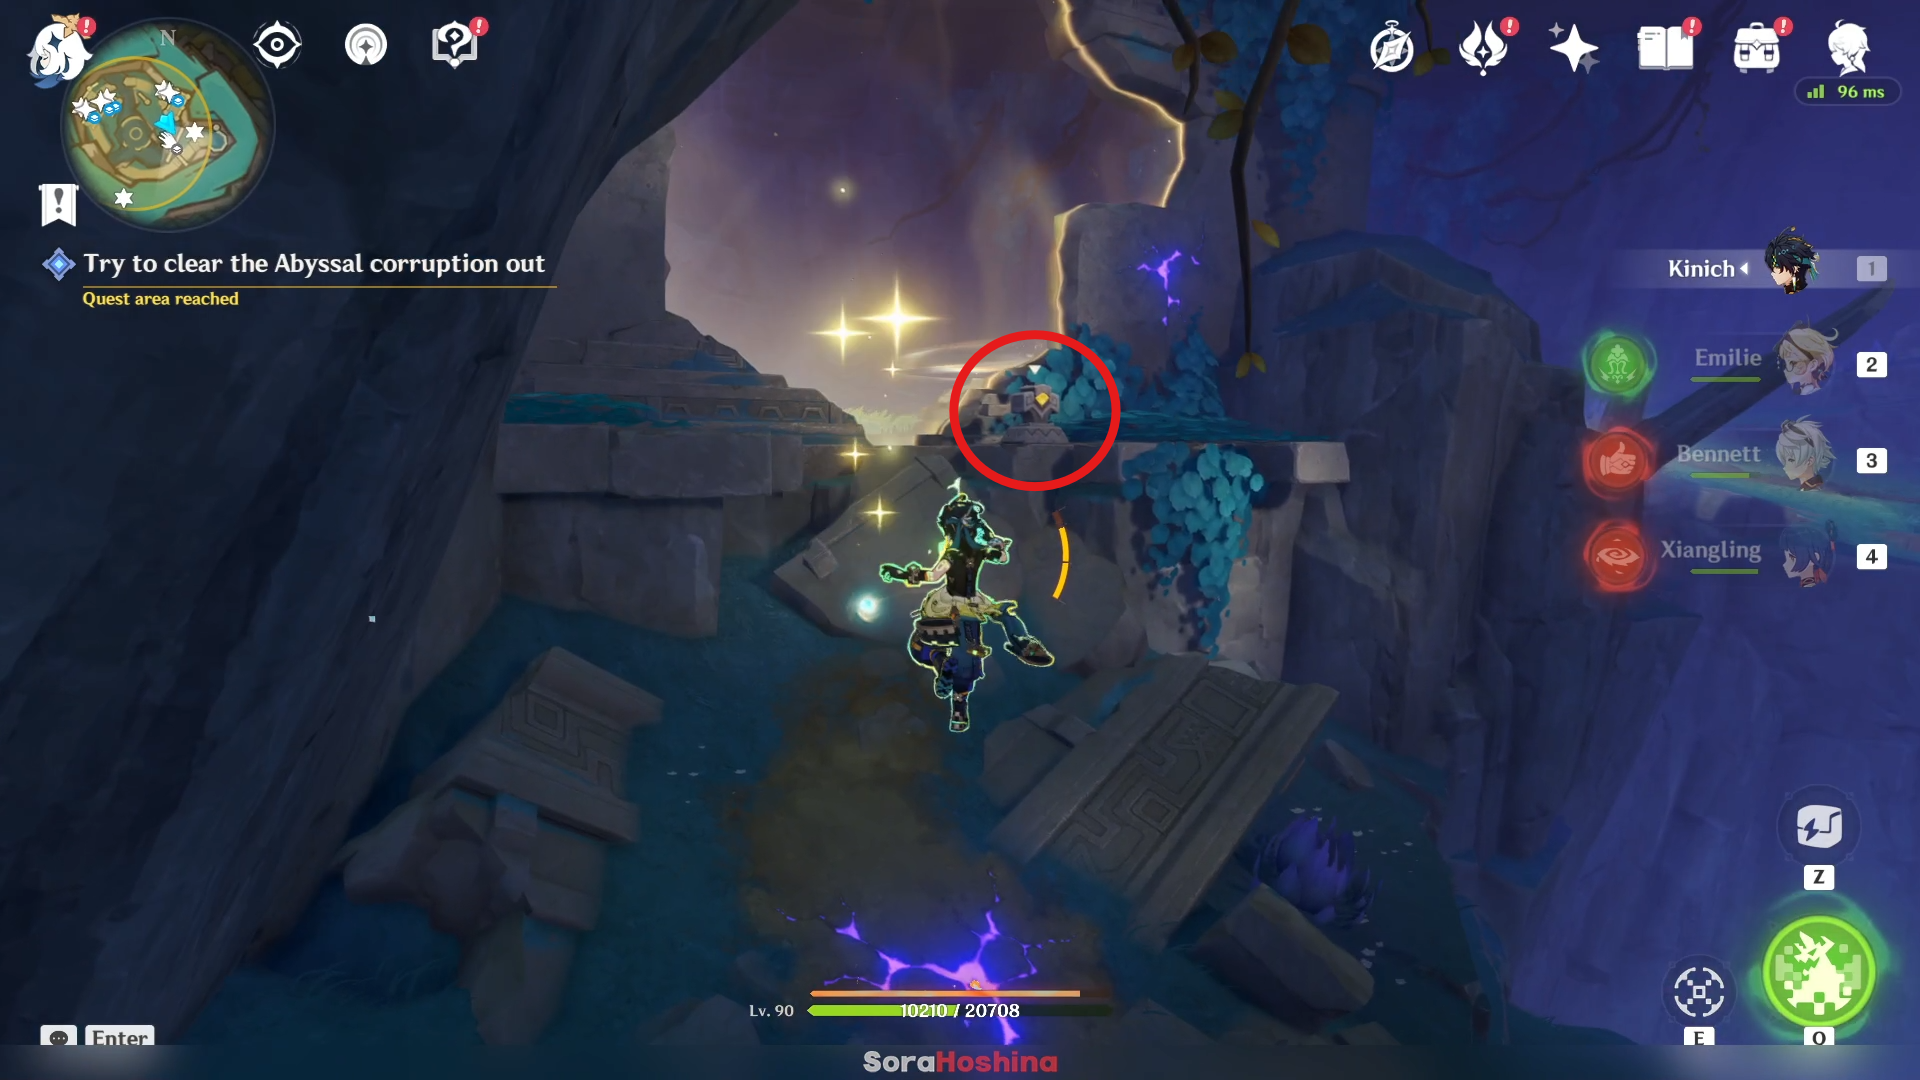
Then go further ahead to activate the switch (using the Rust-Spotted Key). This will make the golden barrier disappear and you can get to the first area where you stumble upon this puzzle.
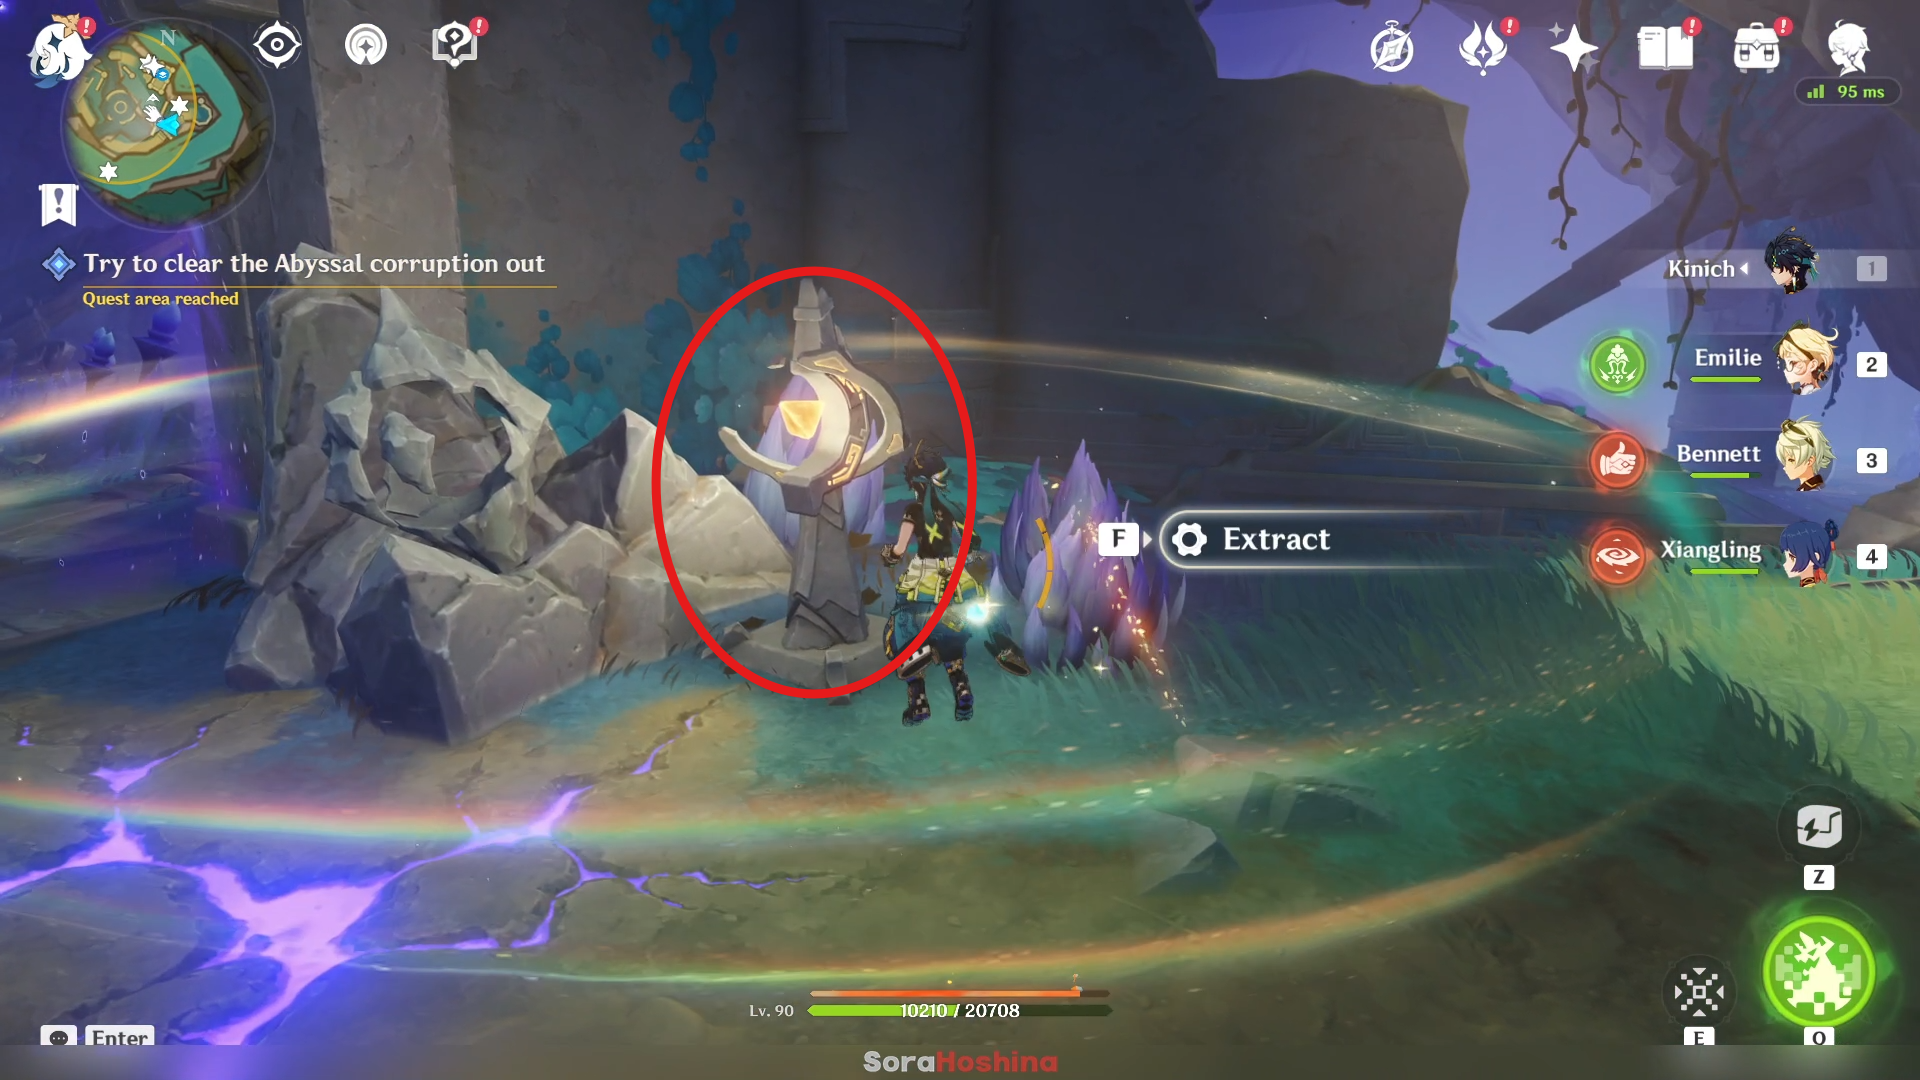
Extract the Radiant Fragment in the pillar here (remember that this fragment is the first one you place in this ruin).
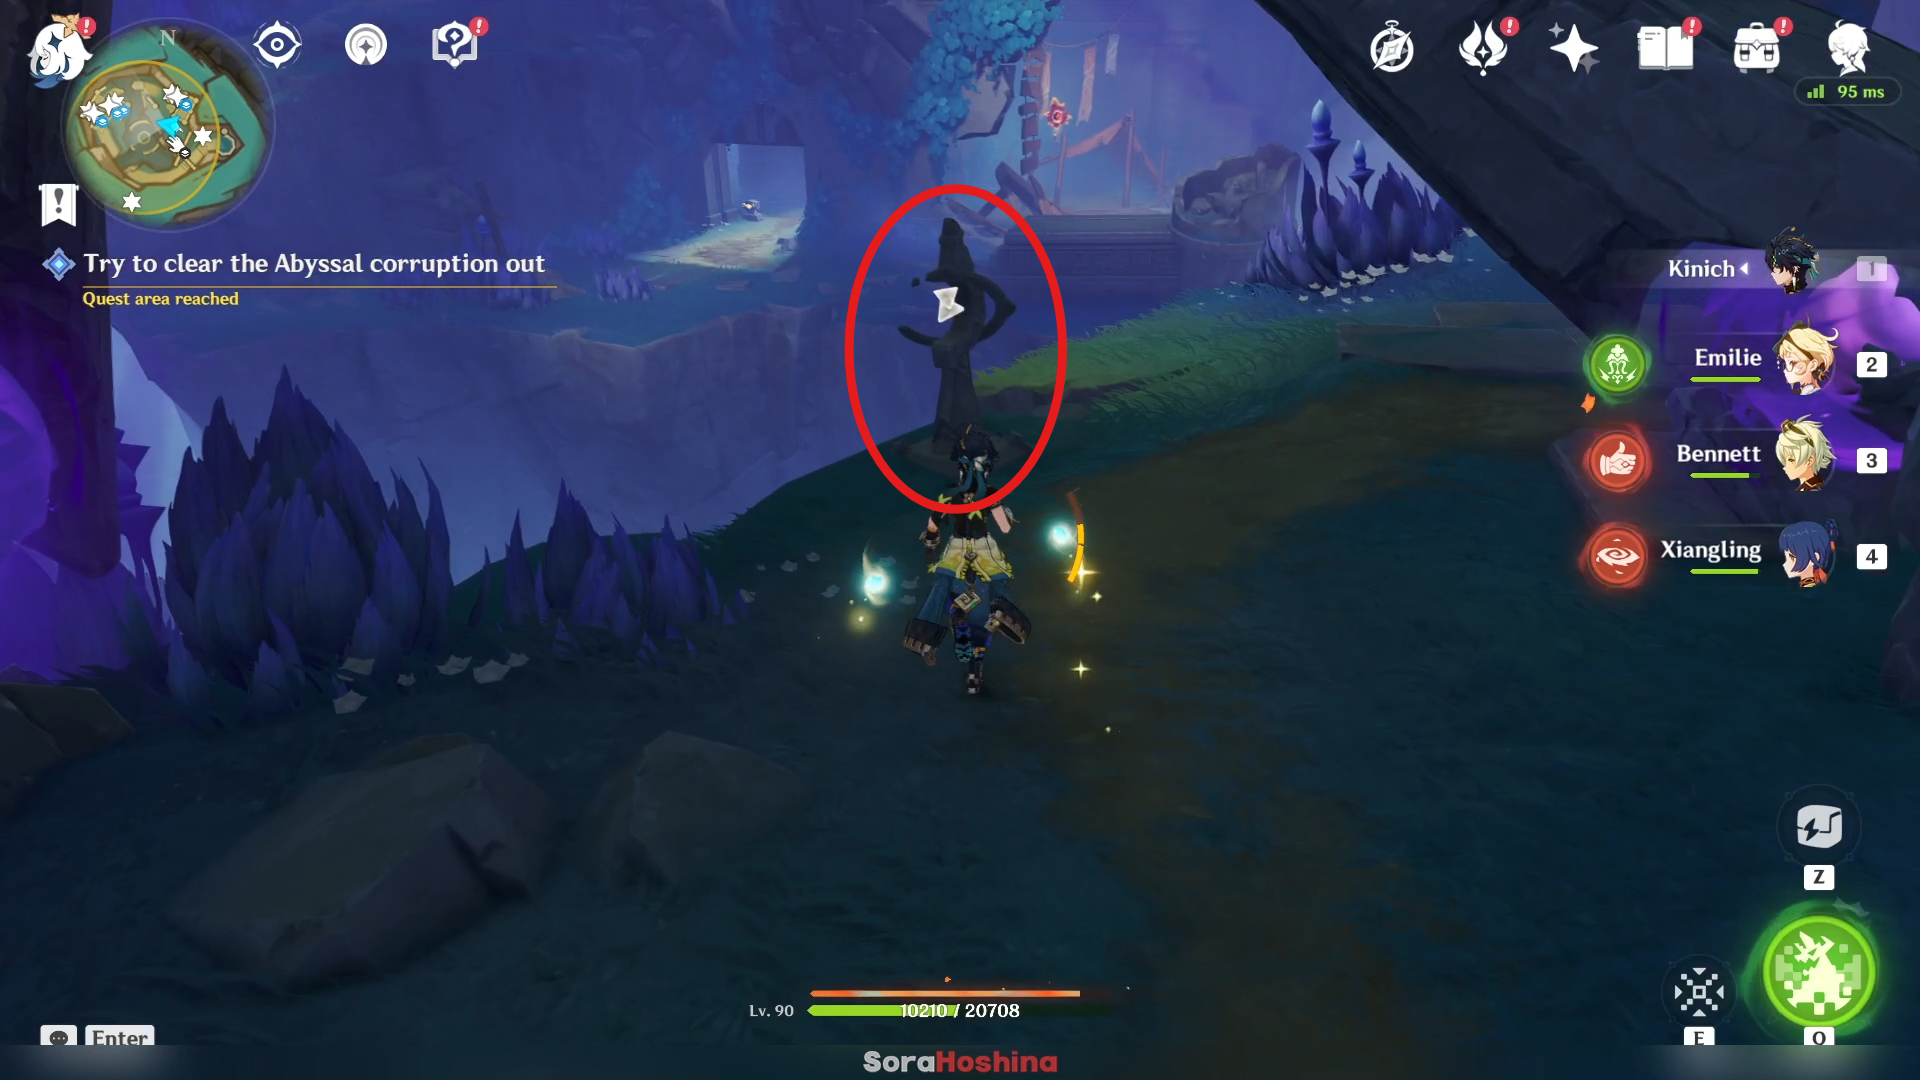
Now go back to place the 2 Radiant Fragments for the last Pillar you need to light up. After that, just follow the quest navigation until you need to go back to the surface again.
To the Sky-Road
Find the Altar of Primal Flame
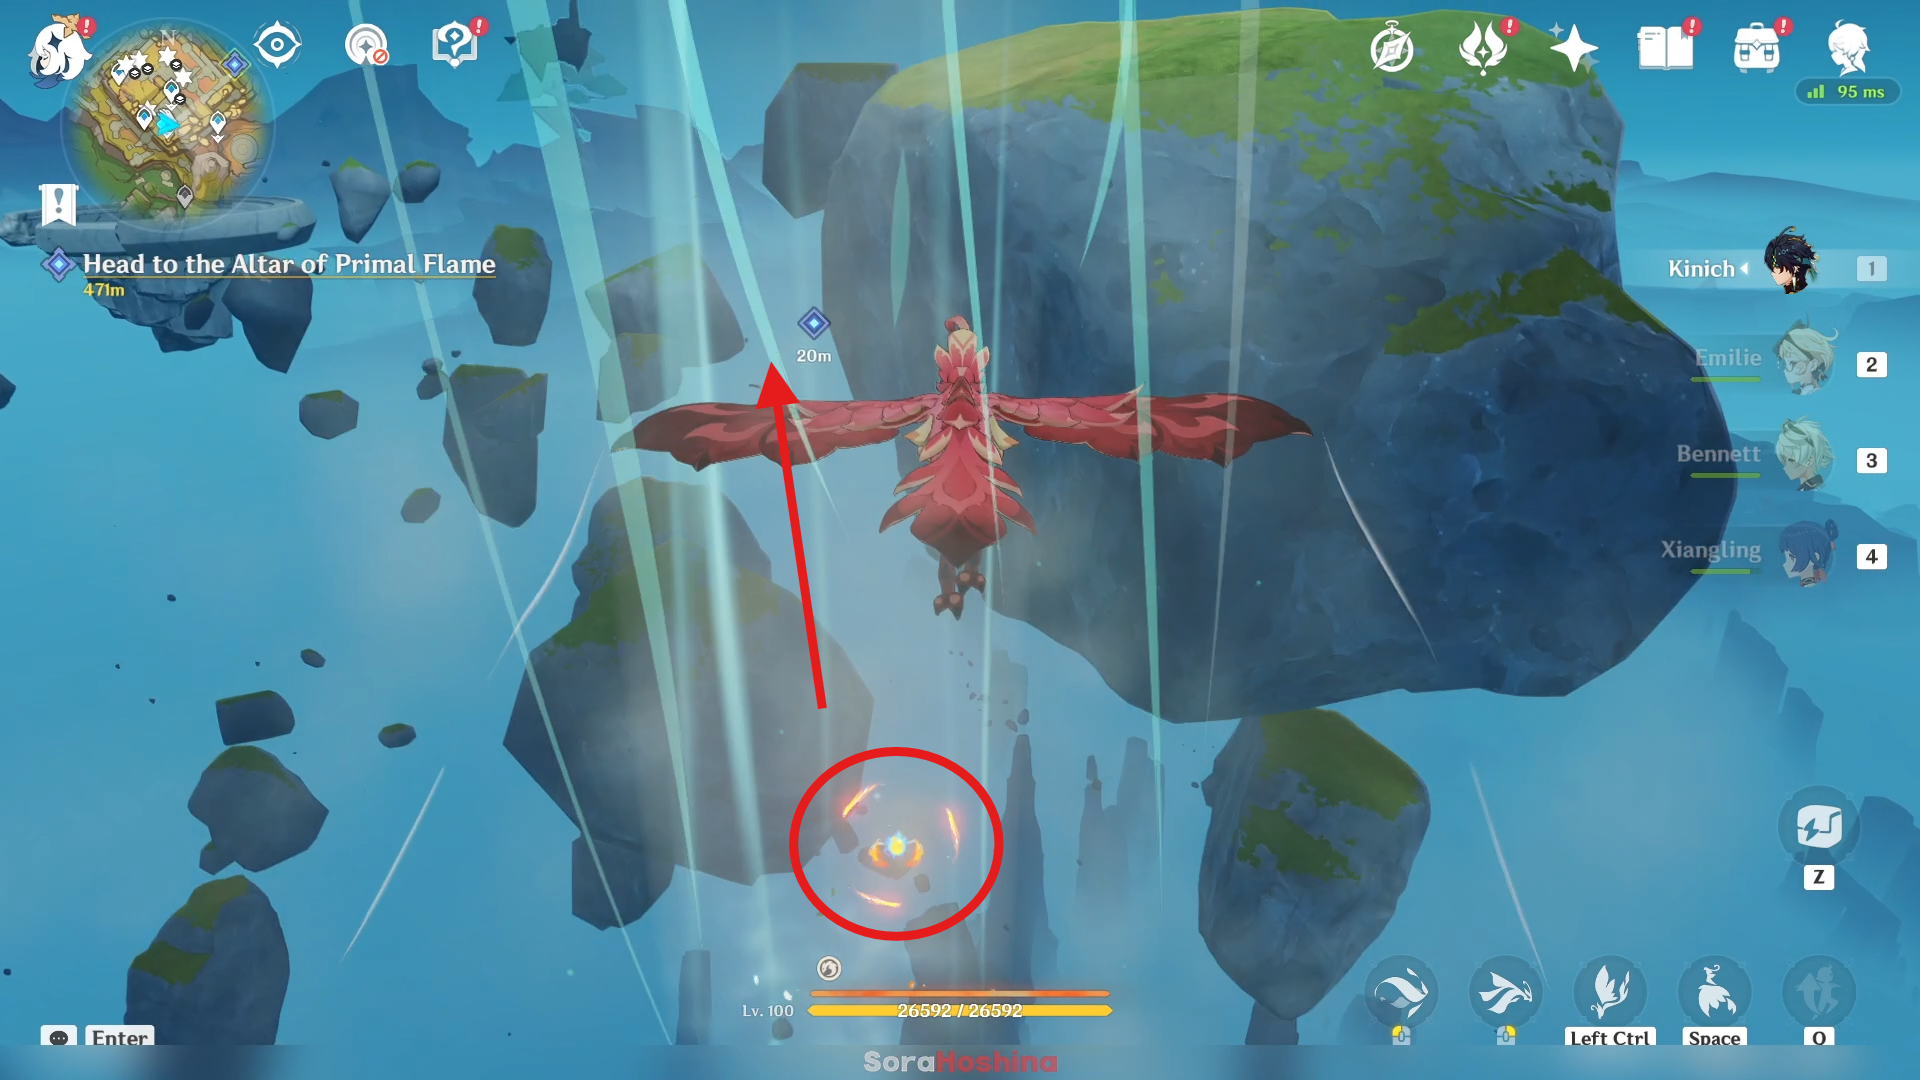
After talking to Bona, you need to indwell a Qucusaur (or use Chasca) to follow her in gliding. Just follow Bona while getting nearby Scorchwind Conflux (getting this will make you enter a state of having full Phlogiston and not consuming any for a period of time).
The Other Side of the Sky
Find Bona with little Tepetlisaurus
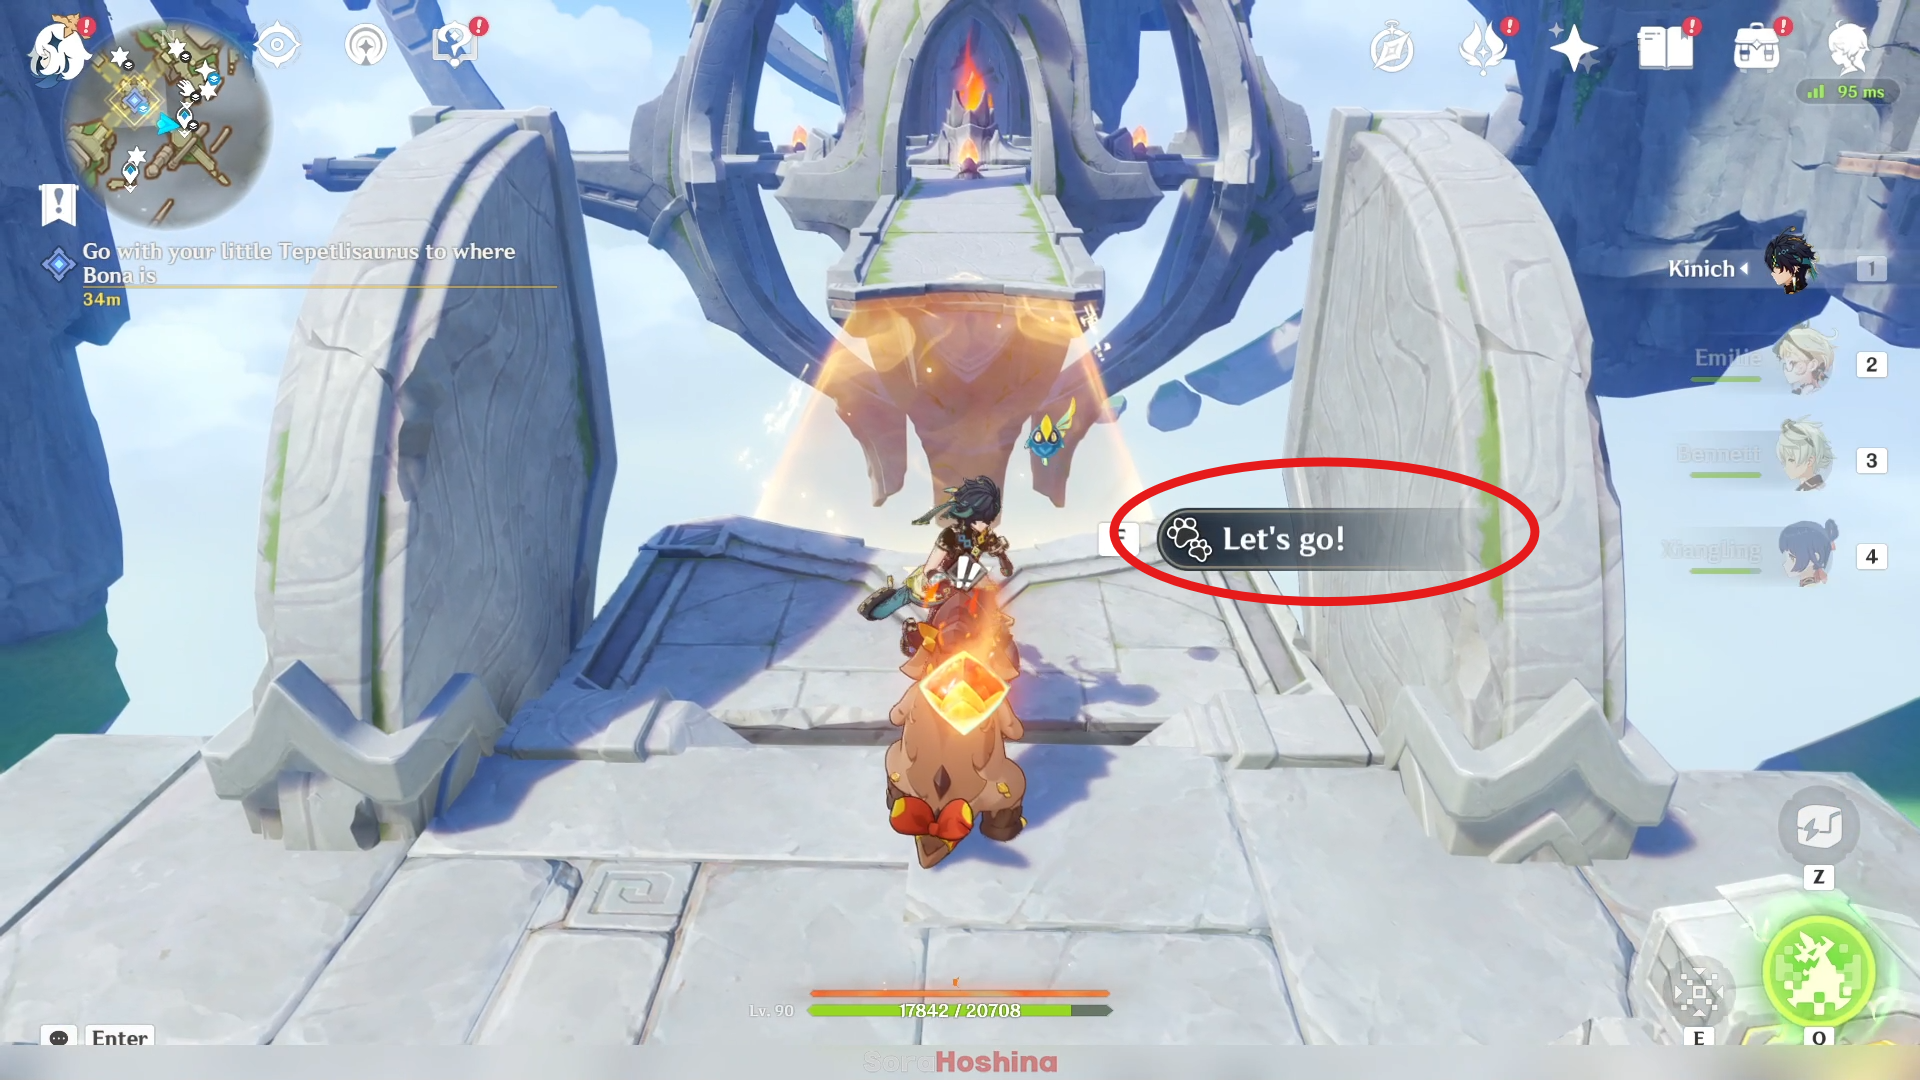
Once you reach Tonatiuh, go forward until you find Bona. There's a lot of bridge usage here so remember that you need to approach your Saurian and choose the option to let it cross the bridge.
The Flowing Primal Flame
Retrieve the Firestone on the northeastern floating island
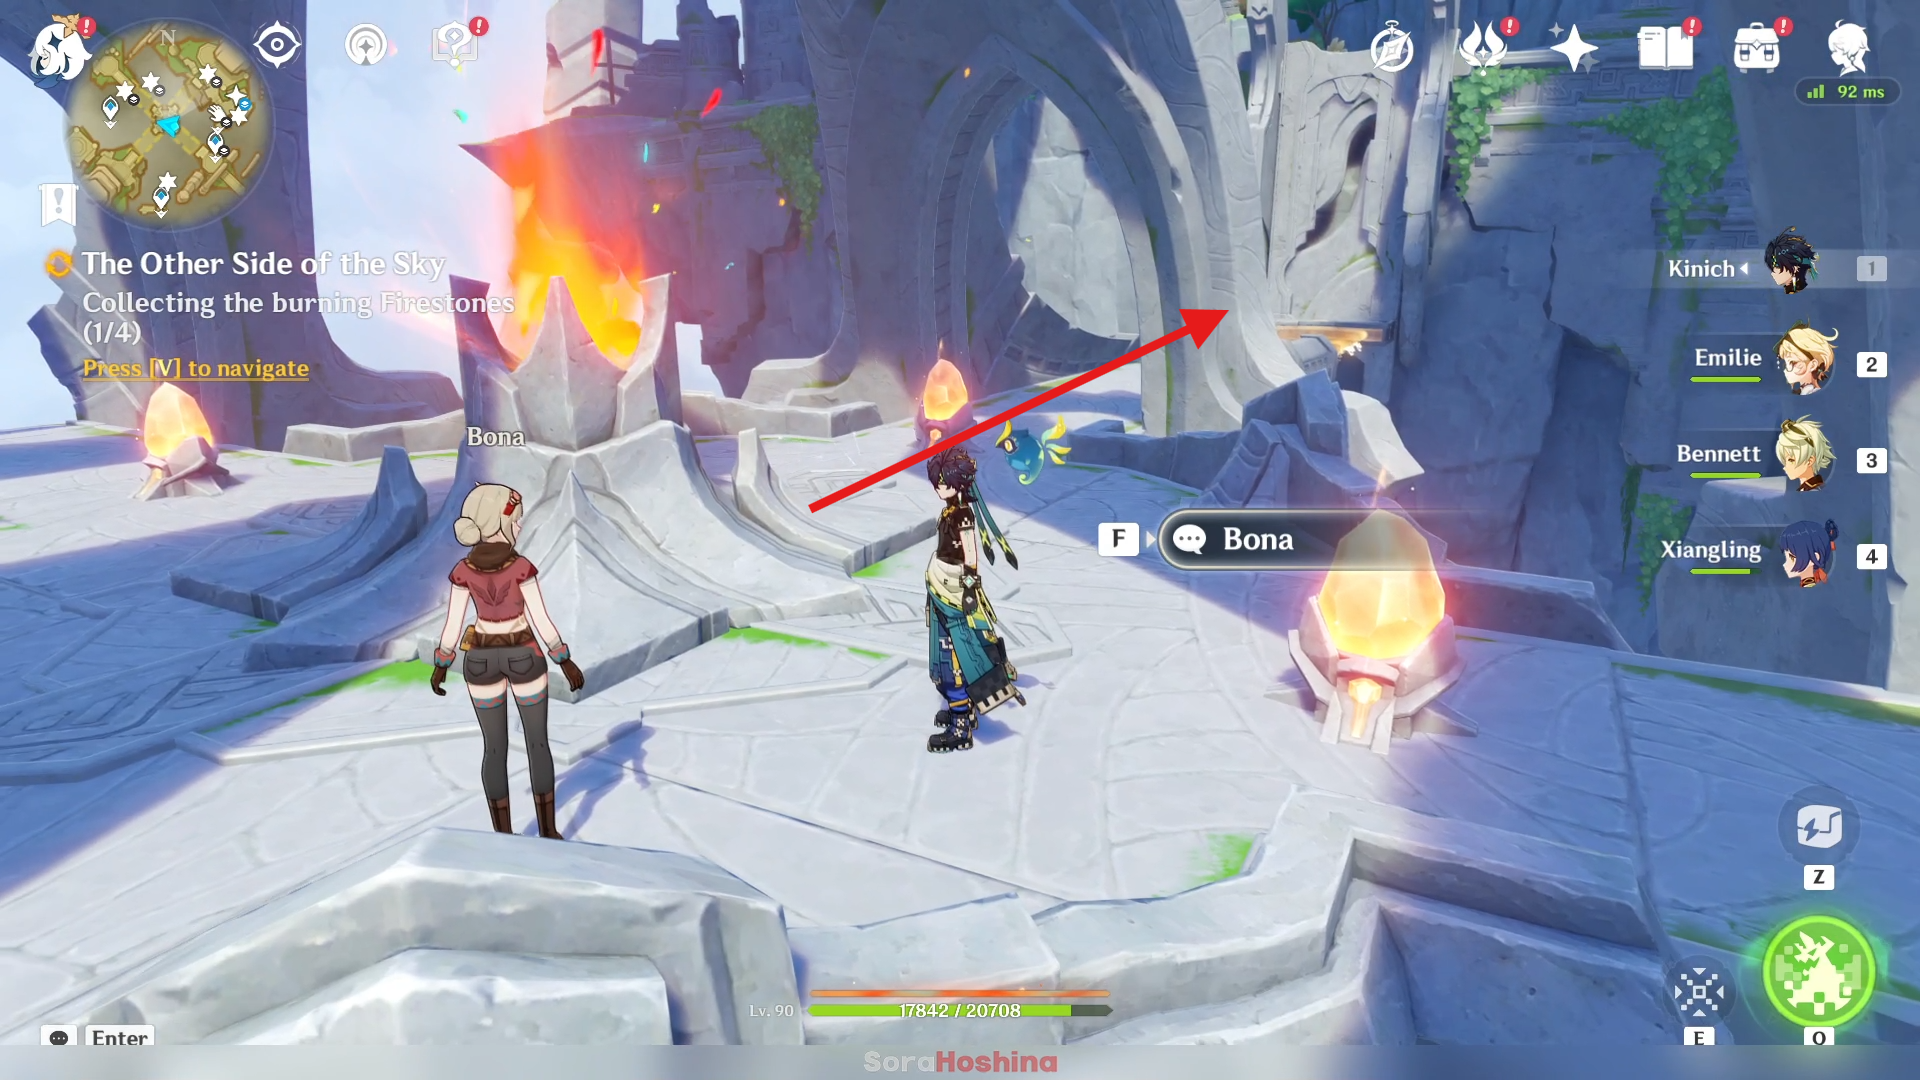
You need to find 3 burning Firestones using the bridges. Now this is a puzzle that is pretty confusing. So follow the guide below and don't tap everything.
First of all, go to the northeast part where Bona already let the bridge down.
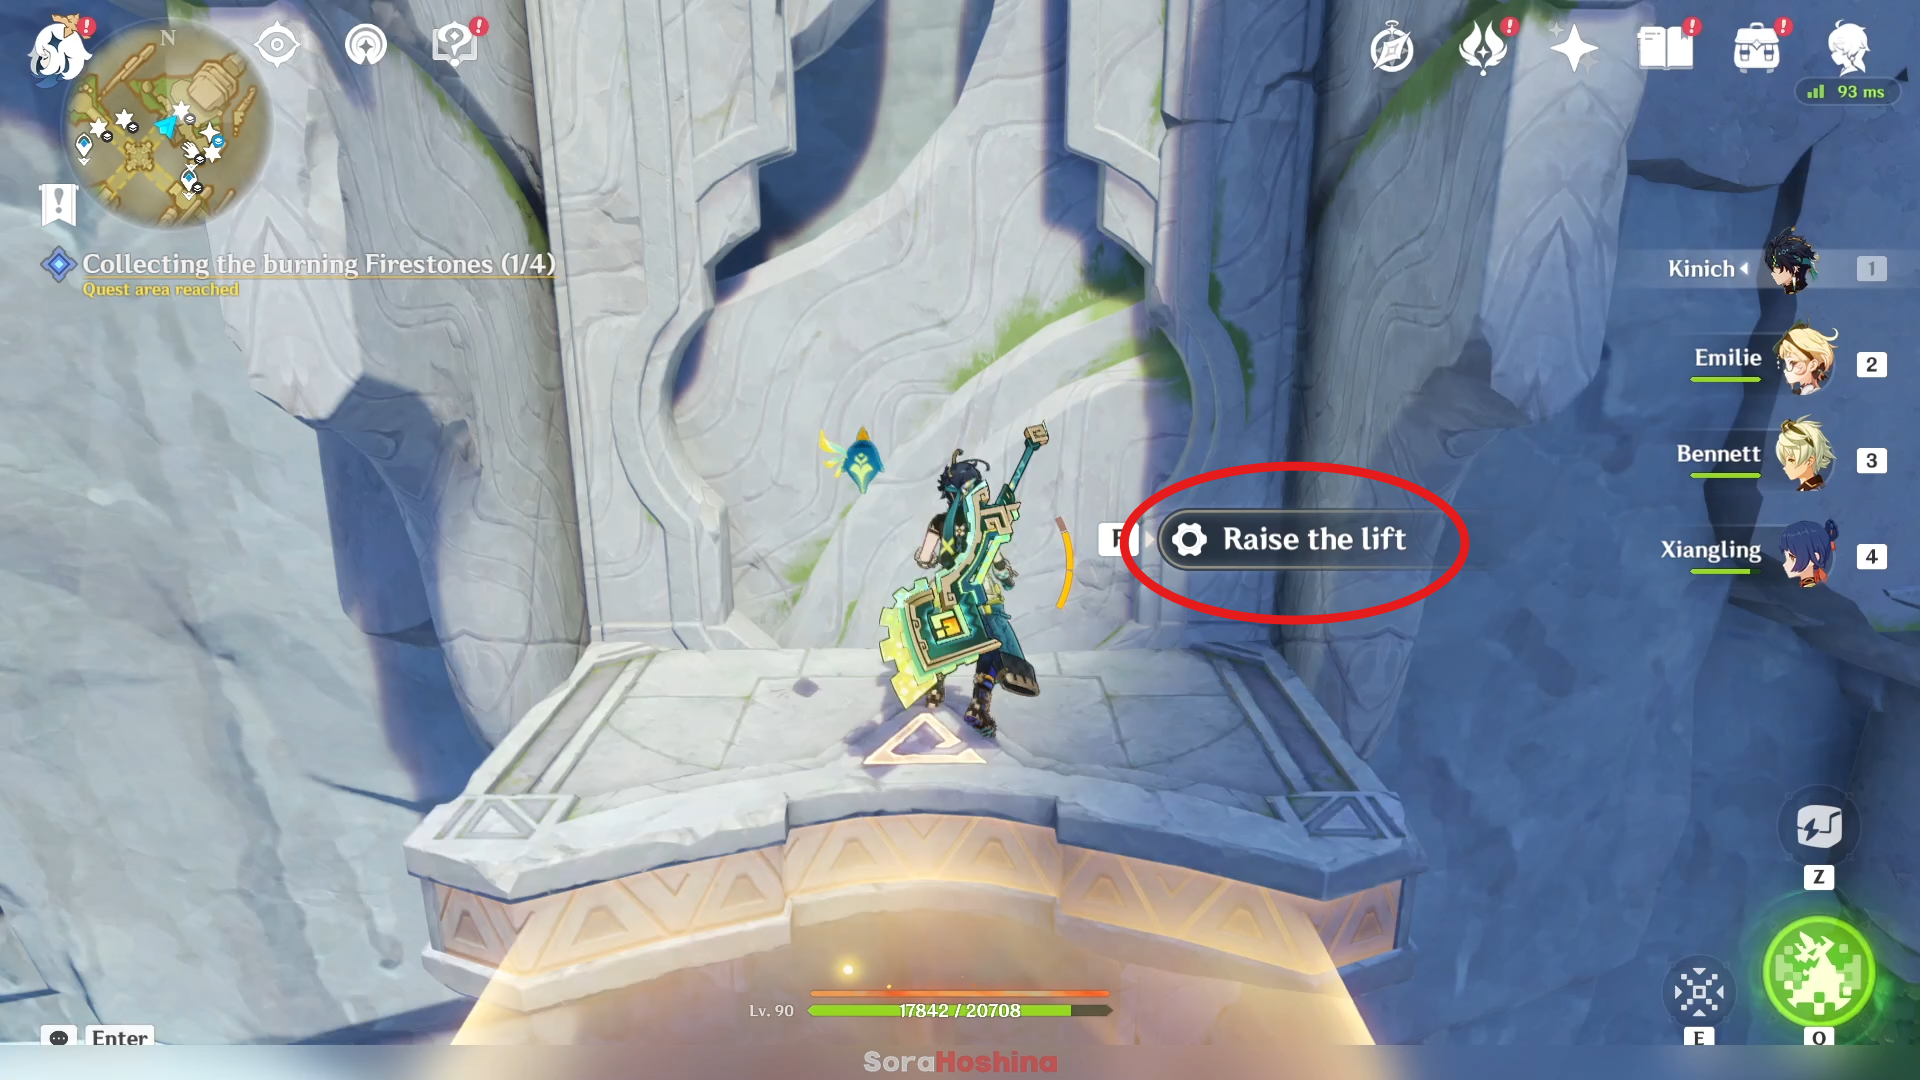
Once you're at the end, choose to raise the lift. Once you're up there, follow your Saurian until it enter a locked door.
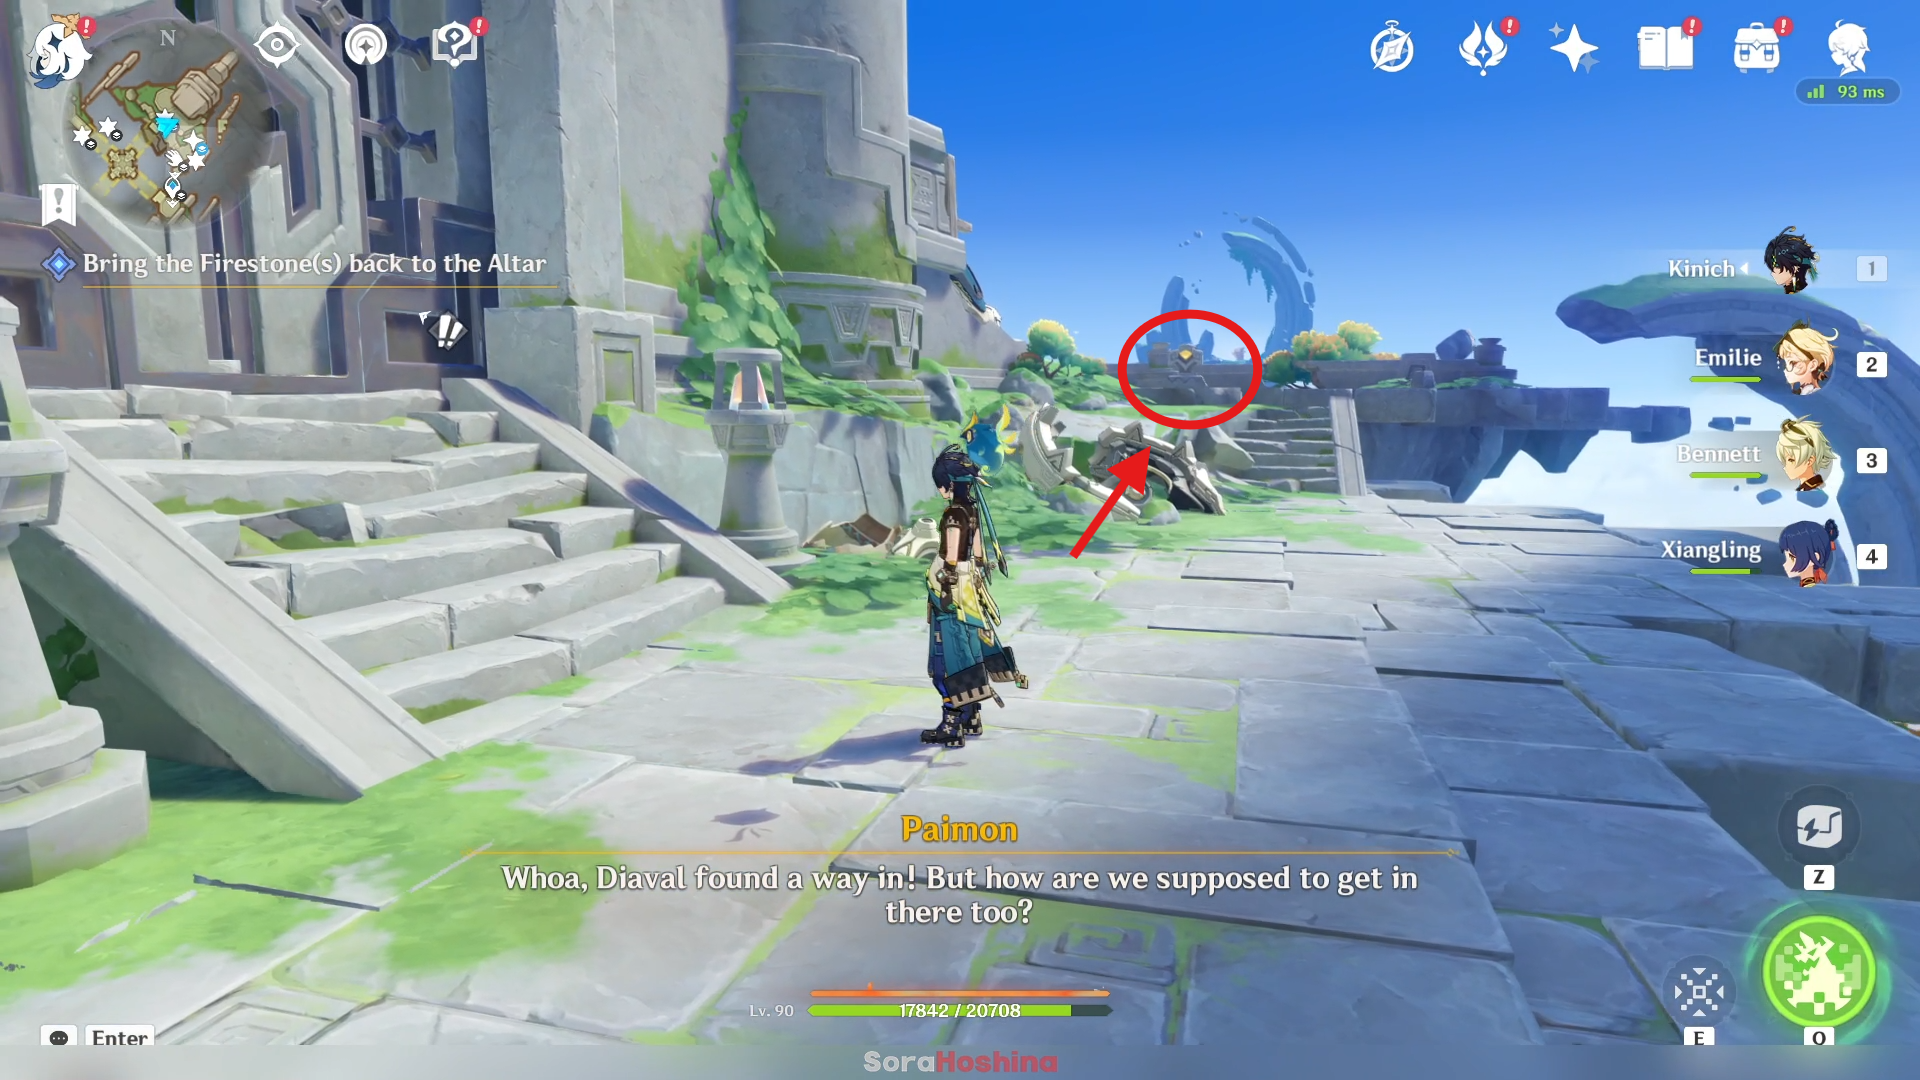
Obviously you can't enter the room so go to the switch not far from the door and activate it. You can go to the rooftop.
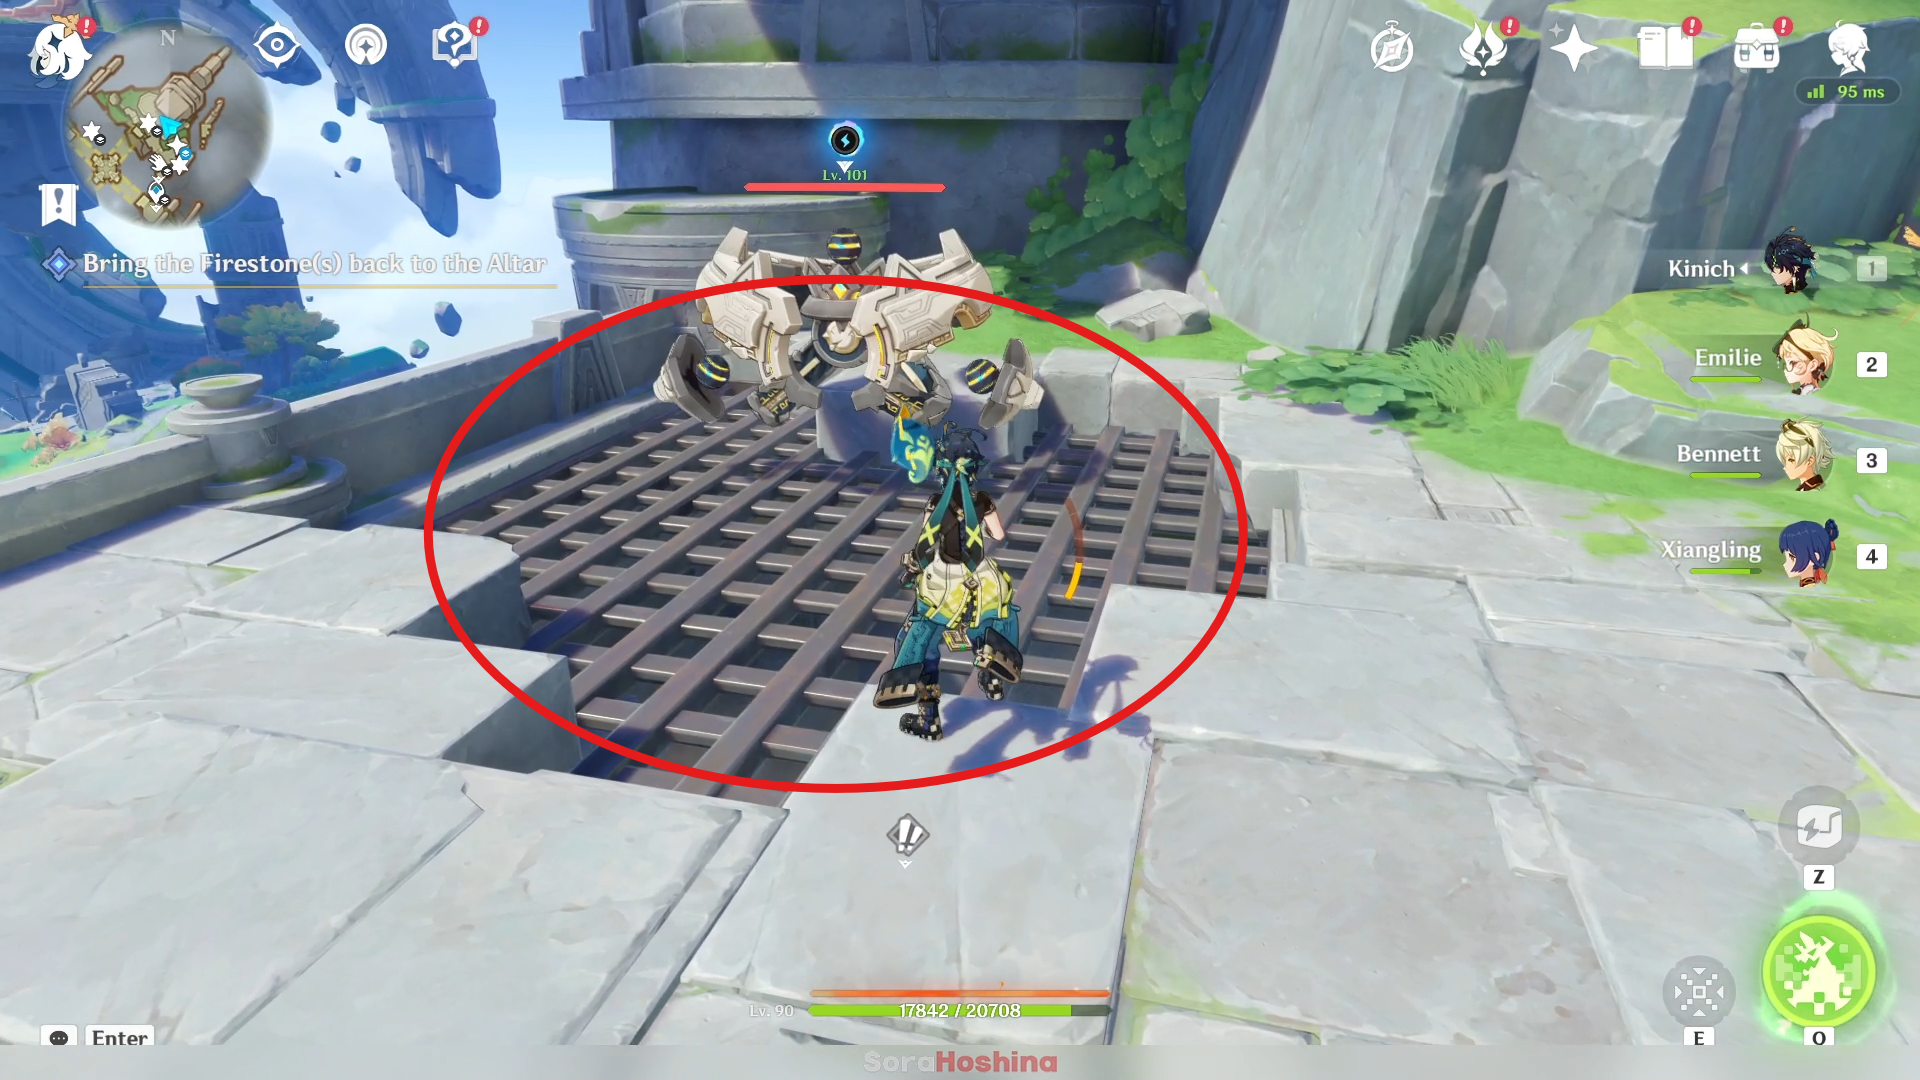
Once you're there, go to the left side and the rock will crumble down, alongside an enemy. Defeat the enemy to unlock another switch.
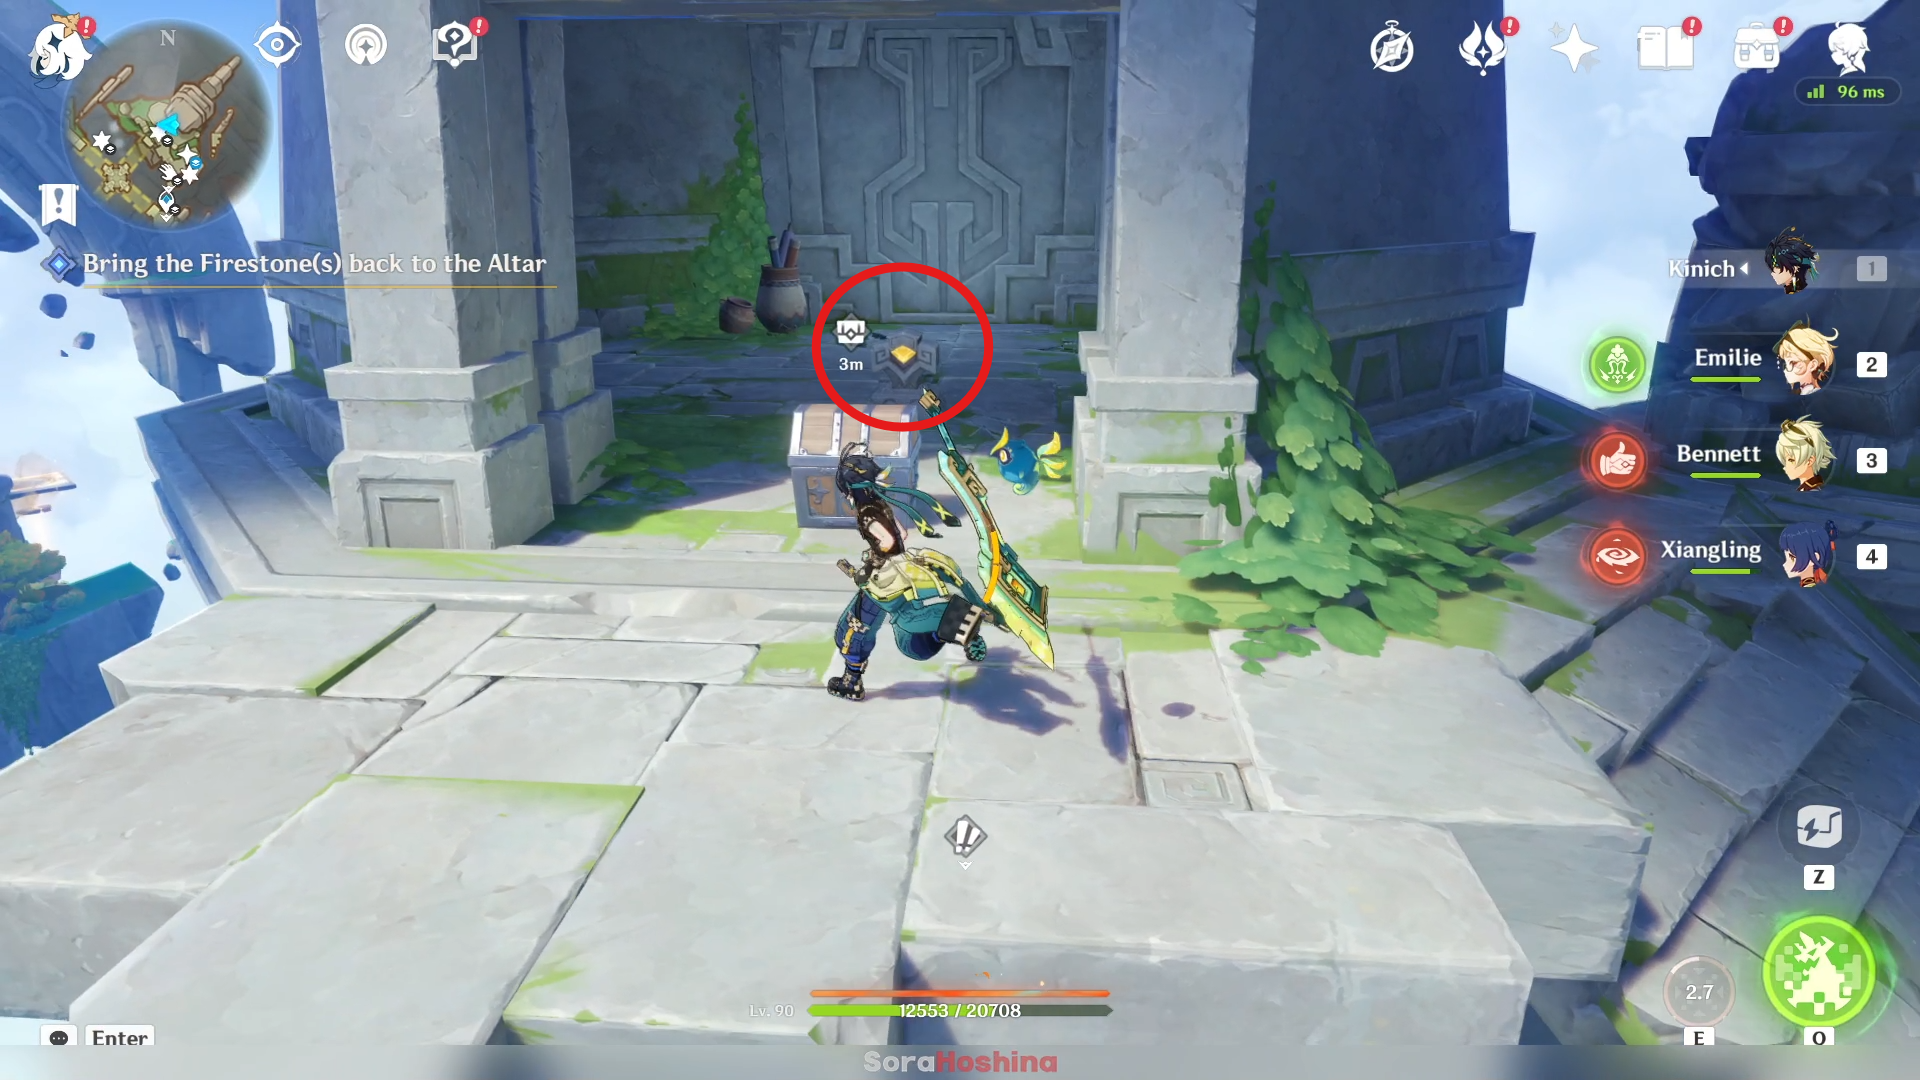
After the enemy is defeated, a treasure chest will appear on top of the stairs. Behind that chest is a switch. Activate it to open the gate to enter the room.
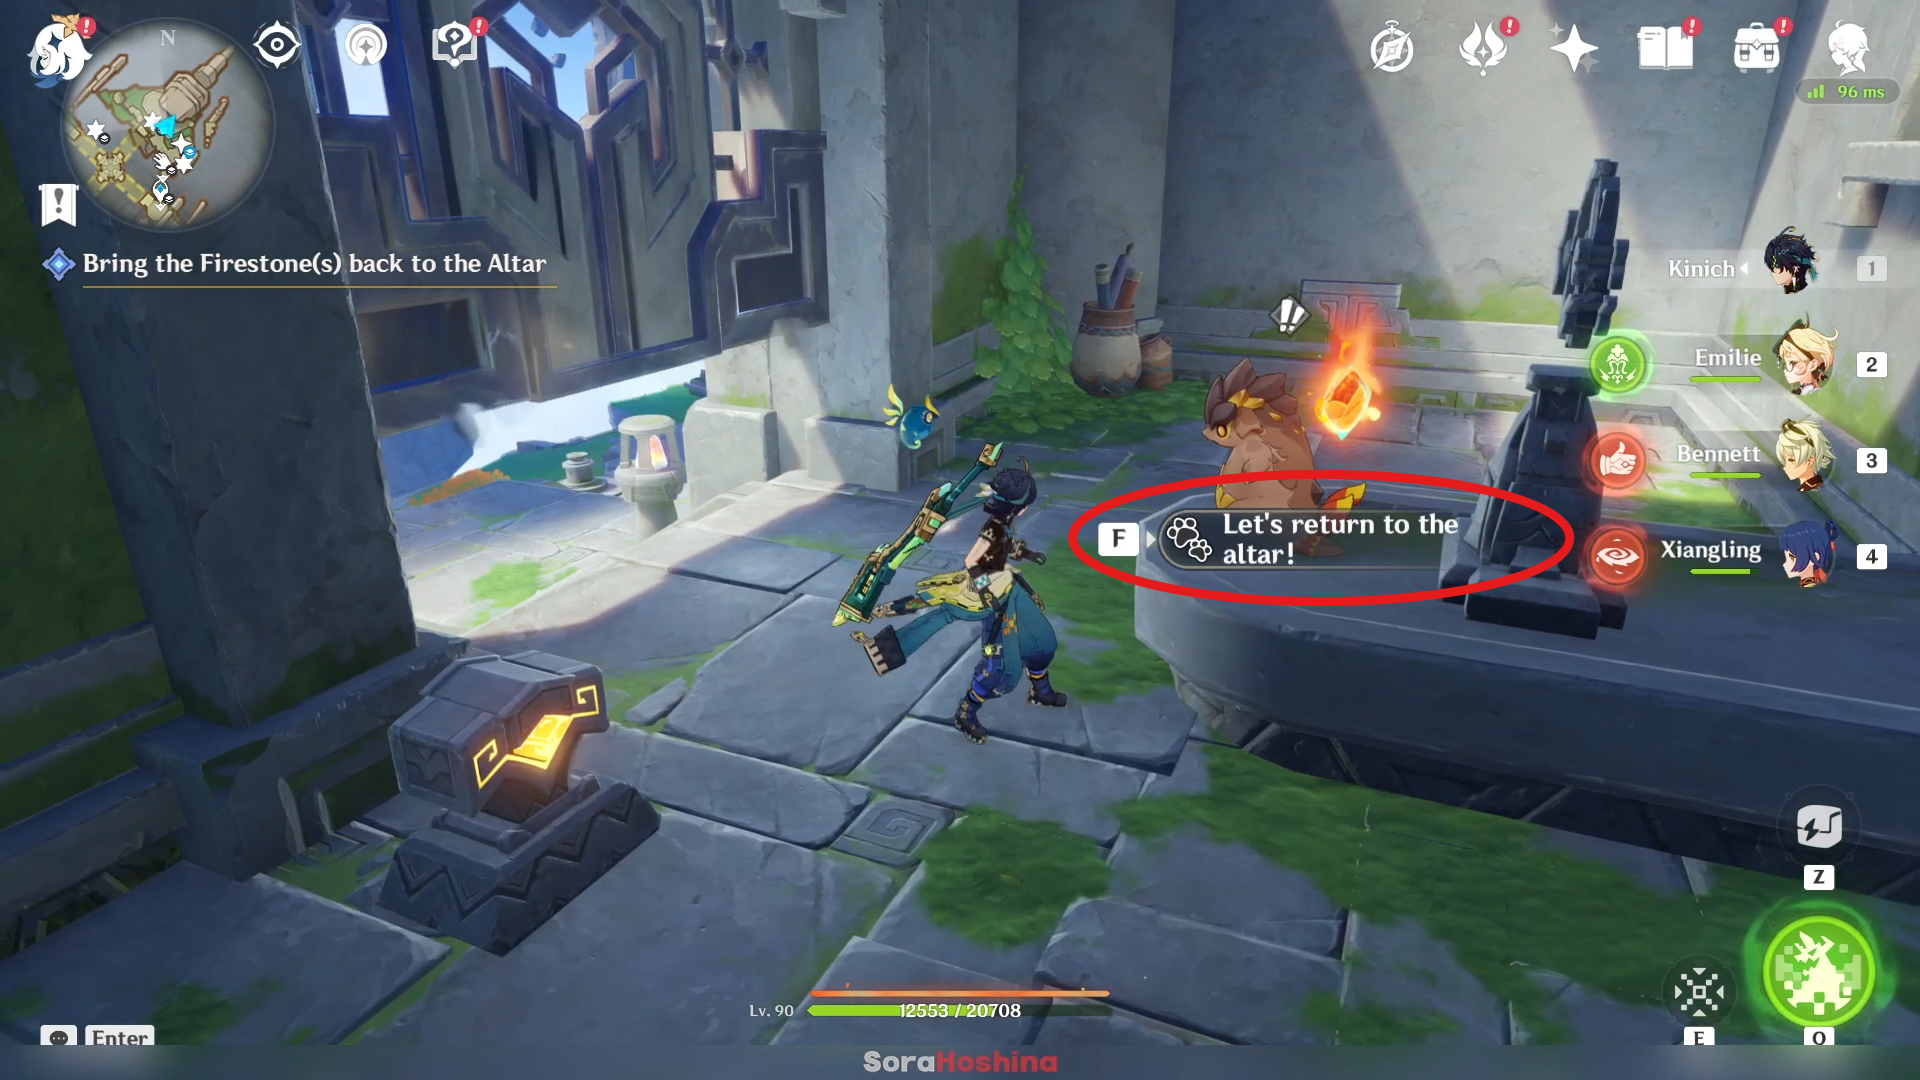
Once you open the door, don't forget to approach your Saurian and choose to return to the altar. Do not touch any button on the lift for now.
Retrieve the Firestone on the lower level of the northwestern floating island
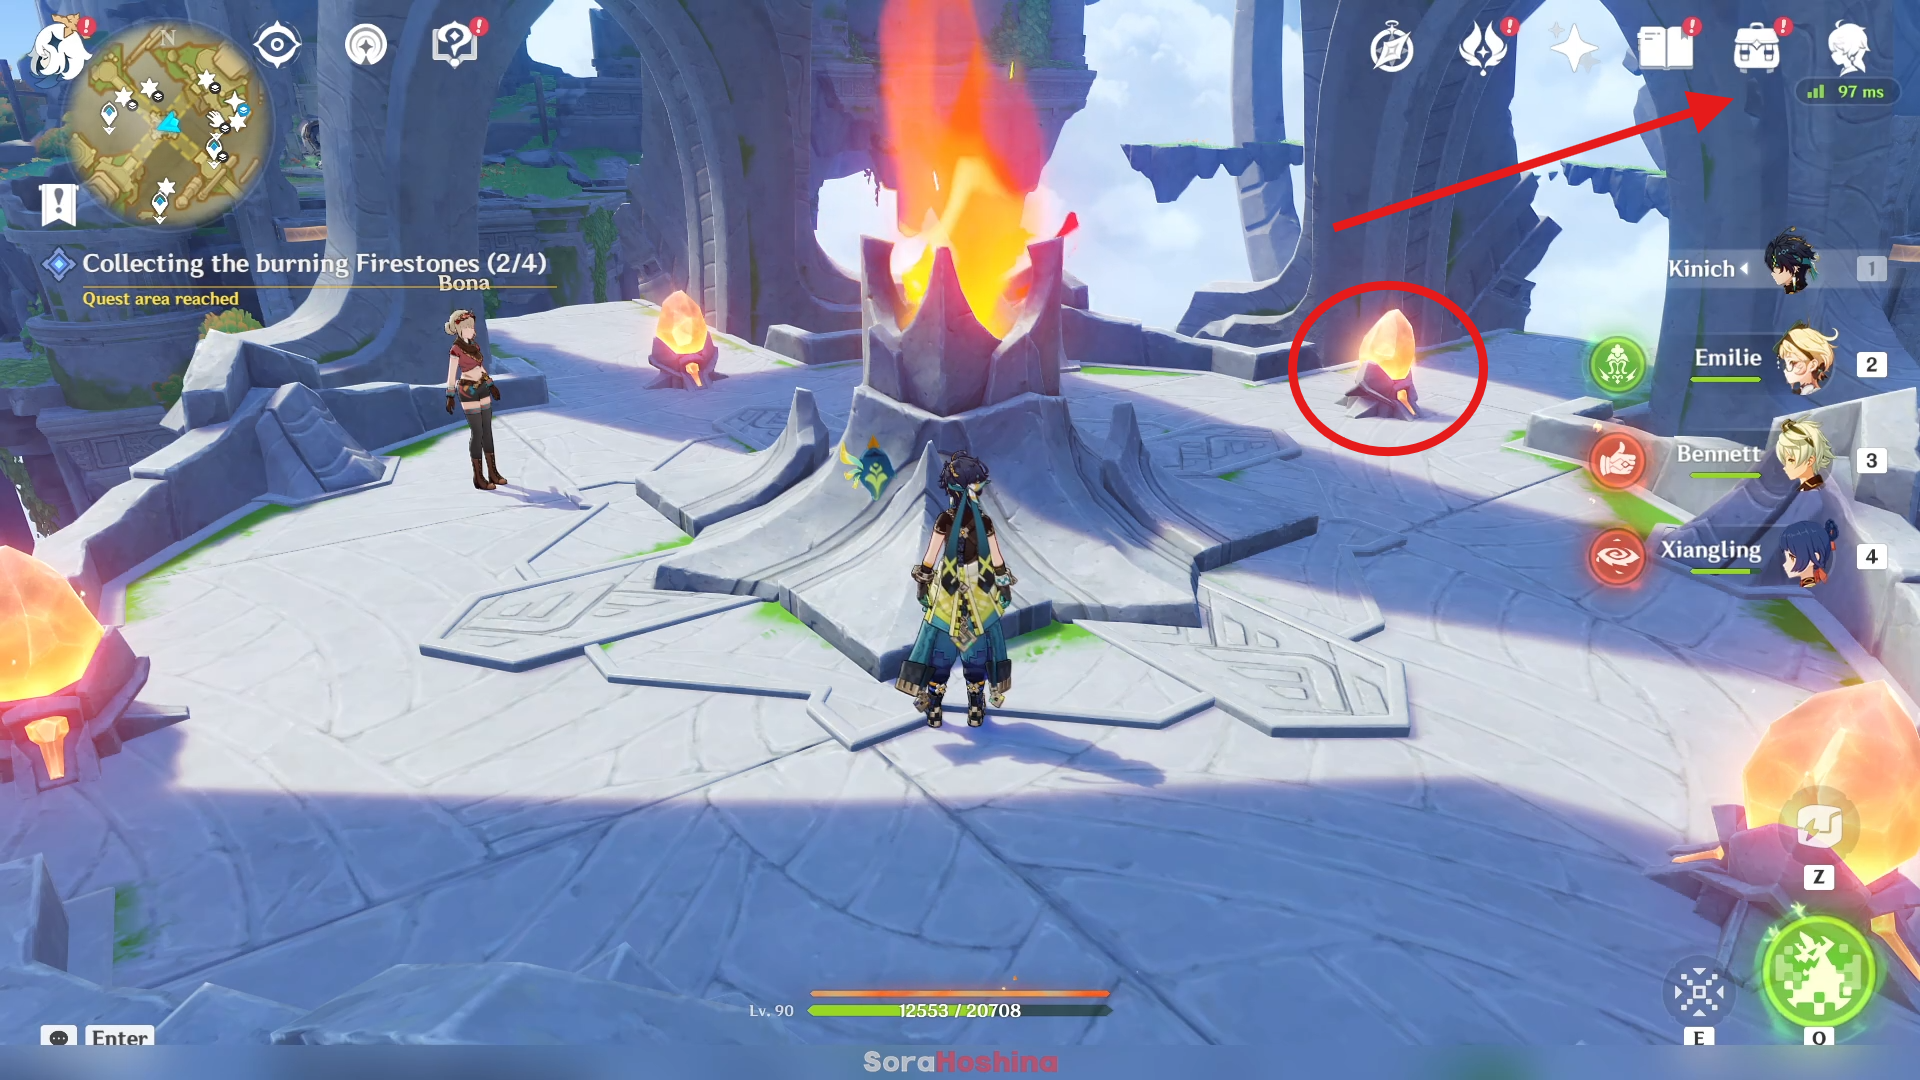
Now that the second Firestone is done, you can activate the lift on the northwest ONCE. Approach the Firestone there until it get UFO-ed to another floating island.
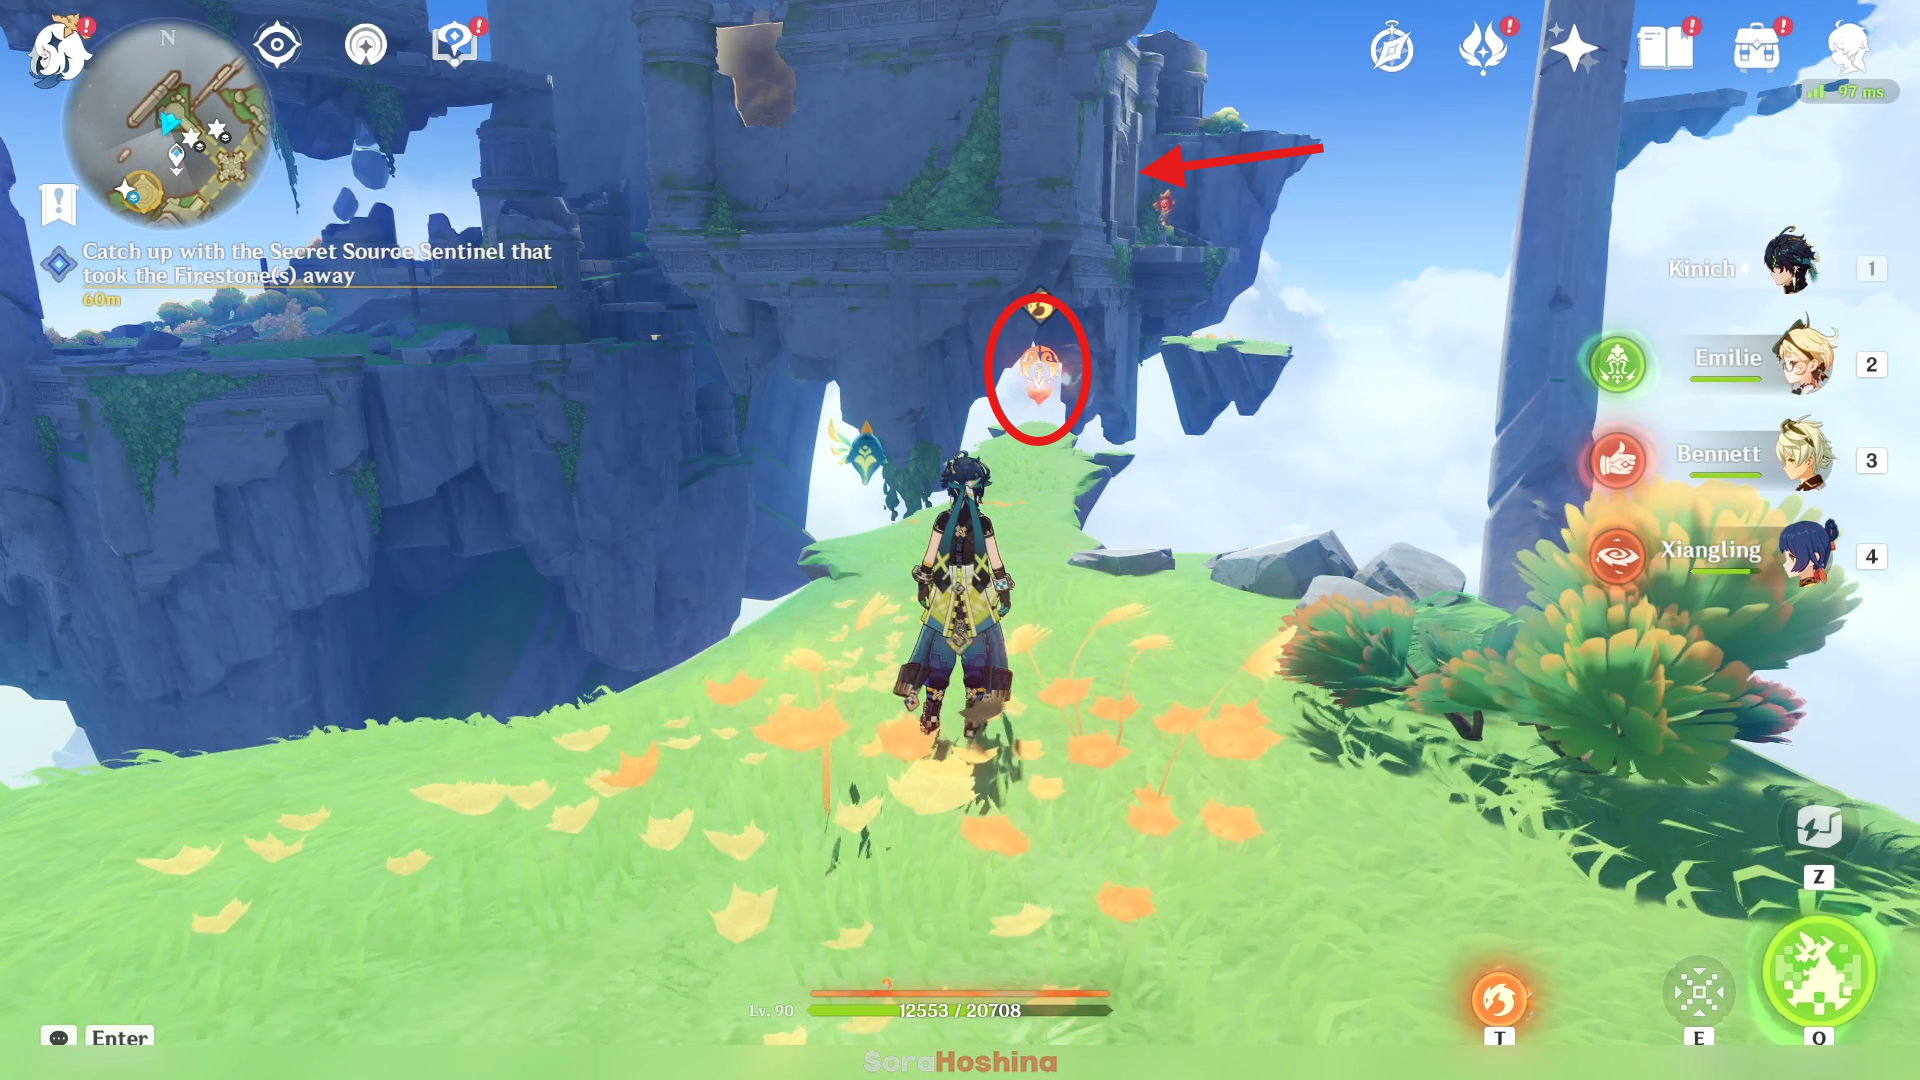
Indwell a Qucusaur nearby and fly to the open gate just beside the Pyroculus in the distance.
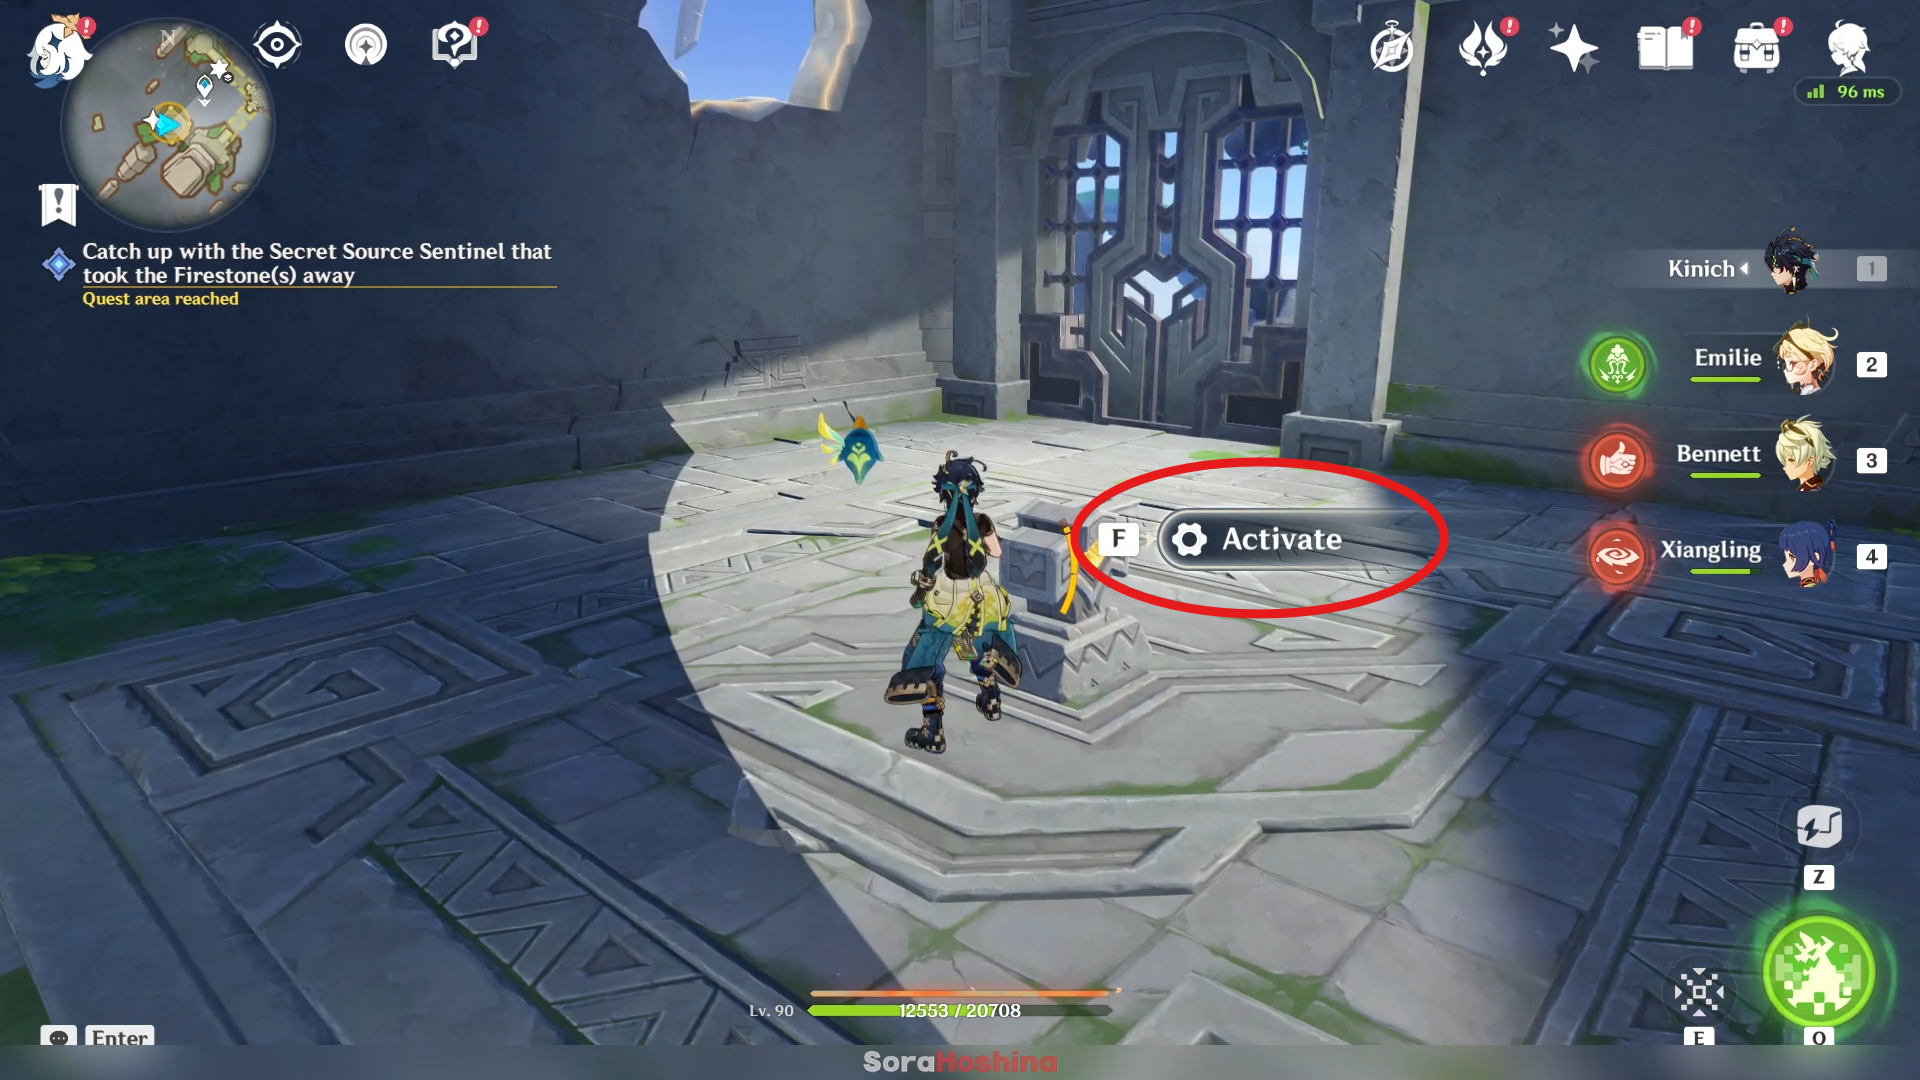
Activate the elevator and it will go down. Meanwhile the Firestone that were brought to the floor above will also go down.
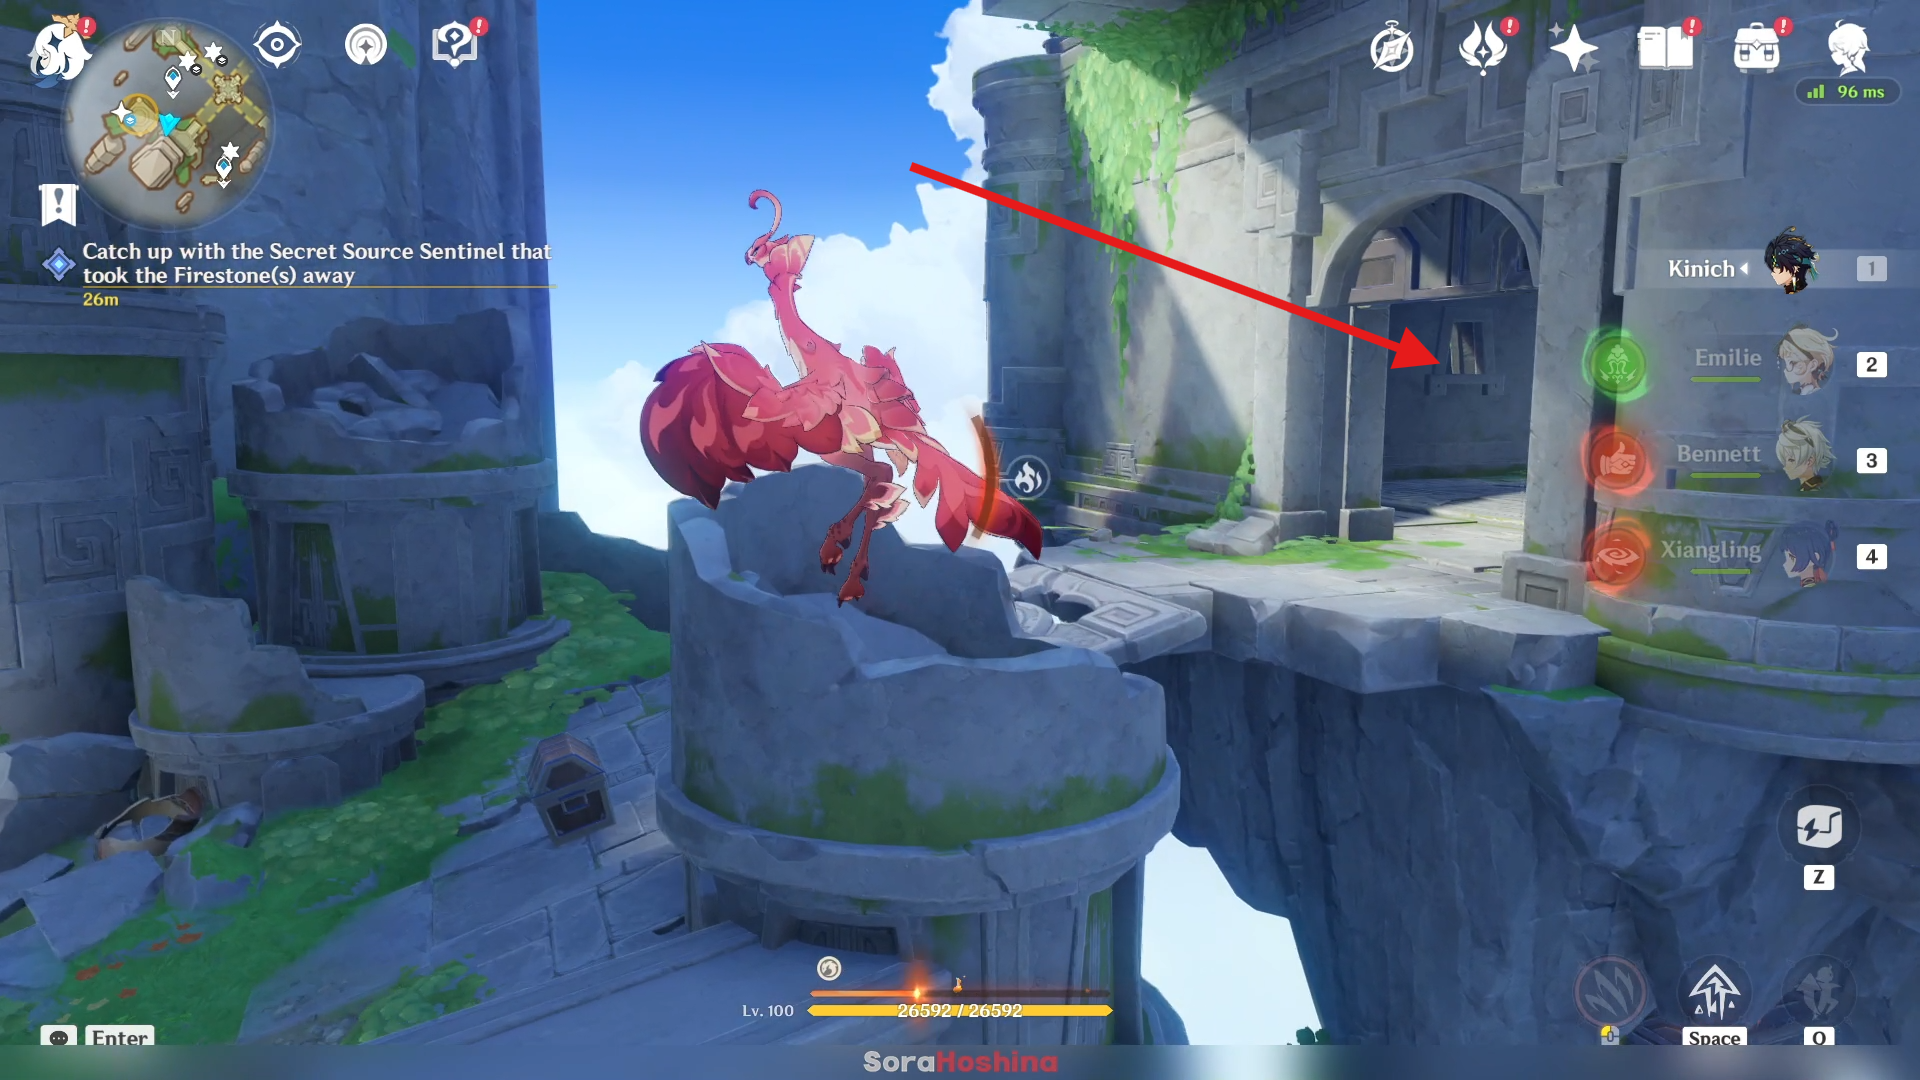
Indwell a Qucusaur and fly above to the other side of the gate. Enter there and get the Firestone.
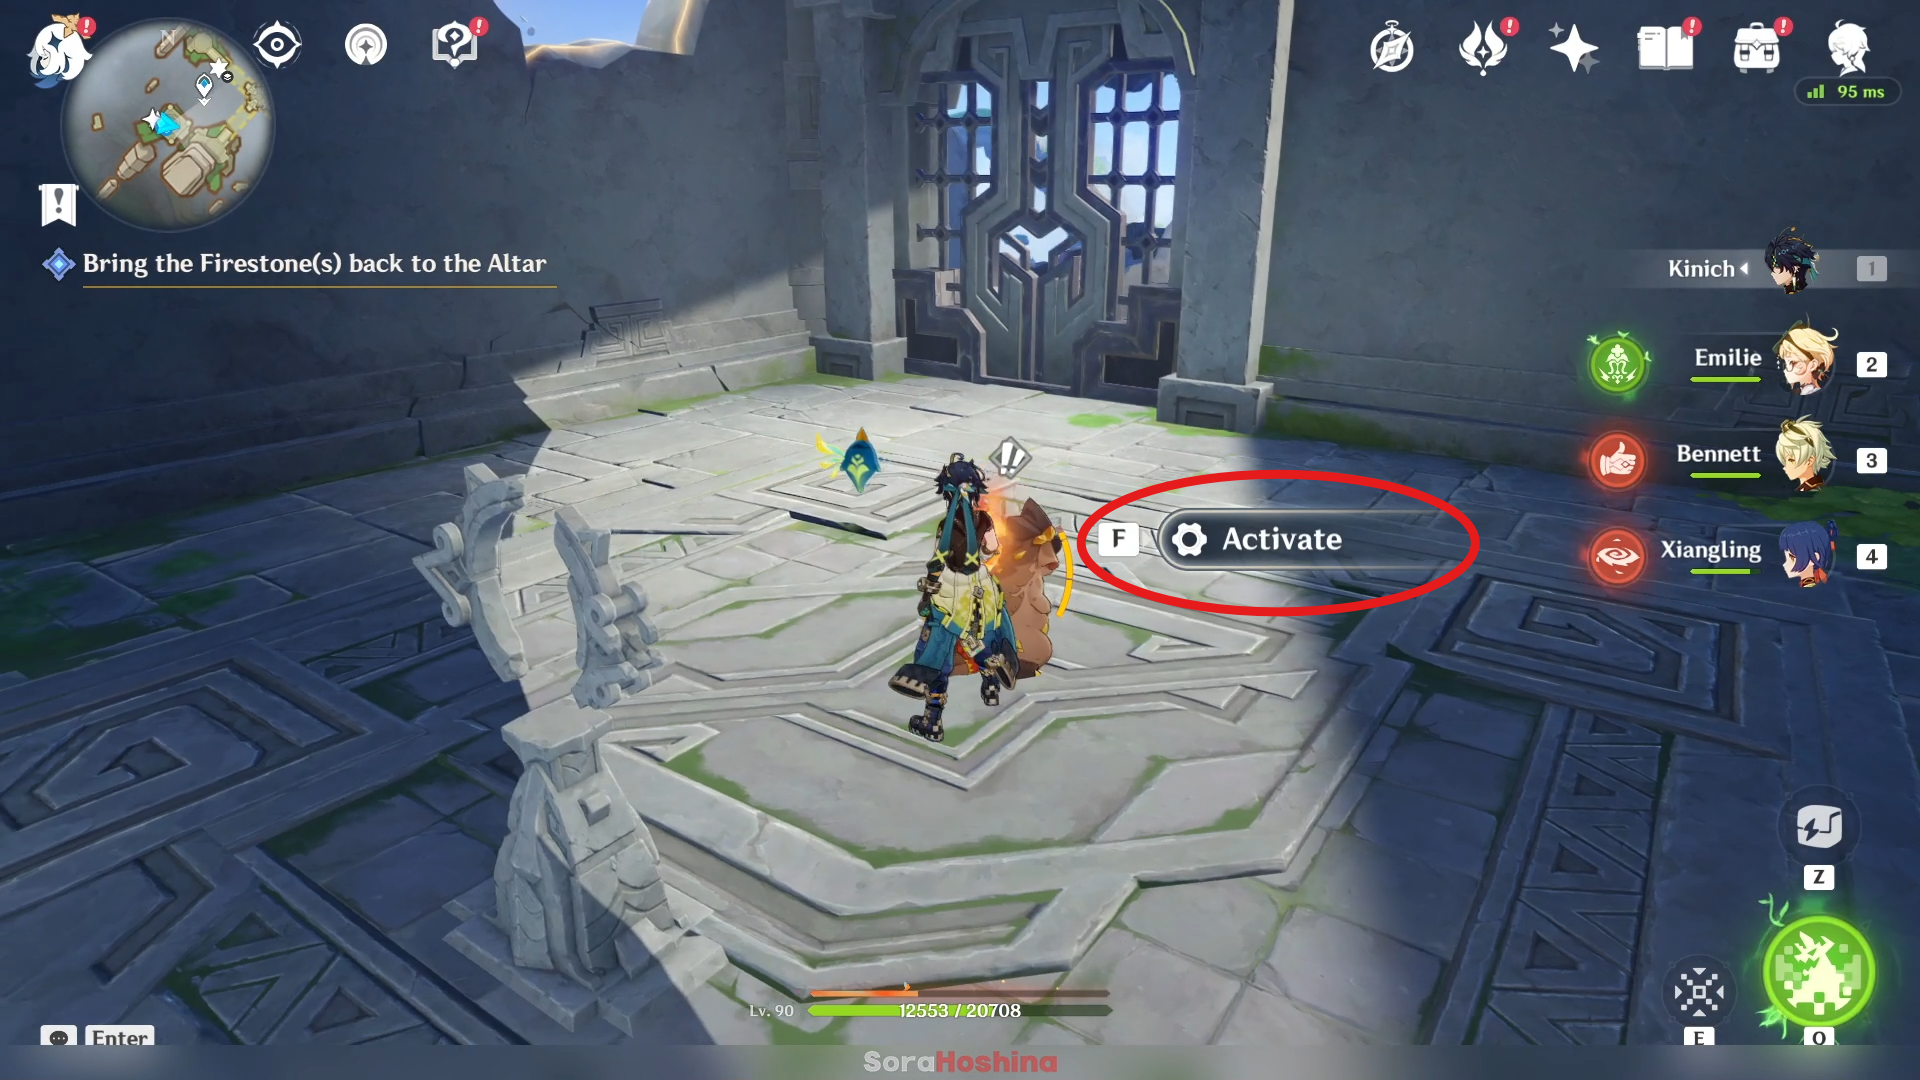
Once you get the Firestone, the door will be closed again. Just activate the elevator to escape from that locked room. after that, lead your Saurian to the bridge. Bona will automatically change the bridge direction so wait for her first.
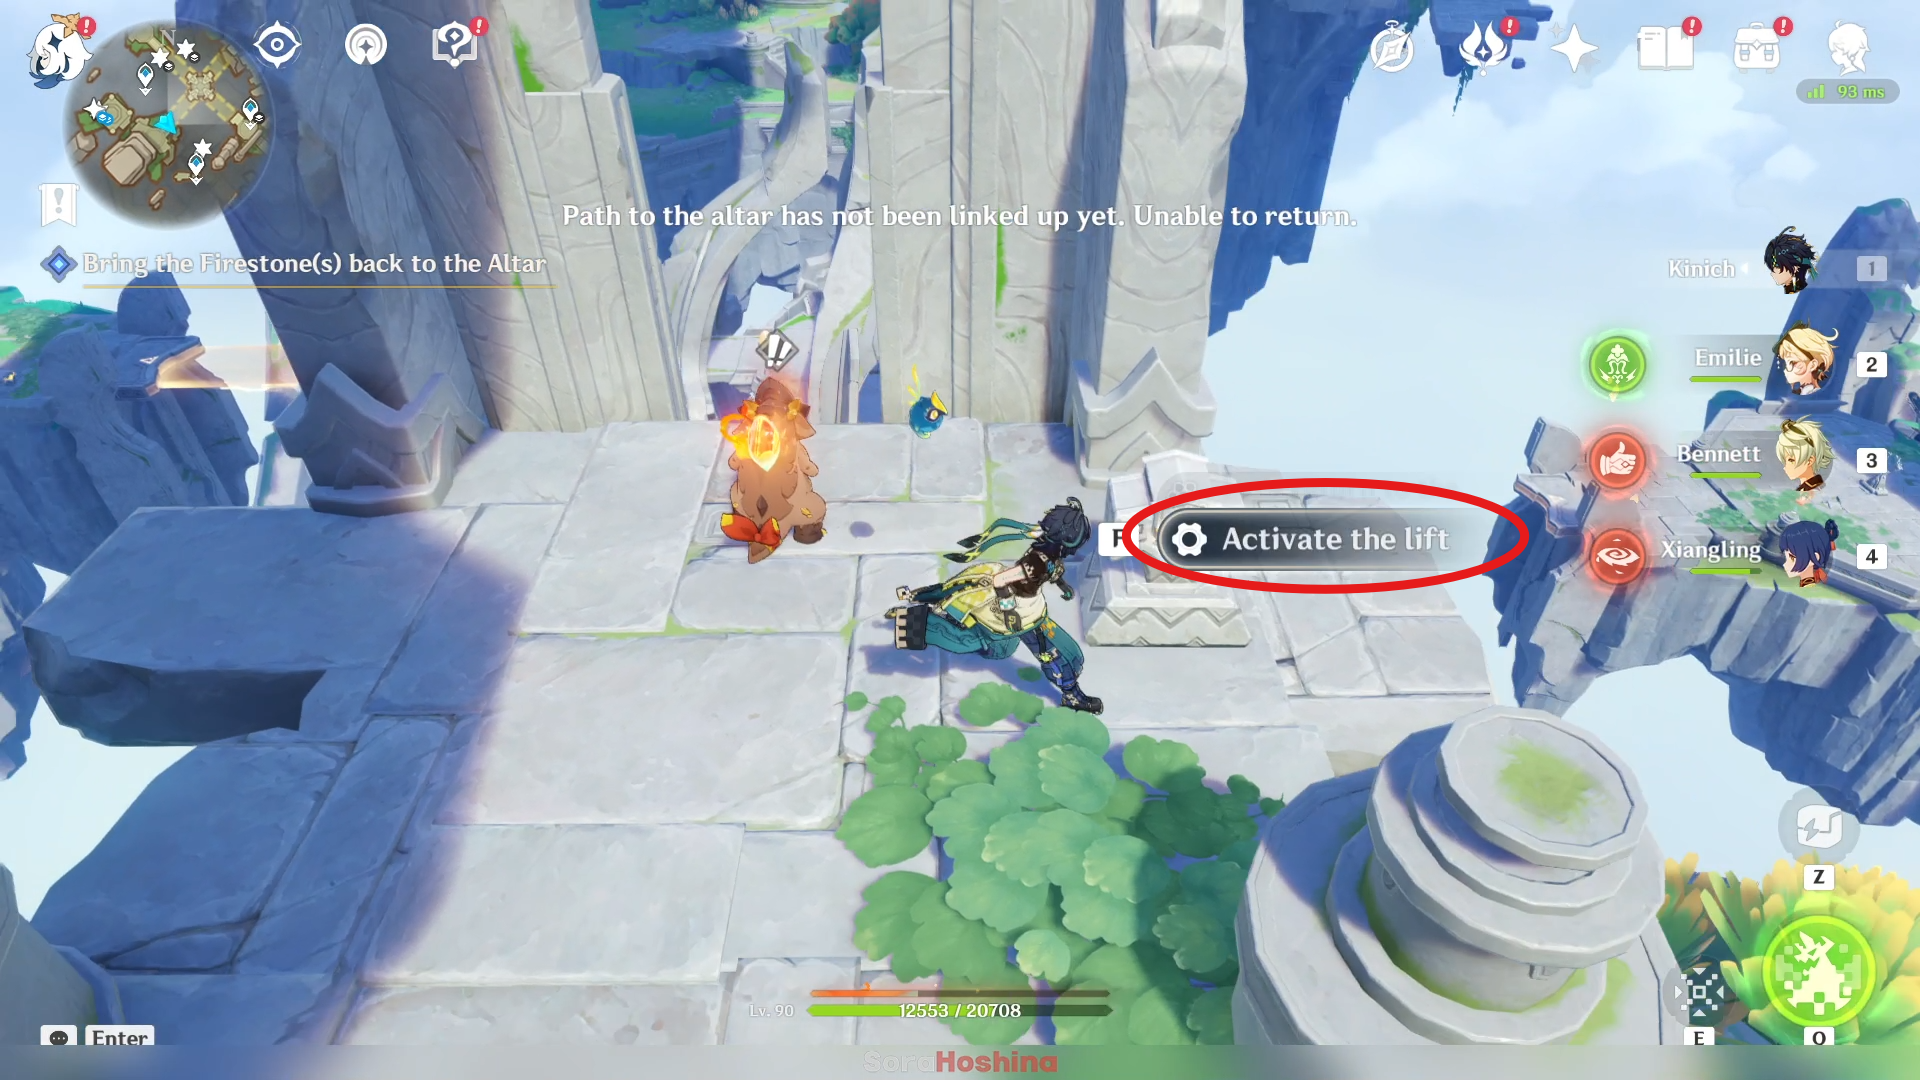
After she's done, activate the lift so you can cross it. Don't forget to interact with your Saurian first or he won't move.
Retrieve the Firestone on the upper level of the northwestern floating island
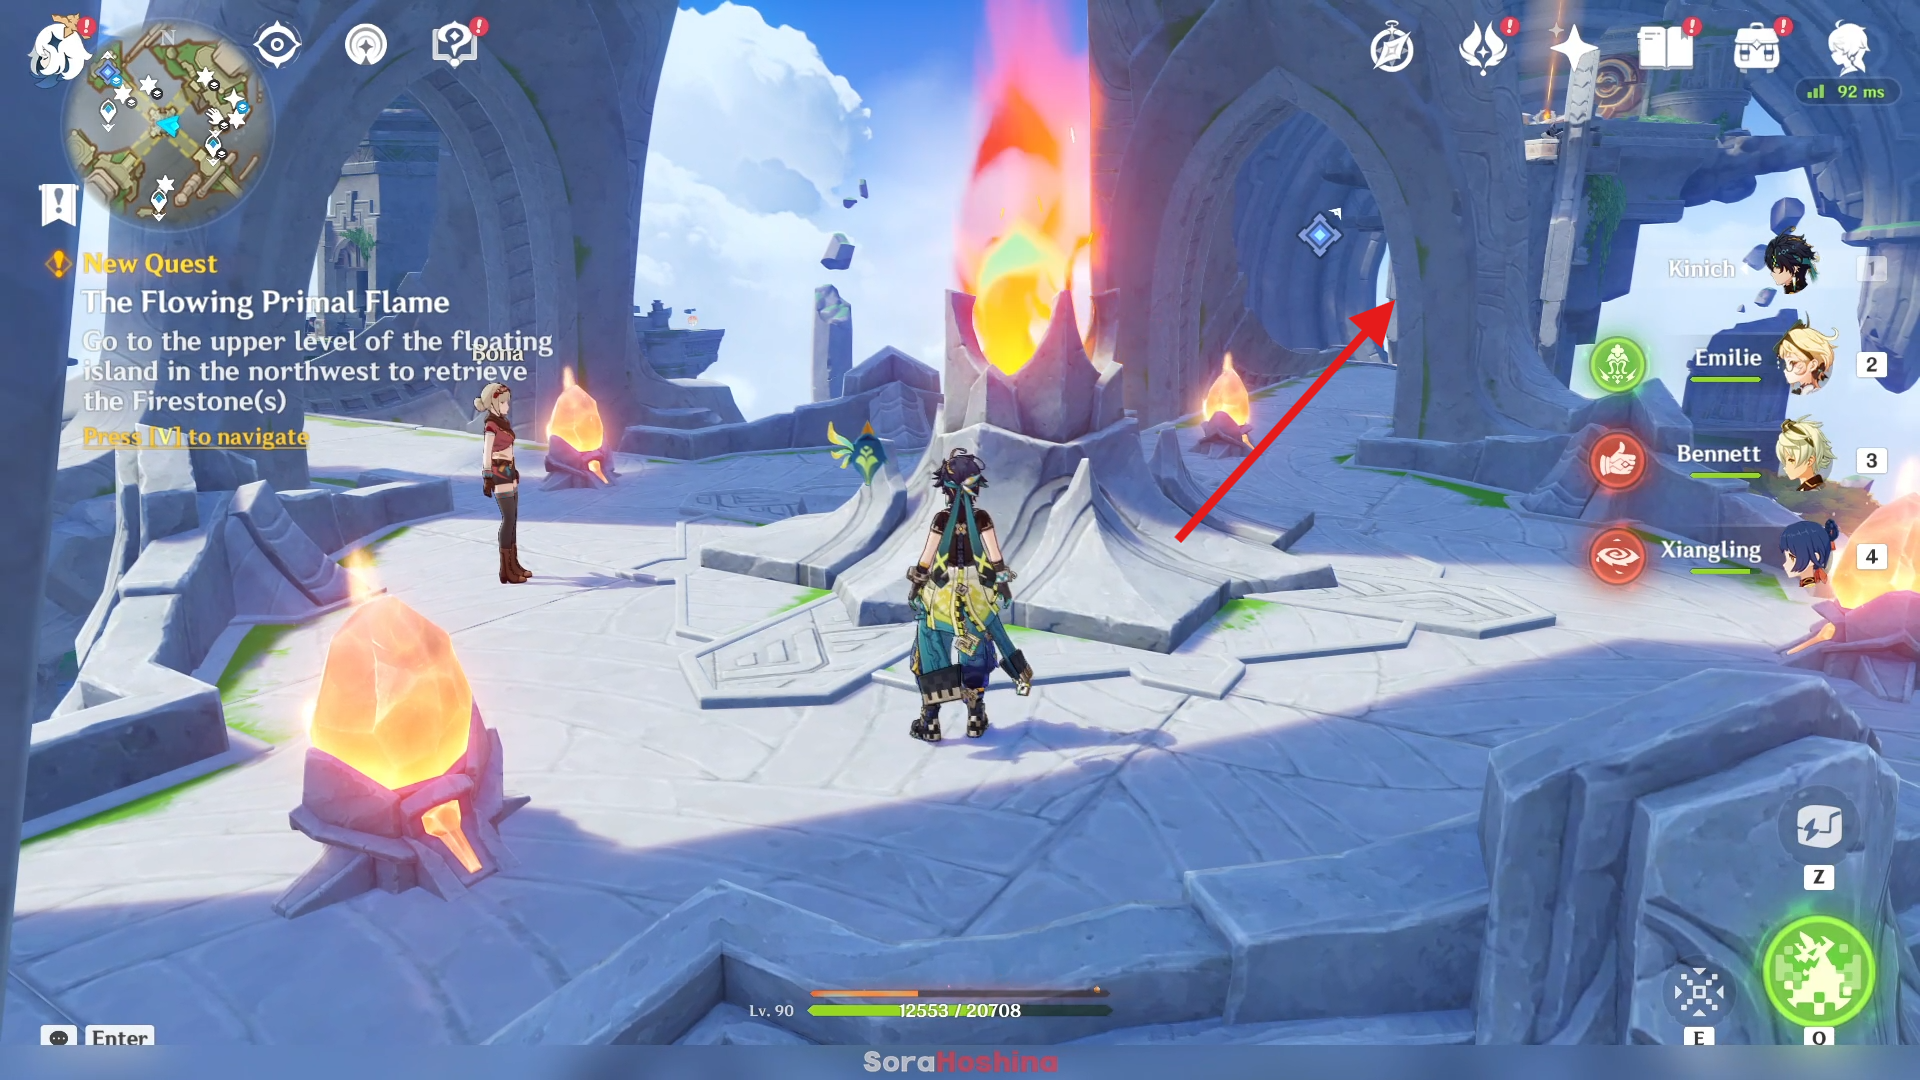
Now, head northwest again but no need to change any bridge.
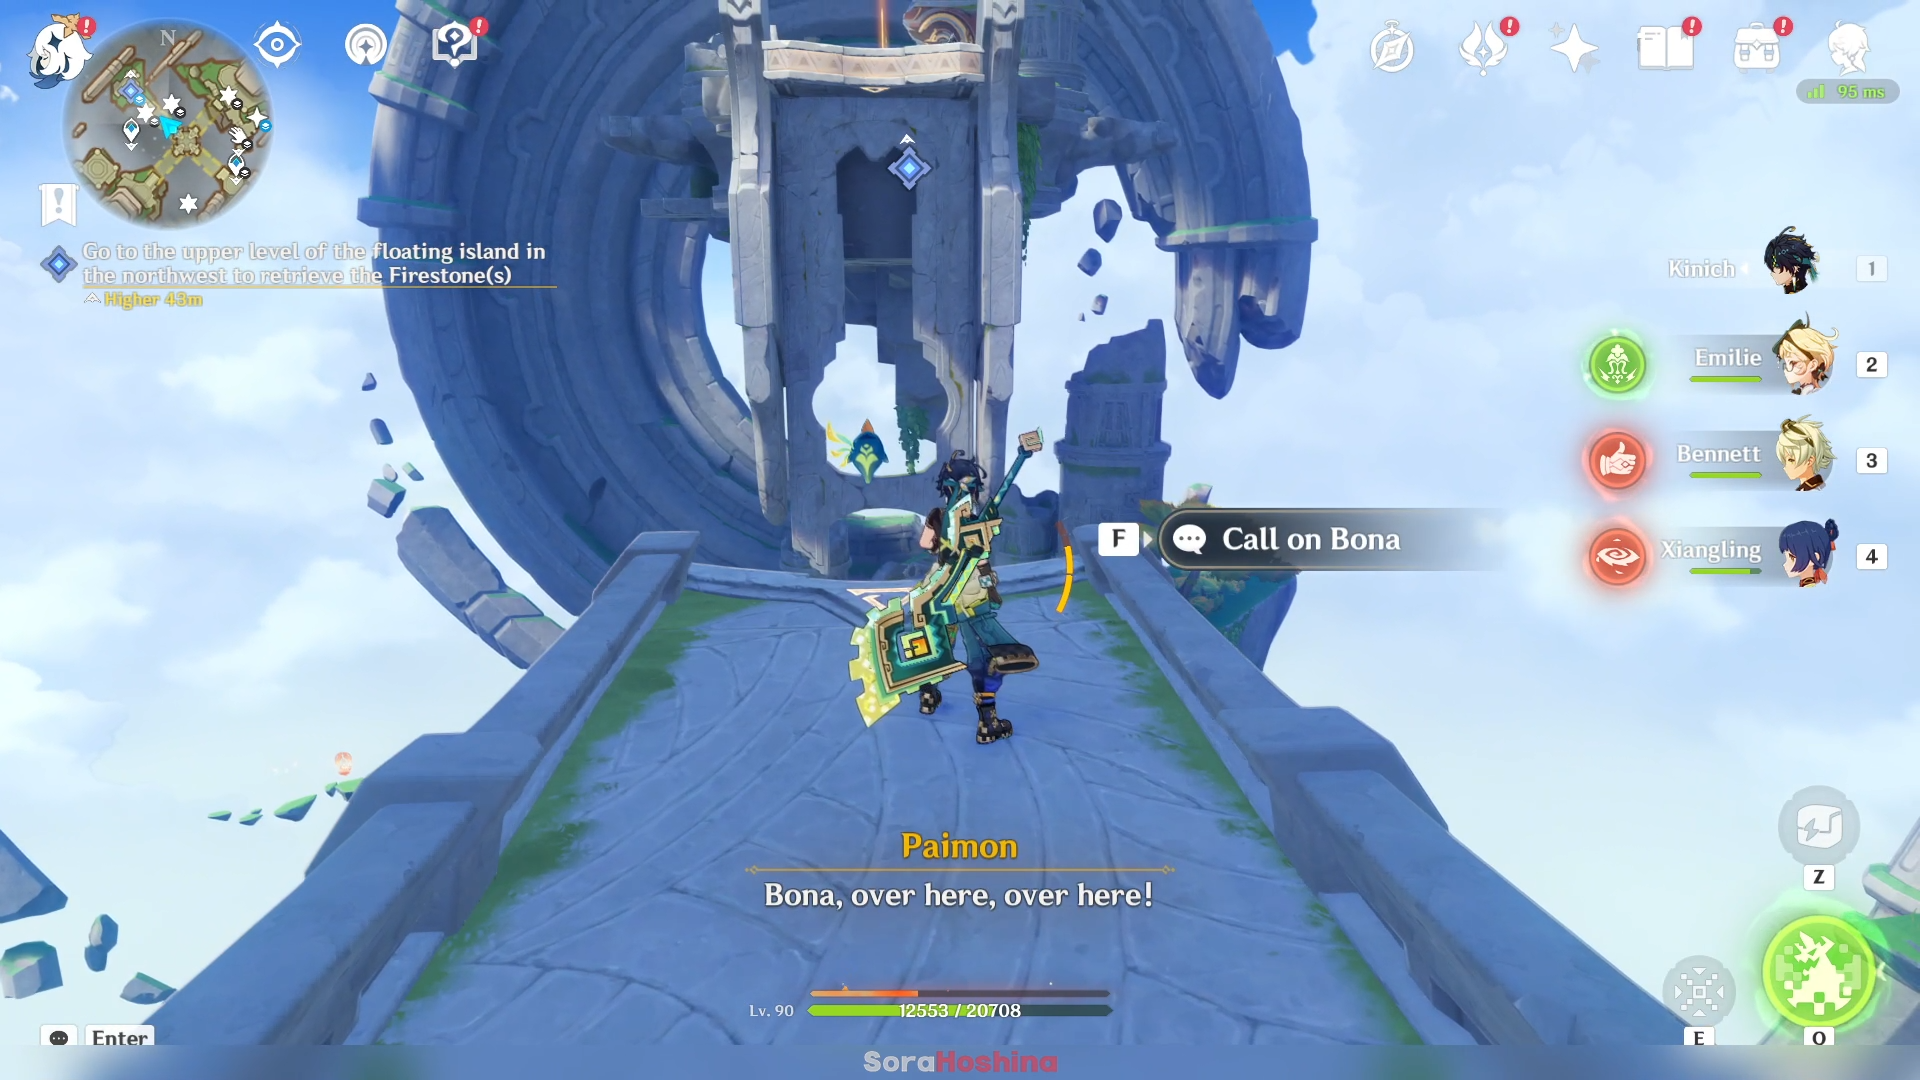
There, you can call on Bona. She will change the bridge direction upward so you need to jump and glide to the platform across.
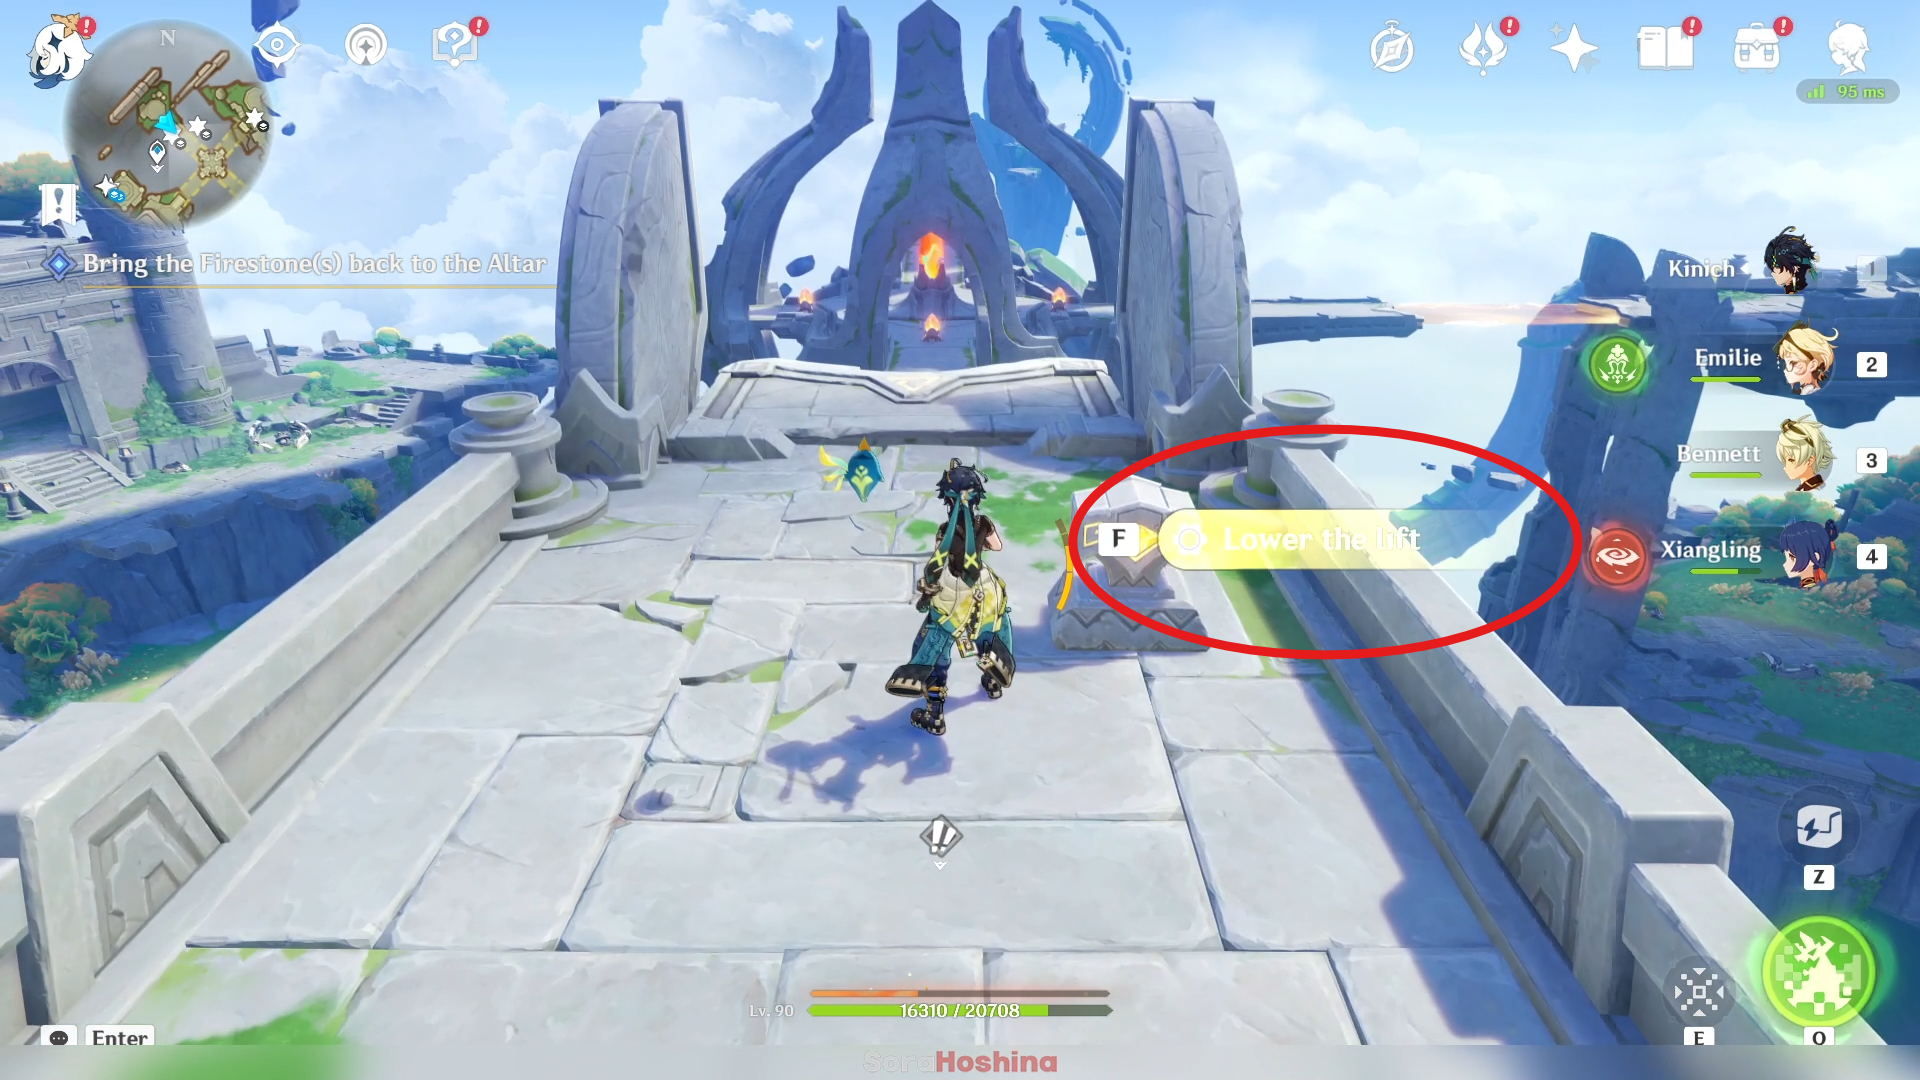
Get the last Firestone, defeat the enemy, then lower the lift. Bona will change the direction of the bridge and then you can cross it. Don't forget to interact with your Saurian first or he won't move.
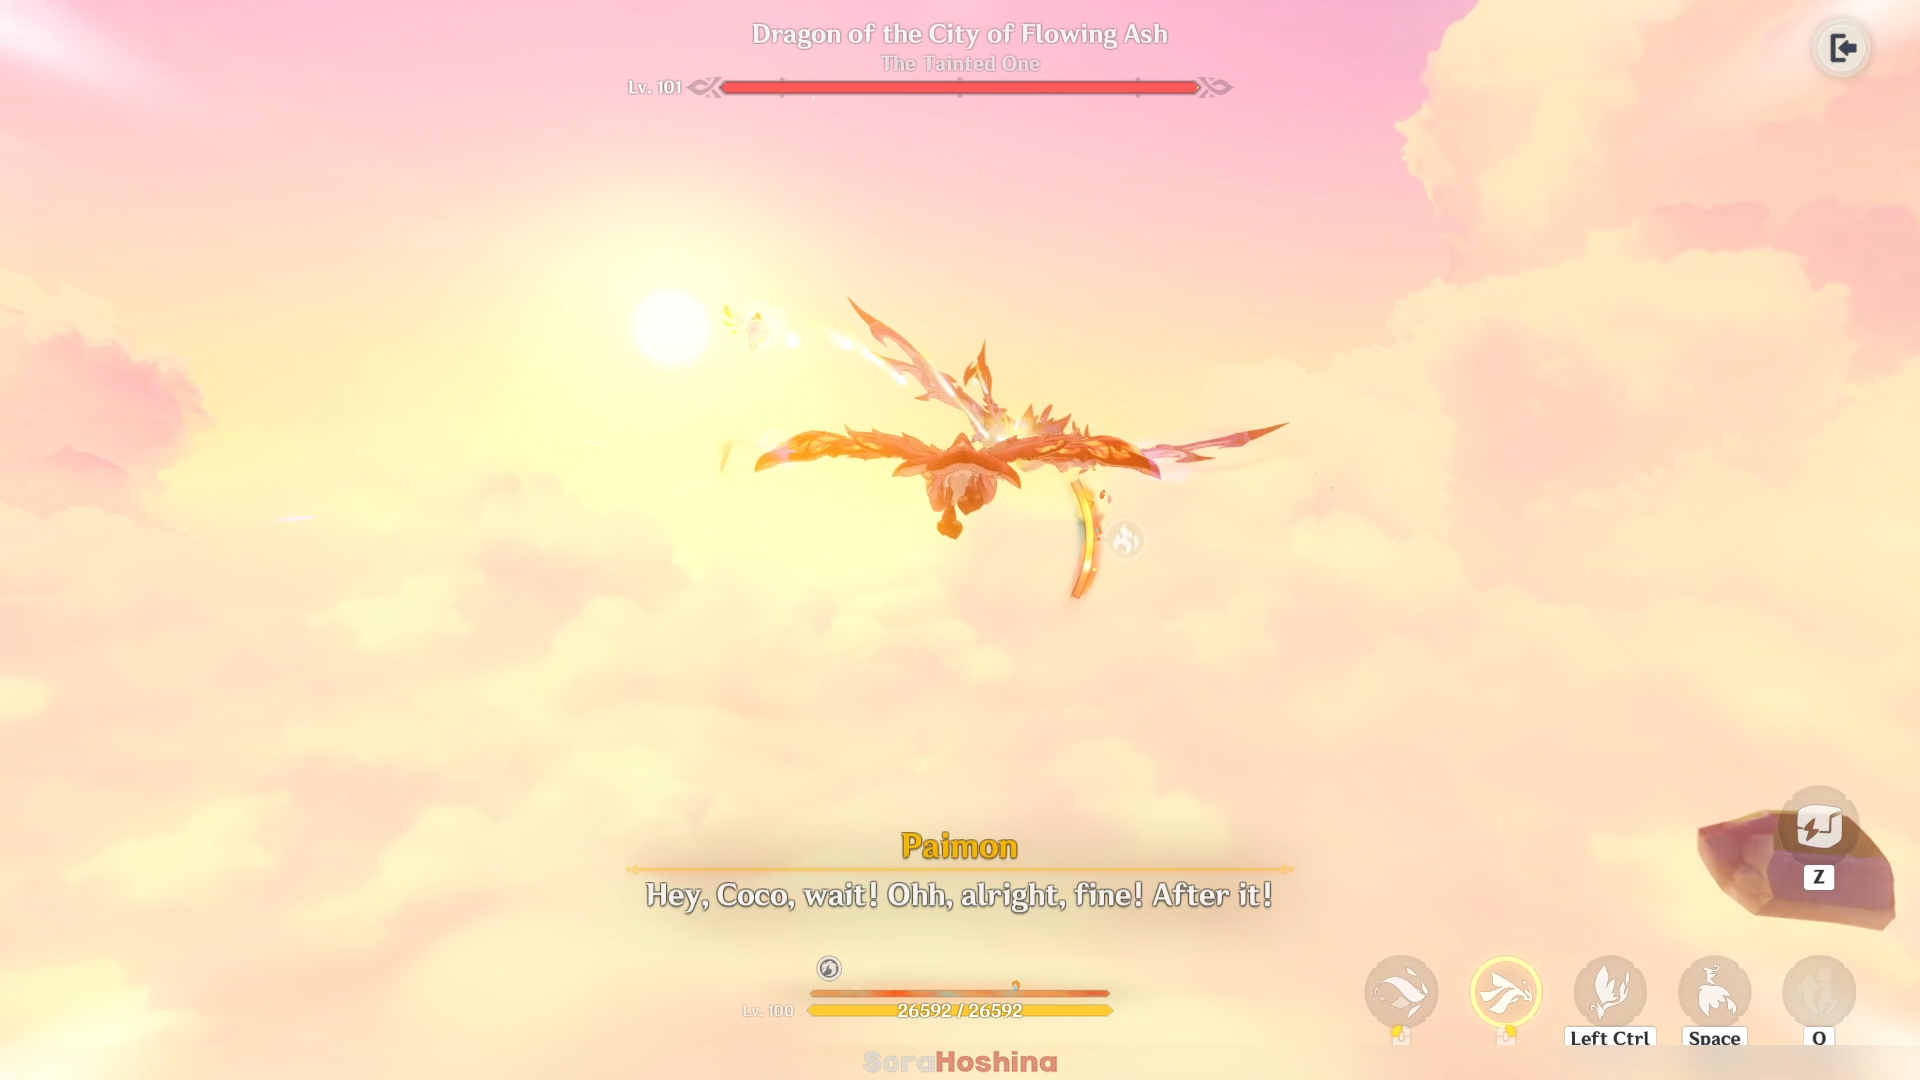
Once you're done, follow the quest navigation to chase after the evil dragon. Your Phlogiston won't be depleted so don't worry about it.
Moment of Awakening
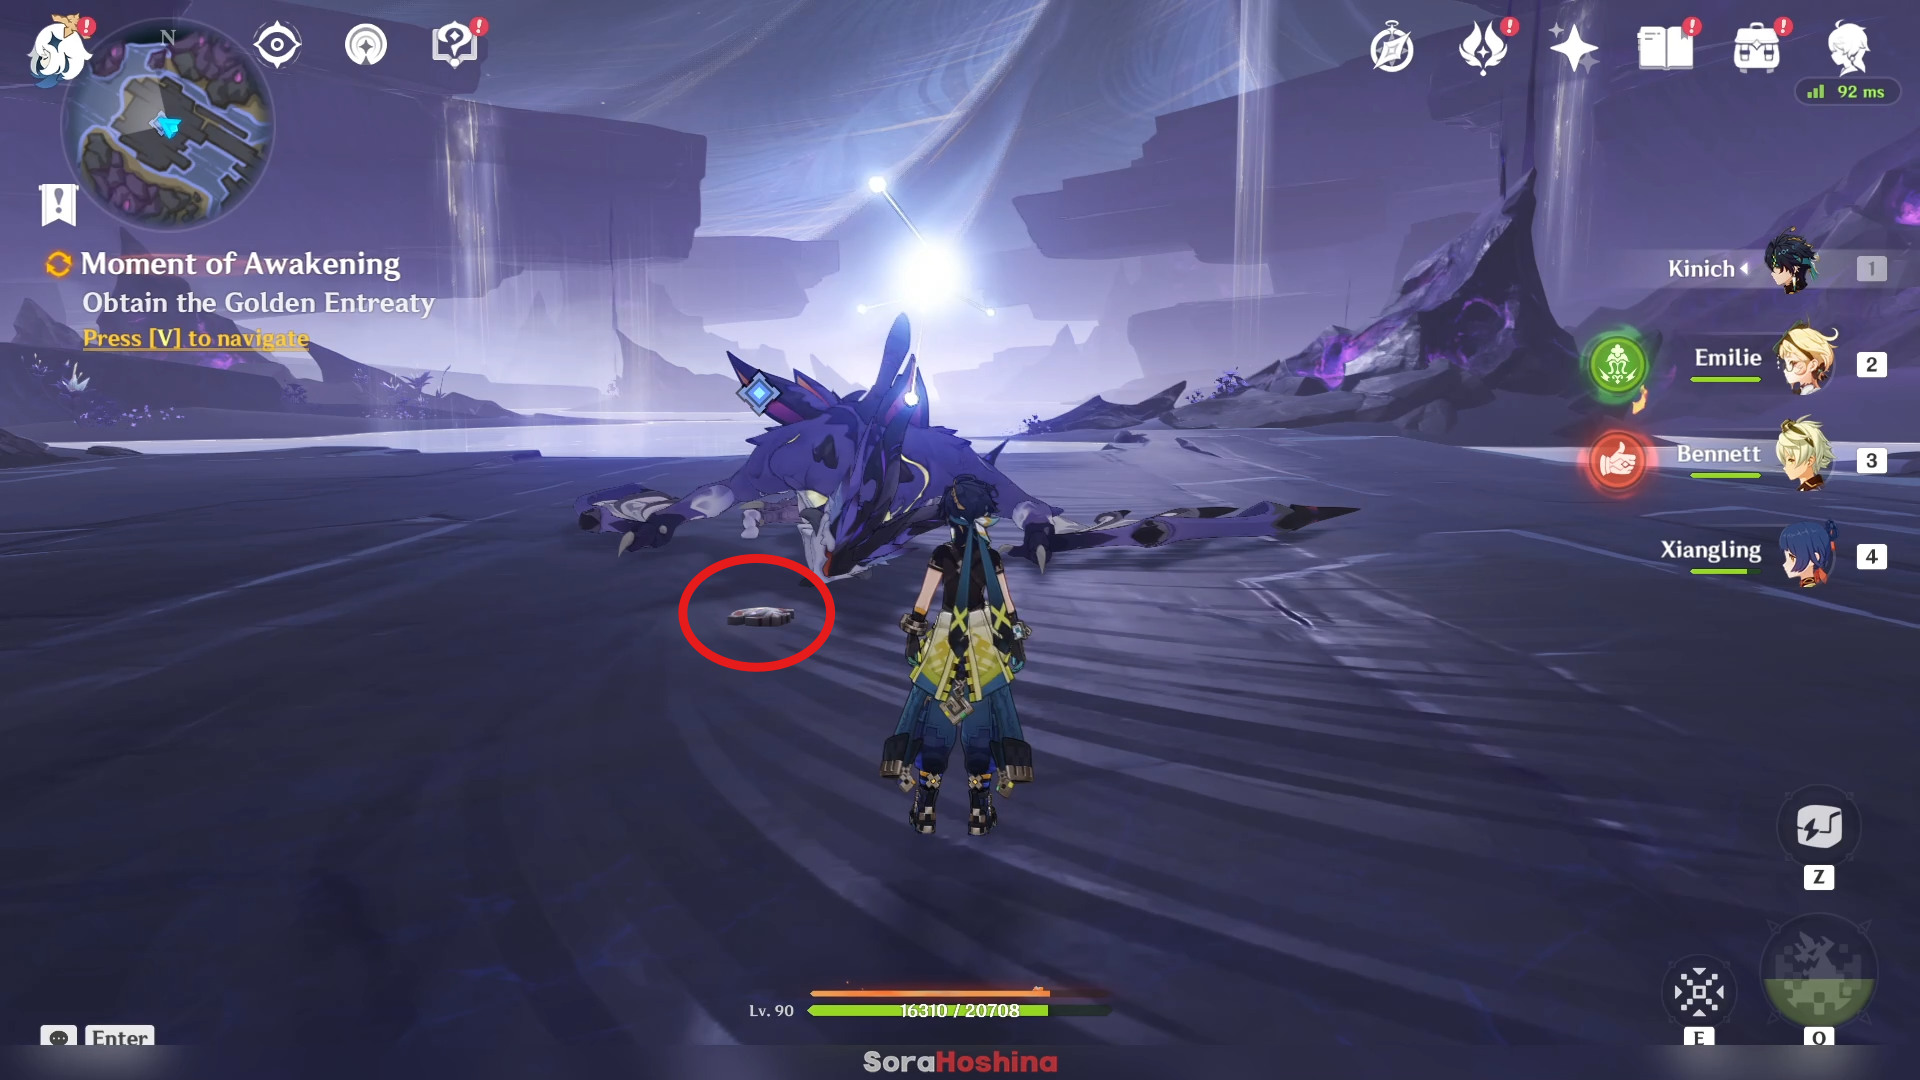
Defeat the evil dragon for one last time and pick up the Golden Entreaty.
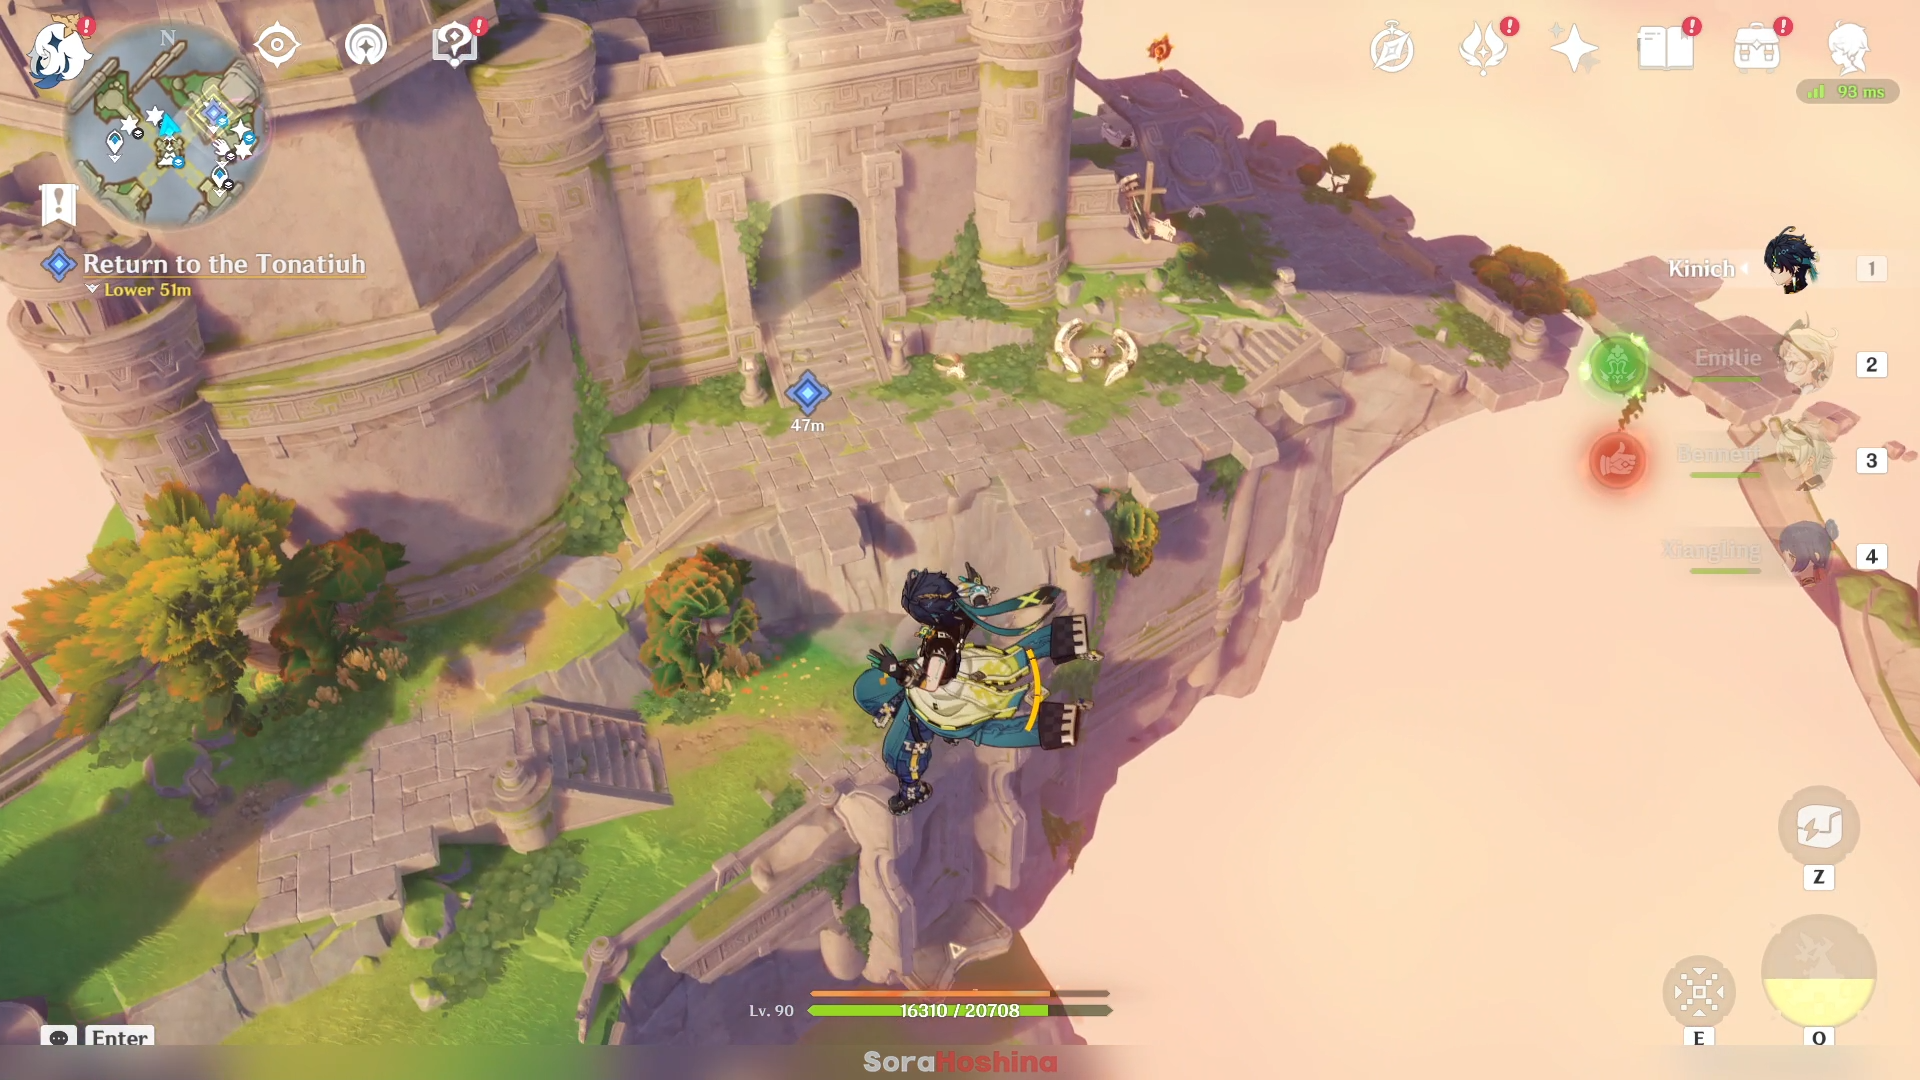
Lastly, return to Tonatiuh to find your little Saurian again to complete the quest. You can return there by teleporting to the Tonatiuh icon on the map.


