Table of Contents [Hide]
- Energy Amplifier: Lemma Gameplay Overview
- Energy Amplifier: Lemma Gameplay Tutorial
- Energy Amplifier: Lemma Event Guide
- Energy Amplifier: Lemma Event Rewards

You and Paimon encounter the Akademiya researcher Hosseini once again, this time in Fontaine. He seems to have brought an all-new Energy Amplifier with him...
Please refresh the page if some of the images are broken.
Energy Amplifier: Lemma Gameplay Overview
Event Gameplay Duration:
➥ 2024/08/12 10:00:00 – 2024/08/26 03:59:59
Eligibility:
➥ Adventure Rank 27 or above
Event Overview:
➥ After the event begins, a new challenge stage will unlock every day. A total of 6 stages will be unlocked.
➥ Each stage is comprised of 3 combat rounds, during which you must defeat as many opponents as possible within the time limit to score points.
➥ Before any challenge begins, you will need to set your parties up. The same character can be placed into parties for all 3 rounds of combat.
➥ Party members will gain Motive Force based on their adventuring prowess. Motive Force can be used to set Ley Line Effectors to help your party gain combat buffs. The same character can only grant Motive Force once per stage.
➥ When configuring the Ley Line Effectors, the 3 parties will jointly contribute to the total Motive Force during challenges.
➥ You cannot use Food or other items during the event challenges.
Energy Amplifier: Lemma Gameplay Tutorial

Each stage in "Energy Amplifier: Lemma" is comprised of 3 combat rounds, during which you must defeat as many opponents as possible within the time limit to score points.
Before any challenge begins, you will need to set your parties up. The same character can be placed into parties for all 3 rounds of combat.

Party members will gain Motive Force based on their adventuring prowess (their LEVEL). Motive Force can be used to set Ley Line Effectors to help your party gain combat buffs. The same character can only grant Motive Force once per stage.
If you lack Motive Force, you may consult the Training Guide in the menu for suggestions.

Primary and Secondary Effector buffs will only work for parties that have set them up. After your current party has set up Primary Effectors, you can then set Secondary ones. Only after all 3 parties have set up Secondary Effectors can you put Resonant Effectors in place, and the buffs from Resonant Effectors will apply to all 3 parties.
Energy Amplifier: Lemma Event Guide
1) "Interference: Overgrowth"
Monster List

Opponent Special Features: The unstable energy that some opponents have when they appear will explode after a certain duration, dealing DMG to nearby characters. After opponents with unstable energy are defeated, the unstable energy will transfer to another opponent, and the timer will reset. When this happens, the initial duration for the explosion timer will be reduced, and its damage will be increased. The higher the selected challenge difficulty, the greater the damage dealt by unstable energy.
Recommended Team For New Players

If you have very limited character, use the following teams to get the minimum 5000 points to get all rewards.
| Ley Line Disorder | After a character triggers a Dendro-related reaction on an opponent or uses Dendro Cores to deal DMG to an opponent (including Burgeon and Hyperbloom), the All Elemental RES of that opponent is decreased by 30% for 4 seconds. |
| Trial Characters | Emilie + Nahida + Collei |
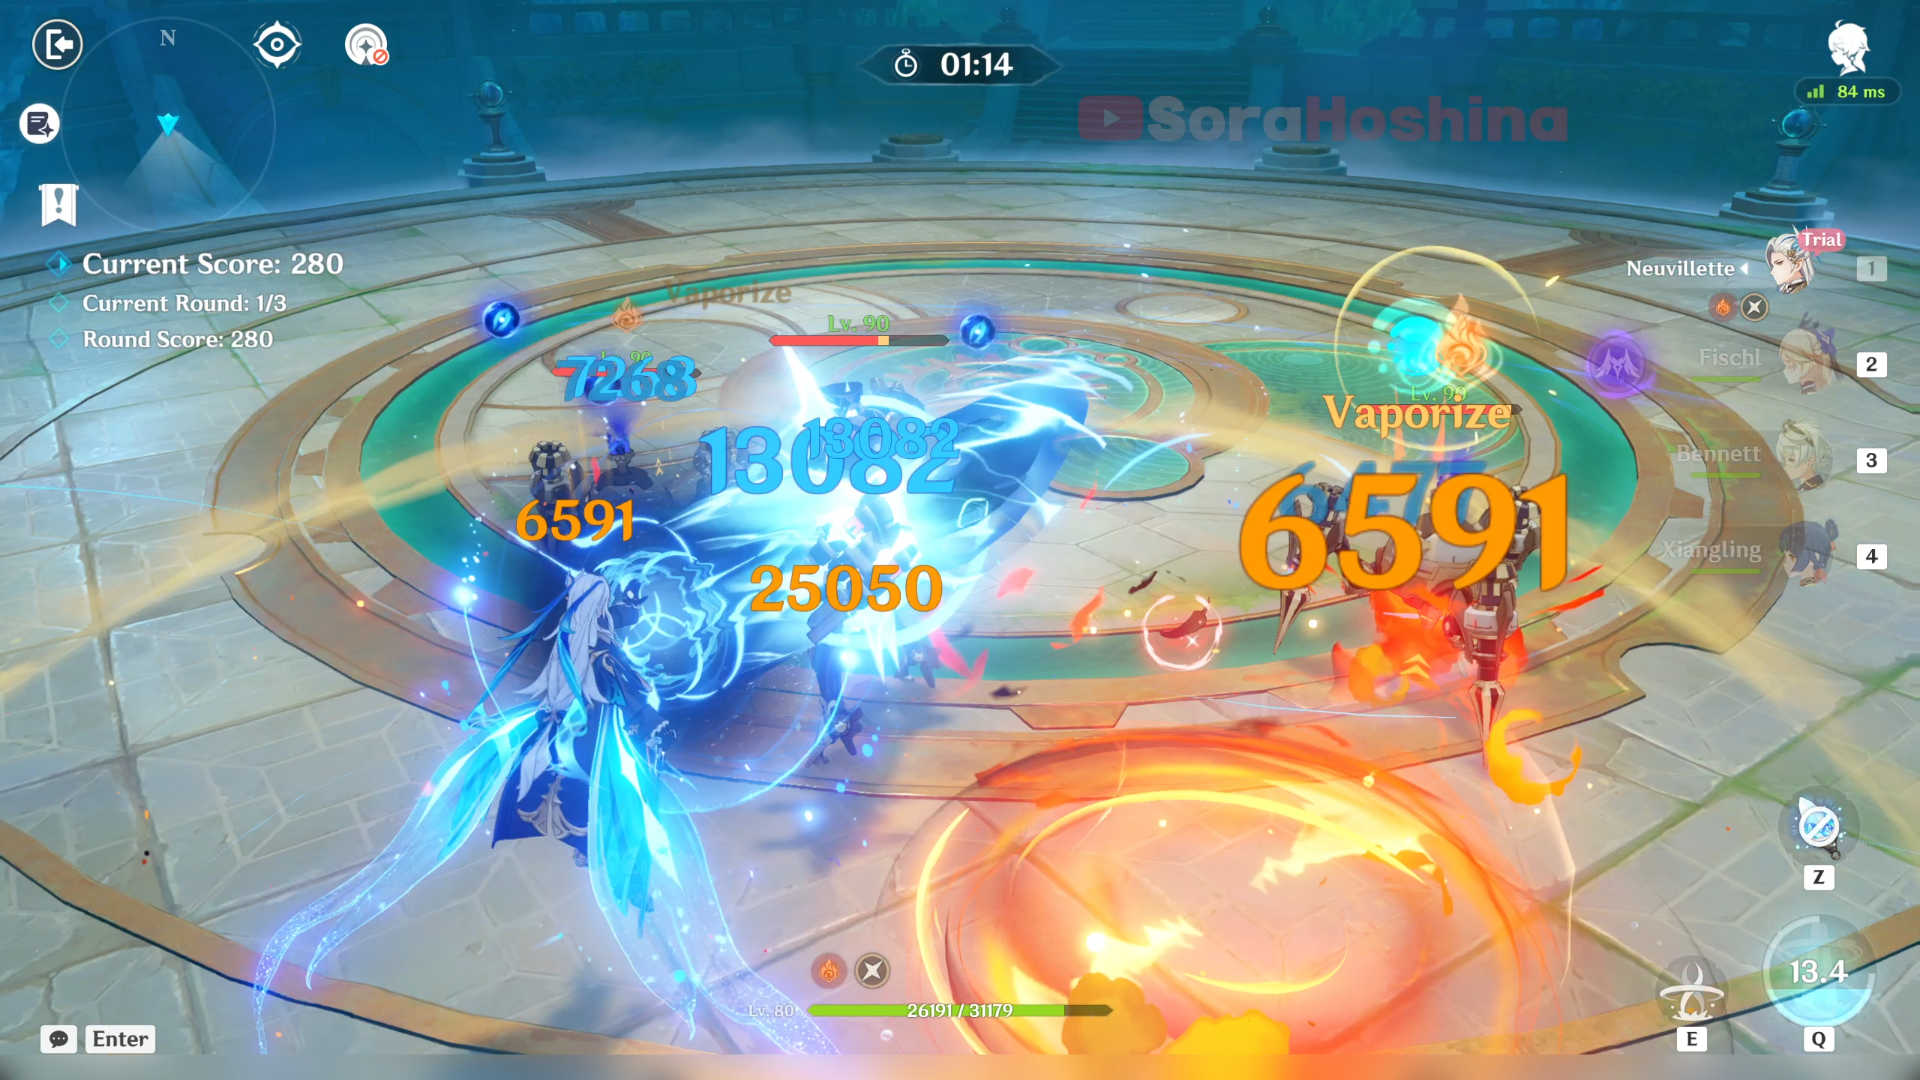
Round 1 until Round 3: Trial Emilie + Trial Nahida + Xiangling + Barbara

The rotation is quite simple: Emilie Skill > Xiangling Burst & Skill > Nahida Skill & Burst > Emilie Burst > Barbara Skill & Normal Attack to trigger extra Vaporize/Burgeon.
Of course, you don't have to follow the rotation to a T and use any rotation you are comfortable with.
Recommended Team For F2P

If you want to get more points for flexing, use the following teams.
| Ley Line Disorder | After a character triggers a Dendro-related reaction on an opponent or uses Dendro Cores to deal DMG to an opponent (including Burgeon and Hyperbloom), the All Elemental RES of that opponent is decreased by 30% for 4 seconds. |
| Trial Characters | Emilie + Nahida + Collei |
Round 1: Trial Emilie + Bennett + Xiangling + Kazuha/Sucrose (Burning Team)
Since there are a lot of enemies here in each wave, having AoE damage like the characters mentioned is good. Although there are some Hydro enemies in here, so Emilie would Bloom or Burgeon instead of Burning.
Round 2: Trial Collei + Kuki Shinobu + Xingqiu + Flex character (Hyperbloom Team)
There are not many enemies in each (at most 2 enemies in one wave) so bring a team that deals single-target damage. Since they give Trial Collei, might as well just use Hyperbloom team.
Round 3: Trial Nahida + Nilou + Yaoyao + Barbara (Bloom Team)
Similar to round 1, there are many enemies here, so I recommend bringing Bloom team (even better with Nilou) so everything explodes here. You can swap the Bloom team in Round 1 and the Burning team in Round 2 if you want.
Video Playthrough


In each wave, there will be an enemy that will be given 'unstable energy' - you can see by the golden bubble on top of their head. Once that bubble gets bigger and explodes, it will damage your character. So try to defeat the enemy with the unstable energy first.
2) "Validation: Torrential Tide"
Monster List

Opponent Special Features: When the active character is within the Duel Zone of an elite opponent, that character's DMG will be increased by 10%. When they are outside a Duel Zone, they will take DMG every 3 seconds. The higher the selected challenge difficulty, the greater the damage taken.
Recommended Team For New Players

If you have very limited character, use the following teams to get the minimum 5000 points to get all rewards.
| Ley Line Disorder | After a character triggers a Hydro-related reaction on an opponent, the All Elemental RES of that opponent is decreased by 30% for 6 seconds. |
| Trial Characters | Sigewinne + Ayato + Xingqiu |
Round 1 until Round 3: Trial Ayato + Xingqiu + Bennett + Xiangling
The rotation here is: Bennett Burst & Skill > Xingqiu Burst & Skill x2 (if proc Sac Sword passive) > Xiangling Burst & Skill > Ayato Burst & Skill.
For the first and second waves in round 1, you DON'T have to use Xiangling's Burst and Skills because there are only Pyro enemies and her damage won't hurt them. Use Bennett's Burst and Skill though so you can get that buff and Energy for himself.
Recommended Team For F2P

If you want to get more points for flexing, use the following teams.
| Ley Line Disorder | After a character triggers a Hydro-related reaction on an opponent, the All Elemental RES of that opponent is decreased by 30% for 6 seconds. |
| Trial Characters | Sigewinne + Ayato + Xingqiu |
Round 1: Trial Ayato + Yelan/Furina + Kaeya + Rosaria/Anemo CC (Freeze Team)
There are Pyro Slimes and Pyro Mages here so it's best if you have at least 2 Hydro characters to destroy their Pyro shield. I thought of the Vaporize team, but since there are too many Pryo-related enemies, I scrap that idea and recommend the Freeze team.
Since there are many enemies, you can choose to bring one Anemo CC to replace one Cryo character. Or you can just use the 4th Resonant Effector that can summon a vortex to gather enemies.
Round 2: Trial Sigewinne + Nilou + Nahida + Yaoyao/Kirara (Bloom Team)
Similar to the first round, there are also many enemies in this place. But since they give us Sigewinne, might as well use her and bring Bloom team here. That way you don't need to bring Anemo CC.
Round 3: Trial Xingqiu + Arlecchino (Pyro DPS) + Flex + Flex (Vaporize Team)
For the last round, single-target DPS is enough since there are only max 3 enemies in each wave. If you bring Trial Xingqiu like recommended, then use a Pyro DPS to trigger Vaporize. In my case, I bring Arlecchino, Lynette, and Fischl.
Lynette's Burst does help in taunting enemies to come toward the Bogglecat Box. And Fischl is just here for extra reaction and DPS.
Video Playthrough

You can see some (elite) enemies have green circles around them. Those are the Duel Zone and if you attack said enemies within the zone, the damage will be increased by 10% so be sure to attack inside those green circles. If you're outside of those zones, your character will receive damage.
3) "Observation: Soaring Will"
Monster List

Opponent Special Features: Some opponents will have Energy Crystal Clusters attached when they appear. Crystal Clusters will periodically attack characters dealing True DMG. After each time Energy Crystal Clusters attack, their DMG will increase, max 4 stacks. When an opponent with an Energy Cluster is defeated, the Cluster will drift away for a time, after which the Cluster will attach to nearby opponent with the highest percentage of their max HP and its DMG increase stacks will reset. The higher the selected challenge difficulty, the greater the damage dealt by Clusters, and the shorter the time they drift.
Recommended Team for New Players

| Ley Line Disorder | When a character's Normal Attacks hit opponents, the DMG dealt by this character's Normal Attacks is increased by 10% for 4 seconds. Can be triggered up to once every 0.2 seconds, max 3 times; When characters' Charged or Plunging Attacks hit an opponent, unleash a shockwave that deals True DMG at the location hit. Can be triggered up to once every 2.5 seconds. |
| Trial Characters | Arlecchino + Zhongli + Gaming |
Round 1 until Round 3: Trial Arlecchino + Xingqiu + Xiangling + Trial Zhongli

The rotation here is: Arlecchino Skill > Zhongli Skill > Xiangling Burst & Skill > Xingqiu Burst & Skill > Arlecchino Charged ATK & Spam Normal ATK > (Optional) her Burst if low on HP to heal.
Remember that with Bond of Life, no one can heal Arle except herself (not that I bring any healer in the team), so save her Burst for clutch moment for emergency heal.
Recommended Team for F2P

| Ley Line Disorder | When a character's Normal Attacks hit opponents, the DMG dealt by this character's Normal Attacks is increased by 10% for 4 seconds. Can be triggered up to once every 0.2 seconds, max 3 times; When characters' Charged or Plunging Attacks hit an opponent, unleash a shockwave that deals True DMG at the location hit. Can be triggered up to once every 2.5 seconds. |
| Trial Characters | Arlecchino + Zhongli + Gaming |
Round 1: Trial Gaming + Xianyun + Bennett + Xiangling (Mono-Pyro Team)
Since there are too many enemies that can have Cyro shields, I'm choosing the Mono-Pyro team so they can remove the shields immediately. You can replace Xianyun with any other elemental character if you want more reactions.
Round 2: Xiao + Faruzan + Furina + Zhongli (Plunging Team)
Since there are no elemental enemies here, you can choose any team you want, but preferably one that deals Normal Attacks the most. In this round, all the enemies spawn at the same location so Xiao's Burst pretty much hits the right spot and the right AoE too, so he's really good here (I'm just bias towards him).
Round 3: Trial Arlecchino + Fischl + Thoma + Chevreuse (Overload Team)
Similar to the first round, there are many enemies with Cryo shield and even Tainted Phantasm who have constant Hydro state. Vaporize is decent, but I opt to Overload so they can remove the shield ASAP.
Video Playthrough

In each wave, there will be an enemy that will be given 'Energy Crystal Clusters' - you can see by the golden bubble around their body (This enemy buff is pretty similar to the first stage). These Energy Clusters will periodically attack your character. So try to defeat the enemy with the Energy Crystal Clusters first.
4) "Collection: High-Energy Elements"
Monster List

Opponent Special Features: Opponents' ATK increased by 20%. For each opponent defeated, the aforementioned ATK bonus is further increased by 4%, max 5 stacks.
Recommended Team for New Players

| Ley Line Disorder | Increase character's Elemental Skill and Elemental Burst DMG by 25% |
| Trial Characters | Yae Miko + Ayaka + Xiangling |
Round 1: Trial Ayaka + Kaeya + Bennett + Xiangling
Round 2: Kaeya + Bennett + Xiangling + Xingqiu
Round 3: Trial Ayaka + Kaeya + Xingqiu + Xiangling
Unfortunately even after the 10th time I still can't figure a team composed around the exact same trial characters for all rounds.
Round 2 is too based around single-target while Round 3 is too based around AoE because there are many enemies in many waves (Round 3 also needs a Hydro chara in case the Pyro agent manages to put up his shield). If I used the same team on all rounds, it always came out with 4k points only.
Recommended Team for F2P

| Ley Line Disorder | Increase character's Elemental Skill and Elemental Burst DMG by 25% |
| Trial Characters | Yae Miko + Ayaka + Xiangling |
Round 1: Trial Ayaka + Barbara/Mona/Kokomi + Shenhe/Xingqiu + Flex (Freeze Team)
They nicely gave us Hydro Mimic here so let's freeze them with free Ayaka. Of course, there are other normal enemies so don't forget to bring Hydro characters to help Ayaka.
Round 2: Raiden Shogun + Xingqiu + Bennett + Trial Xiangling (National Team)
This round is nice enough since there's only a small amount of enemies and they don't need gathering so bring any team you like.
Round 3: Trial Yae Miko + Nahida + Furina + Kokomi/Jean/Baizhu (Hyperbloom Team)
Now, the last round is not nice because there are too many enemies and each wave spawns in a different spot so bringing Anemo CC will really help you (or choose the 4th Resonant Effector), or just use Nilou's Bloom team.
Video Playthrough
Opponents' special features are just ATK buff so there's no need for further explanation. The more you defeat an enemy, the stronger the leftover enemies on the field are. So it's best if you defeat all enemies in each wave at the same time or at least try to.
5) "Extension: Polyphasic Excitation"
Monster List

Opponent Special Features: Some opponents gain the following effects: Increase the ATK of opponents within a certain radius by 20%, and increase their All Elemental and Physical RES of 40%.
Recommended Team for New Players
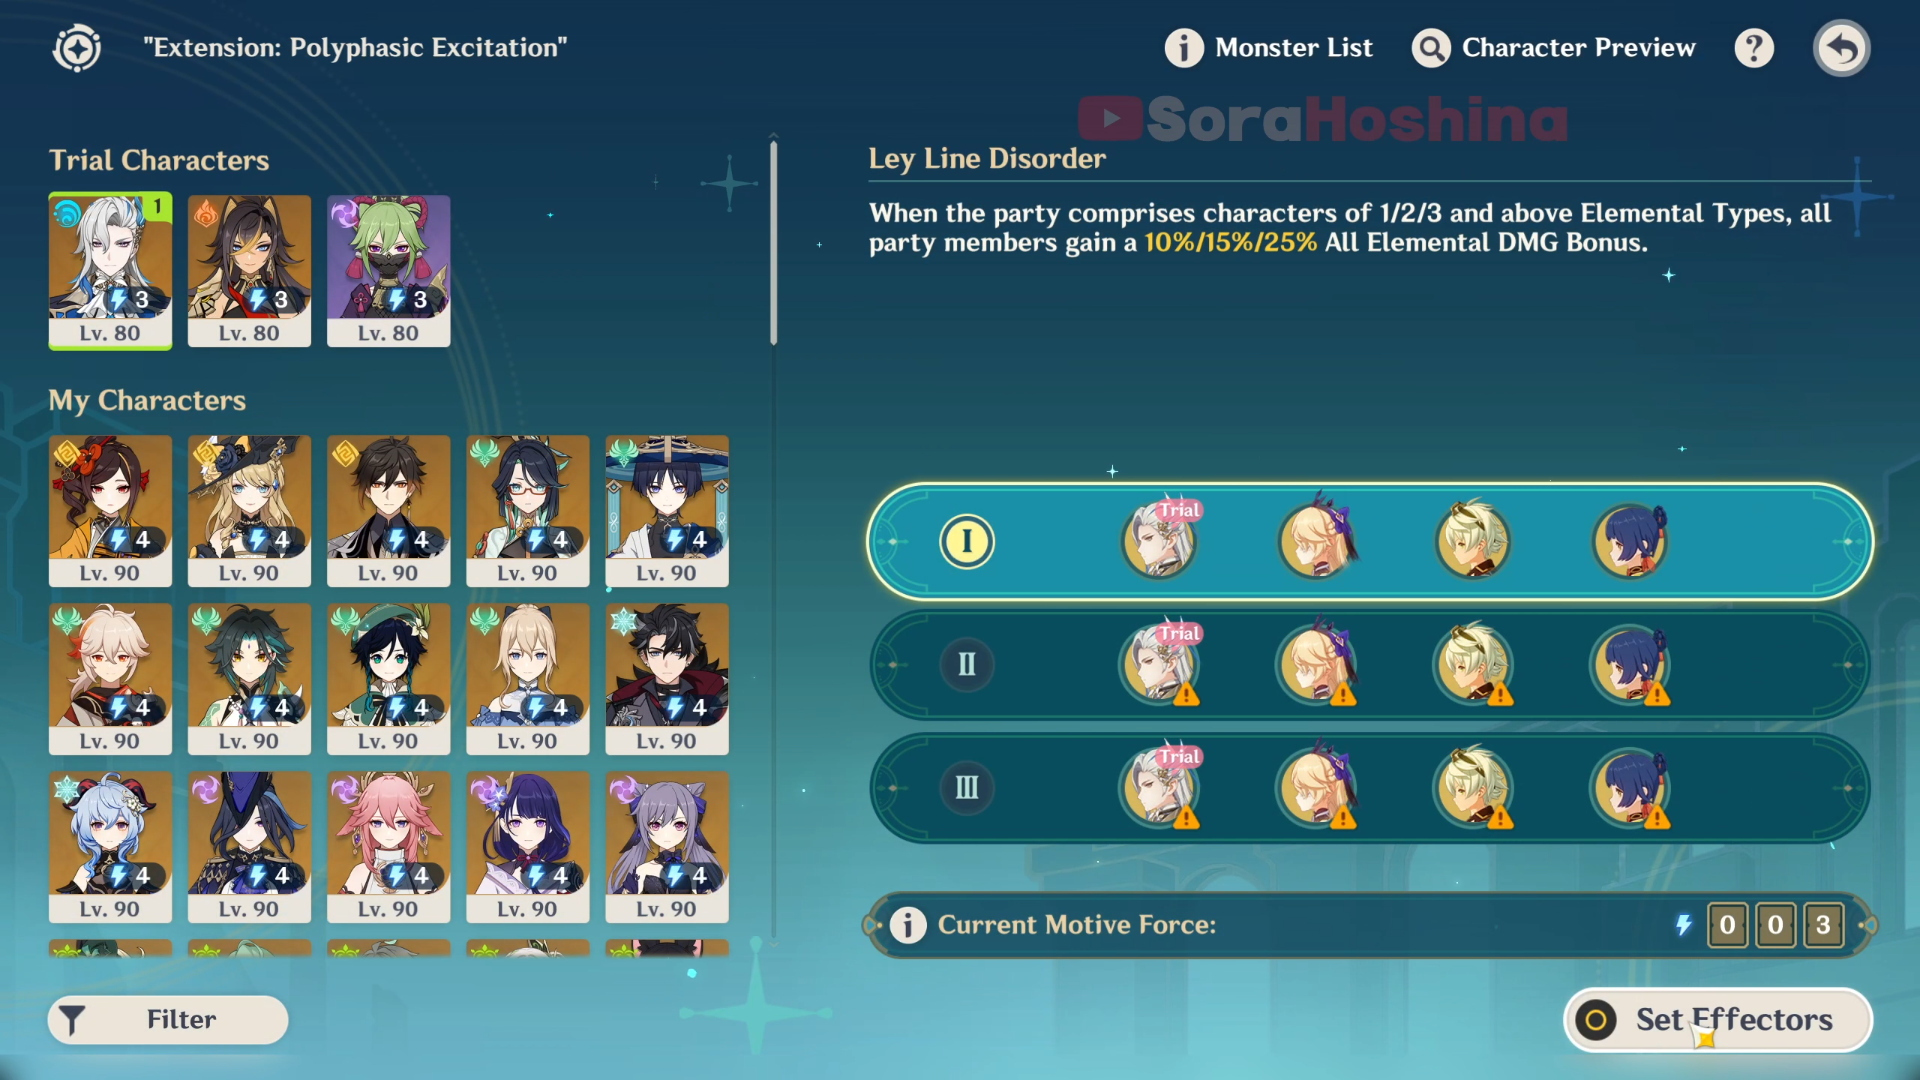
| Ley Line Disorder | When the party comprises characters of 1/2/3 and above Elemental Types, all party members gain a 10%/15%/25% All Elemental DMG Bonus. |
| Trial Characters | Neuvillette + Dehya + Kuki Shinobu |
Round 1 until Round 3: Trial Neuvillette + Fischl + Bennett + Xiangling
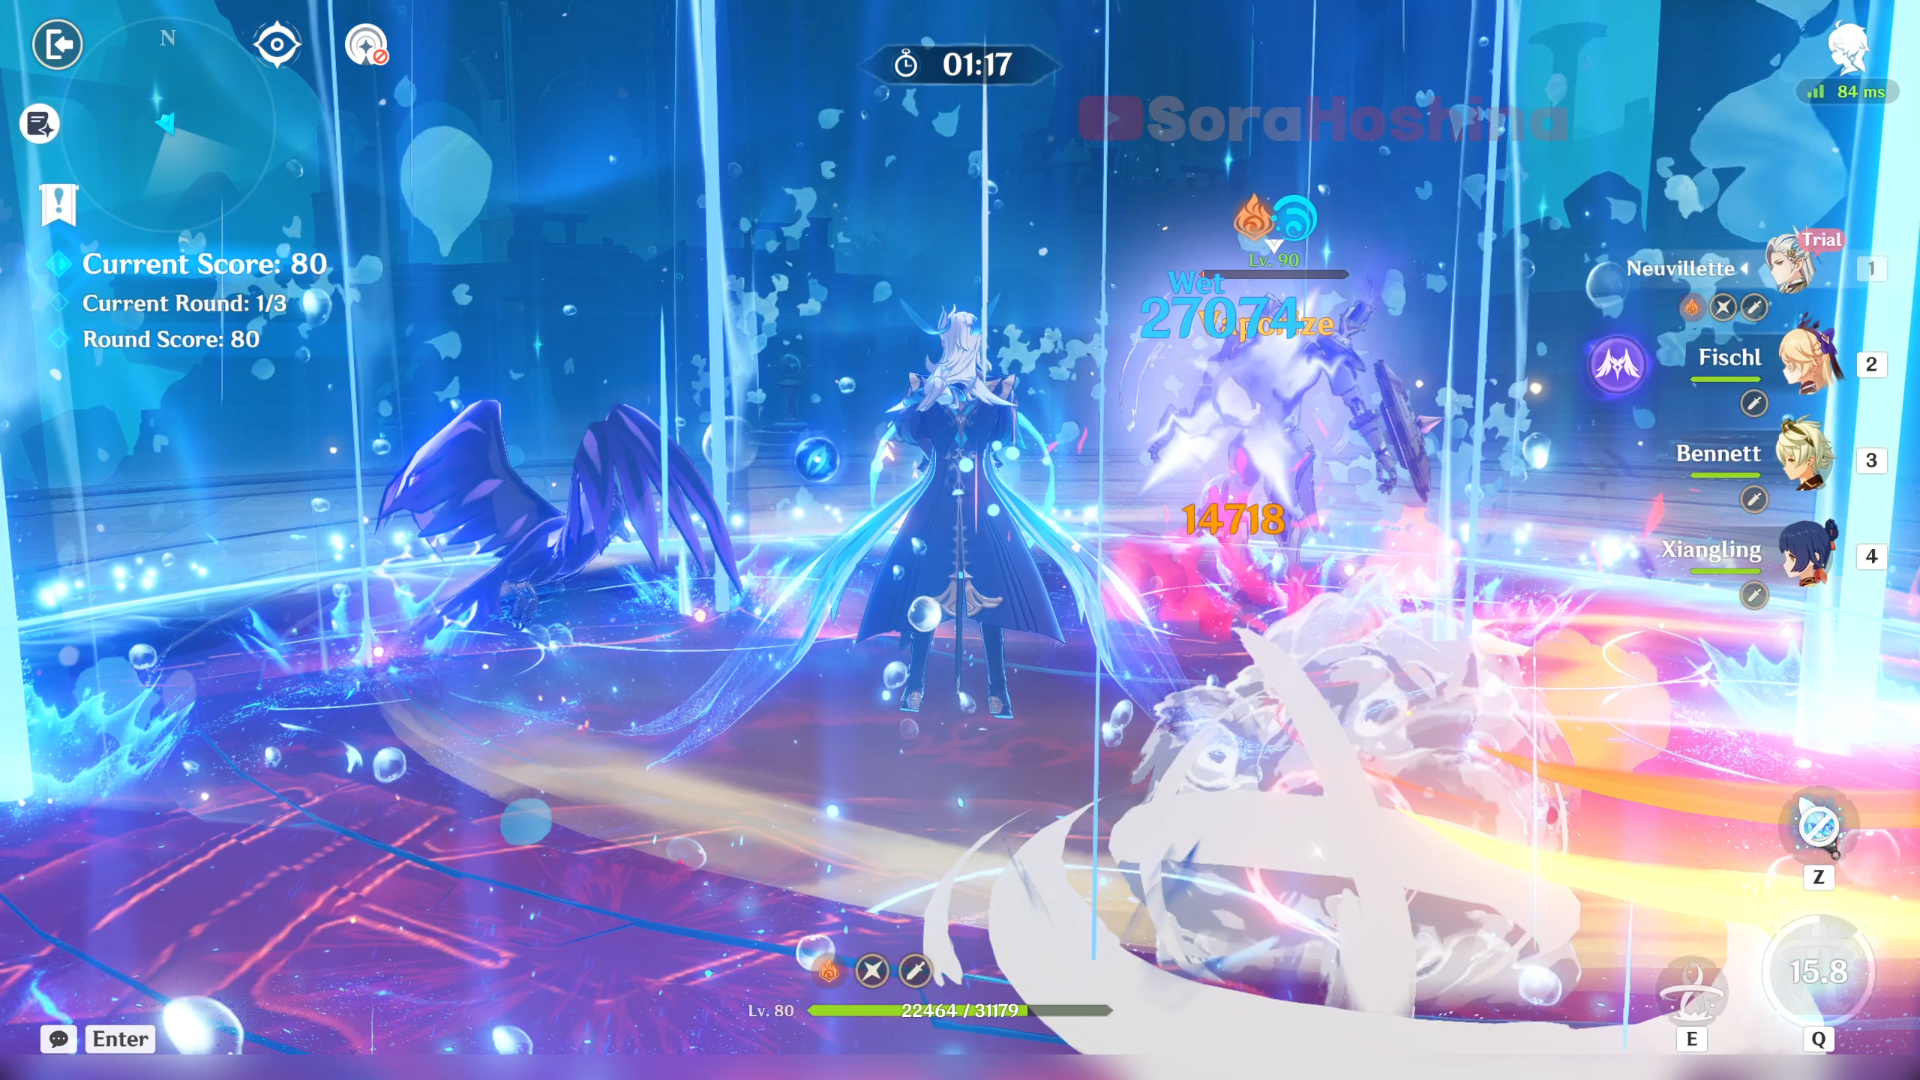
Remember that this Neuvillette is C0 so without a shielder, he will get staggered much easily if being hit by an enemy. Add a shielder replacing Bennett if you want. There isn't a really specific rotation here because I'm just spamming button at this point. If their Burst is up, use it. If you feel their Skill CD is over, use it. For example:
Neuvillette Skill > Fischl Skill / Burst > Bennett Burst & Skill > Xiangling Burst & Skill > Neuvillette Burst, Skill if up & Charged Attack.
Recommended Team for F2P
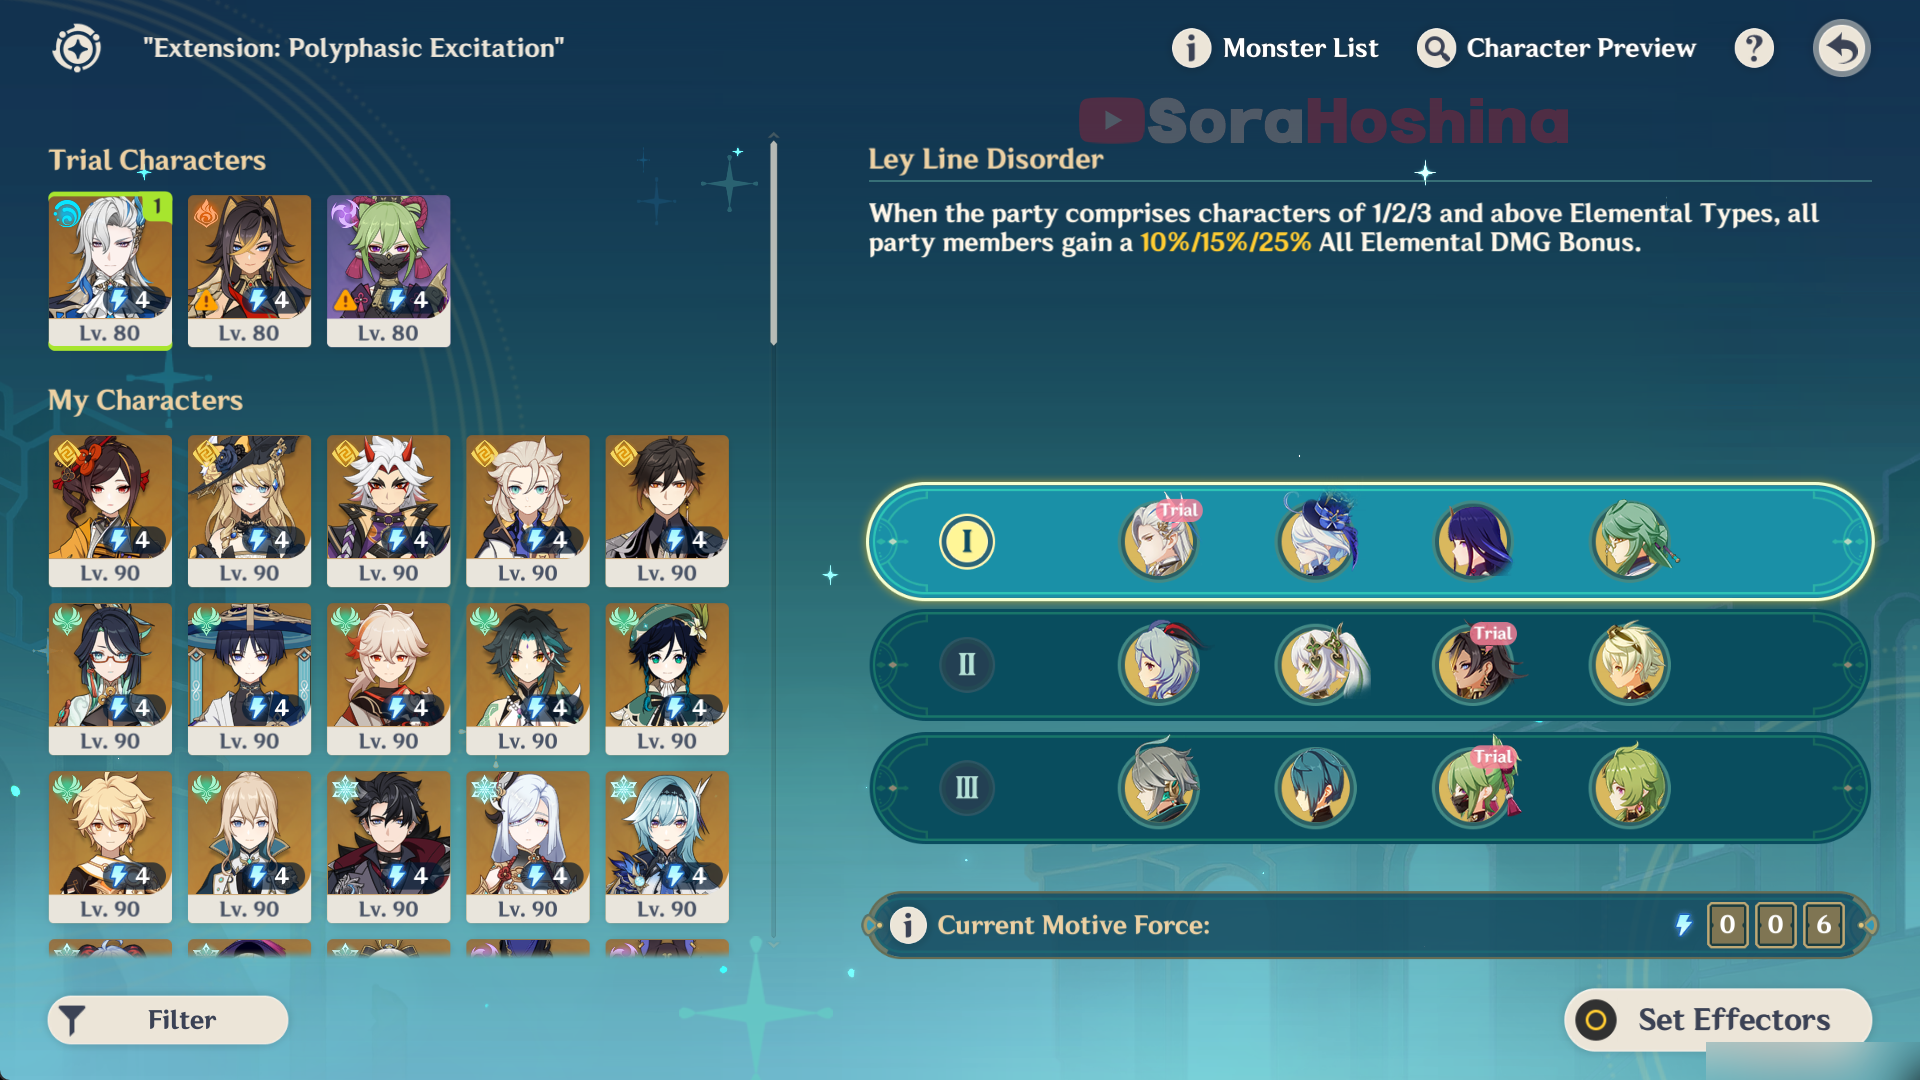
| Ley Line Disorder | When the party comprises characters of 1/2/3 and above Elemental Types, all party members gain a 10%/15%/25% All Elemental DMG Bonus. |
| Trial Characters | Neuvillette + Dehya + Kuki Shinobu |
Round 1: Neuvillette + Furina + Raiden Shogun + Baizhu (Double Hydro Team)
Based on the Ley Line, it's best if you have at least 3 different elements in each team so you can get the Elemental DMG Bonus. Neuvillette can be in any team since he's that OP but Round 1 and 2 would be the best because there are many enemies in each wave for these 2 rounds and Neuvillette's Charged ATK would be able to hit all the enemies here.
Round 2: Ganyu + Nahida + Dehya + Bennett (Burgeon Team)
Since there are many Mitachurls in this round, put Dehya here because she can increase resistance to interruption.
Round 3: Alhaitham + Xingqiu + Trial Kuki Shinobu + Flex (Hyperbloom Team)
There are not too many or too few enemies here so Hyperblooom works fine with Trial Kuki Shinobu.
Video Playthrough
Certain elite opponents in each wave have the small sandy circle (like in the image above) with the following effects: Increase the ATK of opponents within a certain radius by 20%, and increase their All Elemental and Physical RES of 40%. It's a pretty great buff on them so be sure to defeat the elite enemy first.
6) "Exceedance: Resonance Amplification"
Monster List

Opponent Special Features: The HP Percentage of all opponents affected by this will change every 8 seconds: After changing, all their HP% values will be the same as the HP% of the affected opponent with the highest current HP%.
Recommended Team for New Players

| Ley Line Disorder | When a character triggers a Swirl or Crystallize Reaction, all party members gain a 25% All Elemental DMG Bonus for 8 seconds. Can be triggered up to once every 1 second. |
| Trial Characters | Chiori + Venti + Sucrose |
Round 1: Navia + Trial Venti + Bennett + Fischl
Round 2 and 3: Clorinde (Electro / Pyro DPS) + Chevreuse + Fischl + Bennett

Round 1 is more to AoE while Round 2 and 3 are to single-target DPS. So I used 6 characters instead of 4. In Round 1, Trial Venti does not have great Energy Recharge so you need to use his Skill multiple times to get his Burst back up.

In Round 2, some waves have multiple enemies, and some waves have only 1-3 of them. The most dangerous one is definitely the Golem one because as long as they have their Geo shield, your damage won't even scratch them. Claymore, Geo, and Overload reaction would help in chipping their Geo shield.

Round 3 is even more single-target than the first two because most waves only have 2 enemies. Because of the Opponent Special Features, it's really hard to make sure both of them are down since AoE would deal too little damage for 2 enemies and single-target would deal huge damage to one of them but the special features can easily heal the lower HP enemies. What you need to do is hit both enemies one at a time while making sure their HP has the same amount.
Recommended Team for F2P

| Ley Line Disorder | When a character triggers a Swirl or Crystallize Reaction, all party members gain a 25% All Elemental DMG Bonus for 8 seconds. Can be triggered up to once every 1 second. |
| Trial Characters | Chiori + Venti + Sucrose |
Round 1: Trial Venti + Raiden Shogun + Kokomi + Collei (Hyperbloom Team)
Oh boy, you can see how many enemies there are in this round so bring an Anemo CC. Other than Venti, you can actually bring anyone you want but I'm going for the Hyperbloom team because why not.
Round 2: Trial Chiori + Noelle/Navia + Furina/Bennett + Xiangling (Crystallize Team/Noelle-Furina Team)
Since there's a Golem in this round, be sure to bring a Geo character (especially Claymore) so you will have an easy time destroying their Geo Shield. Other option is Overload team since Pyro+Electro reactions also helps in depleting the Geo Shield.
Round 3: Trial Sucrose + Xingqiu + Fischl + Beidou (Taser Team)
The last trial character is Sucrose so let's bring her along in the last round as a Driver for other characters.
Video Playthrough

The Opponent Special Feature here is the most dangerous since it can heal enemies to the enemy with the highest current HP%. You can see when it's activated when the enemies start glowing green like in the picture above (every 8 seconds). You can't do anything to stop them from doing this so you can only make sure the enemies with the 'highest current HP' do not have that much HP or just mow all enemies down so only 1-2 left on the field.
Energy Amplifier: Lemma Event Rewards
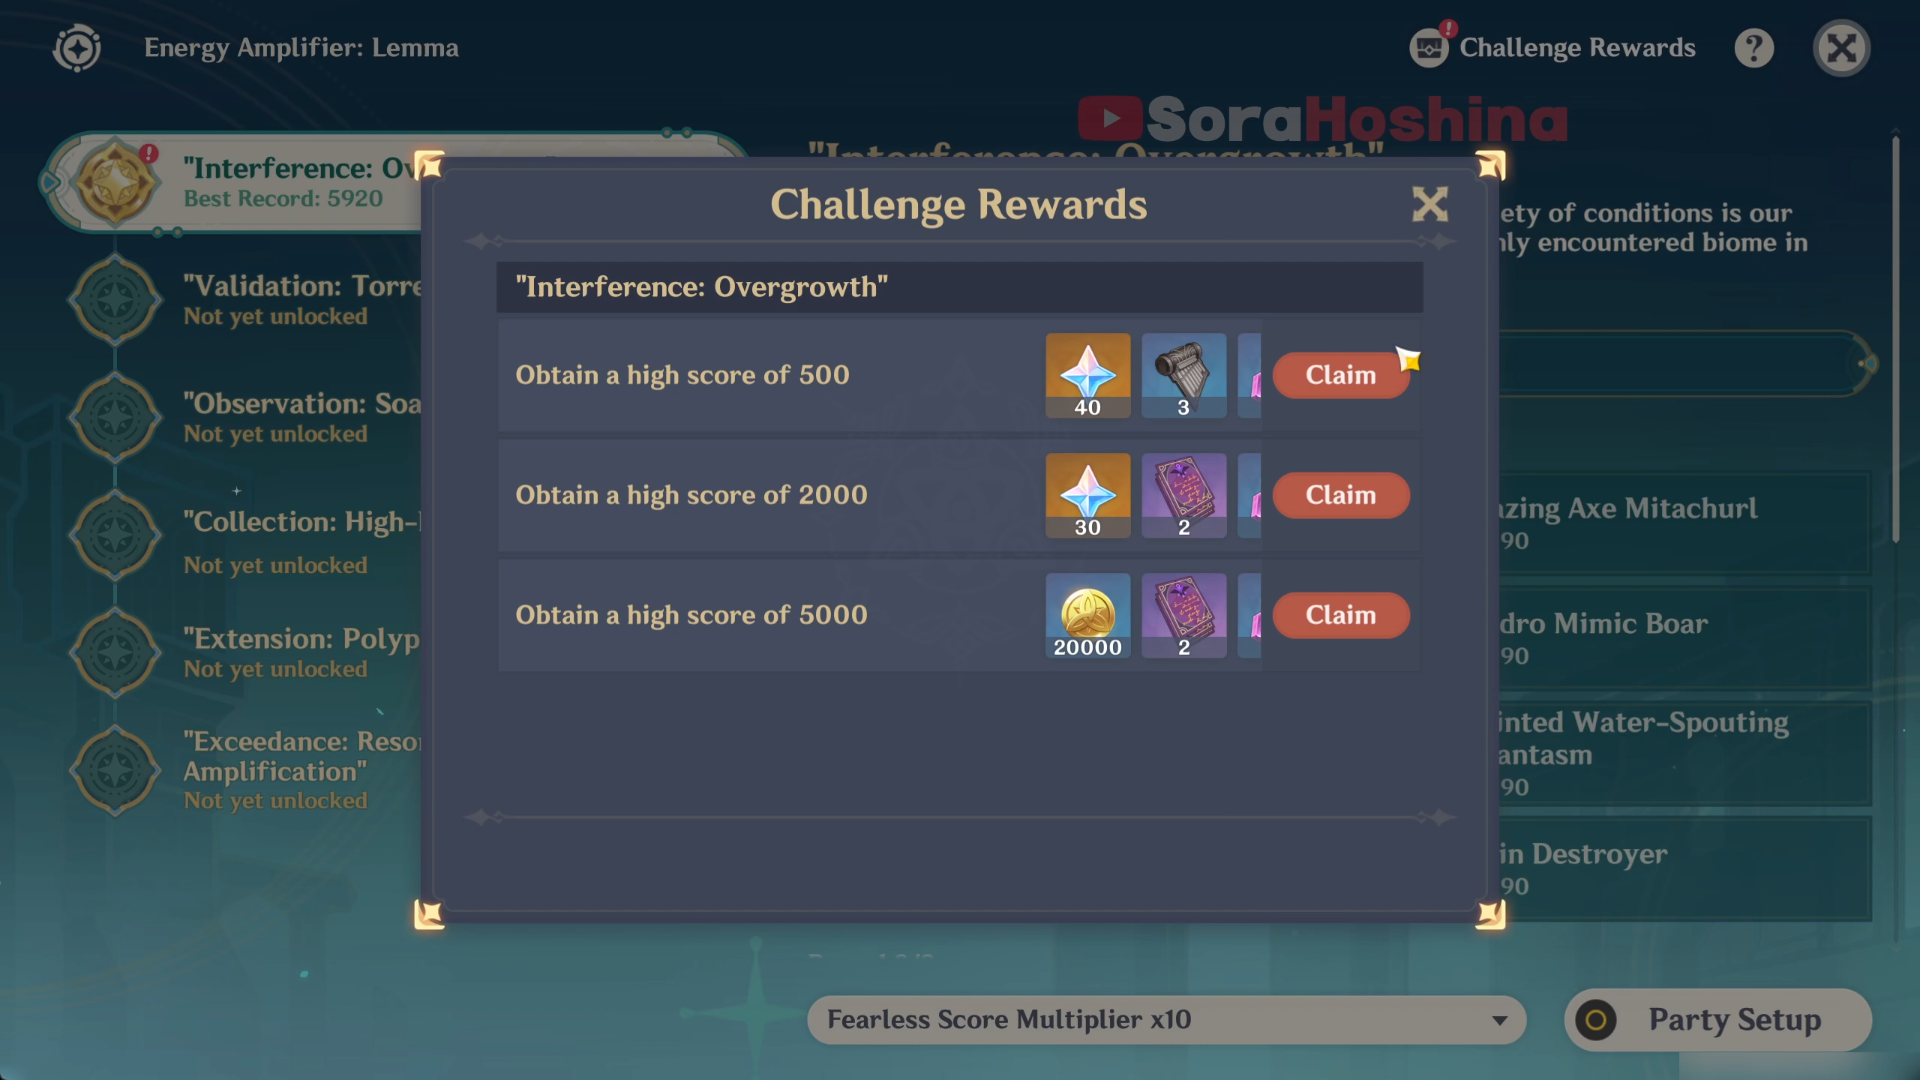
➥ Don’t forget to manually claim your rewards from the event page. By completing all the event challenges, you will get the following rewards:
- Primogem x 420
- Chapter of an Ancient Chord x 6
- Mystic Enhancement Ore x 60
- Hero's Wit x 24
- Mora x 120000
- Sublimation of Pure Sacred Dewdrop x 6
- Wine Goblet of the Pristine Sea x 6