Table of Contents [Hide]
With the new Natlan Region, Spiral Abyss F10 finally has a new set of enemies to face. Comparing this floor to the 9th floor, there is a small increase in difficulty as enemies have a higher level and are far more powerful than the usual mobs.
Blessing of the Abyssal Moon
Reminder: Blessing of the Abyssal Moon will change every refresh cycle and may not be updated in this guide. But the enemies list and strategy will remain the same.
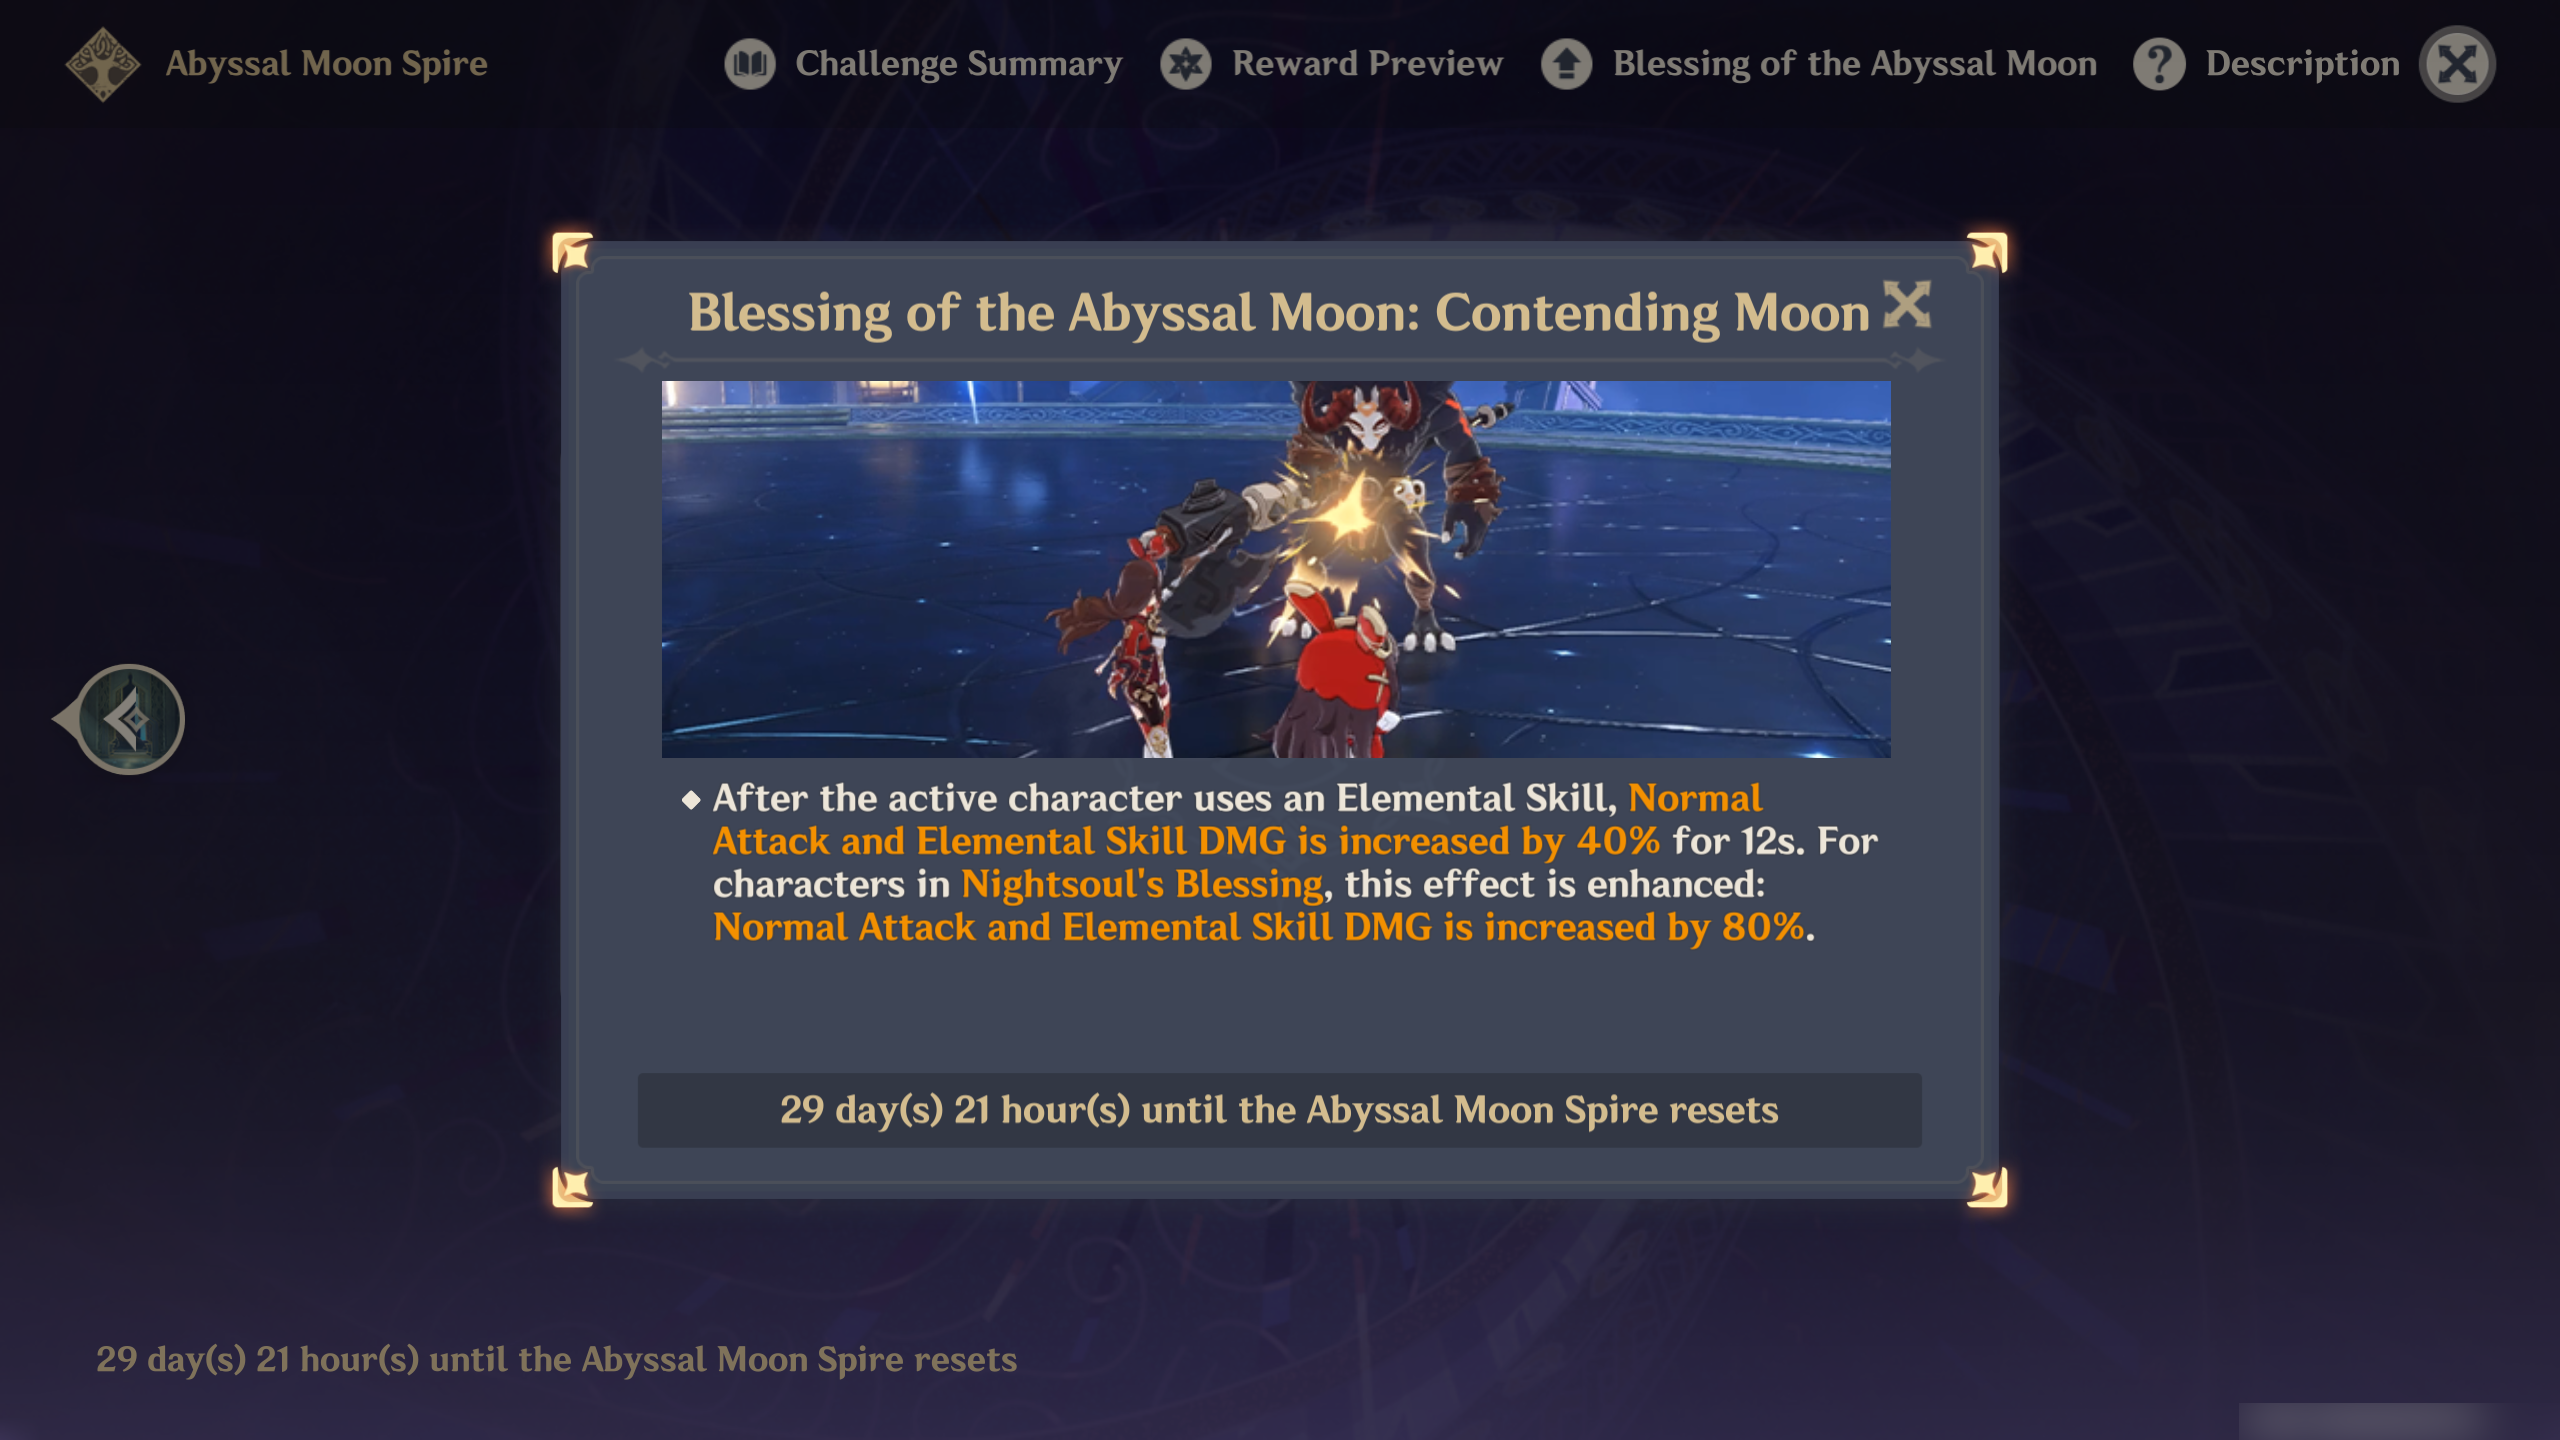
Blessing of the Abyssal Moon: Contending Moon
After the active character uses an Elemental Skill, Normal Attack and Elemental Skill DMG is increased by 40% for 12s. For characters in Nightsoul's Blessing, this effect is enhanced: Normal Attack and Elemental Skill DMG is increased by 80%.
Nightsoul's Blessing is only for Natlan character so if you want that juicy 80% increased DMG for Skill and Normal ATK, bring Natlan characters along. Although 40% for non-Natlan characters doesn't sound too bad either..
Ley Line Disorder
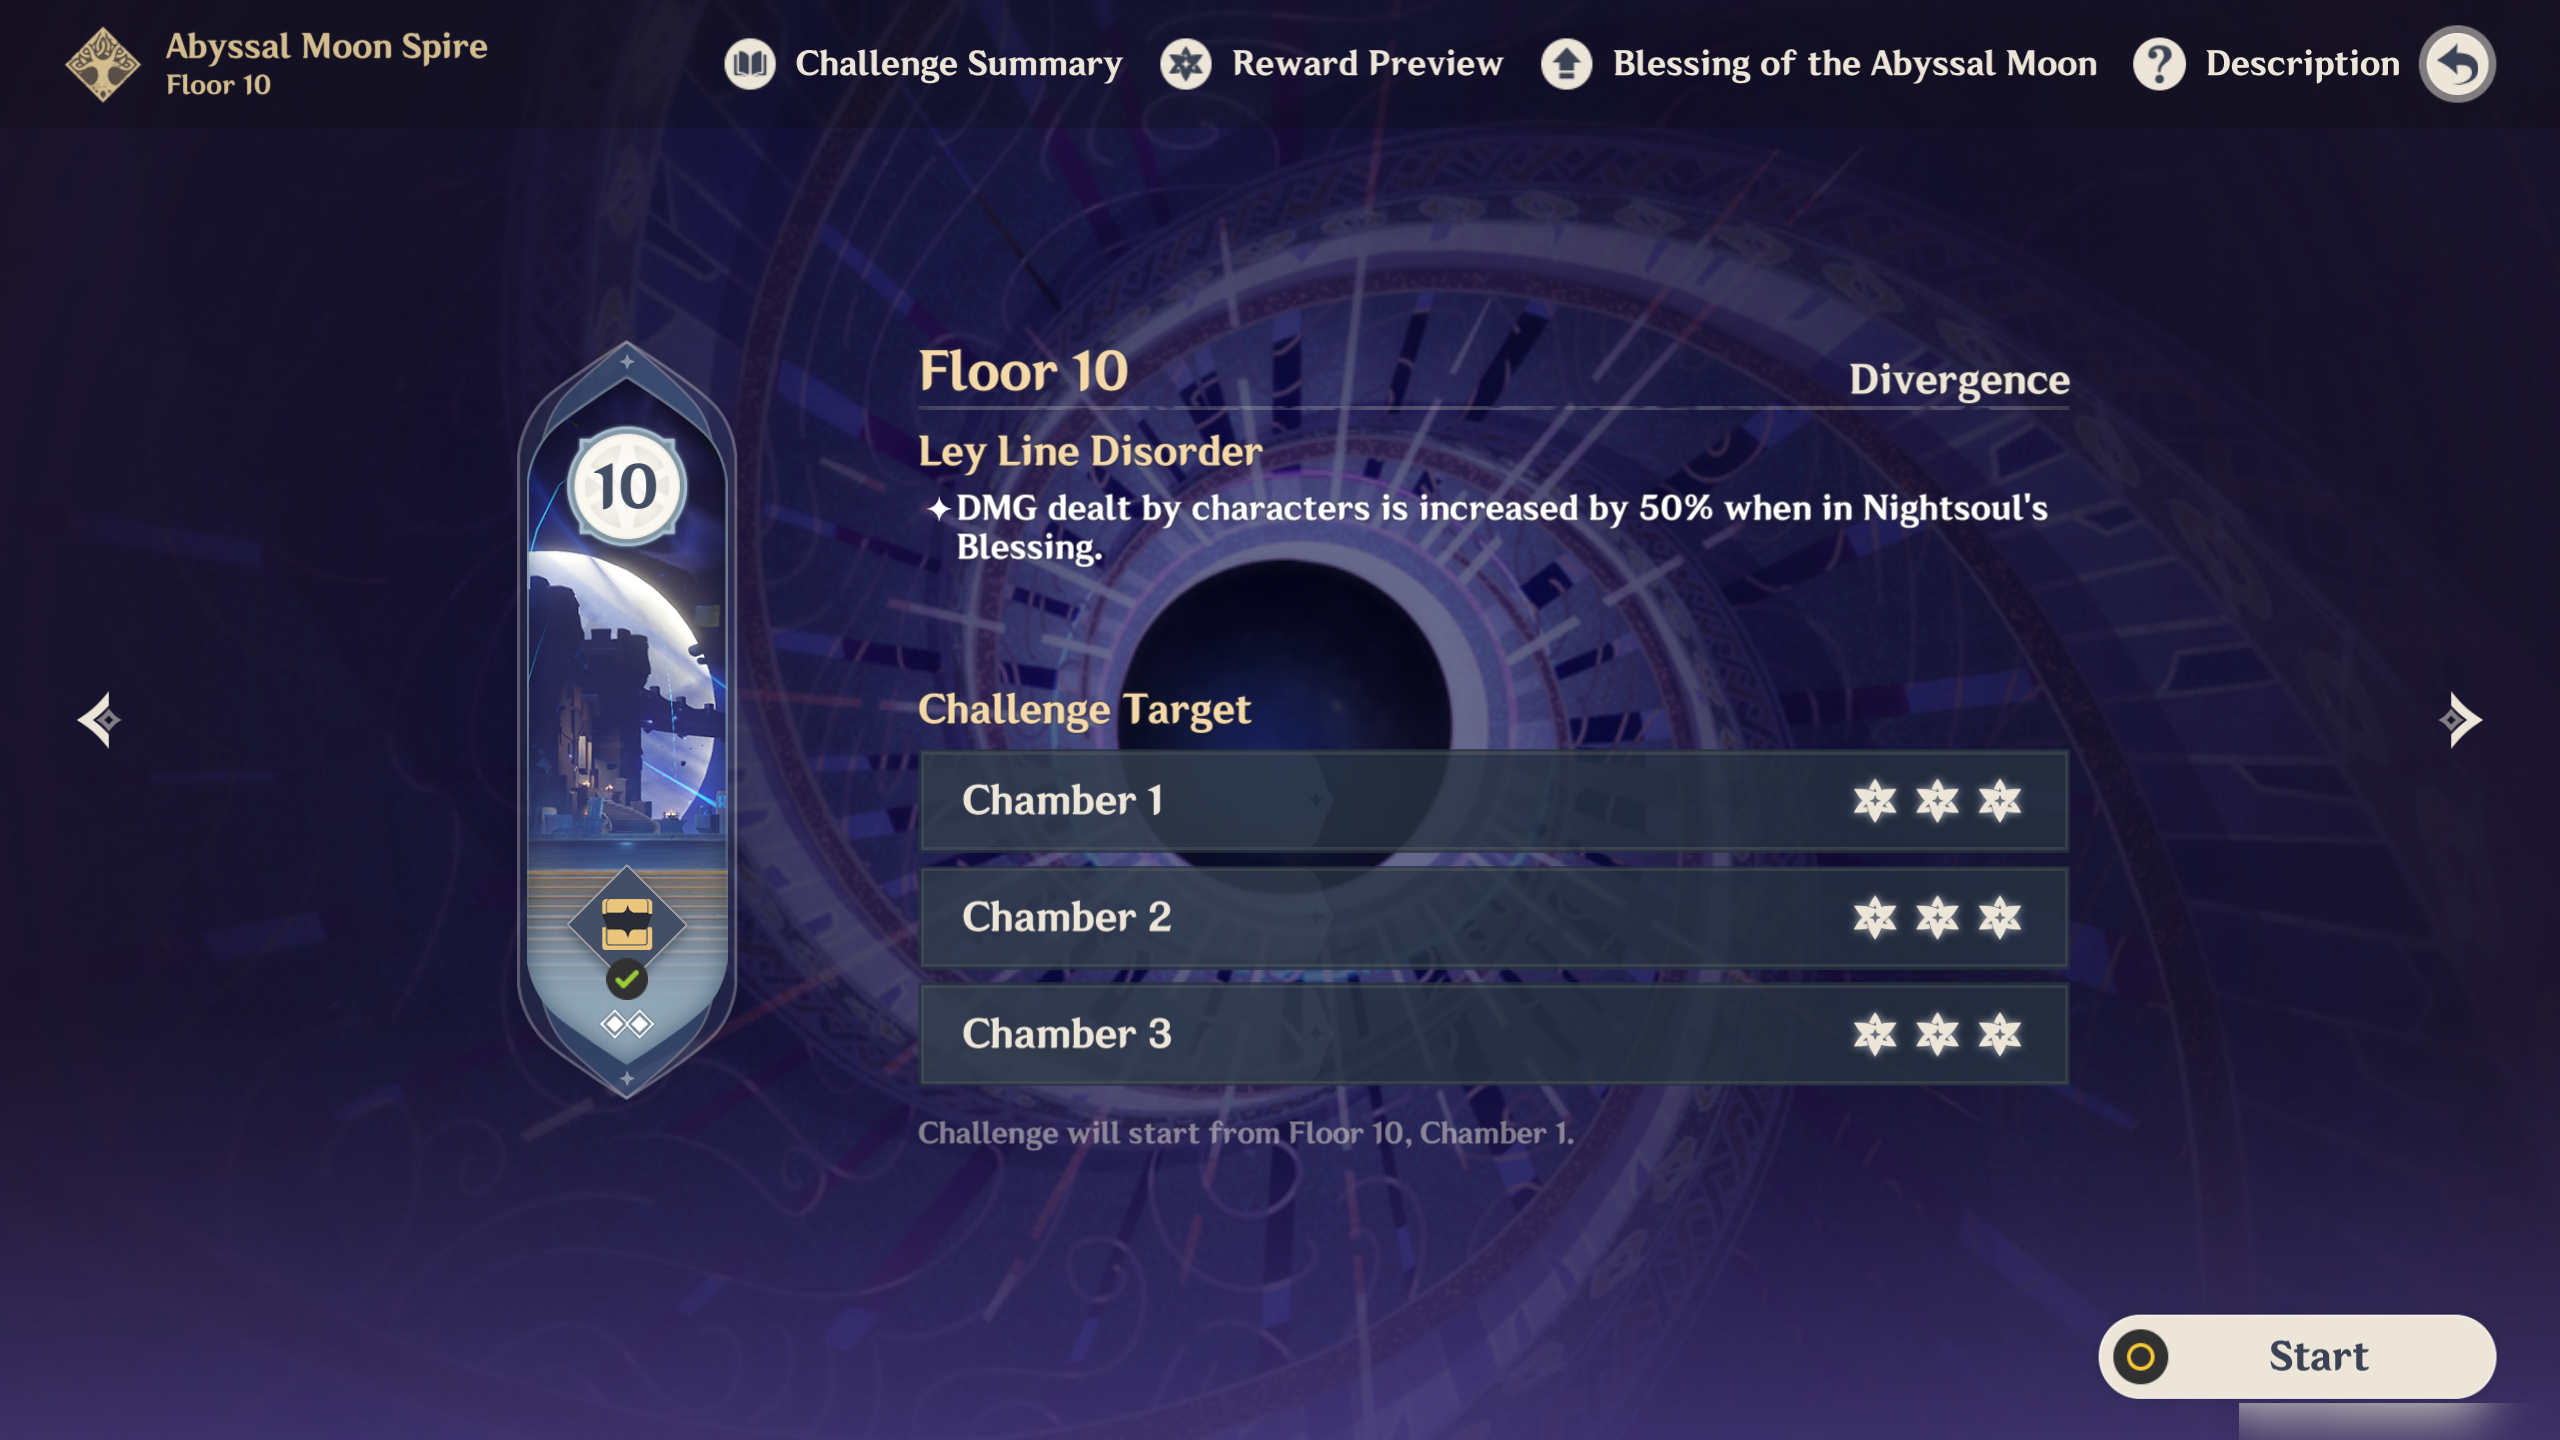
DMG dealt by characters is increased by 50% when in Nightsoul's Blessing.
Unfortunately, this buff is only accessible for Natlan characters because non-Natlan characters are unable to gain Nightsoul's Blessing. If you have a built Natlan character, consider bringing them so they can provide extra damage to the team.
Team Recommendations
Team Recommendations for the First Half
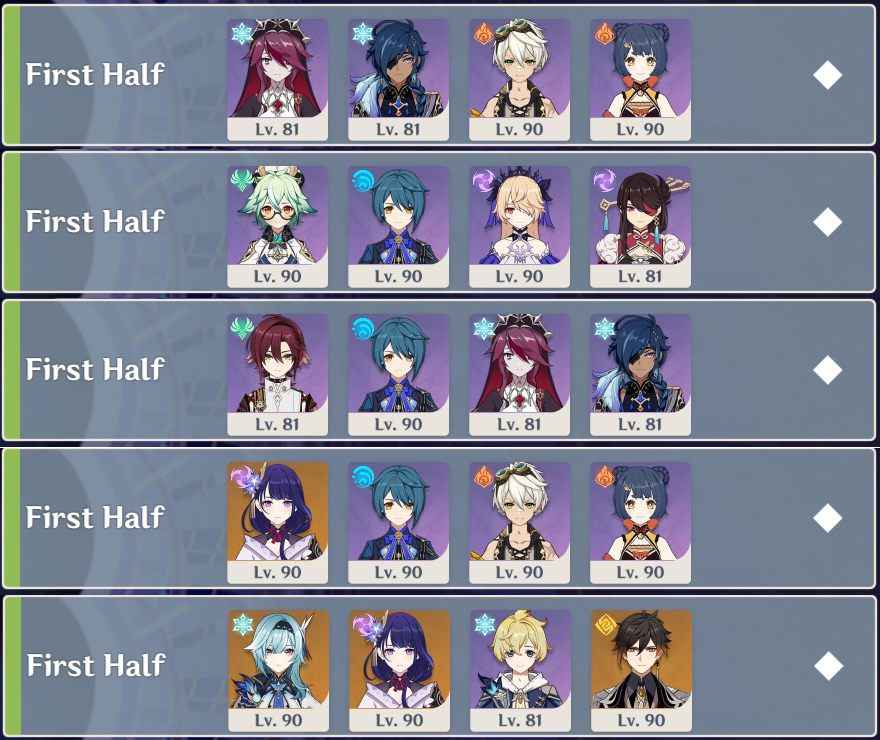
| The recommended elements for the First Half |    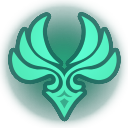  All elements except those mentioned below + Physical ➥ Physical is recommended here because all the Tribal Warriors have very low resistance against Physical attack. Their RES to Physical is -20%. Yes, it's that low so you can take advantage of Physical on these chambers. Fortunately, the Saurians also have normal Physical RES so you don't have to worry about them. ➥ It's also recommended to bring an Anemo CC because there are a lot of enemies in these chambers for each wave! |
| The not recommended elements for the First Half |    Geo, Dendro, Hydro ➥ This is because each Saurian has high resistance against their own elements. For example, the Tepetlisaurus has 50% Geo Resistance (Whelp has 30% Resistance) while Koholasaurus has 50% Hydro RES. |
Example:
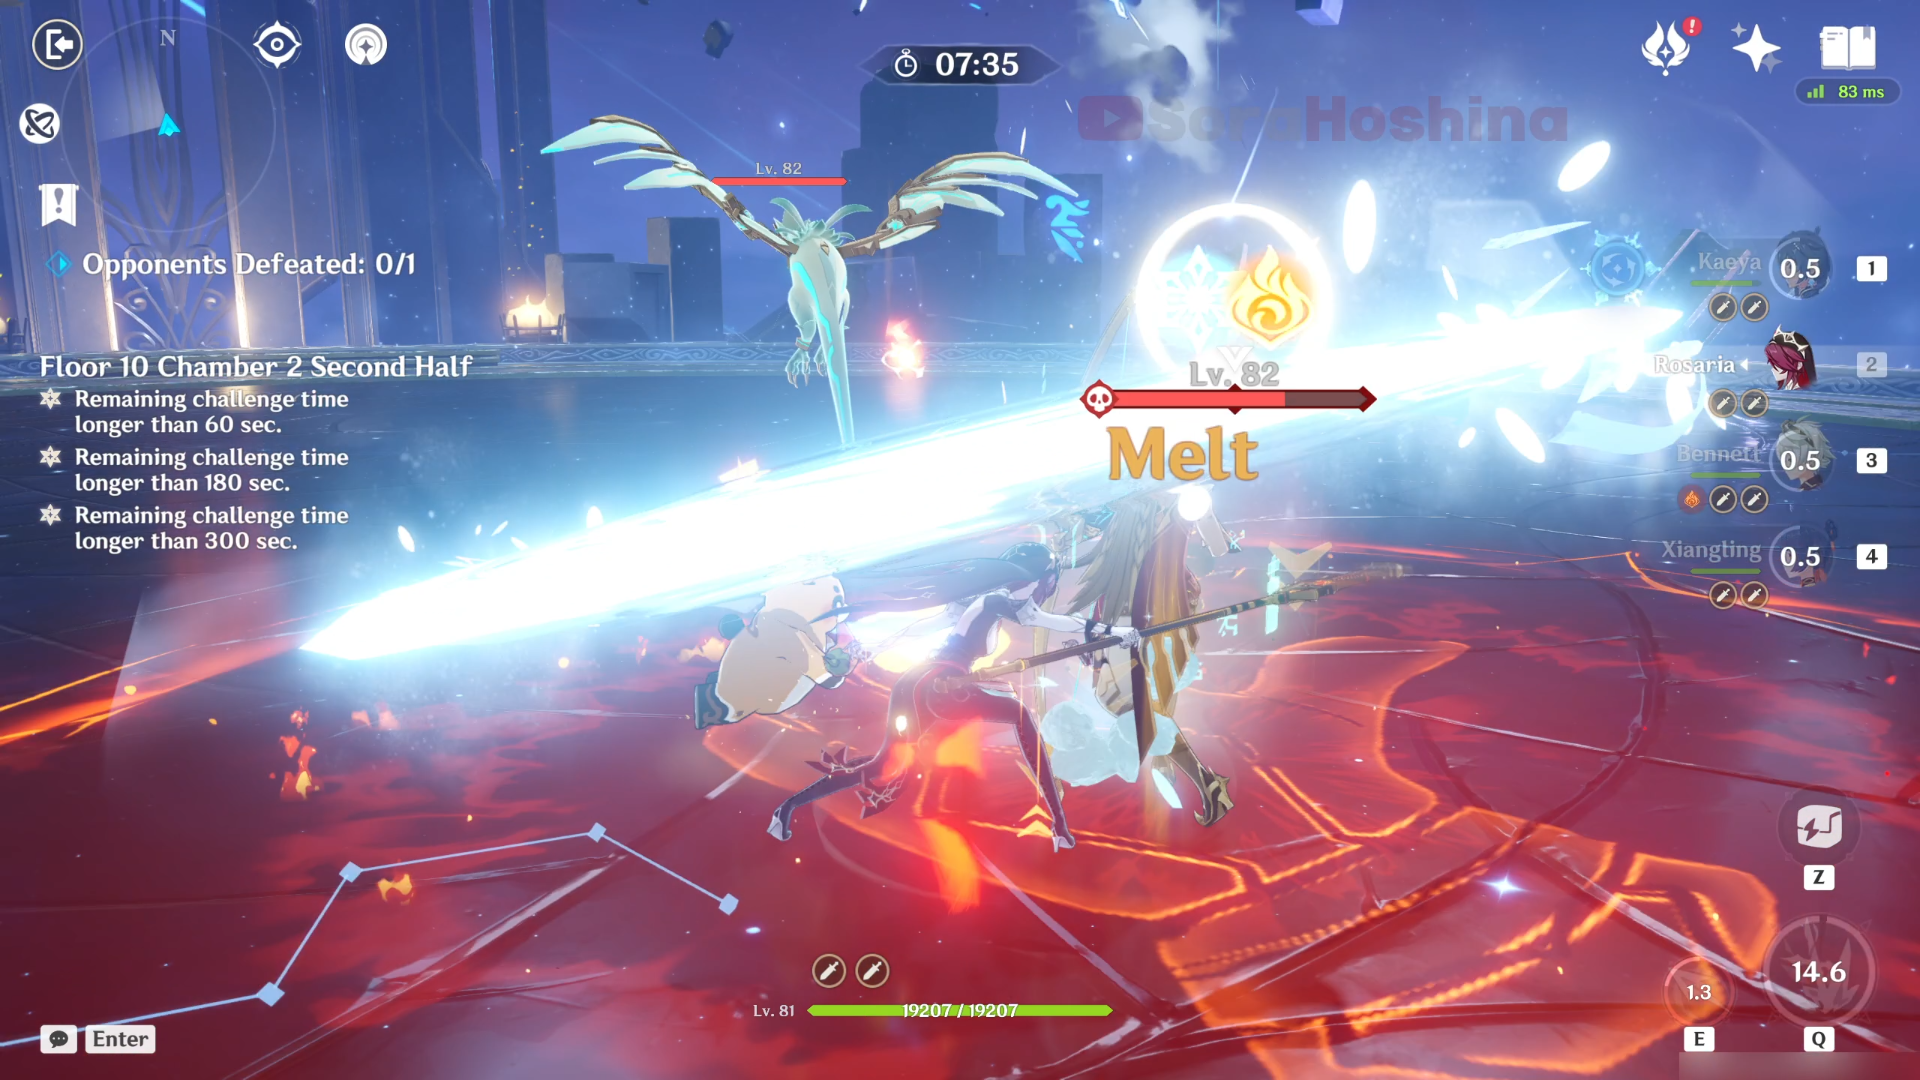
(1) Melt Team: Rosaria + Kaeya + Bennett + Xiangling
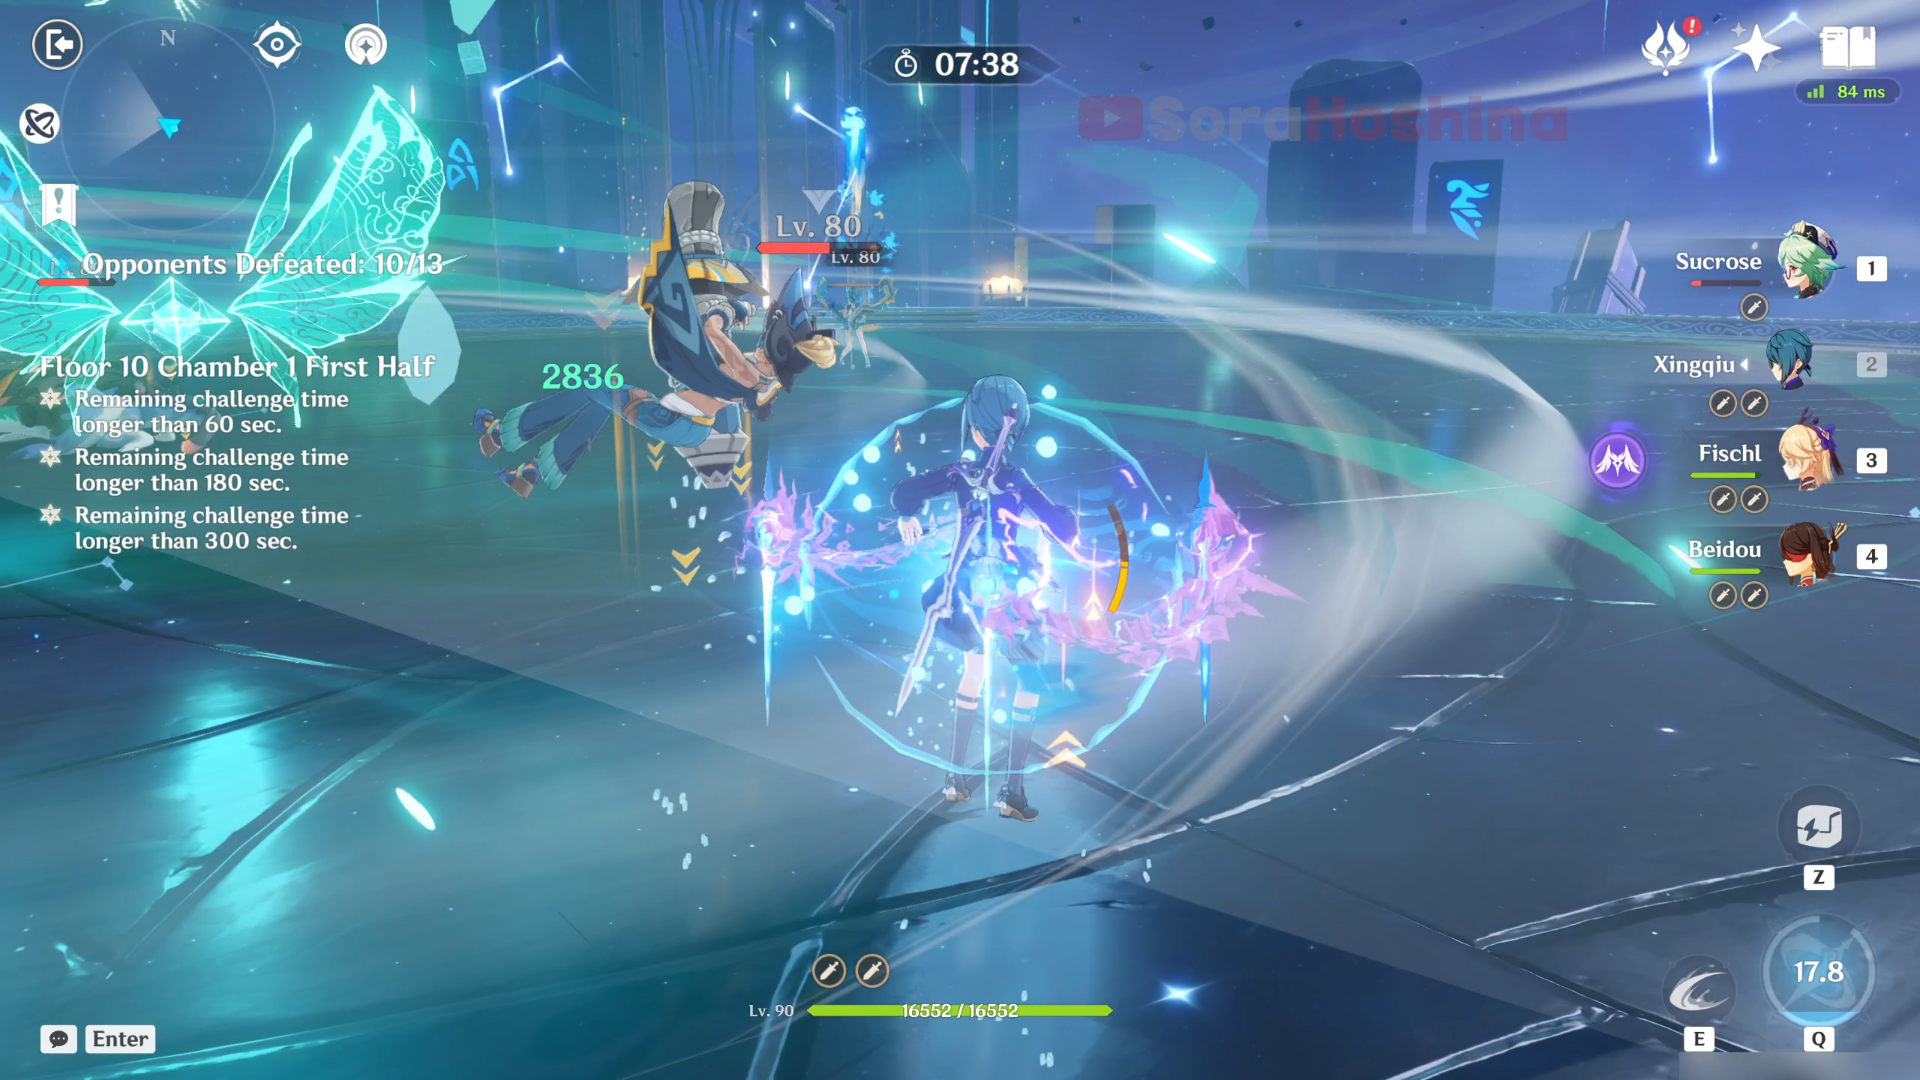
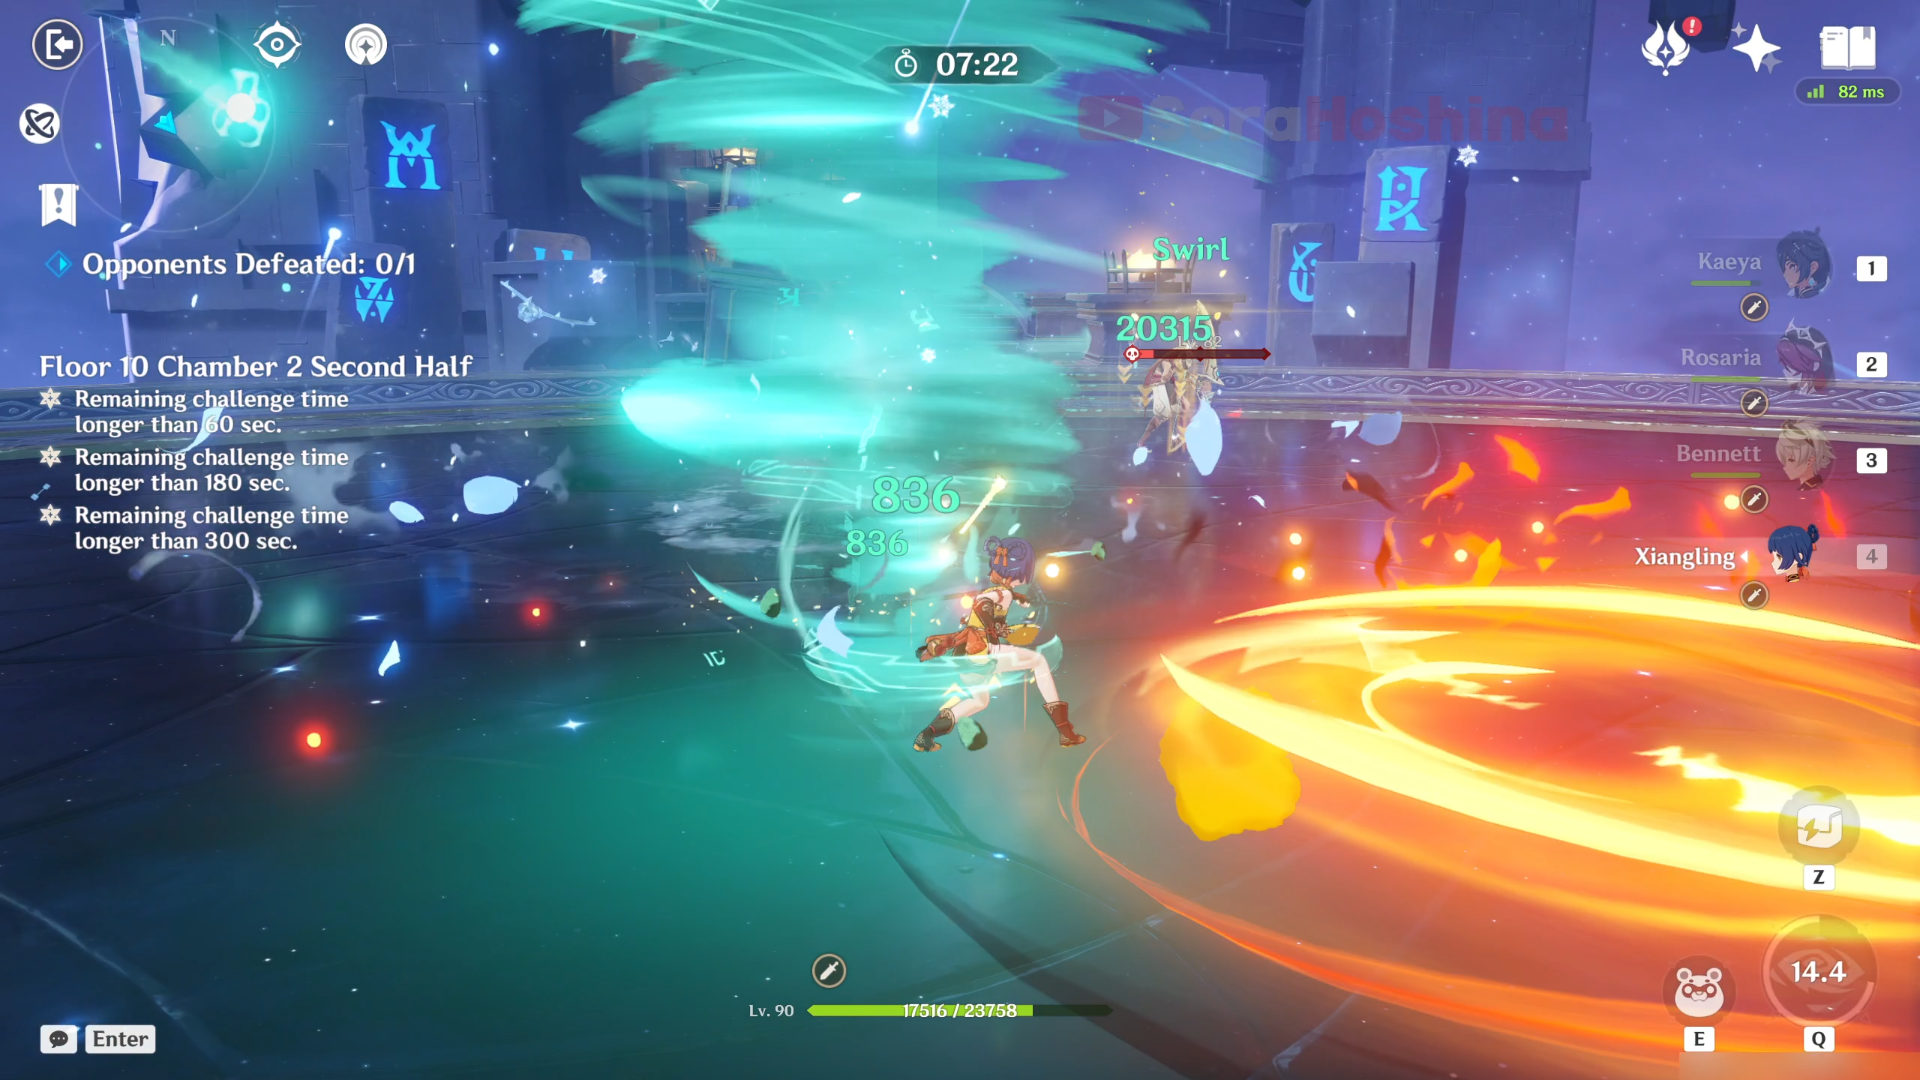
(2) Taser Team: Sucrose + Xingqiu + Fischl + Beidou
(3) Freeze Team: Heizou + Xingqiu + Kaeya + Rosaria
(4) National Team: Raiden Shogun + Xingqiu + Bennett + Xiangling
(5) Physical Team: (Razor + Rosaria) or (Eula + Raiden) + Mika + Zhongli
Team Recommendations for the Second Half
| The recommended elements for the Second Half | All elements |
| The not recommended elements for the Second Half | None ➥ Other than there's only one enemy in each chamber, all of them also have no high RES to any elements or Physical. You can bring any team you want, preferably with a single-target DPS. |
Example:
(1) Vaporize Team: Yanfei + Xingqiu + Bennett + Xiangling
(2) Overload Team: Yanfei + Bennett + Fischl + Beidou
(3) Hyperbloom Team: Dendro MC + Xingqiu + Kuki Shinobu + Collei
(4) Vaporize Team 2: Arlecchino + Yelan/Xingqiu + Flex + Zhongli
(5) Burning Team: Kinich + Emilie + Bennett + Xiangling
Floor 10 Chamber 1
First Half

Wave 1: Flowing Blade Skirmisher x1, Flowing Blade Grease-Saw x1 & Koholasaur Whelp x3
Wave 2: Flowing Blade Harpoon-Thrower x1, Flowing Blade Skirmisher x1, Flowing Blade Grease-Saw x1 & Koholasaur Whelp x2
Wave 3: Koholasaurus x1, Koholasaurus Warrior: Waveshuttler x1 & Koholasaurus Warrior: Reefsplitter x1
In the first wave, there are 5 enemies surrounding you when you start the challenge. If you remember, the Yumkasaur Whelps can only spit at you so they're not a big deal. What you should worry about are the 2 Tribal Warriors here as they have a skill that charges at your character. As long as you can dodge their attacks, this wave is easy.
TIPS: You can see when they're going to start doing their charged attack by looking at the icon above their head. This is also the same for other Tribal Warriors. If you see the icon on top of their head, that means they're going to do their 'Ultimate' attack.

Although I mentioned wave 2, once you defeat any enemy in wave 1, the enemies in wave 2 pool will immediately spawn. You can see the enemy's roster in the infographic above. There's only one new enemy here and that's the Flowing Blade Harpoon-Thrower. He has a little bit more skills than other Tribal Warriors (can do both melee and ranged attack) and he also can charge at your character. Same as before, watch their attack and avoid incoming attacks (unless you bring a shield).
After you defeat all the enemies in wave 1 and wave 2, the last wave will start with 3 high-ranked enemies. The 2 Tribal Warriors here are ranged attackers with their slingshot and cannon, focus on either one of them (even better if you can group both Tribal Warriors) and let the Koholasaurus chase after you. Try to stagger them so their relentlessly aimed shots will stop. Oh yes, they will also charge at your character (like other Koholasaurus Warriors) by surfing on top of their weapon. Make sure to swerve out of their direction (this move can easily stagger your character) and you should be good.
Second Half
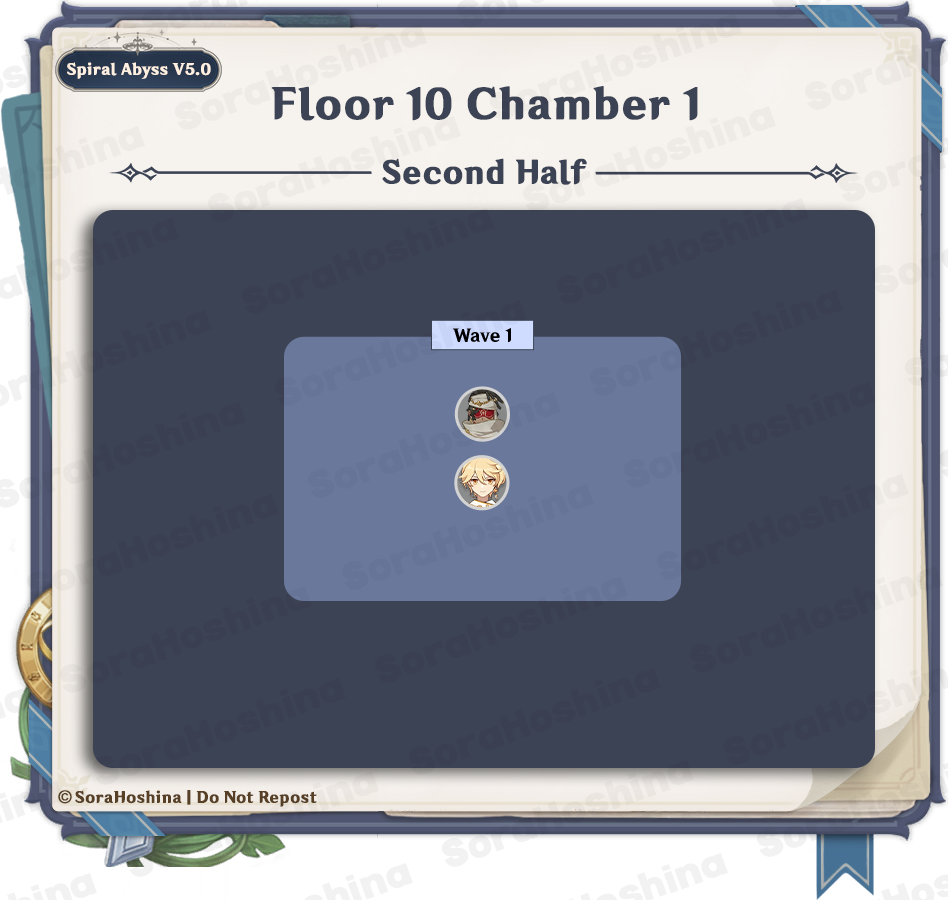
Wave 1: Eremite Stone Enchanter
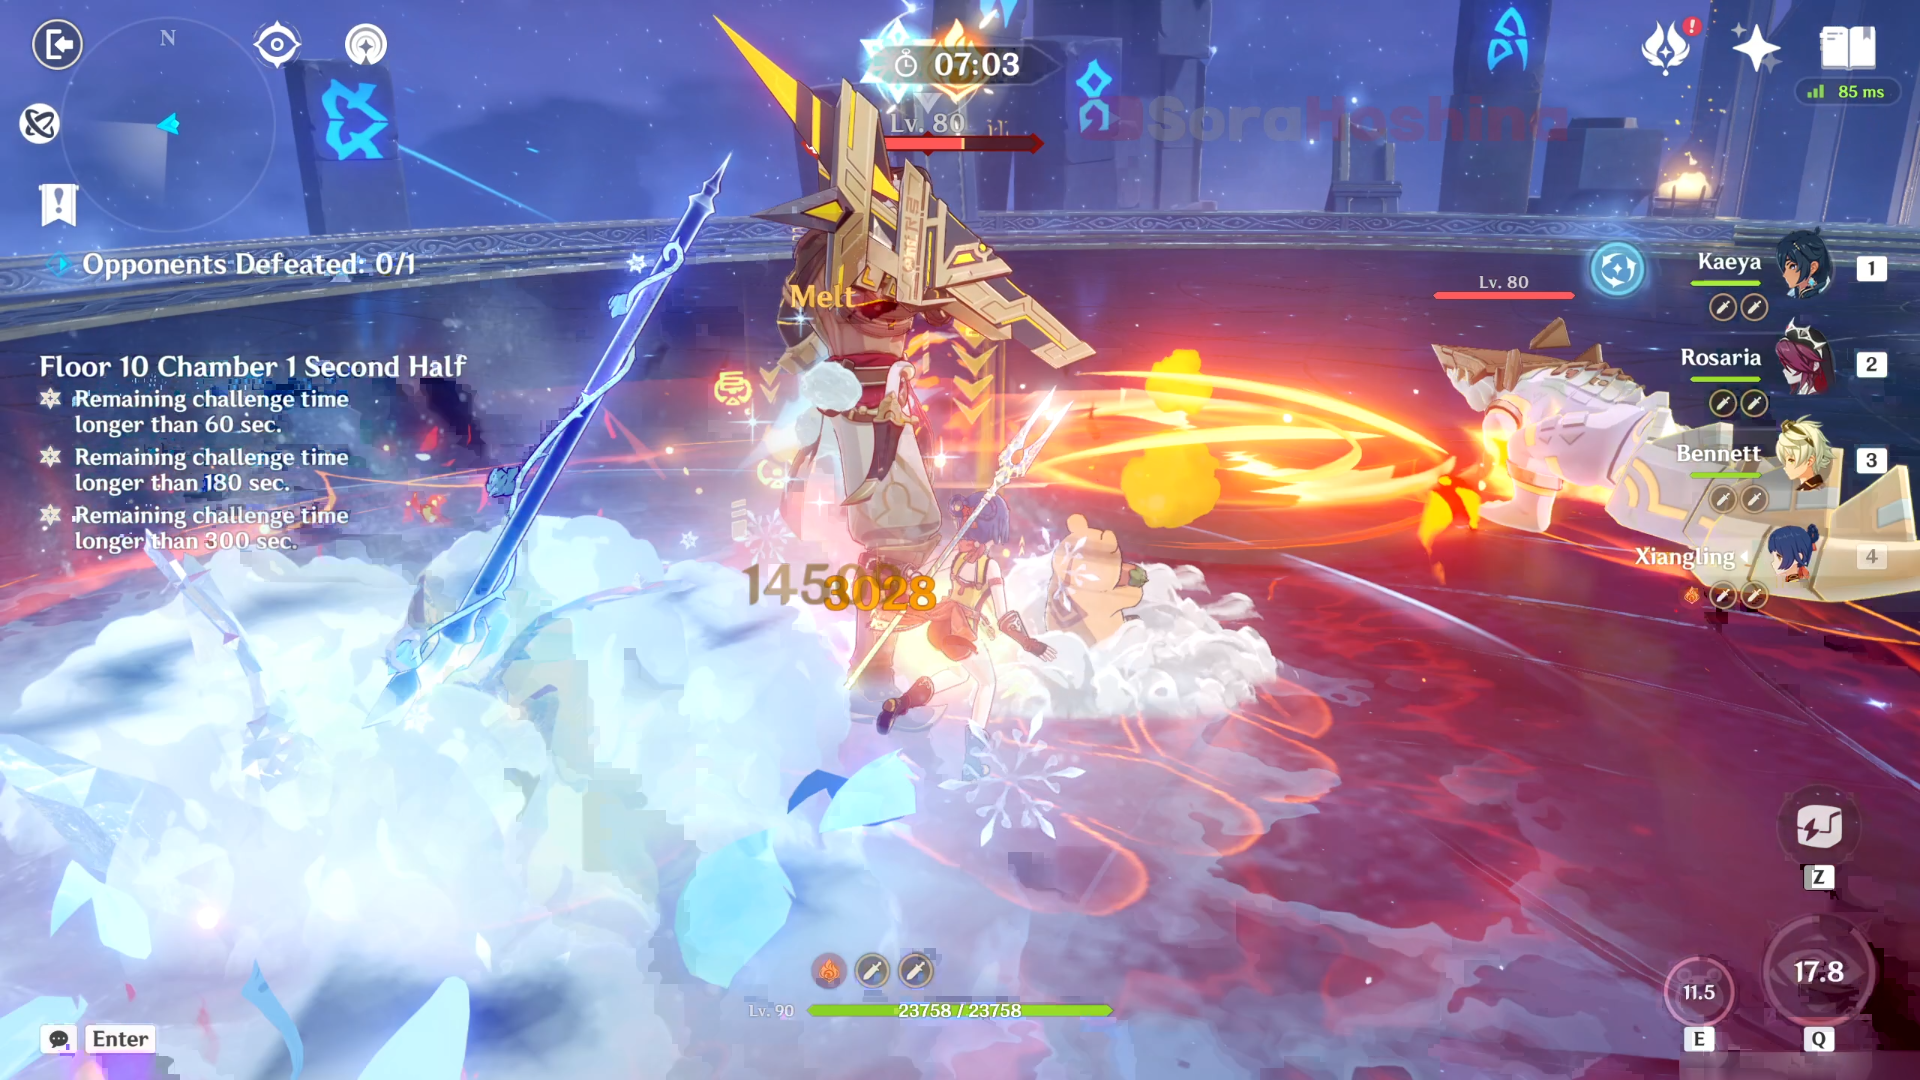
There is only one wave, which is 1 Eremite Stone Enchanter. From your previous spot in the middle or back area, immediately go to the front area towards the Eremite because he won't move for a while as he uses the skill that will summon his spirit animal.
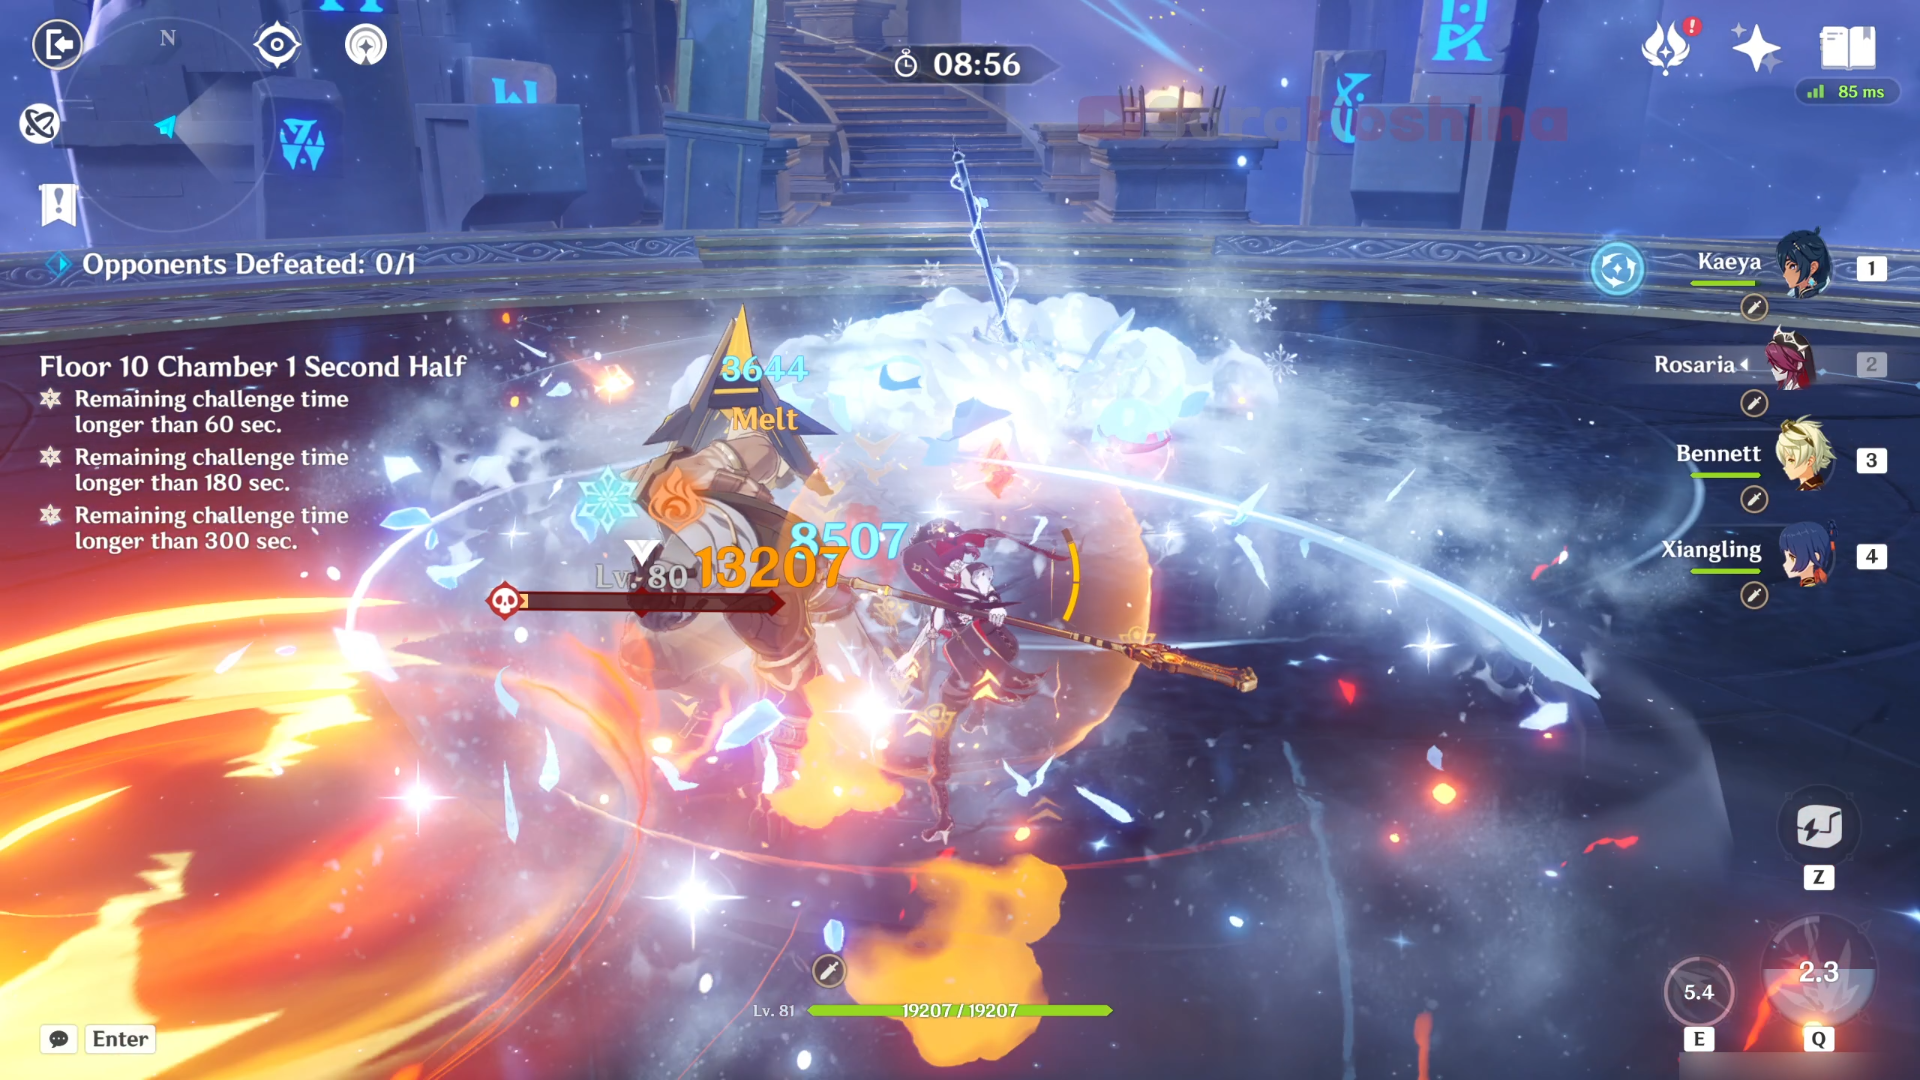
Right from the start, the Stone Enchanter will enter an enhanced state (increased RES and high Interruption Resistance) and summon his spirit animal crocodile. If your DPS can't break through his now-increased RES, the best move is to kill the spirit animal first. That way, the enhanced state will end, and he will receive True DMG and will become stunned for 10 seconds. You can then use all sorts of Skills/Bursts during the 10-second DPS window. Don't worry though once he's recovered, because he can only enter the enhanced state once.
Remember that as long as their spirit animals are still alive, you can't pull them using Anemo CC.
Floor 10 Chamber 2
First Half
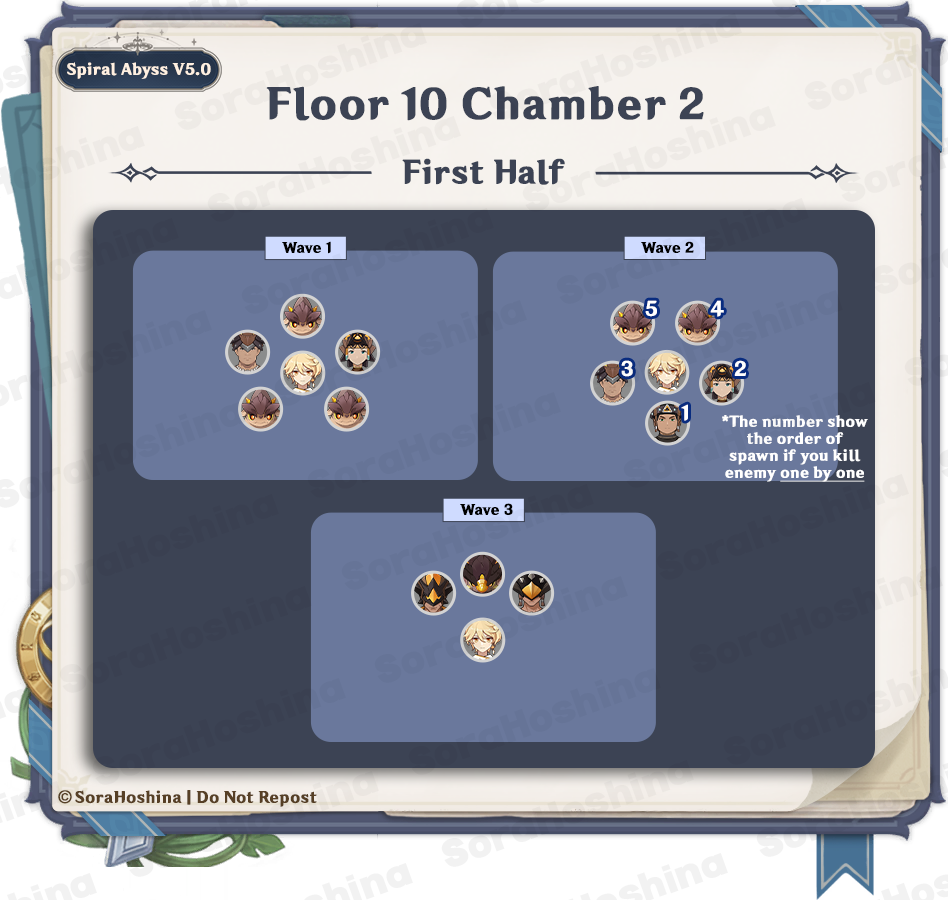
Wave 1: Forged Sand Interrogator x1, Forged Sand Shieldbreaker x1 & Tepetlisaur Whelp x3
Wave 2: Forged Sand Javelineer x1, Forged Sand Interrogator x1, Forged Sand Shieldbreaker x1 & Tepetlisaur Whelp x2
Wave 3: Tepetlisaurus x1, Tepetlisaurus Warrior: Shard Striker x1 & Tepetlisaurus Warrior: Rockbreaker Blade x1
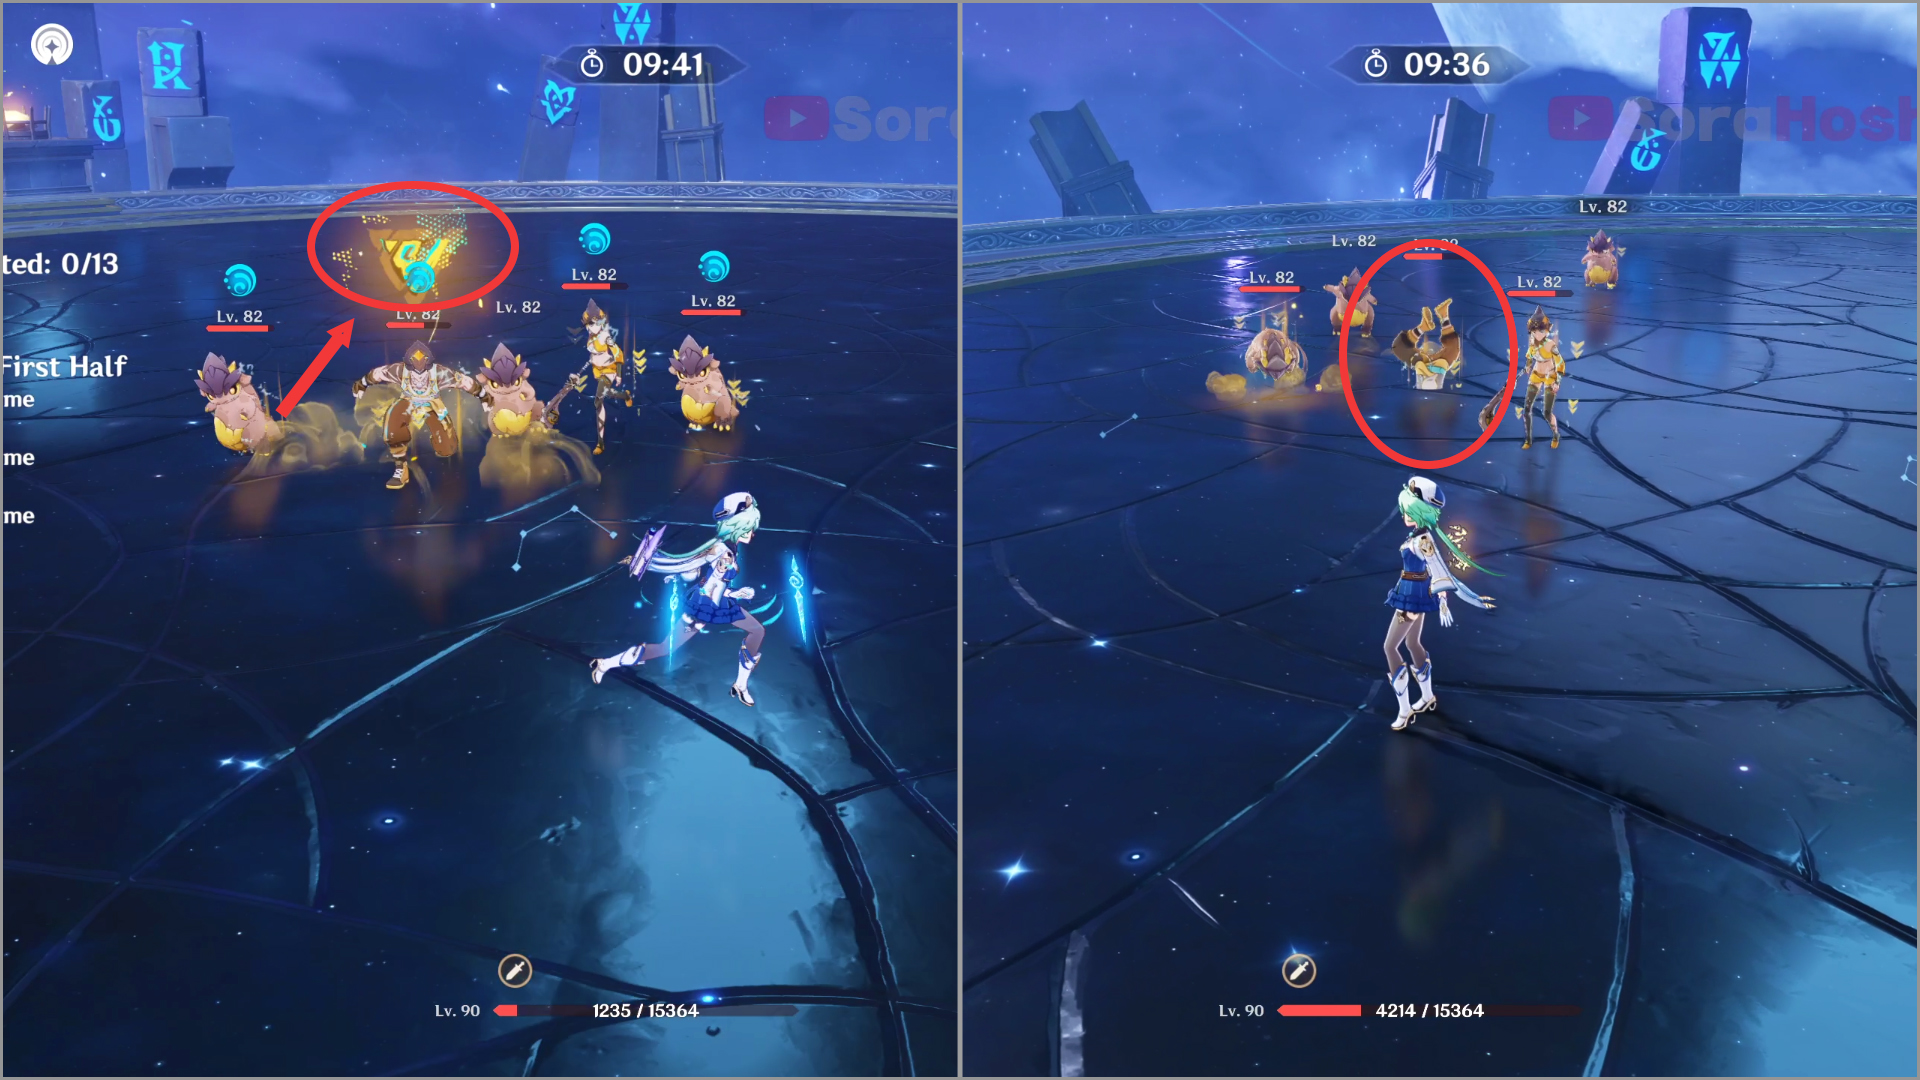
In the first wave, there are 5 enemies surrounding you when you start the challenge. The Tepetlisaur Whelps can only headbutt at you so they're not a big deal. What you should worry about are the 2 Tribal Warriors here; they're a melee attacker and have a skill that charges at your character by performing headspins. You can avoid them by running in another direction, but if your character gets hit, the stagger effect will be annoying, especially since there are many enemies here. But the best part is when they finish the headspin, they will be stuck in the ground for a short time so you can attack them (albeit may be interrupted by other enemies).
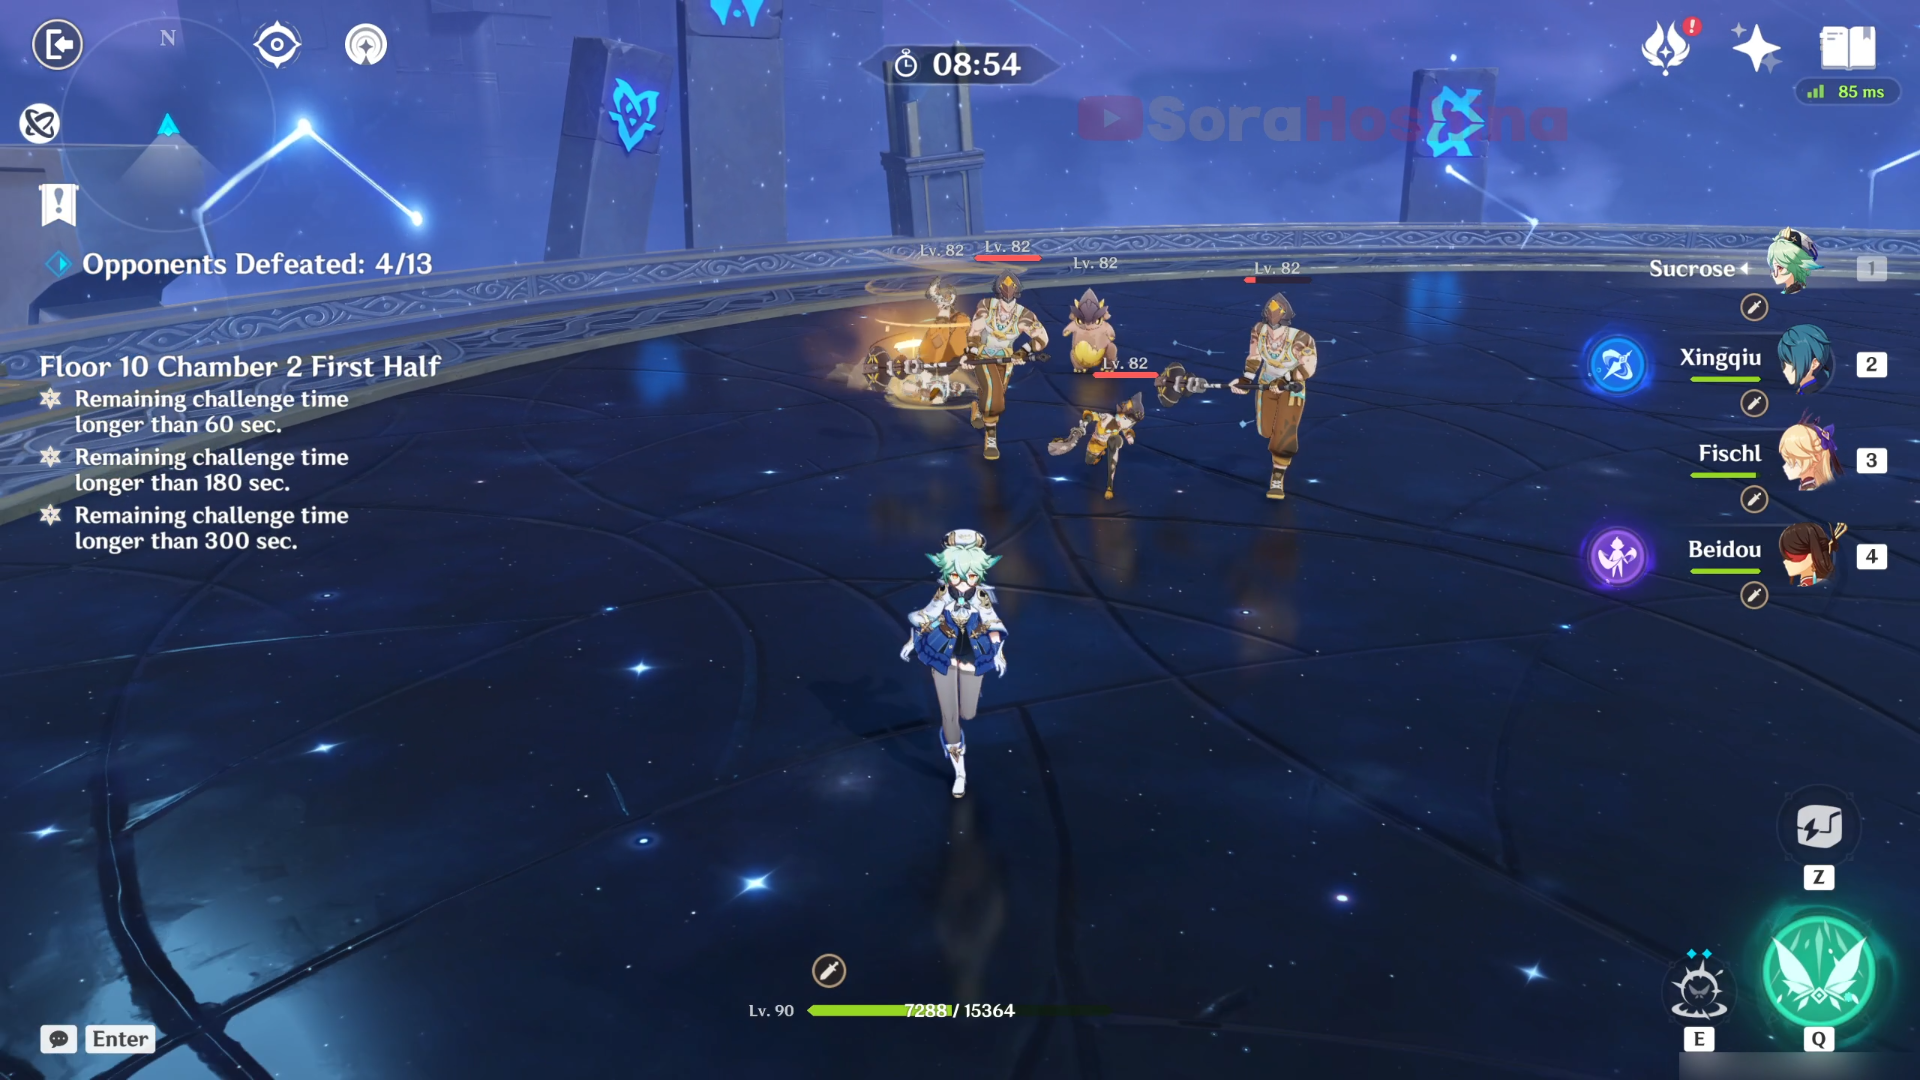
Although I mentioned wave 2, once you defeat any enemy in wave 1, the enemies in wave 2 pool will immediately spawn. You can see the enemy's roster in the infographic above. There's only one new enemy here and that's the Forged Sand Javelineer. He has a little bit more skills than other Tribal Warriors (can do both melee and ranged attack) and he also can charge at your character by performing headspins. Same as before, watch their attack and avoid incoming attacks (unless you bring a shield).
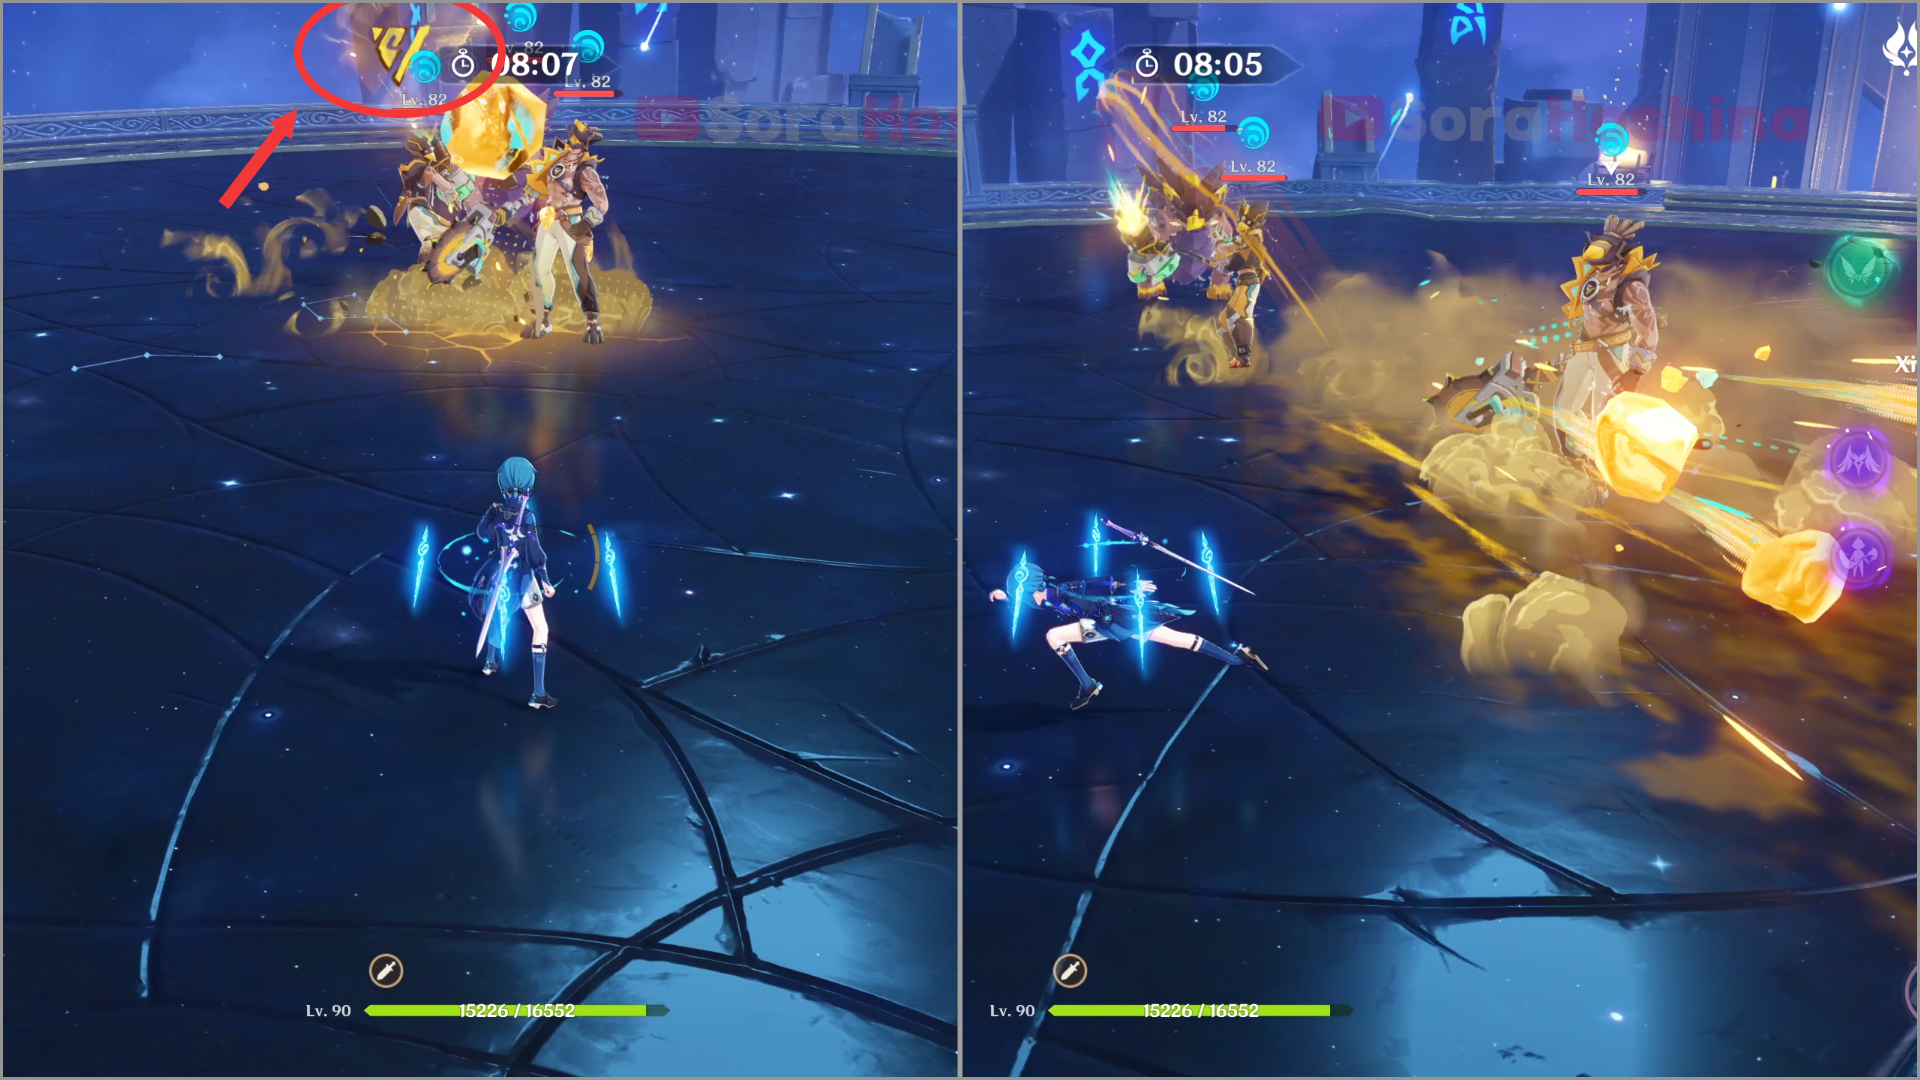
After you defeat all the enemies in wave 1 and wave 2, the last wave will start with 3 high-ranked enemies. The 2 Tribal Warriors here are melee attackers with their hammers and saws. They also have the ability to summon a massive crystal and launch it forward (kinda long-ranged attack) but it's only in one direction so you can easily avoid it. Fortunately, they can't do any headspin so you don't have to worry about that and focus on attacking them whenever possible.
Second Half

Wave 1: Eremite Galehunter
There is only one wave, which is 1 Eremite Galehunter. From your previous spot in the middle or back area, immediately go to the front area towards the Eremite because she won't move for a while as she uses the skill that will summon her spirit animal.
Right from the start, the Galehunter will enter an enhanced state (increased RES and high Interruption Resistance) and summon her spirit animal bird. If your DPS can't break through her now-increased RES, the best move is to kill the spirit animal first. That way, the enhanced state will end, and she will receive True DMG and will become stunned for 10 seconds. You can then use all sorts of Skills/Bursts during the 10-second DPS window. Don't worry though once she's recovered, because she can only enter the enhanced state once.
Remember that as long as their spirit animals are still alive, you can't pull them using Anemo CC.
Floor 10 Chamber 3
First Half
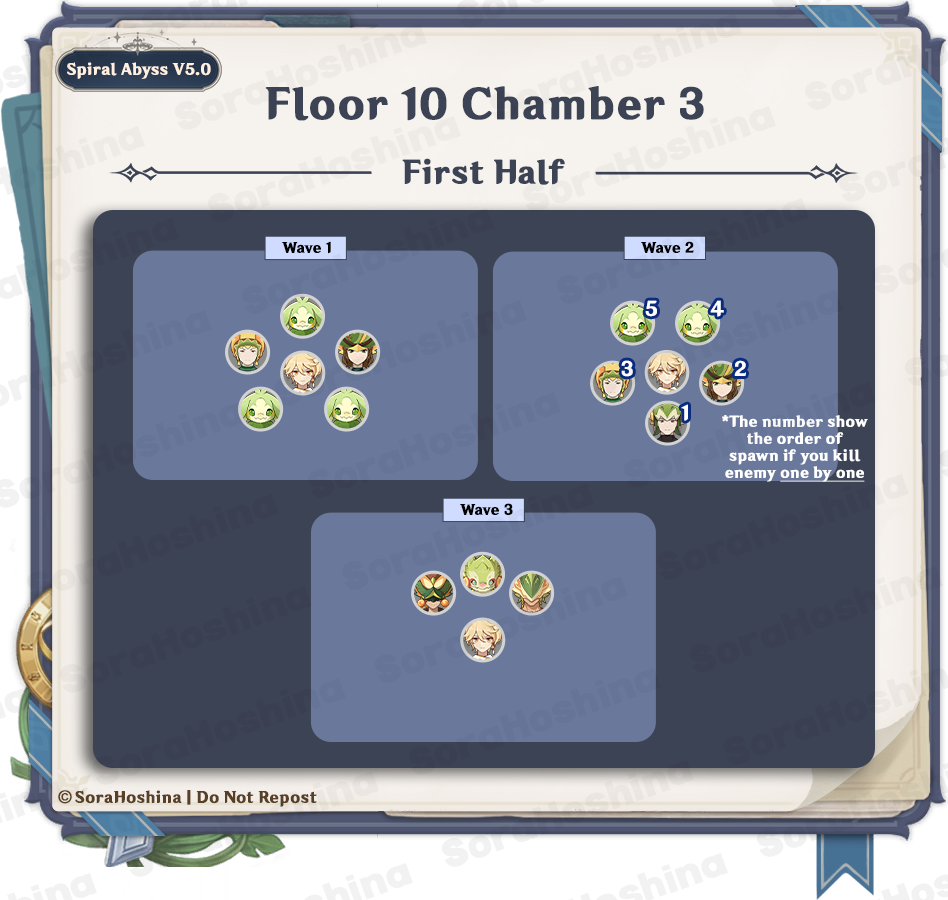
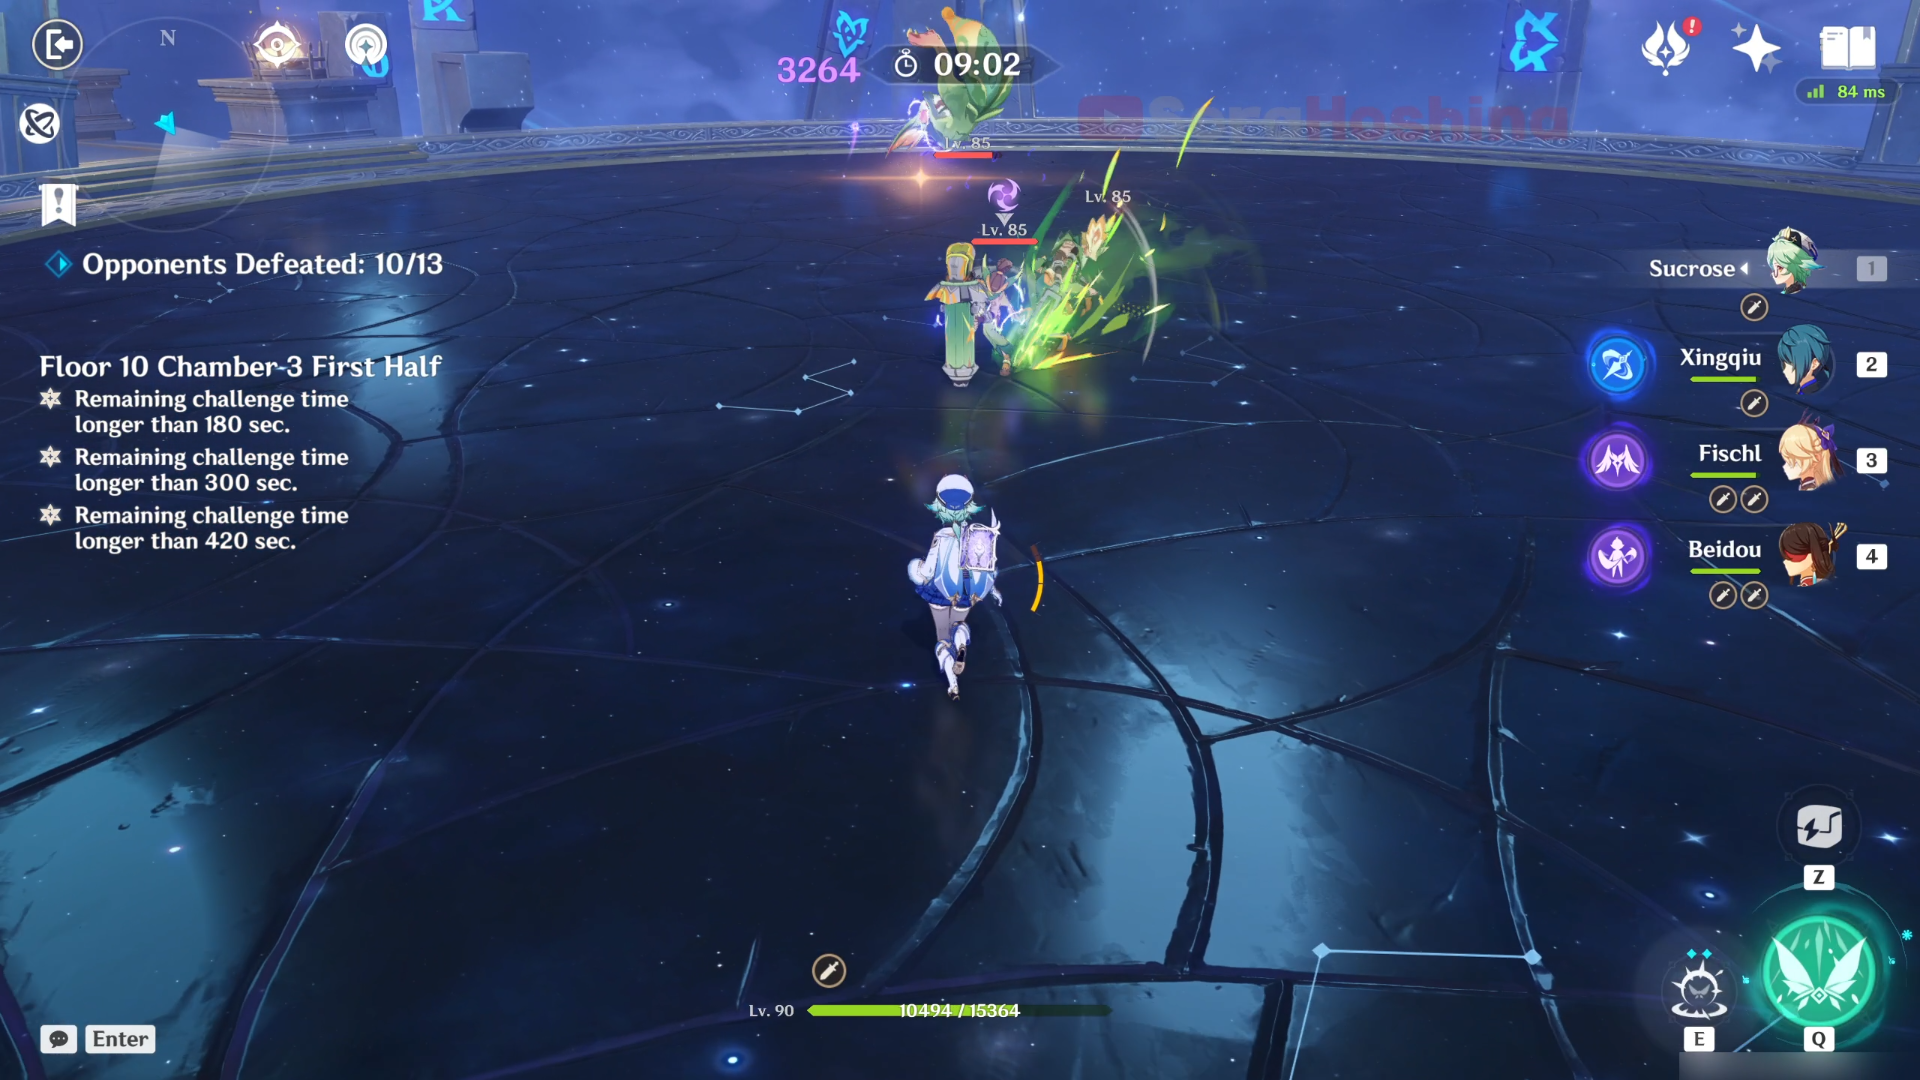
Wave 1: Swiftstep Seeker x1, Swiftstep Storm Scout x1 & Yumkasaur Whelp x3
Wave 2: Swiftstep Armed Courier x1, Swiftstep Seeker x1, Swiftstep Storm Scout x1 & Yumkasaur Whelp x2
Wave 3: Yumkasaurus x1, Yumkasaurus Warrior: Whirling Leaves x1 & Yumkasaurus Warrior: Flowing Skyfire x1
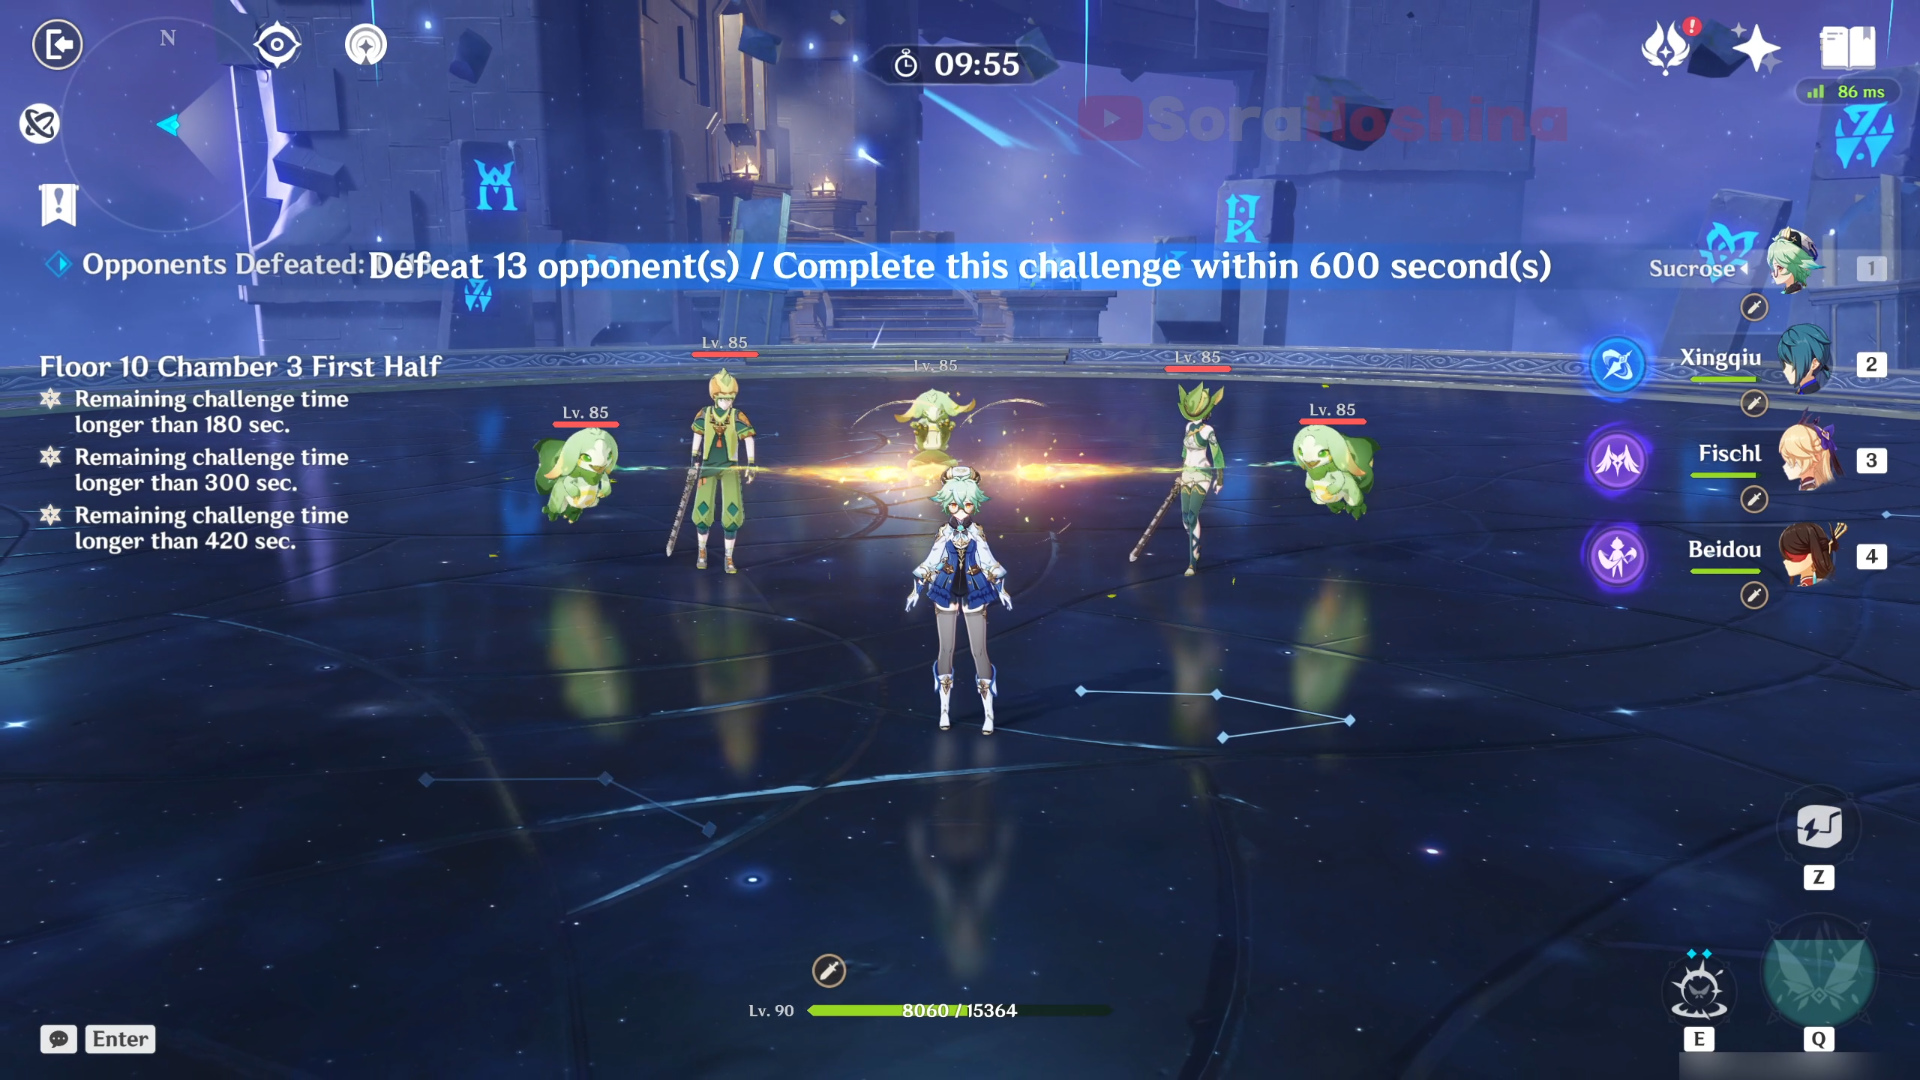
In the first wave, there are 5 enemies surrounding you when you start the challenge. There are 3 Yumkasaur Whelps here and they often use their tongue to swing themselves forward, performing a headbutt. Just beware of the glowing line and you can avoid it pretty easily. For the Tribal Warriors, they can't charge at you like other tribals (thank goodness for that) but their attack can be melee and ranged attacks.
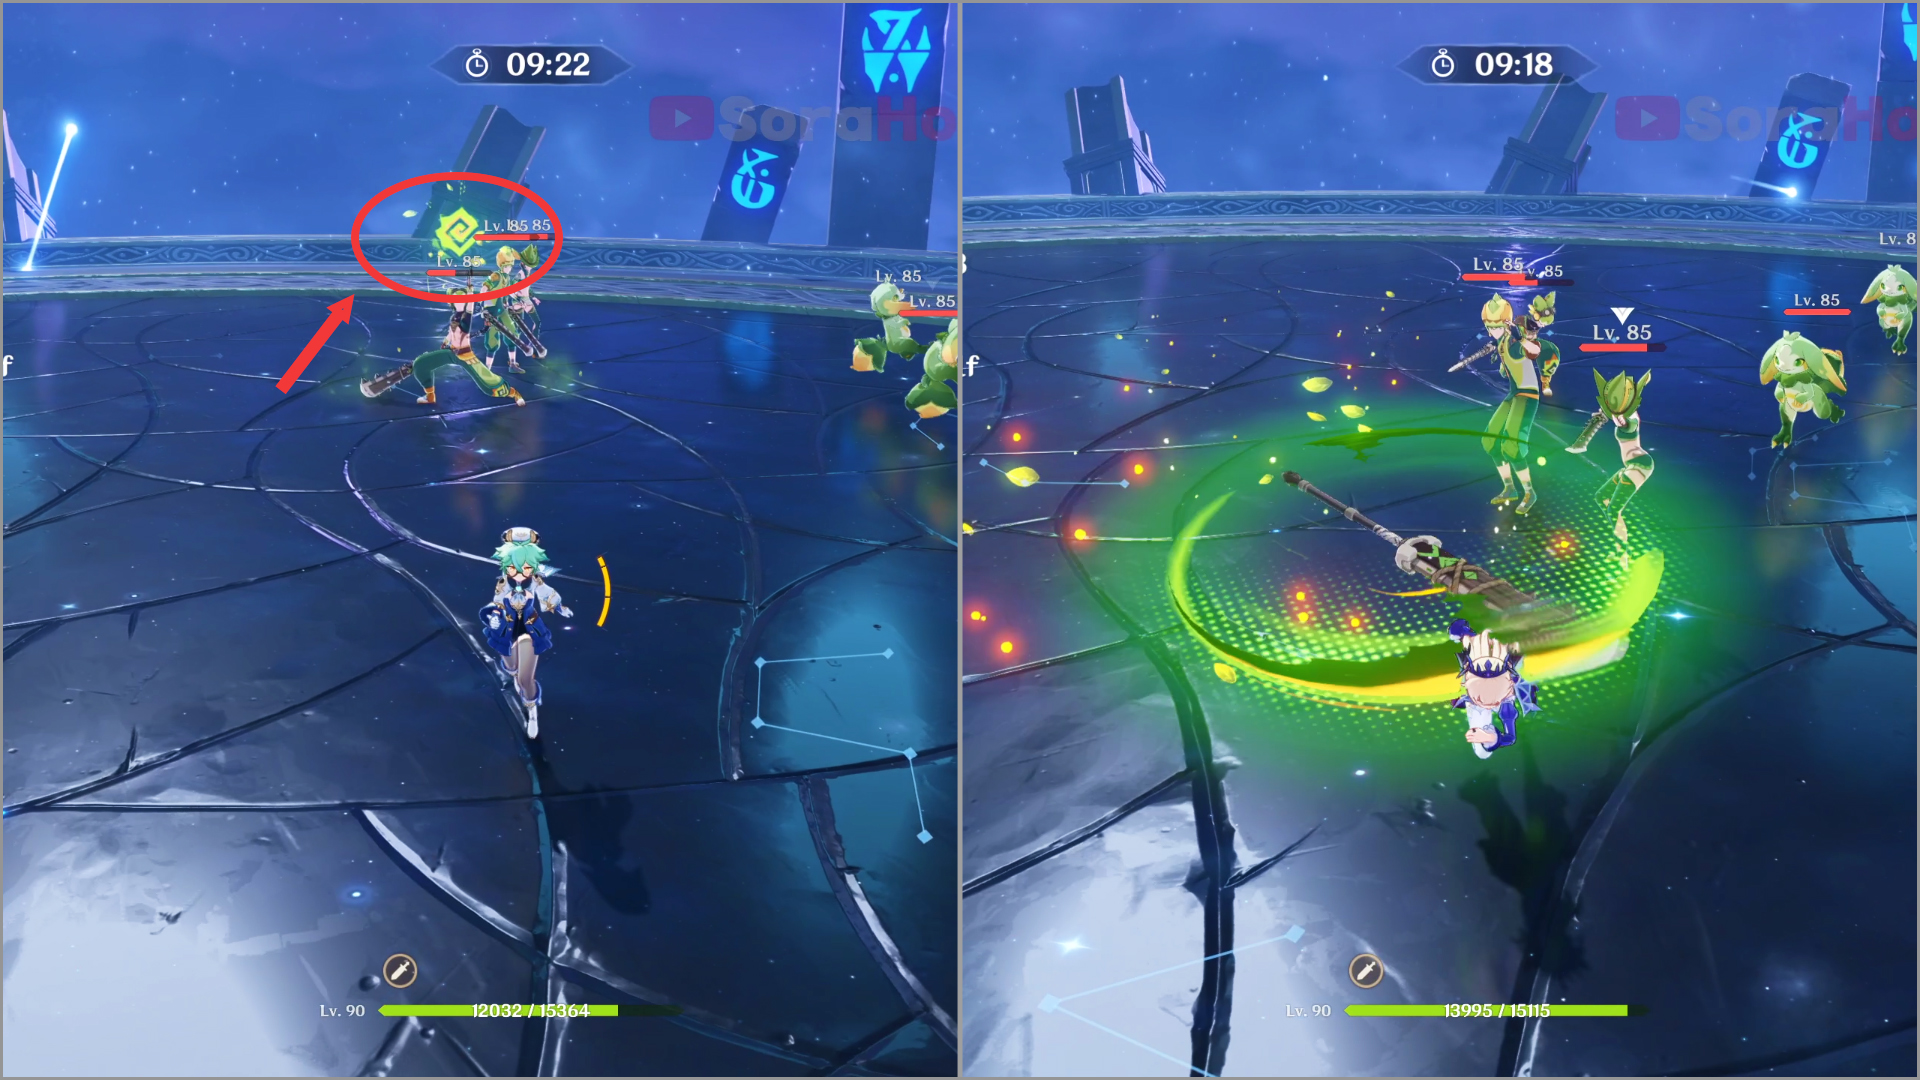
Although I mentioned wave 2, once you defeat any enemy in wave 1, the enemies in wave 2 pool will immediately spawn. You can see the enemy's roster in the infographic above. There's only one new enemy here and that's the Swiftstep Armed Courier. He's just like the previous Tribal Warriors mobs (can do both melee and ranged attack) with no extra skill. Same as before, watch their attack and avoid incoming attacks (unless you bring a shield).
After you defeat all the enemies in wave 1 and wave 2, the last wave will start with 3 high-ranked enemies. The 2 Tribal Warriors here can deal both melee and ranged attacks with their cannon and saw (the gentleman here prefers melee while the lady prefers ranged attacks). Focus on the lady warrior because she might not get near you while the male warrior (and the Yumkasaurus) here will almost always chase after you.
Second Half

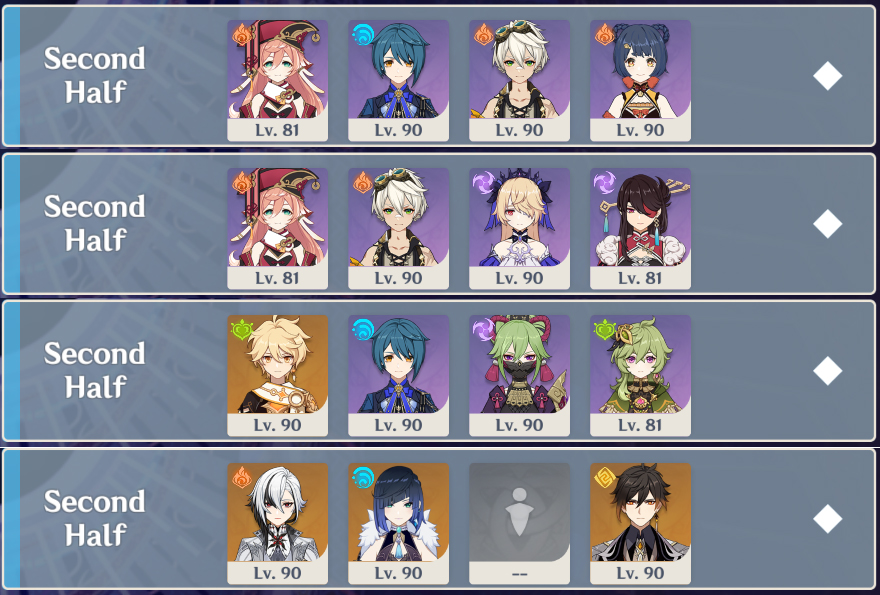
Wave 1: Secret Source Automaton: Hunter-Seeker
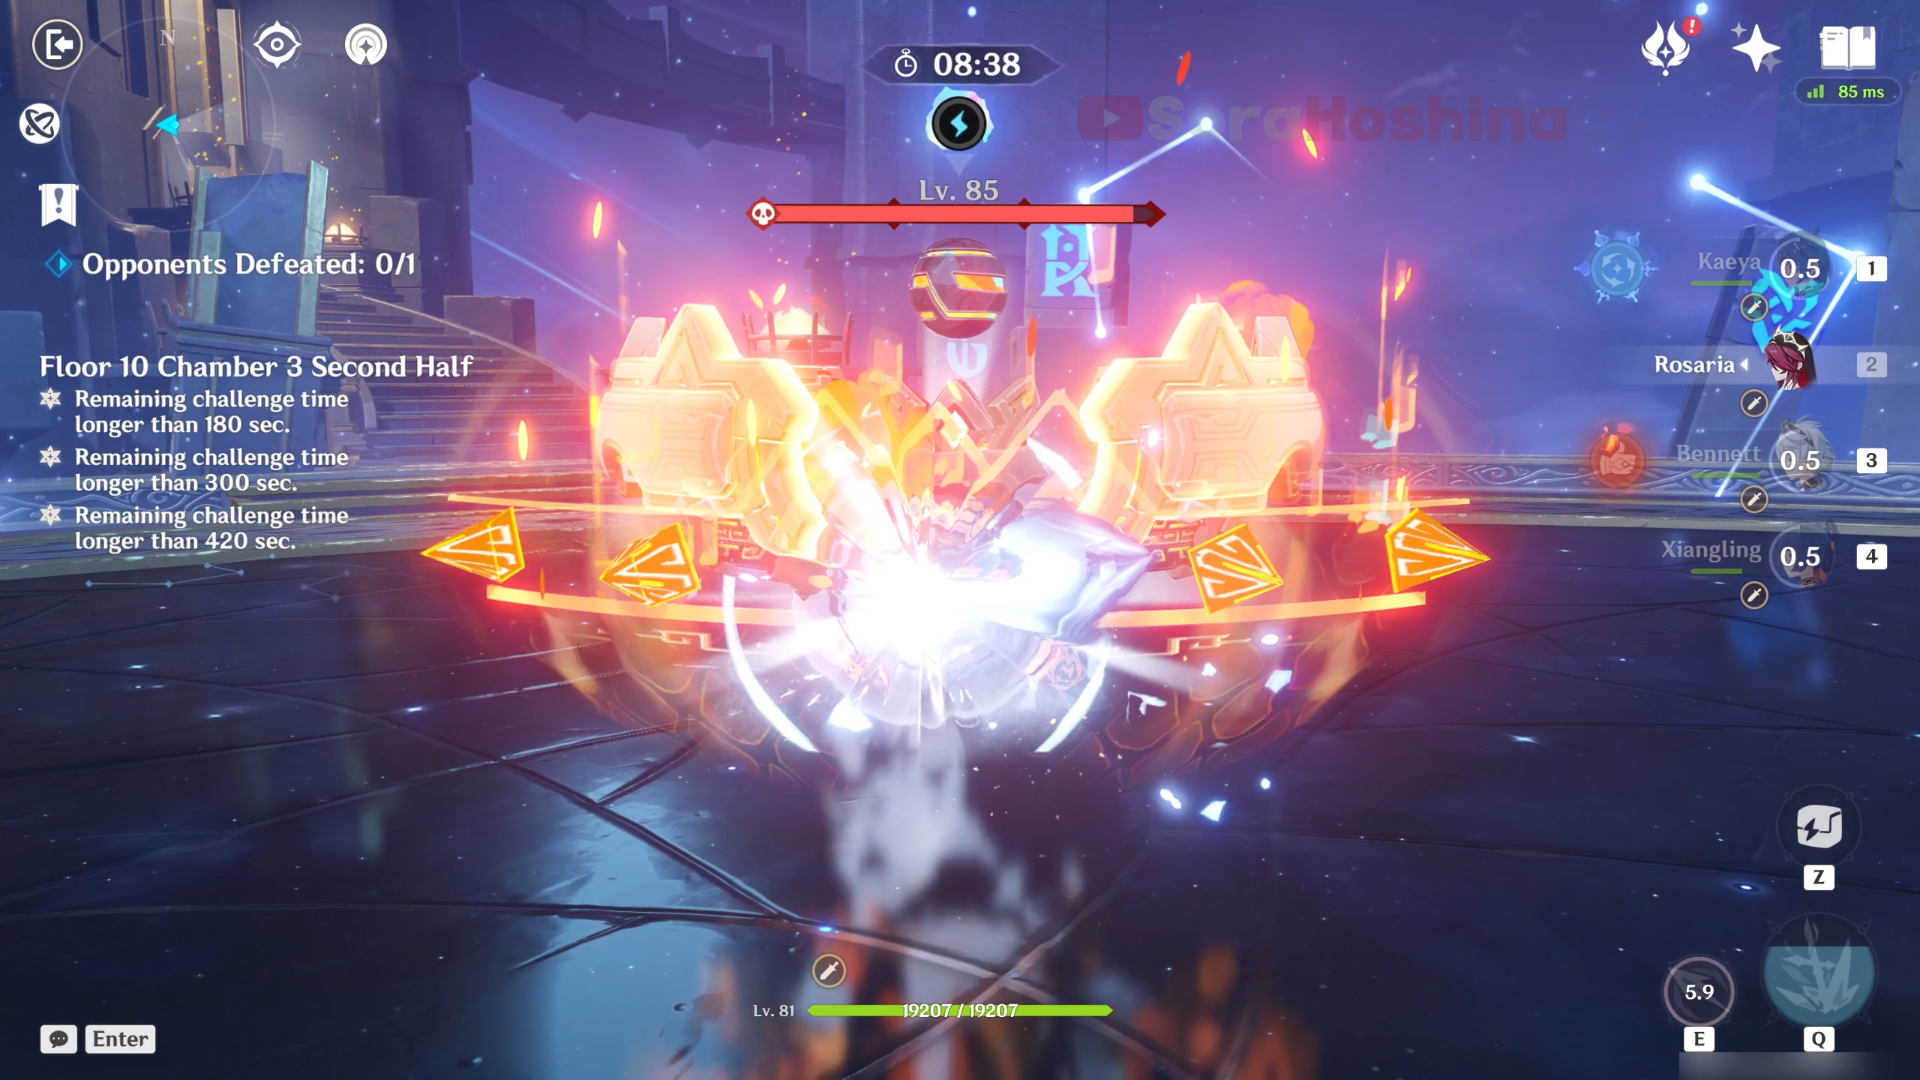
There's only one wave here and it's the new enemy in the Automaton series: the Secret Source Automaton: Hunter-Seeker. This Automaton can deal with both melee and ranged attacks. Personally, I find their attacks are very easy to avoid because they almost always has an indicator on where the attacks are going.
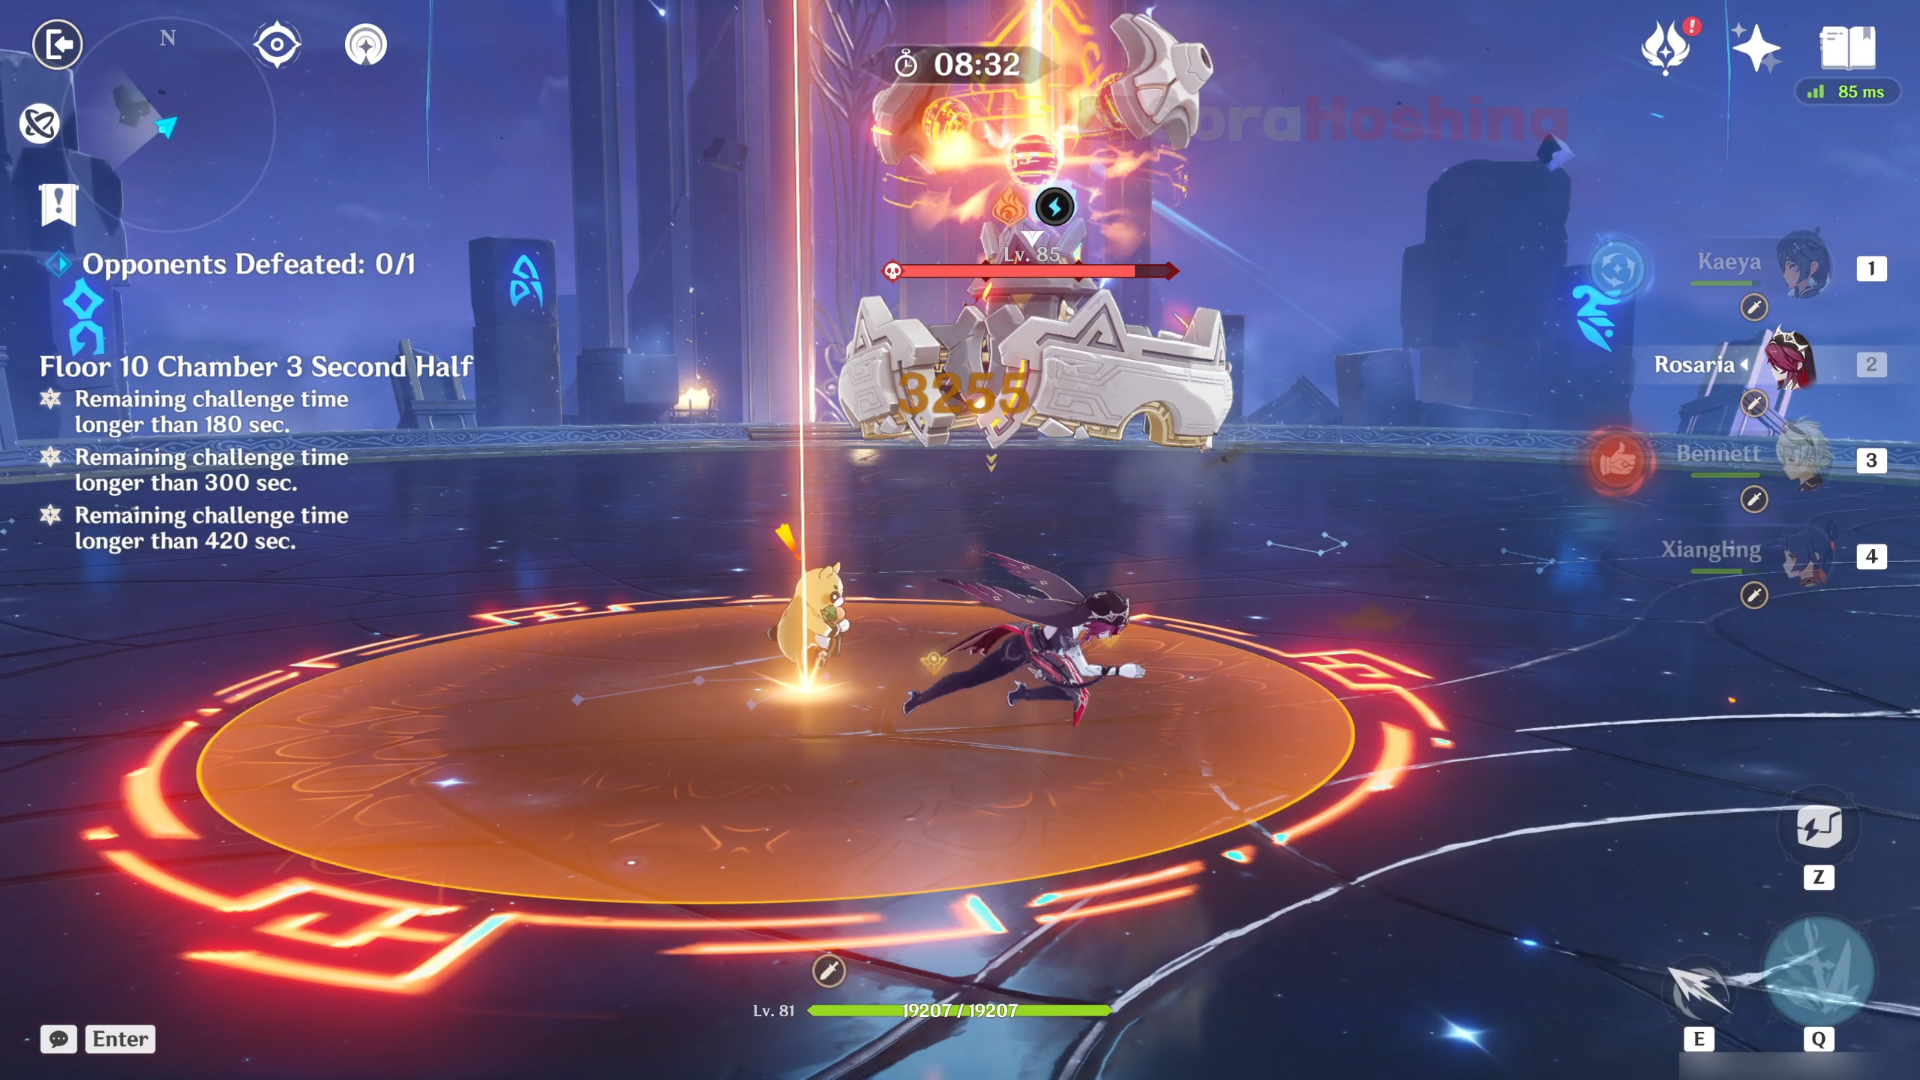
For example, when the Automaton shoots a beam into the sky, there will be an AoE circle on the ground to show where the attack will land, or when it fires the beam at your character, you can see a laser line showing where the Automaton will aim the beam. There's only one enemy here, so as long as you observe their attack pattern, it's very easy to avoid their attacks.
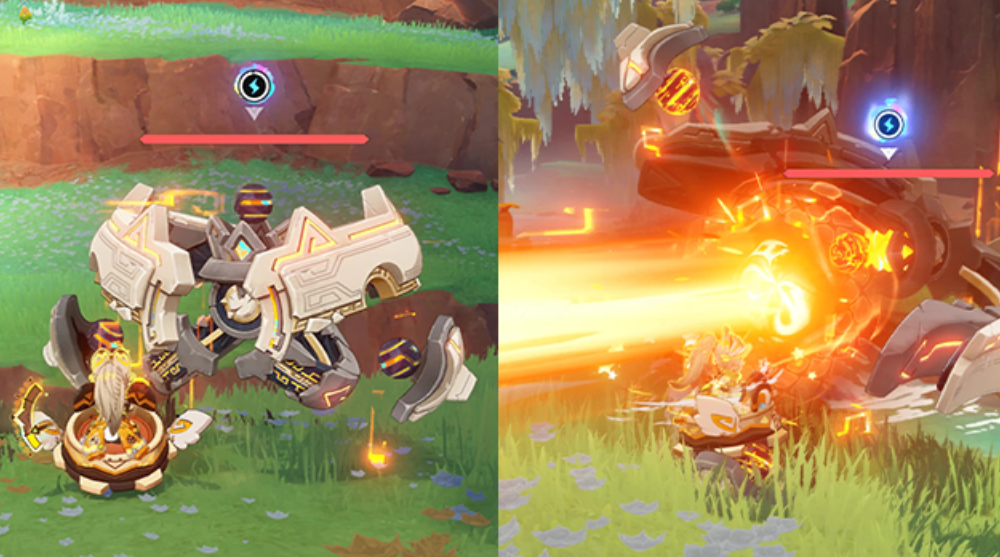
If you bring a Natlan character in this stage, the Automaton can unleash one extra skill. You can see the icon on top of their HP, those are the Adaptive Countermeasures. When the Natlan character is in Nightsoul's Blessing state, the robot will accumulate the Adaptive Countermeasures, and when it's full, it will unleash a bigger laser attack that follows the direction of your character.
That big attack comes with a big price where, while the special cluster laser is being unleashed and for an additional 4 seconds afterward, the Hunter-Seeker's RES to all DMG is reduced by 40%. Honestly, it's a big win because the laser is pretty easy to avoid and you can deal higher damage to the enemy afterward.