Table of Contents
Thoma is a support character that can attack and protect at the same time. His Elemental Burst deals AoE Pyro DMG when attacking, while continuously providing a shield to his teammates.
This guide is based on the Community Character Builds by the Genshin Helper Team.
Skills Overview
Normal Attack: Swiftshatter Spear

Normal Attack
Performs up to 4 consecutive spear strikes.
Charged Attack
Consumes a certain amount of Stamina to lunge forward, dealing damage to opponents along the way.
Plunging Attack
Plunges from mid-air to strike the ground below, damaging opponents along the path and dealing AoE DMG upon impact.
Elemental Skill: Blazing Blessing

Thoma vaults forward with his polearm and delivers a flame-filled flying kick that deals AoE Pyro DMG, while also summoning a defensive Blazing Barrier. At the moment of casting, Thoma's Elemental Skill applies Pyro to himself.
The DMG Absorption of the Blazing Barrier scales off Thoma's Max HP.
The Blazing Barrier has the following traits:
• Absorbs Pyro DMG 250% more effectively.
• When a new Blazing Barrier is obtained, the remaining DMG Absorption of an existing Blazing Barrier will stack and its duration will be refreshed.
The maximum DMG Absorprtion of the Blazing Barrier will not exceed a certain percentage of Thoma's Max HP.
Shield Duration: 8 seconds
Skill CD: 15 seconds
Elemental Burst: Crimson Ooyoroi

Thoma spins his polearm, slicing at his foes with roaring flames that deal AoE Pyro DMG and weave themselves into a Scorching Ooyoroi.
Scorching Ooyoroi
While Scorching Ooyoroi is in effect, the active character's Normal Attacks will trigger Fiery Collapse, dealing AoE Pyro DMG and summoning a Blazing Barrier.
Fiery Collapse can be triggered once every 1s.
Shield Duration: 8 seconds
Scorching Ooyoroi: 15 seconds
Skill CD: 20 seconds
Energy Cost: 80
Except for the amount of DMG they can absorb, the Blazing Barriers created in this way are identical to those created by Thoma's Elemental Skill, Blazing Blessing:
• Absorbs Pyro DMG 250% more effectively.
• When a new Blazing Barrier is obtained, the remaining DMG Absorption of an existing Blazing Barrier will stack and its duration will be refreshed.
The maximum DMG Absorption of the Blazing Barrier will not exceed a certain percentage of Thoma's Max HP.
If Thoma falls, the effects of Scorching Ooyoroi will be cleared.
Ascension 1: Imbricated Armor
When your current active character obtains or refreshes a Blazing Barrier, this character's Shield Strength will increase by 5% for 6s.
This effect can be triggered once every 0.3 seconds. Max 5 stacks.
Ascension 4: Flaming Assault
DMG dealt by Crimson Ooyoroi's Fiery Collapse is increased by 2.2% of Thoma's Max HP.
Passive Talent: Snap and Swing
When you fish successfully in Inazuma, Thoma's help grants a 20% chance of scoring a double catch.
TLDR / Rotation
Thoma's useful kits are hidden behind his Skill and Burst. As long as you use his Skill/Burst before the Main DPS, any rotation would be eligible. Keep in mind that Thoma works better with DPS that use Normal Attack so they can re-summon the shield (after Thoma's Burst is activated).
For example: Thoma's Skill and Burst > Support Skill/Burst if you have any > Main DPS damage output, preferably Normal Attack
Reminder that Thoma's Elemental Burst Cooldown is 20 seconds. So unless you have C2 Thoma that increase the duration of his Burst, you need to wait 5 seconds after his Burst ends before you can cast it again. That's why it's best if Thoma is the first support character to be activated in the rotation.
Talent Priorities

Skill > Burst
Thoma's talent levels do not contribute towards his Burgeon damage, so leveling them is optional in this respect. However, you may still wish to level them for stronger shielding.
For an EM-focused build, upgrading Thoma's talent levels isn't a necessity.
Constellations

Best Constellations: C1, C2 & C4
C1: A Comrade's Duty ⭐
When a character protected by Thoma's own Blazing Barrier (Thoma excluded) is attacked, Thoma's own Blazing Blessing CD is decreased by 3s, while his own Crimson Ooyoroi's CD is decreased by 3s.
This effect can be triggered once every 20s.
C2: A Subordinate's Skills ⭐
Crimson Ooyoroi's duration is increased by 3s.
C3: Fortified Resolve
Increases the Level of Blazing Blessing by 3.
Maximum upgrade level is 15.
C4: Long-Term Planning ⭐⭐⭐
After using Crimson Ooyoroi, 15 Energy will be restored to Thoma.
C5: Raging Wildfire
Increases the Level of Crimson Ooyoroi by 3.
Maximum upgrade level is 15.
C6: Burning Heart
When a Blazing Barrier is obtained or refreshed, the DMG dealt by all party members' Normal, Charged, and Plunging Attacks is increased by 15% for 6s.
Role 1: Burgeon
This build focuses on using Thoma as a trigger unit for Burgeon reactions. A role he excels at because of his slow Pyro application reducing the likelihood of creating Burning reactions and his shield reduces the self-damage from the aforementioned Burgeon reactions.
Recommended Weapons
- Kitain Cross Spear (4⭐)*
- Favonius Lance (4⭐)
- Dragon's Bane (4⭐)*
- Moonpiercer (4⭐)
- Black Tassel (3⭐)
- Rightful Reward (4⭐)

1) Kitain Cross Spear (ATK: 565 • Elemental Mastery: 110)
| Increases Elemental Skill DMG by 6~12%. After Elemental Skill hits an opponent, the character loses 3 Energy but regenerates 3~5 Energy every 2s for the next 6s. This effect can occur once every 10s. Can be triggered even when the character is not on the field. |

2) Favonius Lance (ATK: 565 • Energy Recharge: 30.6%)
| CRIT Hits have a 60~100% chance to generate a small amount of Elemental Particles, which will regenerate 6 Energy for the character. Can only occur once every 12~6s. |

3) Dragon's Bane (ATK: 454 • Elemental Mastery: 221)
| Increases DMG against opponents affected by Hydro or Pyro by 20~36%. |

4) Moonpiercer (ATK: 565 • Elemental Mastery: 110)
| After triggering Burning, Quicken, Aggravate, Spread, Bloom, Hyperbloom, or Burgeon, a Leaf of Revival will be created around the character for a maximum of 10s. When picked up, the Leaf will grant the character 16~32% ATK for 12s. Only 1 Leaf can be generated this way every 20s. This effect can still be triggered if the character is not on the field. |

5) Black Tassel (ATK: 354 • HP: 46.9%)
| Increases DMG against slimes by 40~80%. |

6) Rightful Reward (ATK: 565 • HP: 27.6%)
| When the wielder is healed, restore 8~16 Energy. This effect can triggered once every 10s, and can occur even when the character is not on the field. |
Recommended Artifacts
- Flower of Paradise Lost (4)
- Gilded Dreams (4)
- +80 EM set (2) +80 EM set (2)
- Emblem of Severed Fate (2) +80 EM Set (2)
- Crimson Witch of Flames (4)

1) 4-Pc Flower of Paradise Lost
2-Piece Bonus: Increases Elemental Mastery by 80.
4-Piece Bonus The equipping character's Bloom, Hyperbloom, and Burgeon reaction DMG are increased by 40%. Additionally, after the equipping character triggers Bloom, Hyperbloom, or Burgeon, they will gain another 25% bonus to the effect mentioned prior. Each stack of this lasts 10s. Max 4 stacks simultaneously. This effect can only be triggered once per second. The character who equips this can still trigger its effects when not on the field.

2) 4-Pc Gilded Dreams
2-Piece Bonus: Increases Elemental Mastery by 80.
4-Piece Bonus: Within 8s of triggering an Elemental Reaction, the character equipping this will obtain buffs based on the Elemental Type of the other party members. ATK is increased by 14% for each party member whose Elemental Type is the same as the equipping character, and Elemental Mastery is increased by 50 for every party member with a different Elemental Type. Each of the aforementioned buffs will count up to 3 characters. This effect can be triggered once every 8s. The character who equips this can still trigger its effects when not on the field.

3) +80 EM set (2) +80 EM set (2)

4) Emblem of Severed Fate (2) +80 EM Set (2)

5) 4-Pc Crimson Witch of Flames
2-Piece Bonus: Pyro DMG Bonus +15%
4-Piece Bonus: Increases Overloaded and Burning, and Burgeon DMG by 40%. Increases Vaporize and Melt DMG by 15%. Using Elemental Skill increases the 2-Piece Set Bonus by 50% of its starting value for 10s. Max 3 stacks.
Main & Sub Stats Priority
| Artifact Main Stats | Artifact Sub Stats |
|---|---|
| Sands - Energy Recharge / Elemental Mastery Goblet - Elemental Mastery Circlet - Elemental Mastery While building as much Elemental Mastery (with enough Energy Recharge) as possible is optimal for damage, you may use some HP% mainstats if you desire a stronger shield. This can be relevant if running teams without other forms of defensive utility outside of Thoma's shields, and it's worth keeping in mind that Burgeon deals self-damage. | Energy Recharge Elemental Mastery HP% Flat HP Crit Rate* *Crit Rate is only useful if using Favonius Lance |
Role 2: Support
Thoma ideally wants to focus on shield over damage, and his burst uptime is required to achieve better shields, which is why he needs ER% on top of HP%.
Recommended Weapons
- Favonius Lance (4✩)
- Engulfing Lightning (5✩)
- "The Catch" (4✩) [R5]
- Kitain Cross Spear (4✩)
- Prototype Starglitter (4✩)
- Skyward Spine (5✩)
- Black Tassel (3✩)*
- Rightful Reward (4✩)*
1) Favonius Lance (ATK: 565 • Energy Recharge: 30.6%)
| CRIT Hits have a 60~100% chance to generate a small amount of Elemental Particles, which will regenerate 6 Energy for the character. Can only occur once every 12~6s. |

2) Engulfing Lightning (ATK: 608 • Energy Recharge: 55.1%)
| ATK increased by 28~56% of Energy Recharge over the base 100%. You can gain a maximum bonus of 80~120% ATK. Gain 30~50% Energy Recharge for 12s after using an Elemental Burst. |

3) "The Catch" (ATK: 510 • Energy Recharge: 45.9%)
| Increases Elemental Burst DMG by 16~32% and Elemental Burst CRIT Rate by 6~12%. |
4) Kitain Cross Spear (ATK: 565 • Elemental Mastery: 110)
| Increases Elemental Skill DMG by 6~12%. After Elemental Skill hits an opponent, the character loses 3 Energy but regenerates 3~5 Energy every 2s for the next 6s. This effect can occur once every 10s. Can be triggered even when the character is not on the field. |

5) Prototype Starglitter (ATK: 510 • Eneregy Recharge: 45.9%)
| After using an Elemental Skill, increases Normal and Charged Attack DMG by 8~16% for 12s. Max 2 stacks. |

6) Skyward Spine (ATK: 674 • Energy Recharge: 36.8%)
| Increases CRIT Rate by 8~16% and increases Normal ATK SPD by 12%. Additionally, Normal and Charged Attacks hits on opponents have a 50% chance to trigger a vacuum blade that deals 40~100% of ATK as DMG in a small AoE. This effect can occur no more than once every 2s. |
7) Black Tassel (ATK: 354 • HP: 46.9%)
| Increases DMG against slimes by 40~80%. |
8) Rightful Reward (ATK: 565 • HP: 27.6%)
| When the wielder is healed, restore 8~16 Energy. This effect can triggered once every 10s, and can occur even when the character is not on the field. |
Recommended Artifacts
- Noblesse Oblige (4)
- Tenacity of the Millelith (2) / Emblem of Severed Fate (2) / Vourukasha's Glow (2) [Choose two]
- The Exile (2) + Scholar (2)

1) 4-Pc Noblesse Oblige
2-Piece Bonus: Elemental Burst DMG +20%
4-Piece Bonus: Using an Elemental Burst increases all party members' ATK by 20% for 12s. This effect cannot stack.

2) Tenacity of the Millelith (2) / Emblem of Severed Fate (2) / Vourukasha's Glow (2) [Choose two]

5) The Exile (2) + Scholar (2)
The Exile 2-Piece Bonus: Energy Recharge +20%
Scholar 2-Piece Bonus: Energy Recharge +20%
Main & Sub Stats Priority
| Artifact Main Stats | Artifact Sub Stats |
|---|---|
| Sands - Energy Recharge / HP% Goblet - HP% Circlet - HP% | Energy Recharge HP% Crit Rate** Flat HP **Crit Rate is an option when using Favonius Lance. |
Team Compositions
Burgeon Team

Thoma: Shielder + Burgeon triggers
Nahida / Dendro MC / Alhaitham / Collei: 4-Pc Deepwood Memories character
Xingqiu / Yelan: Hydro Applicant
Kuki Shinobu / Fischl: Battery
Vaporize Team (Shield Support)

Thoma: Shielder
Hu Tao: Pyro DPS
Xingqiu / Yelan: Hydro Applicant
Sucrose / Venti / Kazuha: Battery
Vaporize 2 Team (Shield Support)

Thoma: Shielder
Yoimiya: Pyro DPS
Xingqiu / Yelan: Hydro Applicant
Yun Jin: Normal ATK Buffer

Sora
Articles: 368More Articles
Genshin Impact: On the Trail of Behemoths Event Guide
Genshin Impact: Emblem of Steadfast Valor Event Guide

Genshin Impact: Shuyu’s Baffling Beetle Battle Bowl Event Guide
Genshin Impact Codes – January 2025
Genshin Impact: Mortal Travails: Series V Achievement Guide
Genshin Impact: Challenger: Series X Achievement Guide
Genshin Impact: Citlali Pull Recommendation
Genshin Impact: Mavuika Pull Recommendation

Genshin Impact: Mavuika Ascension and Talent Materials
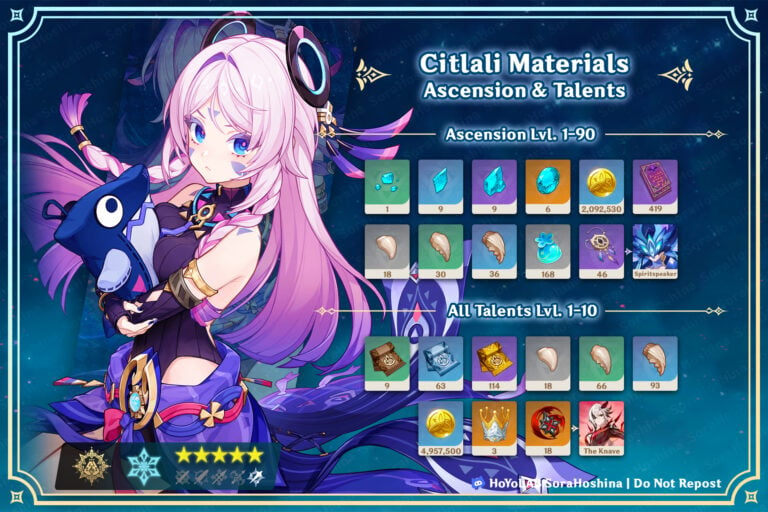
Genshin Impact: Citlali Ascension and Talent Materials
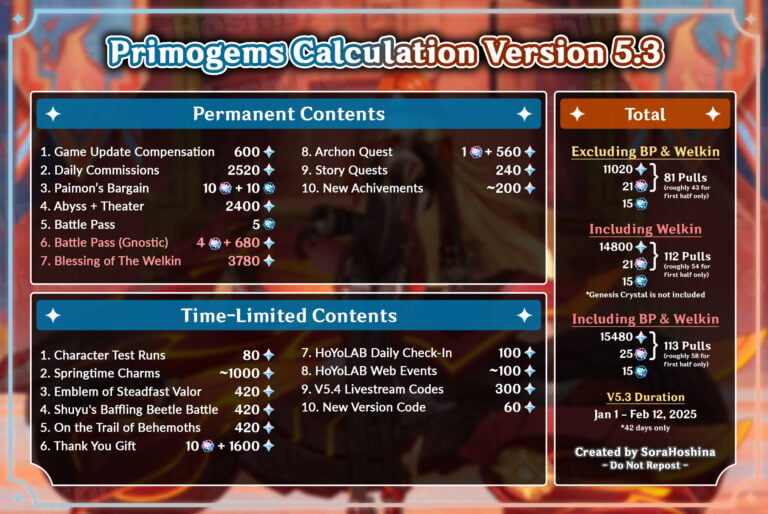
Genshin Impact: Primogems Calculation Version 5.3
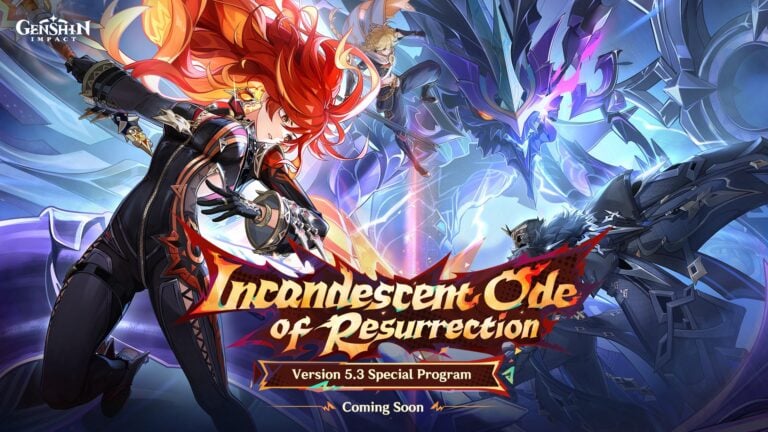
Genshin Impact 5.3 Special Program Livestream Overview
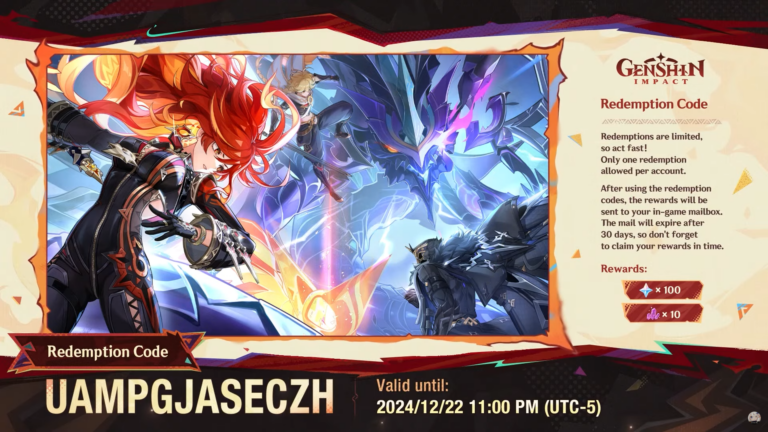
Genshin Impact: 3 New Redemption Codes from 5.3 Special Program
Genshin Impact 5.3 Livestream Countdown
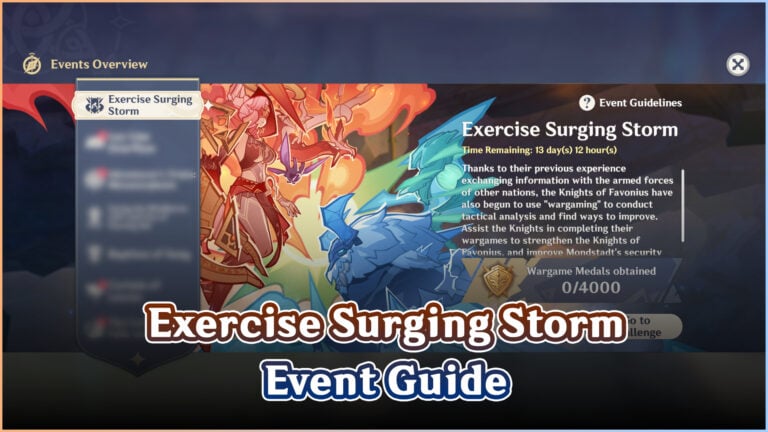
Genshin Impact: Exercise Surging Storm Event Guide
Genshin Impact: Spiral Abyss V5.2 Floor 12 Complete Guide

Genshin Impact: Spiral Abyss V5.2 Floor 11 Complete Guide
Genshin Impact: Adventurer’s Trials: Metamorphosis Event Guide
Genshin Impact: Imaginarium Theater Version 5.2 Guide