Table of Contents

Some screens in Penacony suddenly started to air strange programs. Uma, a presenter from the TV station, wants to chat about this incident with you. Who knows what kind of secretive stories are hidden behind it...
Gameplay Overview
Event Gameplay Duration:
➥ 2024/02/29 12:00:00 – 2024/03/25 03:59:00 (server time)
Eligibility:
➥ Complete the Trailblaze Mission “Penacony — Whodunit”
Event Overview:
➥ There are a total of 5 TV screens with their signals hijacked in this event. Trailblazers need to find the corresponding TV screens on different maps and defeat the mastermind after entering battle.
➥ Each stage from Stages 1–4 features a key enemy that possesses a corresponding Mutation Mechanic. Targeting the enemy’s Mutation Mechanic is an efficient way to defeat the enemy.
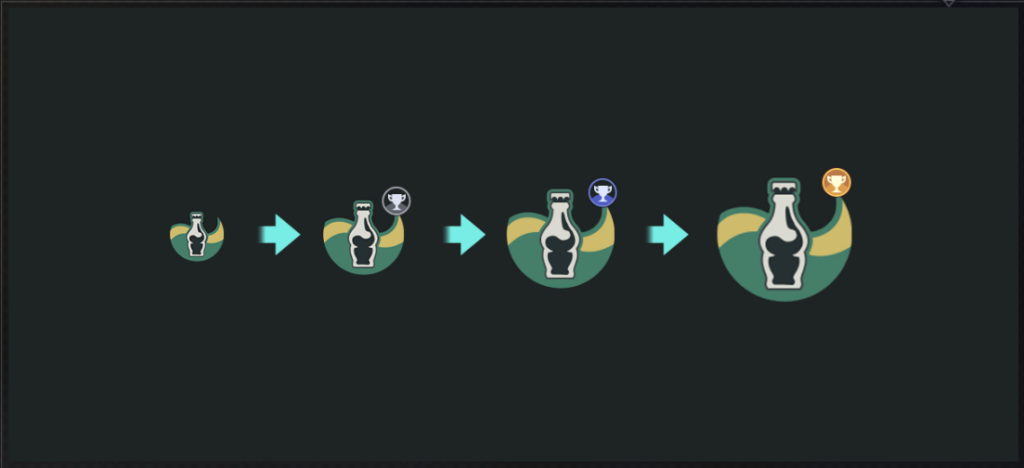
➥ Every stage from Stages 1–4 all have their corresponding Stage Buffs. During battle, triggering the Mutation Mechanic will increase your Stage Buff rank and increase your characters’ combat effectiveness.
➥ Stages 1–4 are composed of 2 phases, Buff Buildup and Final Showdown.
➥ In the Buff Buildup phase, there is a countdown of 4 Cycles where the enemies will continuously spawn. In this phase, you need to exploit key enemies’ Mutation Mechanic to raise the Stage Buff rank as much as possible.
➥ In the Final Showdown, Trailblazers must defeat as many enemies as they can for a higher score in 6 Cycles. If you have leftover Cycles when you pass the stage, you will receive extra scores. Additionally, Stage Buff ranks cannot be increased during the Final Showdown.
➥ Stage 5 is the final boss fight. Before you enter the stage, select any 2 accumulated Stage Buff from Stages 1–4 and use them for the final boss fight. (You can inherit the highest Stage Buff rank you’ve historically obtained in Stages 1–4). Defeat as many waves of enemies as possible within 6 Cycles to receive a higher score. If you have leftover Cycles when you pass the stage, you will receive extra scores.
Gameplay Tutorial

In the Dreamjolt TV event, a total of 5 TV screens have been hacked. Locate the screens and fight the culprits to foil the mastermind's plan.
All enemies hacking the TV screens have their own unique Mutation Mechanics. You need to exploit these Mutation Mechanics to defeat the enemies and gain more potent Stage Buffs, which allows you to effectively take down more enemies and earn more points.

Defeat more enemies during the Final Showdown phase to earn more points. You will earn additional points if you have any remaining Cycles.

Your Stage buff will not be upgraded during the Final Showdown.
Dreamjolt TV
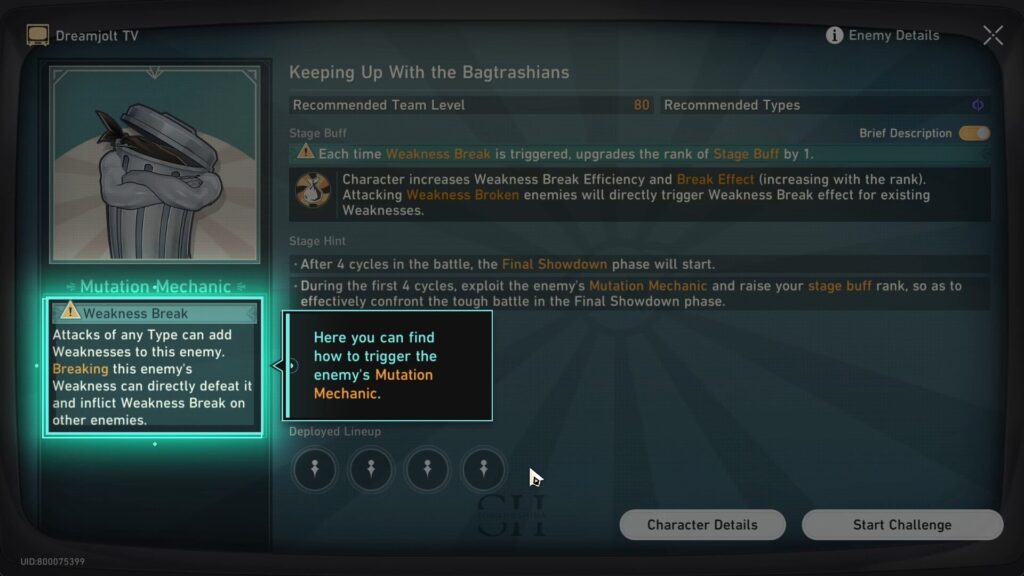
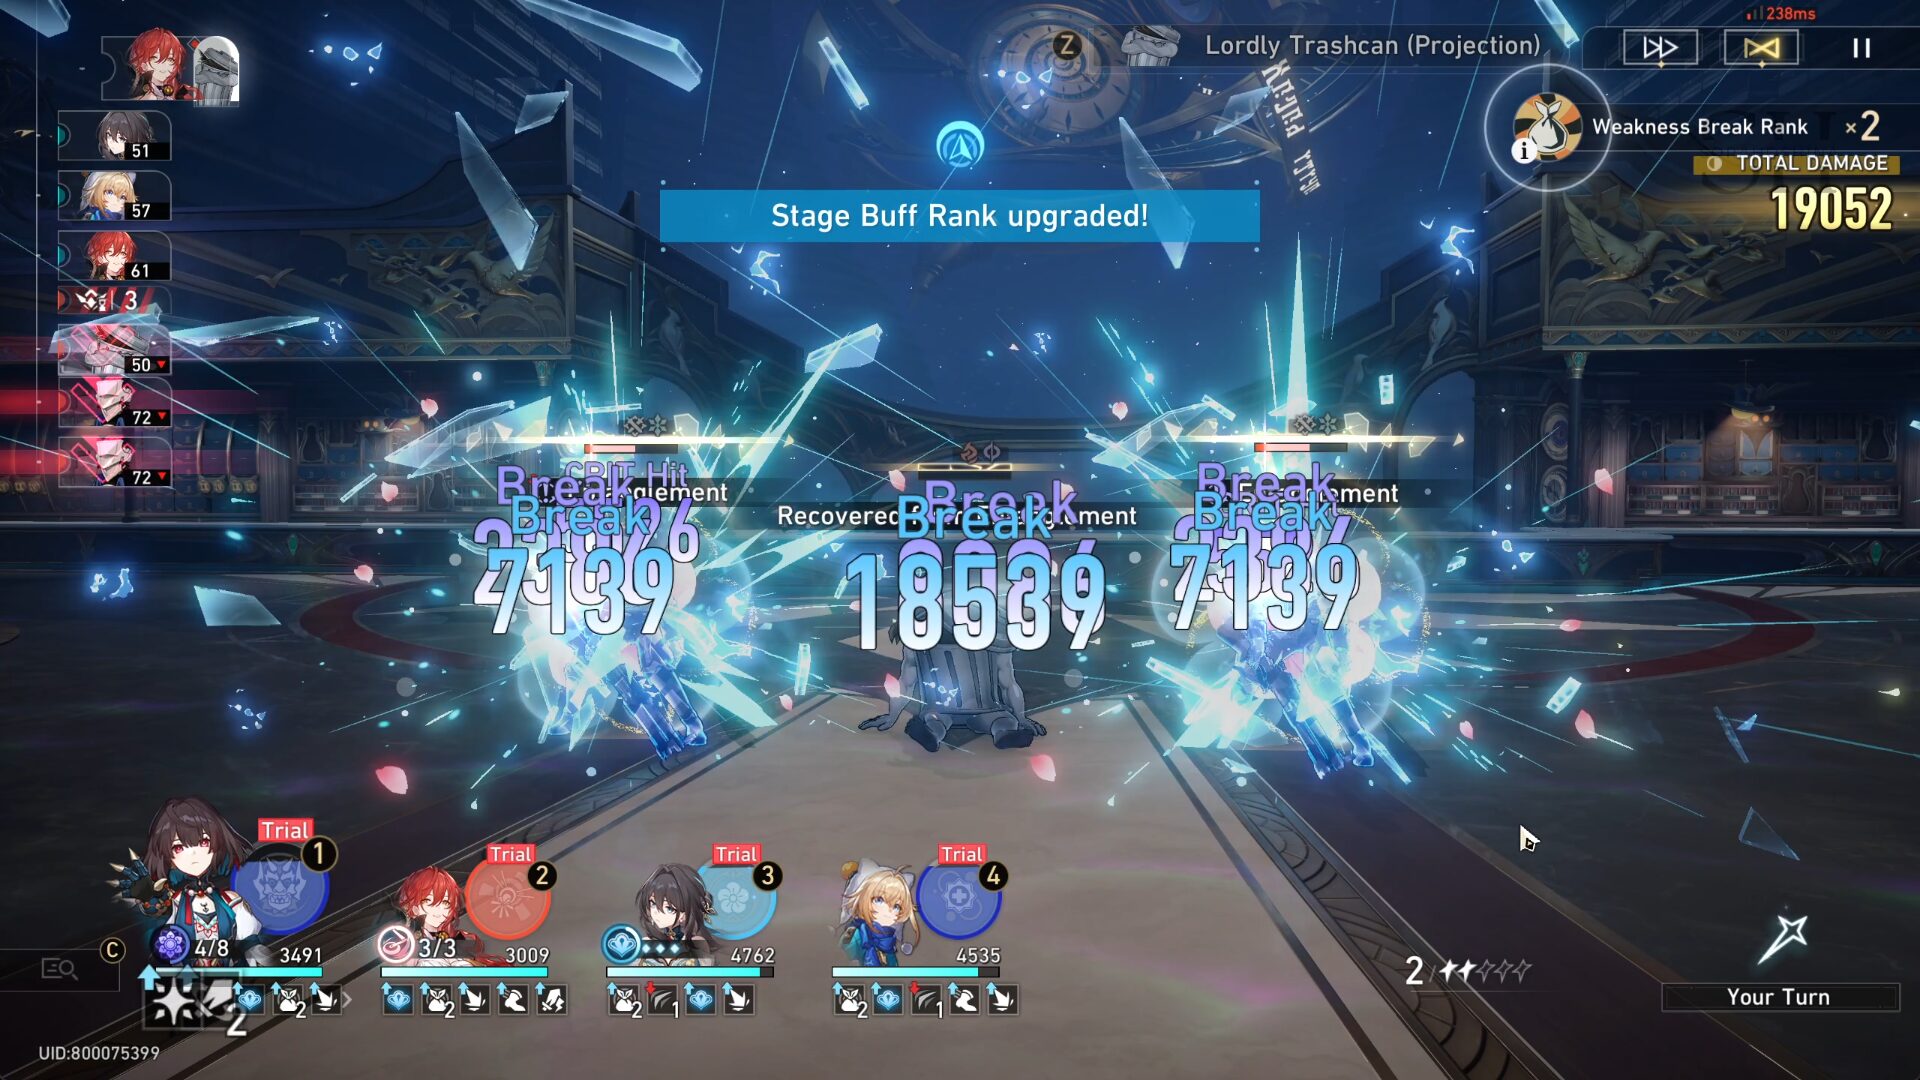
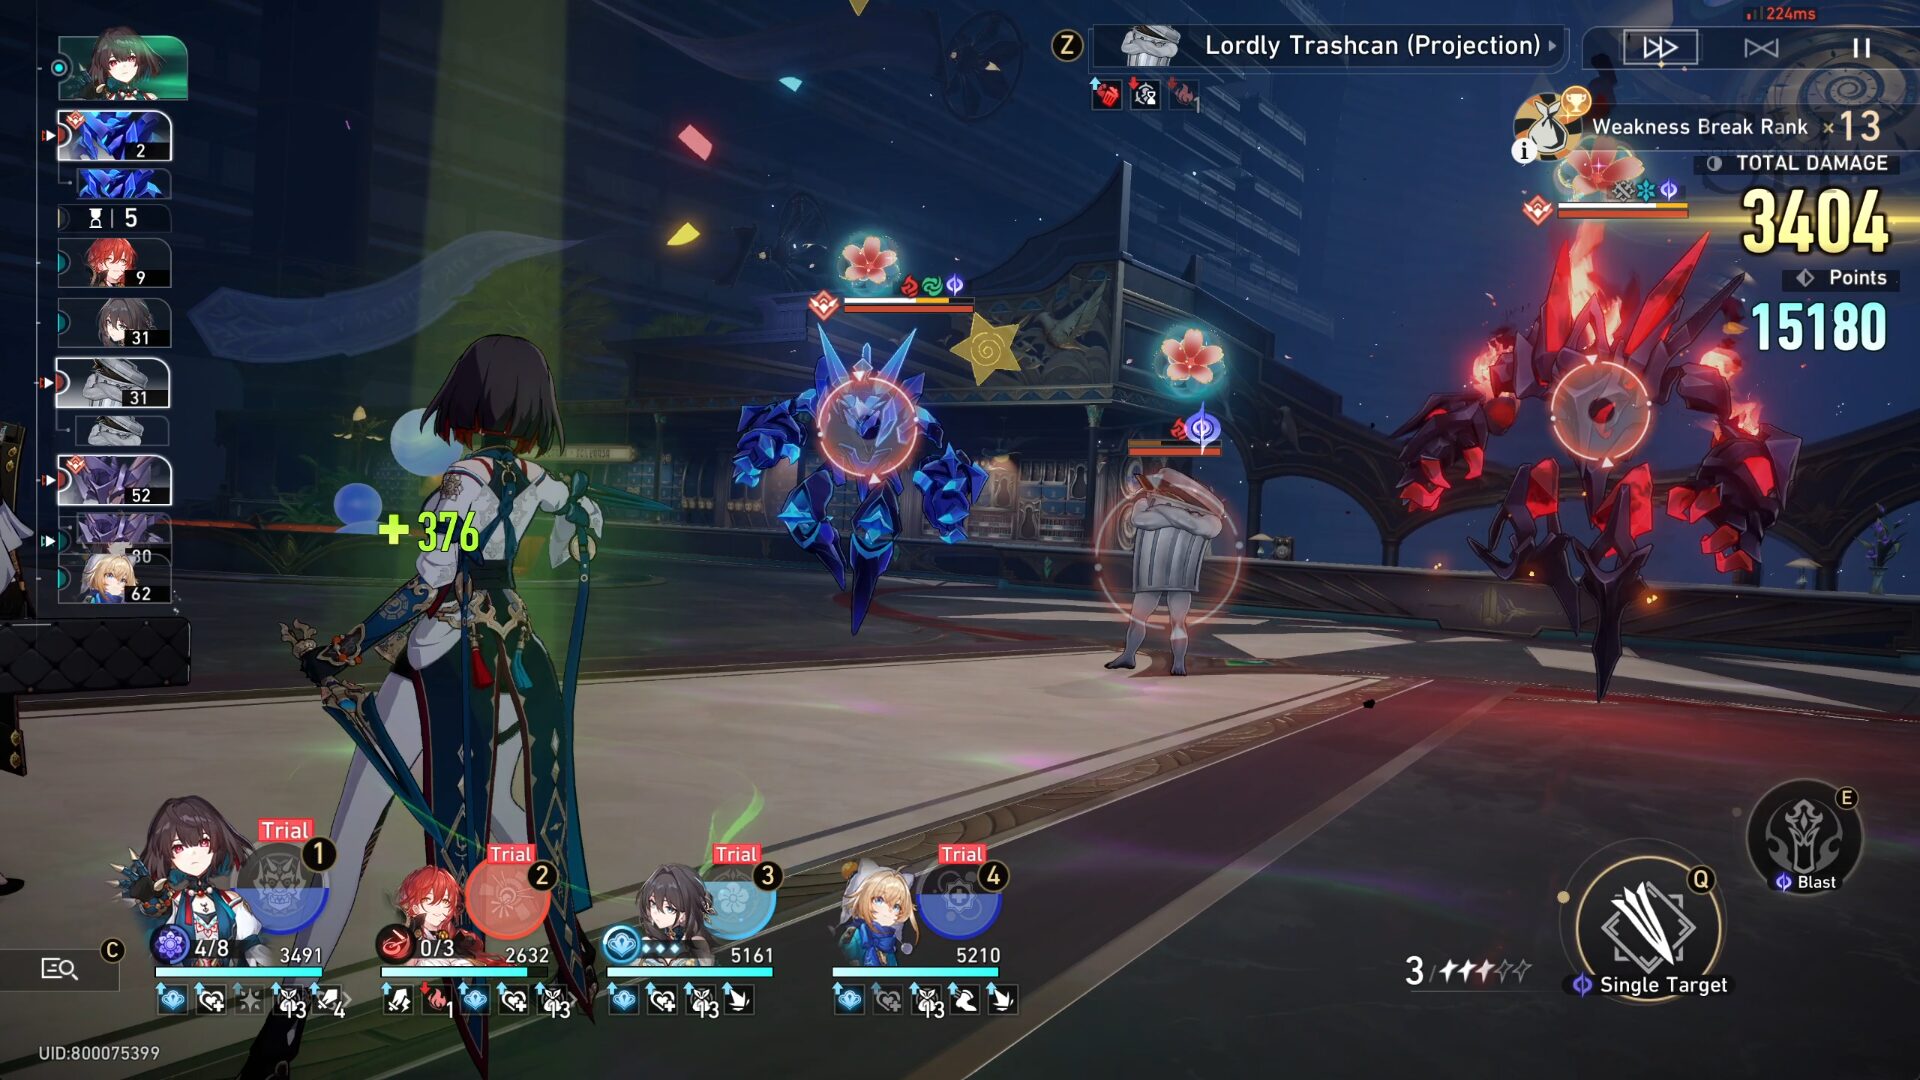
Stage 1: Keeping Up With the Bagtrashians
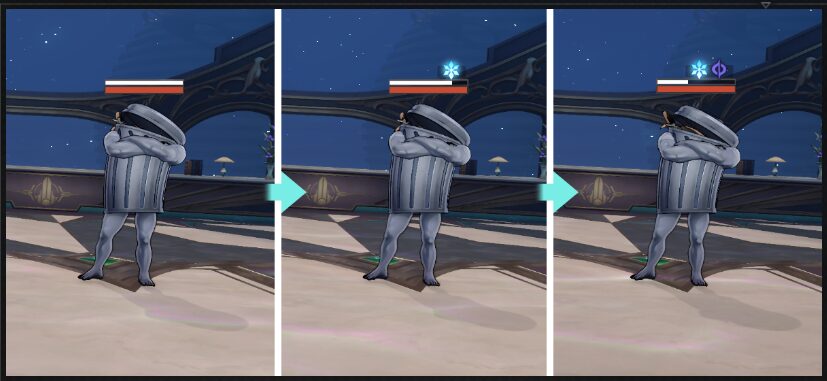
Attacks of any Type can implant a Weakness of the corresponding Type on this enemy.

Mutation Mechanic: Weakness Break
Breaking this enemy's Weakness will directly defeat them and inflict Weakness Break on all enemy targets aside from Lordly Trashcan (Projection).
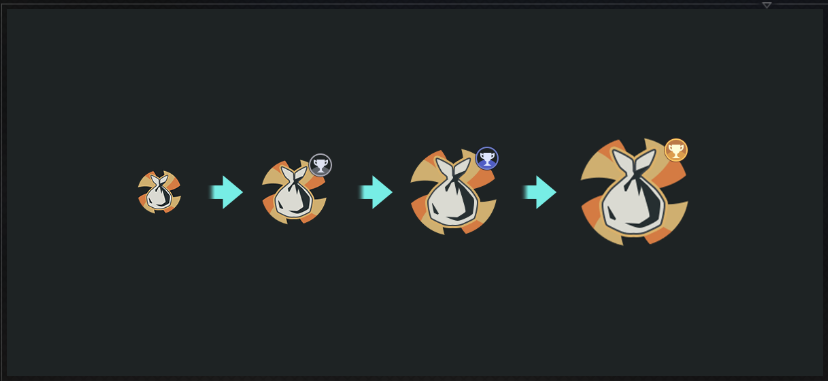
After using the Weakness Break mechanic to break the Lordly Trashcan (Projection)'s Weakness, you may upgrade your Stage Buff by 1 rank.
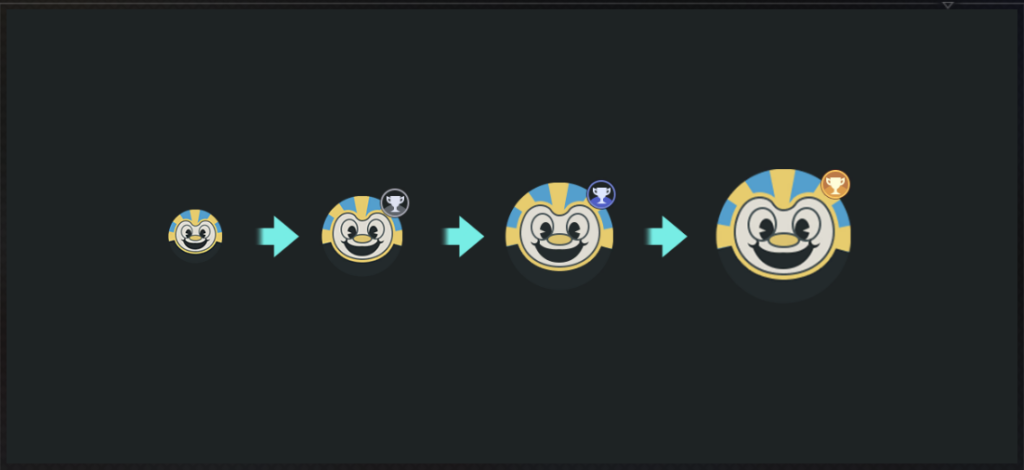
As you increase your Stage Buff rank, the rating for the Stage Buff will also increase.
Team Recommendation
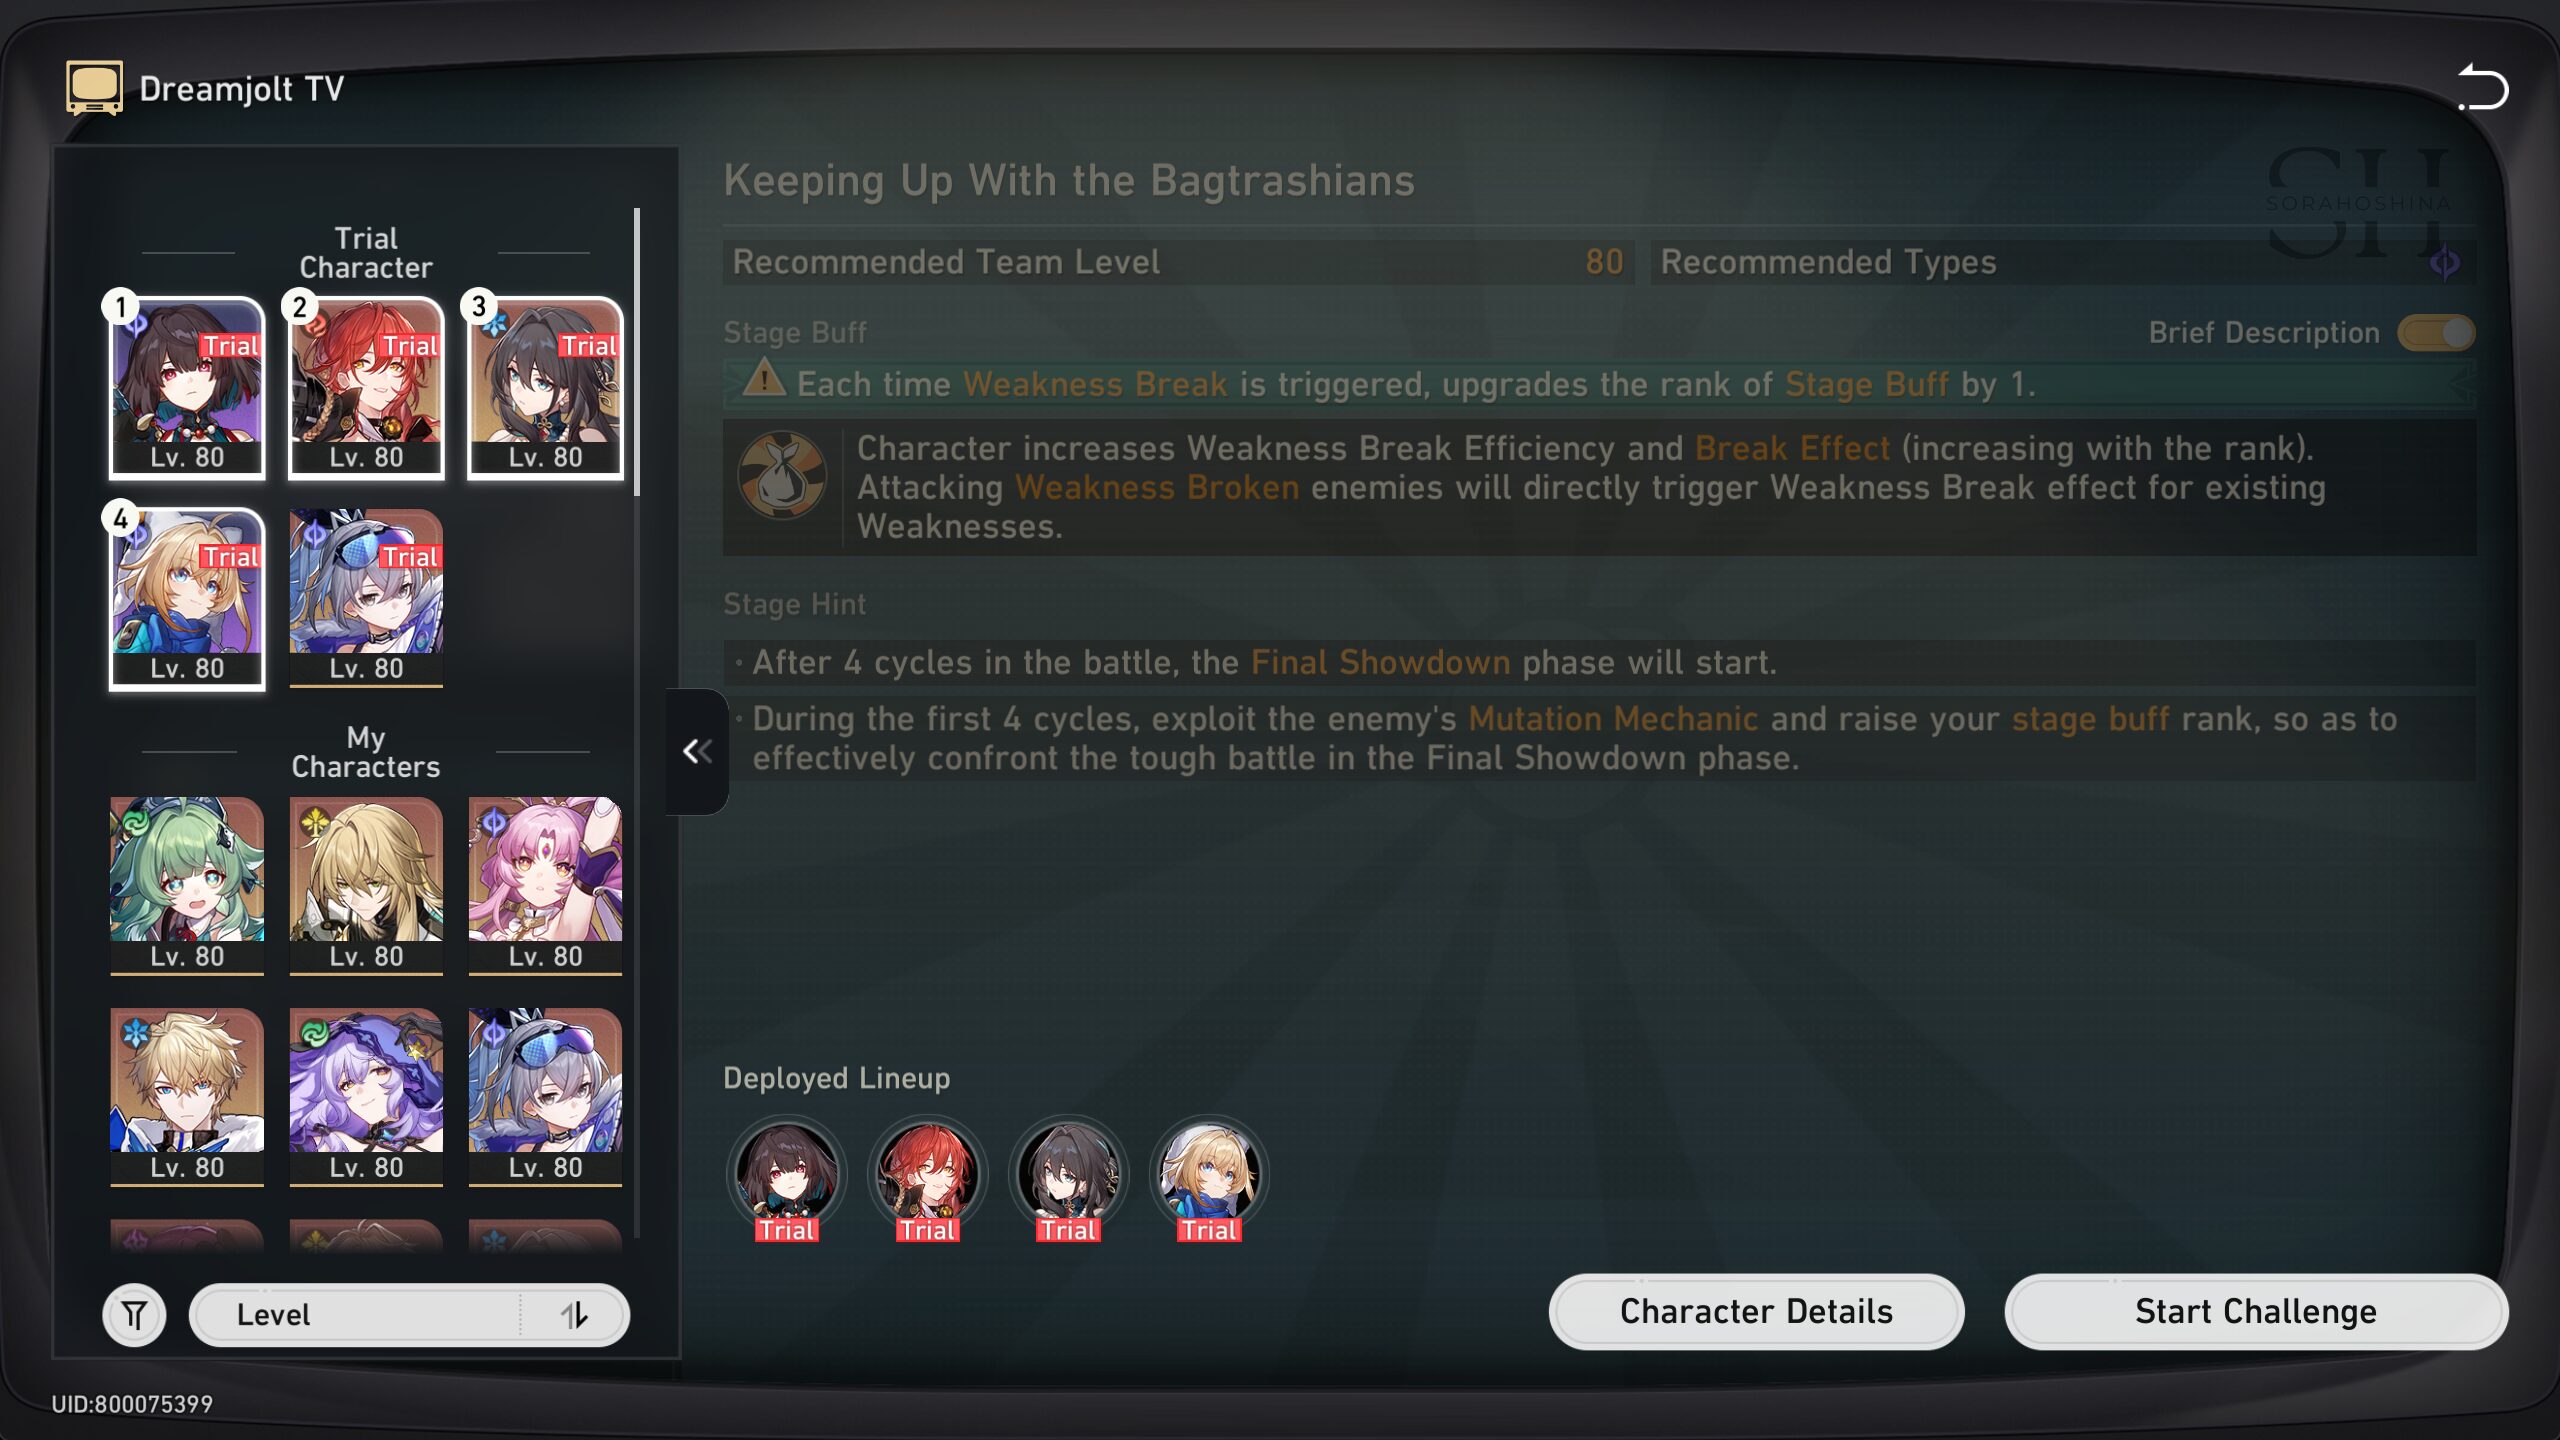
Recommended Team(s):
1) Trial Xueyi + Trial Himeko + Trial Ruan Mei + Trial Lynx
2) Trial Xueyi + Trial Himeko + Trial Silver Wolf + Trial Lynx
Buff Buildup Commences
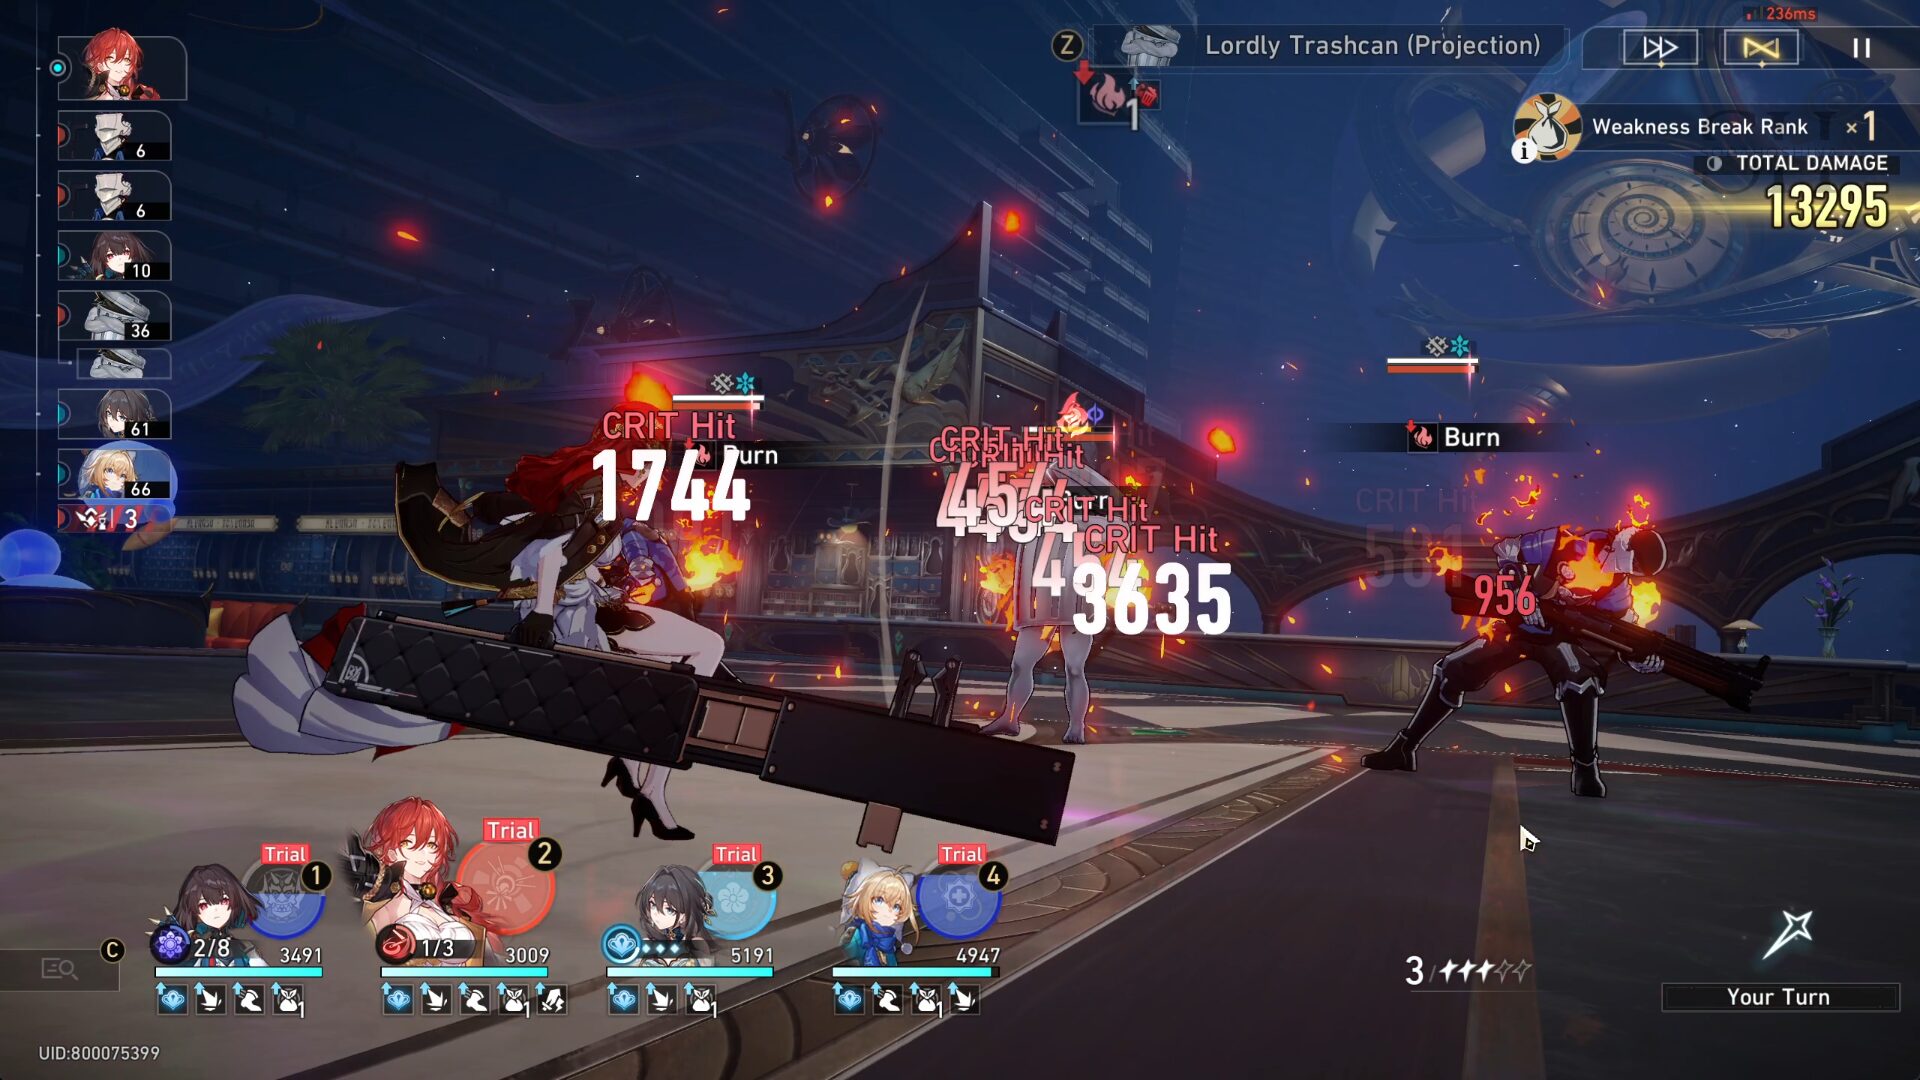
During the first 4 rounds where you'll build the buff, focus on the Trash Can, focus on the Trash Can, focus on the Trash Can! Any type of attacks will increase its Type Weakness, and the faster you Weakness Break it, the better!
When the Trash Can has a Weakness Break, you will get 3 stuffs:
1) Directly defeat the Trash Can
2) Inflict Weakness Break on all enemy targets aside from Lordly Trashcan
3) Gain 1x Stage Buff
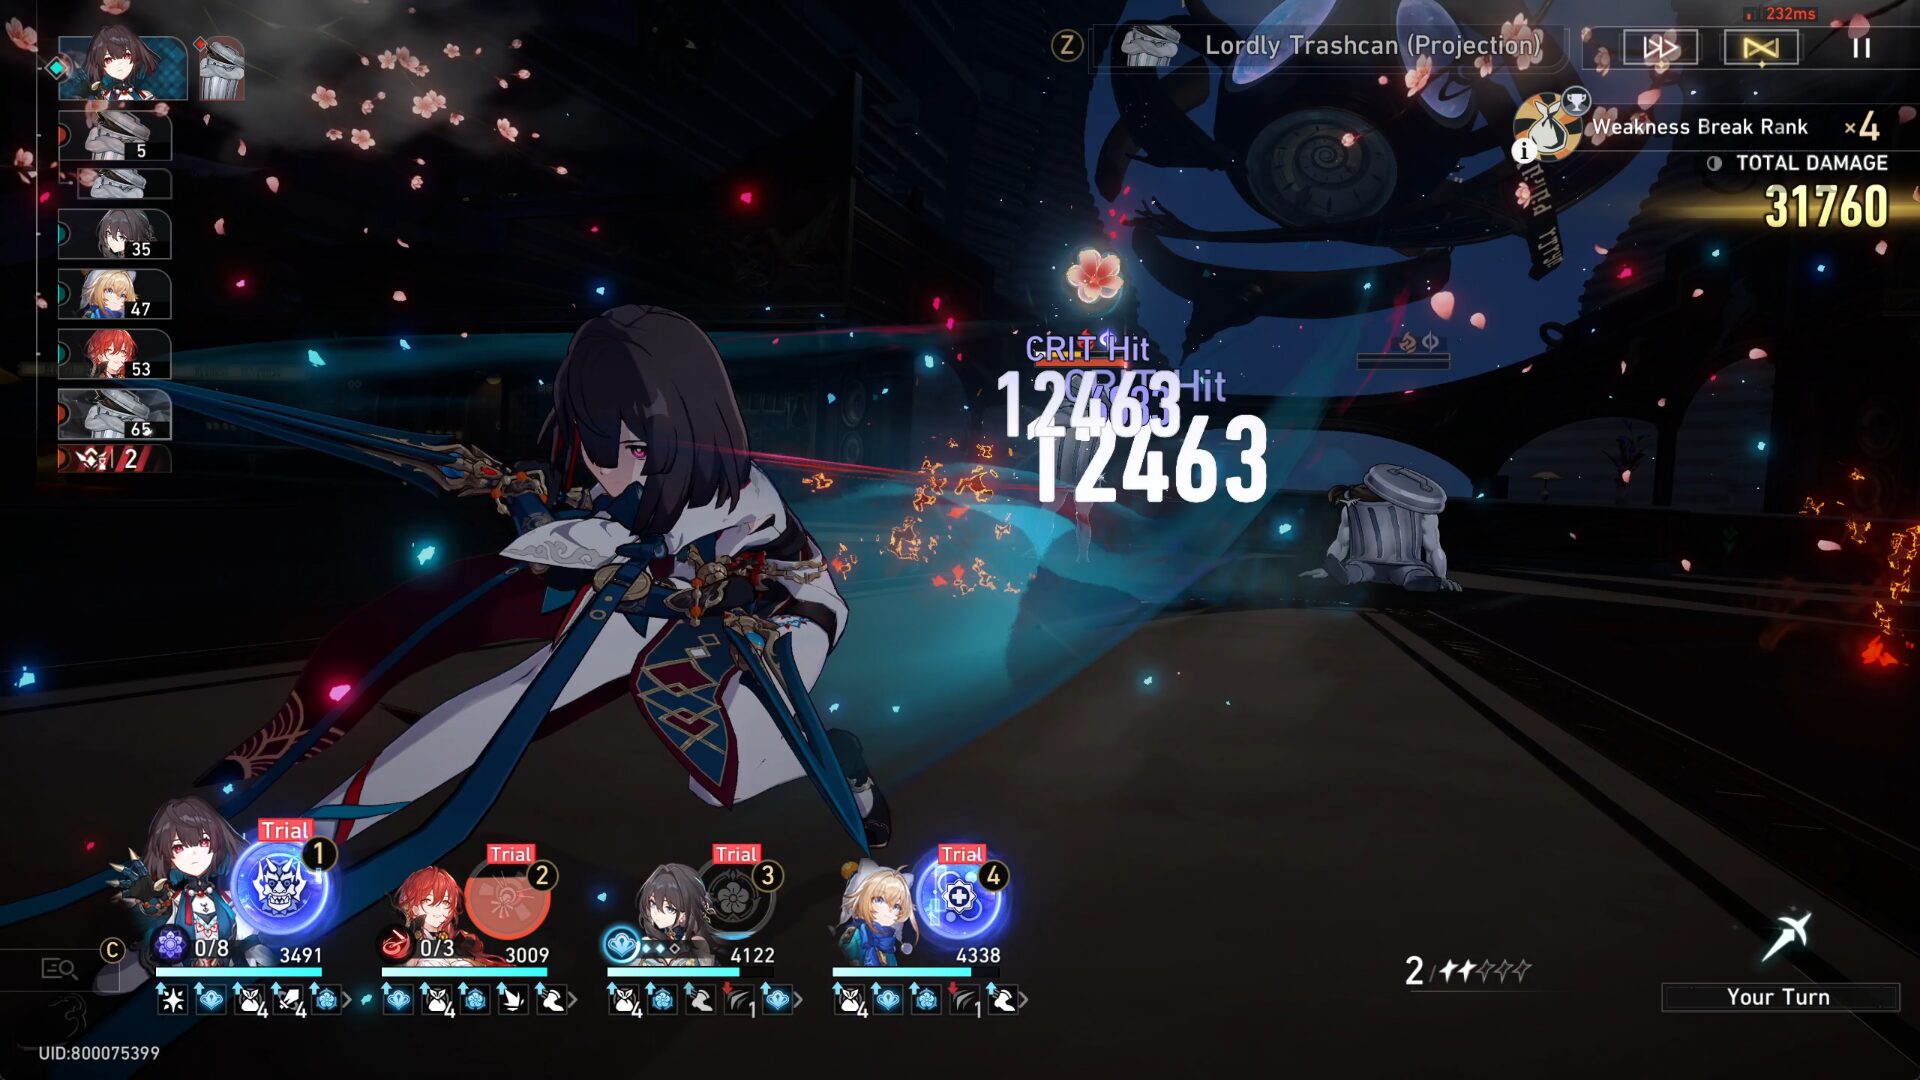
This is where the follow-up combo of both Xueyi and Himeko comes into play, as they both can single-handedly deal with all the mobs (both follow-up attacks can deal damage to multiple enemies). These kits can make you hit enemies without taking turns, this is the best option to stack the stage buffs.
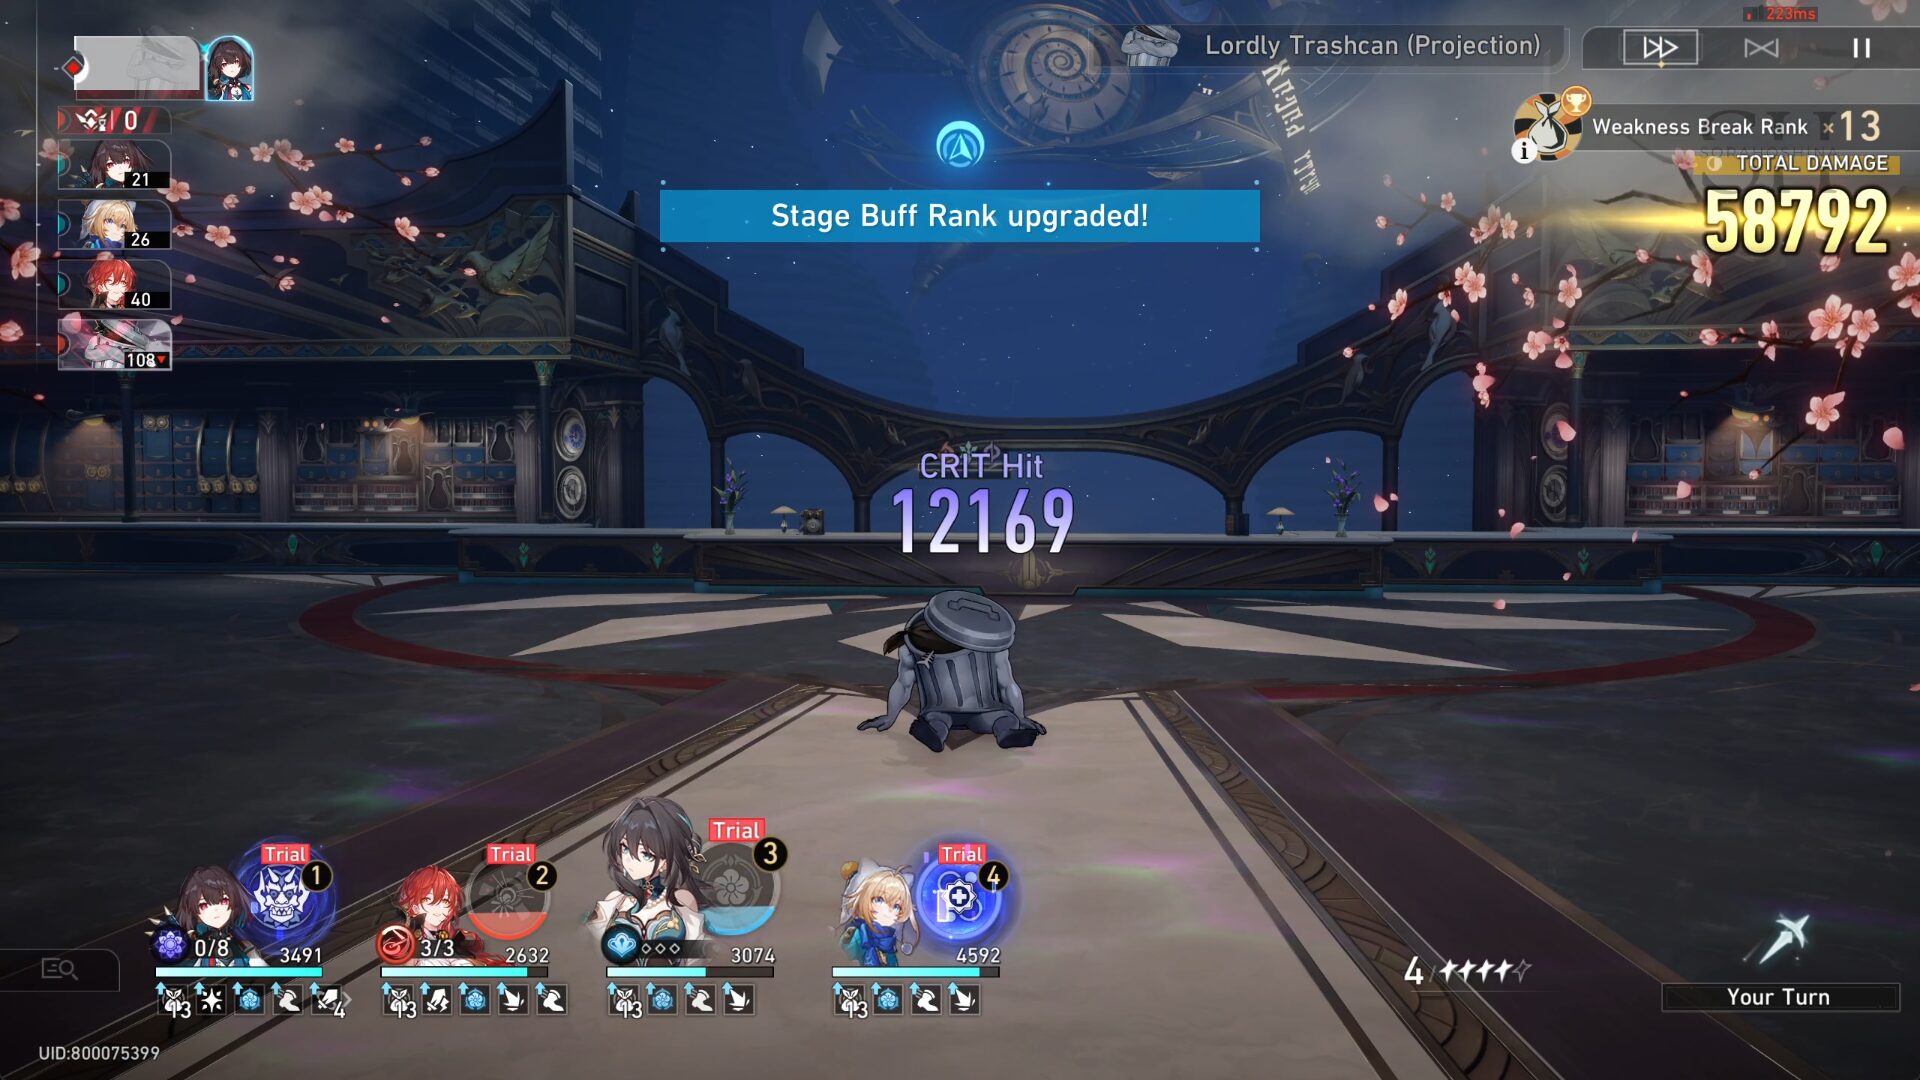
By the end of the Buff Buildup Commence, you should be able to get around ~13 Weakness Break Rank.
Final Showdown Commences
When the Final Showdown Commences, just auto battle it and you should be good since Ruan Mei buffs the whole team instead of a single characters (if you did choose a single buffer like Tingyun/Bronya/Sparkle, I suggest buffing Xueyi instead of Himeko)

But when it comes to multiple enemies like these, I tend to manually control the characters to target the Trash Can (i'm worried in case they target the mobs).
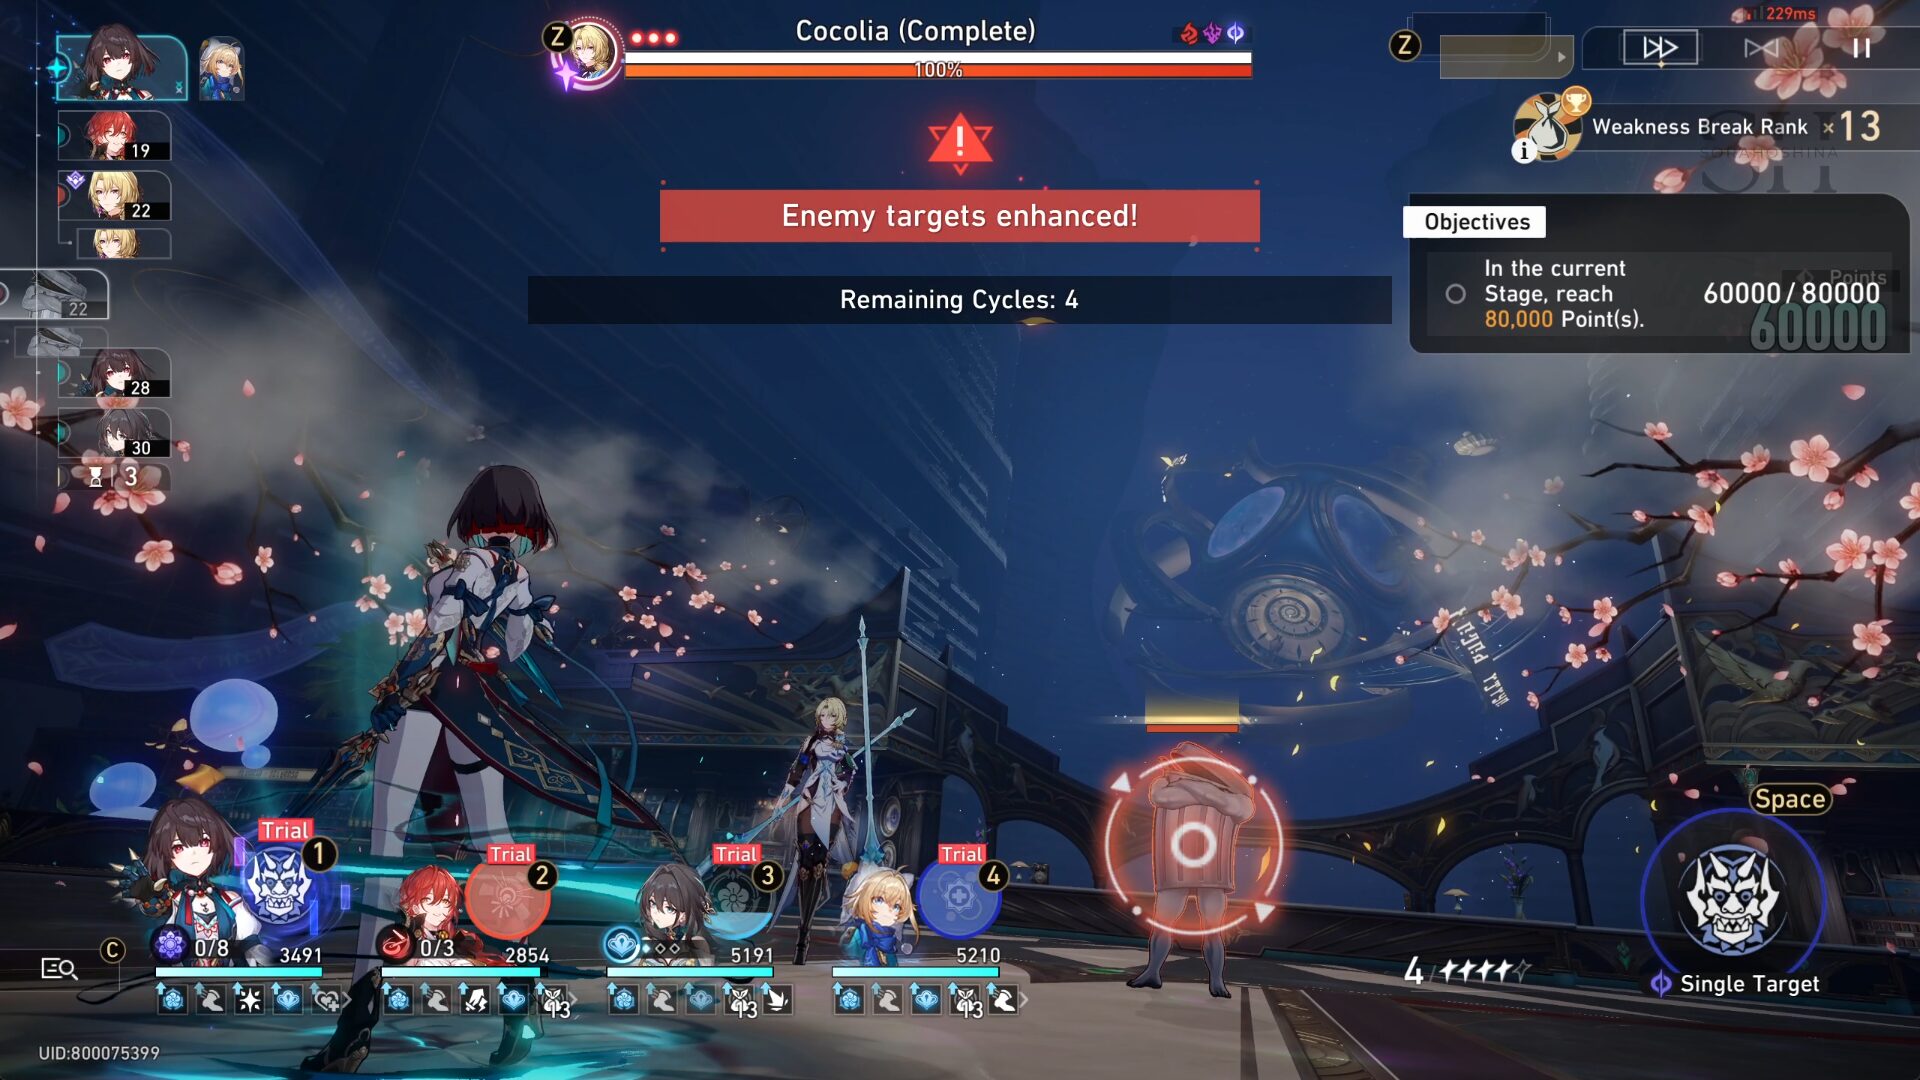
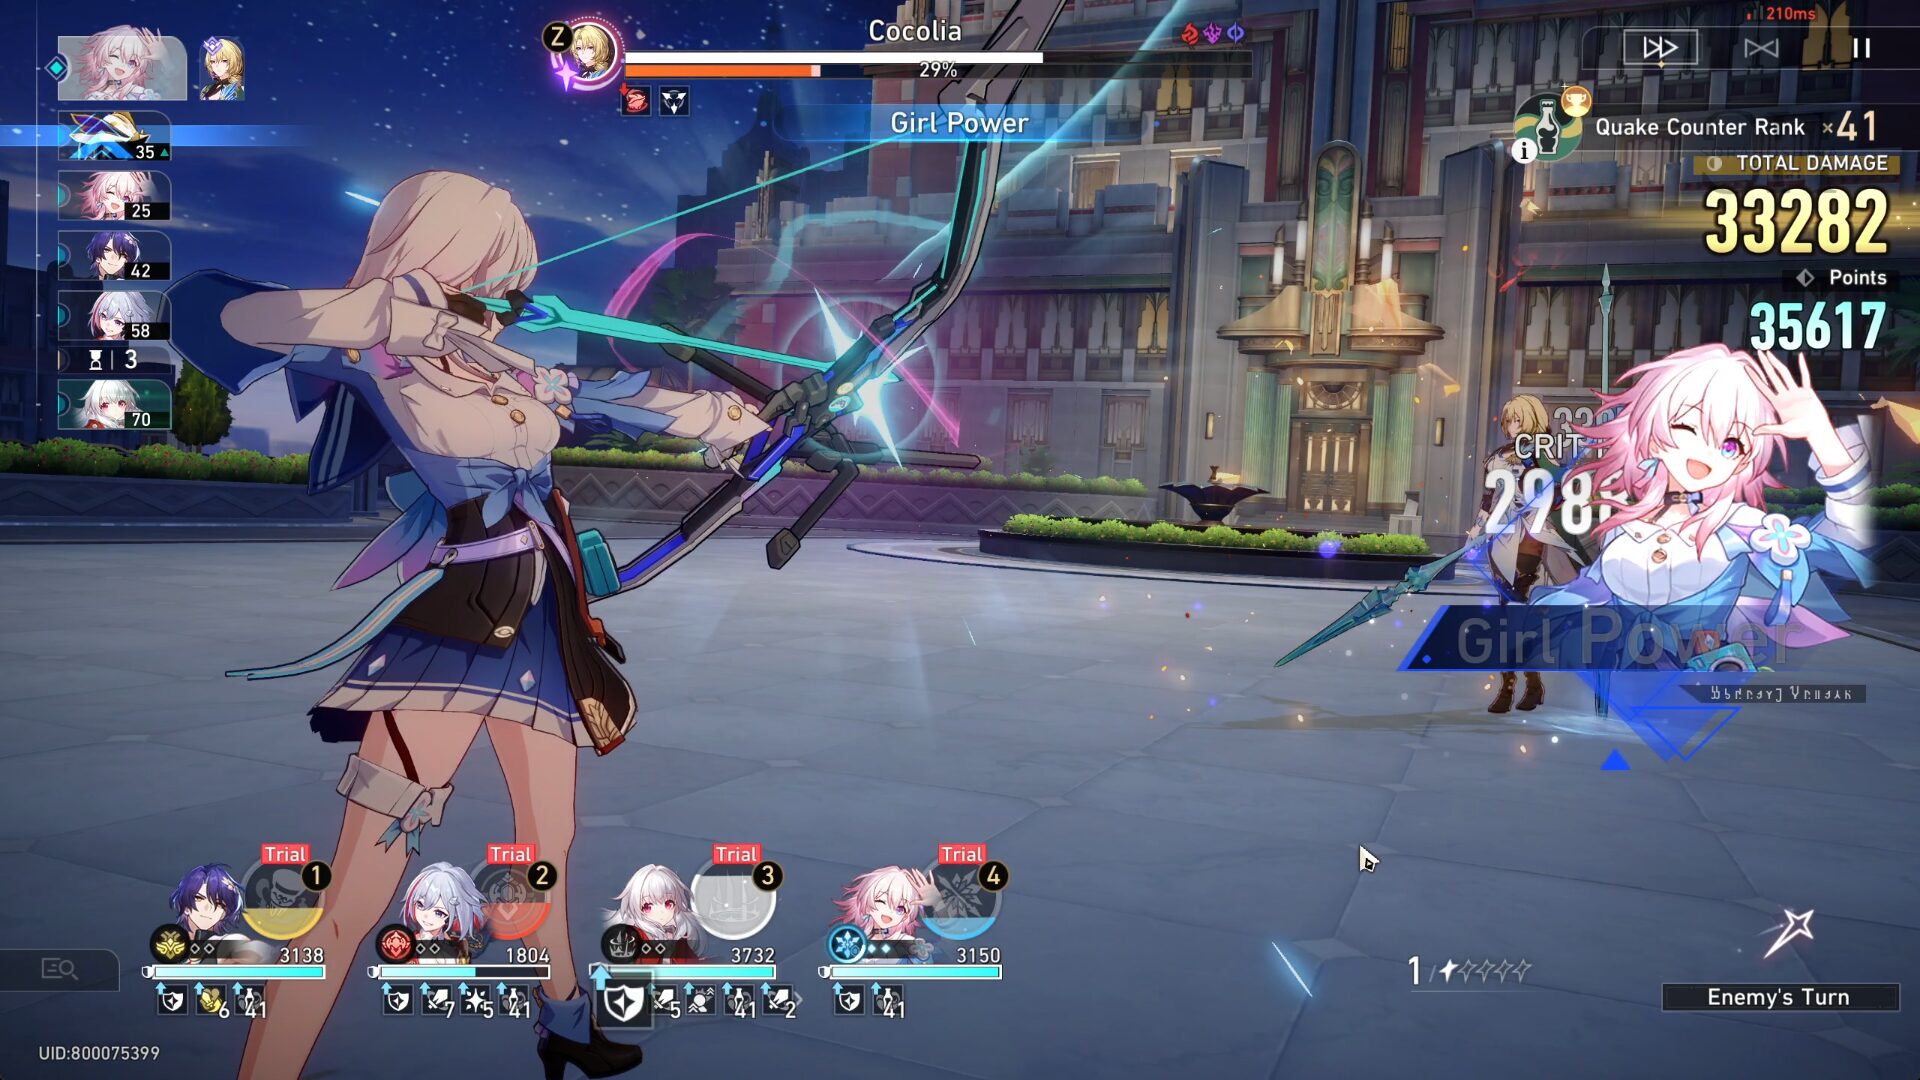
In the last wave with Cocolia, there will only be 1 Trash Can and after this one is defeated, there will be no more Trash Can that can help you Weakness Break other enemies.
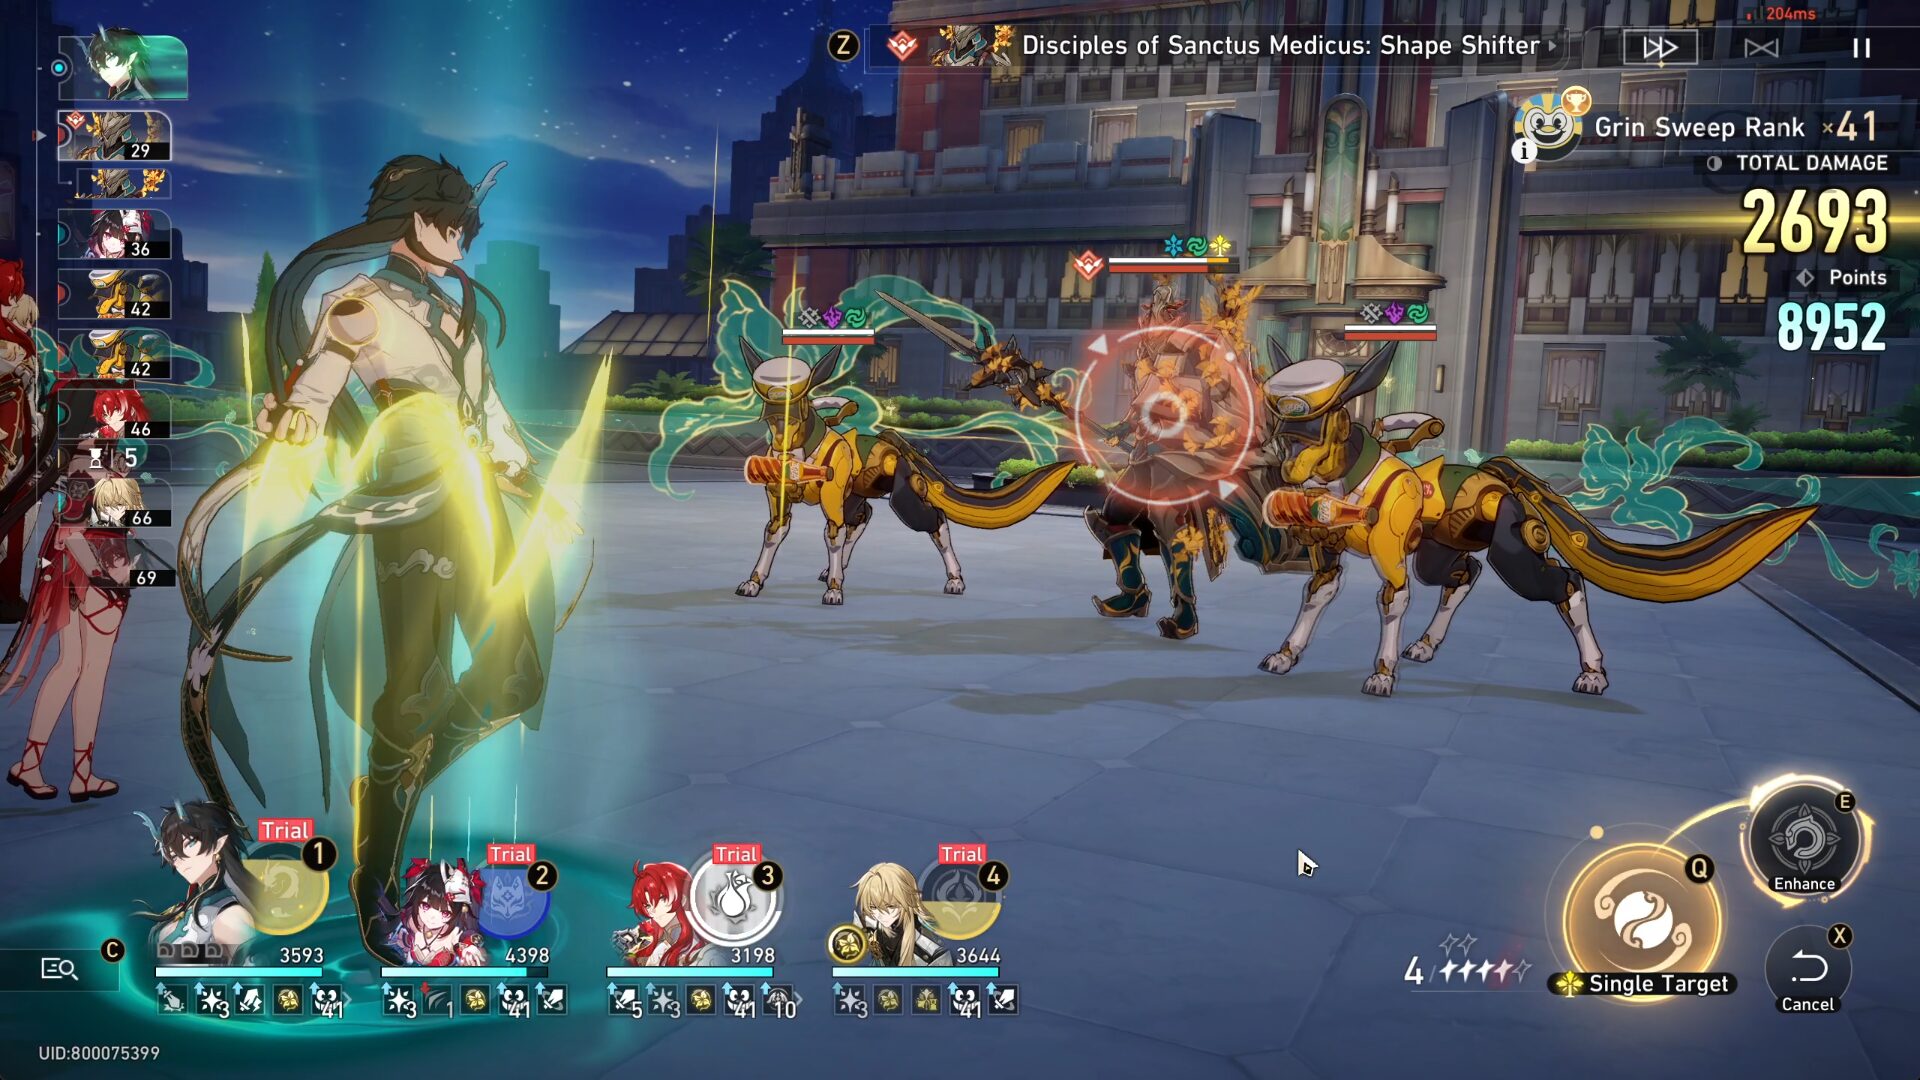
Stage 2: Loony Telly

Attacking this enemy can make it switch between the Surprise Channel and the Fright Channel.
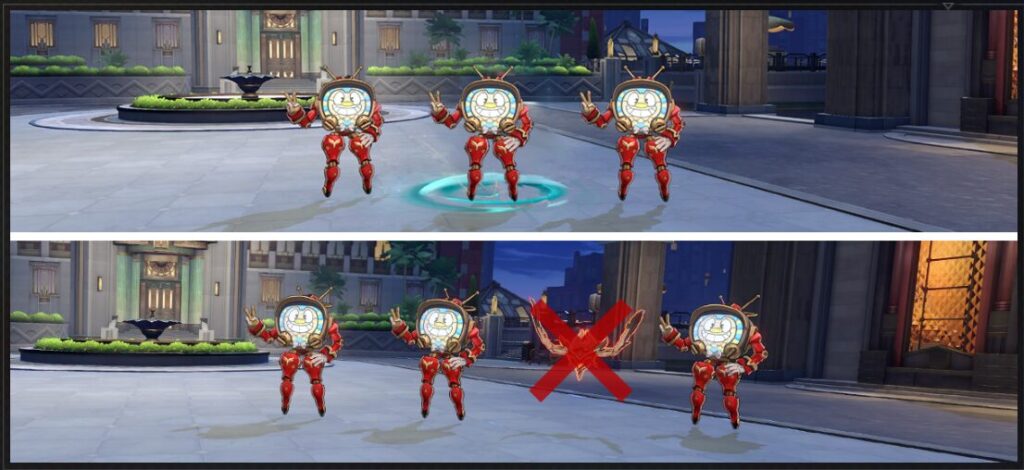
Mutation Mechanic: Grin Sweep
When 3 or more of these enemies in the Surprise Channel are adjacent to each other, triggers the Grin Sweep effect, immediately defeating them.
After switching 3 or more adjacent Dreamjolt Troupe's Mr Domescreen (Projection) to the Surprise Channel to trigger Grin Sweep, you may upgrade the Stage Buff by 1 rank.
As you increase your Stage Buff rank, the rating for the Stage Buff will also increase.
Team Recommendation
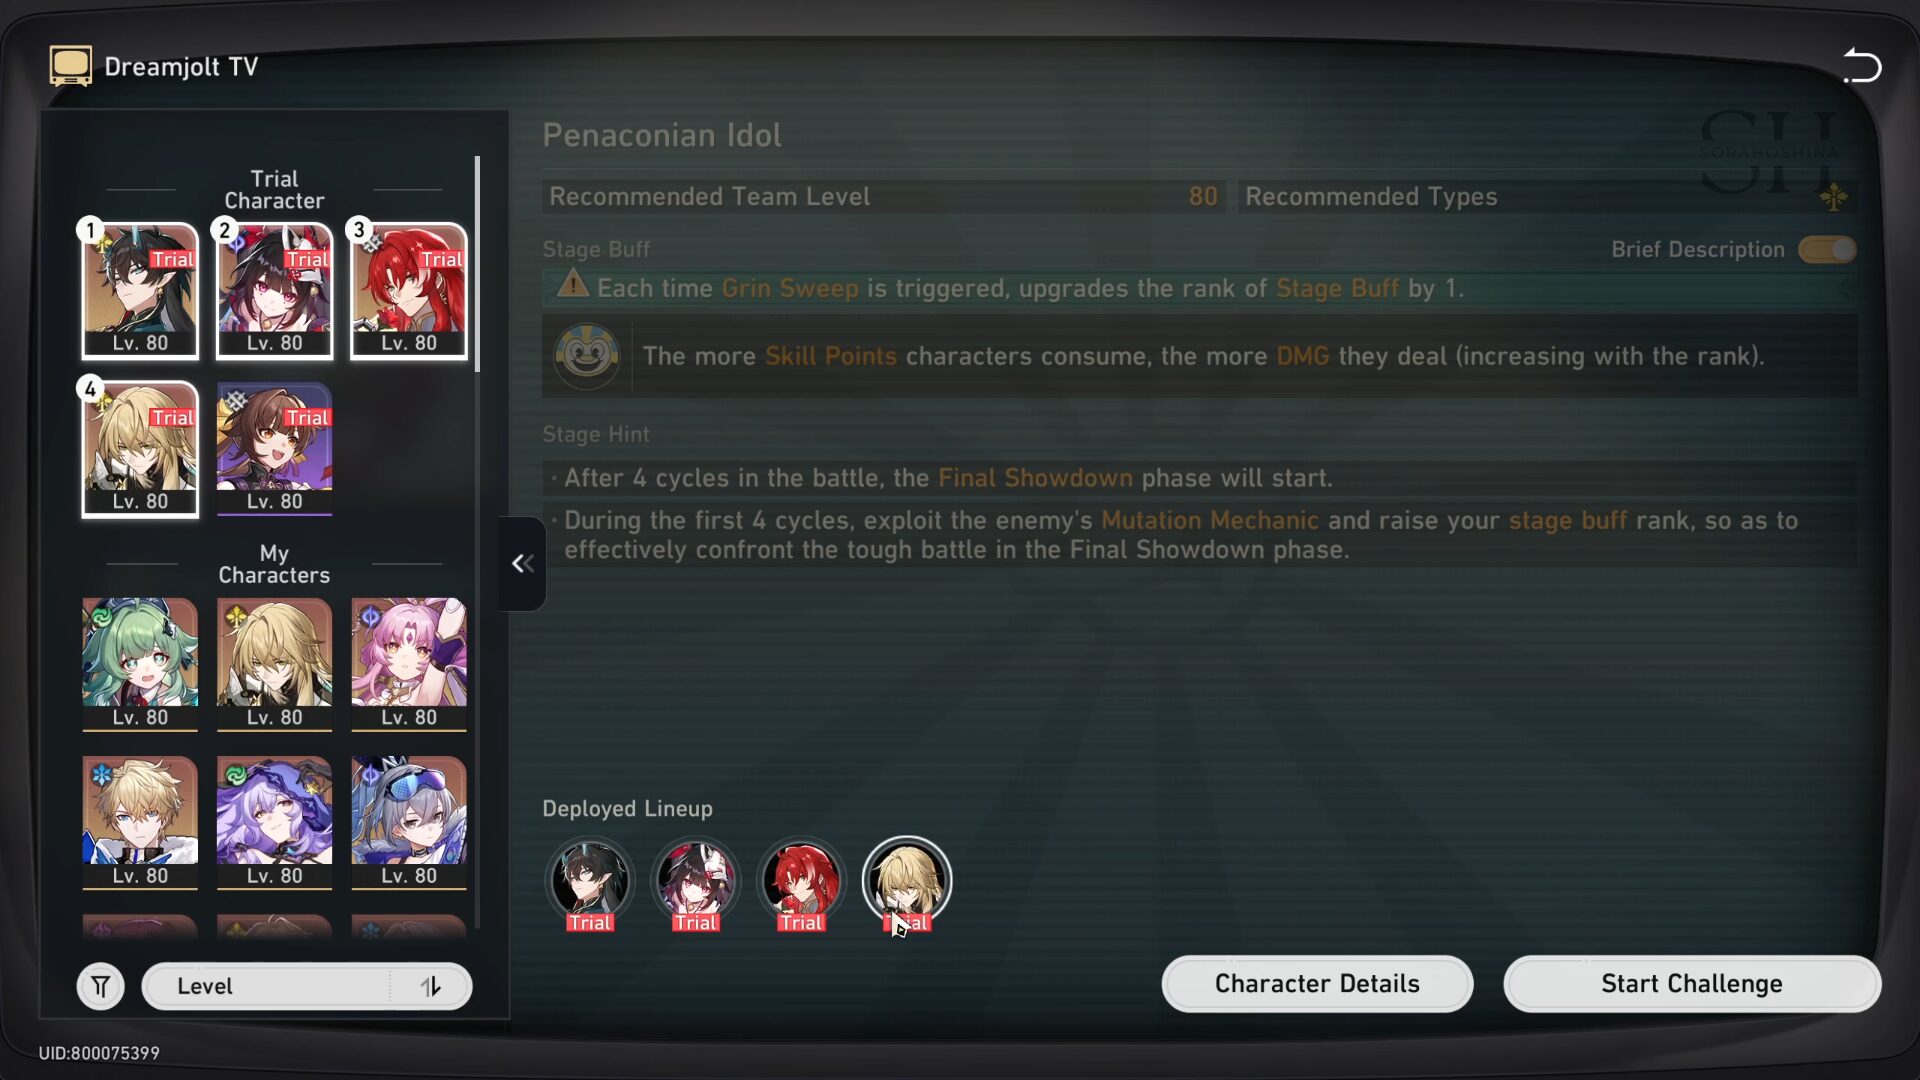
Recommended Team(s)
1) Trial DHIL + Trial Sparkle + Trial Argenti + Trial Luocha
2) Trial DHIL + Trial Sparkle + Trial Sushang + Trial Luocha
Buff Buildup Commences

In the buff buildup section, Argenti is the star here to use his AoE attack and change all of Mr. Domescreen's state to Surprise State. Although DHIL's Blast ATK and Luocha's Ultimate can also help. Remember that one attack can make it switch between the Surprise Channel and the Fright Channel.
Surprise Channel: Give one ally some energy
Fright Channel: Deal AoE damage and make your whole team lose some energy
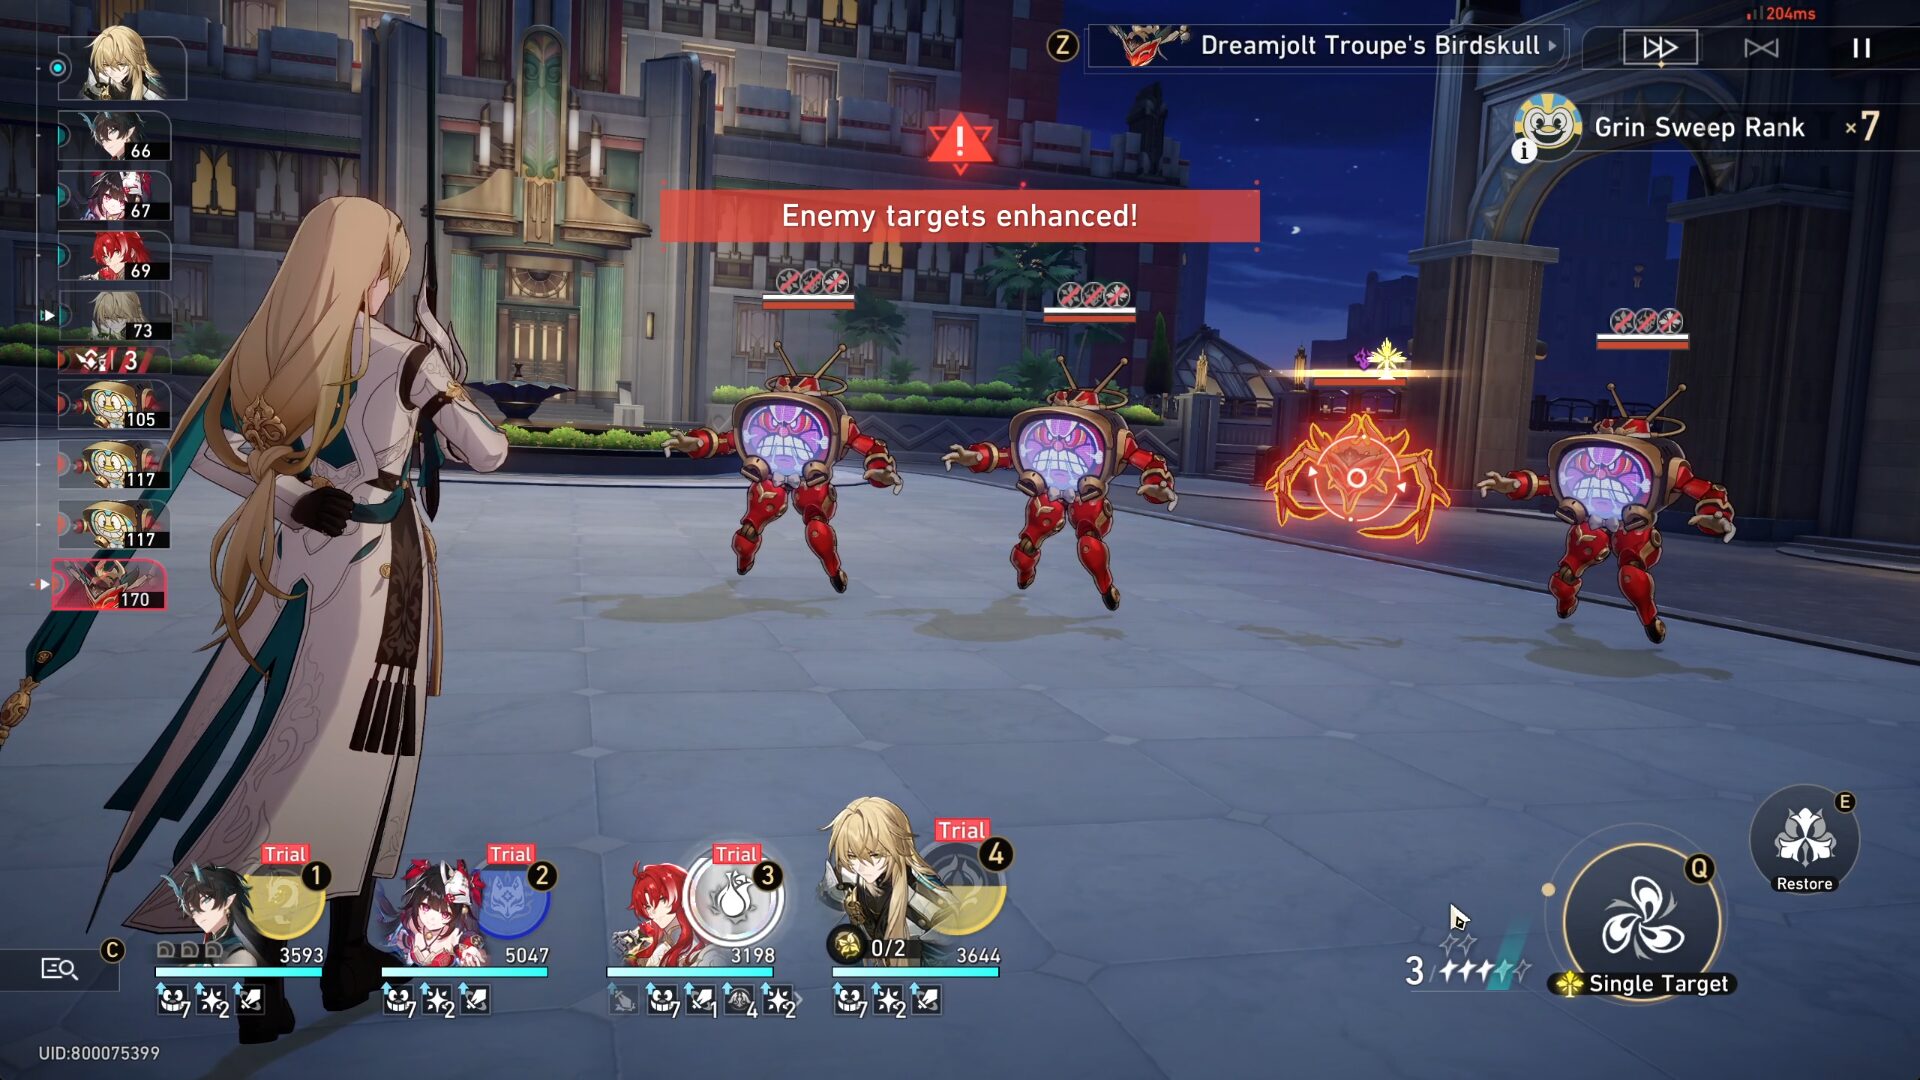
When there are some enemies in between Mr. Domescreens, uses any single target attack to defeat them. Then, use any AoE or Blast attacks to deal hit all Domescreens.
Or, you can reduce the singular enemy with a normal attack until it reaches a critical hp, then use Argenti's Ultimate to deal the finishing blow while also attacking the Domescreens to change their state to Surprise Channel.
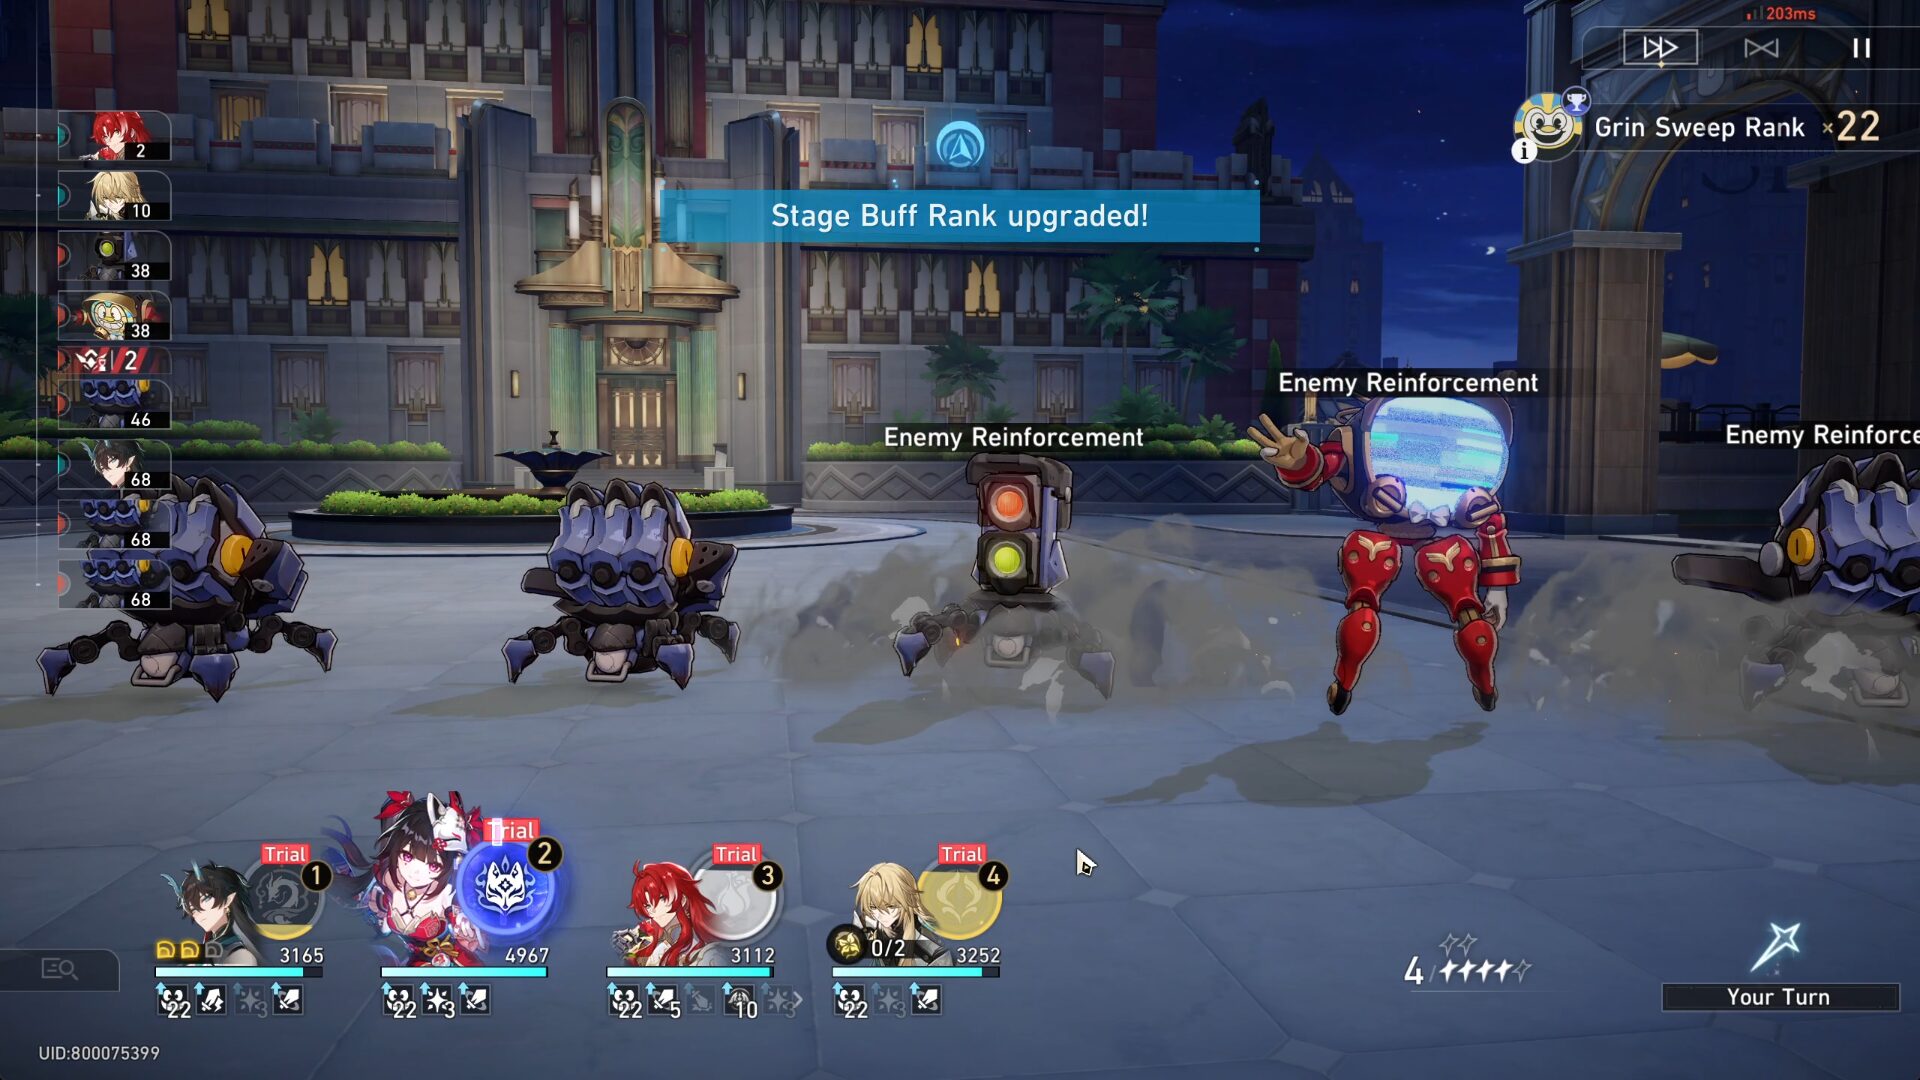
Far into round 2 or 3, there will be more enemies aside from Mr. Domescreens that will show up. This is when you need to start attacking them so more Mr. Domescreens can come again to create a line. Usually, Argenti's Skill alone should be able to take all the mobs down.
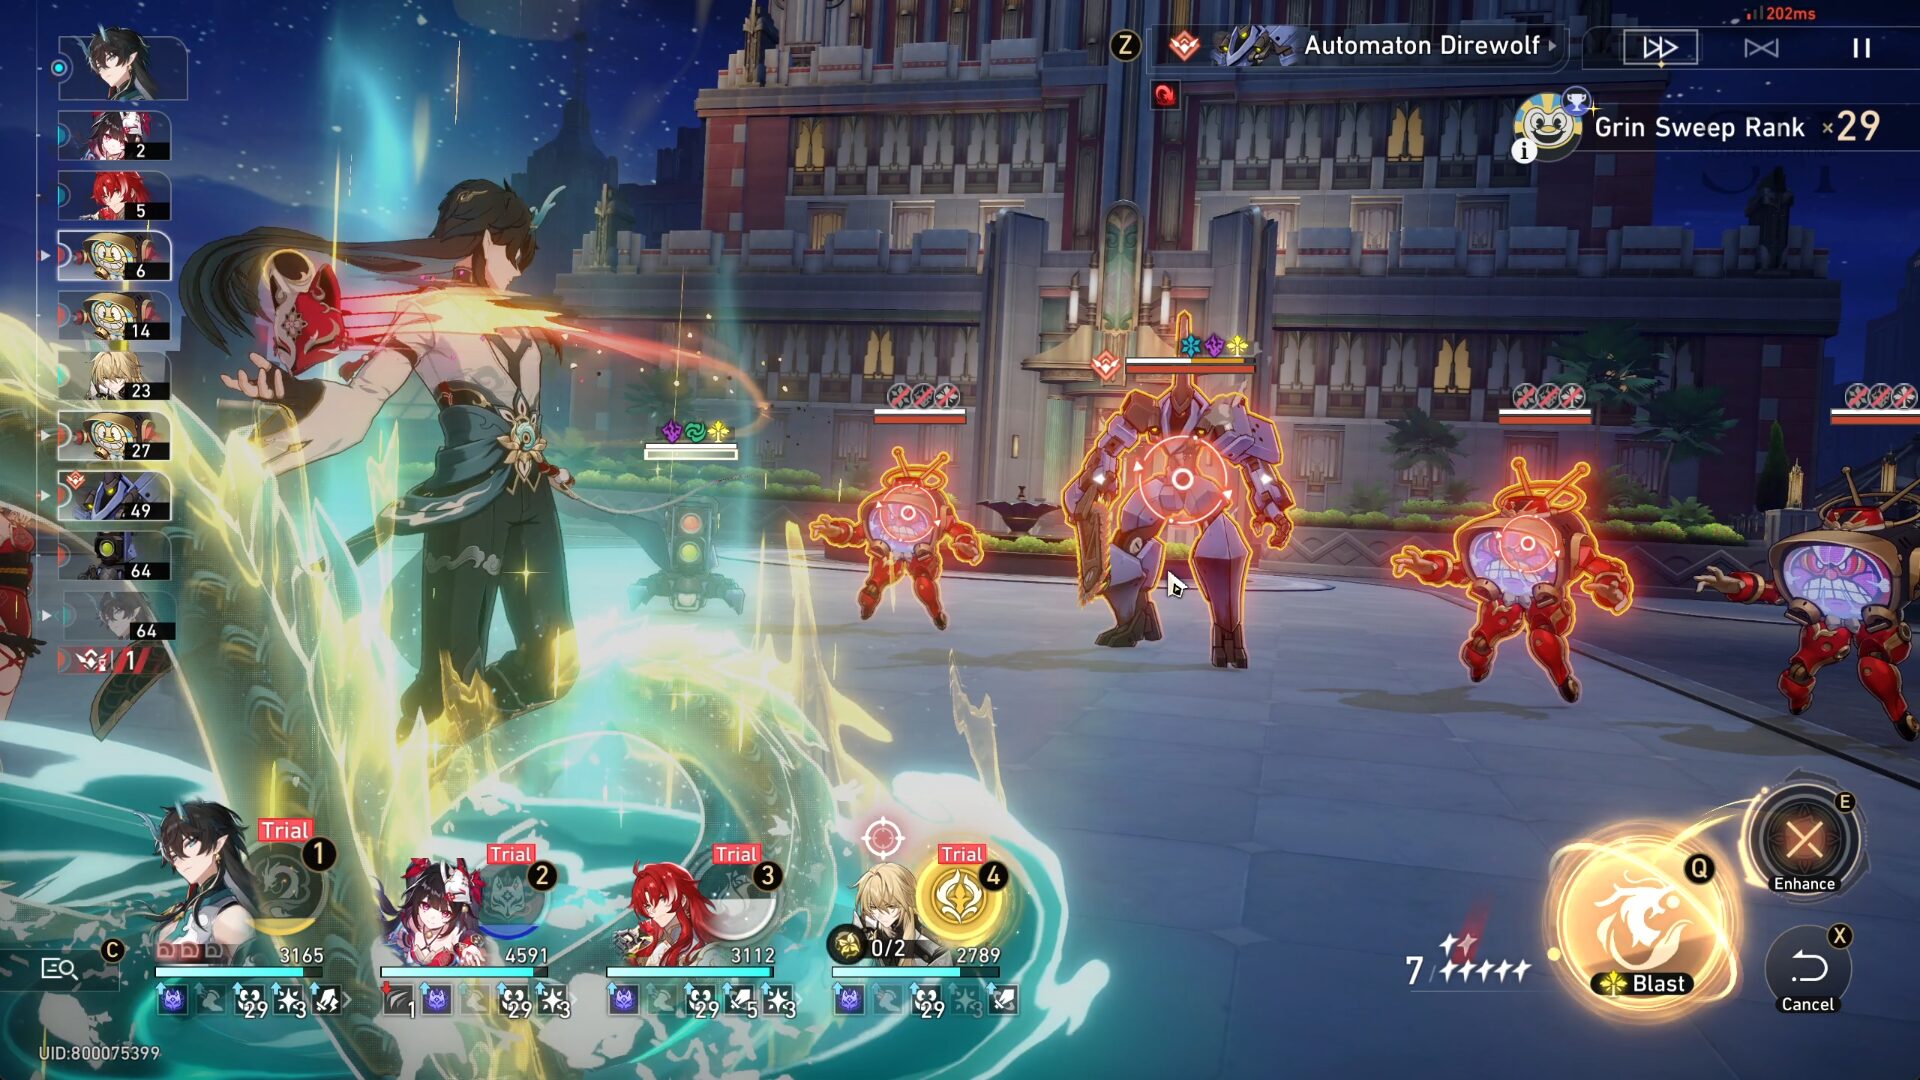
But when it comes to Automaton Direwolf, it's definitely DHIL's time. Sure, it will change Mr. Domescreens' state, but that's not the focus until you defeat the annoying mobs first. By the end of the Buff Buildup Commence, you should be able to get ~30-45 Grin Sweep Rank.
Final Showdown Commences
When the Final Showdown starts, make sure to only let DHIL consume the SP (and Sparkle for her Skill onto DHIL) while Argenti and Luocha only use Normal Attack. This is so you can take full advantage of the stage's buff where the more Skill Points a character consume, the more DMG they deal. And the only one who can take advantage of this is DHIL (and Qingque).
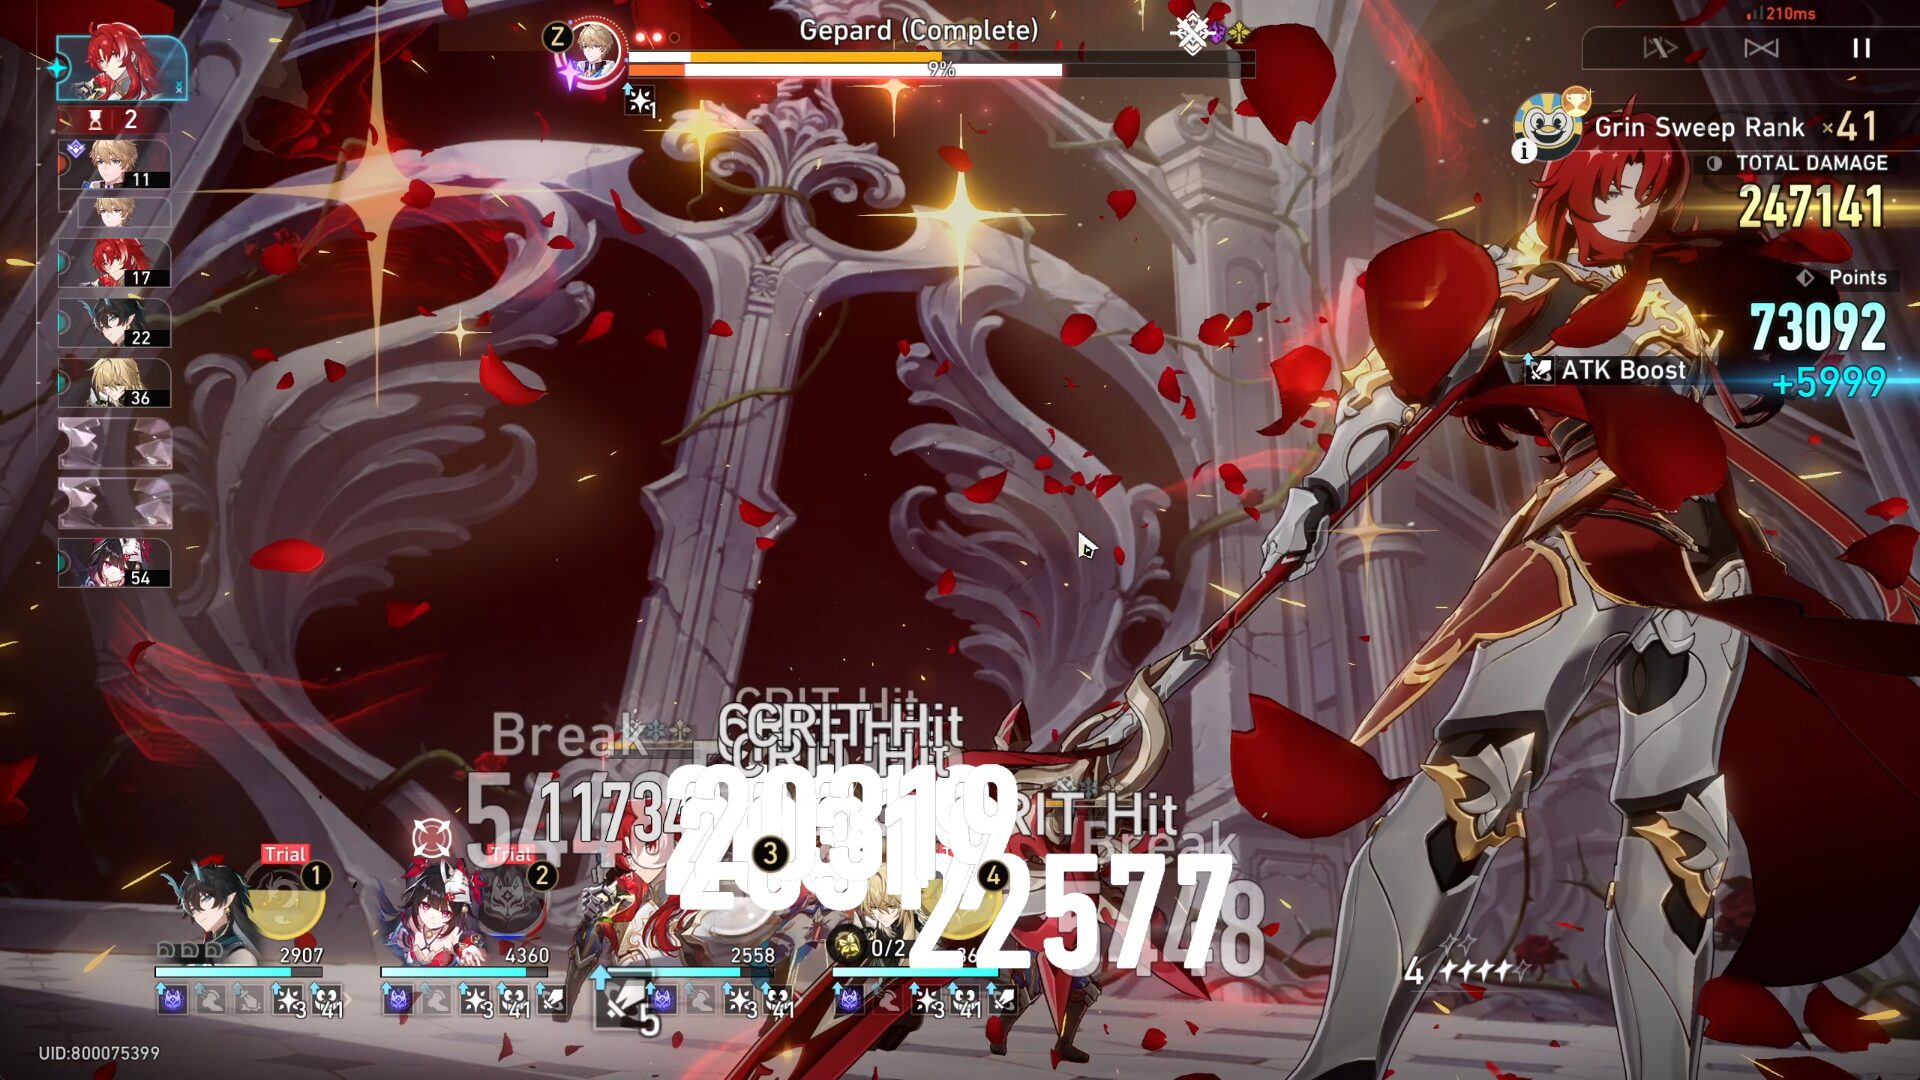
Of course, if you think you have more than enough Skill Points, use Argenti's Skill to fill his Energy so you can use his Ultimate when Gepard's wave comes. As Gepard can summon up to 2 enemies at a time, so Argenti's Ultimate can defeat them super fast. When it comes to healing, Luocha's Talent is enough to keep all your allies healthy.
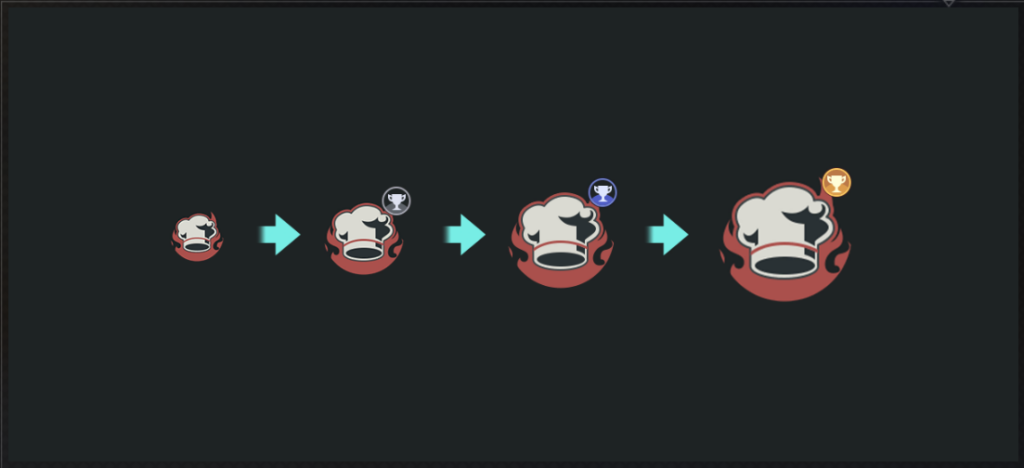
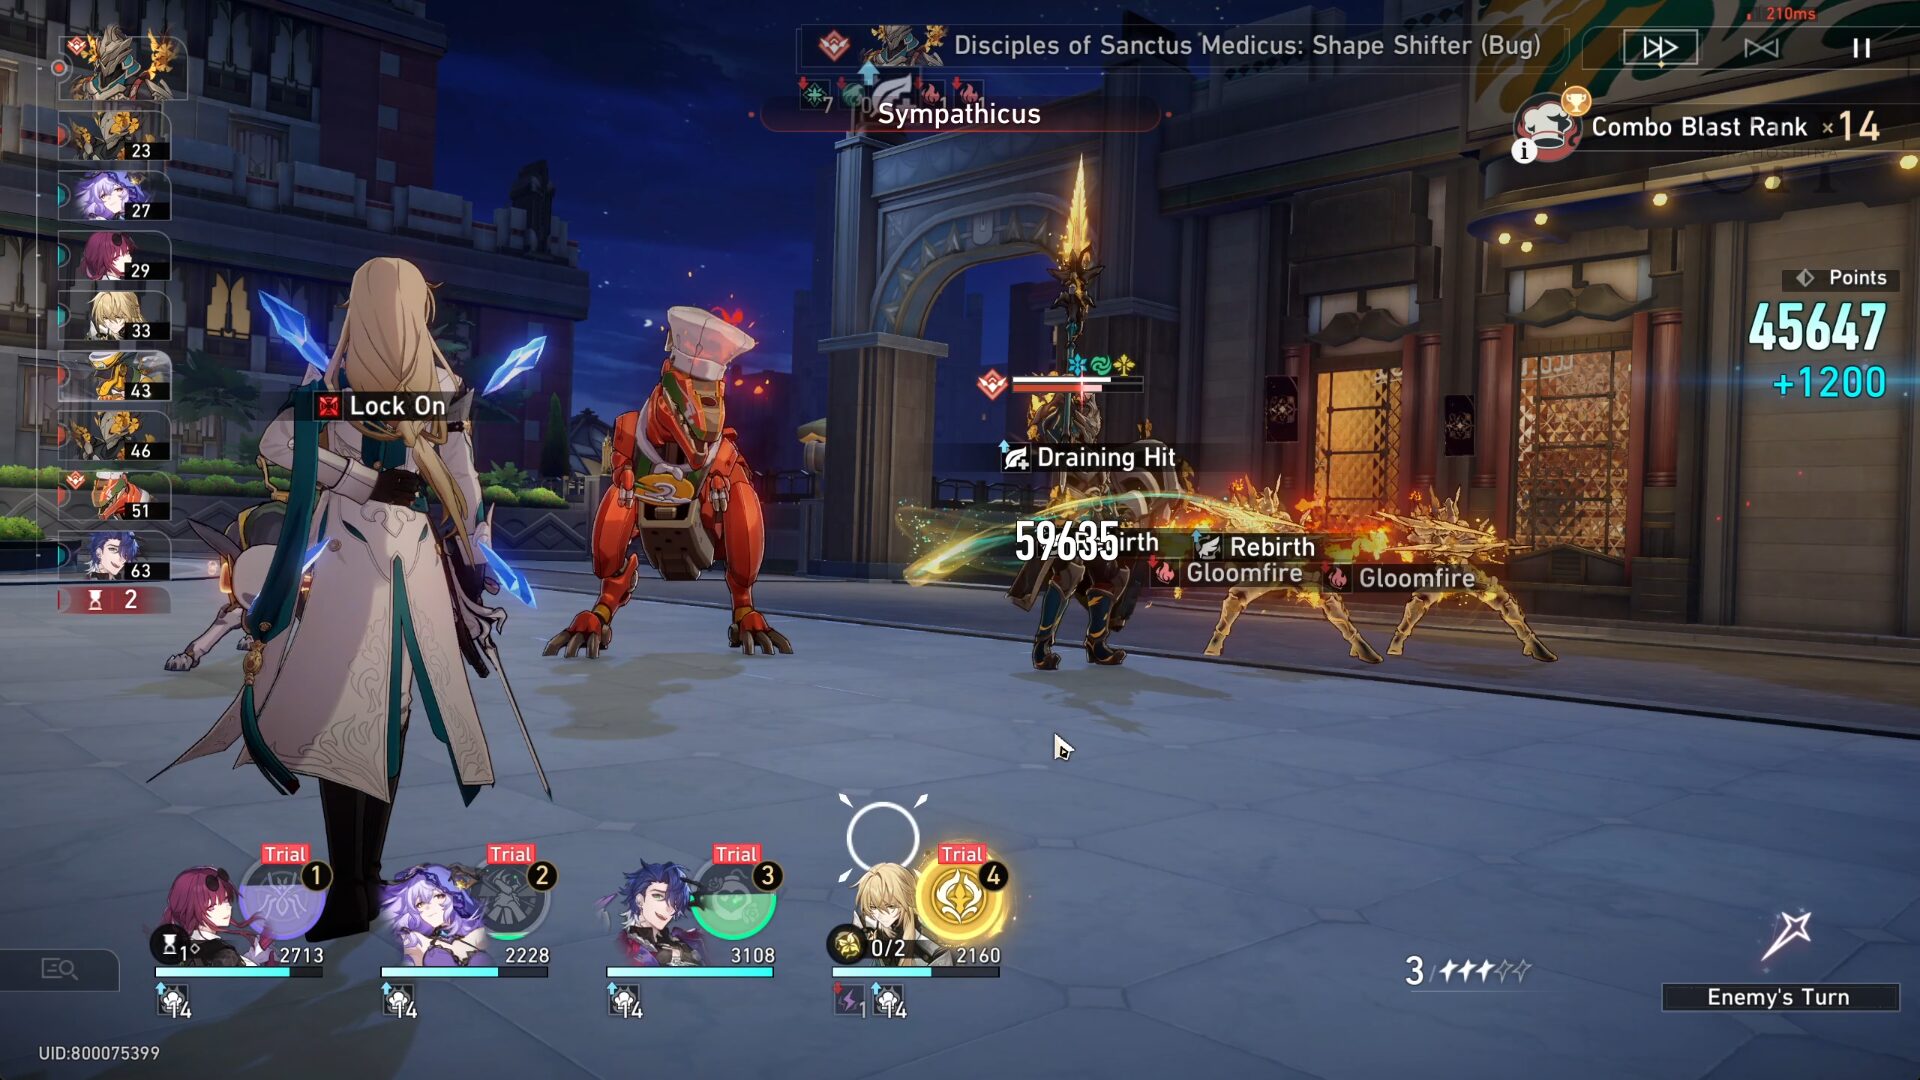
Stage 3: Inferno's Kitchen
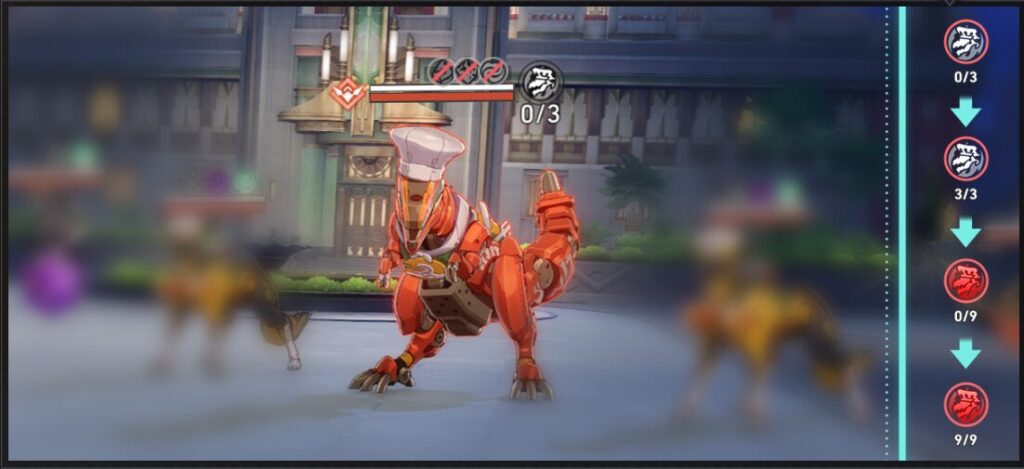
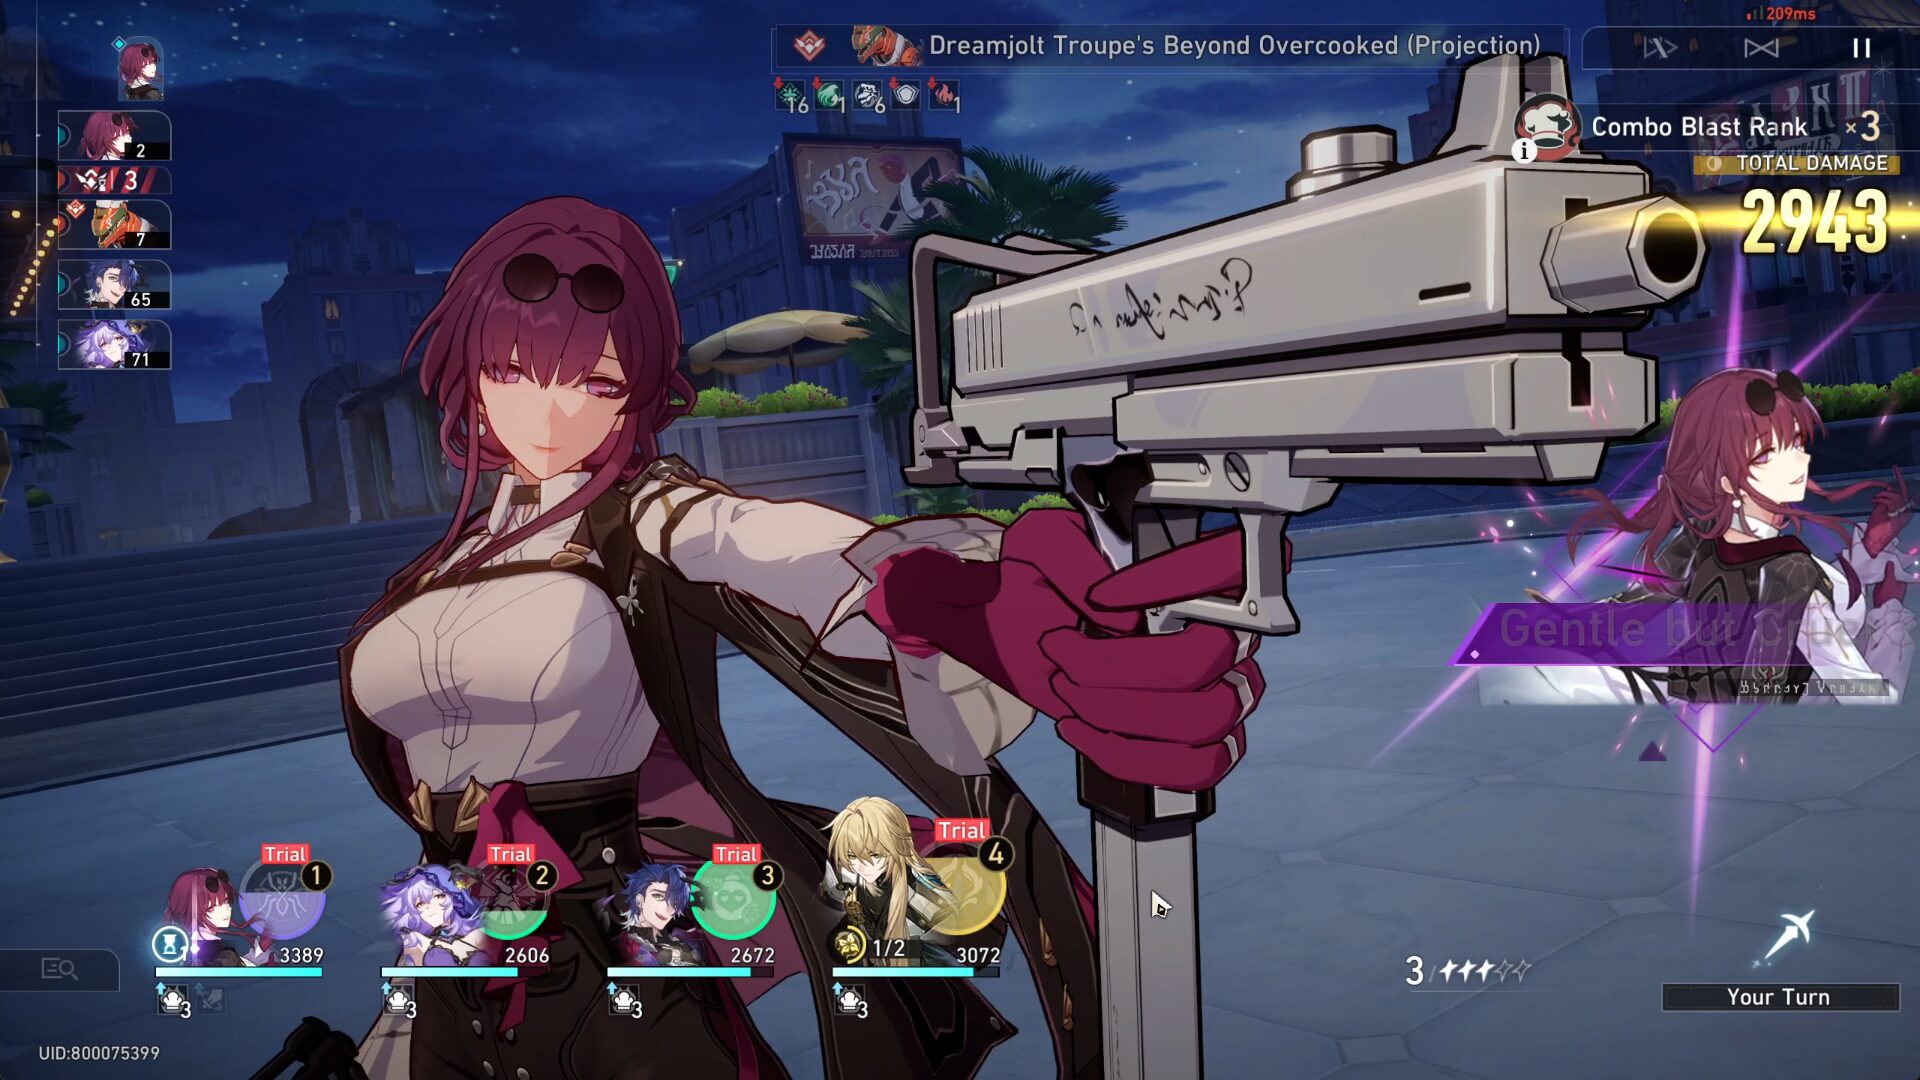
Mutation Mechanic: Combo Blast
Attacking this enemy or dealing DoT to it increases Stove Overheating stacks. When a certain number of stacks is reached, trigger Combo Blast, dealing DMG to all enemies and regenerating Energy for all allies.
By attacking or inflicting DoT on Dreamjolt Troupe's Beyond Overcooked (Projection) to trigger the Combo Blast mechanic, you may upgrade the Stage Buff by 1 rank.
As you increase your Stage Buff rank, the rating for the Stage Buff will also increase.
Team Recommendation
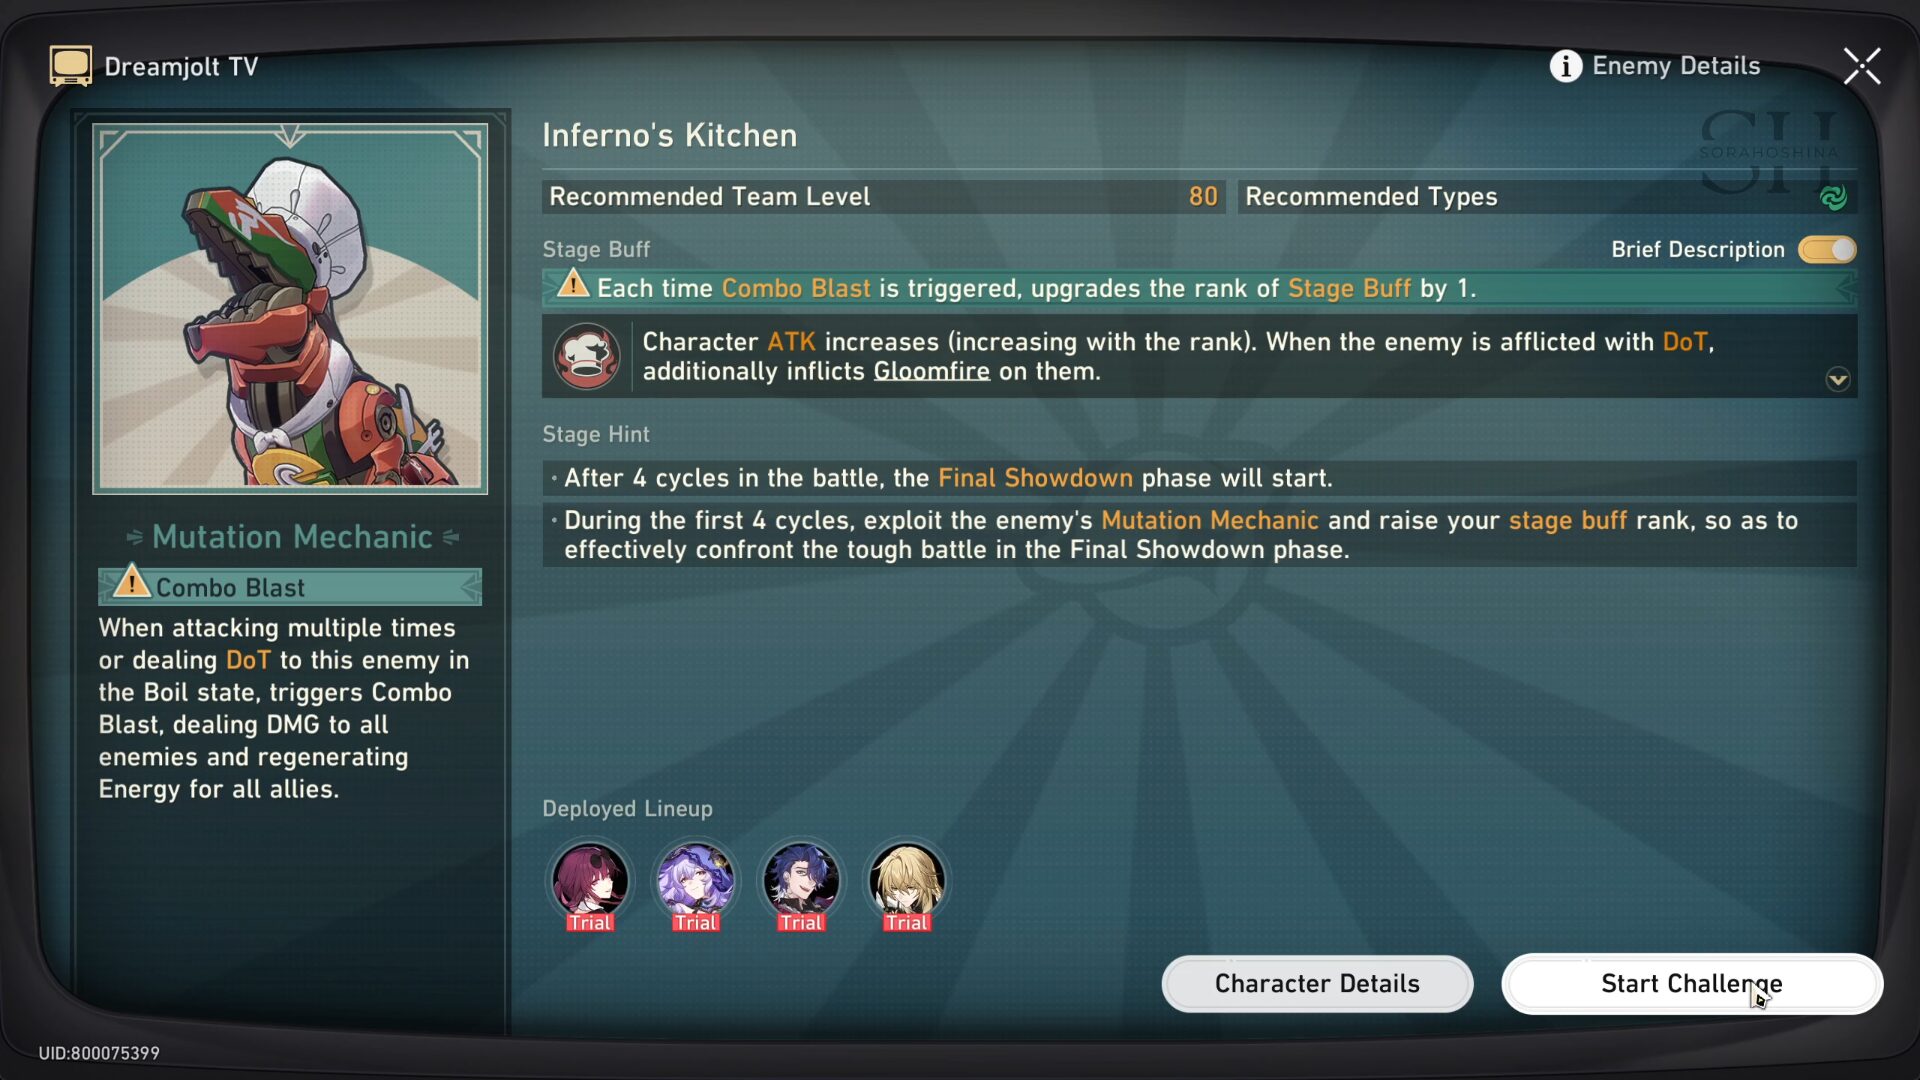
Recommended Team(s)
1) Trial Kafka + Trial Black Swan + Trial Sampo + Trial Luocha
2) Trial Kafka + Trial Black Swan + Trial Luka + Trial Luocha
Buff Buildup Commences
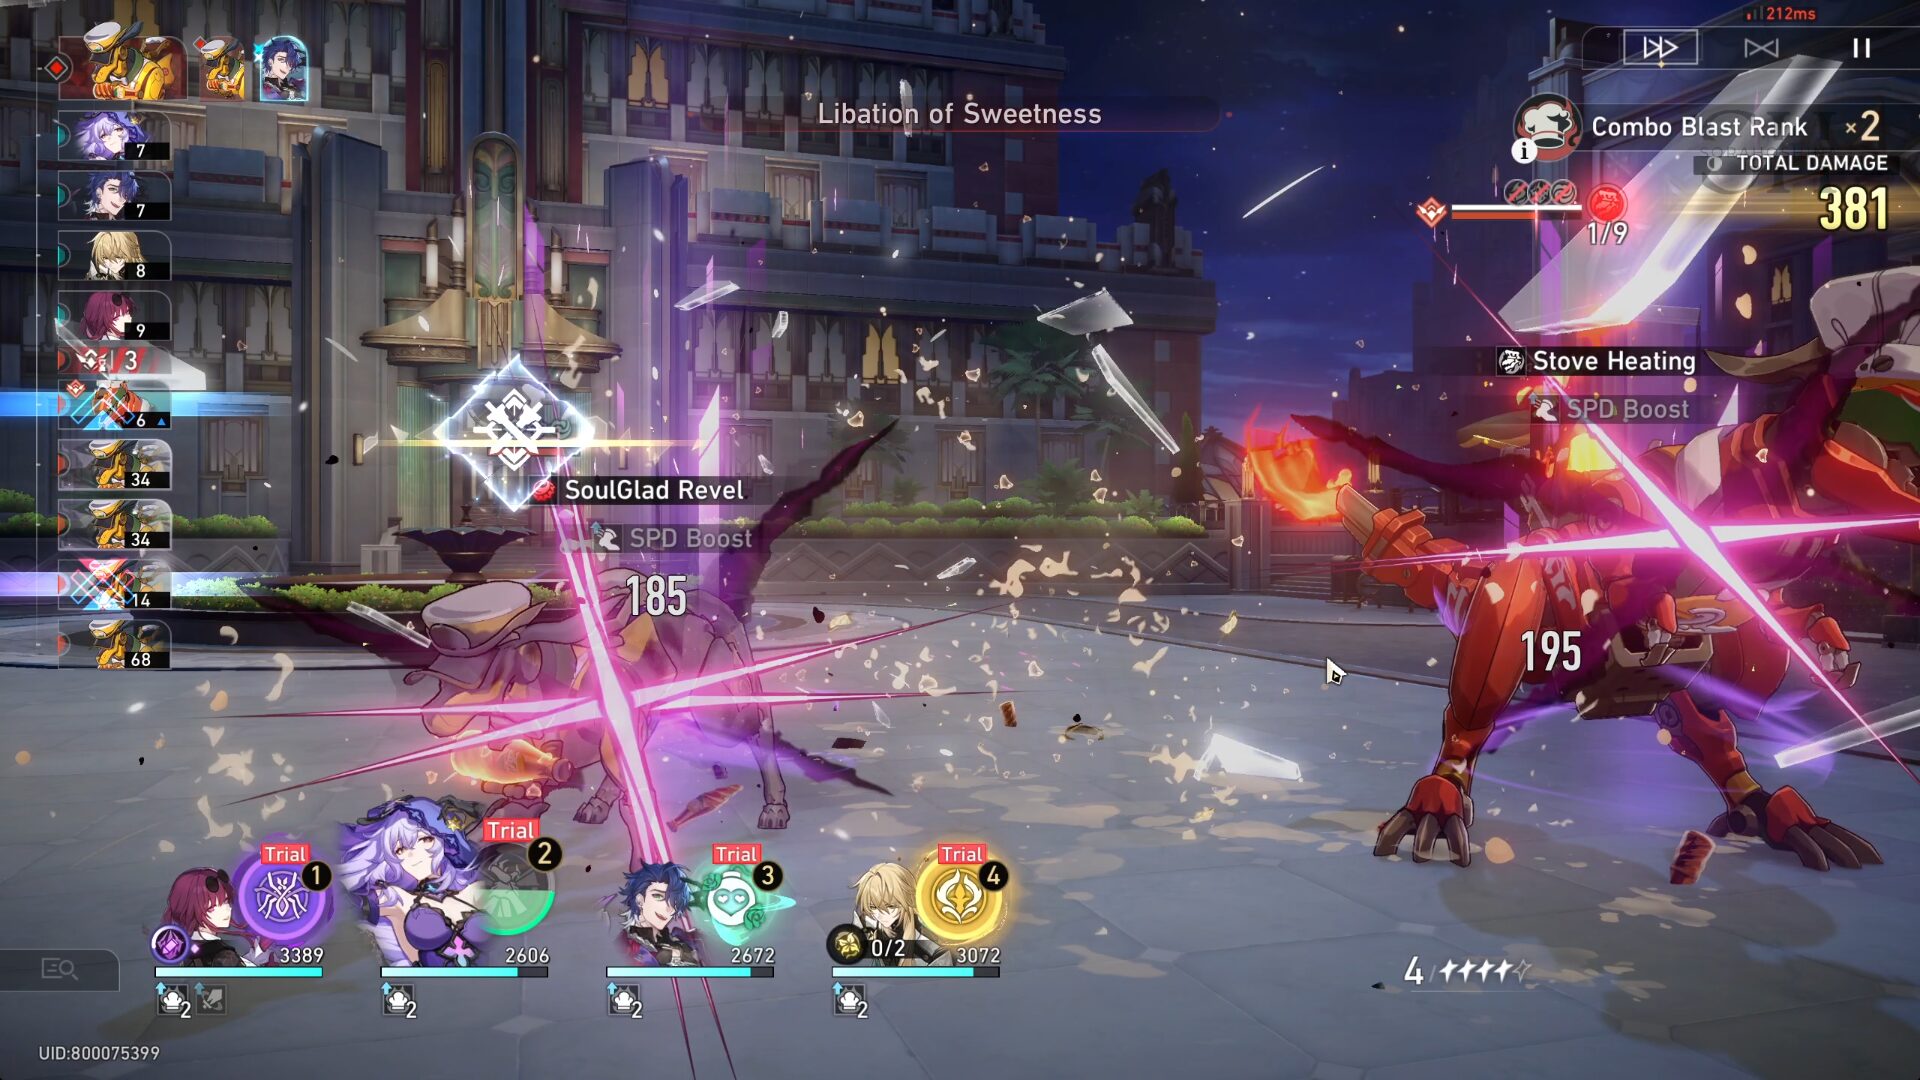
In the Buff Buildup, you can actually auto-battle the whole thing since most of the time, the characters will attack the T-Rex. It's not 100% though so I still prefer to manually control them. Aside from DoT, other enemies exploding once defeated (the dogs) will also increase the Stove Overheating stacks as it deals Blast attacks.
Try to use Skill every time possible, but don't forget to use Normal Attack too so Kafka can use her follow-up attack (it's not much damage but hey, more hit for the T-Rex). Whenever your Ultimate is full, also use them whenever you can because all of the trial characters (except Luka) have AoE Ultimate.
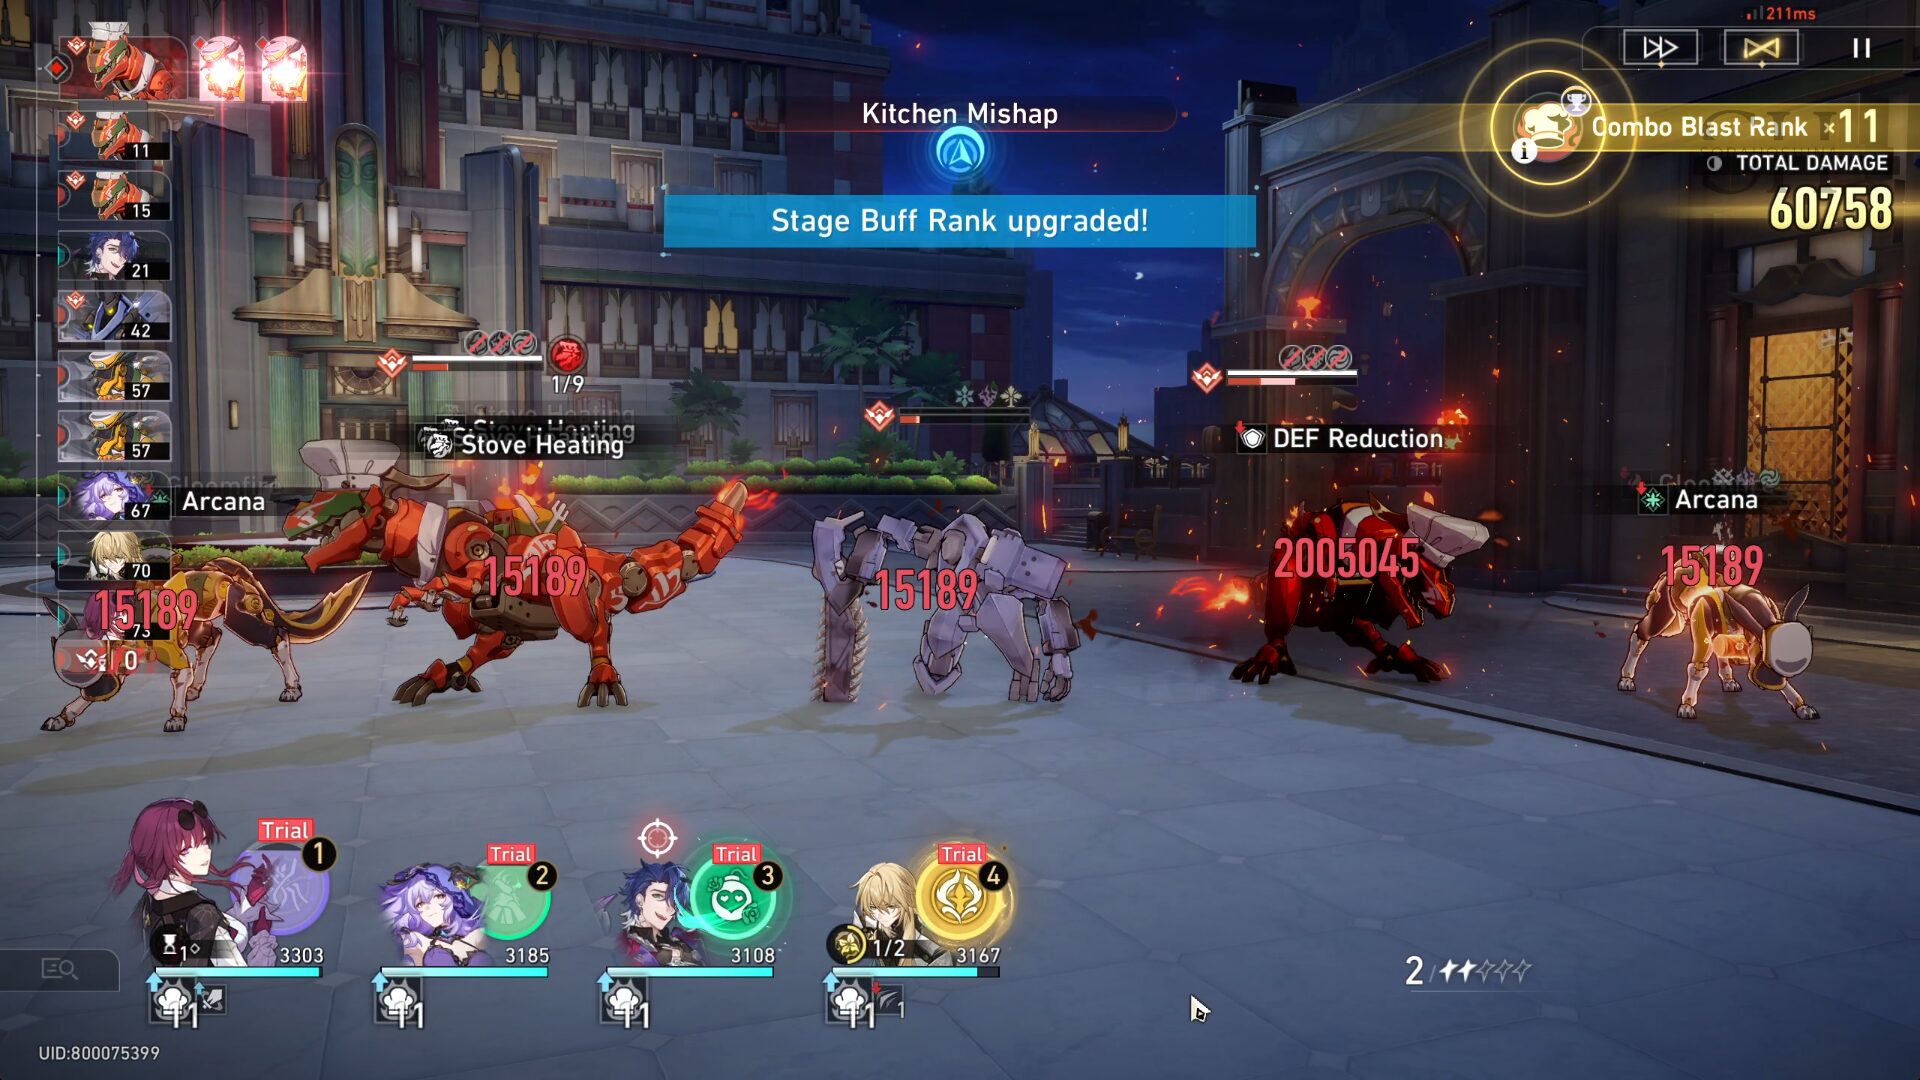
If possible, try to make the T-Rex explode first (by increasing its Stove Overheating stacks) so it can give your whole team Energy before you defeat it. By the end of this buildup, you should get around ~13 Combo Blast Rank.
Final Showdown Commences
There's nothing special with the Final Showdown, so you can auto-battle it for the first few rounds. But don't forget to use Luocha's Ultimate when the Sanctus Disciple boss summons more of his goons so he can remove their Vigor Drain buff (heals himself when attacking you).
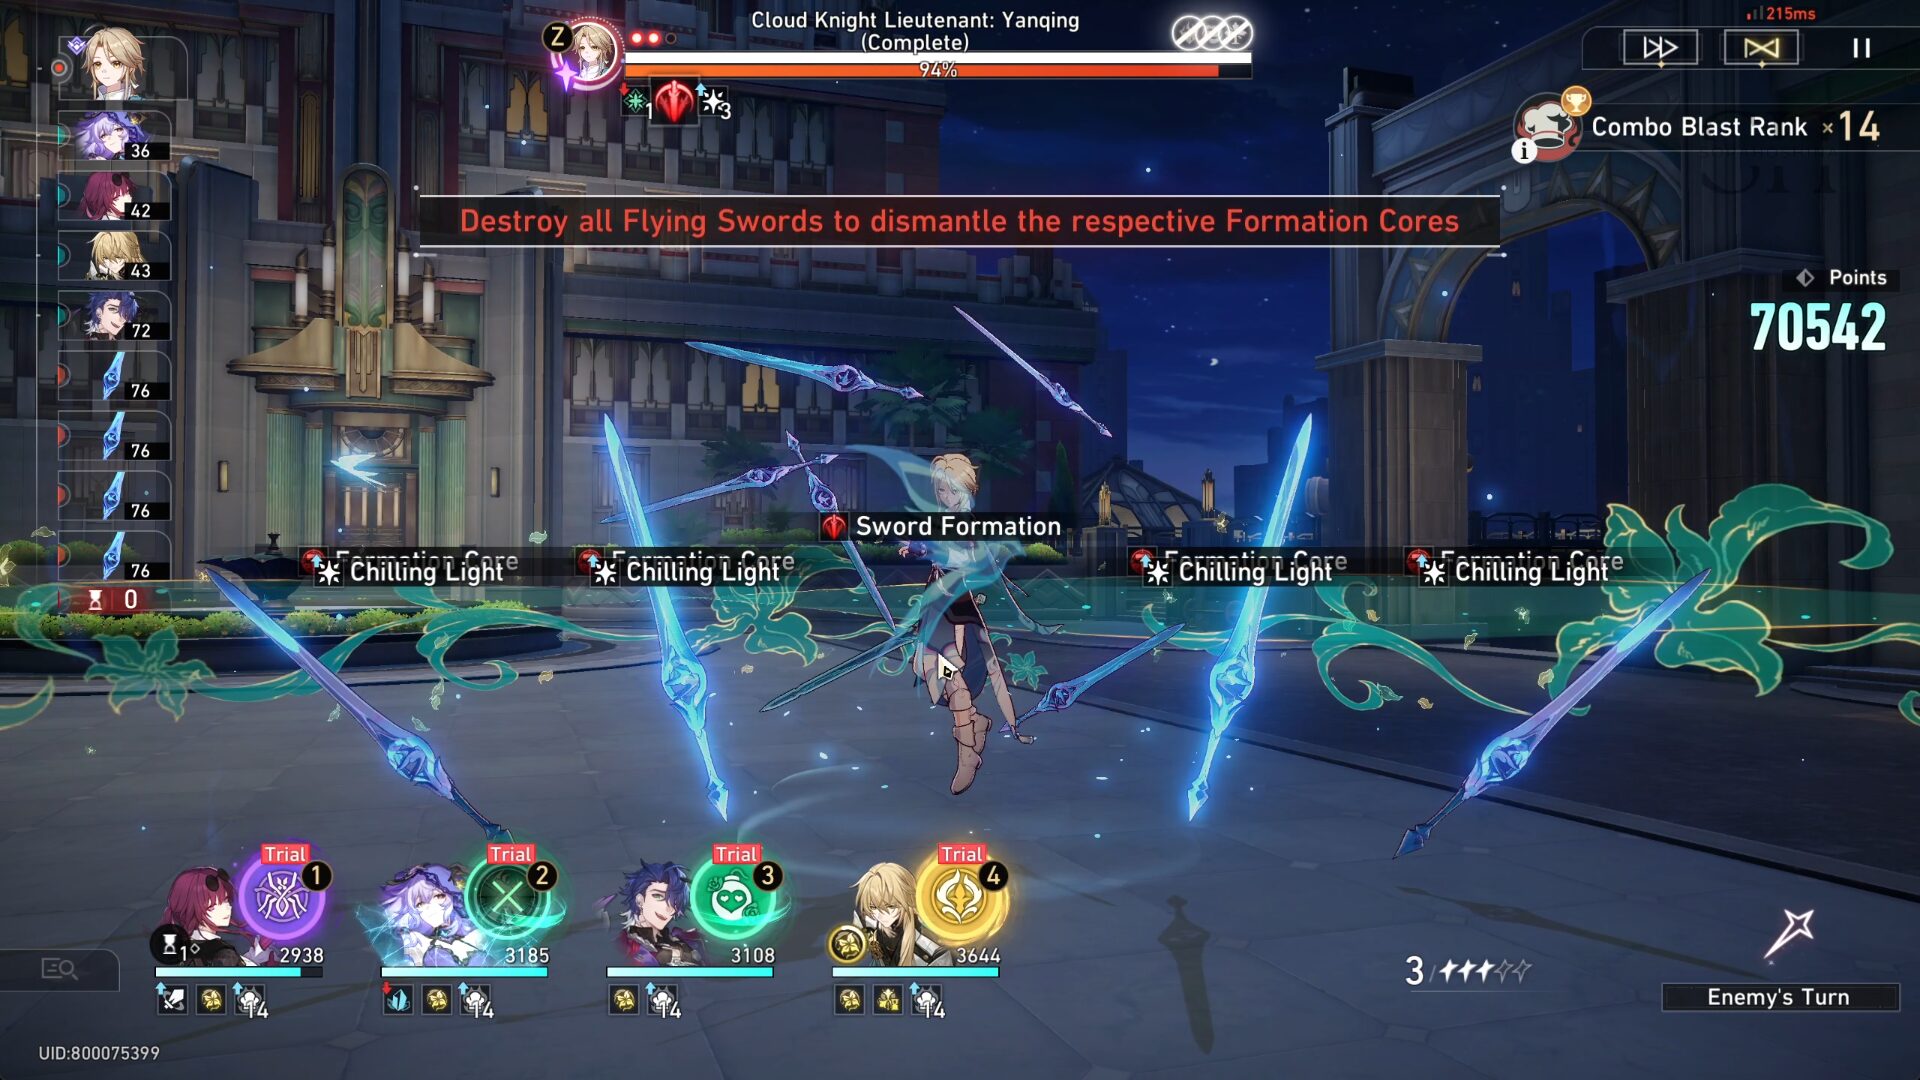
When facing Yanqing, I suggest manually controlling your characters to save your Ultimate until after he summons his 4 swords. When all swords appear, spam your Ultimate to destroy all of them at once.
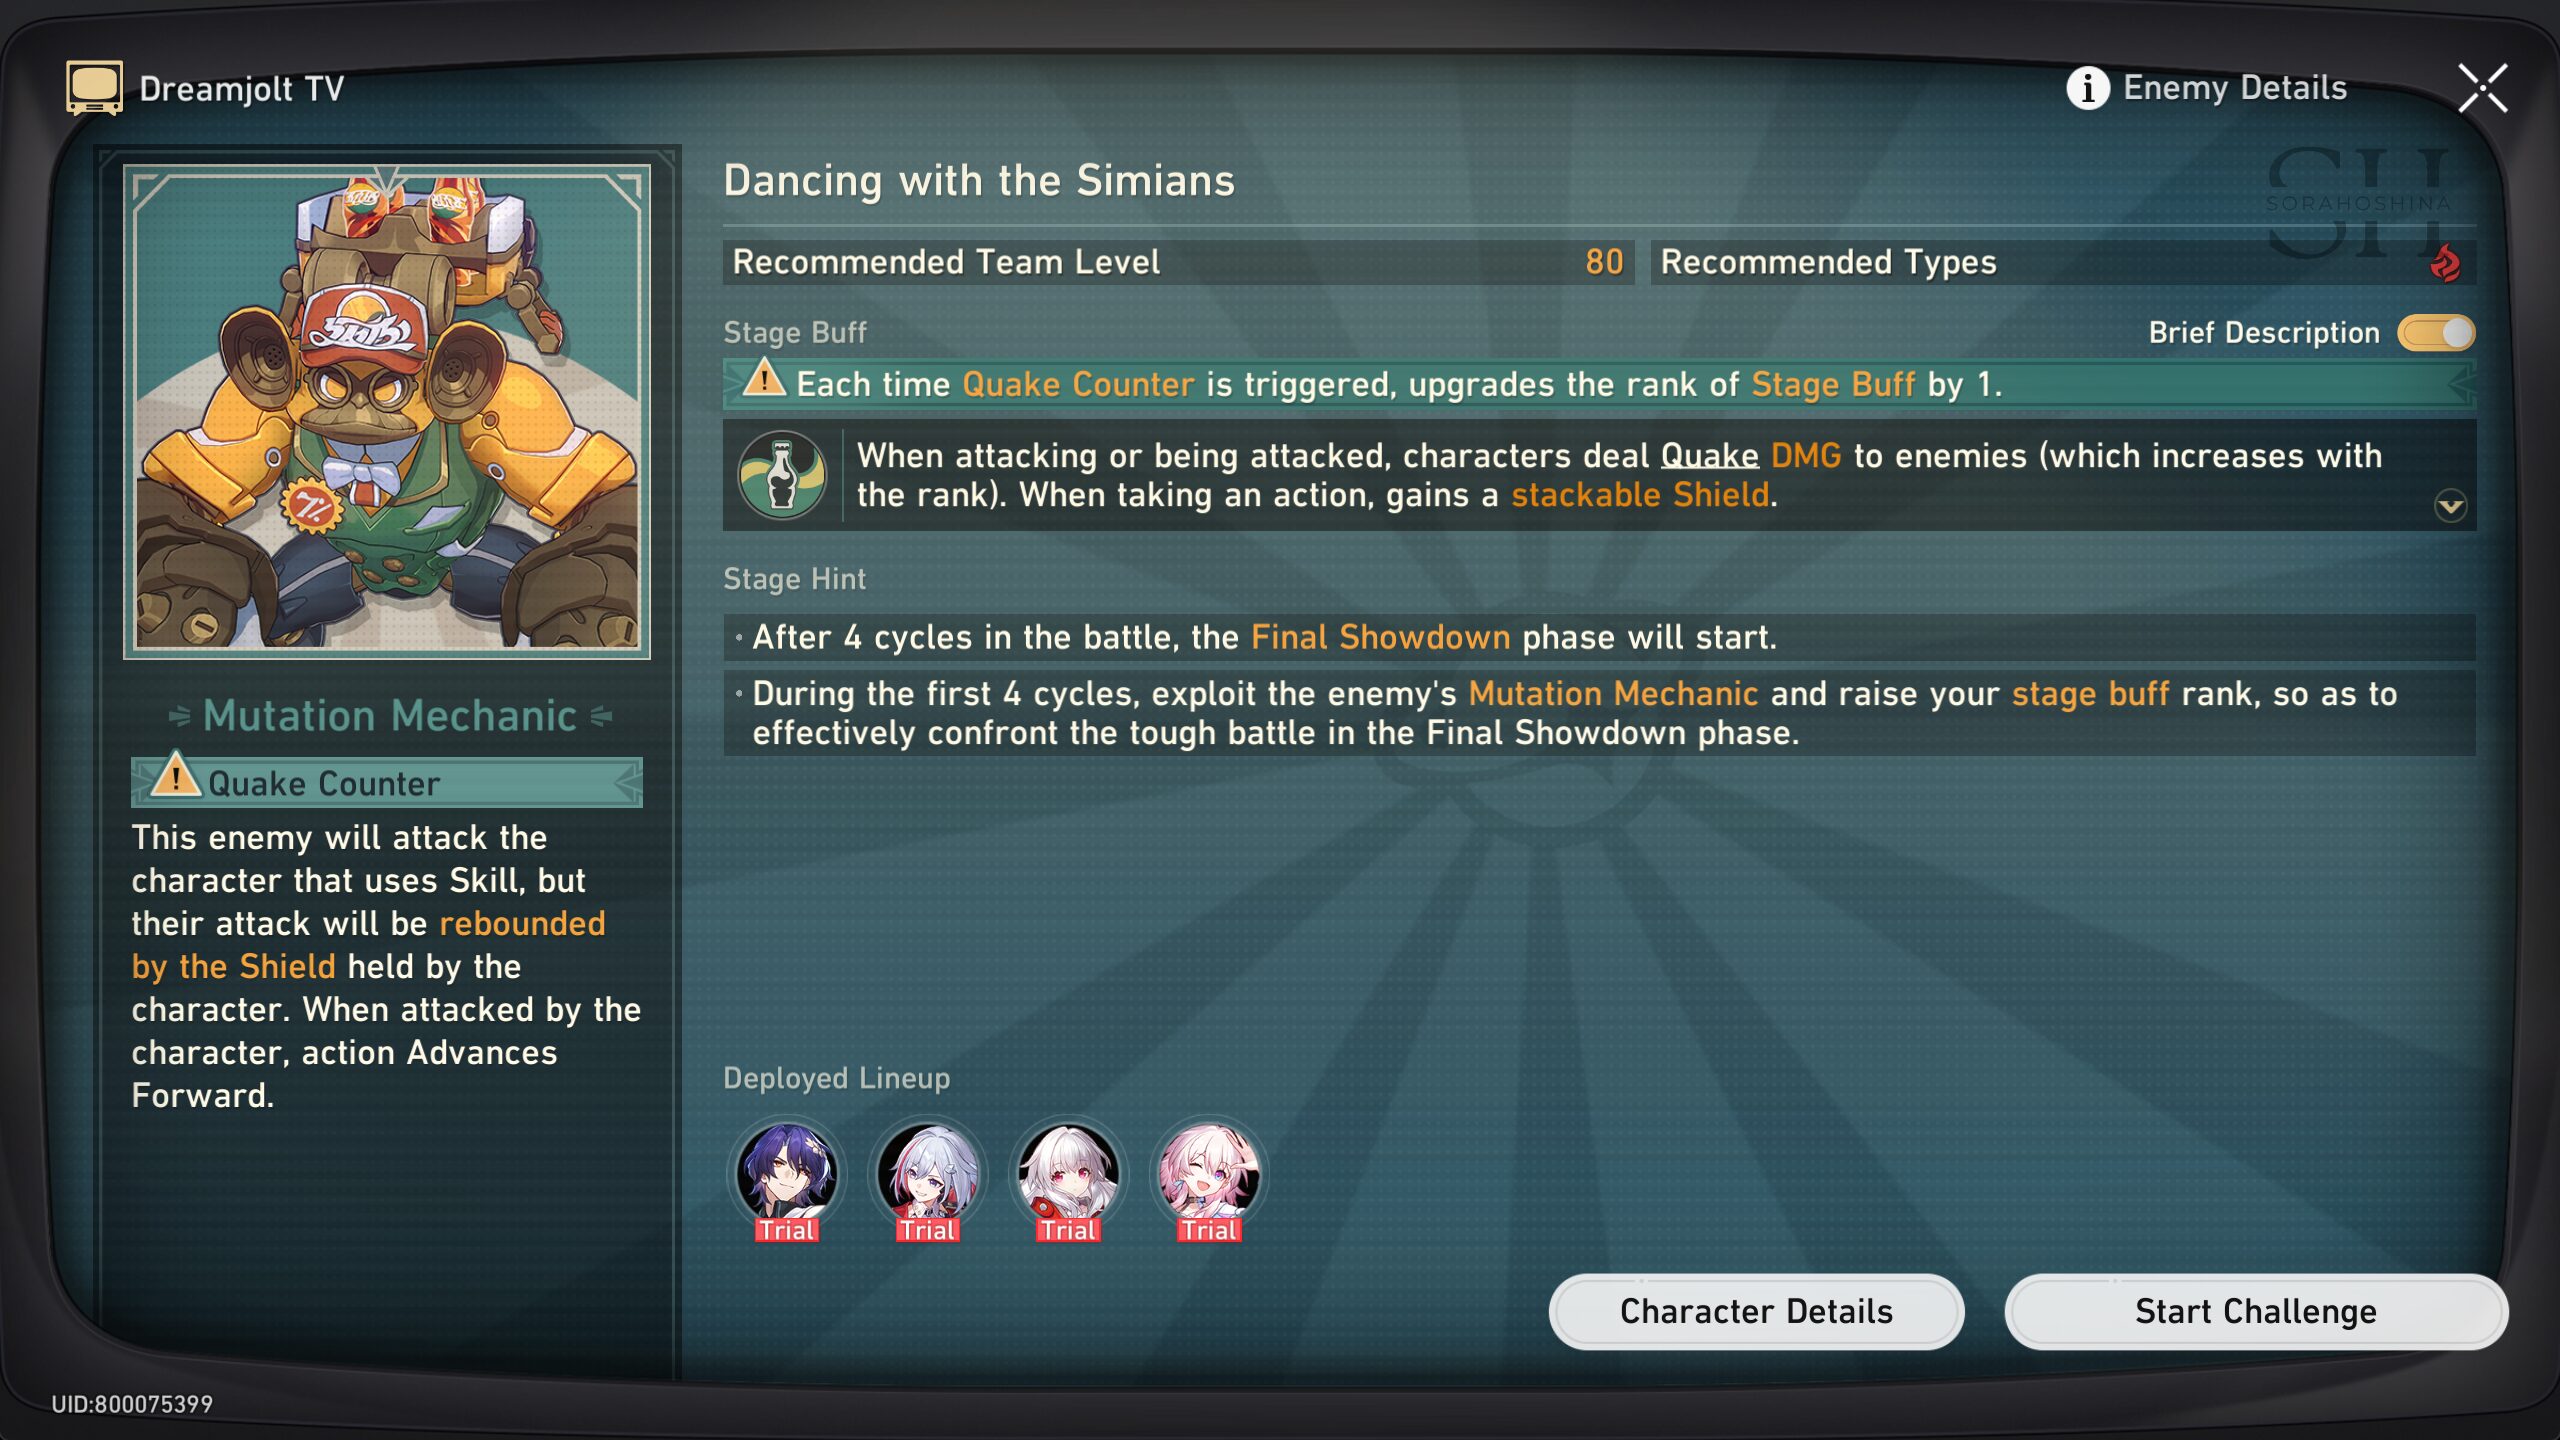
Stage 4: Dancing with the Simians
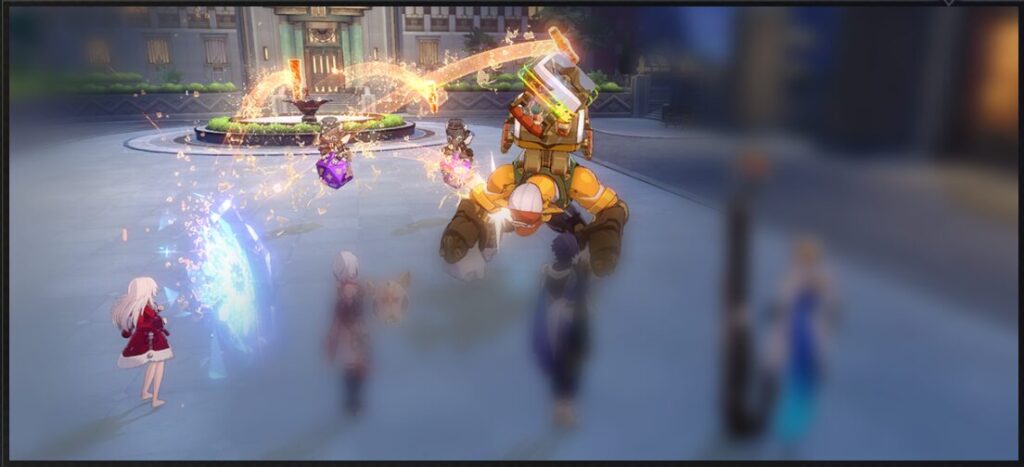
Mutation Mechanic: Quake Counter
Characters gain Shield after taking action. While Shielded, characters can rebound this enemy's attacks, triggering the Quake Counter mechanic anc dealing Blast DMG.
Mutation Mechanic: Quake Counter
Attacking this enemy Advances Forward its action, making it possible to rebound more of its attacks.
After rebounding the attack of Dreamjolt Troupe's Sweet Gorilla (Projection) to trigger the Quake Counter mechanic, you may upgrade the Stage Buff by 1 rank.
As you increase your Stage Buff rank, the rating for the Stage Buff will also increase.
Team Recommendation
Recommended Team(s)
1) Trial Dr. Ratio + Trial Topaz & Numby + Trial Clara + Trial March 7th
2) Trial Dr. Ratio + Trial Topaz & Numby + Trial Clara + Trial Gepard
Put Clara in the middle as there will be some enemies in the Final Showdown that can deal Blast DMG. If Clara is in the middle, she has a higher chance of being hit = more follow-up attacks.
Buff Buildup Commences

When you first start the battle, look at where Topaz's Proof of Debt debuff is on the enemies, as it will be afflicted on a random enemy when you first enter the battle. If the debuff is not on the Gorilla, use Topaz's Skill on the Gorilla to make sure the debuff changes to this boss instead of some mobs.
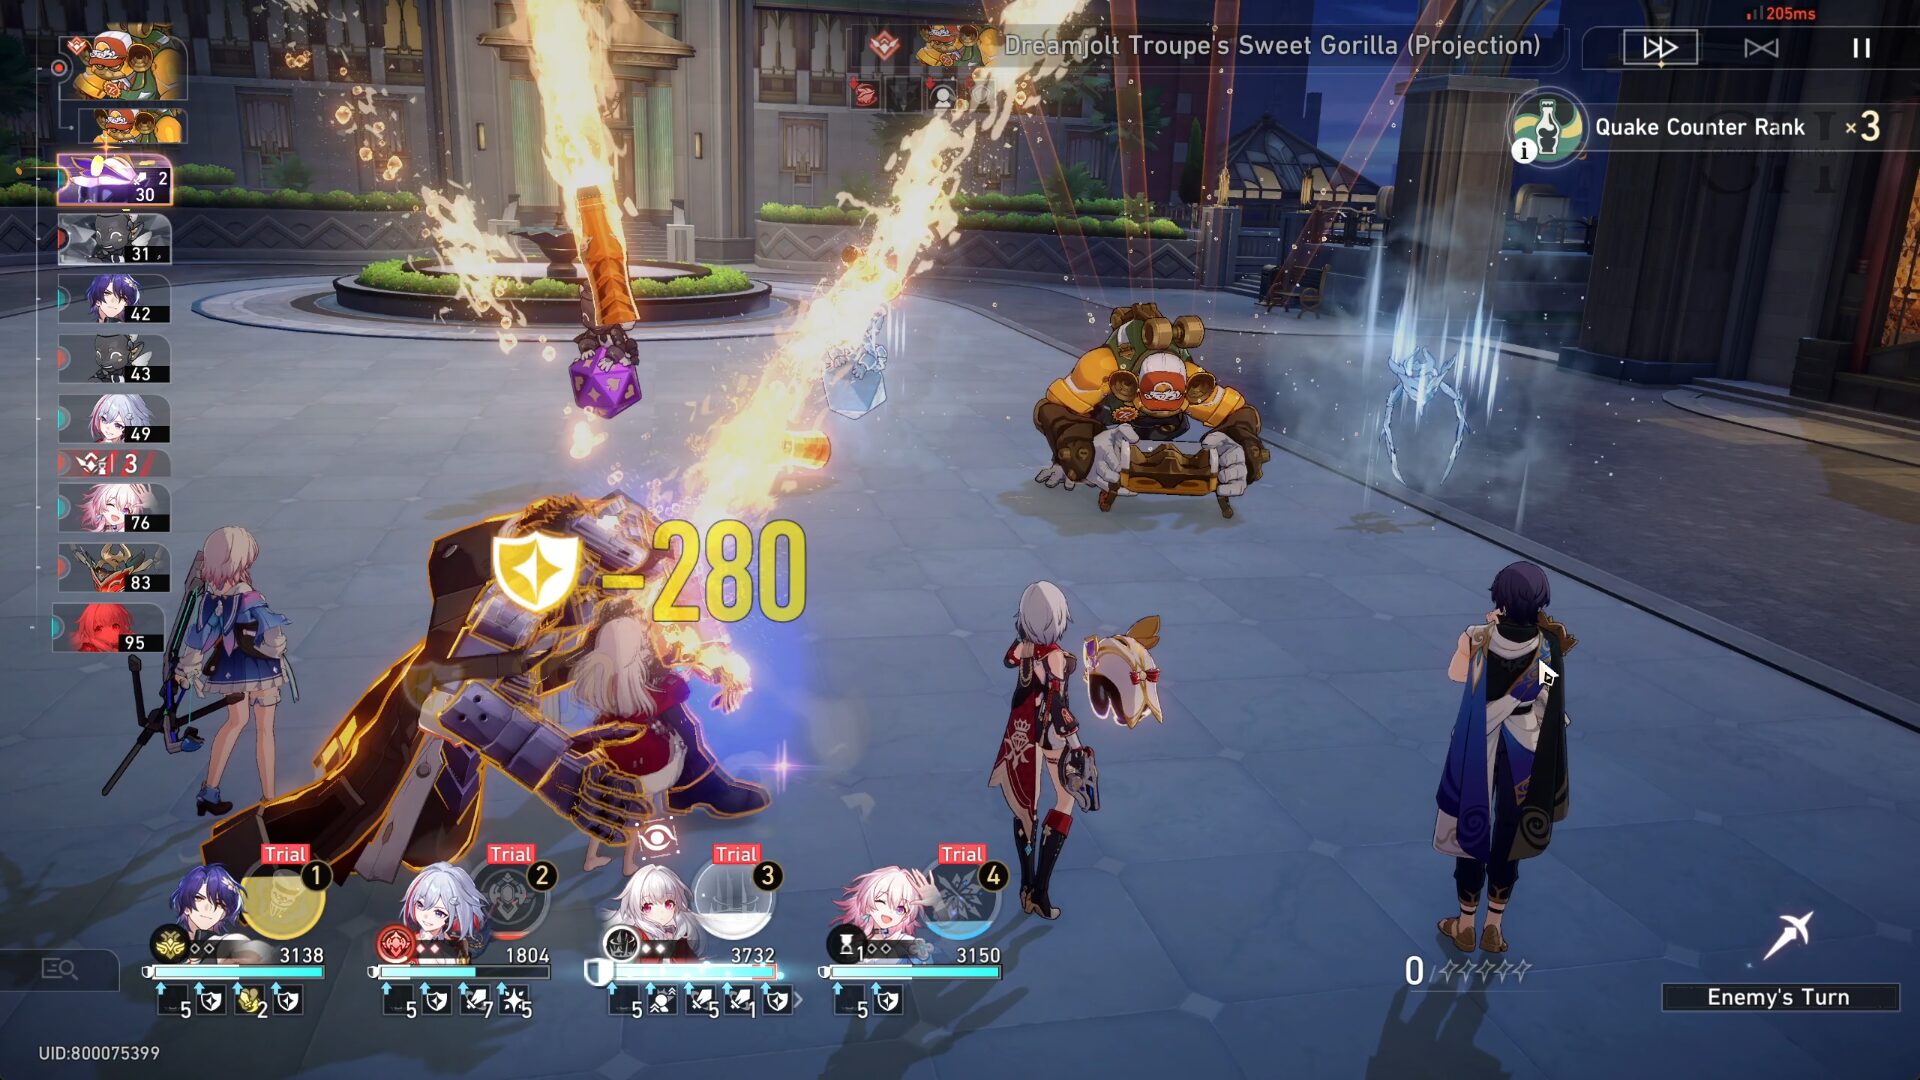
During the buildup, the damage isn't really important as the trial characters can hardly do any damage to the Gorilla, but the mobs are fair game though. Some enemies will explode and deal damage to the Gorilla = advancing forward its action, making it easier for you to rebound most of its attacks if you have a shield. The rebound is what hurt the Gorilla the most so that's what you'll be focusing on most of the time.
For each character, I suggest the following:
Dr. Ratio: Use his Skill once the Gorilla has more than 3 debuffs (if not, just use Basic to save SP)
Topaz: Use her Skill only when the Gorilla didn't get the Proof of Debt debuff (other than that, keep using her Basic)
Clara: Always use her Skill to deal AoE DMG to all enemies so they won't have the chance to attack your team and chip whatever shield they have
March 7th: At first, use her Skill on Clara. After that, just use her Basic during the whole buff buildup since everyone will have a shield from the stage buff, so you don't really need to use March's shield atm. Instead, save SP for other DPS.

Of course, use everyone's Ultimate whenever possible and when it comes to single-target Ultimate, target the Gorilla. At the end of the buff buildup, you should get around ~40 Quake Counter Rank.
Final Showdown Commences
With the current team setup, you can auto-battle it with no problem since all you need to do is attack enemies, attack enemies, or be attacked by enemies. But if there are too many enemies, I suggest manually controlling them since there are 2 single-target DPS in your team. Use them to focus on the big boss while Clara's Skill deal with the mobs.
If Cocolia freezes Clara or Dr. Ratio, use March 7th Skill can to release them as soon as possible (Her Skill can remove debuff). If March 7th is frozen, nothing can be done.
Since this stage relies on the rebound effect, having enemies to attack you is the best. During Cocolia's wave, You can use March 7th Ultimate without worry since Cocolia is resistant against being Frozen.

During Svarog's wave (in the third phase), when he summons the Auxiliary Robot Arm Unit, immediately focuses on this robot first (try to not make someone get caught by the robot). If someone gets caught, you will lose someone to attack the enemy, or being attacked = the harder it is to activate the stage buff where it will deal Quake DMG to enemies, which is honestly your main source of damage.
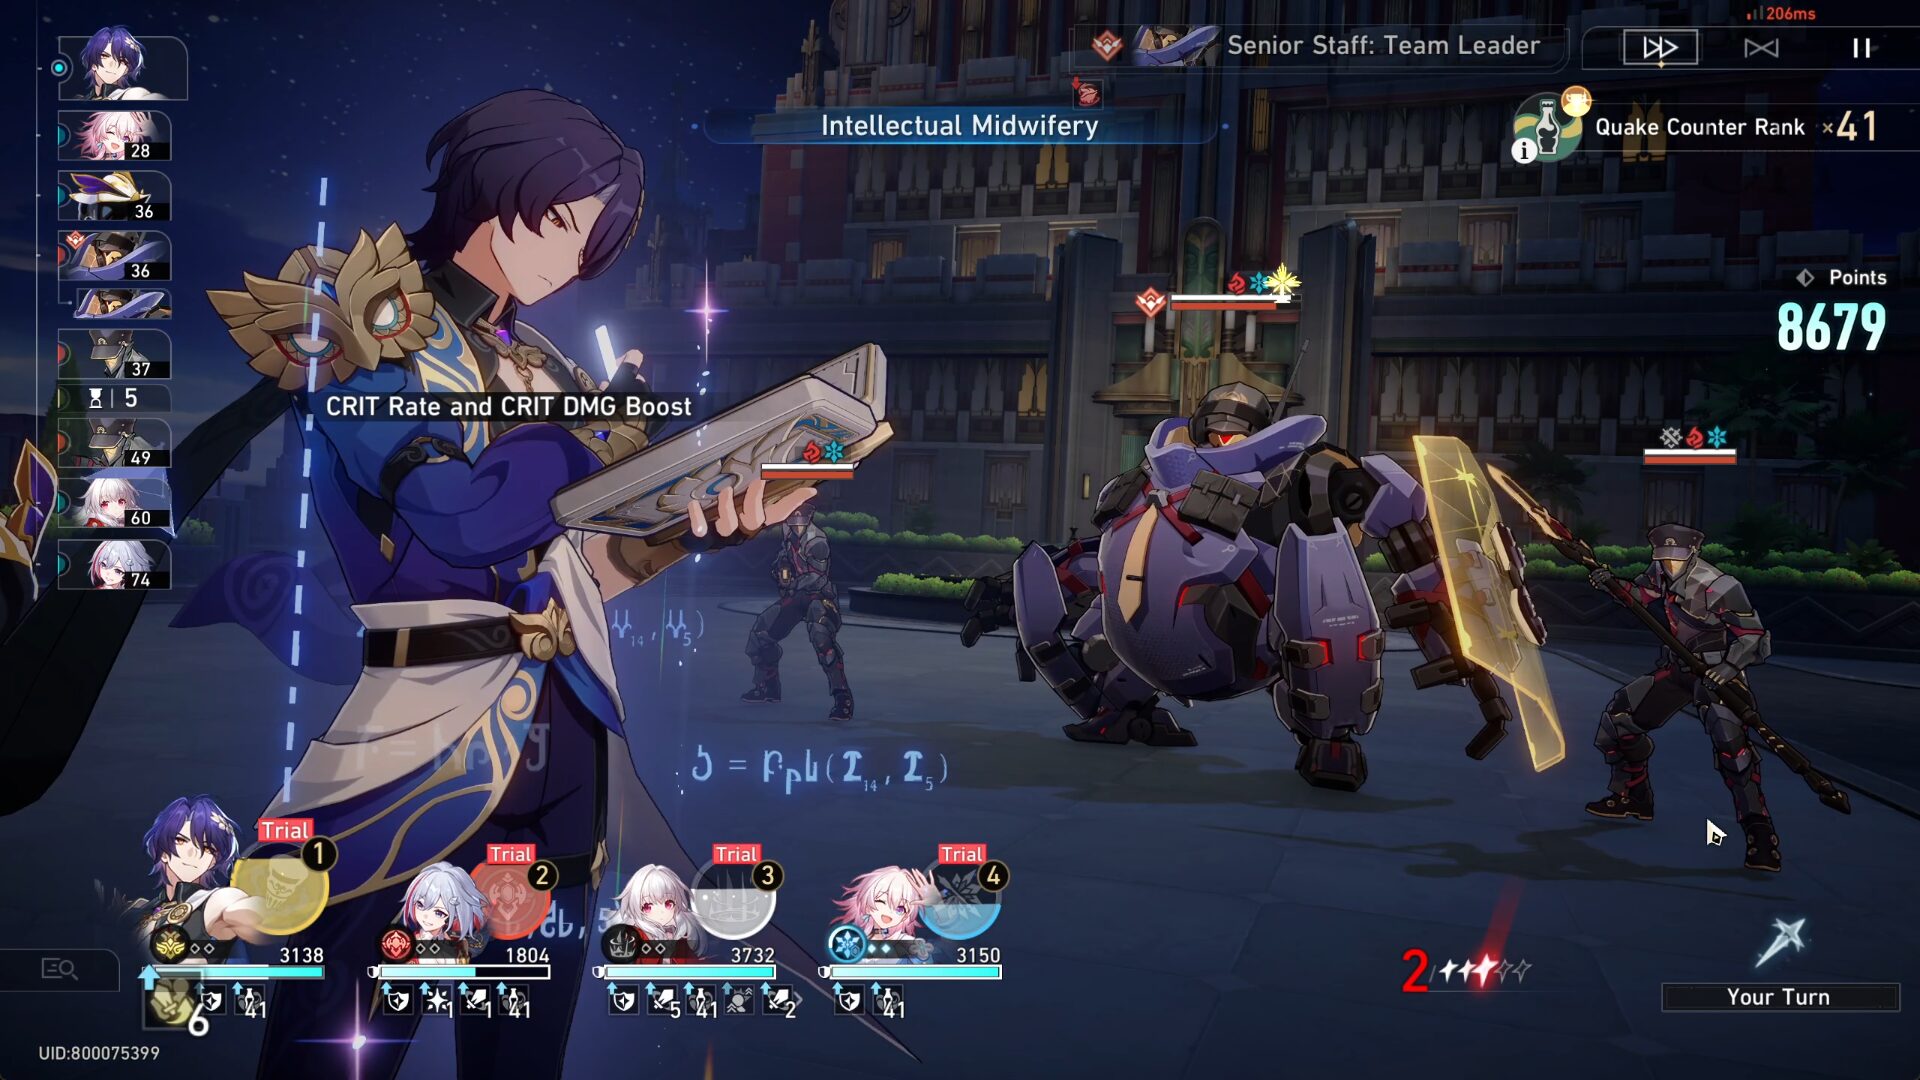
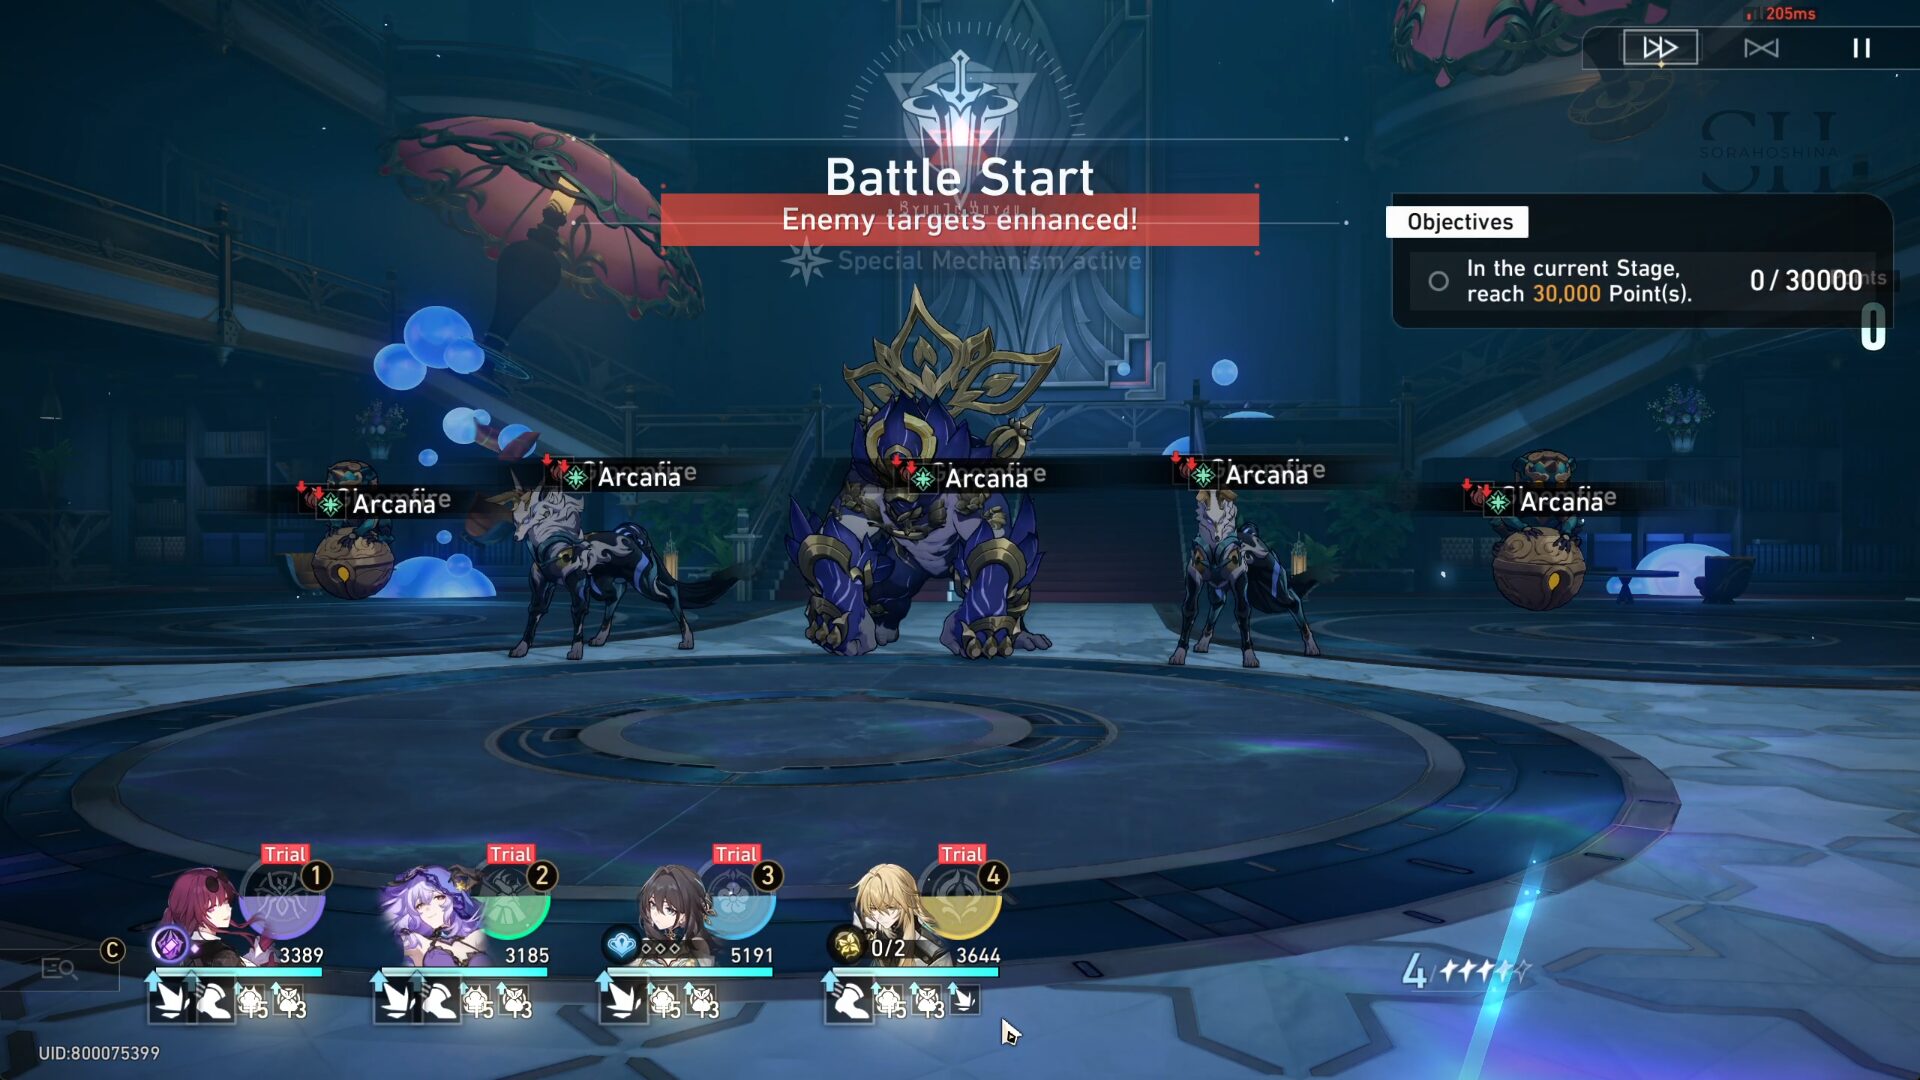
Stage 5: Emotional Void
Stage 5 is the final boss fight. Before you enter the stage, select any 2 accumulated Stage Buff from Stages 1–4 and use them for the final boss fight. (You can inherit the highest Stage Buff rank you’ve historically obtained in Stages 1–4). Defeat as many waves of enemies as possible within 6 Cycles to receive a higher score. If you have leftover Cycles when you pass the stage, you will receive extra scores.
Team Recommendation

Recommended Team(s)
1) Trial Kafka + Trial Black Swan + Trial Ruan Mei + Trial Luocha
2) Trial DHIL + Trial Sparkle + Trial Ruan Mei + Trial Gepard
Different teams prefer different types of buffs. If you choose Kafka's DoT team, choose the first (Weakness Break) and the third (Combo Blast) buffs.
But if you choose DHIL's team, choose the second (Grin Sweep) and fourth (Quake Counter) buffs.
Final Showdown Commences
There is no Buff Buildup Commence as you will be using the buffs from previous stages. Instead, you will go straight to final battles with various bosses. If you think the buff levels you have are low, you can go back to previous levels to increase the buff stacks and it will be reflected in this fifth stage.
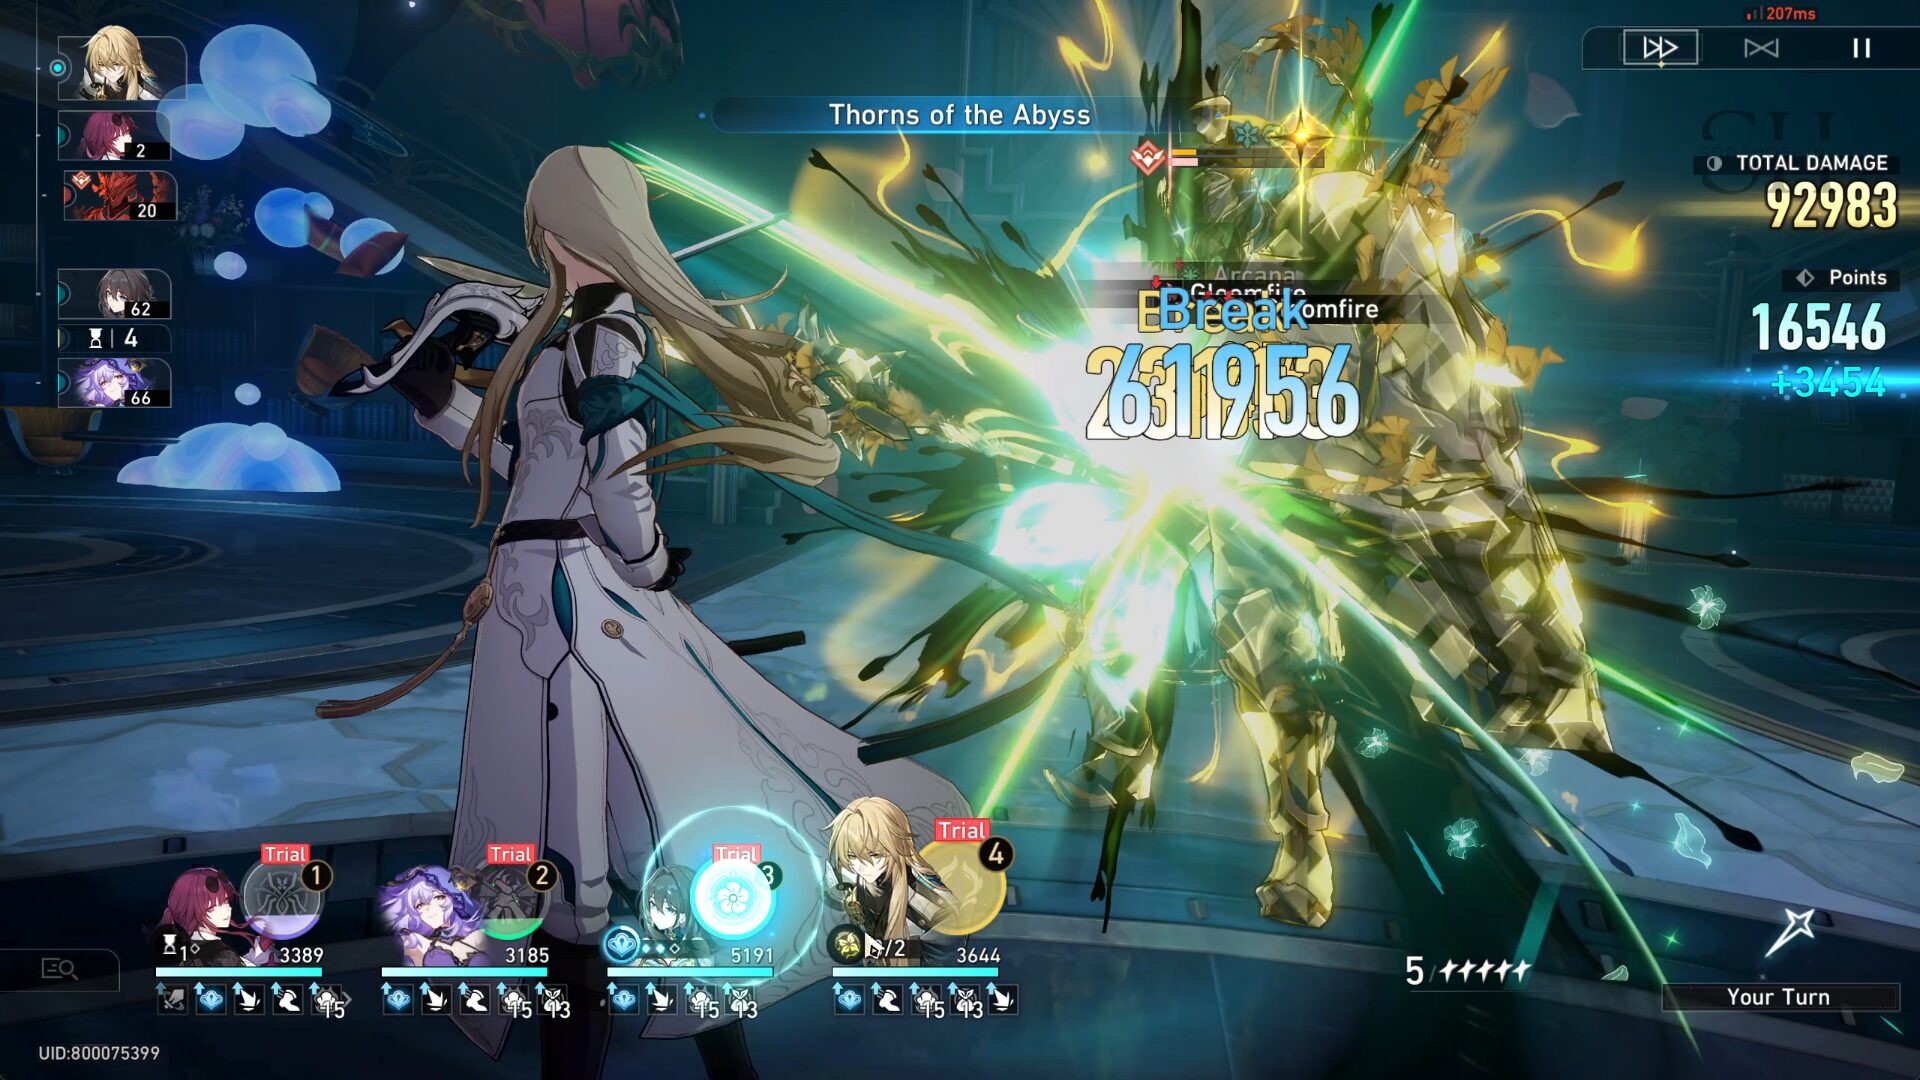
In all honesty, this stage is pretty easy and you can fully auto-battle it and still get the minimum 80000 Points. The only 'hard' wave is with the last boss: the Memory Zone Meme.
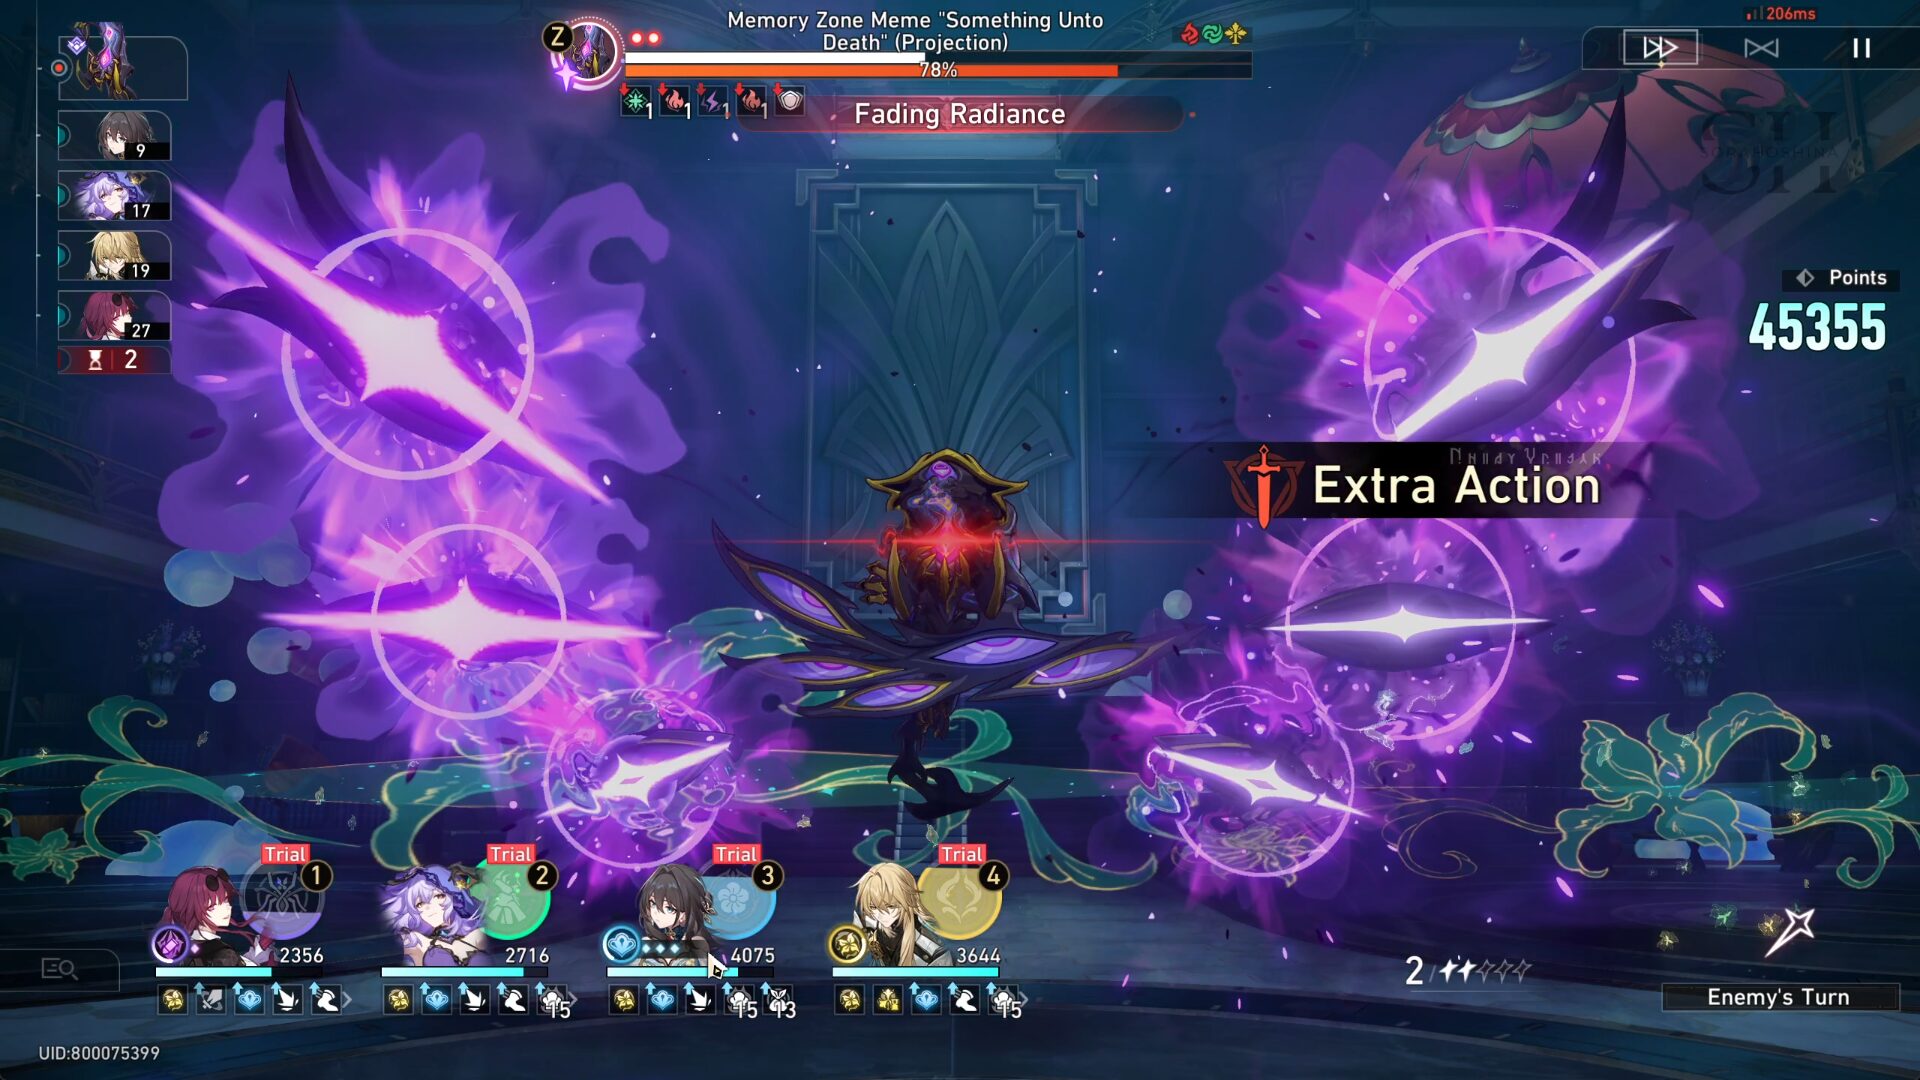
In the boss' first phase, the skill you need to pay attention to is the Fading Radiance. It will enter the Sunset state and gains 1 stack each time a character uses Basic ATK, Skill, or Ultimate.
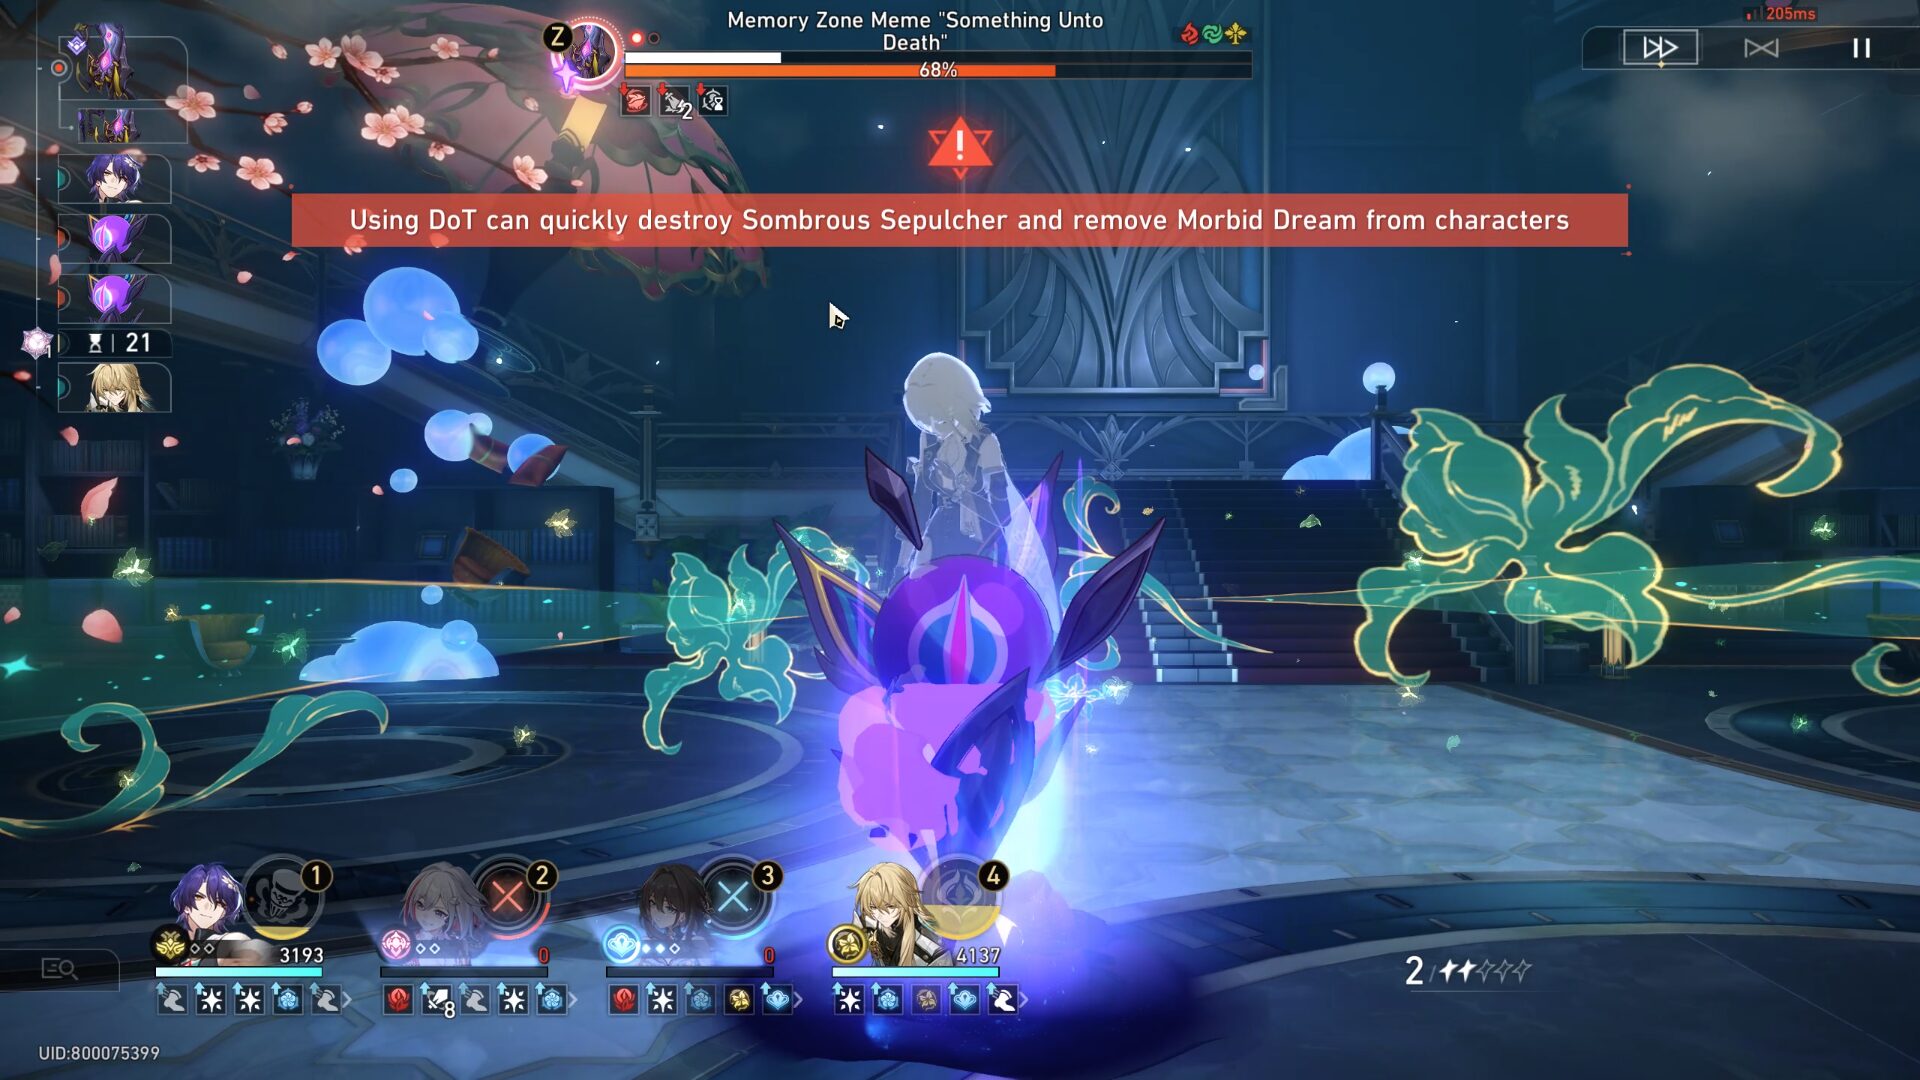
When Sunset reaches 3 stacks, it will immediately launch a killing blow on the last-acting character and inflict Morbid Dream on them. Characters that are locked within the Morbid Dream cannot move until you destroy all 5 stacks of the Sombrous Sepulcher (the thing that is locking your character).
When the boss uses this skill, try to make Luocha or Ruan Mei trapped inside those and not Kafka or Black Swan. Their Skills (especially Black Swan) can easily destroy the Sombrous Sepulcher.
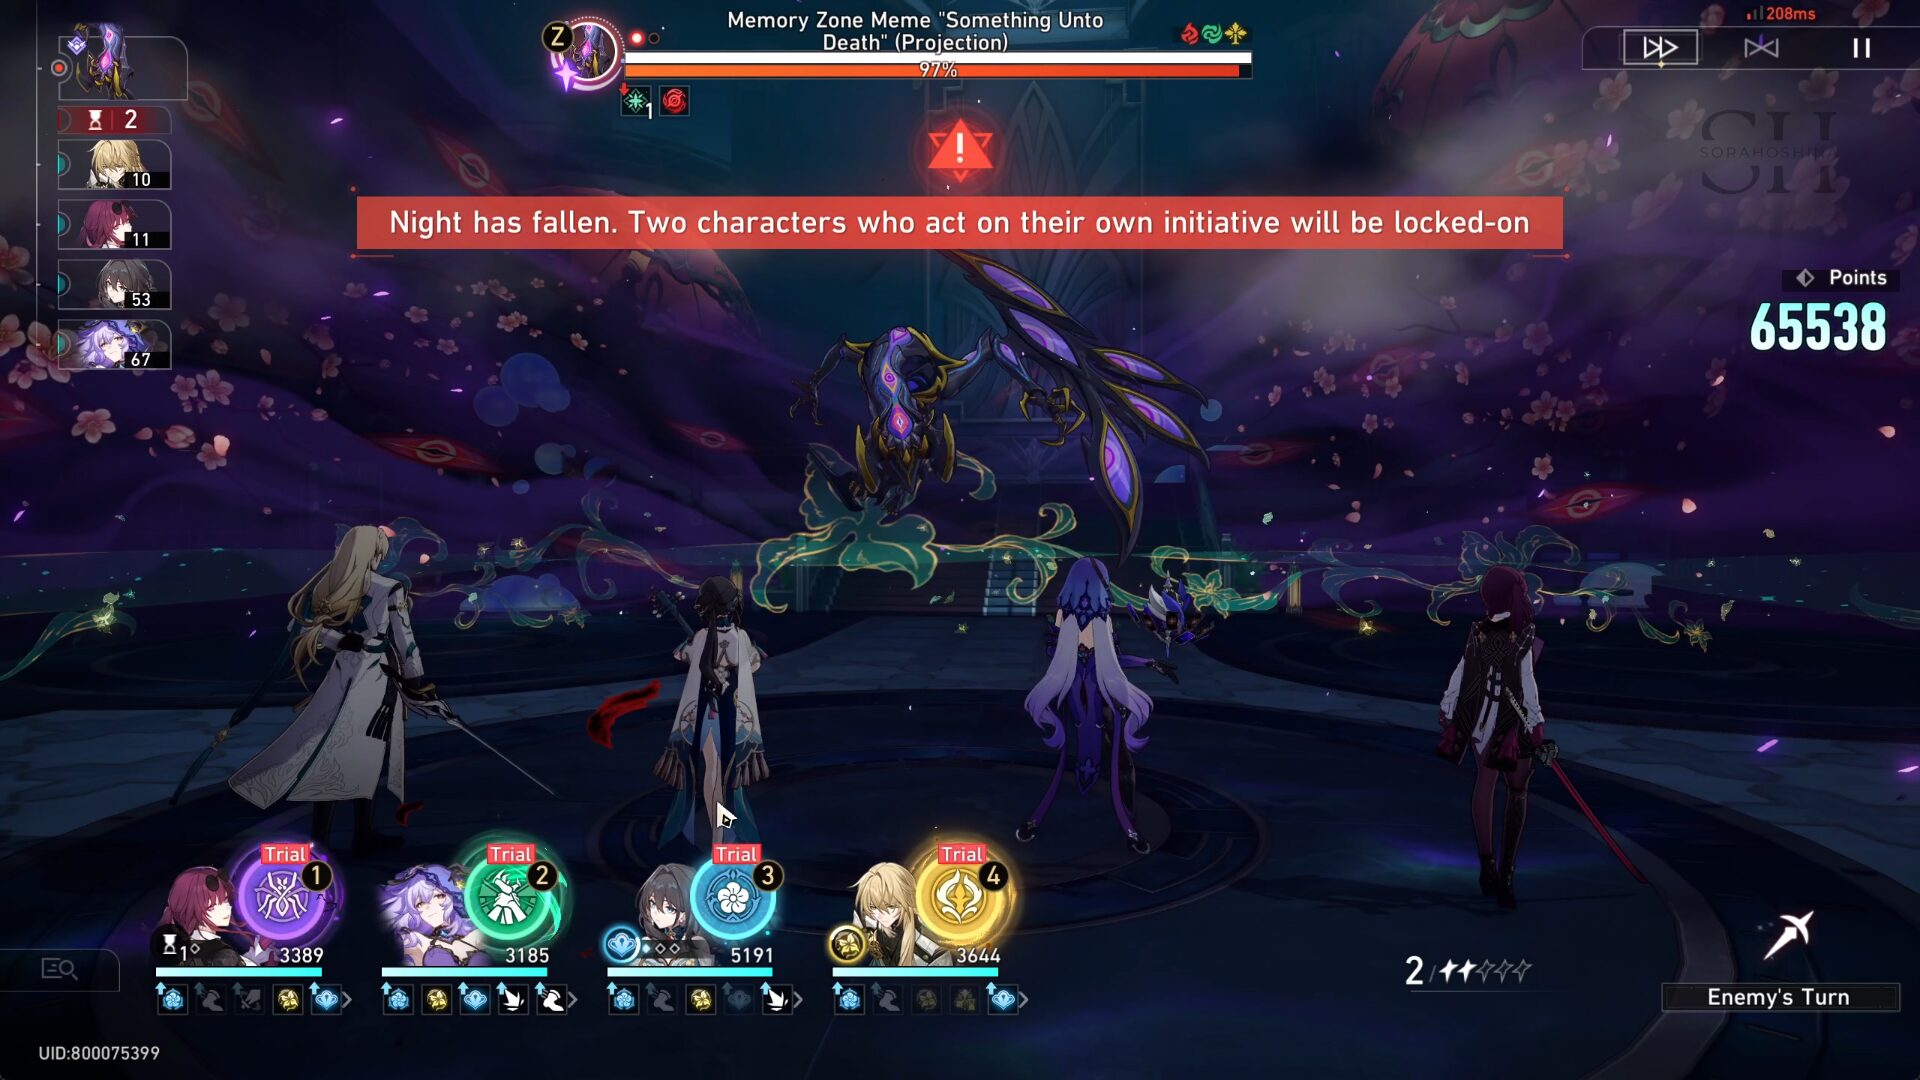
In the second phase, all your characters will have their Ultimate fully recharged. However, the first 2 characters that you will use (by using their Ultimate / Normal ATK / Skill) will be locked by the Reaper to get locked inside the Morbid Dream. Similar to the first phase, sacrifice Ruan Mei and Luocha so the 2 DoT ladies can use their skills to free them later.
Gameplay Rewards
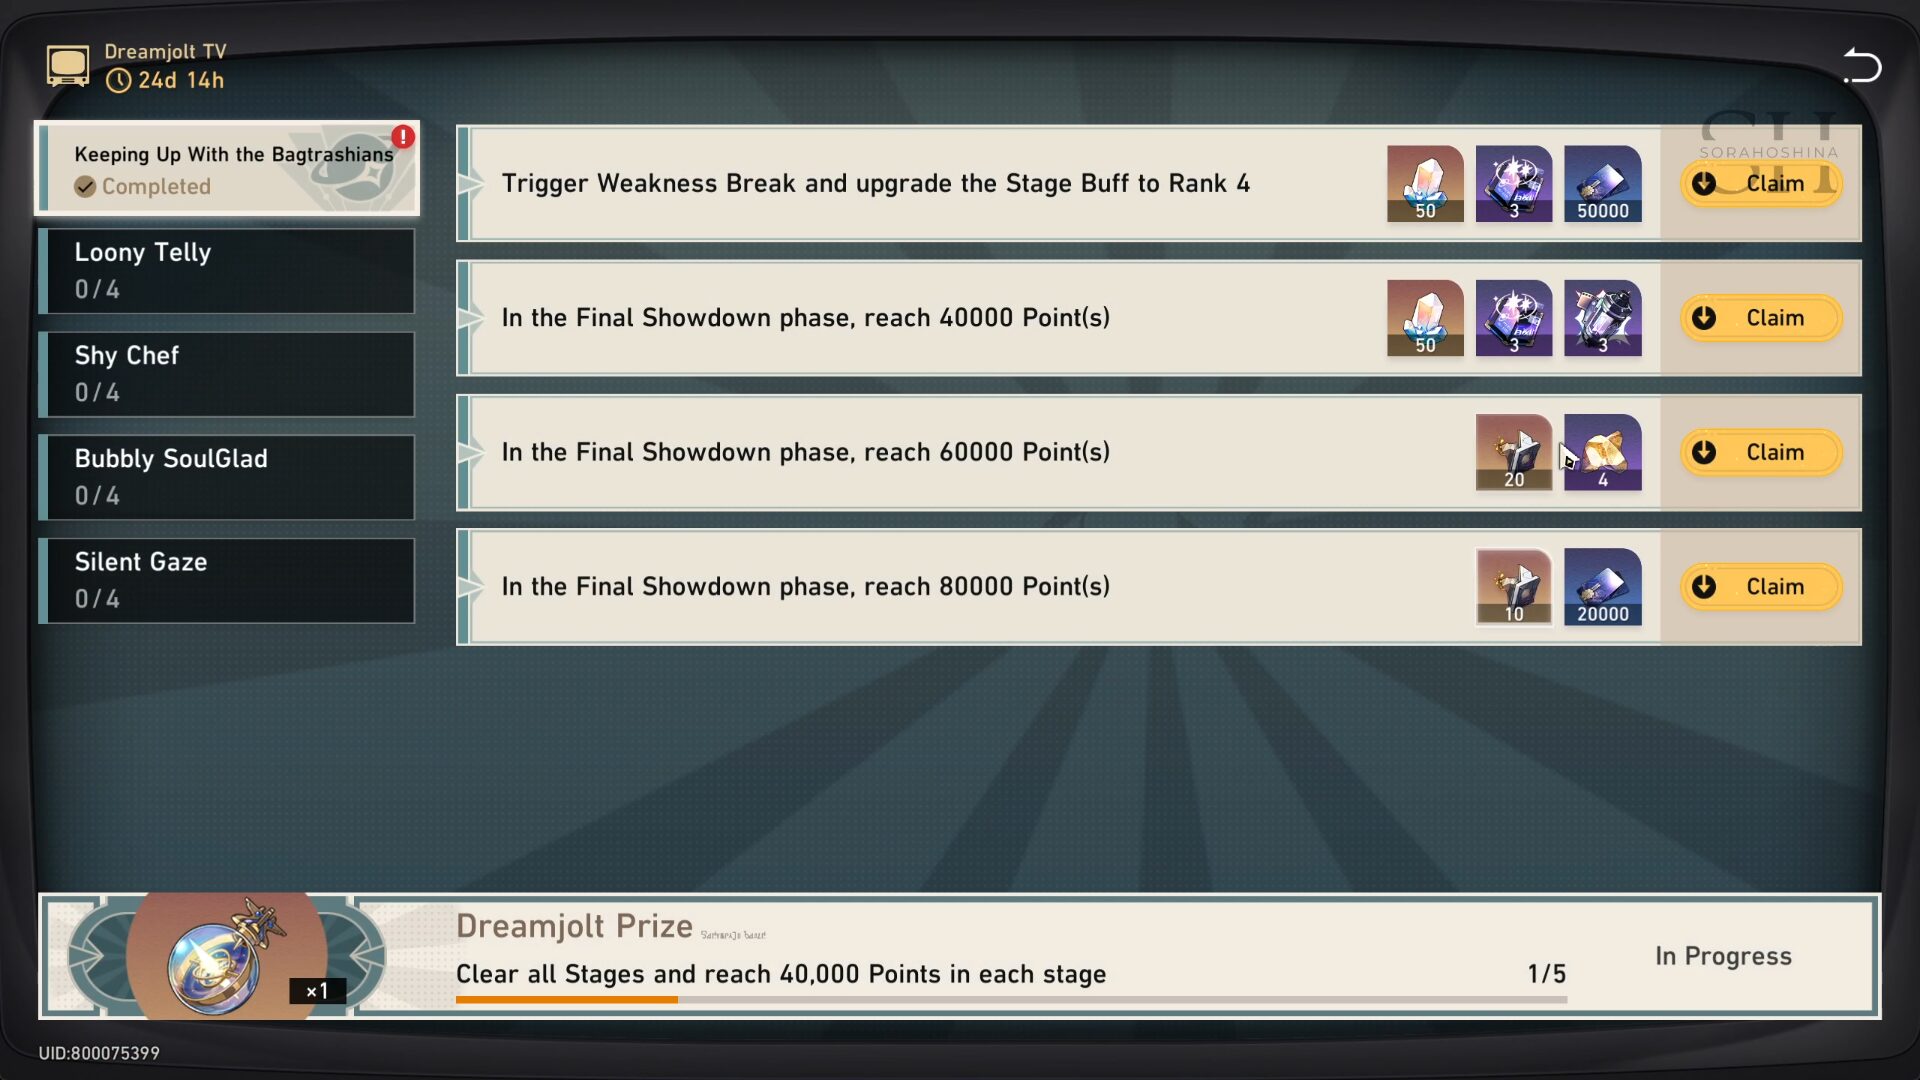
➥ Don’t forget to manually claim your rewards from the event page. By completing all the event challenges, you will get the following rewards:
- Stellar Jade x500
- Traveler's Guide x30
- Credit x350000
- Refined Aether x15
- Relics Remains x150
- Lost Crystal x20

Sora
Articles: 233More Articles

Honkai: Star Rail Stellar Shimmer Event Guide

Honkai: Star Rail Redemption Codes – July 2024

Honkai: Star Rail Version 2.3 Tier List (July 2024)

Honkai: Star Rail Jade Character Guide

Honkai: Star Rail Boothill Character Guide

Honkai: Star Rail Xueyi Character Guide

Honkai: Star Rail Misha Character Guide

Honkai: Star Rail Gallagher Character Guide

Honkai: Star Rail Ruan Mei Character Guide

Honkai: Star Rail Firefly Character Guide
Honkai: Star Rail Memory of Chaos Stage 12 Guide (V2.2 – A Song’s True Theme)

Honkai: Star Rail Memory of Chaos Stage 11 Guide (V2.2 – A Song’s True Theme)

Honkai: Star Rail Memory of Chaos Stage 10 Guide (V2.2 – A Song’s True Theme)
Honkai: Star Rail Memory of Chaos Stage 9 Guide (V2.2 – A Song’s True Theme)

Honkai: Star Rail Memory of Chaos Stage 8 Guide (V2.2 – A Song’s True Theme)
Honkai: Star Rail Memory of Chaos Stage 7 Guide (V2.2 – A Song’s True Theme)
Honkai: Star Rail Stellar Jades Calculation in Version 2.3

Honkai: Star Rail Version 2.3 Special Program Livestream Overview

Honkai: Star Rail 3 New Redemption Codes from 2.3 Livestream