
Table of Contents [Show]
New to the Tower of Salvation? Check out the Tower of Salvation Quick Start Guide for basic information about mechanics and how to play.
Using Night World Obsidian

TOS seasons last 4 weeks. It's designed this way because you are not meant to clear all the floors within the first few days. You need time to build up your Obsidian earnings to buy the seasonal stats, which are essential for progressing through the tower. This section deals with the recommended order for spending Obsidian.
Order of priority for beginners
For beginners who do not yet have many high level costumes and have not yet reached the upper floors of the tower, damage should be your first priority. The aim is to have enough damage to one shot most enemies in the lower floors. It is recommended that you start by investing only in either ATK or M.ATK (depending on your preferred team type), but not both. Try to choose either physical or magical only to focus on each season.
After getting a few points in damage, SP is needed. For beginners, you are more likely to have low level costumes with higher SP costs. Getting the SP upgrades will help you activate more skills on Turn 1 and beyond.
Refresh is the next priority. It significantly improves the consistency of your runs, and should not be overlooked. Refreshes are almost never wasted, because even if you don't use all your refreshes on your opening team, refreshes can be used to reroll boss relic rewards. Getting the right SR or UR relic can make all the difference. Again, invest to the 3rd tier.
After clearing the first few levels, beginners may find that it is no longer possible to one-shot all enemies, even with good relics. At this point, DEF and M.RES become essential to survive enemy attacks. HP is also helpful, but lower priority than DEF and M.RES.
Discount probability improves your chances of getting a price discount in shops. For beginners, discount probability is a low priority, as you don't really need to rely on discounts to afford to buy most relics you need.
The recommended order of priority for beginners is:
- ATK or M.ATK (choose one): buy up to and including the 1,000 cost tier.
- SP: buy up to and including the 1,000 cost tier.
- Refreshes: buy up to and including the 1,000 cost tier.
- Then upgrade the 5,000 cost tier for each of ATK/M.ATK, SP and refreshes.
- DEF and M.RES: buy up to and including the 5,000 cost tier.
- Discount probability: buy up to and including the 5,000 cost tier.
- HP: buy up to and including the 5,000 cost tier.
- Then unlock the final tiers depending on what you need most.
If you ever get stuck, use your keys to quick battle on the highest level you've cleared so far, until you have enough Obsidian to buy the next stat upgrade.
Order of priority for Lv 10 clears
If you are going for Level 10 clears or high scores, the order of priority is very different. It is assumed that, if you are going for Level 10 clears, you have many high level costumes with unlocked potentials. This means that damage is not the first priority.
Once you've reached Level 6 and above, SP upgrades become far more important than damage. SP becomes very scarce in later levels. Not only does your starting SP reduce in higher levels, but from Lv 6 onwards, you also have no SP regen each turn.
Discount probability also becomes a much higher priority. In the final few levels, Silver rewards are significantly reduced, so a higher discount probability greatly improves your odds of being able to access high tier relics.
Therefore, for Level 10 clears, the order of priority is:
- SP and refreshes
- Discount probability
- ATK or M.ATK (choose one)
- DEF and M.RES
- HP
Physical or Magical?
As stated above, since you have limited Obsidian for upgrading stats, it's best to focus on either physical or magical each season.
Right now, magical teams have a slight edge over physical. This is mainly because magic costumes overall tend to have better AOE reach, whereas with physical costumes there are a lot of costumes that have only small AOE skills. Magic teams also have Beach Vacation Morphea, who is one of the best attackers for TOS.
High value physical attackers for TOS include, for example:
- Blade: Big range and high damage on Young Lady.
- Justia: Pool Party is the cornerstone of her kit for both evasion and boosting damage.
- Liatris: Good damage and range, can be used to activate DOT relics.
- Luvencia: Big range, high damage and high hit count.
- Sacred Justia: Good range and damage, but cost is on the high side, and not good against small mobs.
- Yuri: Very good damage on both costumes. Whitebolt removes buffs.
Note GC Rafina is ok in the early game, but suffers in the late game due to low base damage.
High value magical attackers for TOS include:
- Eclipse: Big range, good damage. Nightmare Bunny SP recharge helps a lot in later difficulty levels.
- Levia: Track and Field amplifies damage. Night of Jealousy also has good range and damage.
- Michaela: Strong damage with long range AOE. Skill penalties are not a big deal in TOS.
- Morphea (Beach Vacation only): Two attacks in one! Summons can also act as shields to absorb enemy attacks.
- Schera: Removes buffs. Code Name S also silences.
- Venaka: Big range and very good damage. DJ has M.RES reduction.
Of course, whether you pick physical or magical may in part depend on what costumes you have invested in on your account.
High chain or low chain?
Another important team building consideration is whether you build a high chain team (high hit count) or a low chain team.
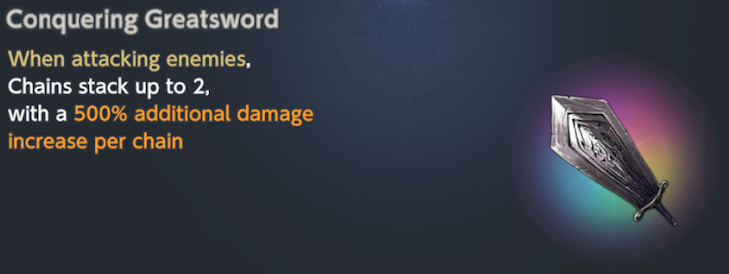
Low chain teams are easier and more consistent to build: simply aim for the relics that give low chain damage bonuses (Hammer of Authority, Crushing Axe, Conquering Greatsword) and avoid relics that increase your chain count. Also, recruit Beach Angel Teresse if you can for further synergy. The low chain strategy does not require much luck and works well with the majority of costumes, since the majority of costumes deal 5 or less hits.
 |  |  |
High chain teams are a lot more difficult to build, but the potential endgame payoff is also higher, because there are more UR relics that work with this strategy.
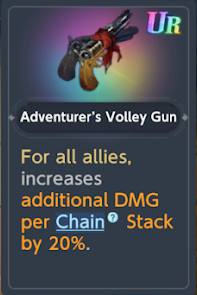
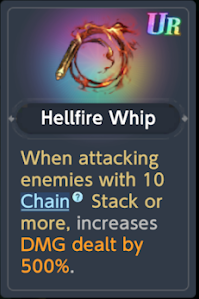
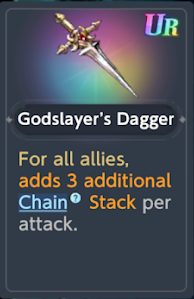
It's difficult to build because relics that improve chain damage (e.g. Strategy Guide, Quickfire Dual Pistols, Adventurer's Volley Gun) and relics that give high chain bonuses (e.g. Chain Whip, Thorn Whip, Hellfire Whip) don't help very much in the first half of your run. It's only after you obtain relics that increase chain count (e.g. Palace Guard's Ring, Mages Circlet, Godslayer's Dagger) that you start to see exponential returns from the high chain strategy.
The high chain strategy relies a lot on refreshes and luck, because you need several pieces to set it up. If you don't get the right combination of relics AND costumes, you may be stuck with relatively weak relics that do little on their own.
Rainbow and mono element teams
The "Pomegranate" series of relics gives big bonuses if you have 5 allies of different elements. The "Apple" series of relics gives big bonuses if you have 3/4/5 allies of the same element.
Don't bother trying to build rainbow or mono element teams: Neither the "Pomegranate" series nor the "Apple" series is worth the trouble. Being forced to build rainbow/mono teams is extremely limiting. In addition, if one or more of your units die, you could lose the damage bonuses entirely in the middle of the battle.
On the other hand, the "Grape" series of relics is recommended. The Grape series requires only 3 different elements on your team to activate. This is very easy to achieve, and in fact happens almost all the time without even trying.
If you have Divine Grapes, it's worth getting Sky Apple, only because Sky Apple + Divine Grapes makes Tricolor Marble (all allies +200% ATK/M.ATK). Otherwise, Sky Apple is not recommended.
Crit rate and crit damage
Crit damage is one of the best ways to quickly improve your damage output, so long as you have a good crit rate. B.Helena, DS. Liberta and RH.Rou all give a big 50% crit rate boost. With the right relics (e.g. Gambler's Token, Deadeye's Bayonet etc), it's easy to reach a high crit rate, which makes crit damage relics extremely good value.
Note: unlike normal story battles, the RNG rolls in Tower of Salvation are fixed. You cannot repeatedly reset to fish for crits. Even if you reset the battle, the crits will proc in exactly the same way.
However, it is still possible to re-engineer the crit outcomes by resetting and changing the attack order of your characters, which will also change which attack gets the crit. For example, if you notice that first 4 hits don't crit but the 5th hit crits, you can re-order your characters so that the character that does the 5th hit is the one that crits.
Other offensive relics
- Relics that buff property damage are not recommended. It's not common to have a strong element costume available. Many bosses also have no element.
- Relics that increase damage dealt at the expense of damage taken (Forbidden Powder, Unidentified Dish) are ok in lower difficulty levels, but not recommended in higher difficulty levels. The loss of survivability can be very punishing in the higher floors, and is generally not worth it.
- Relics that buff 1st position damage (Fleetfoot Herb, Fair Wind Flower) are not recommended. 1st pos is usually reserved for buffers, not attackers, so the damage bonus is usually wasted.
- On the other hand, the relics that buff 5th position damage (Vanguard's Spear, Peerless Javelin) are highly recommended, and are better than most other relics of the same rarity. These relics give very large offensive buffs, and allow you to do focused damage with your best attacker. Simply put your best attacker in the 5th position.
Defensive relics
- Defensive relics are not really required for early difficulty levels. They become more relevant only in later levels where you cannot reliably clear battles within a single turn.
- The best defensive relics are the ones that grant evasion (Veil of the Night, Talisman of Speed).
- The next best defensive relics are the ones that increase DEF and M.RES (e.g. Elven Cloth, Fairy Silk). Keep in mind that DEF/M.RES caps at 90%.
- Relics that give energy guards at the start of battle (Rabbit Doll, Teddy Bear) are also good. Relics that give energy guards on hit are not as good, because some enemies can one-shot you.
- Healing relics are generally not needed, especially if you can recruit B.Helena and/or MC.Teresse. Note that healing is available at all shops for a small cost of 1000 Silver.
- Other defensive relics, including counter relics, are mostly low priority and only work well in niche situations.
Other relics
- SP cost reduction and SP gain relics are very useful for the later difficulty levels. After Lv6, you have no automatic SP regen, and your only source of SP is normal attacks and SP charging skills.
- Interest bonuses and silver reward bonuses are essential for high score run, but are not high value if you pick them up late in your run, and are also not high value if you spend your silver often.
- Unless you are aiming for a high score run, event success relics are not really worth it. Event encounters can sometimes give you better rewards than regular battles, but they can also sometimes give you bad luck choices that can ruin a good run.
High value costumes for high difficulty levels
Below are some recommended units for TOS.
BV Morphea | Beach Vacation Morphea is simply one of the best for Tower of Salvation. First of all, her two summons can act as shields to absorb enemy hits and protect your team (just remember to de-select their self-destruct skills). In tough battles (especially where there are only 1 or 2 enemies), she can use her summons repeatedly to stall until Death Time. Secondly, Morphea and her summons each have different knockback skills, so she gives you access to 3 different kinds of knockback in one. Many battles have weird enemy formations, so do not overlook the strategic value of her knockbacks to reposition enemy mobs. Thirdly, Morphea's summons can pack a punch. Her skill effectively gives you 2 strong AOE attacks in one turn. Fourthly, Morphea's summons can help you recharge SP from normal attacks if you don't self-destruct them. The SP recharge can really add up in longer battles. Her main drawback is her high SP cost, so she does not leave much room for other high cost costumes. She's also best used in a magic team, to make use of magic damage bonuses. |
Evasion | Evasion is an effective way to deal with heavy damage from even the strongest enemies. Of the evasion costumes available, Justia is the best value if you have her with at least +3 costume level and her potential upgrade that boosts SP gain. SP is an extremely valuable resource in later levels, so being able to charge SP and tank attacks with evasion for only 1 SP is very good value. In addition, her skill boosts the power of her next few attacks. Tip: subbing out PP.Justia, and then immediately subbing her back in, refreshes her skill cooldowns. This technique allows you to keep PP Justia's evasion up every turn for a net 1 SP gain (at +5 full potential, it costs 4 SP to cycle her and 1 SP to activate her skill for 6 SP gain). Honorable mention goes to WC.Rou and Maid Rubia. |
Silencers   | Silencers are recommended when you do not have enough damage to one-shot your enemies. In the later levels, many enemies simply cannot be killed in one turn, so silence is an effective way to keep your team alive. In particular, in later levels you will encounter enemies who gain very strong buffs (especially counter buffs) and are immune to buff removal. A great way to deal with them is to silence them before they can activate their buffs. The best silencer is FS.Olstein (due to his big AOE and SP recharge effect), but B.Eleaneer and CNS.Schera also work. Remember to check the enemy's status at the start of battle to see if they are immune to silence, buff removal, etc. |
| Buff removers | Buff removal is useful to deal with enemies with taunt, counter, and strong offensive buffs (as long as they are not immune to buff removal). It's useful to have at least 1 buff remover in your roster. Schera, Yuri and Eleaneer are best for this purpose. |
Buffers    | You should make it a priority to find a buffer as soon as possible, ideally in your opening team. The best buffers to look for in your opening team are B.Helena, DS.Liberta and BA.Teresse. If you get one of these buffers but don't yet have them at +5 costume level, it's a good idea to max them out when you get to your next shop. After the above, MC.Teresse (damage and heal) are RH.Rou (crit rate and energy guard) are also high value picks. H.Lathel is also very good for physical teams, but doesn't offer quite as much utility as the other buffers. |
When selecting characters, if all of your options are bad, consider getting some characters with different kinds of knockbacks. Having different knockback options can sometimes help you with difficult formations.
High scores
Level 10 too easy? The next challenge is to try for a ranking high score. For more info on high scoring, check out the high score guide.