


Table of Contents [Show]

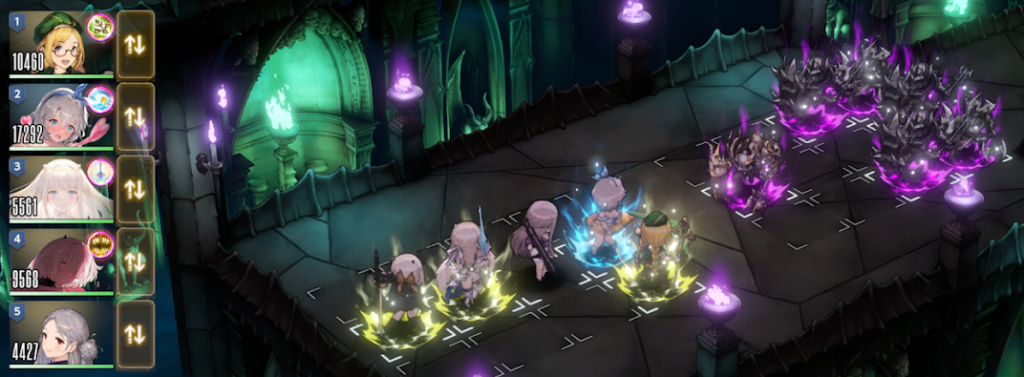
Tower of Pride is one of the most interesting and rewarding game modes, because it's basically 3 challenges in one, depending on the power of your character roster. Each challenge comes with new strategies.
- The beginner challenge is to simply clear all 6 floors in the tower.
- The intermediate challenge is to clear all the floors while meeting all of the bonus scoring conditions. To do this, you need to have strong units in all elements, and they need to be strong enough to clear each battle within 1 turn.
- The expert challenge, for veteran players only, is to get a perfect score on all levels, reach Rank 1 and earn the maximum season rewards. This requires not only the best 5-star units, but also careful strategy to "solve" each puzzle. Getting to first place earns an additional 3000 Devil Coins and 30 Ancient Crystals per season, compared to being unranked.
**SPOILER ALERT** This guide contains suggested solutions for reaching max scores. Part of the fun of Tower of Pride max scoring is to find the solution to each battle, like a puzzle game. If you don't want to spoil the solutions, don't read the solutions in the last section below!
Beginner challenge: clearing the floors
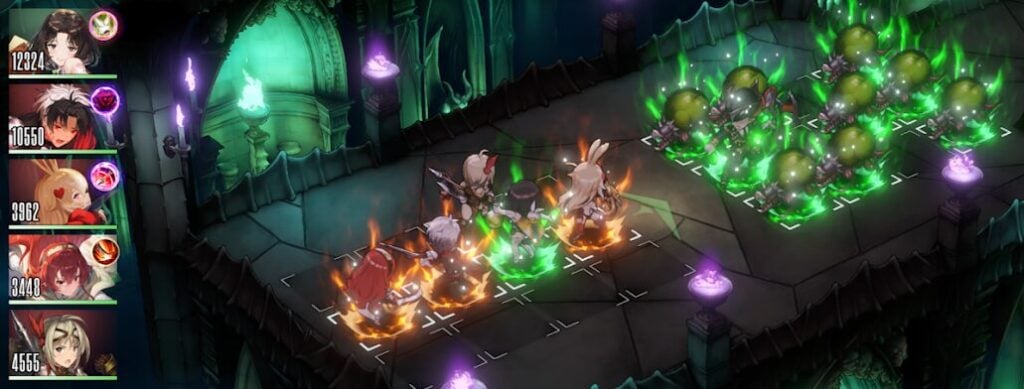
As a beginner, your main objective is to clear as many floors as you can to earn those Ancient Crystal rewards. You most likely won't be able to fulfil all of the bonus conditions yet, since it's hard to defeat all enemies in one turn when your costumes are underleveled.
Since each player will have different characters and costumes, there's no one size fits all guide. Here are some general tips to help get through as many floors as possible:
- Fiend Scholar Olstein and Lucrezia both have large AOE silence. If you can't clear the enemies in one turn, a silencer can be very useful to stop enemies from activating strong abilities. Check your enemies' skills so that you are not caught by surprise.
- Using knockbacks strategically is key to completing a lot of the levels. Pushing units into the correct position can help you make the most out of your AOE (including attack AOE and silence AOE). Also, Violent Student Kry is really good for many of the floors, because he can often take out 1-2 enemies from his knockback damage alone.
- Buffers are a must-have to maximize damage. For buffers that are readily available to new players, Arines is for physical teams and Elpis is for magic teams. AOTU.Diana, H.Lathel, B.Helena, MC.Teresse and Refithea are all good 5-star buffers to bring along, if you have them.
- Don't sleep on 3-stars and 4-stars! Having a 3-star or 4-star costume who is on-element and at +5 may be more effective than a 5-star who is off-element and at +0.
- Retries are free, so it's usually a good idea to focus your gear build for maximum crit damage. You can get away with a lower crit rate because you can fish for crits by repeatedly retrying if you miss the crit, though it takes some patience.
- Bring food! Food can be used between battles to heal up.
Intermediate challenge: all bonus conditions met
Attempting to all meet the bonus conditions is an entirely different challenge. You now need to clear everything in one turn, which means that enemy skills become irrelevant, and silencers are not required. Also, you are now forced to use different elemental teams on each floor, so you can't just rely on your "strongest PVE team" anymore.
On all levels, a buffer is recommended for the off-element team member. Diana is usually recommended.
If you are not aiming for a perfect score, there are many possible solutions. Some recommended units are below:
| Floor | Recommended units |
| 1 | H.Lathel, Liatris, Loen, Levia If you have Liatris or Loen, after your 3x3 clear you should only be left with a single row (3-wide) of enemies to clear (e.g. with LL.Elise, PP.Lathel, Eris, etc). On the boss battle, after using Liatris or Loen, you will need to use one vertical AOE on each side (e.g. Alec, LL.Elise, FG.Anastasia). An alternative solution is to use Lathel or Beatrice to push a side enemy into the middle, then clear with EA.Eris. |
| 2 | B.Helena, Justia (especially BG.Justia), Jayden, PP.Angelica, If you don't have BG.Justia, Floor 2 has some of the most tricky formations to clear. Whats more, the enemies have 75% DEF, which means that magic attackers (PP.Angelica, Jayden) and Justia are best. All rooms can be cleared with those 3 units + a front forward pusher. |
| 3 | MC.Teresse, Rafina (especially GC.Rafina and CNA.Rafina), Rafina makes light work of this level. There are many other water options to attack with, so there are many other ways to clear the level even without Rafina. Remnut and Ingrid are surprisingly good in this level if you don't have GC.Rafina or CNA.Rafina. |
| 4 | Arines, Justia (especially BG.Justia), Yuri or Ventana. Again, without BG.Justia, Floor 4 has very tricky formations to clear. WR.Justia/Kendo Justia + PP.Angelica is a good combo that can deal with a lot of the room formations. |
| 5 | Diana, Summer Vacation Dalvi + 2 front forward knockbacks Now that we have Summer Dalvi, this level is a piece of cake to clear. Just bring any two units with front forward knockback ability (e.g. Lecliss + Fred). On every level, using 2 knockback pushes will position enemies perfectly for Summer Dalvi to do a one-hit KO. |
| 6 | For the Dark units: Kry and Samay are recommended. For the Light units: BG.Justia is best, otherwise WR.Justia/KOB.Justia, PP.Angelica + Yuri or Layla are preferred. There are many options for light teams, though, and other solutions exist. |
Expert challenge: Perfect score solutions
Scoring mechanics
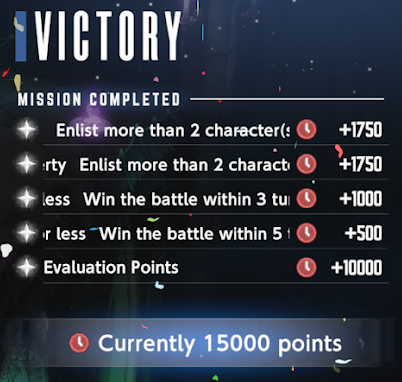
Before we go into the solutions, it's important to first understand how scoring works in Tower of Pride. To go for the max score, you obviously have to meet all bonus conditions (bring X element units and complete each battle in 1 turn). The remaining part of your score, called the "Evaluation Points", is calculated based on your battle performance, but the in-game manual does not clearly state how the performance score is calculated. We've run tests and also checked with the devs to determine the hidden scoring rules for the Evaluation Points, as set out below:
- First of all, part of your performance score is calculated based on your remaining HP at the end of the battle. Therefore if you are aiming for a perfect score run, you must make sure your units are fully healed before starting a Tower of Pride floor run. Note also that some skills (e.g. Lathel, Michaela) cause the character to lose HP after attacking, which will prevent you from reaching max score.
- Secondly, each character's attack is scored based on total damage dealt by the attack. Testing indicates that you need 1 million total damage to reach maximum score. The total damage number is displayed when attacking.
- Thirdly, your character's total damage will be higher if it hits more enemies. You should ideally aim to hit at least 3 enemies at a time and crit against all of them.
- Fourthly, once the enemy dies, further hits are not counted towards total damage. For example, say you have a Knight of Blood Justia who hits 3 times for 5000 damage per hit. If the enemy has 6000HP, then only Justia's first 2 hits will be counted for scoring purposes, and the third hit is disregarded. Therefore, multi-hit skills are not good for getting a high score. High damage single-hit skills are necessary for getting a perfect score.
- Lastly, only your best attack in each battle is counted for the battle performance score. E.g. if you attacked with 3 different characters, only the character who did the best attack will be taken into account in your final score, and the other two characters are disregarded.
The Evaluation Points score is capped at 10,000 for normal rooms and 30,000 for boss rooms. You need to reach the cap on every room to get a perfect score for the floor.
The general strategy for each floor is to pick one high damage single-hit costume as your primary attacker. The primary attacker usually needs to hit at least 3 enemies and crit against all of them with high crit damage (though if your costumes are strong enough and well geared enough, you may be able to get away with hitting just 2 enemies). Other than your primary attacker, your other attackers for clearing mobs don't need to be single-hit costumes, because their score won't be counted anyway.
UR IV gears are assumed, with a focus on crit damage (e.g. Venomous Touch). AOTU.Diana +5 is also necessary for most levels, though BA.Teresse (limited) works just as well in some cases. High costume levels and potential upgrades will make things easier, though they are not always required. If your primary attacker is hitting 3 enemies at a time with triple crits, but you still aren't hitting the perfect score cap, then you'll probably need to upgrade your gears, your costumes/potentials, and/or your buffers. Again, getting a perfect score is an end-game goal for players who have very strong costumes in all elements.
**SPOILERS BELOW**
Note these are recommended solutions, but other solutions are possible, especially as new costumes are released.
Floor 1 spoilers
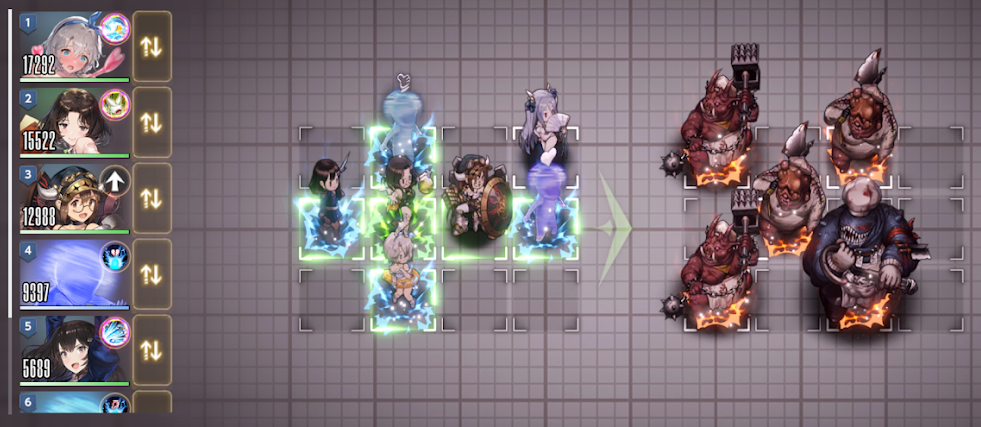
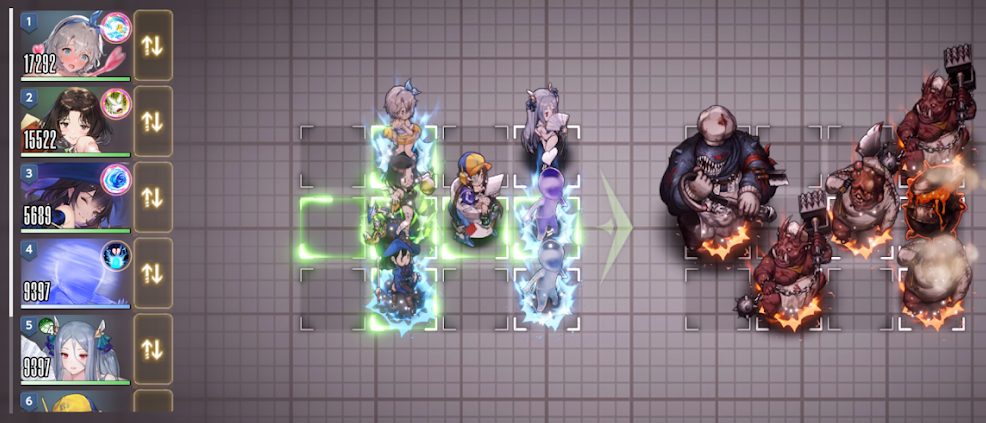
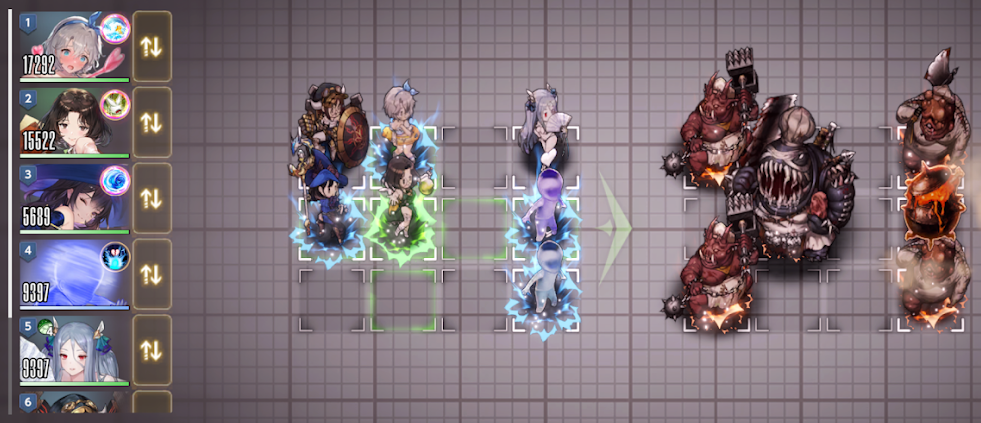
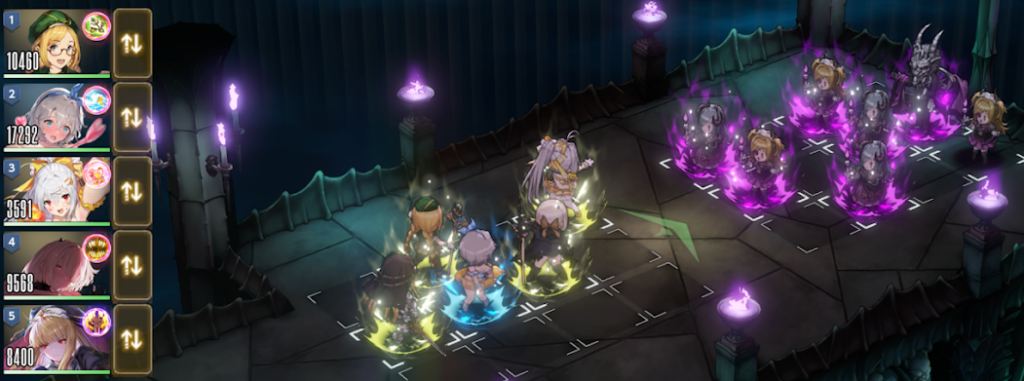
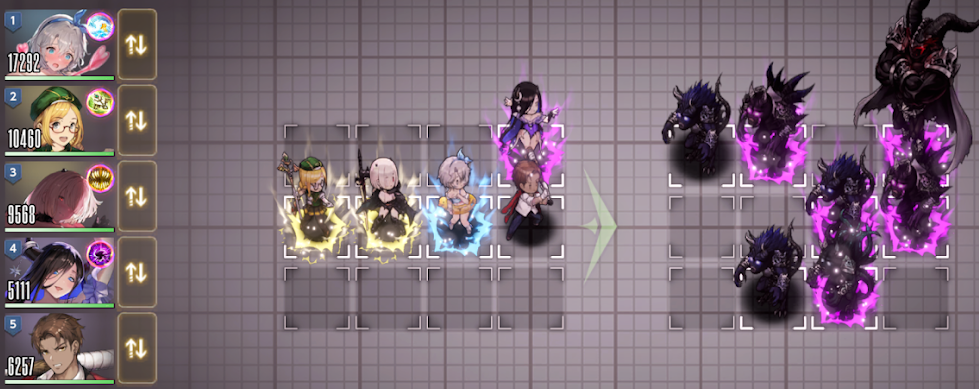
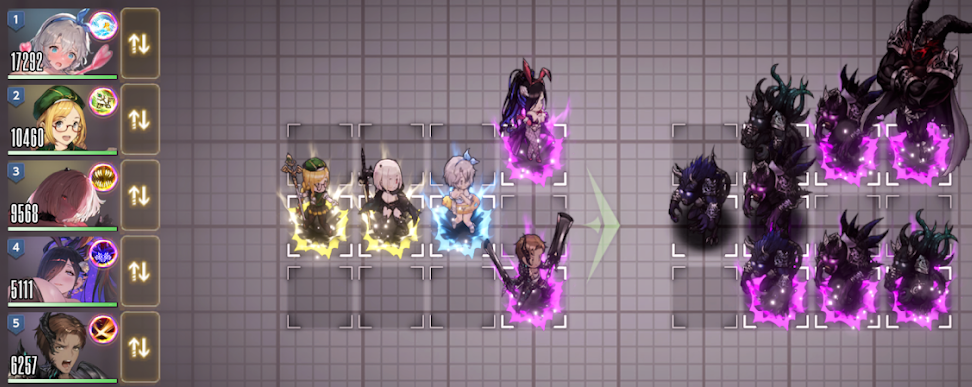
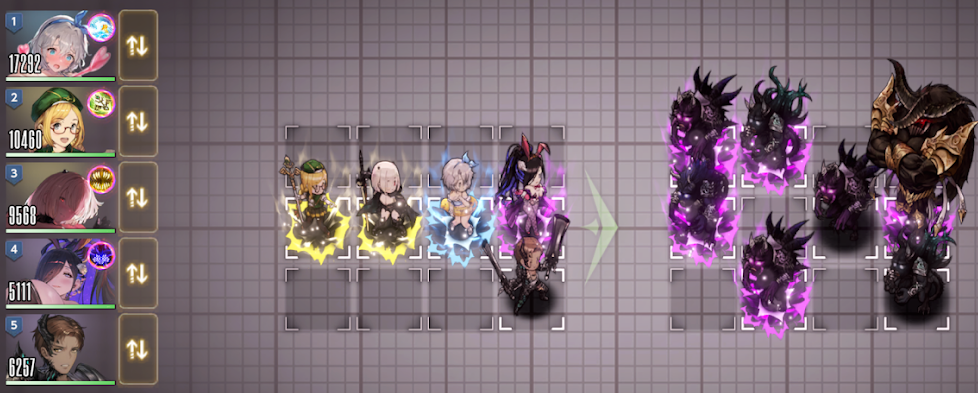
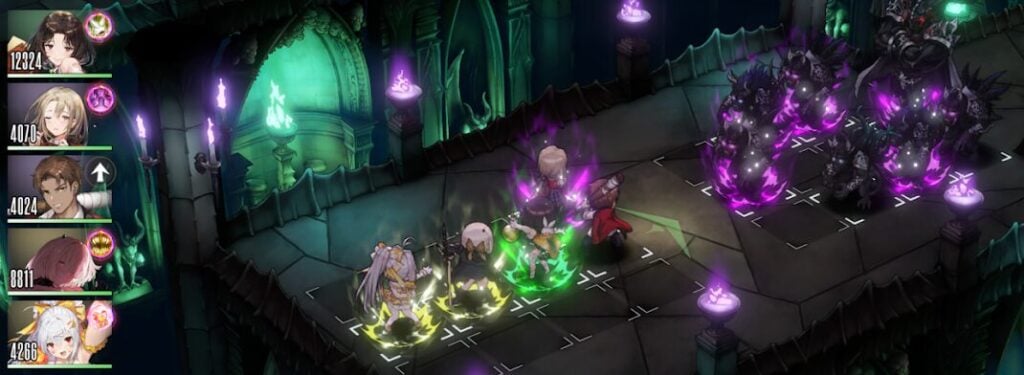
The solution below shows EA.Eris +0 as the primary attacker with RS.Liatris for clearing mobs. Note than an alternative is Maid Liatris (upgraded AOE) as the primary attacker with a horizontal AOE attacker (e.g. LL.Elise) for clearing the remaining attackers. Loen is also strong and works well, but doesn't benefit from H.Lathel.
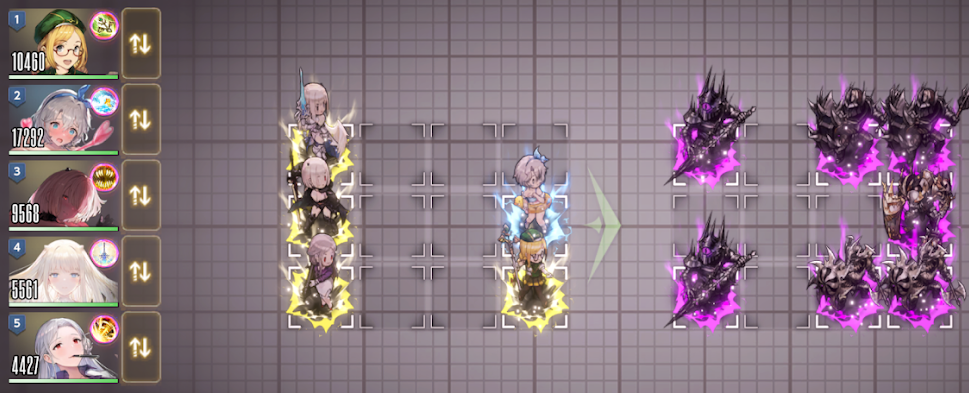
Room 1-1 solution
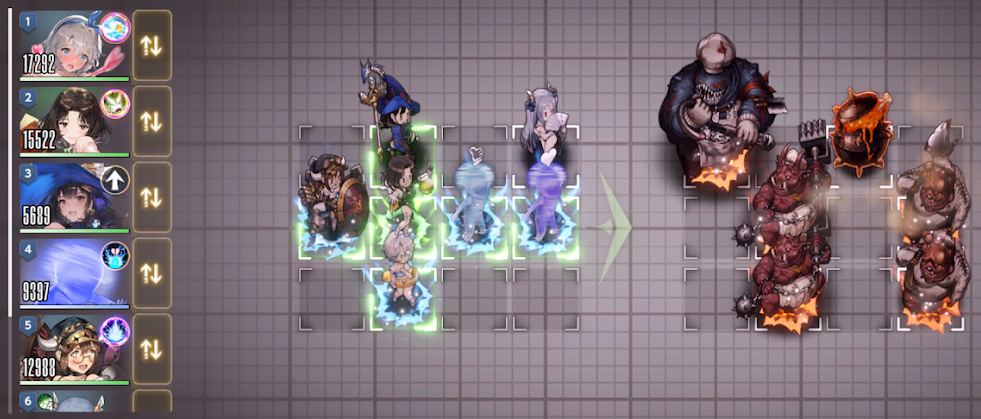
Room 1-2 solution
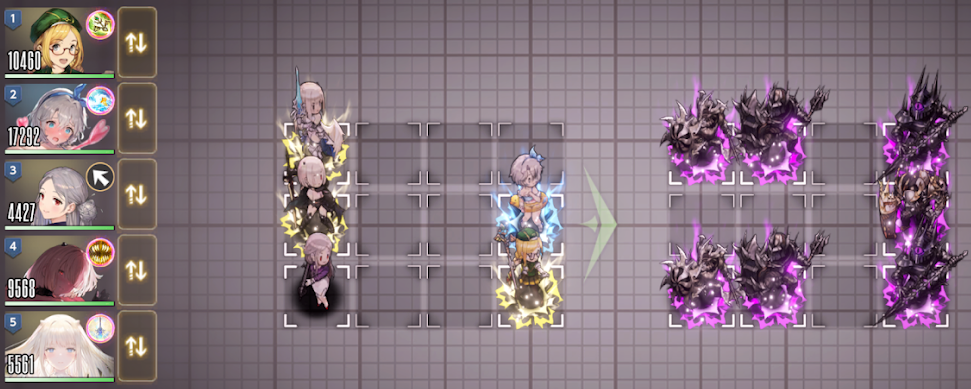
Room 1-3 solution
Room 1-4 solution
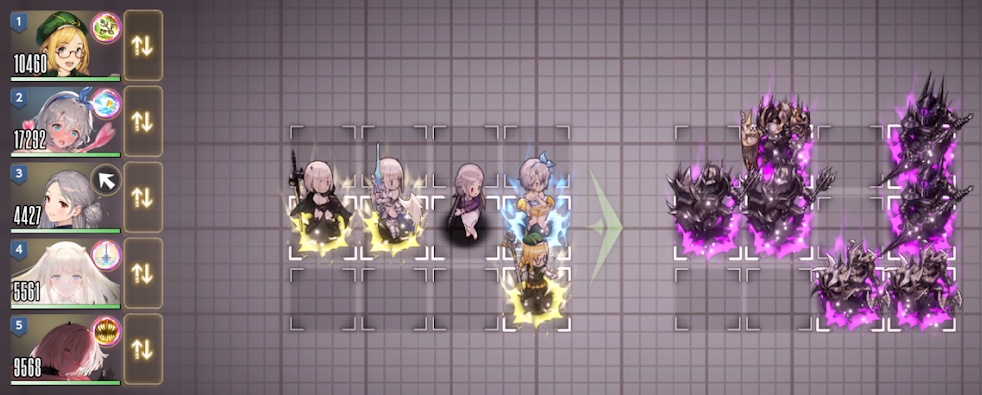
Boss room solution
Floor 2 spoilers
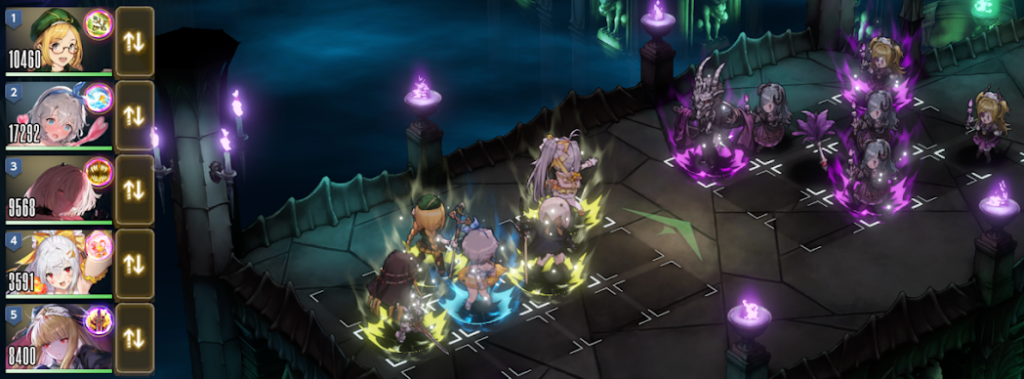
Solution A: Beach Teresse + BG.Justia
Floor 2 has enemies with high defense. This solution only works with BA.Teresse, a limited costume. Diana does not work with BG.Justia because there are diminished returns from using 2 different property damage buffs. Michaela and Sacred Justia are swappable, as other combinations are possible for clearing the remaining mobs.
Solution B (below) does not require BA.Teresse.
Room 2-1 solution
Room 2-2 solution
Room 2-3 solution (Layla can be used instead of Michaela for knockback)
Room 2-4 solution (BG Justia can also attack bottom/right row for similar results)
Boss room solution
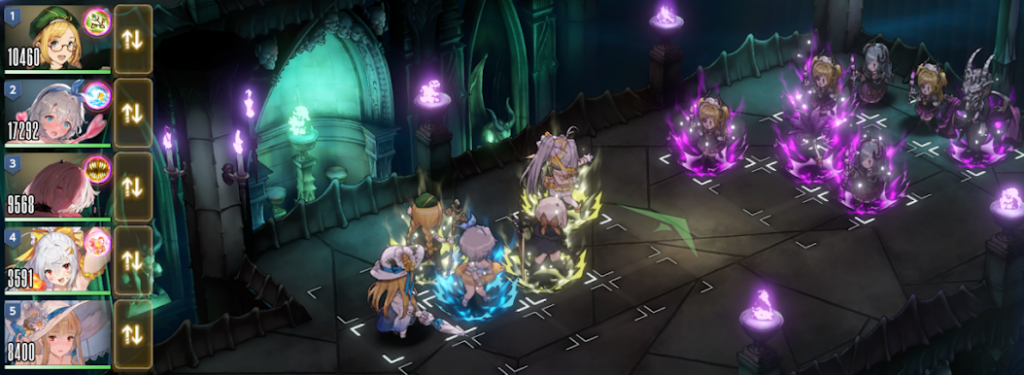
Solution B: CI.Yuri + DEF shredder (No BA.Teresse)
NOTE: For the solution below, Gray must be bare naked - no gears! The aim is to have him reduce DEF without killing the enemies. Lovely Lady Elise is an acceptable alternative. +5 CI.Yuri and Layla cannot be swapped. BG.Justia is used here for clearing mobs, but Sacred Justia also works.
Room 2-1 solution
Room 2-2 solution
Room 2-3 solution
Room 2-4 solution
Boss floor solution

Floor 3 spoilers
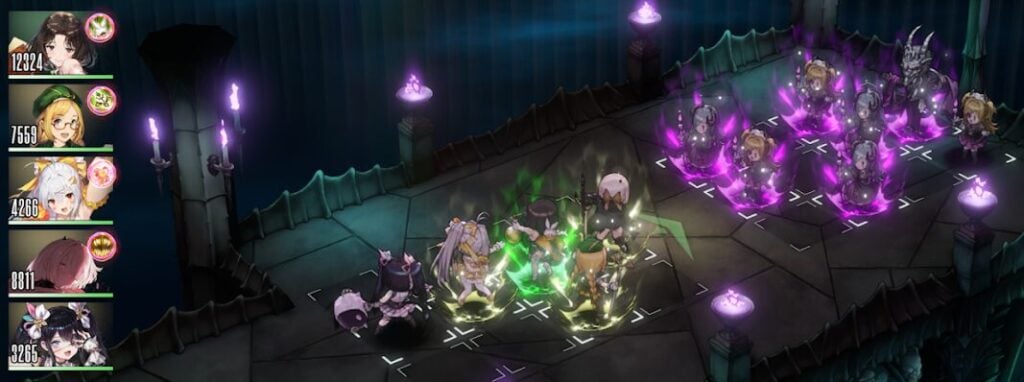
Solution A: BV.Morphea
This solution uses BA.Teresse, but MC.Teresse should also work. Schera and Rafina are swappable, other options can be used for clearing mobs.
Room 3-1 solution
Room 3-2

Room 3-3
Room 3-4 solution (Lapis Witch Schera in the mid column also works)
Boss floor solution (PP.Schera or Code Name Schera also works)
Solution B: Roxy
NOTE: Shown below is Roxy +4 with MC.Teresse +4. Schera was used with no gears. Her role was mainly to stack chains to boost Roxy's damage, whilst not killing the enemy. You may not need Schera for chain stacking if you have a strong enough Roxy and MC.Teresse or BA.Teresse.
Room 3-1 solution
Room 3-2 solution
Room 3-3 solution
Room 3-4 solution
Boss floor solution

Floor 4 spoilers
Solution A: BA.Teresse + BG.Justia
Room 4-1 solution
Room 4-2 solution
Room 4-3 solution
Room 4-4 solution
Boss room solution

Solution B: AOTU.Diana + CI.Yuri
Solution below shows +5 CI.Yuri as the primary attacker with +5 BG.Justia for clearing mobs. Layla is necessary, but only for the boss battle.
Room 4-1 solution

Room 4-2 solution
Room 4-3 solution
Room 4-4 solution
Boss room solution

Floor 5 spoilers
Shown below is DJ.Venaka +4. Gray is only used for his push until the boss level. If you have Venaka's range upgrade then any Gray costume will do in the boss fight, though if you don't have Venaka's range upgrade, then you will need either Pool Party or Vanguard Gray for the vertical AOE. Alternatively, a well equipped Samay can be used instead of Gray.
Room 5-1 solution
Room 5-2 solution
Room 5-3 solution
Room 5-4 solution
Boss floor solution


Floor 6 spoilers
Solution A: BA.Teresse + BG.Justia
Room 6-1 solution
Room 6-2 solution
Room 6-3 solution
Room 6-4 solution

Boss room solution (NB.Eclipse is not compulsory, Kry + any attacker that can defeat the boss is fine)
Solution B: AOTU.Diana + CI.Yuri
Solution below shows +5 CI.Yuri as the primary attacker. Both BG.Justia and Samay are used for clearing mobs here, so don't forget to gear up Samay.
Room 6-1 solution
Room 6-2 solution
Room 6-3 solution
Room 6-4 solution
Boss room solution

Good luck!