Table of Contents [Show]
How to use this tier list
Due to the unique game mechanics of Brown Dust 2, every character has its unique uses depending on their AOE coverage, special effects, turns available to set up and so on. For many characters, you will need to use all of their costumes together to reach their full power.
This tier list ranks characters only by their maximum damage potential, and assumes that you have all of their costumes maxed out and are facing the right kind of enemy formation to achieve the max possible damage. This tier list does not take into account AOE, turns required to set up, survivability, or support power (see the supporter/utility tabs instead).
The tier list is ranked on the following basis:
- S Tier: Characters that have costumes with attacks that are significantly above average (e.g. >1000% multiplier with strong offensive stats) and/or have costume combos that can boost their own damage (e.g. Whitebolt Yuri + Comeback Idol Yuri). These will usually be the best choices for end game content.
- A Tier: Characters who have good offensive stats and high damage costumes skills. Although their max potential damage output is not as good as S-tier attackers, they are still often used in late game content depending on the enemy formation and weaknesses.
- B Tier: Characters with low power offensive skills and/or low offensive stats. They are not recommended for use as your main attackers in for late game content.
- C Tier: Characters who deal low damage, and are not mainly used as attackers (they have other uses though!).
- Not attackers: This character's role is not as an attacker at all (check the supporter tab instead).
You will need attackers from all elements in order to clear difficult late game content. Therefore, this tier list will help you pick which costumes deal the best damage in each element.
Legend
A down arrow (↓) indicates that the character has very niche uses, and not recommended to invest in for beginners. E.g. Ventana only works well against single target enemies with Taunt or Concentrated Fire applied. Nartas only works well against physical types, and also has a long cooldown with no followup costumes.
An up arrow (↑) indicates that the character is particularly recommended for having useful utility in PVE game modes (other than just good damage).
(LC) means that that the character is a limited collaboration character that is not available in the normal draw pool.
PVE Attacker Tier List
 |  |  |  |  | |
| S |  Morpeah (↑) Morpeah (↑)  Yumi (LC) |  Eris (LC) Eris (LC) Levia (↑) Levia (↑) Loen Loen |  Hikage (LC) Hikage (LC) Nebris Nebris Venaka (↑) Venaka (↑) |  Michaela Michaela Sacred Justia Sacred Justia Ventana (↓) Ventana (↓) Yuri Yuri |  Blade  Luvencia Luvencia |
| A |  Roxy (LC) Roxy (LC) Scheherazade (↑) Scheherazade (↑) |  Anastasia Anastasia Liatris Liatris Rubia Rubia |  Dalvi Dalvi  Yozakura (LC) Yozakura (LC) |  Justia Justia |  Eclipse Eclipse Eleaneer Eleaneer  Nartas (↓) Nartas (↓) |
| B |  Rafina Rafina |  Alec  Elise Elise  Lathel Lathel |  Gray Gray Yomi (LC) Yomi (LC) | 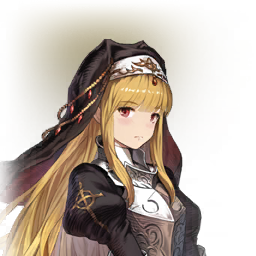 Angelica Angelica |  Rou Rou |
| C |  Glacia Glacia | 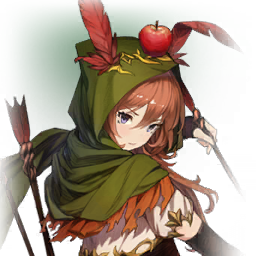 Zenith (↑) Zenith (↑) | 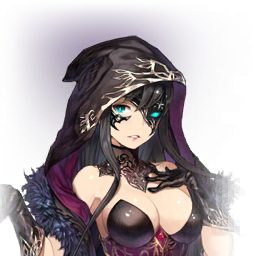 Celia (↑) Celia (↑) | ||
| Not attacker |  Teresse Teresse |  Liberta |  Diana Diana Lecliss Lecliss Olstein Olstein |  Granhildr Granhildr Helena Helena Refithea Refithea |  Seir |
Beginner's guide to offensive supporters
Multiple offensive supporters are essential for dealing high damage in PVE battles. For maximum damage, your team of 5 characters will usually have:
- 3 supporters,
- 1 main attacker, and
- 1 other team member, depending on what is needed for the situation (e.g. a knockback, an additional supporter or an additional attacker).
The general rule is that you should aim to have as many different types of buffs as possible for maximum effect (see the FAQs for more details).
How to use this list
All 5-star supporters in Brown Dust 2 are very good with their own balanced strengths and weaknesses. Therefore this is a list, not a tier list. Use it to quickly compare supporters from each category to build an optimal team, based on the kind of enemy you are facing and the kind of offensive buffs you need.
PVE Offensive Supporter List
| ATK |  Homunculus Lathel 160%/70%/70% |  MC Teresse 120%/120%/0% |  DS Liberta 115% (4 turns) |
| M.ATK |  B-Rank Helena 115% (4 turns) |  MC Teresse 120%/120%/0% | |
| Crit Rate |  B-Rank Helena 50% (4 turns) |  DS Liberta 50% (4 turns) |  Red Hat Rou 50% (6 turns) |
 AOTU Diana 30% (8 turns) | |||
| Crit Damage |  Gluttonous Refi 125% (6 turns) | ||
| Property Damage |  AOTU Diana 220% (8 turns) |  PWB Refi 100% (2 turns) | |
| Chain stack buff |  PWB Refi +1 chain per hit (2 turns) | ||
| High chain stackers |  Celia Celia (all costumes) |  Luvencia Luvencia (all costumes) |  Hikage (LC) Hikage (LC)(single target only) |
| Vulnerability (single target) | 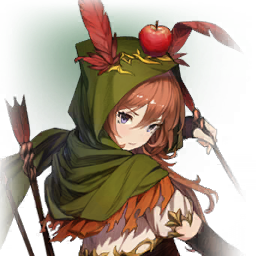 RH Zenith (Single target) 100% |  Cat Eris (LC) (Physical only, single target) 150% |  YL Blade (Physical only, single target) 150% |
| Vulnerability (AOE) |  TF Levia (Magic only) 120% main, 100% others |  GC Rafina (Physical only) 100% | |
| Vulnerability (elemental) |  WD Venaka (Wind only) 150% |  OP Ventana (Single target, light only) 100% | |
| Vulnerability (whole team) |  BA Teresse (up to 5 chains) 200% |  OM Liberta (10 or more chains) 130% |  NH Seir (stacks when Seir is hit) 22% per stack |
Honorable mentions
- Arines (3-star) is a very good physical buffer for beginners
- Elpis (4-star) is a very good magical buffer for beginners
- Kind student Samay (4-star) is a weak but cheap ATK / M.ATK buff
Beginner's guide to utility costumes
In some PVE battles, you will need utility costumes to deal with special kinds of difficult enemies. A quick guide is below:
- Buff removers can be used to deal with enemies that have strong counterattack buffs, strong offensive buffs, or energy guards. Note that against enemies with evasion, the buff removal does not apply unless you can connect a hit.
- Silencers can be used to prevent enemies from activating strong skills. This is especially useful in Tower of Salvation. Note that most bosses are immune to silence.
- DEF/M.RES reduction is necessary against some enemies with high DEF or M.RES. If you are struggling to deal damage against an enemy, check their stats in case they have high DEF or M.RES. Note: skills that reduce DEF/M.RES by less than 45% have not been included in this list.
- ATK/M.RES reduction, heal, and other defensive buffs are rarely needed in PVE, except in the most difficult end game content. Most of the time, the aim should be to maximize offense to win the battle as quickly as possible.
- SP regen is not usually needed in story PVE battles, but it is sometimes useful in longer battles like fiend hunts and guild raids. SP regen is necessary for the higher levels of Tower of Salvation. Note: costumes that regenerate less than 5 SP are not included in this list.
- Tanks are also usually not needed in story PVE battles. If you really need a tank, 4-star Specialist Andrew will work well most of the time because he has both taunt and evasion, so he can absorb strong attacks without even needing much gear or level investment (simply retry if he misses on his evasion chance).
When using utility costumes, always check the enemy status to see if they are immune to silence, buff removal, weakening, etc.
PVE Utility List
| Buff removal |  Scheherazade Scheherazade(all costumes) |  WB Yuri WB Yuri |  PMB Eleaneer PMB Eleaneer |
 SBC Olstein (stat buffs only) |  SE Rafina (barrier/energy guard only) | ||
| Silence |  FS Olstein FS Olstein |  CNS Schera |  B-Rank Eleaneer |
| Weakening (ATK/M.ATK) |  SBC Olstein (70% ATK / 70% M.ATK) |  Curse Celia (65% ATK) |  Descendant Celia (65% M.ATK) |
| Weakening (DEF/M.RES) |  Empress Rubia (45% DEF) |  B-Rank Gray (50% DEF) |  CNA Rafina (50% DEF) |
 DJ Venaka DJ Venaka(50% M.RES) |  LL Elise LL Elise (50% DEF/50% M.RES) | ||
| Team heal |  B-Rank Helena (100% of her M.ATK) |  OM Liberta (25% of target's max HP) |  MC Teresse (75% of her HP) |
| Team energy guard |  AD Diana (1100% of her M.ATK) |  Red Hat Rou (150% of her max HP) |  PWB Refi (50% of target's max HP) |
| Team barrier (damage reduction) |  TI Helena (70%) |  Gluttonous Refi (50%) | |
| SP Regen |  TI Helena (6 SP) |  PP Justia (6 SP) |  Gluttonous Refi (5 SP) |
 FS Olstein FS Olstein(6 SP per hit) |  NB Eclipse (1 SP per hit, attacks 3 times) |  B Seir (recharges SP when hit, 3 SP per hit) |
Honorable mentions
- Marauder Kry (4-star) applies 50% DEF reduction
- Kind Liberator Samay (4-star) applies 50% M.RES reduction
- Lucrezia (4-star) is a cheap AOE silencer that requires no investment
