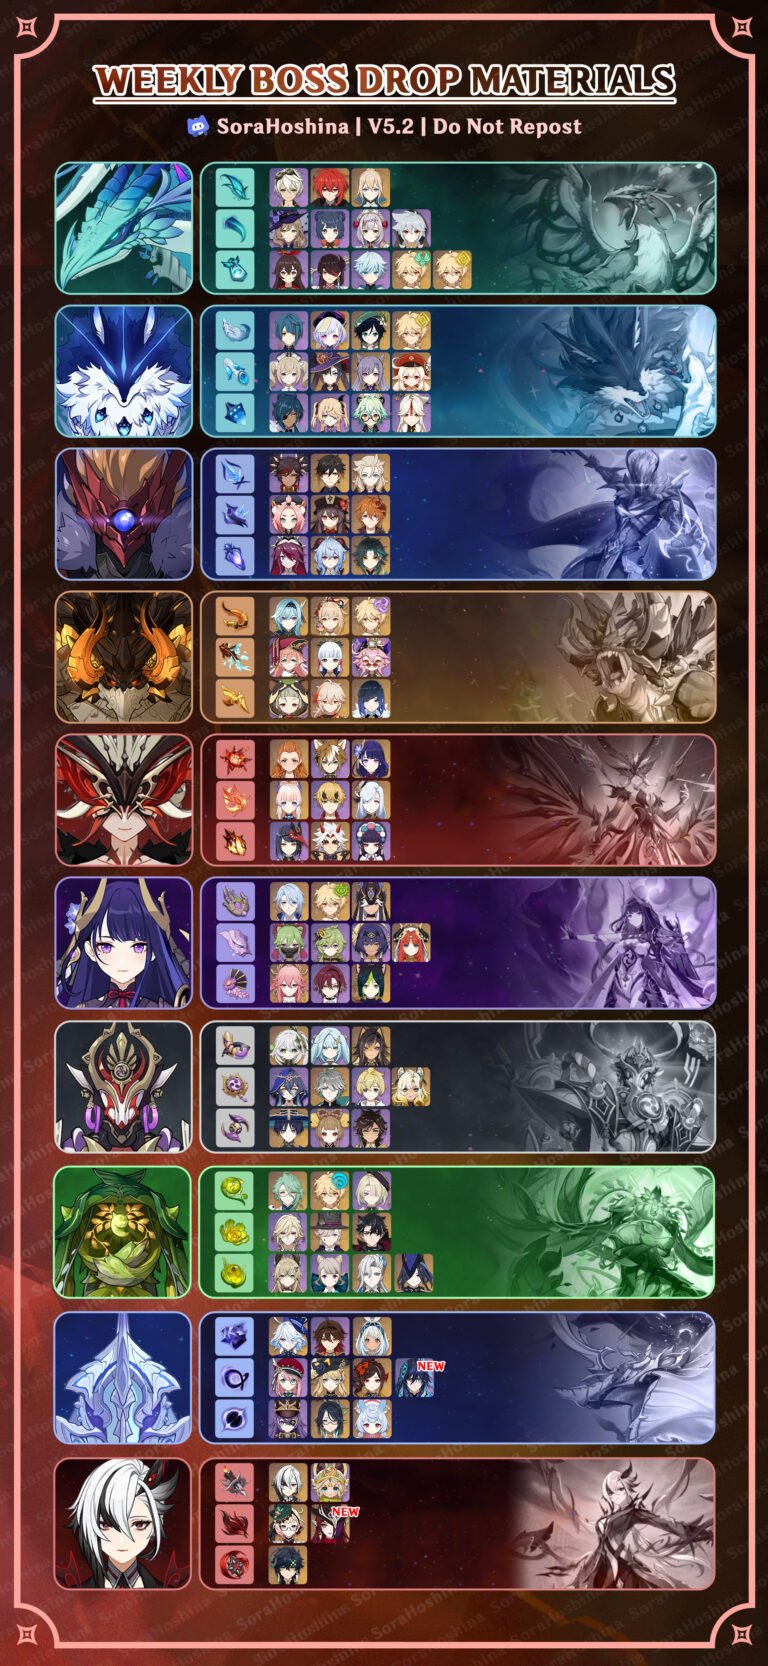
Table of Contents
Floor 11 is the start of a challenge in Spiral Abyss for Genshin Impact players. The difficulty spikes up a little bit from the previous floor, in addition to the ever-changing roster of enemies in each version. In version 5.1, you will encounter lots of mobs and a pair of Local Legends. Follow this guide to know more about enemies' lineup, their weaknesses, and how to complete the entire chamber on Floor 11.
Blessing of the Abyssal Moon

Reminder: Blessing of the Abyssal Moon will change every refresh cycle and may not be updated here. But the enemies list and strategy will remain the same.
Rugged Moon
After a character uses an Elemental Skill, said character's DEF increases by 60% for 9s.
Ley Line Disorder
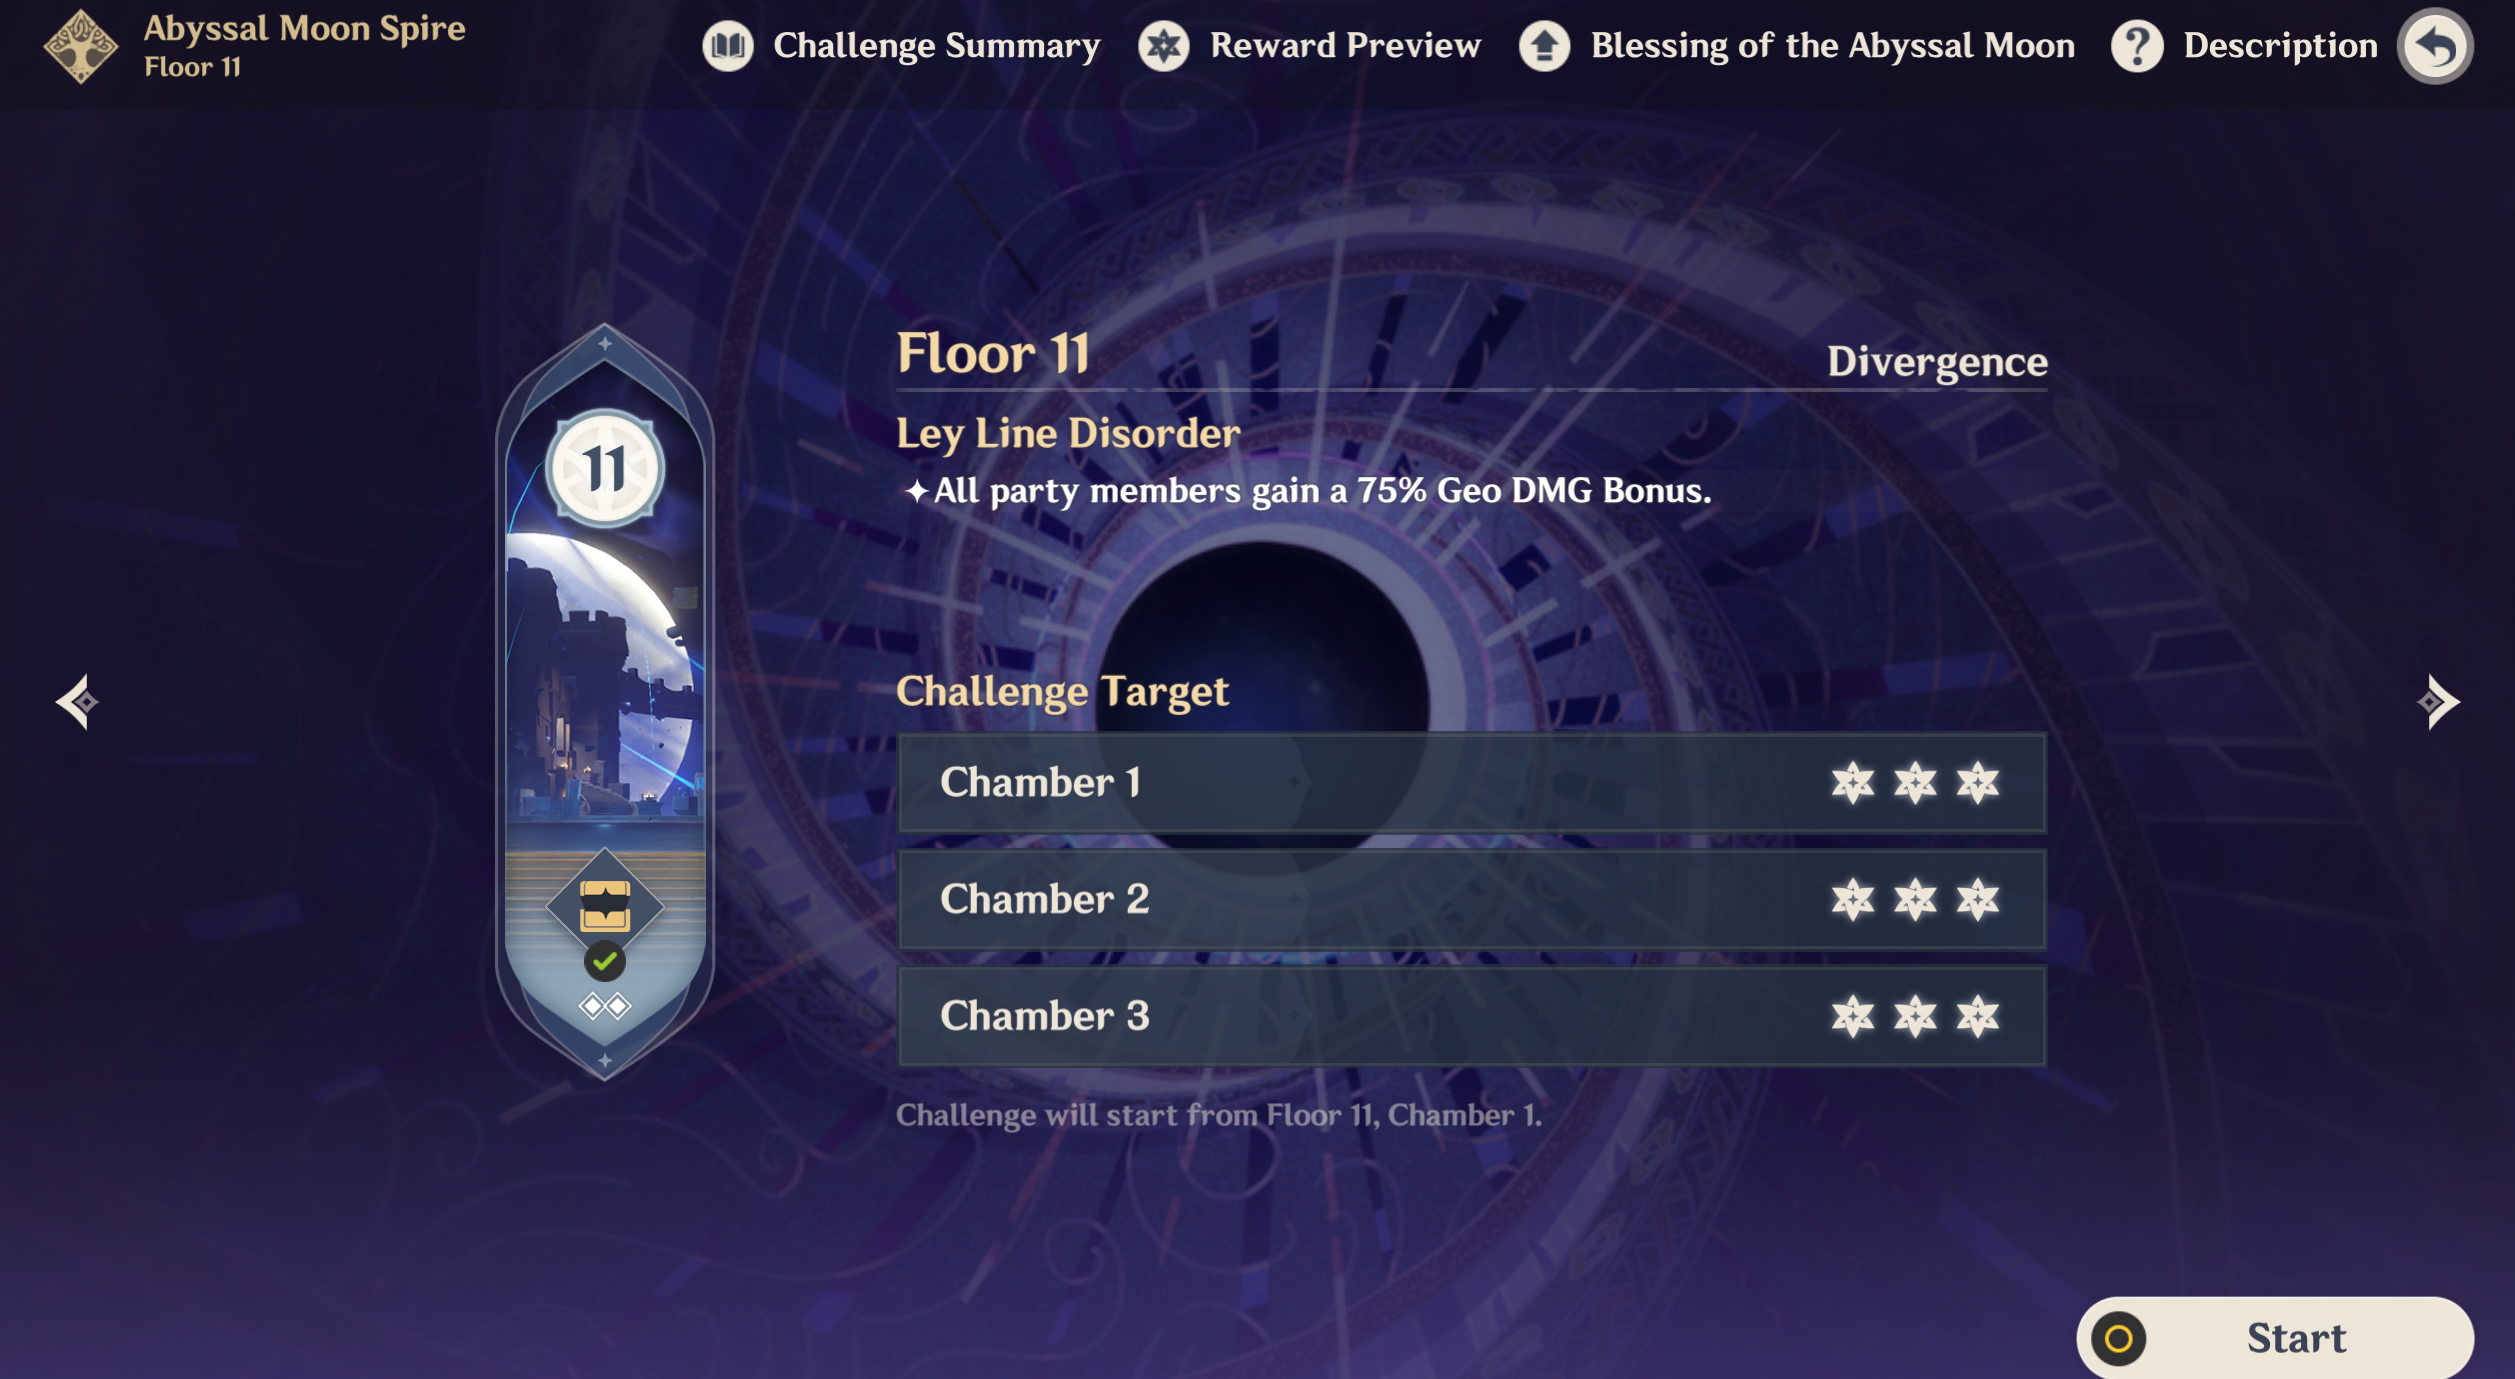
- All party members gain a 60% Geo DMG Bonus.
- All party members gain a 60% Pyro DMG Bonus.
Team Recommendations
There are Leyline Monolith stages for Chamber 1, and some enemies spawn near each other/easy to gather while some are a bit far away. You can bring along an Anemo CC to any of the teams if you want. If you plan to bring a Bloom team, remember that the explosion from the Dendro Cores will also deal some damage and reduce the Monolith's HP.
Team Recommendations for the First Half
| The recommended elements for the First Half |        All except those mentioned below |
| The not recommended elements for the First Half |  Hydro ➥ Hydro DPS is not recommended because, in chamber 3, there are 2 enemies with high Hydro RES (Vishap and Mirror Maiden). But if your DPS is very strong, this RES is nothing and you can bring them if you want. |
Example:
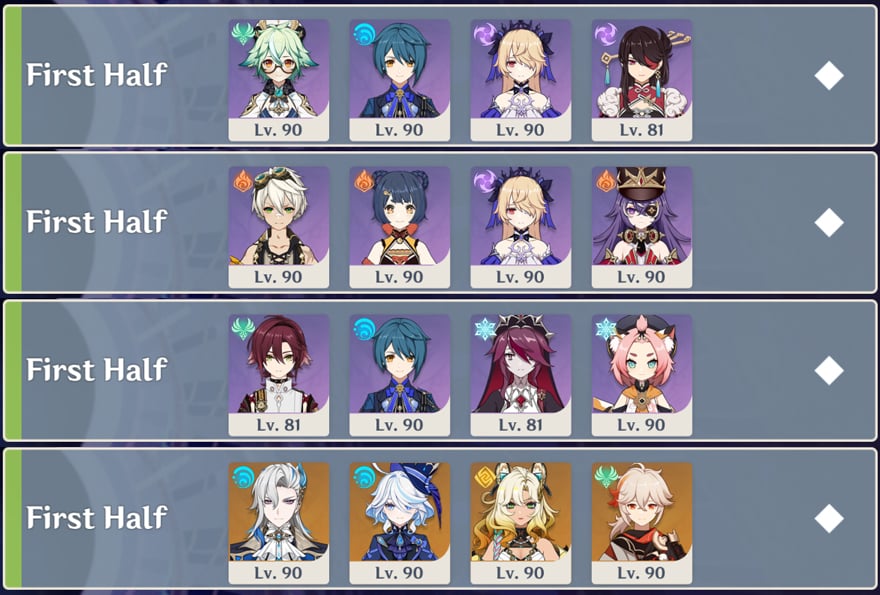
(1) Taser Team: Sucrose + Xingqiu + Fischl + Beidou
(2) Overload Team: Bennett + Xiangling + Fischl + Chevreuse
(3) Freeze Team: Heizou + Xingqiu + Rosaria + Kaeya/Diona
(4) Hypercarry Team: Neuvillette + Furina + Xilonen + Kazuha
You can find more lineups in the official HoYoLAB Lineup Simulator here.
Team Recommendations for the Second Half
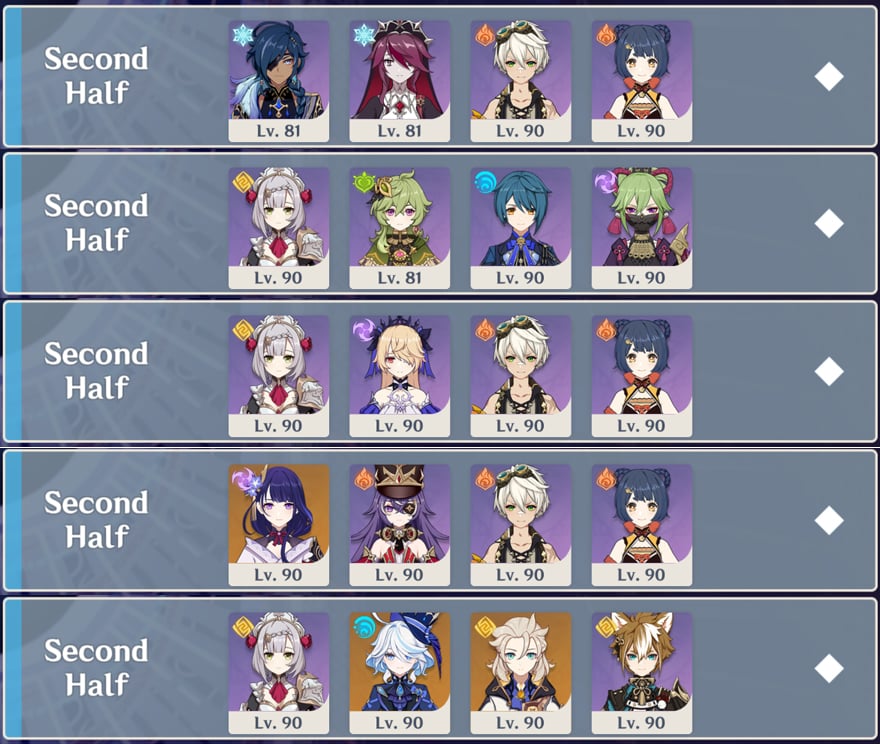
| The recommended elements for the Second Half | All except those mentioned below |
| The not recommended elements for the Second Half | Hydro ➥ Hydro DPS is yet again not recommended here more so than in the first half because the enemies in chamber 3 are completely immune to Hydro. If it's Hydro support or sub-dps then they're okay to bring, but Hydro DPS is not recommended. |
Example:
(1) Melt Team: Kaeya + Rosaria + Bennett + Xiangling
(2) Hyperbloom Team: Noelle/Sucrose + Collei + Xingqiu + Kuki Shinobu
(3) Overload Team: Noelle + Fischl + Bennett + Xiangling
(4) Overload Team: Raiden + Chevreuse + Bennett + Xiangling
(5) Sacrificial HP Team: Noelle + Furina + Albedo + Gorou
You can find more lineups in the official HoYoLAB Lineup Simulator here.
Floor 11 Chamber 1
First Half
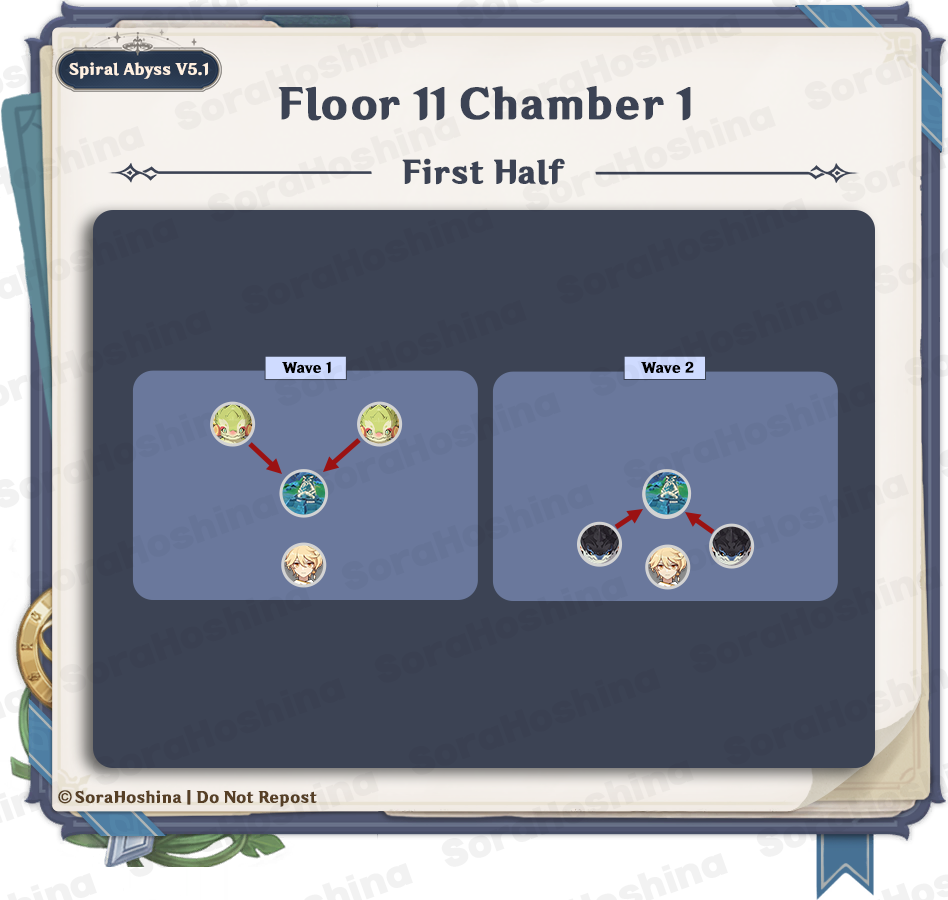
1st Wave: Yumkasaurus x2
2nd Wave: Koholasaurus x2
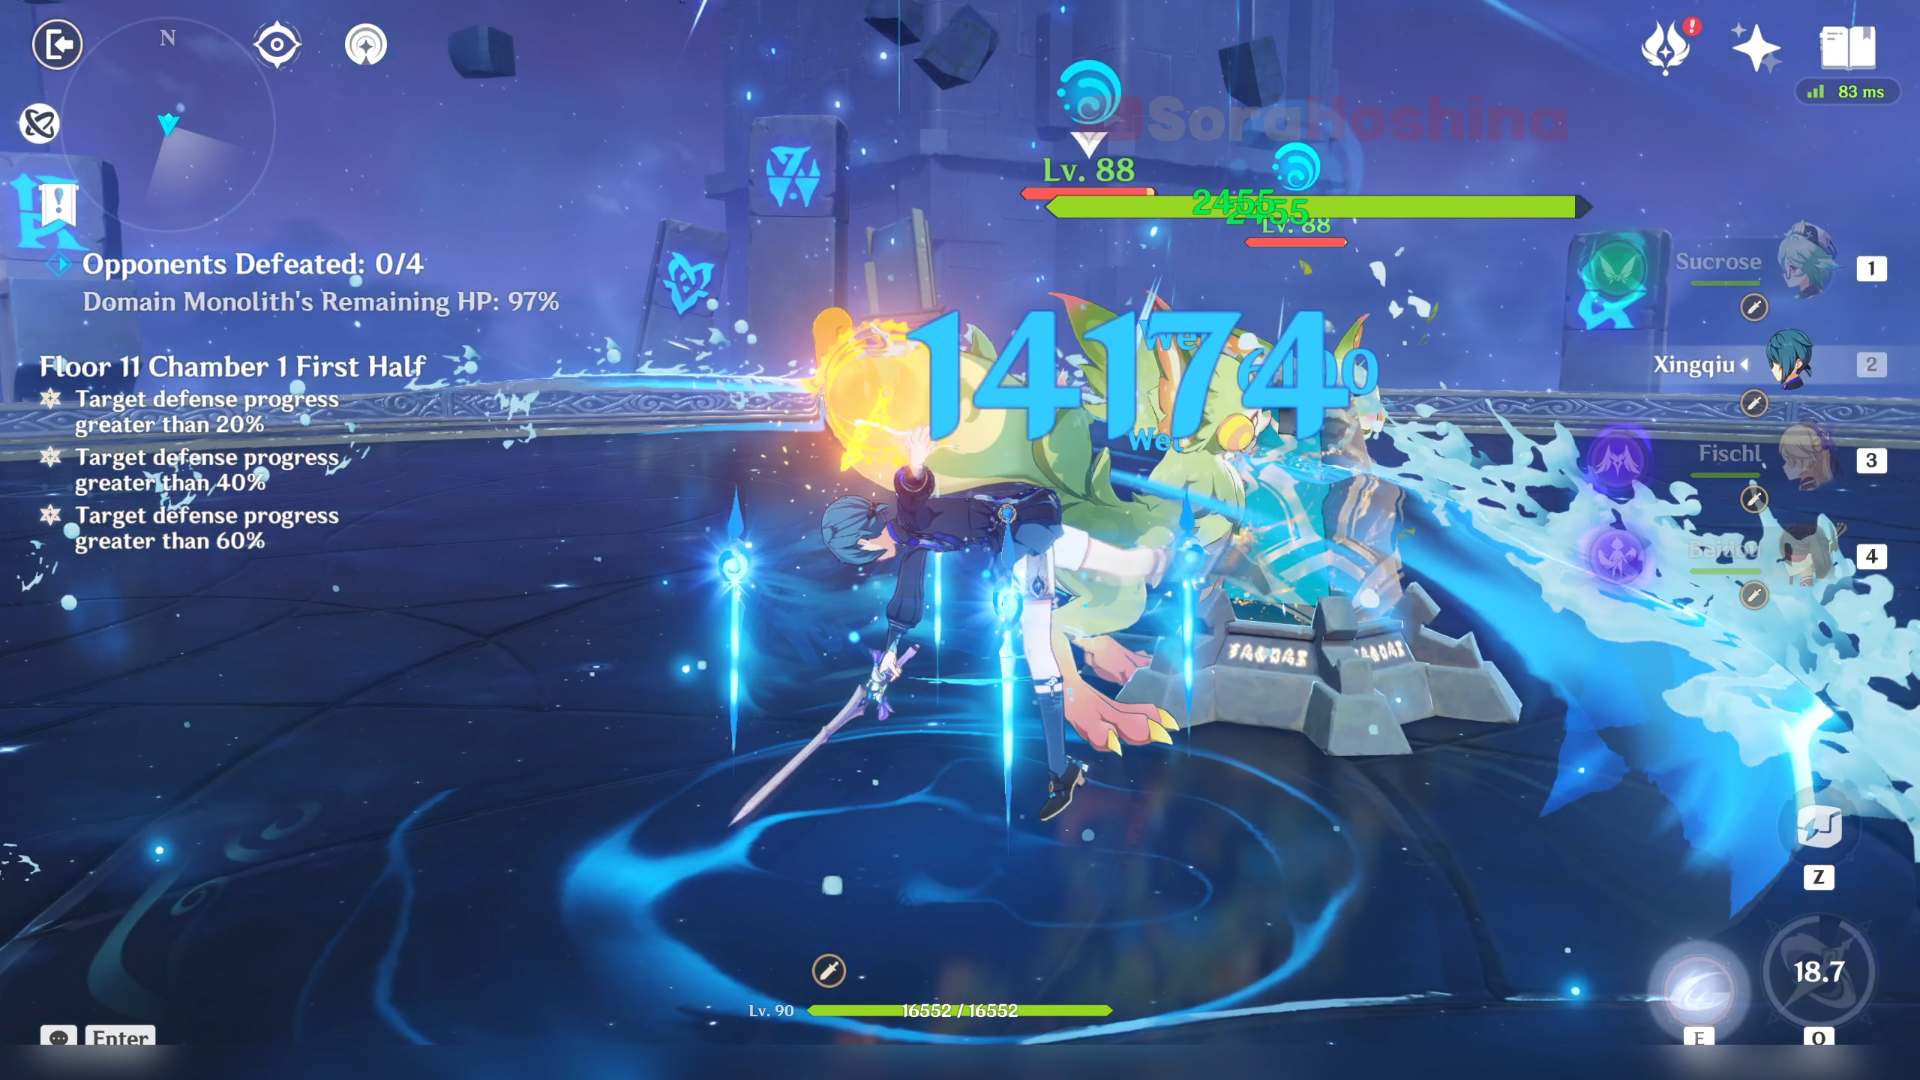
In the first wave, there are only 2 Yumkasaurus at the front. And since both of them focus on the Monolith, you can bet they will immediately run forward to the Monolith. When the challenge starts, go to the Monolith and start attacking the green dinosaurs to trigger aggro. If your DPS is lacking, once the aggro kicks in, lure them to another spot so their hit won't attack both you and the Monolith.
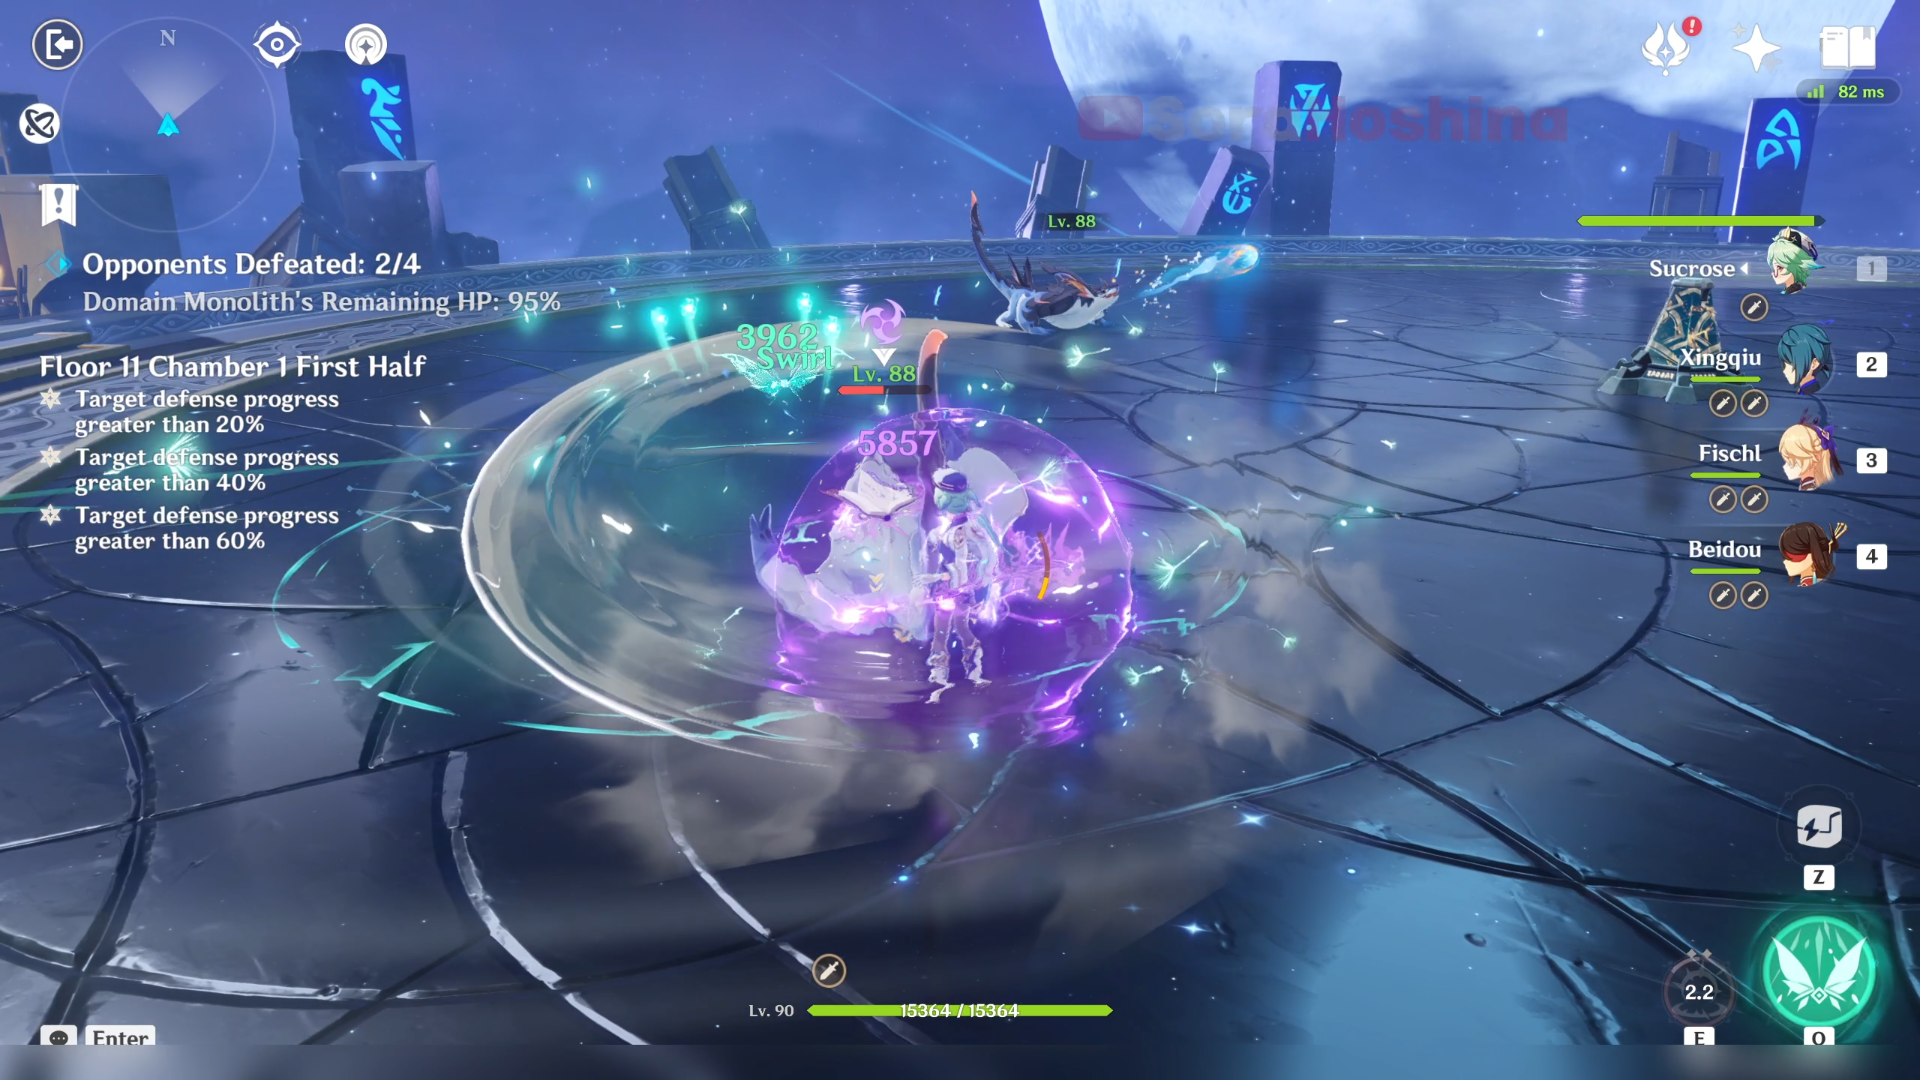
In the second wave, there are 2 Koholasaurus at the back. Same as before, these two will focus on the Monolith. Unfortunately, they're pretty slow and and take their sweet time to reach the Monolith (and they use ranged attack) so it's best if you're the one that comes after them one by one.
Second Half
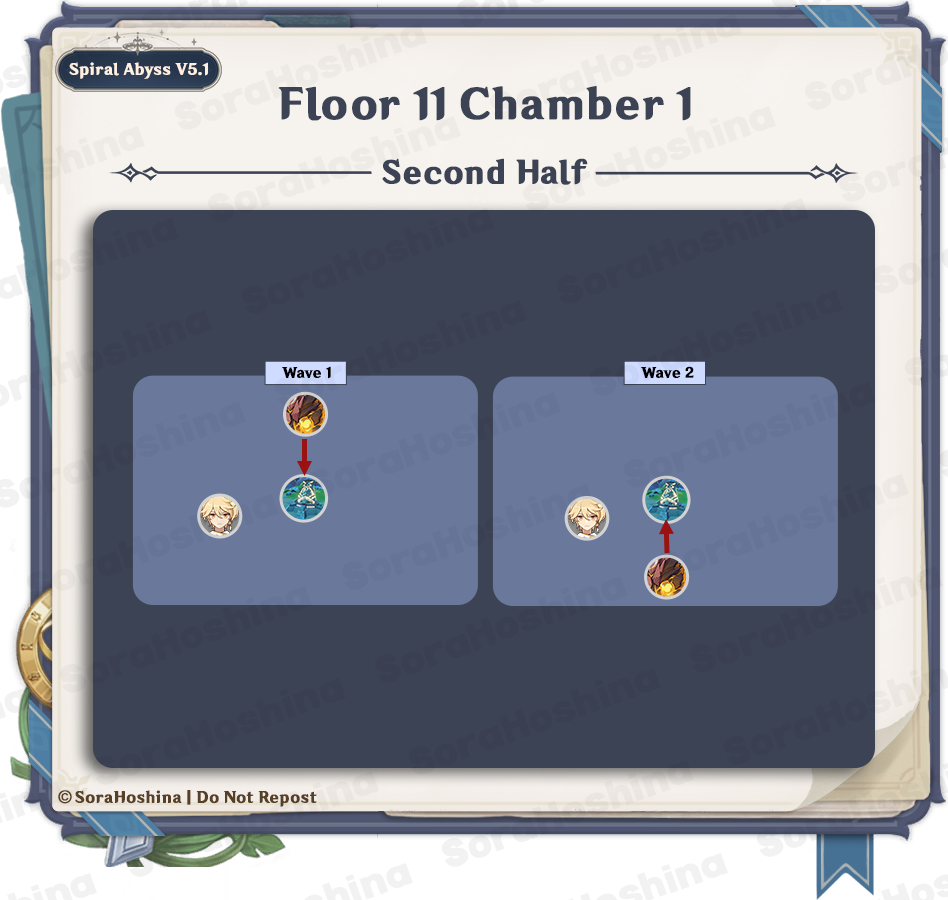
1st Wave: Fluid Avatar of Lava x1
2nd Wave: Fluid Avatar of Lava x1
In the first wave, only 1 enemy can be seen in the front area. This guy also focuses on the Monolith and leaves you alone. Immediately attack the Avatar of Lava and once the aggro kicks in, lure it somewhere else because its attack range is pretty wide so the Monolith might take collateral damage if you're near it.
The second wave also features the same enemy at the back and it also attacks the Monolith. Once the first wave ends, immediately go to the back side so you can reach the Avatar of Lava before it can even go to the Monolith. Then, as usual, spam all your attacks on it.
Floor 11 Chamber 2
First Half
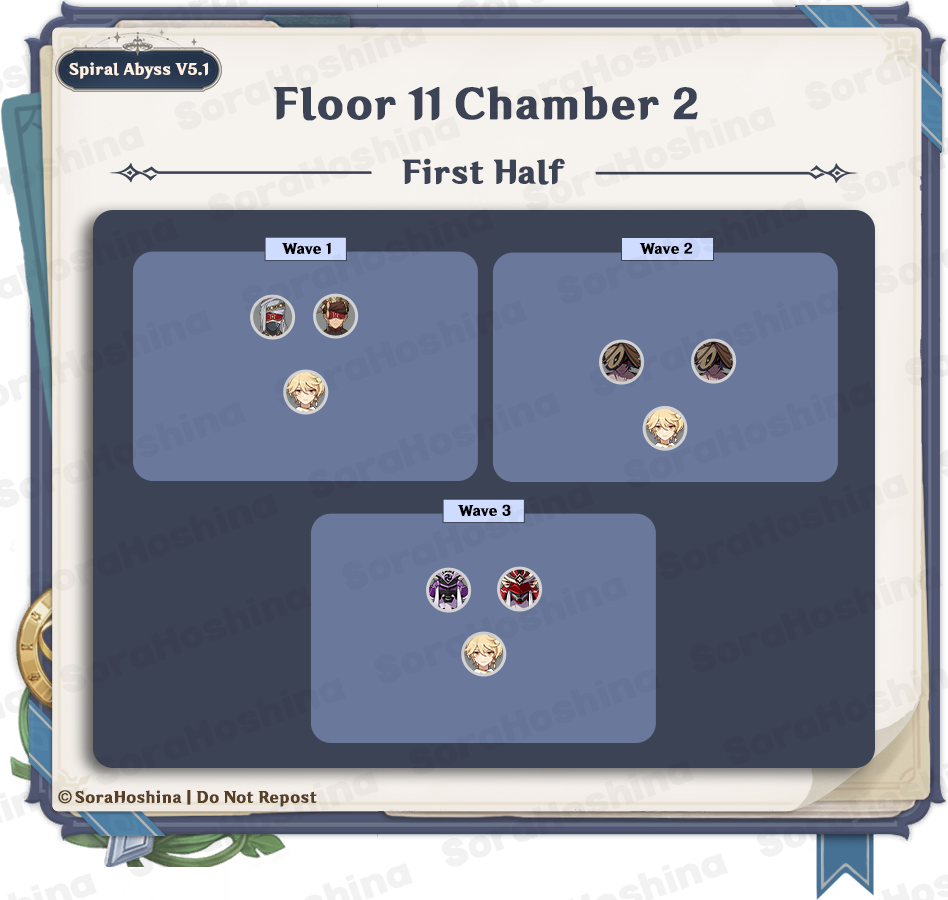
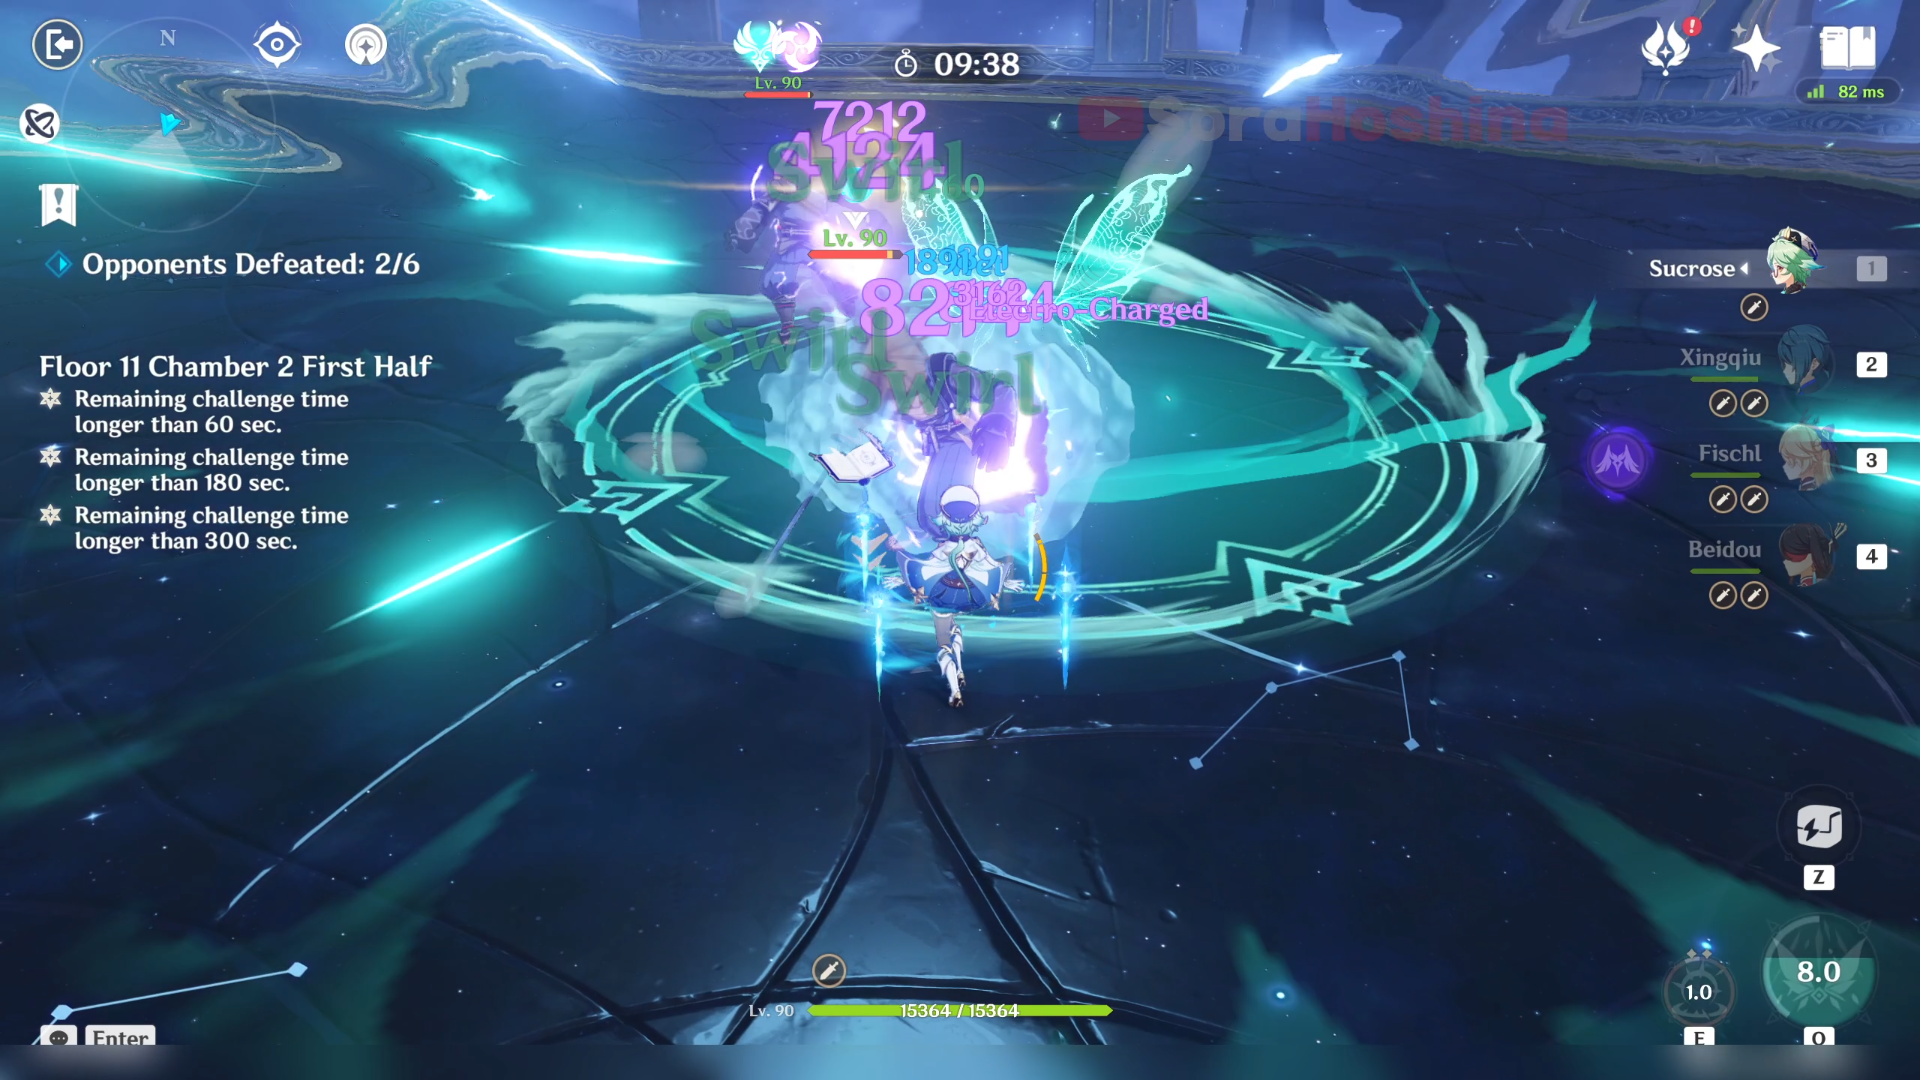
1st Wave: Eremite Sunfrost x1 & Daythunder x1
2nd Wave: Nobushi: Jintouban x2
3rd Wave: Kairagi: Dancing Thunder x1 & Fiery Might x1
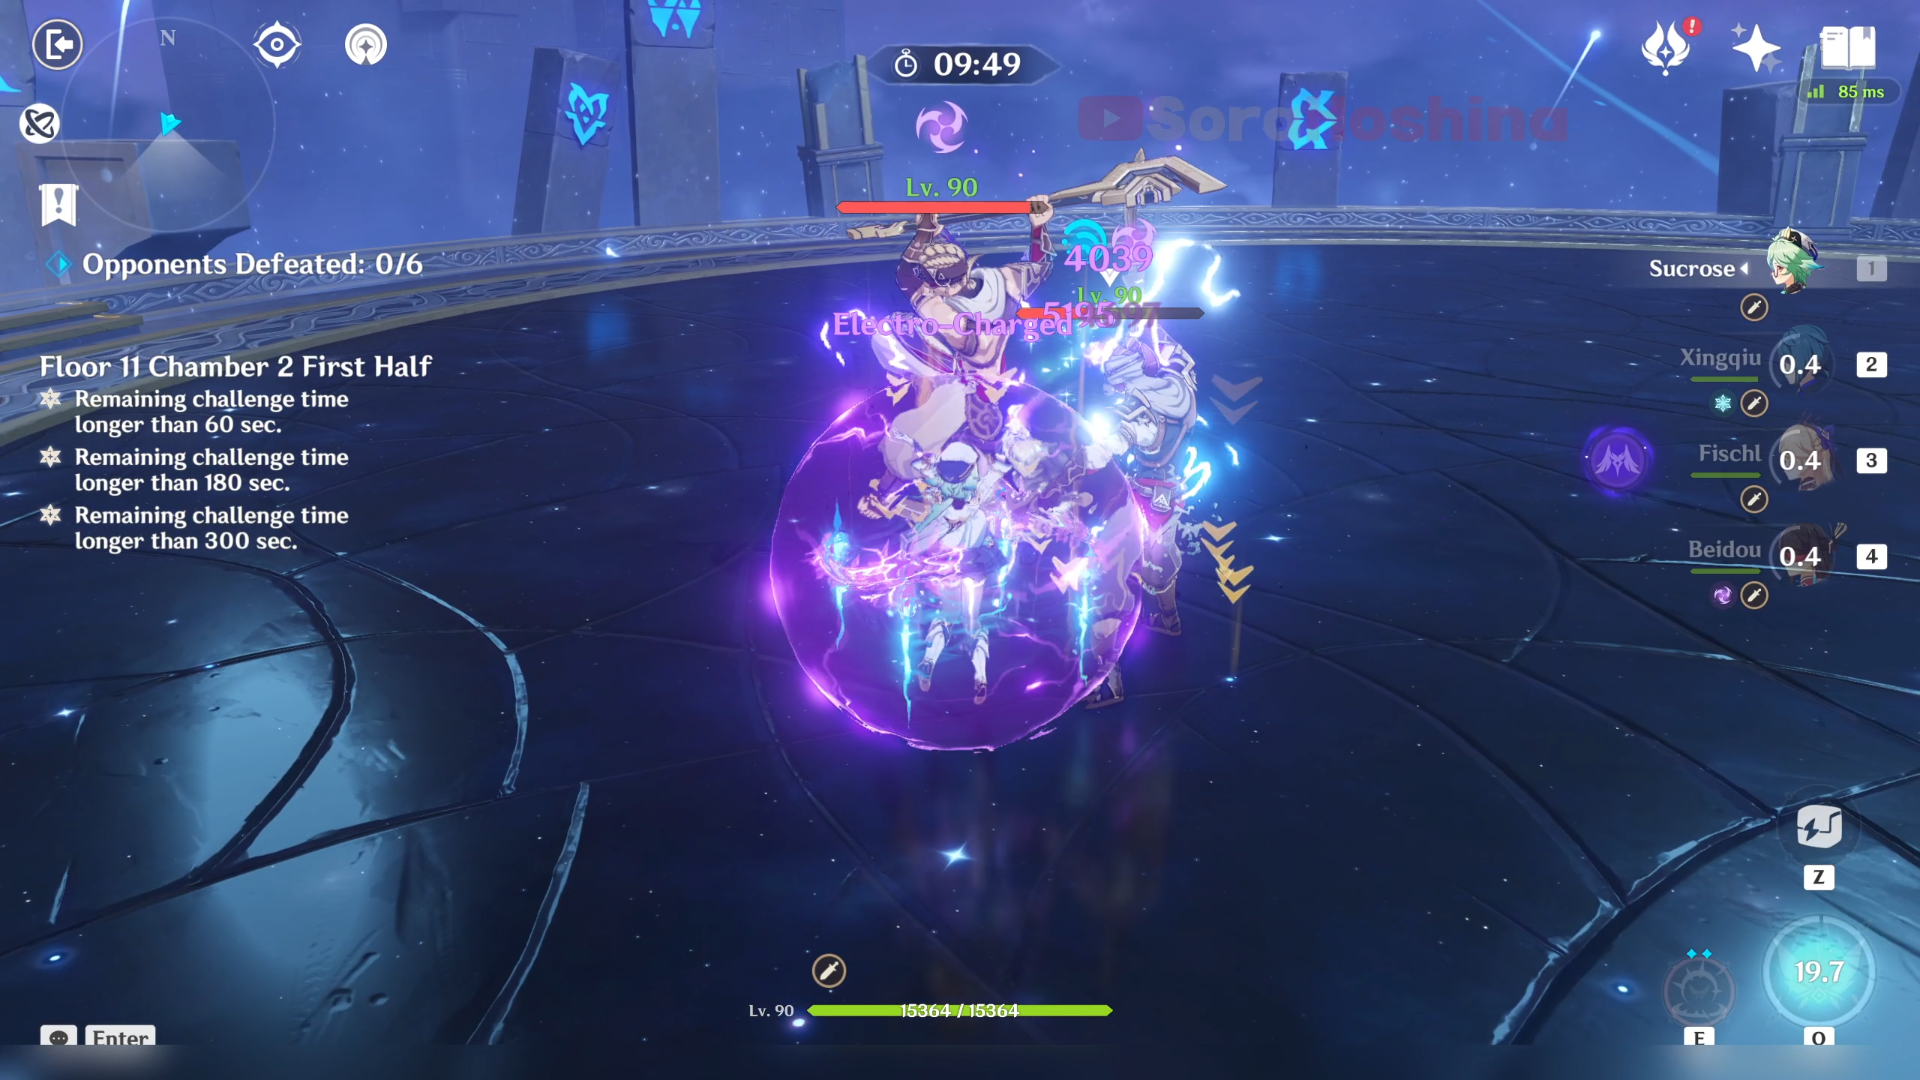
In the first wave, there are 2 Eremite at the front area. These two can trigger Superconduct reactions through their Electro x Cryo attacks. Fortunately, the Eremites here are melee attackers so they won't stray too far away from each other as they will chase after you. So all you have to do is attack both of them at the same time but also beware of their attacks.
In the second wave, there are 2 Nobushi in the middle area. Since they're the same enemy, they won't trigger any reactions so that's one less worry. What you need to worry though is that the Nobushi has an attack that lunges forward so this might break the CC as they dash toward another direction. If something like that happened, just focus on defeating them one by one.
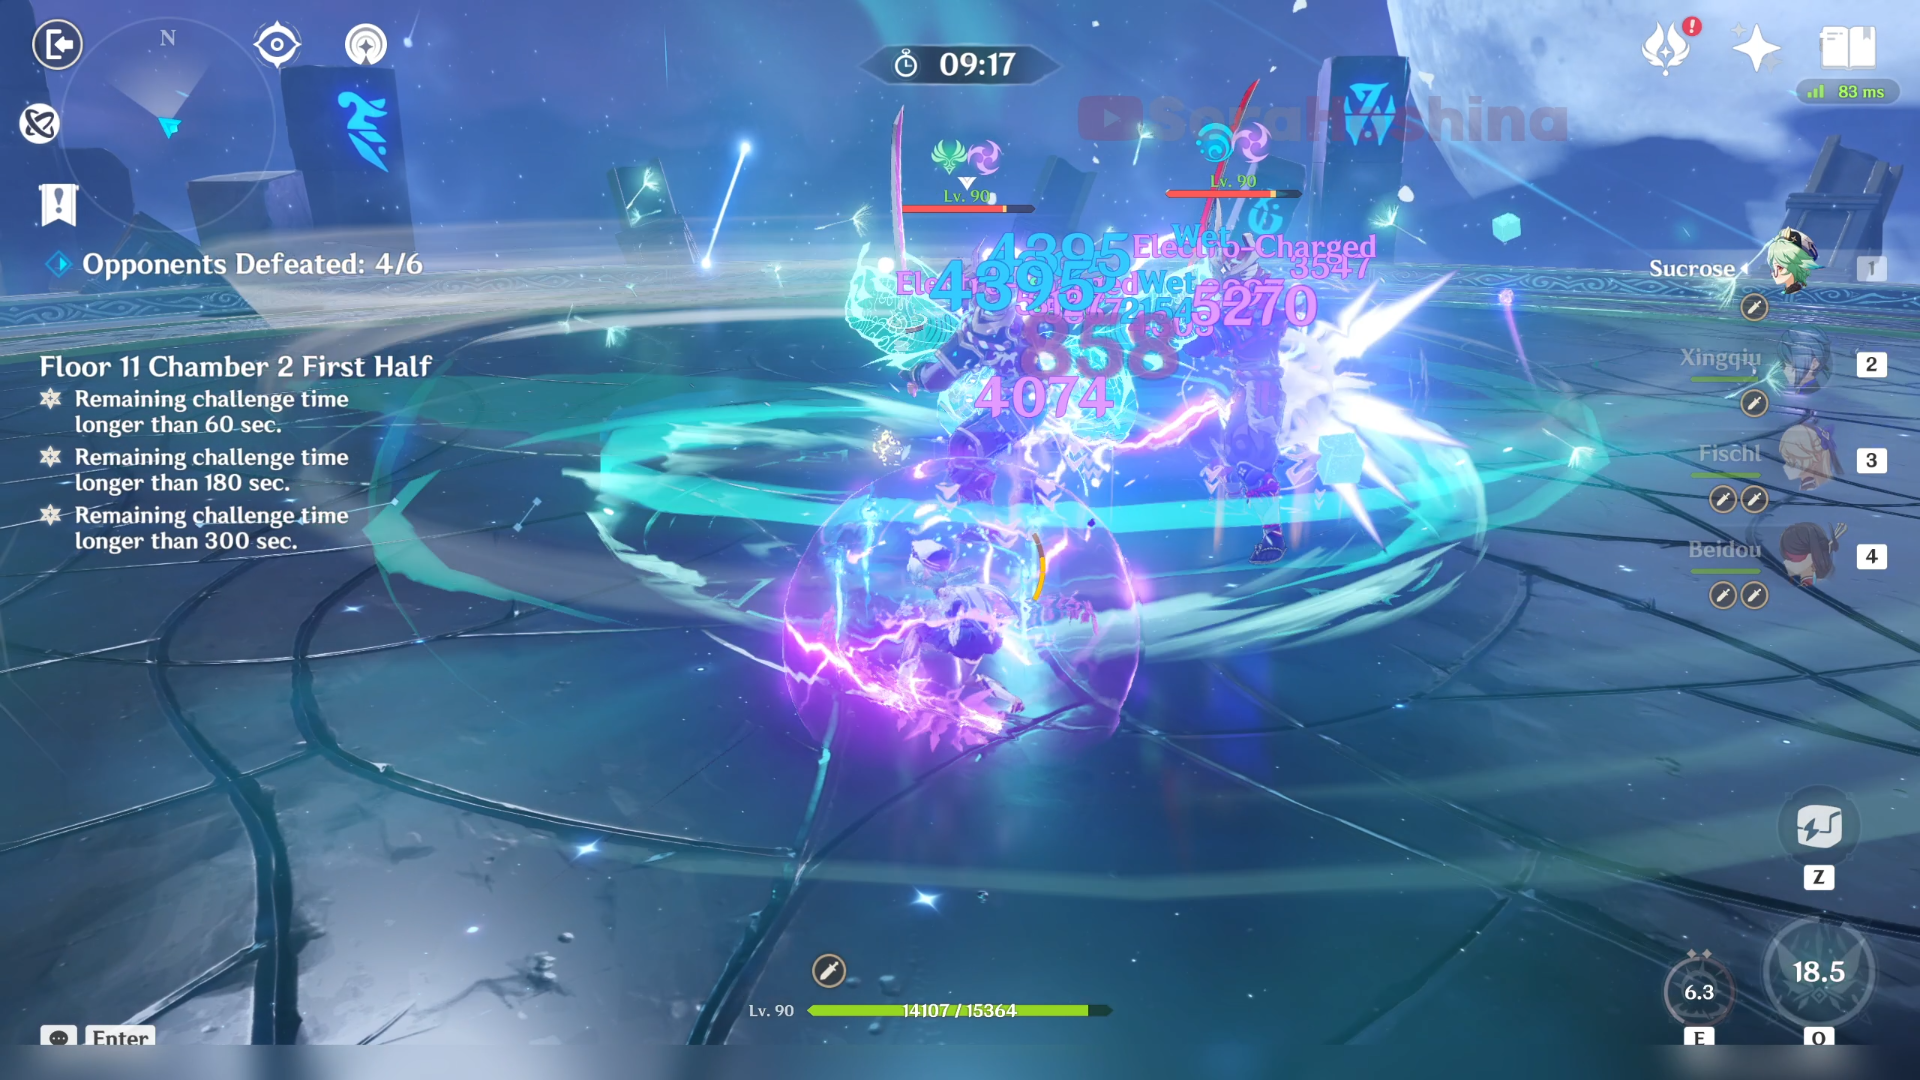
In the third wave, similar to the before, the two Kairagi may use a dash attack whenever they want. If you don't bring an Anemo CC and don't want them to move far away, get near the wall at the front area (make sure your back is facing the wall at the front) so if the Kairagi use a dash attack, the wall will help stop them.
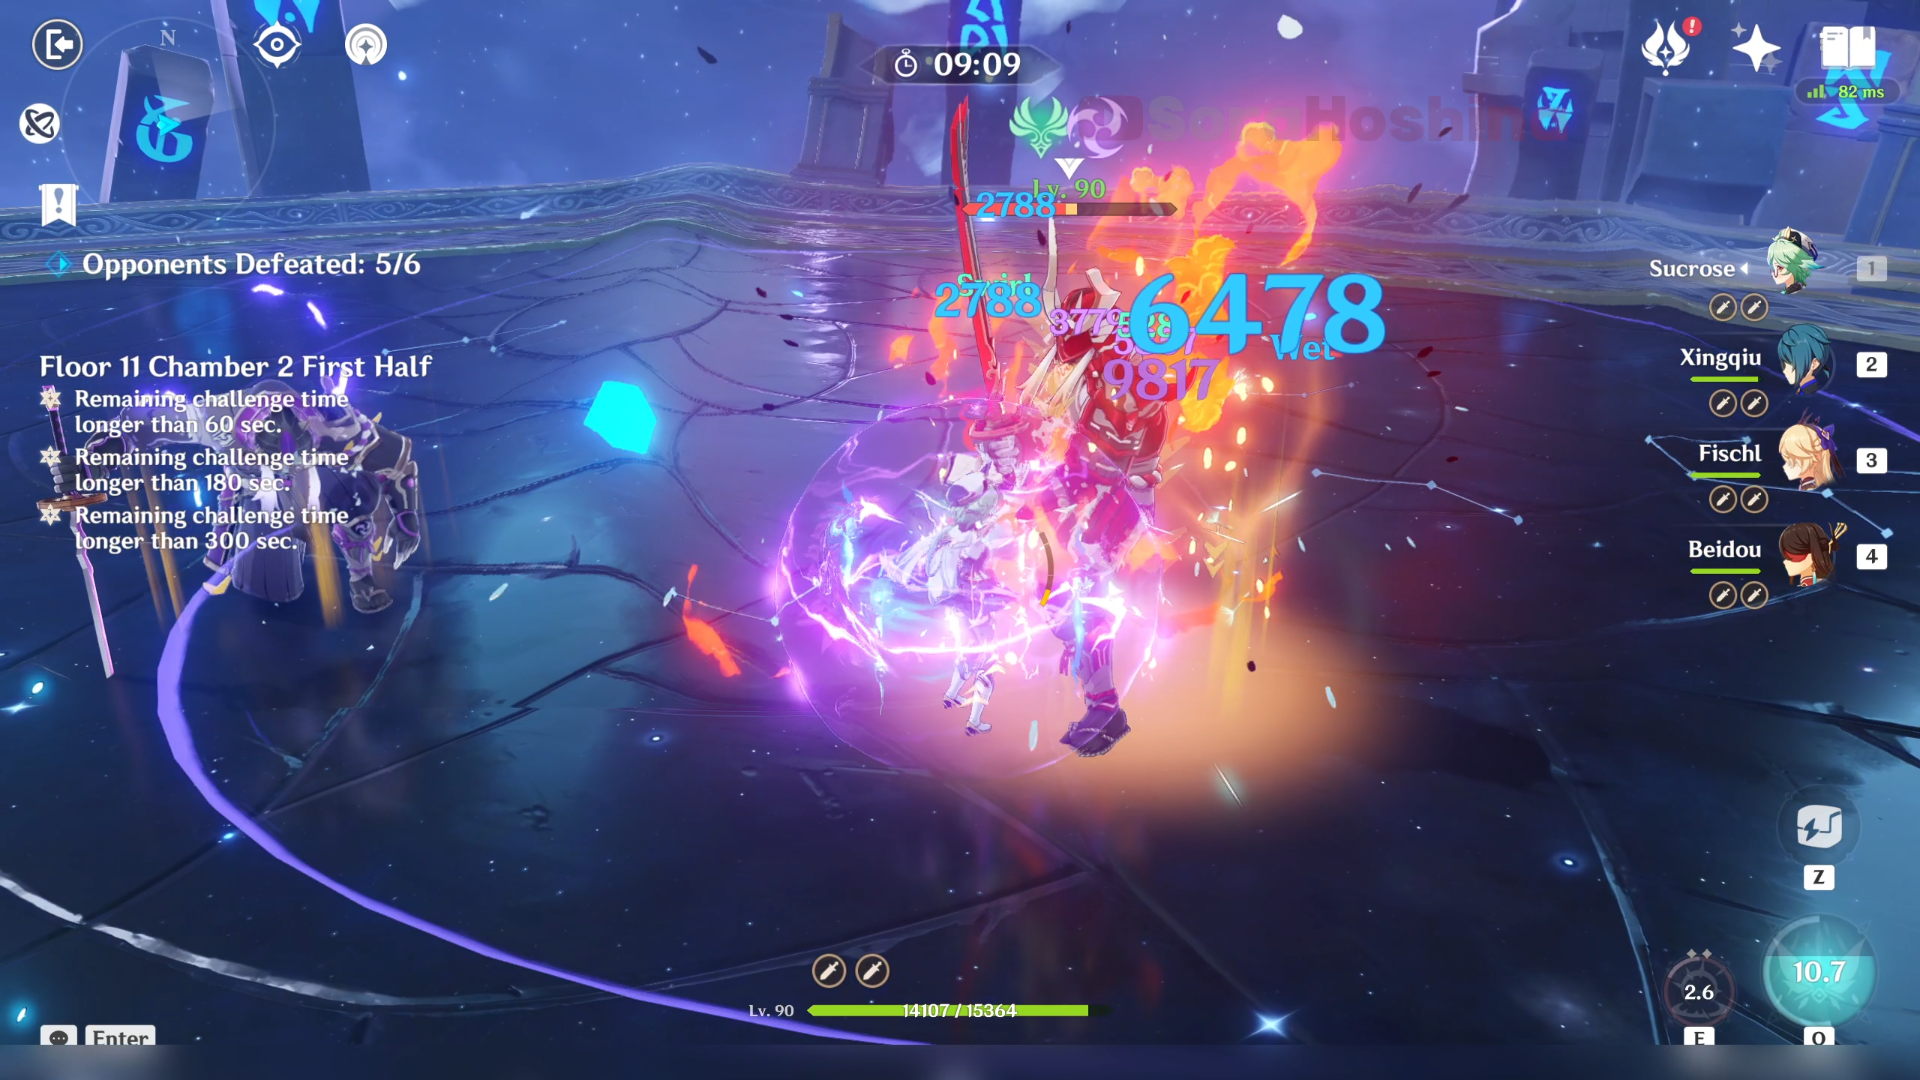
Also, you have to watch out for their ability to regenerate half of their HP and be immune to CC if one of the Kairagi dies while the other one is still alive. The best option to avoid one of them recovering half their HP is to (1) make sure you attack both of them until their HP is the same before finishing them off or (2) use DPS with high burst damage to kill both of them at the same time or (3) using Freeze team to immobilize the Kairagi, giving you a longer window to kill it before it can even heal.
Second Half
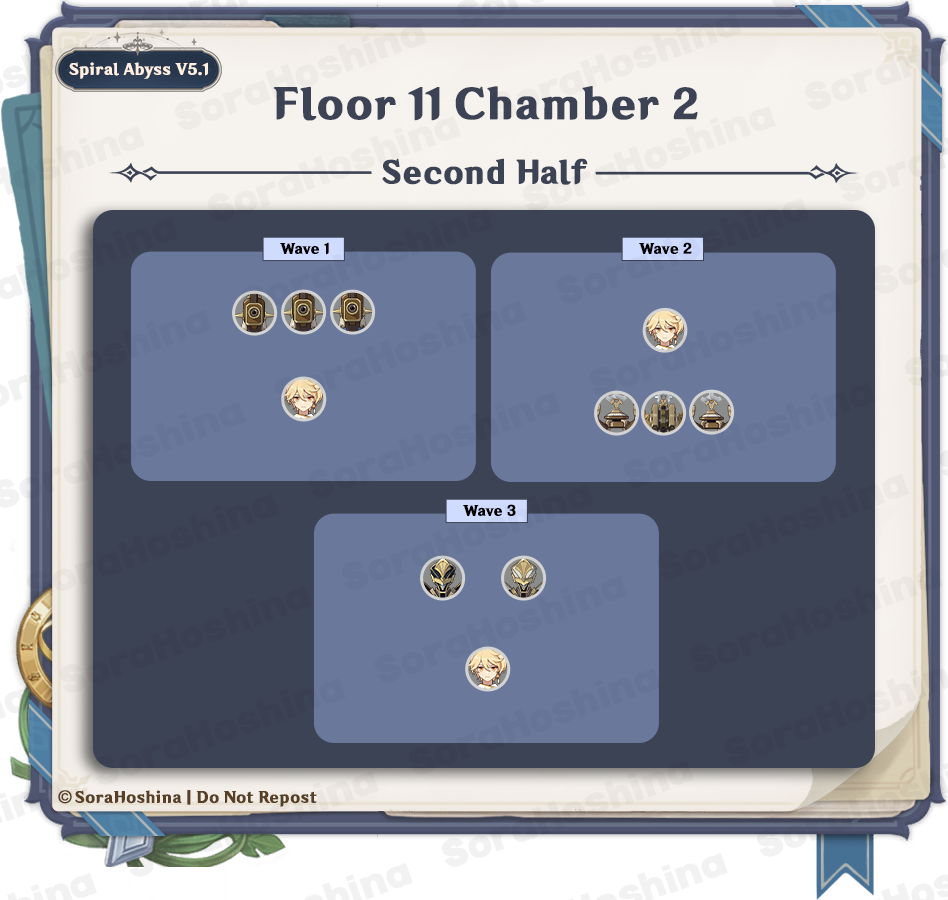
1st Wave: Recon Log Mek - Ousia x3
2nd Wave: Construction Specialist Mek - Ousia x1 & Arithmetic Enhancer Mek - Ousia x2
3rd Wave: Assault Specialist Mek - Ousia x1 & Suppression Specialist Mek - Ousia x1
In the first wave, there are 3 Meka at the front. These 3 are just mobs so you shouldn't have too much problem with it since their HP is pretty low.
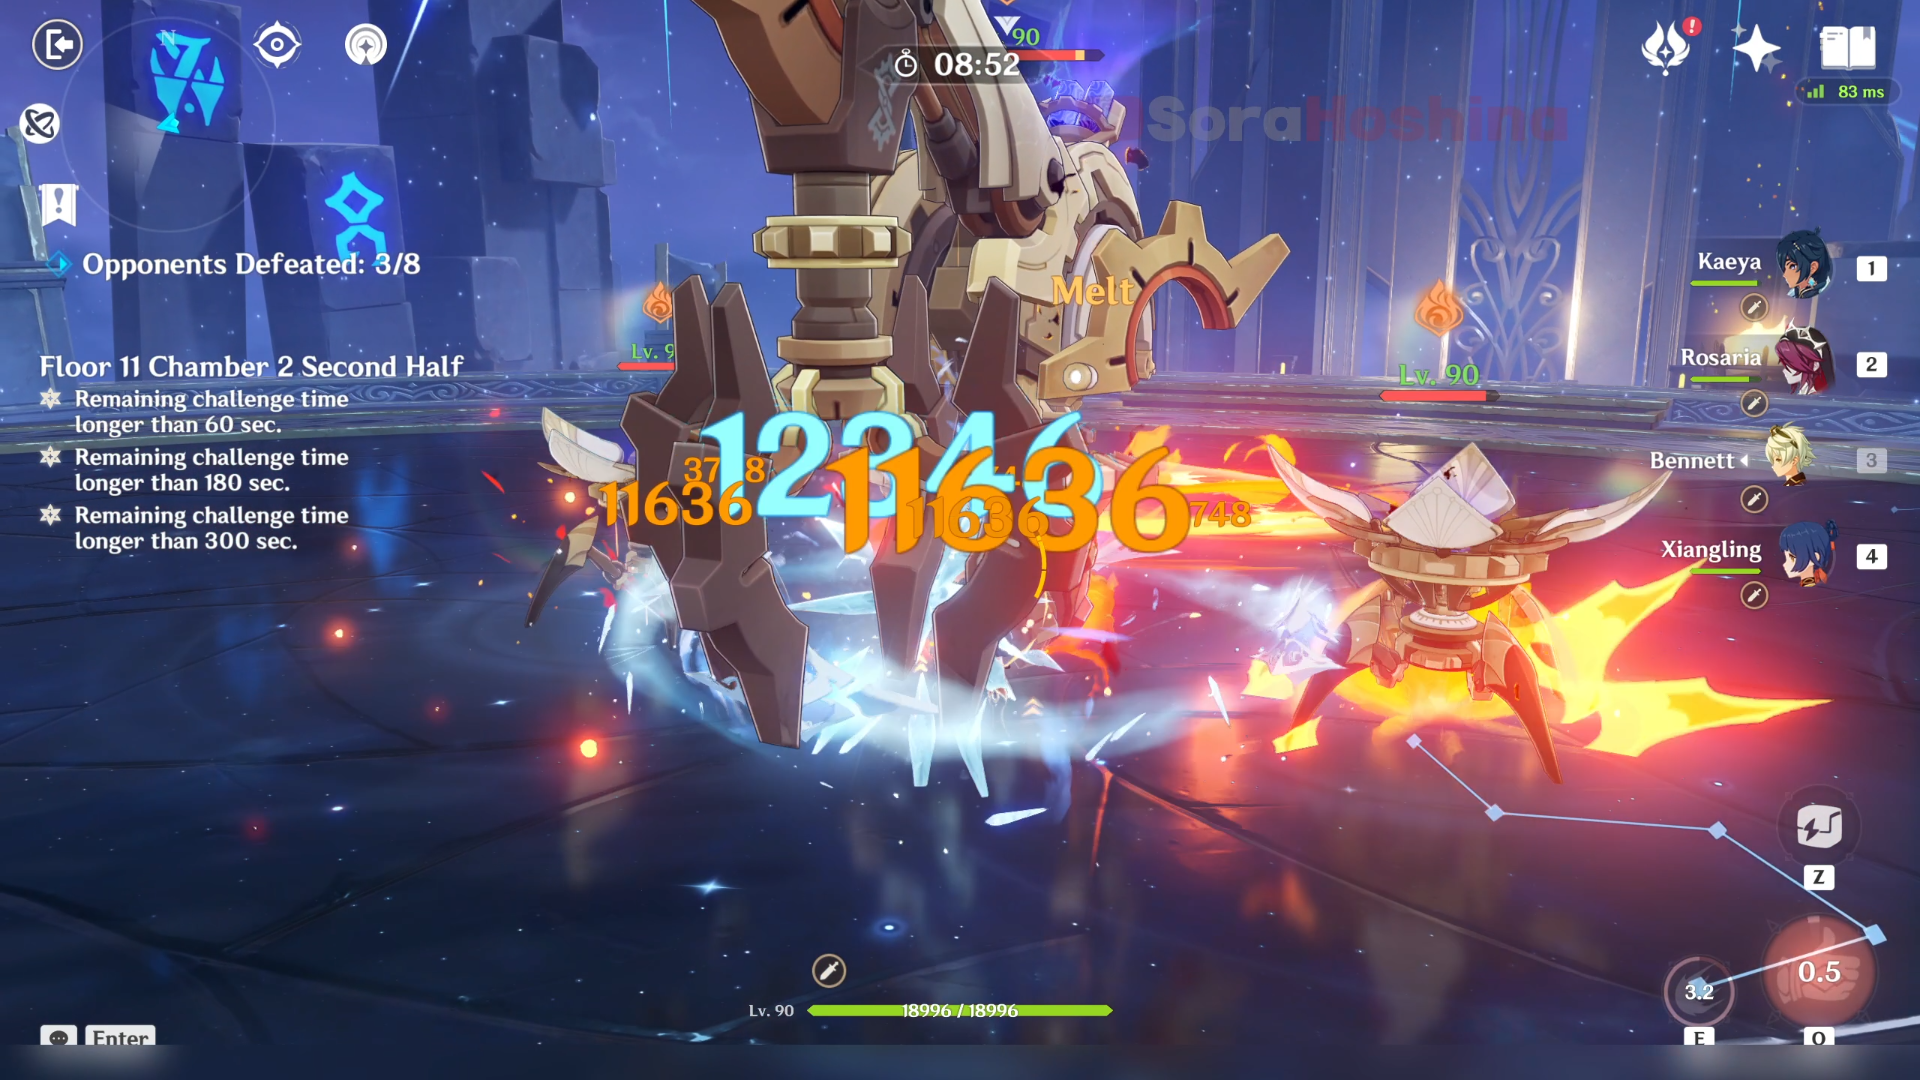
Next in the second wave are 2 Meka mobs and 1 Meka elite in the back area. The big one deals Cryo damage, but since the Meka mobs here are supporters and not attackers, you don't have to worry about being frozen unless you bring a character that can inflict Hydro on self. Speaking of support, one of those Meka mobs can increase the elite's All DMG RES by 20%, so if you double the mob, the elite will get 40% RES (correct me if I'm doing the math incorrectly). If you feel like your damage is too low for the elite enemy, defeat the two Meka mobs first so it won't get any buff.
In the second wave, there are another 2 Meka elites in the front area. Between the left and right one, go to the left one (Suppression Specialist) because that one moves pretty slowly while the other one (Assault Specialist) will often chase after you. Their attack combination can trigger Overload and knock back your unshielded character so be careful of that.
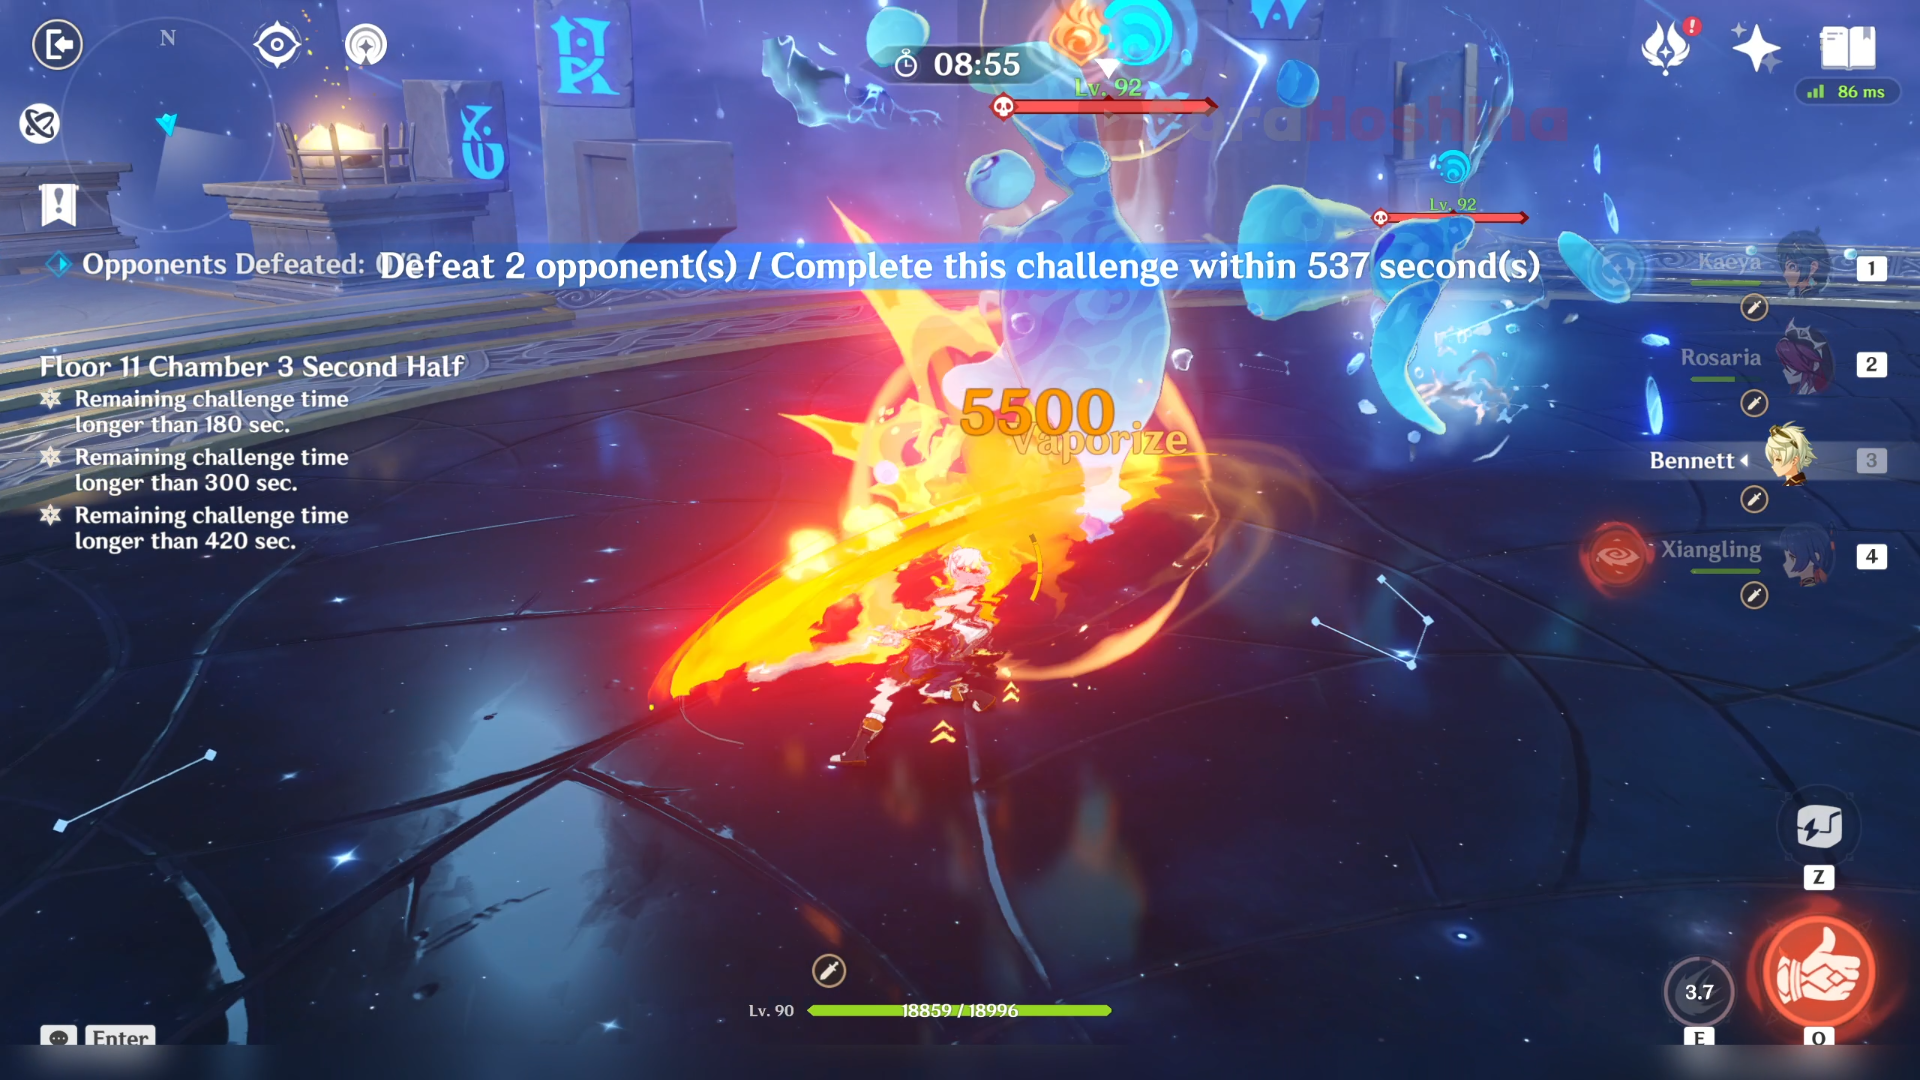
Floor 11 Chamber 3
First Half
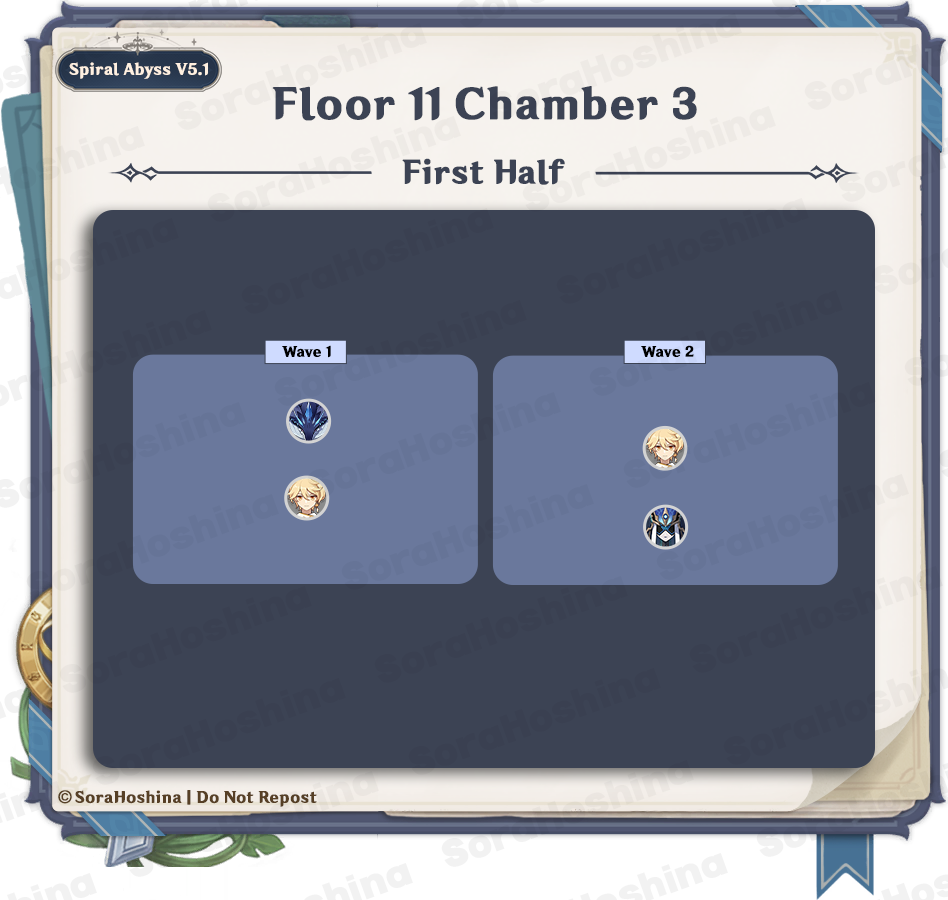
1st Wave: Primordial Bathysmal Vishap x1
2nd Wave: Mirror Maiden x1
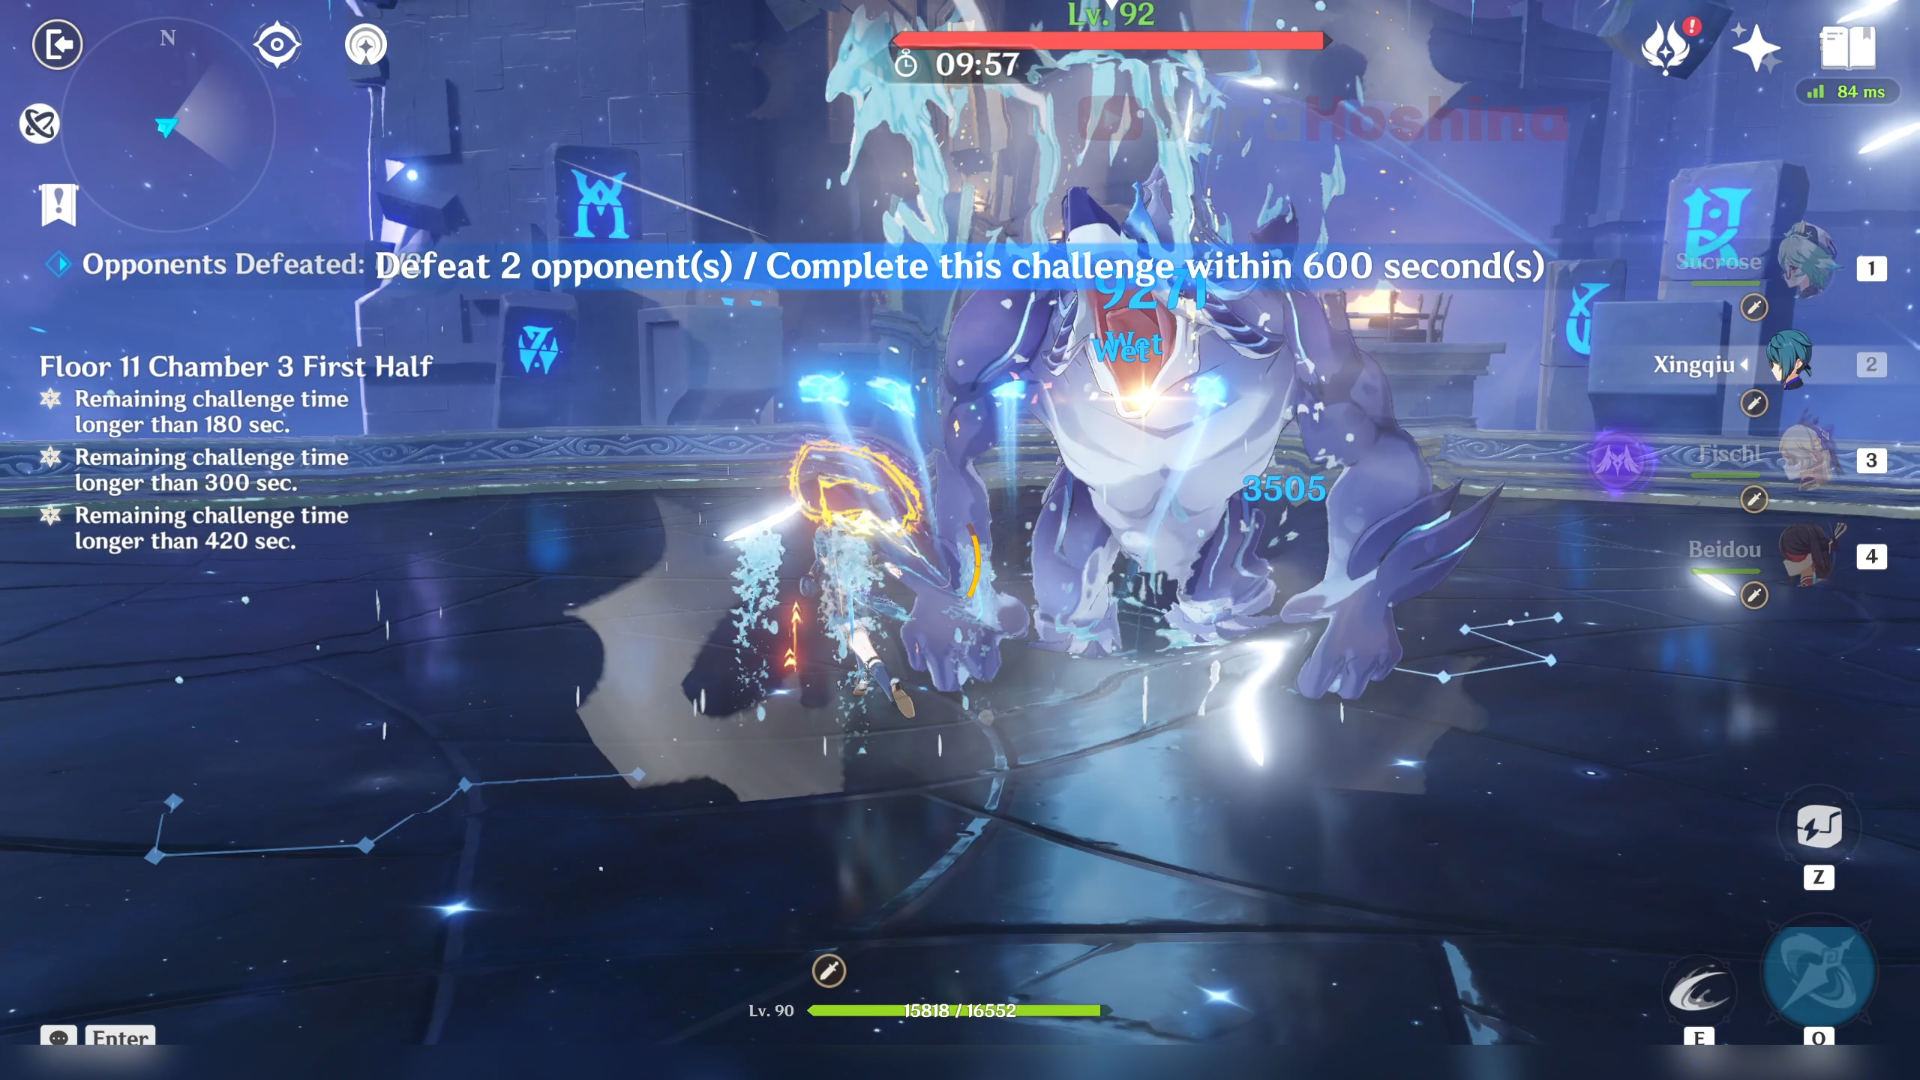
In the first wave, there is one Vishap in the front area. Since there's only one of them, you don't need any CC and just focus on attacking this one enemy. Remember that these Vishaps have 30% resistance against Physical and Hydro, so avoid bringing them if your characters are not fully built.
Two of the most troublesome skills from this enemy are (although if you keep staggering them, they can't even start to attack you):
(1) Cleansing Shower: Drain Energy from your active character. If your character has less than 10 Energy, they will lose lots of health regardless you have a shield or not.
(2) Spike Field (not official name): Create water splashes from the ground, and easily stagger or interrupt any character without a shield.
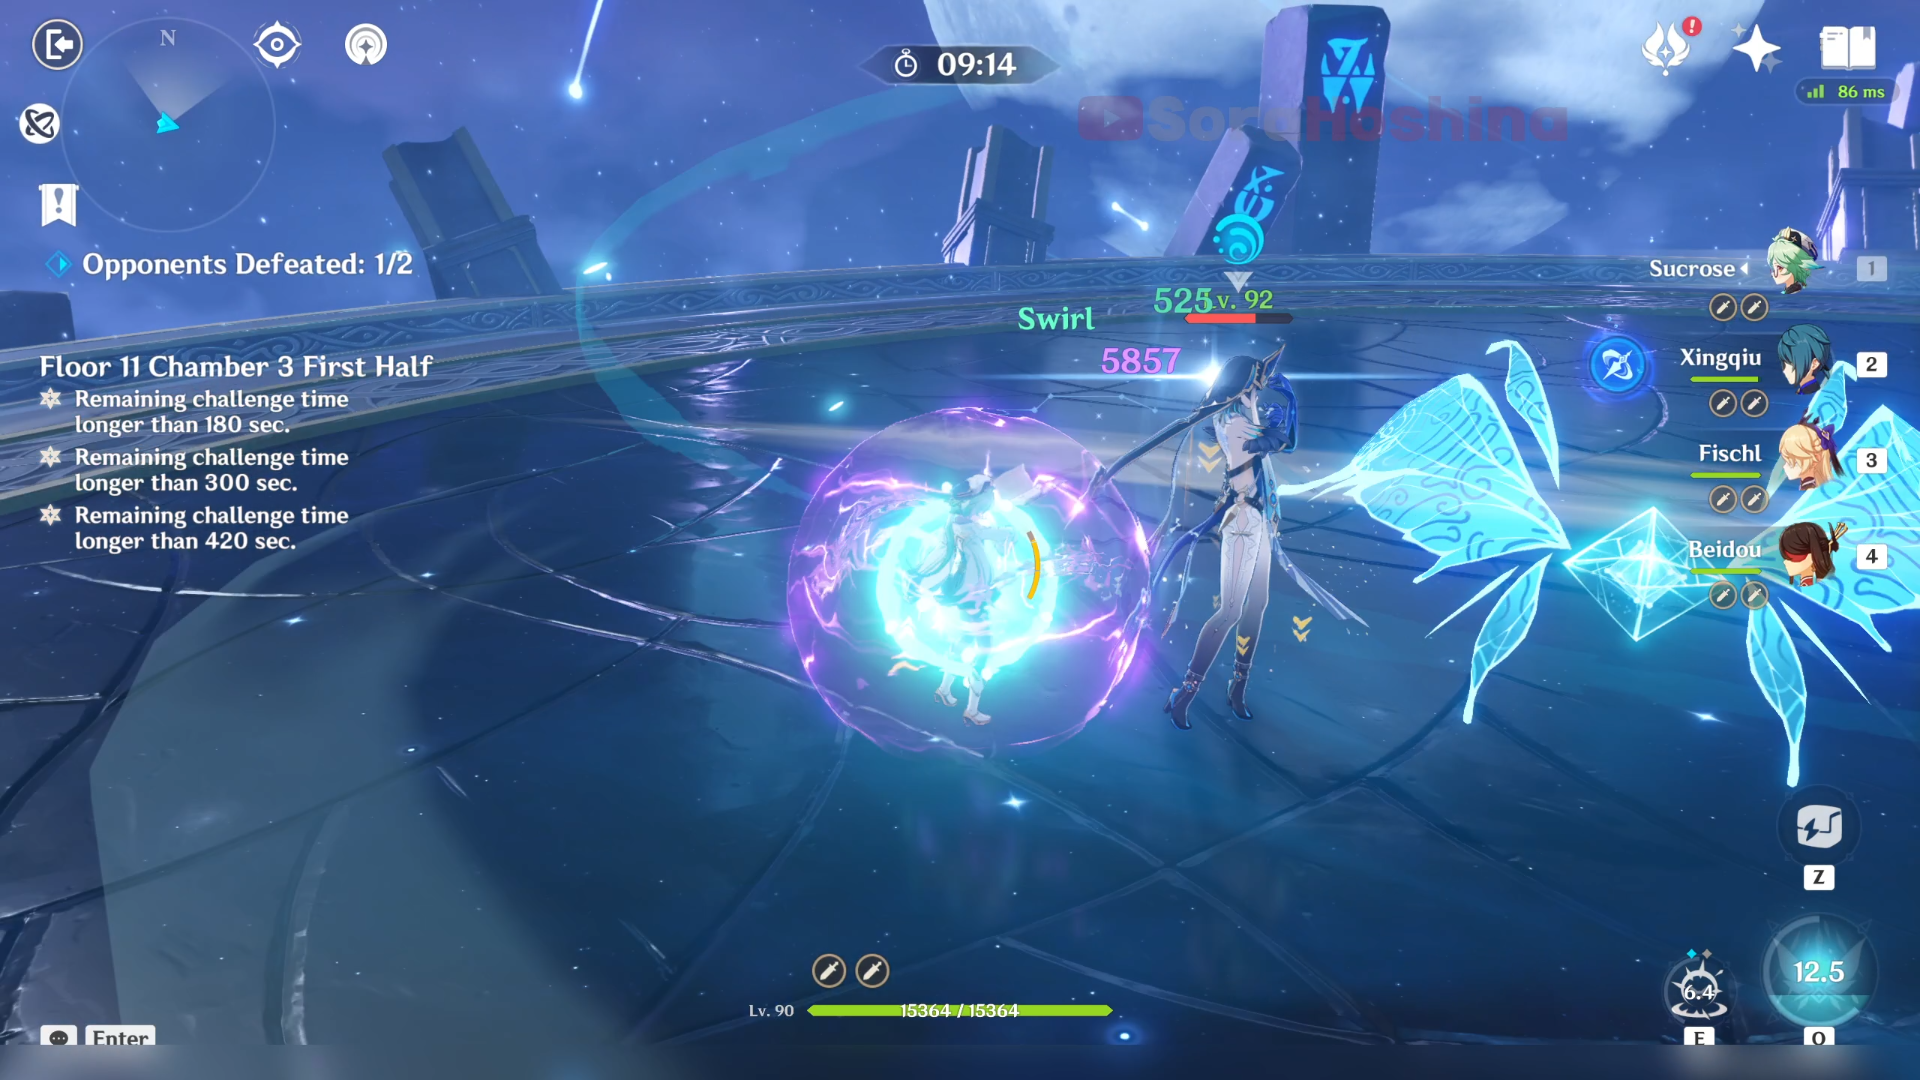
In the second wave, there is only one enemy here which is Mirror Maiden at the back area. Although she has an annoying teleporting skill, there is only one enemy so I believe it's easy enough to catch up to her every time she tries to teleport away to another spot. Fortunately, she doesn't have any Aura or Debuff Abilities so the difficulty is not too hard and you can just focus on attacking and avoiding.
Second Half
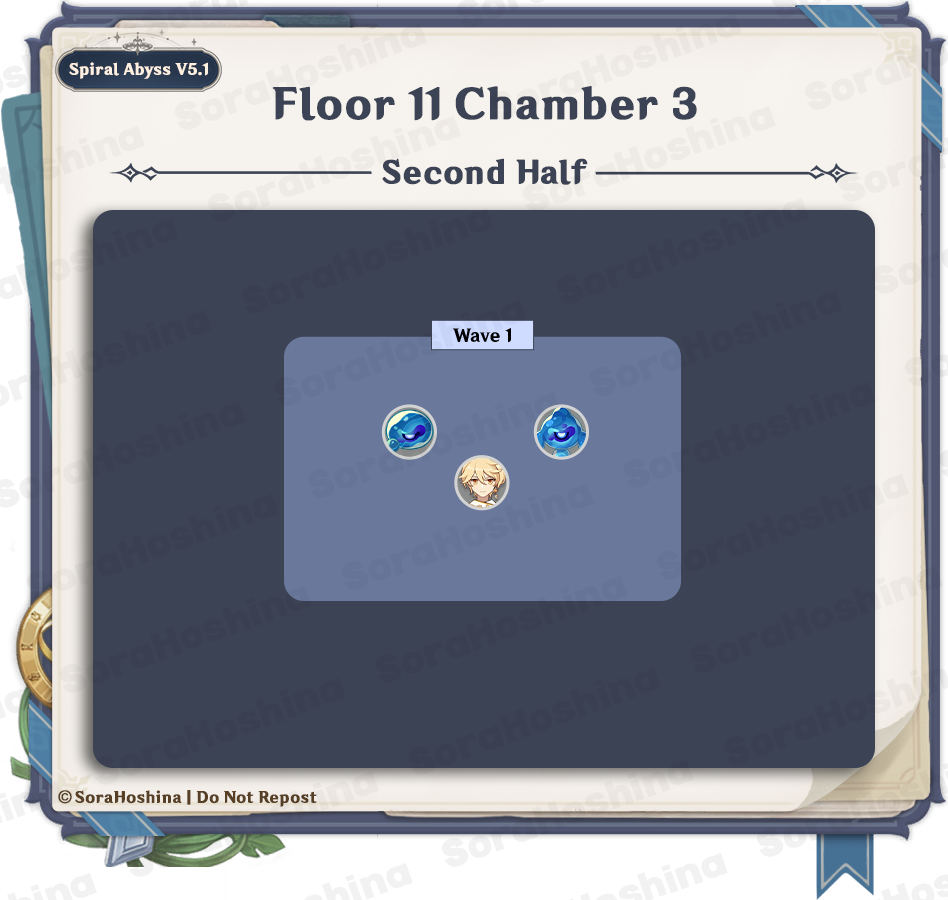
1st Wave: Veteran Tainted Water-Spouting Phantasm x1 & Veteran Tainted Water-Splitting Phantasm x1
There is only one wave here, and the 2 veteran phantasm will spawn at the front area side by side.
Since both Phantasms on this floor are like the Local Legend you find in Fontaine, they will enter Enraged State from the start and will stay that way permanently. In this state, their attacks will be enhanced and become immune to being Frozen.
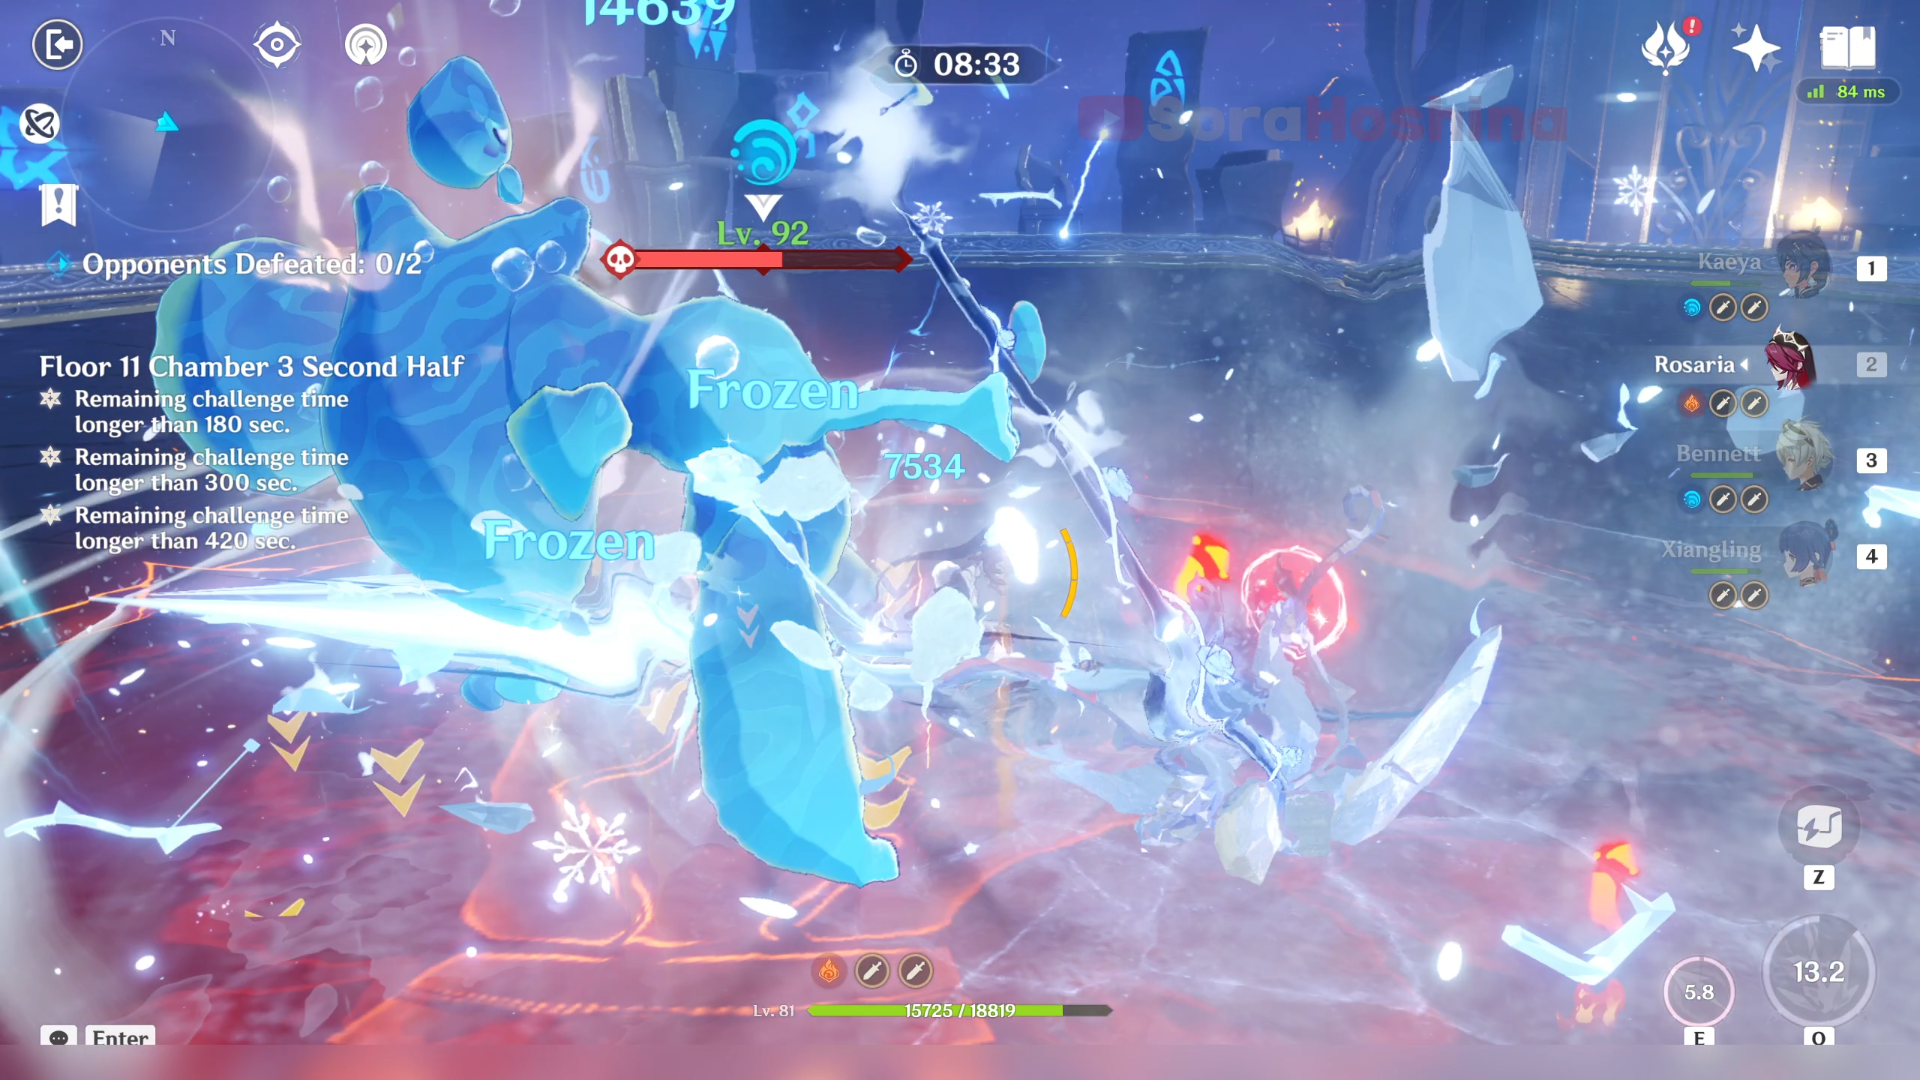
Between the two Phantasms, the Water-Spouting one (the one on your left) is a bit slower than the Water-Splitting one. So from the start of the challenge, go to the Water-Spouting at the left side and let the Water-Splitting chase after you. When the two are really close to each other, it's a matter of spamming damage to them and trying to avoid incoming attacks (unless you have a shield) to reduce the damage taken.
If one of them is defeated, it won't get revived if you didn't defeat the remaining one within a limited time so don't worry about that.

Sora
Articles: 357More Articles
Genshin Impact: Embers Rekindled Achievement Guide
Genshin Impact: All New Quests in Version 5.2
Genshin Impact: Open Your Heart to Me Quest Guide
Genshin Impact: The Mystery of Tecoloapan Beach Quest Guide
Genshin Impact: Glowing Hornshroom Route & Farming Guide
Genshin Impact: The Lone Isle Named Night Quest Guide
Genshin Impact: Withering Purpurbloom Route & Farming Guide
Genshin Impact: Lost Traveler in the Ashen Realm Quest Chain Guide
Genshin Impact: Duelist Series II Achievement Guide
Genshin Impact: All Local Legends in Natlan 5.2 (Including Obsidian Totem Poles)
Genshin Impact: Talent Level-Up Materials Chart (Updated V5.2)
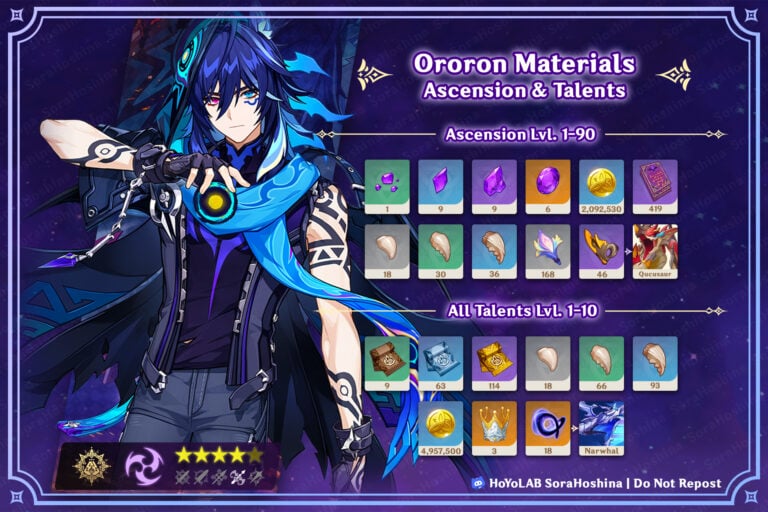
Genshin Impact: Ororon Ascension and Talent Materials
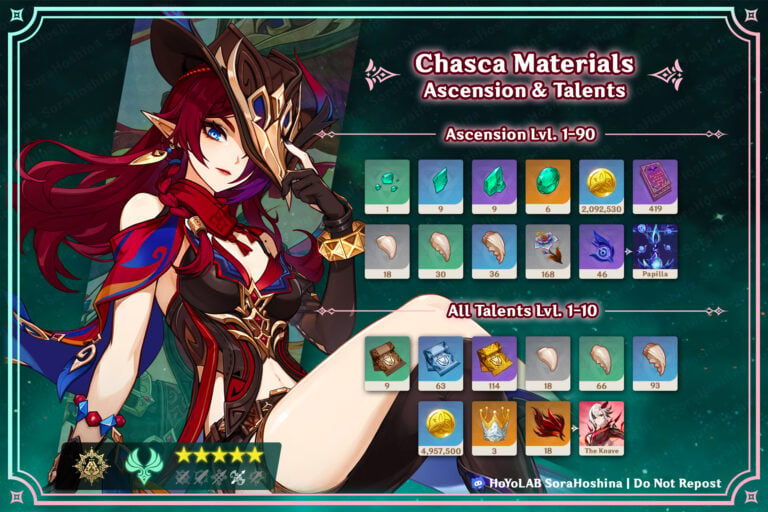
Genshin Impact: Chasca Ascension and Talent Materials

Genshin Impact: Spiral Abyss V5.1 (November) Floor 12 Complete Guide
Genshin Impact: Spiral Abyss V5.1 (November) Floor 11 Complete Guide
Genshin Impact Codes – November 2024
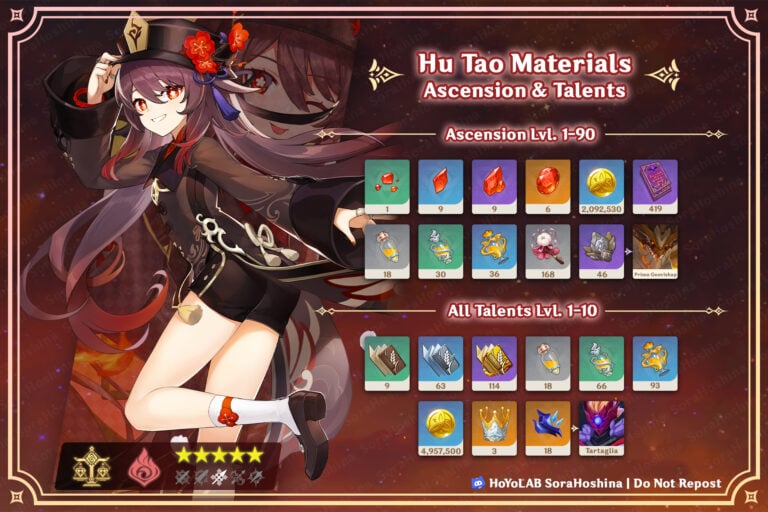
Genshin Impact: Hu Tao Ascension and Talent Materials
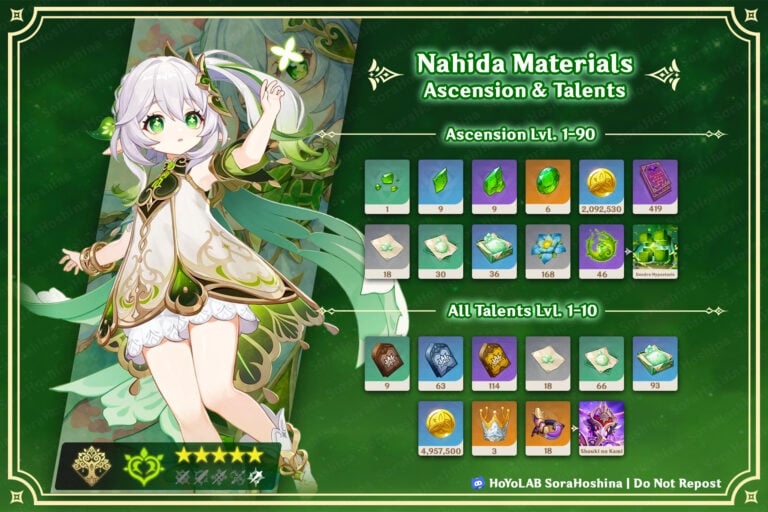
Genshin Impact: Nahida Ascension and Talent Materials
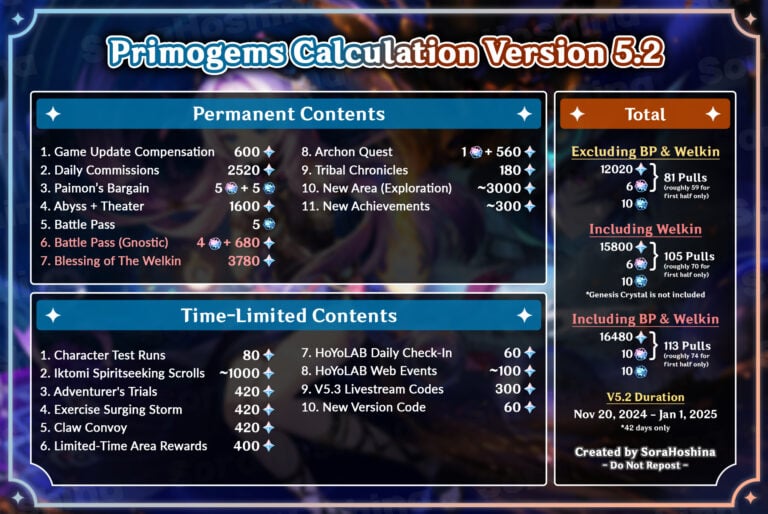
Genshin Impact: Primogems Calculation Version 5.2