Table of Contents
Floor 11 is the start of a challenge in Spiral Abyss for Genshin Impact players. The difficulty spikes up a little bit from the previous floor, in addition to the ever-changing roster of enemies in each version. In version 4.4, there is no normal boss here but there are lots of mobs that come in multiple waves. Follow this guide to know more about enemies' lineup, their weaknesses, and how to complete the entire chamber on Floor 11.
Blessing of the Abyssal Moon
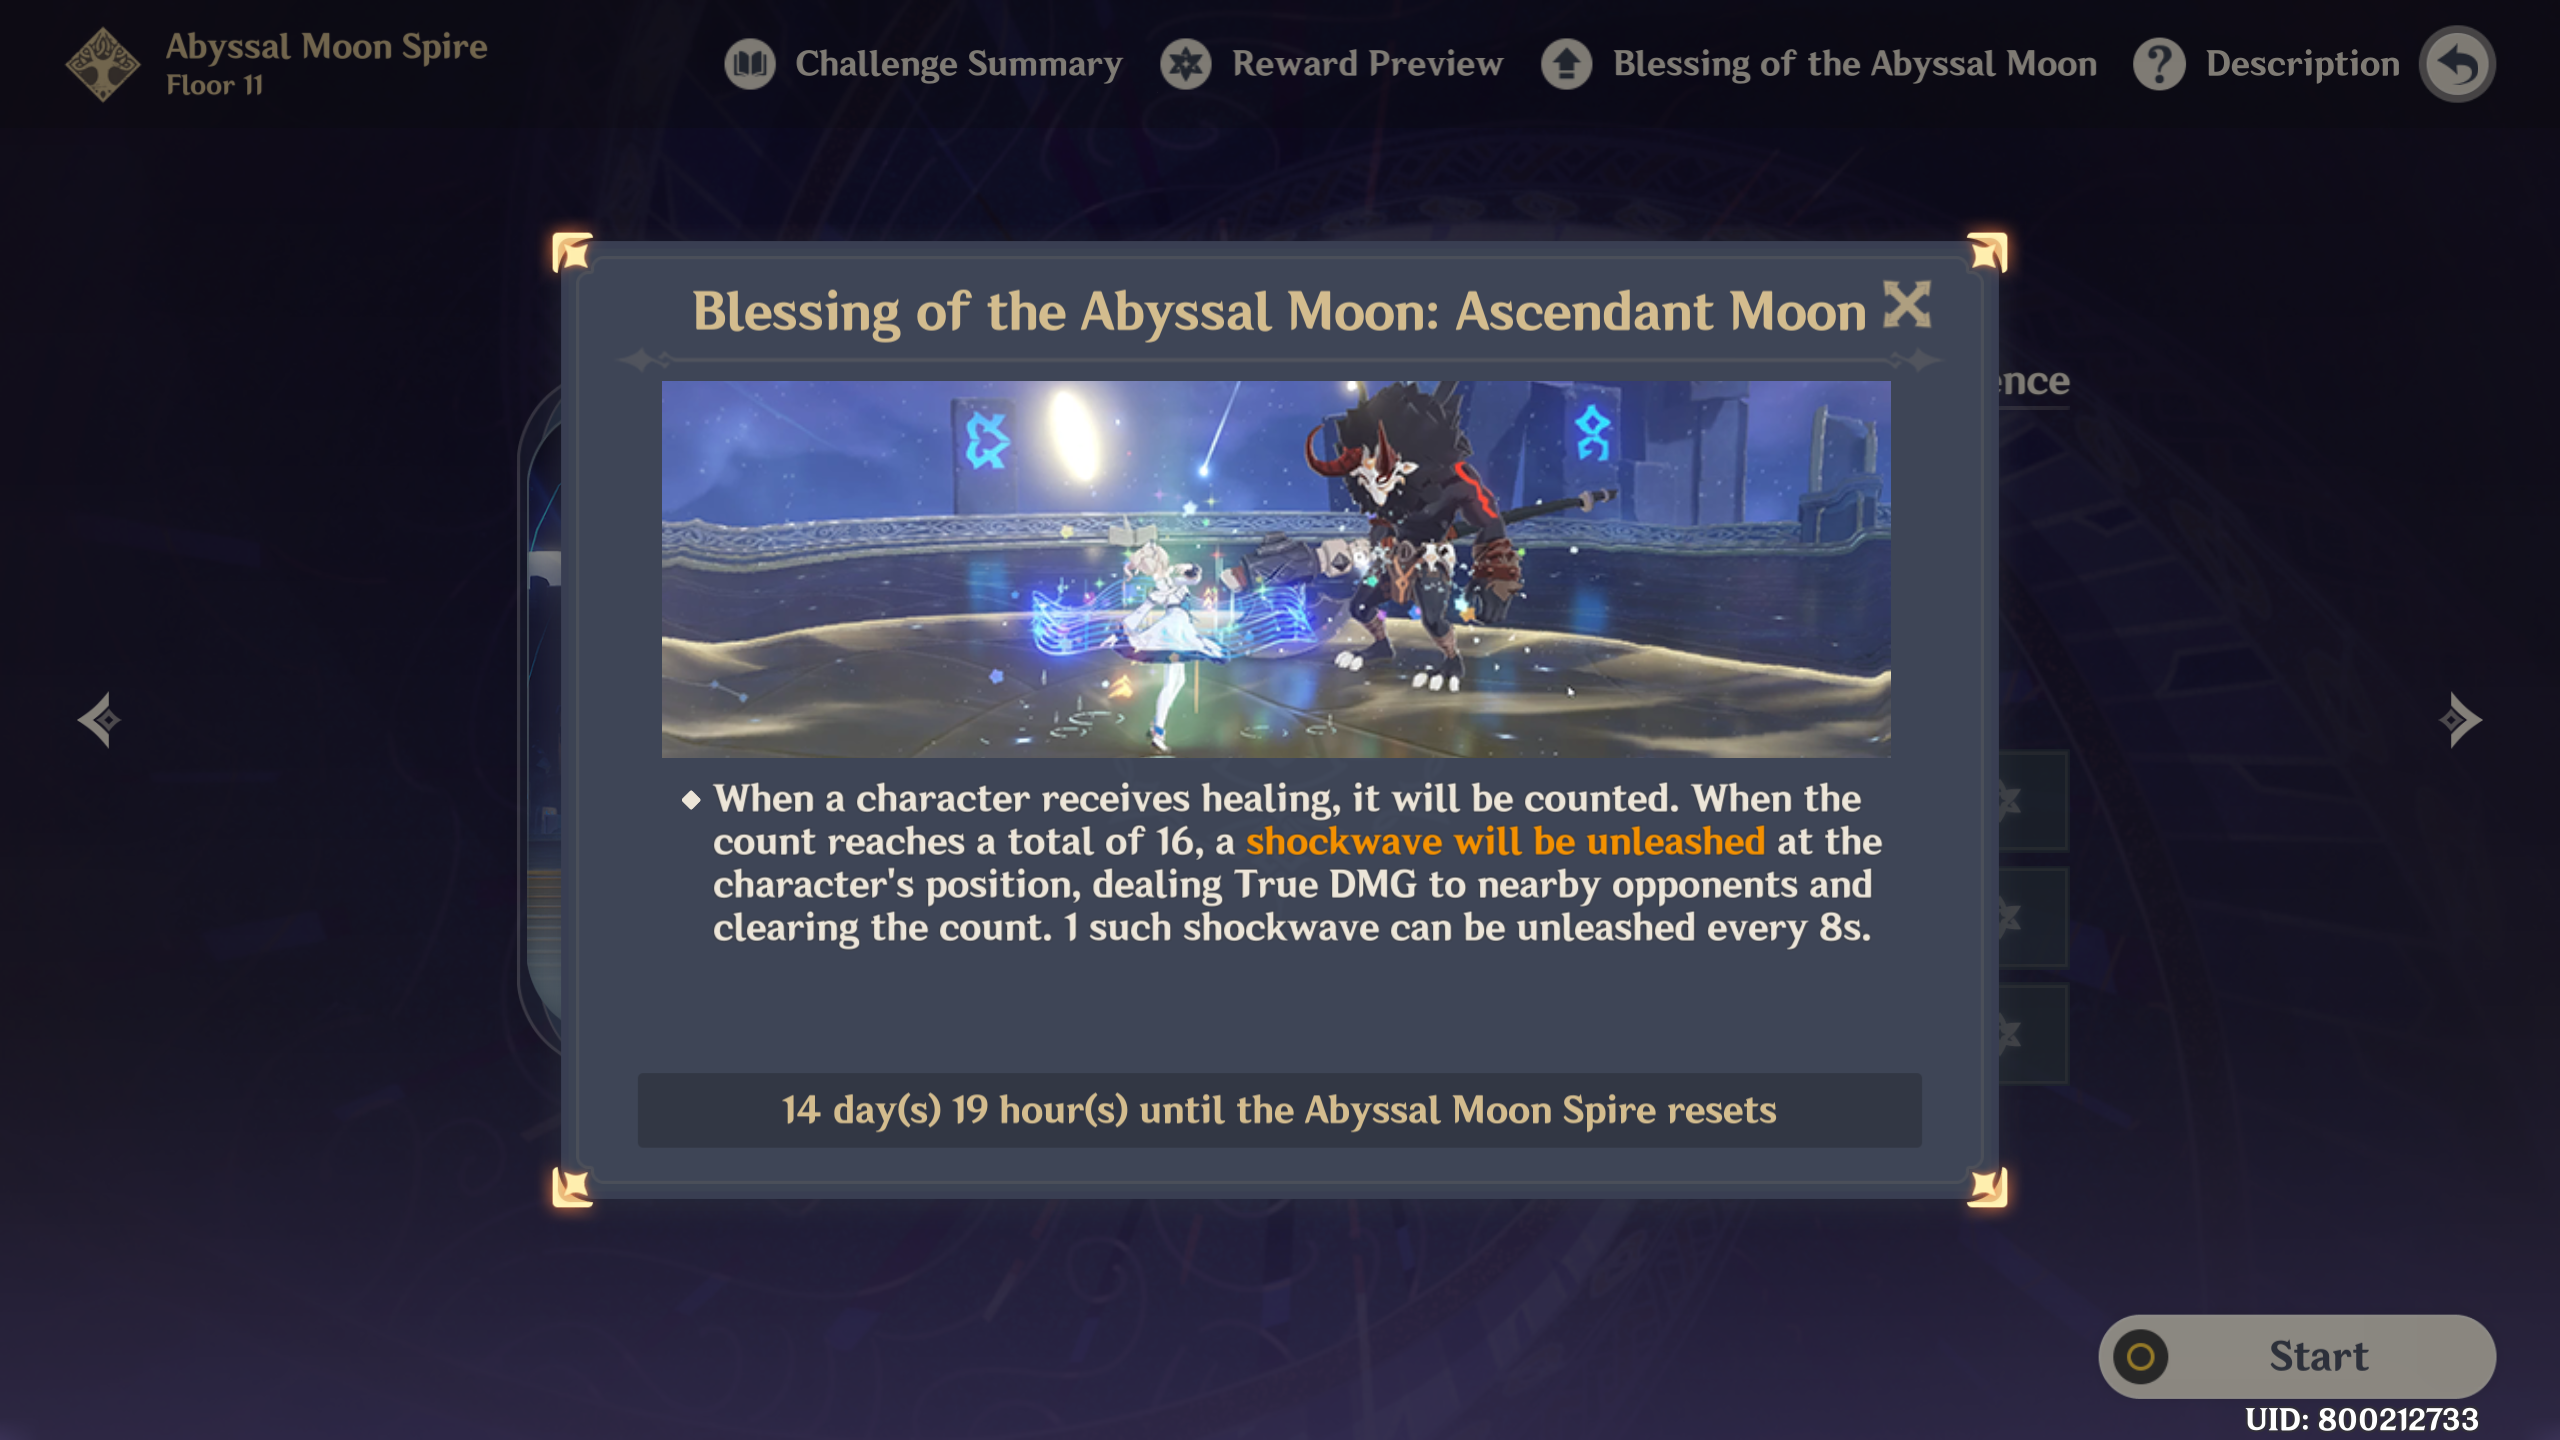
Reminder: Blessing of the Abyssal Moon will change every refresh cycle and may not be updated here. But the enemies list and strategy will remain the same.
When a character receives healing, it will be counted. When the count reaches a total of 6, a shockwave will be unleashed at the character's position, dealing True DMG to nearby opponents and clearing the count. 1 such shockwave can be unleashed every 8s.
Ley Line Disorder

All party members receive a 75% Anemo DMG Bonus.
Team Recommendations
There are Leyline Monolith stages for Chamber 1, and some enemies spawn near each other/easy to gather while some are a bit far away. You can bring along an Anemo CC to any of the teams if you want. If you only have 1 and want to bring them, then it's recommended to add them in the 2nd Half because there are more enemies that can be gathered with Anemo CC in the 2nd Half compared to the 1st Half. If you plan to bring a Bloom team, remember that the explosion from the Dendro Cores will also deal some damage and reduce the Monolith's HP.
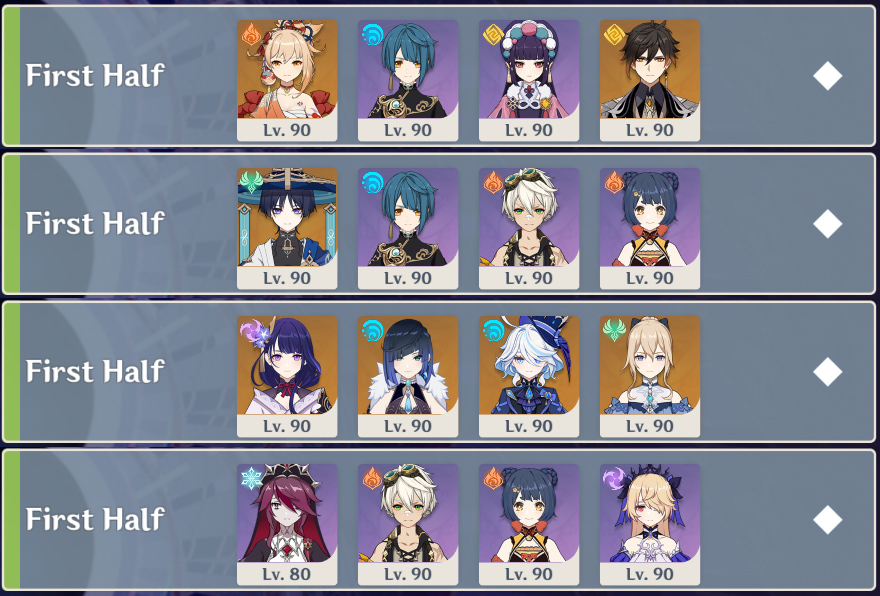
- The recommended element for the First Half is every element except Hydro. Even so, it's not bad to bring Hydro DPS because the only thing I'm wary about using Hydro is because there are Primordial Vishap that have some resistance to Hydro. Other than that issue, Hydro DPS isn't really a bad idea. Physical isn't recommended either because these Vishaps and Ruin Drakes have quite high resistance against Physical attacks. But if your Physical DPS is too strong, go ahead.
- A shielder is better than a healer IMO because, in Chamber 2, the Vishaps can be stunned if they charge towards a character that is being protected by a shield.
- In Chamber 3, there are Ruin Drakes, and your melee DPS might have a bit of a problem when facing those hovering enemies. It's not impossible of course, but there are times when the Drakes hover above your melee range so it's better to at least bring a bow-user so they can hit the weakness points for you (Furina's Salon also constantly attack the Drake's weak point so she's another great option). For examples:
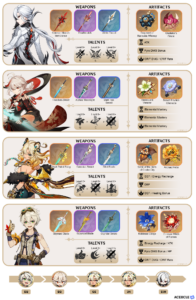
- Vaporize Team: Yoimiya + Xingqiu/Yelan + Yun Jin + Zhongli
- National Team: Wanderer + Xiangling + Xingqiu + Bennett
- Taser Team: Raiden Shogun + Yelan + Furina + Jean
- Melt Team: Rosaria + Bennett + Xiangling + Fischl

- For the Second Half, Anemo Anemo Anemo Anemo is definitely the best element for you to bring. In Chamber 1, there are only Slimes so you can Swirl them. In Chamber 2, there are Abyss Mages with Slimes that they are weak for so you can Swirl again. In Chamber 3, there are too many enemies so it's best if you can gather them. So yeah, Anemo is the best here. Honestly, Sucrose alone can solo the first and second chambers.
- Of course, other elemental reactions aren't bad. In fact, there are no restrictions as long as you bring a character that can counter the Slimes. For examples:
- Tartaglia Vape Team: Tartaglia + Xiangling + Sucrose + Bennett
- Hyperbloom Team: Raiden Shogun + Kokomi + Collei + Venti
- Anemo Hypercarry: Xiao + Faruzan/Sucrose + Bennett + Zhongli
- Anemo Hyperbloom: Heizou + Xingqiu + Kuki Shinobu + Yaoyao
Floor 11 Chamber 1
First Half

1st Wave: 2 Hilichurl Fighters & 1 Blazing Axe Mitachurl
2nd Wave: 2 Hilichurl Berserker & 1 Blazing Axe Mitachurl
3rd Wave: 2 Hilichurl Fighters & 1 Blazing Axe Mitachurl
4th Wave: 2 Hilichurl Berserker & 1 Blazing Axe Mitachurl

- In all four waves, all enemies will attack the monolith. Although all of them target the monolith, this stage is pretty easy because there are only 3 enemies per wave, they spawn each other, and they will surround the monolith so you don't have to use Anemo CC to gather them. In each wave, just get near the monolith and attack all the HiliMitachurls that come close.
- I think this is one of the easiest F11C1 yet (including the previous 4.3 Abyss) as all enemies just rush toward the monolith and we can just destroy them there.
Second Half

1st Wave: 2 Pyro, 2 Cryo & 2 Hydro Slimes
2nd Wave: 3 Pyro, 2 Electro & 2 Hydro Slime
3rd Wave: 2 Pyro, 2 Cryo, 1 Hydro Slimes & 1 Random Element Slime
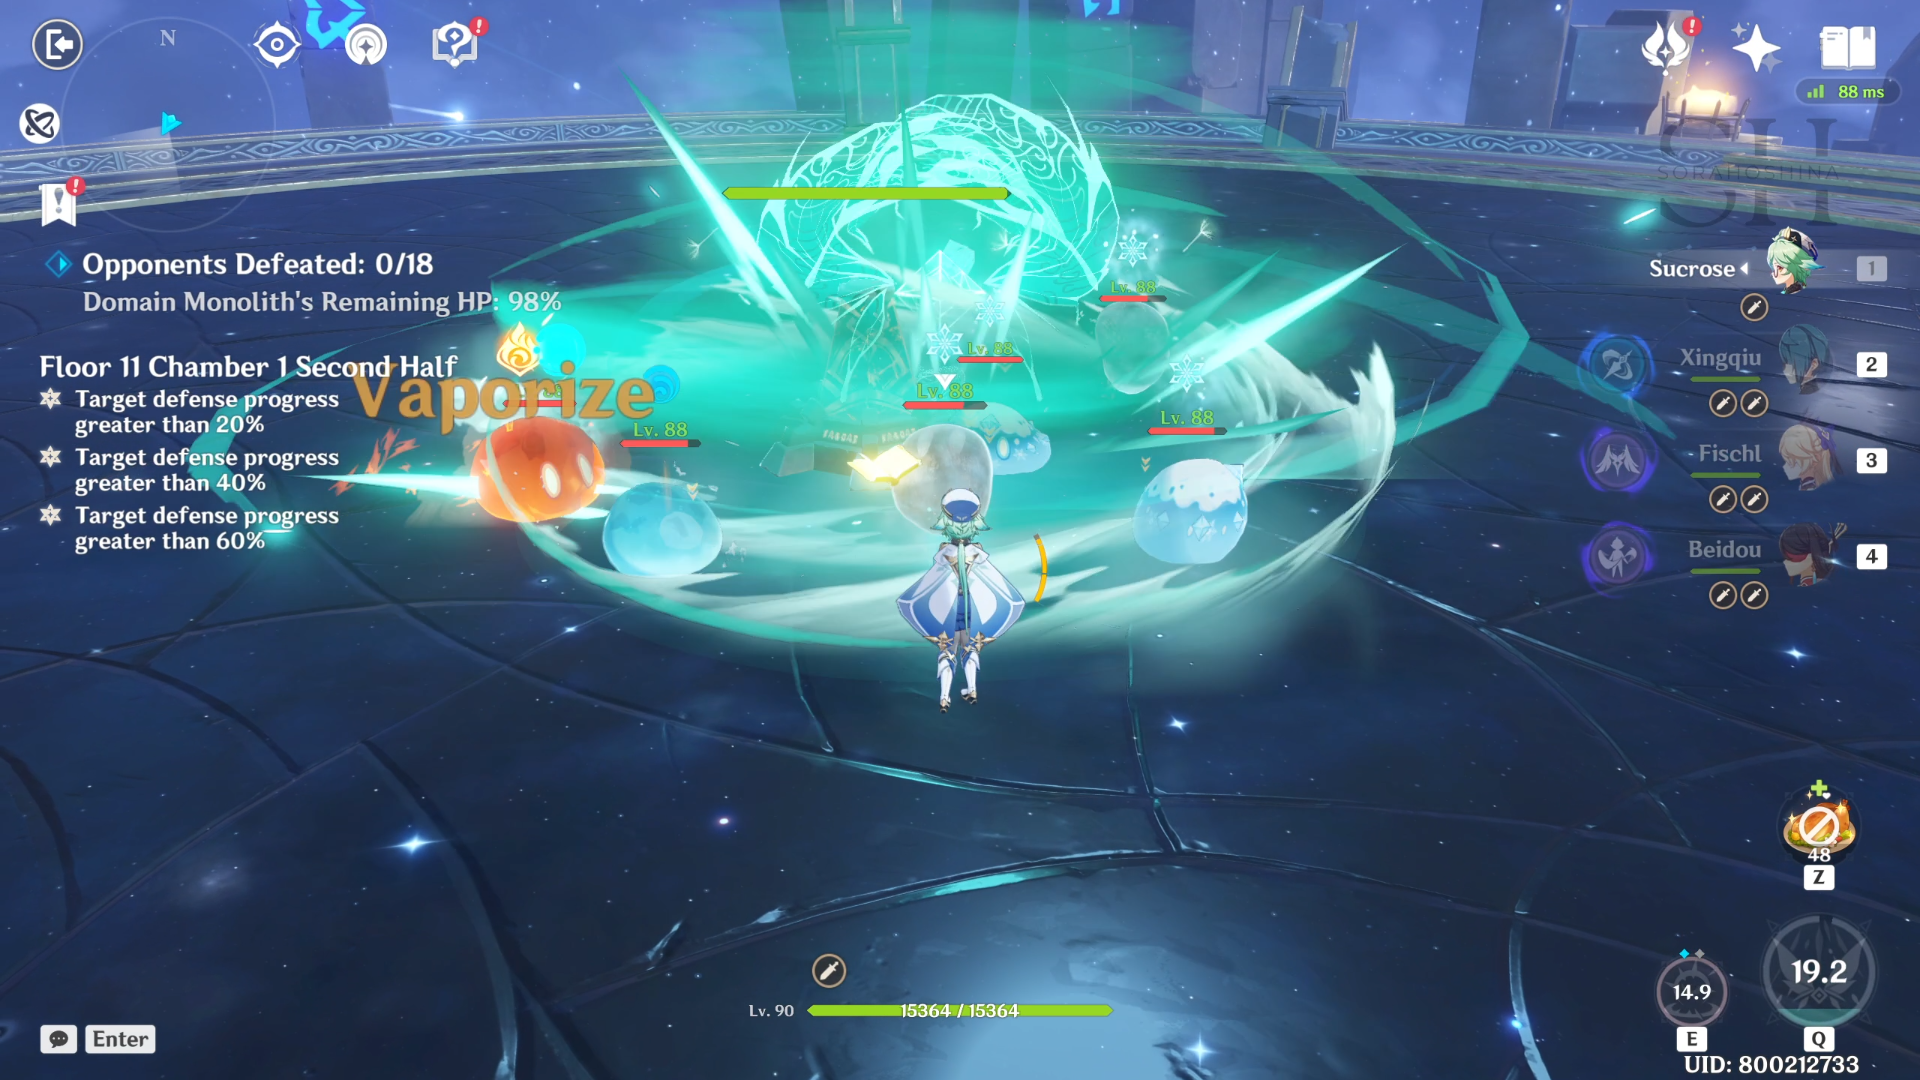
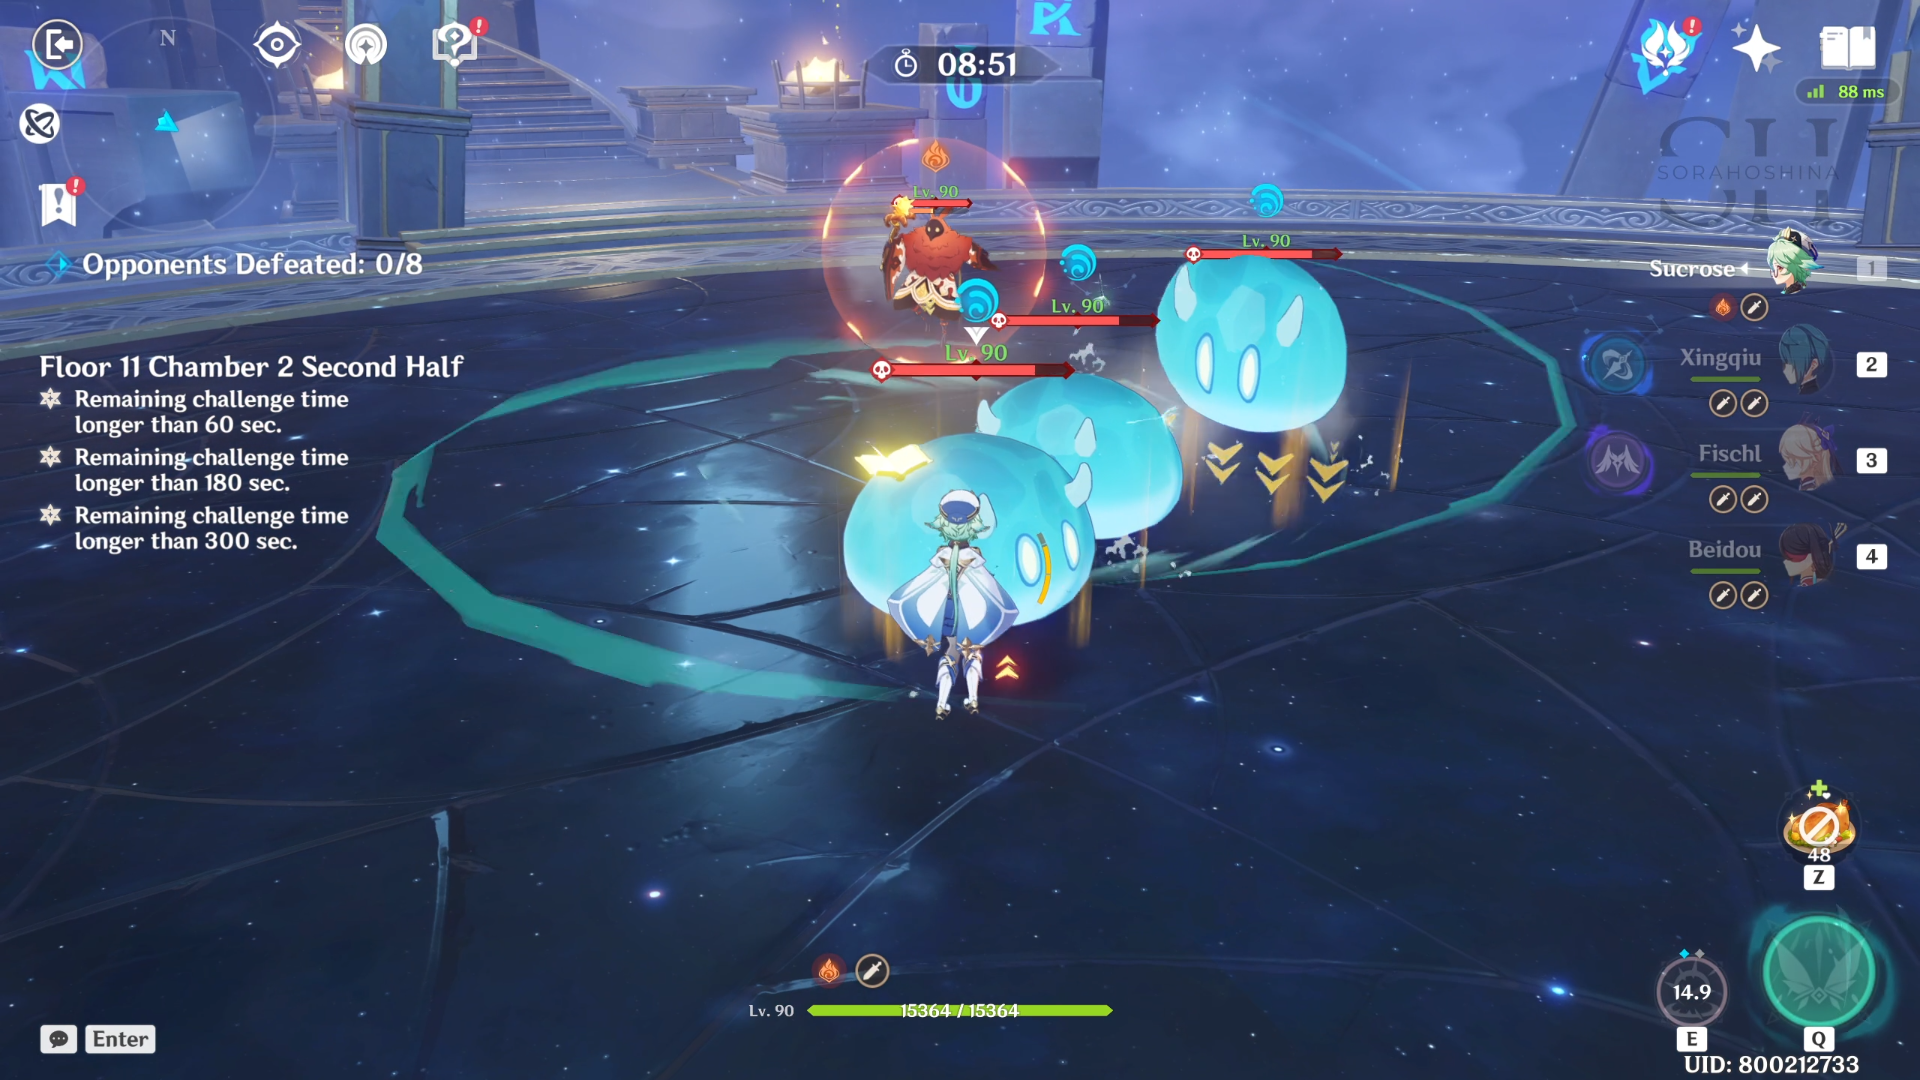
- In the first wave, 6 Slimes will spawn around the Monolith. The Hydro Slimes of them will attack the Monolith while the remaining Slimes will chase after you. If you have Anemo (Sucrose/Kazuha/Venti), it's best to bring them here and use their Skill or Burst to Swirl all the Slimes and defeat all of them in one go. This strategy can be used in every wave of Slimes here.
- If you don't bring Anemo CC, you can only focus on defeating the Slimes one by one (especially the one nearest to the Monolith). Since it's the small Slimes and not the large Slimes, their HP is pretty low so your characters will have an easy time killing them.
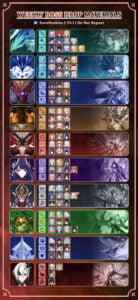
- Although I mentioned waves, the Slimes will spawn every time you defeat any Slime on the field. For example, if you defeat 1 Slime, the next Slime will spawn at their position until all 18 Slimes are out. You can see which Slimes will appear next from the numbers in my infographic above.
- Important (Not really): After numerous trials, I noticed that the 4th Slime in Wave 3 can be random depending on which Slimes you attack, it can be Hydro Slime, it can be Electro, or it can be Pyro Slime.
- Just remember that if the 4th Slime is Hydro or Electro Slime, it will attack the monolith. But if it's Pyro or Cryo Slimes, it will chase after you.
Floor 11 Chamber 2
First Half

1st Wave: 2 Geovishap
2nd Wave: 2 Primordial Bathysmal Vishap

- In the first wave, the 2 Geovishaps spawn at the front area near each other. These Geovishaps have high resistance against Geo elements. Both of them will chase after you so you can group them fairly easily. But they are also knocked back quite easily so you have to angle your character so both of them are in the same line of sight (even better if you can corner them to the wall).
- Once their HP reaches 40% or after a long time has passed the Geovishaps will infuse themselves with Hydro and Cryo, respectively. The only difference here is they have increased resistance against their elements and attacks with respective elements. On the bright side, their body will have constant Hydro/Cryo status so you can spam elemental reactions.
- One other weakness it has is they will be stunned for a moment if they slam attack a shielded character.
- In the second wave, the 2 Vishap spawn at the back area near each other. If you didn't bring Anemo CC, you can start by going to the back wall and trigger the swim attack from the Vishaps so they will chase after you. Remember that these Vishaps have 30% resistance against Physical and Hydro, so avoid bringing them if your characters are not fully built.
- Two of the most troublesome skills from these enemies are:
- Cleansing Shower: Drain Energy from your active character. If your character has less than 10 Energy, they will lose lots of health regardless you have a shield or not.
- Spike Field (not official name): Create water splashes from the ground, and easily stagger or interrupt any character without a shield.
Second Half
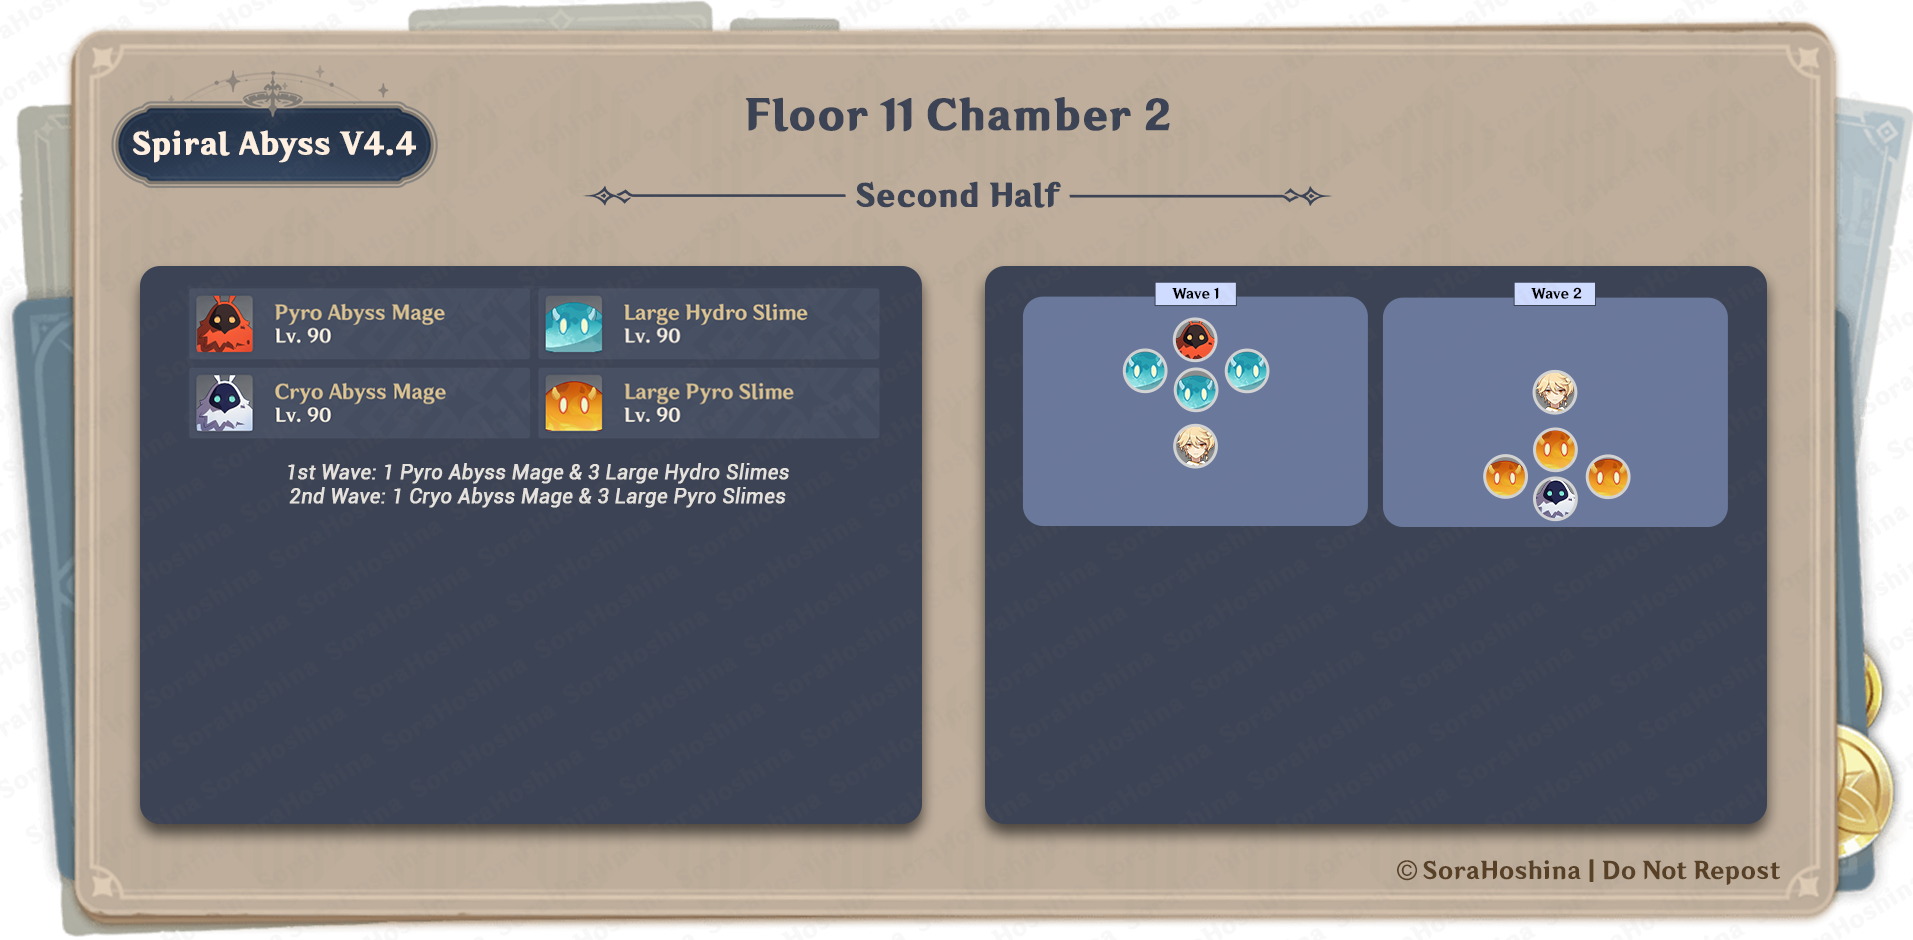
1st Wave: 1 Pyro Abyss Mage & 3 Large Hydro Slimes
2nd Wave: 1 Cryo Abyss Mage & 3 Large Pyro Slimes
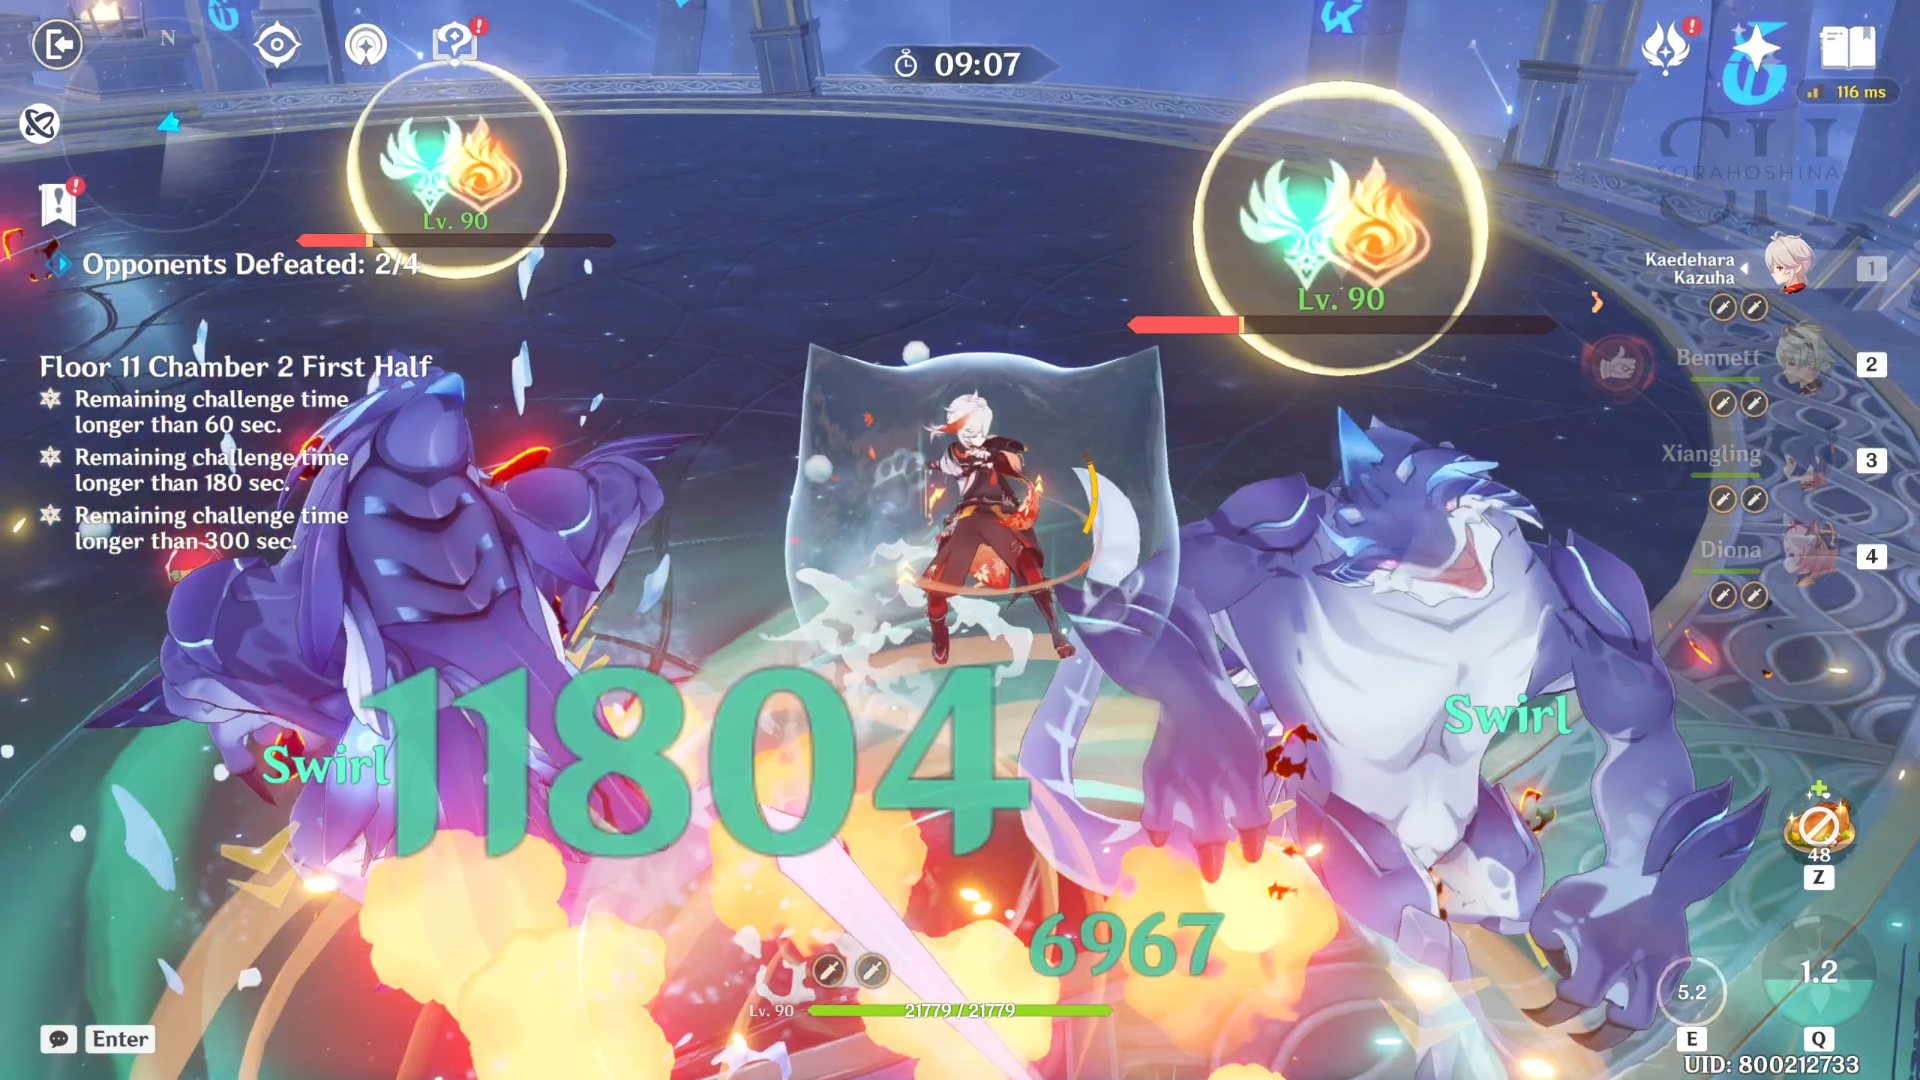
- In the first wave, all enemies spawn in the front area and are very close to each other. The reason may be that they want us to use Anemo to Swirl the Hydro to Pyro Abyss Mage's shield, which is a really good idea.
- Once the shield is gone, the Abyss Mage is pretty much useless and extremely vulnerable. So focus on removing its Pyro shield first (Hydro is the best element for that) and defeat it once the shield is gone before focusing on the Slimes.
- The same strategy can be used in the second wave. The Cryo Abyss Mage will be surrounded by Pyro Slimes, and it's the perfect moment for your Anemo character to Swirl everything.
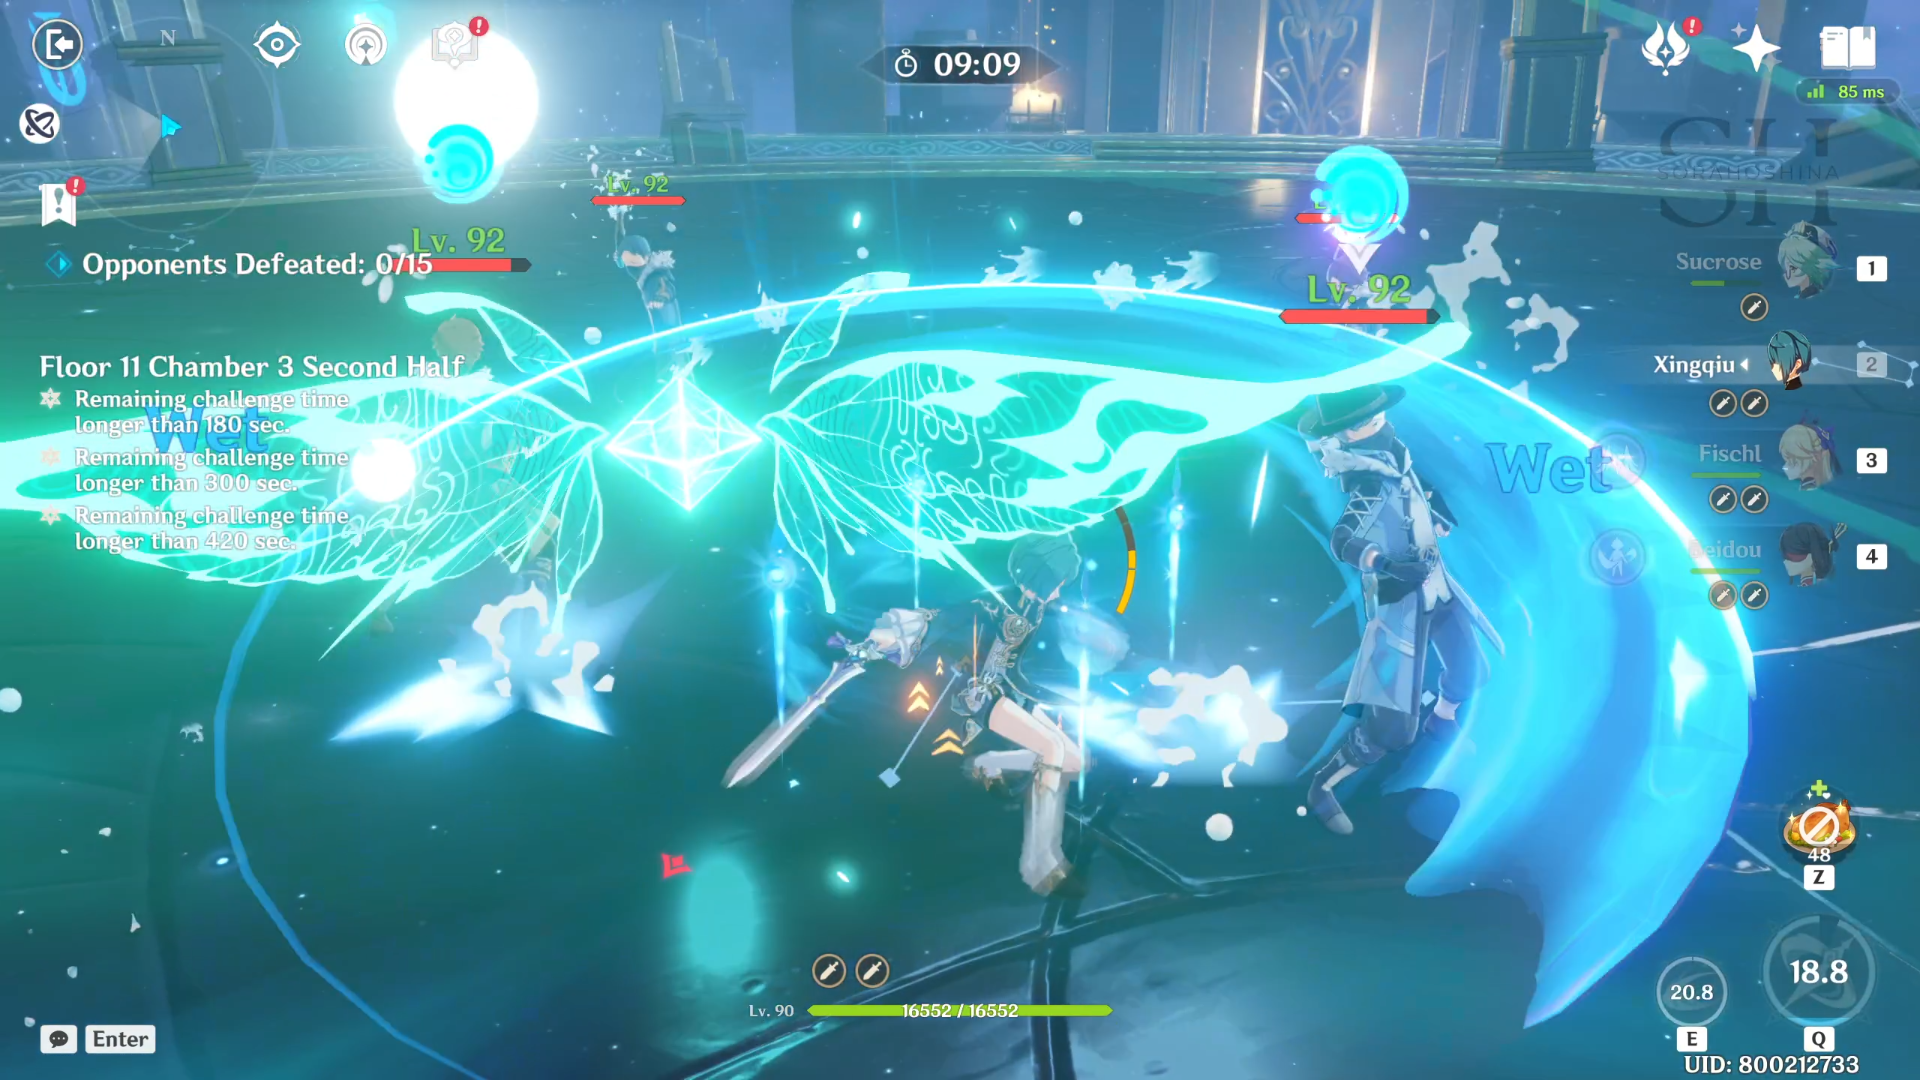
Floor 11 Chamber 3
First Half
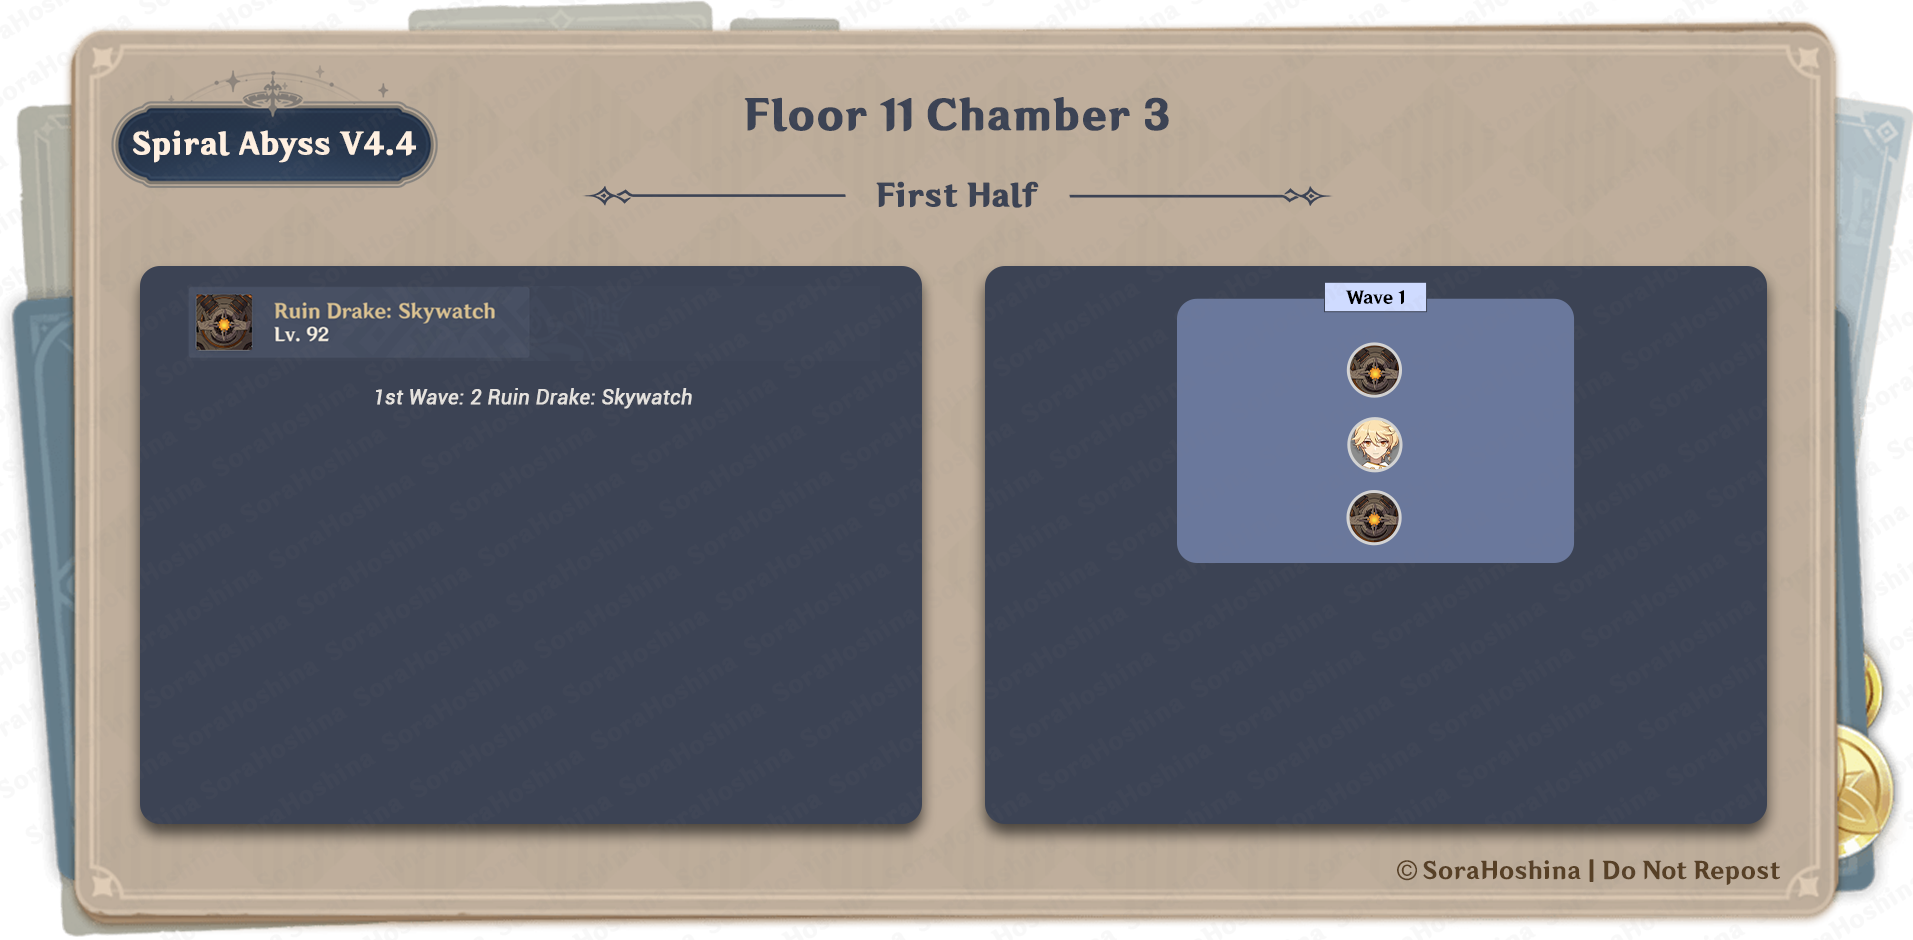
1st Wave: 2 Ruin Drake: Skywatch

- There is only one wave here, and the 2 Ruin Drakes spawn on the opposite side of the area. But doesn't really matter because if you go to one of the Ruin Drake, the other will chase after you anyway.
- The strategy here is: Brute force. Although this enemy hovers, your melee can still hit it like normal. And there are not many things you can do except from hitting it and avoiding any incoming attacks.
- There are multiple weak points that these Ruin Drakes have:
- The Thruster Weak Points (looks like a wing) are only exposed while airborne and intact.
- The Chest Weak Point is only exposed during the Missile Barrage attack (not the official name) - lock onto players and fire missiles.
- The Head Weak Point is only exposed during the Energy Surge attack (not the official name) - its Ultimate attack where it charges before scattering a number of bombs in the air).
- Should you aim for its weak point? You can, and it's up to you. If you feel like attacking the hovering enemy is hard, you can paralyze it first before spamming your attacks.
Second Half

1st Wave: 1 Mirror Maiden, 1 Pyro, 1 Hydro, 1 Electro & 1 Cryo Potioneer
2nd Wave: 1 Mirror Maiden, 1 Pyro, 1 Hydro, 1 Electro & 1 Cryo Potioneer
3rd Wave: 1 Mirror Maiden, 1 Pyro, 1 Hydro, 1 Electro & 1 Cryo Potioneer
- In the first wave, all enemies spawn in the shape of surrounding your active characters (not too near but not too far). There's gonna be lots of elemental reactions happening here because all elements are here.
- When you start the challenge, focus on the Mirror Maiden in every wave because she has the highest HP, ATK, and often teleports away from you. The other Treasure Hoarders will chase after you later anyway (or at least try to get within your range so they can throw their bombs).
- This is where your Anemo CC shines the most because you really want to gather them in one spot rather than focusing on them one by one. Sometimes, these Treasure Hoarders will back up and sometimes walk towards you, so let's just get rid of those possibilities and make them immovable by being sucked into Anemo Vacuum.
- Although I mentioned waves, the enemies will spawn every time you defeat the specific enemy on the field. For example, if you defeat 1 Pyro Treasure Hoarder, the next Pyro Treasure Hoarder will spawn at their position until all of them are out. The same goes with other elemental Treasure Hoarders and Mirror Maidens.

Sora
Articles: 327More Articles
Genshin Impact: Reminiscent Regimen: Thrill Event Guide
Genshin Impact: Spiral Abyss V5.1 Floor 12 Complete Guide

Genshin Impact: Spiral Abyss V5.1 Floor 11 Complete Guide
Genshin Impact: Xilonen Quick Character Guide
Xilonen Team Compositions
Genshin Impact: Talent Level-Up Materials Chart (Updated V5.1)

Genshin Impact: All New Achievements in Version 5.1
Genshin Impact: Envisaged Echoes Keqing Guide
Genshin Impact: Envisaged Echoes Zhongli Guide
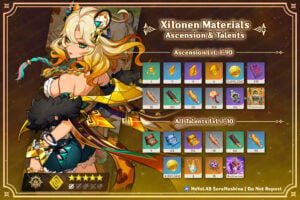
Genshin Impact: Xilonen Ascension and Talent Materials
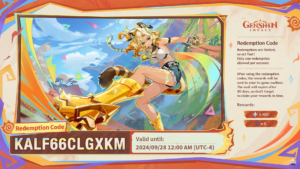
Genshin Impact Codes – October 2024
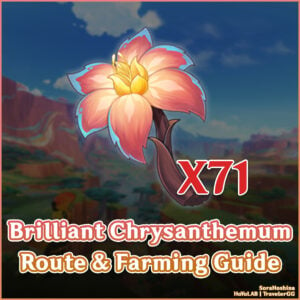
Genshin Impact: Brilliant Chrysanthemum Route & Farming Guide
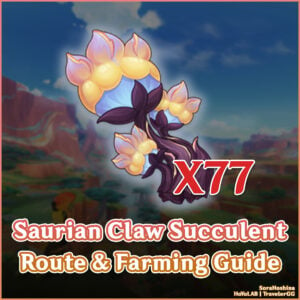
Genshin Impact: Saurian Claw Succulent Route & Farming Guide
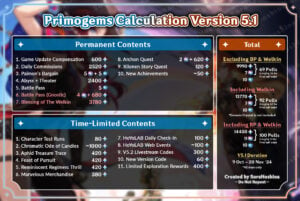
Genshin Impact: Primogems Calculation Version 5.1
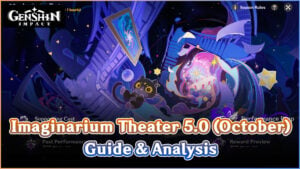
Genshin Impact: Imaginarium Theater Version 5.0 October Guide

Genshin Impact 5.1 Special Program Livestream Overview
3 New Redemption Codes from 5.1 Special Program
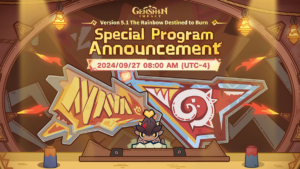
Genshin Impact 5.1 Livestream Countdown
Genshin Impact: Version 5.0 Tier List (September 2024)