Table of Contents
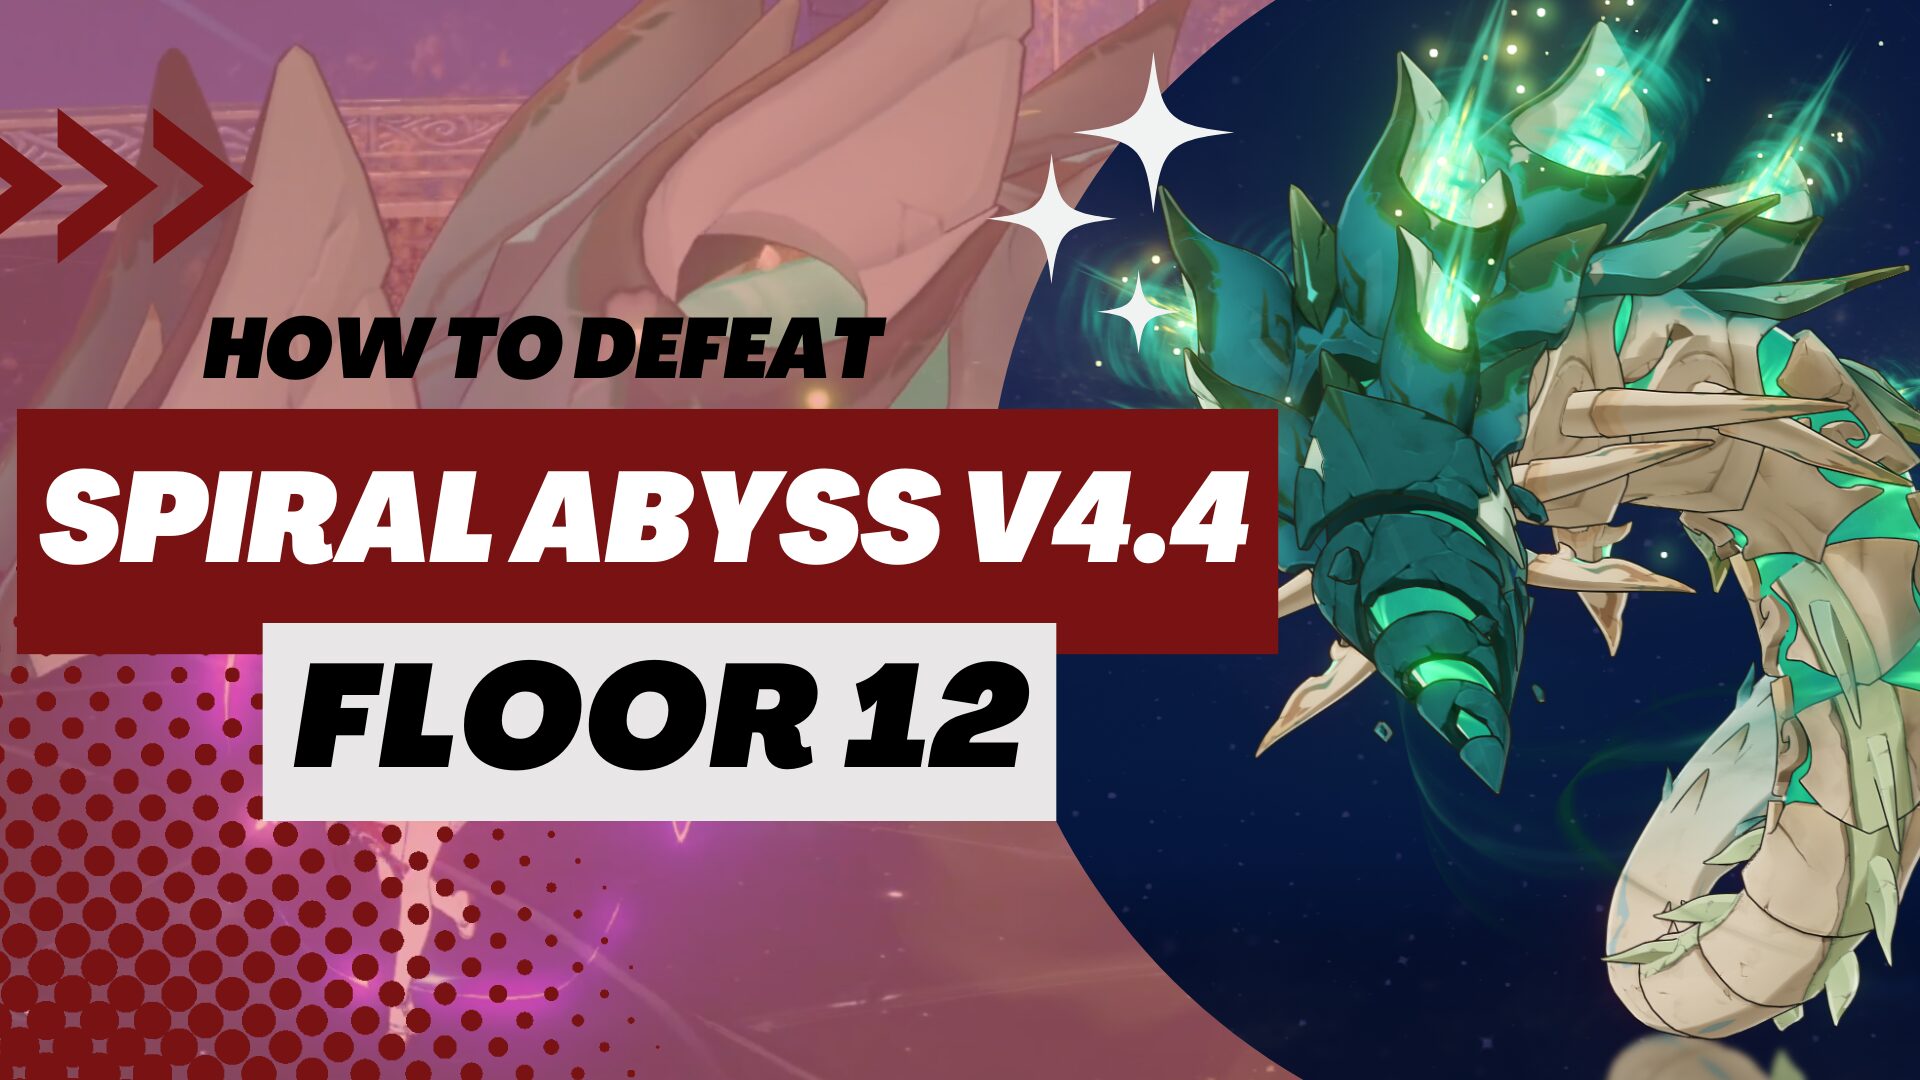
The last floor is here with lots of bosses as opponents! There are a LOT of bosses in 4.4 Abyss and some mobs for you to face. Continue reading this guide for the full analysis of Floor 12 in the Spiral Abyss.
Blessing of the Abyssal Moon
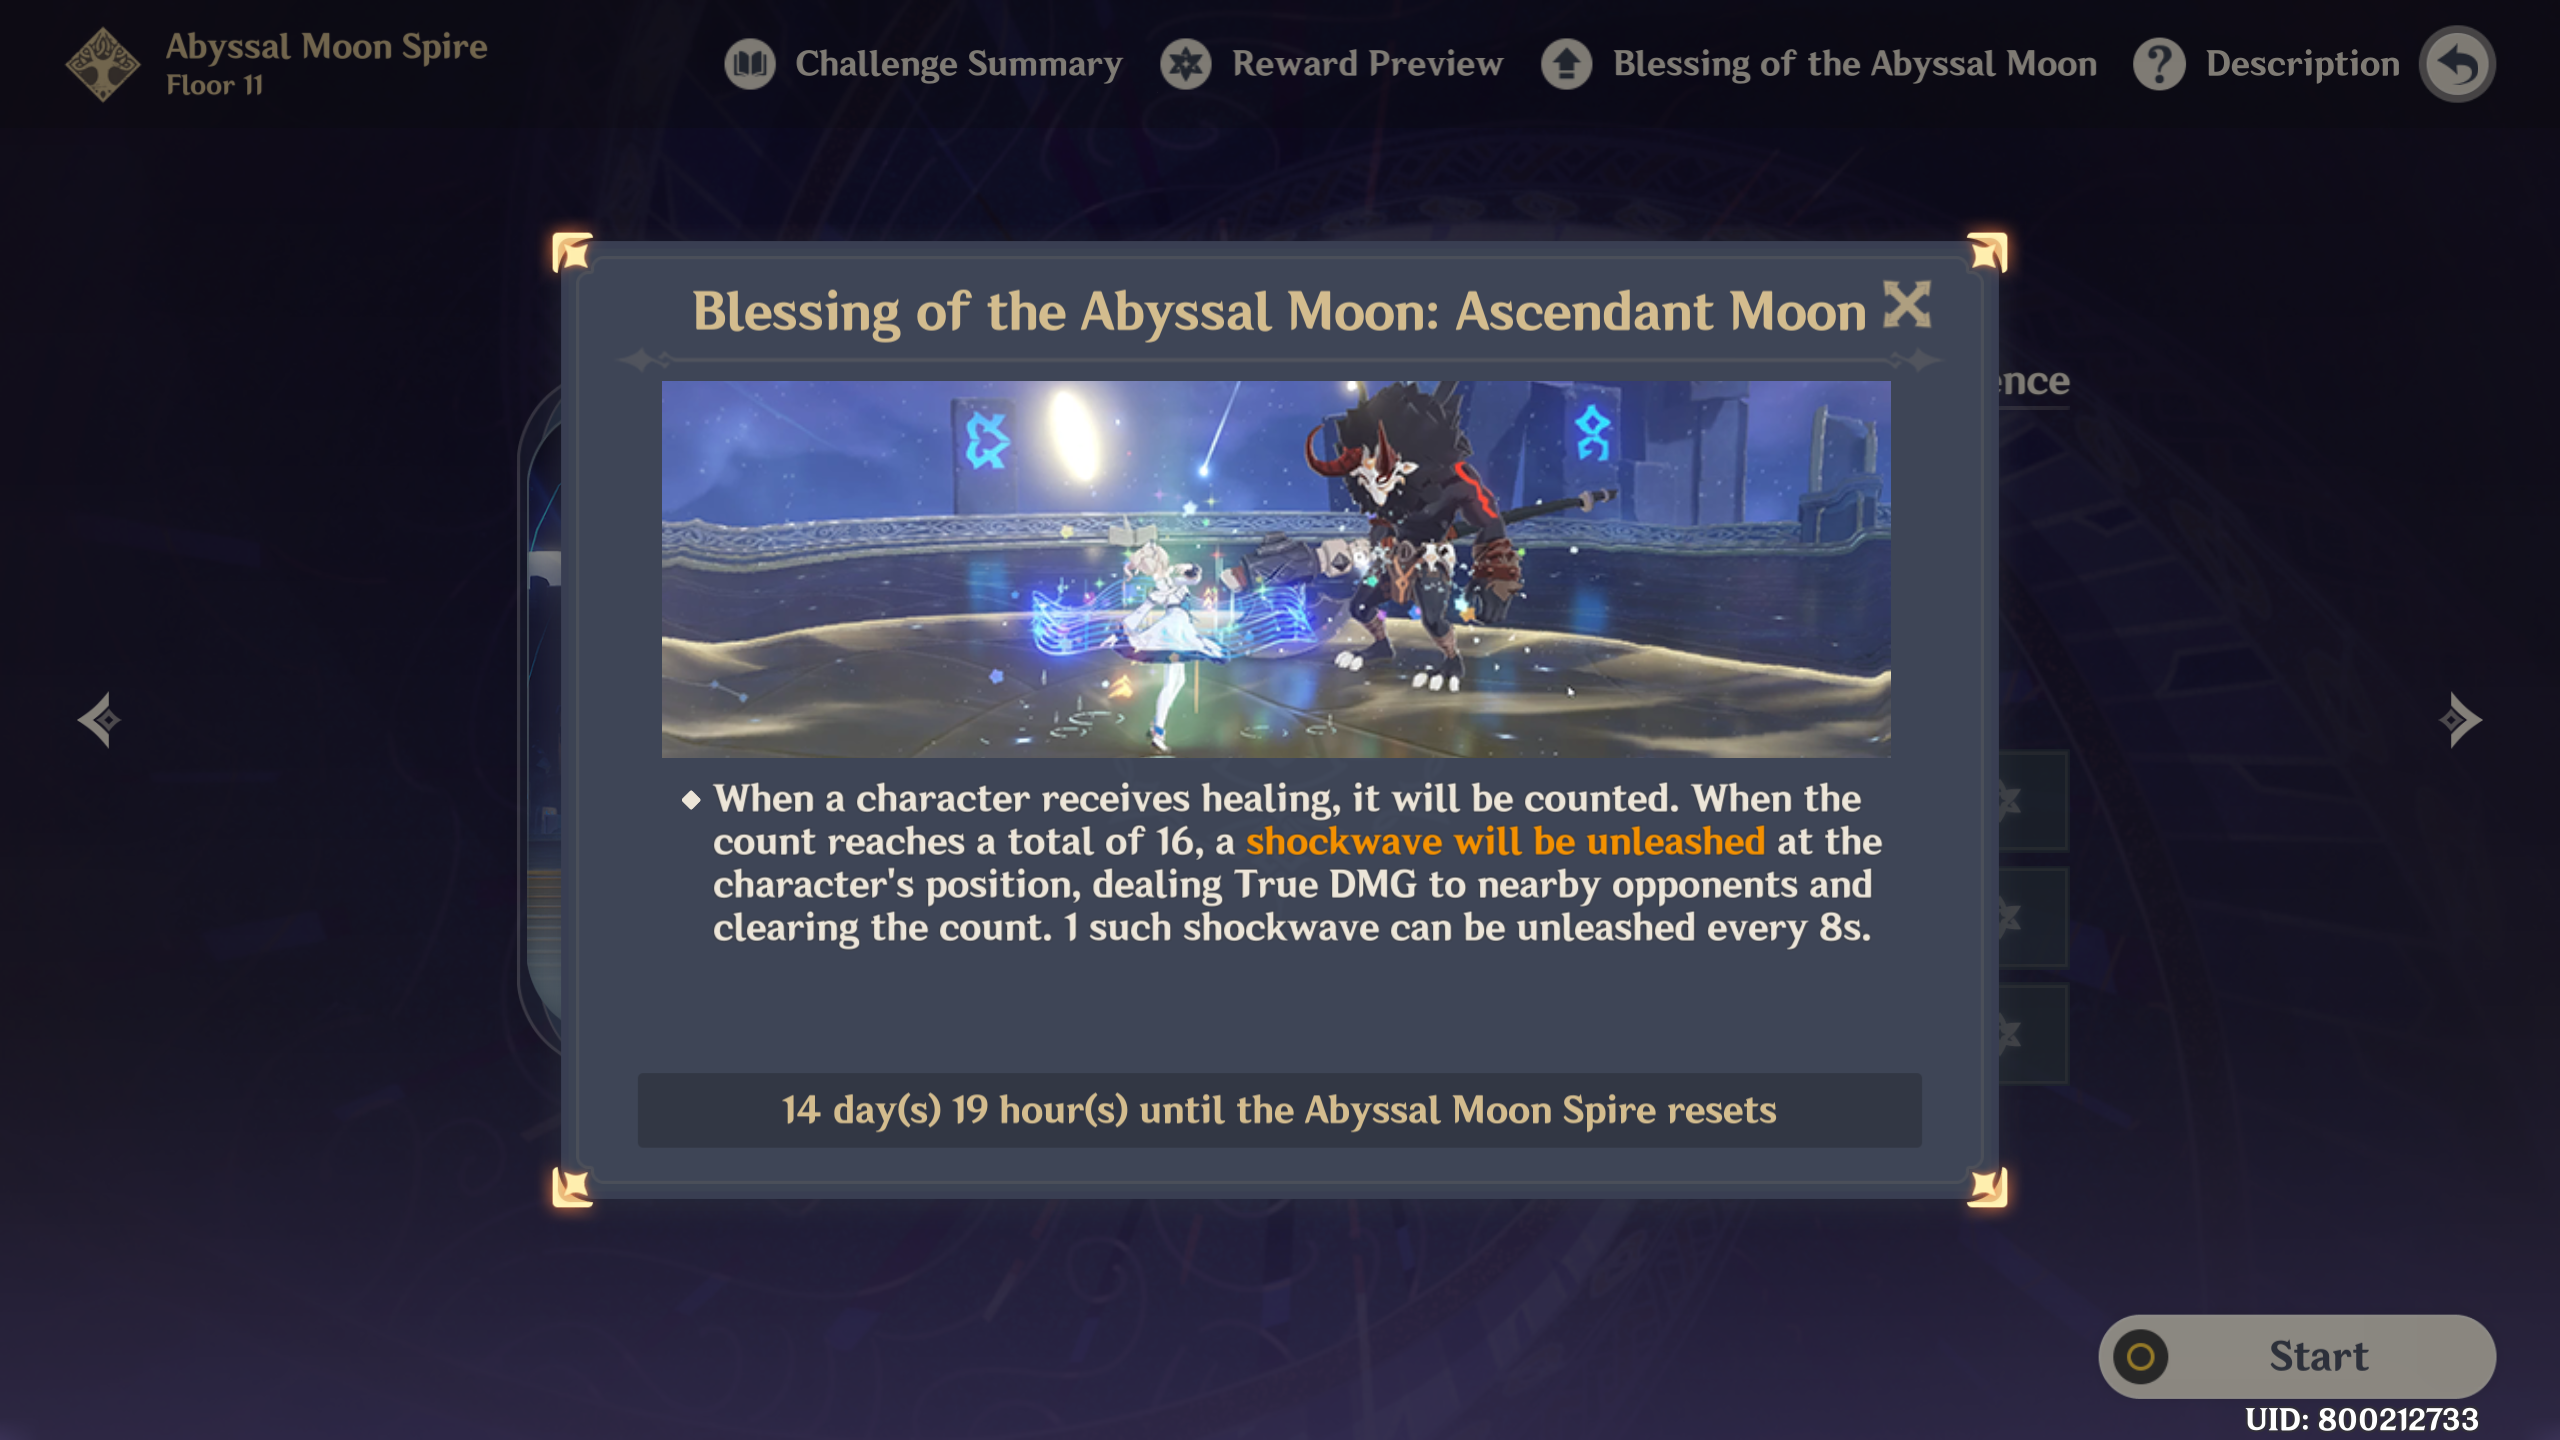
Reminder: Blessing of the Abyssal Moon will change every refresh cycle and may not be updated here. But the enemies list and strategy will remain the same.
When a character receives healing, it will be counted. When the count reaches a total of 6, a shockwave will be unleashed at the character's position, dealing True DMG to nearby opponents and clearing the count. 1 such shockwave can be unleashed every 8s.
Team Recommendations
Ley Line Disorder:
For this floor only, the Let Line flow will be normal.
General Tips:
If the floor is too hard for you, don’t forget that changing teams is an option. Although you need to start from Chamber 1, at least you don’t have to worry about stars for the Chamber you already completed.

- In the First Half, there are quite a lot of mobs here, but only 2 enemies per wave. So both AoE and single-target DPS are good here. In terms of reactions, there are no restrictions really and all elements can be used here, including Physical.
- However, Dendro will have a small disadvantage in Chamber 1 as there are Dendro Breacher Primus here with 50% Dendro RES. But after trying to use my Dendro team, we can still defeat it with no problem. As long as you can destroy their Dendro shield fast enough with Electro or Arkhe attack.
- If you have an Anemo CC, it's great to bring them here. Sure, there are only 2 enemies in each wave, but it still helps gather them before they go too far and reduce their elemental RES using the VV set. For example:
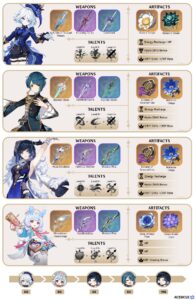
- Plunging Team: Gaming/Xiao (Any other DPS you want) + Xianyun + Furina/Bennett + Kazuha
- Childe National: Tartaglia + Kazuha + Bennett + Xiangling
- Crystallize Team: Navia + Zhongli + Bennett + Xiangling
- Freeze Team: Ayaka + Furina + Kazuha + Diona/Shenhe/Layla
- Bloom Team: Nilou + Furina + Nahida + Kokomi

- In the Second Half, all of your enemies are a single boss on each floor so I highly recommend using a single-target DPS. Some of the not recommended elements are:
- Physical is not recommended here because both Ruin Serpent in Chamber 1 and Aeonblight Drake have 70% RES to Physical DMG.
- Anemo is also a bit iffy because Setekh Wenut has 60% RES against Anemo DMG.
- Other than those 2, almost every team is suitable for this half. But, please do bring at least one bow-user for the Aeonblight Drake because it loves to hover above your melee range and you want to clip its wing (weak points) to paralyze it. For example:
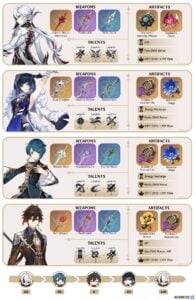
- Vaporize Team: Yoimiya + Xingqiu + Yun Jin + Zhongli
- Hyperbloom Team: Alhaitham + Xingqiu + Kuki Shinobu + Flex
- Hyperbloom Team: Nahida + Yelan + Xingqiu + Raiden Shogun/Kuki Shinobu
- Raiden Hypercarry: Raiden Shogun + Kazuha/Chevreuse + Bennett + Kujou Sara
- Quicken Team: Keqing/Tighnari + Fischl + Yaoyao/Dendro character + Zhongli
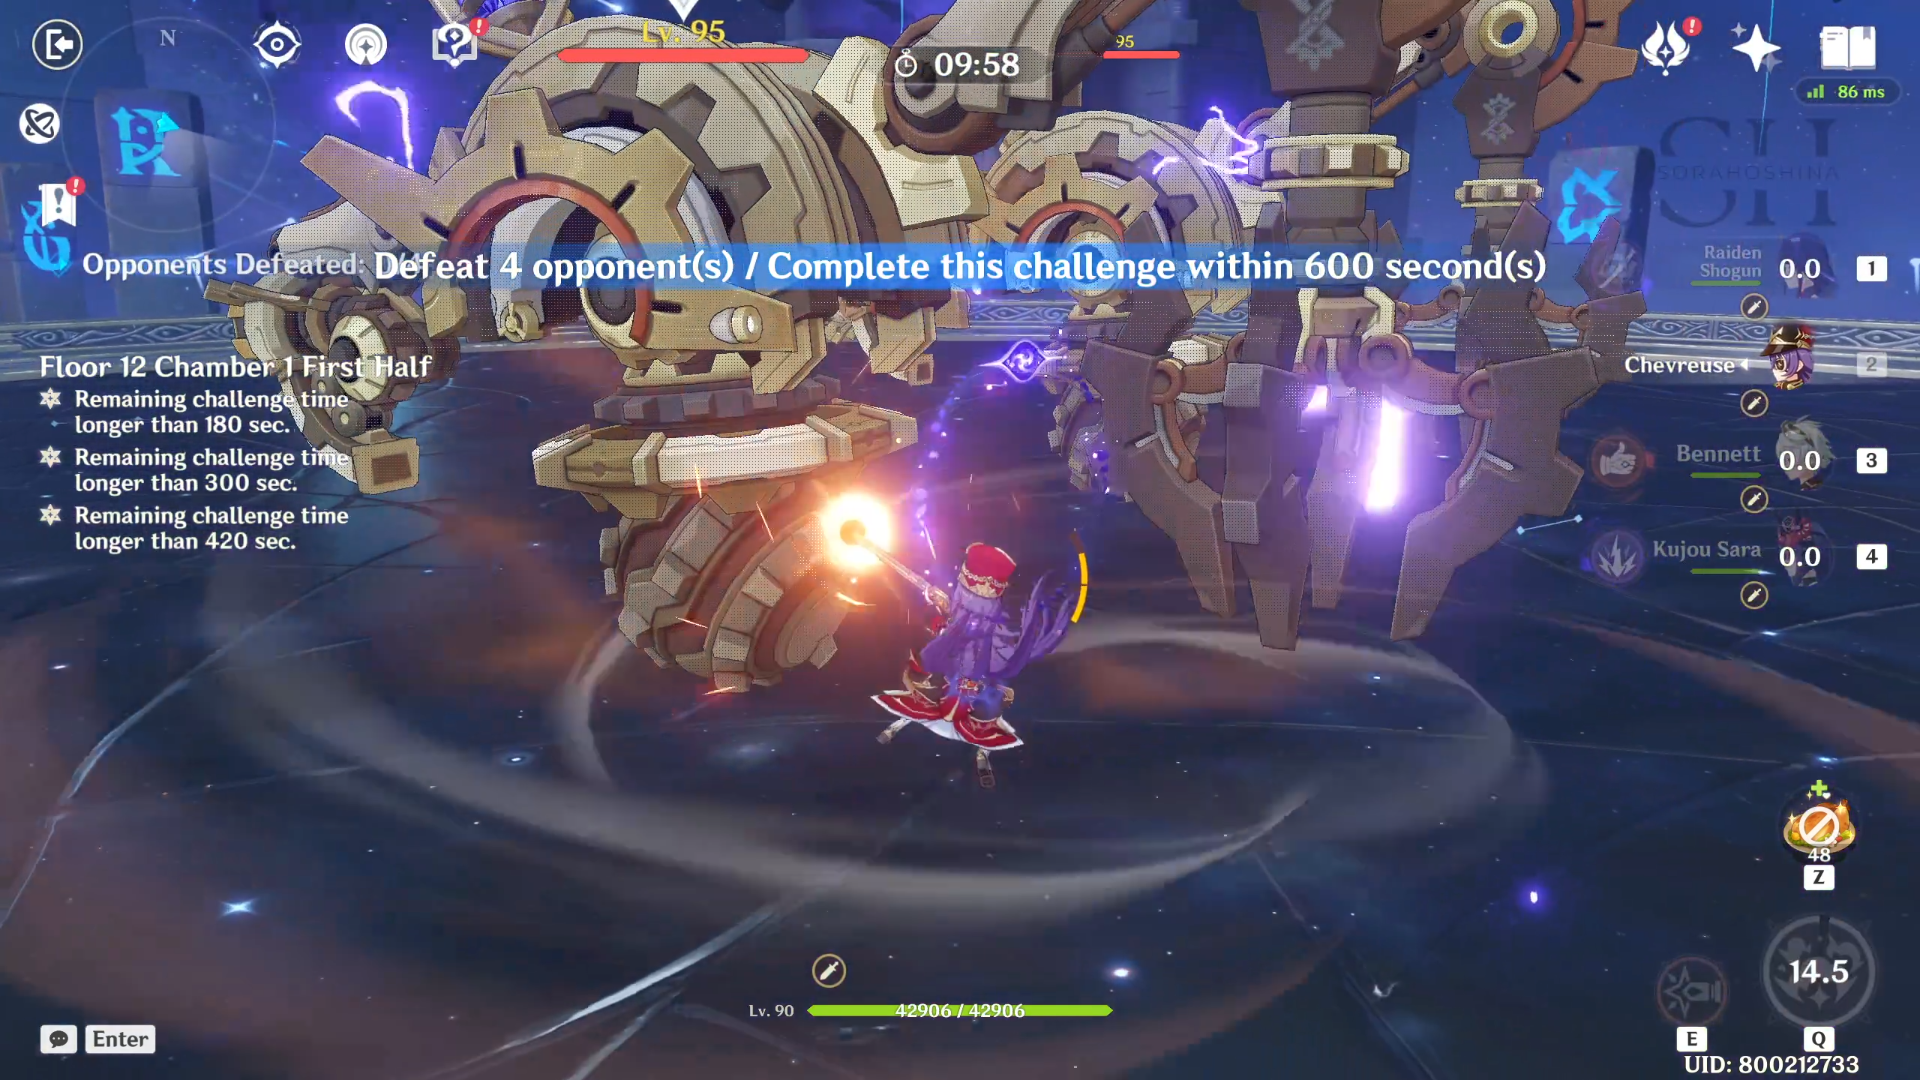
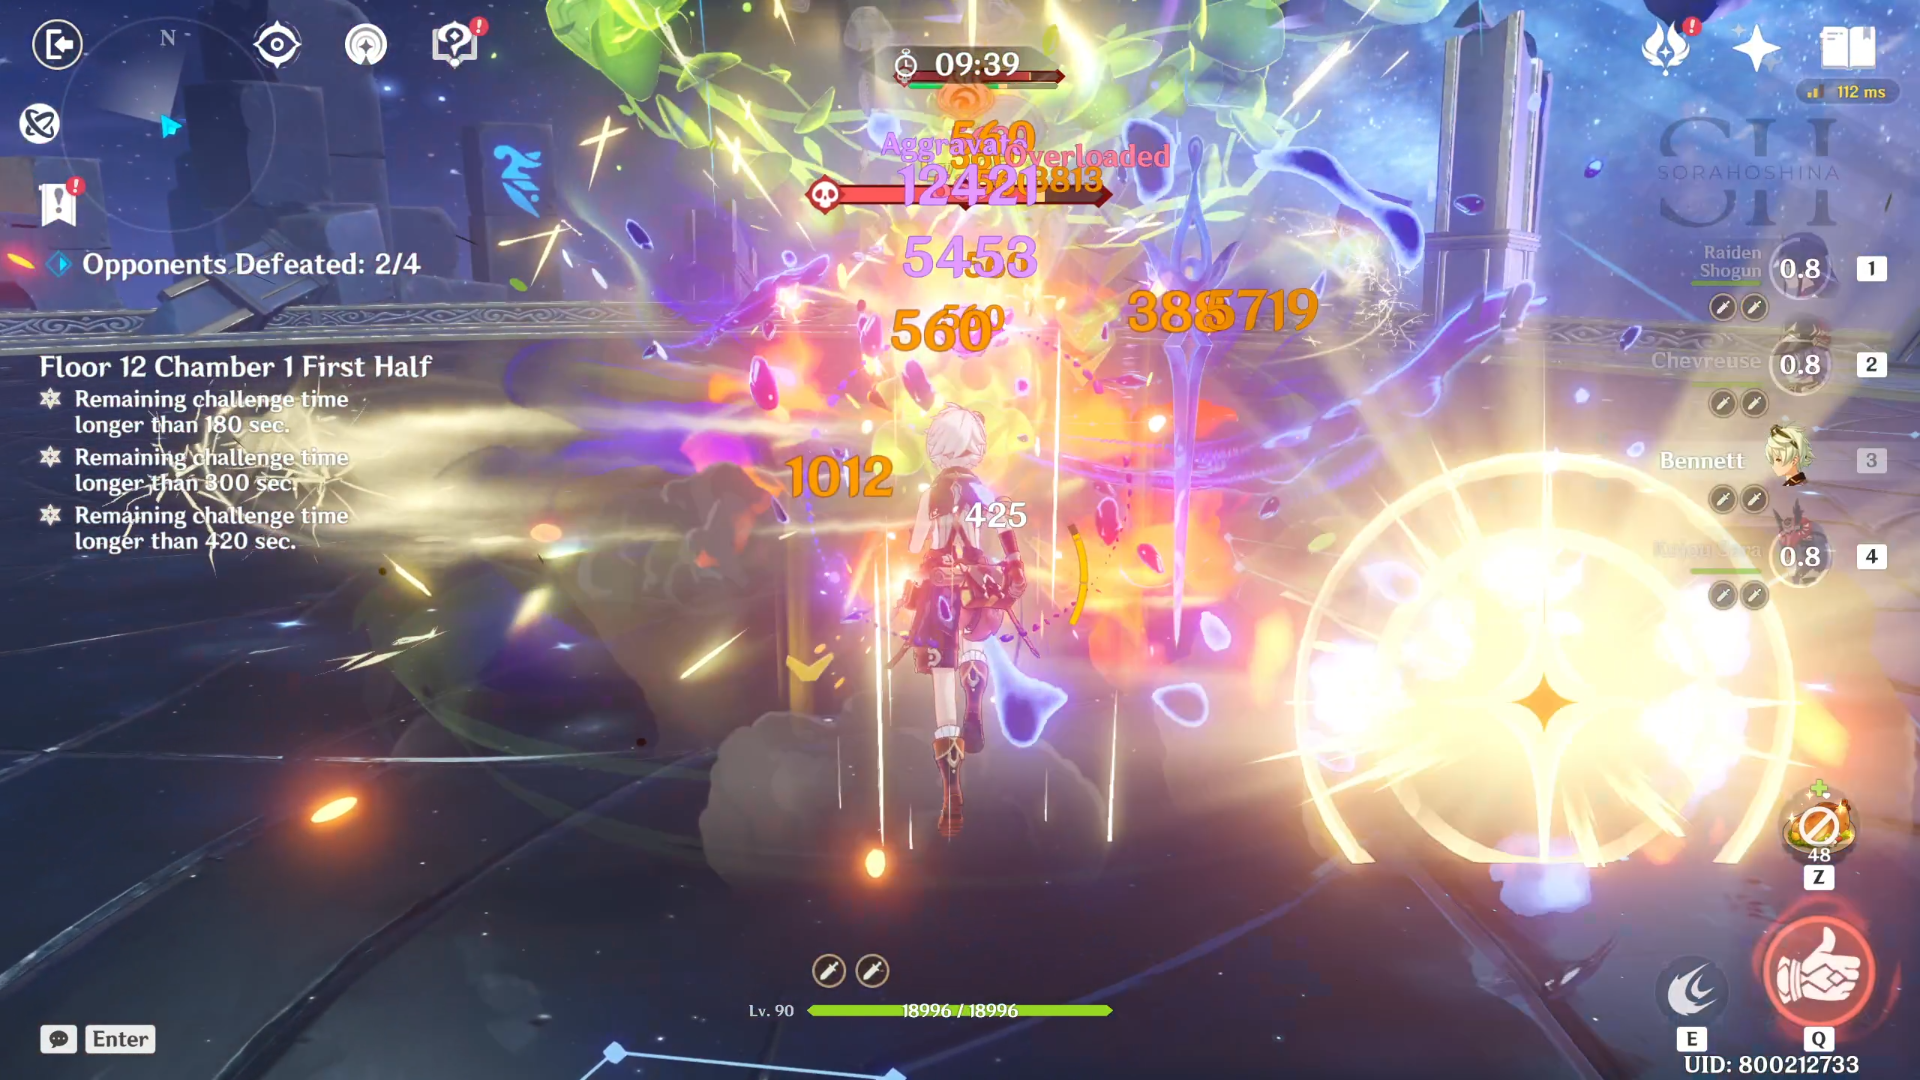
Floor 12 Chamber 1
First Half

1st Wave: 2 Construction Specialist Mek - Ousia
2nd Wave: 2 Large Overgrown Breacher Primus
- In the first wave, there are 2 Specialist Mekas in the front area. Both of these Mekas are Ousia - meaning Cryo attacks. But there are no other elements, so you should be okay as long as you don't use any Skills that inflict yourself with Hydro like Barbara or Xingqiu (when you have the Cryo status).
- When the challenge starts, just go to one of the Meka and the other one will naturally come to you. Other than brute force, there's not really any other strategy. AoE DPS is better than single-target DPS here so you can hit both enemies in one attack. Oh yeah, if possible, don't move to other areas as the next wave will also spawn at the same spot.
- In the second wave, the 2 Breacher Primus will spawn almost at the exact position as the previous Meka. Since these 2 rarely move too, further stressing why AoE DPS is better than single-target. These Primus have high Dendro RES so beware of that when you bring Dendro DPS here.
- Another thing to note is how dangerous their 'Ultimate' attack is. These 2 will periodically enter a stressed state, during which they will gain a Dendro shield and fire waves of Lushmissiles at the player, each missile dealing quite a huge Dendro DMG. When they have this shield, it's highly recommended to remove that shield ASAP so your characters won't die (unless they have a Zhongli-level shield).
- The best attack here would be a single Arkhe attack (Pneuma or Ousia doesn't matter) > Electro > Hydro. About the Arkhe attack, if you want to bring any Fontaine character, I would give browny points to a Pneuma character. After all, they can help stun the Mekas in the previous wave because those are Ousia-type.
Second Half

1st Wave: Ruin Serpent
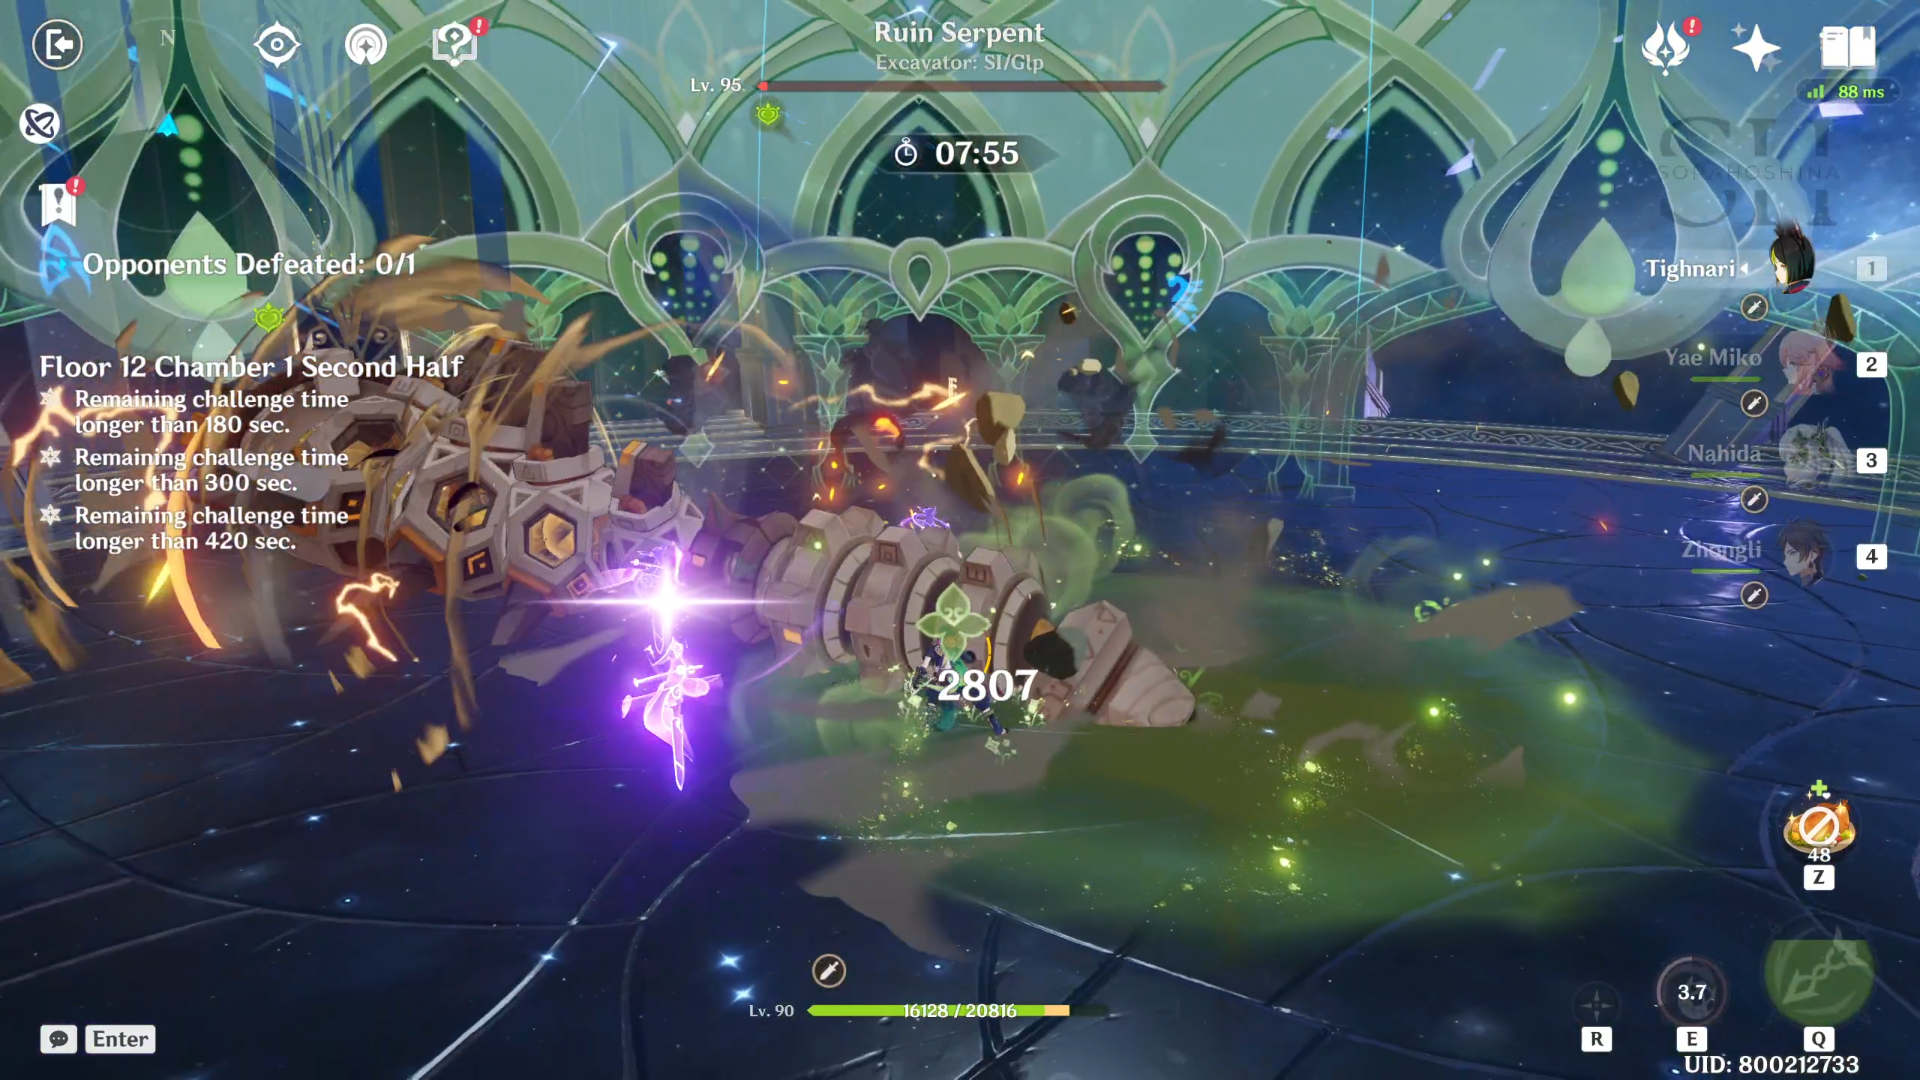
- The second half only has one enemy: the Ruin Serpent. If you have played 2.8 Spiral Abyss, you know how excruciatingly painful it is to fight this boss because they keep burrowing underground most of the time. First of all, it would take around ~5 seconds to appear from the underground so you can only wait
- Anyway, this is the important part. Its attack pattern may be RNG but usually, emphasis on usually, it will start with Steamroll (not the official name) where it will roll its body on the ground in an arc. From the moment you can start attacking this boss until the end of this Steamroll where it burrows underground again, you have around ~20 seconds.
- So I suggest you unleash every Skill and Burst to deal damage to this dude right after you can see the damage being dealt to it because you're gonna have a hard time attacking it after this opportunity.
- If, you're the unlucky few that didn't get Steamroll as its first attack. I suggest you use only Skills in the meantime, and save your Burst until it uses its Ultimate attack when you can paralyze it. Personal opinion: I would restart the stage until I can get this attack because those 20 seconds are really good for dealing as much damage as we can- that is if you don't get knocked out by the Steamroll attack in the first place.
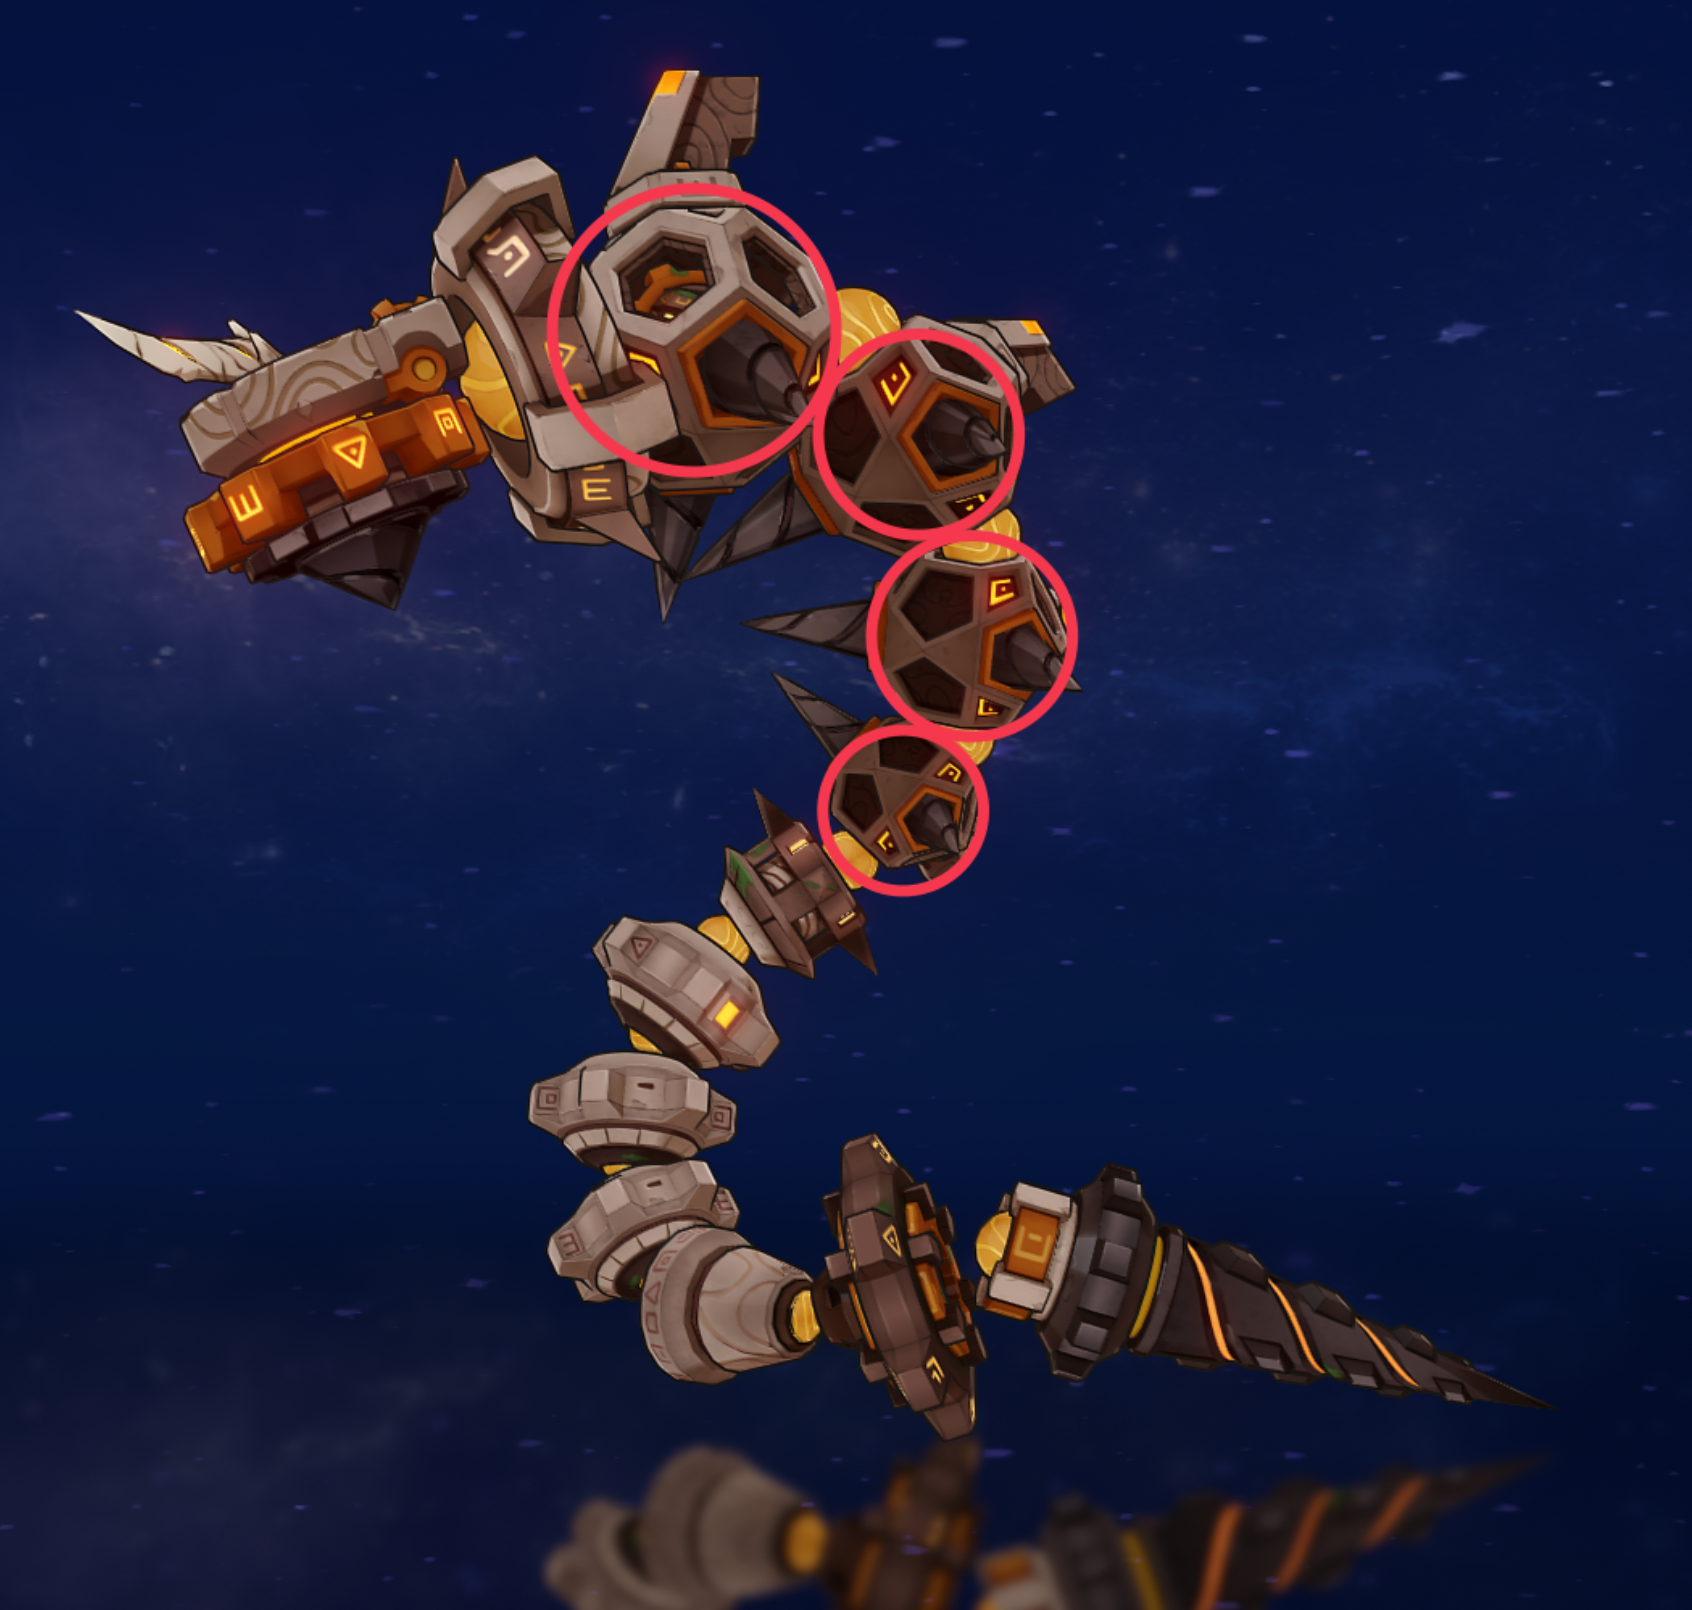
- Now for its Ultimate attack. After 3-5 attacks from Ruin Serpent, there will be instances where the Serpent uses a Bomb Barrage attack (unofficial name) where it spins around a ball while exposing its weak points. It has 4 weak points that you need to hit before you can paralyze it. Yes, it's a lot.
- This is based on observation, but usually, the boss will initiate its Ultimate after the boss moves to the left/right side of the arena > waits for a second > and burrows to the ground. After it appears again, that's when it starts charging and spinning for its Ult. It's really hard to see which weak points you have hit because the boss spins really fast so I'm just gonna mention the best method to hit it.
- The best F2P character to deal with the weak point is Xingqiu, but only if you time it perfectly. Once it starts spinning and your Xingqiu is right in front of it, use his Skill and you have a high chance to hit 2 of the weak points. Then, use his Burst to hit the remaining 2 weak points.
- If you're not experienced enough, it might be hard to pull Xingqiu's move above + the boss is just too quick in spinning, so we're going to the next option: Raiden Shogun (since many people may have her). Unleash her Skill when the boss starts spinning to hit 2 weak points. Then, continue hitting it so her Skill can continue doing AoE Electro DMG (even when the weak point is above your character's range) and hit the remaining weak points.
- The last tip I can give is to use AoE attacks (Bursts) like Keqing, Alhaitham, Kazuha, Ayaka, etc. so they can deal numerous damage while also destroying the weak points.
- Once all 4 weak points are destroyed, the Ruin Serpent will be temporarily paralyzed but only for around ~10 seconds only. This is why I think restarting all over again to get that Steamroll attack as the first attack is a good bargain. Those 20 seconds are much better than these measly 10 seconds.
Floor 12 Chamber 2
First Half
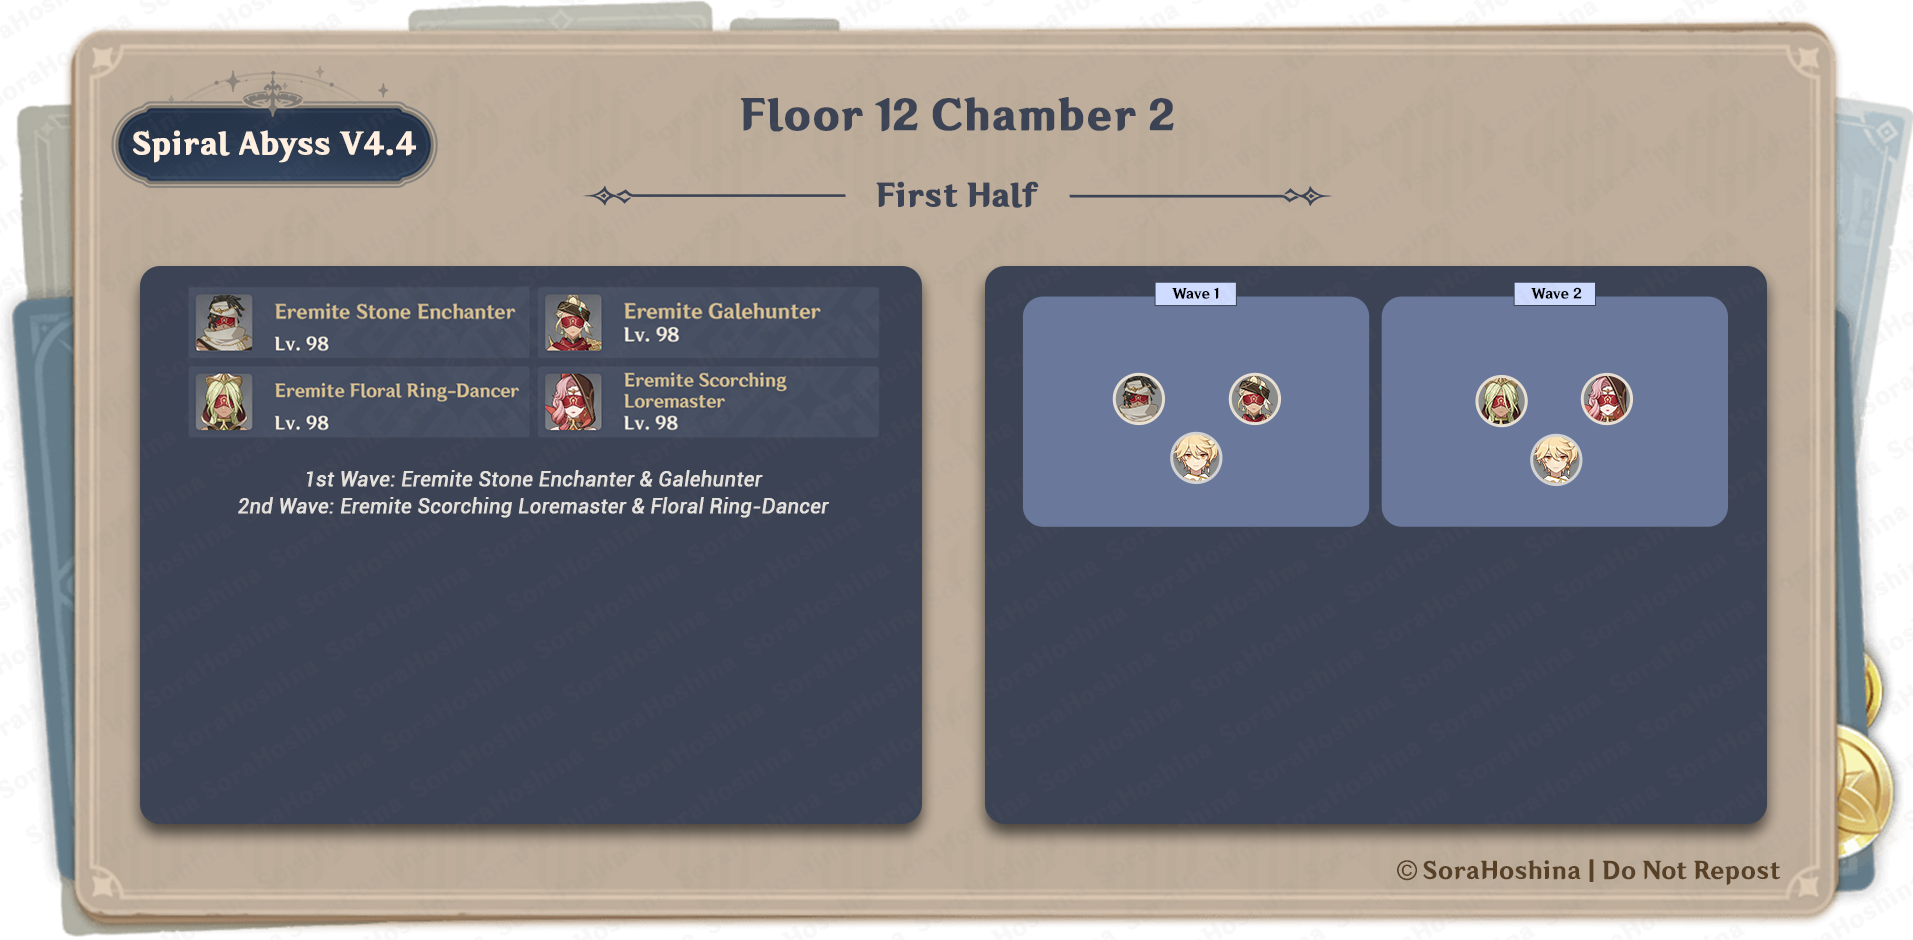
1st Wave: Eremite Stone Enchanter & Galehunter
2nd Wave: Eremite Scorching Loremaster & Floral Ring-Dancer

- In the first wave, there are 2 Eremites and fortunately, they are near each other. However, they will enter enhanced mode + summon their beasts from the start so you can't Anemo CC them. For prioritization, I suggest going after the Galehunter first because she has a skill that can create an Anemo vortex and suck your characters in + she doesn't really chase after you that much, often letting her spirit animal birb chase after you. In contrast, the Stone Enchanter would almost always chase after you.
- I hope you bring a shielder here because you're not fighting 2 enemies, but 4 instead (including the beasts), and while the beasts have half of the Eremites' health, their attack is still decently high.
- When the respective spirit animal is defeated, the enhanced state will end, and the Eremite will become stunned for 10 seconds with decreased Geo (for Stone Enchanter)/Anemo (for Galehunter) RES. They can only enter their enhanced state once.

- In the second wave, there are 2 Eremite ladies that spawn in the same spot as previous Eremites. They will immediately enter an enhanced state by summoning their spirit animals to the arena.
- Among these 2, focus on the Floral Ring-Dancer because Loremaster has the ability to teleport to your location. Ring-Dancer also has the teleport ability but only when she's not in the enhanced state. This way, you can most probably gather them at the same spot ('most probably' because it's not guaranteed).
- It's recommended to focus on defeating the spirit animals first because when they are alive, the Eremite ladies will have increased RES and high Interruption Resistance. Once the animals are defeated, the Eremite will become stunned for 10 seconds with decreased Pyro/Dendro RES (Pyro for Loremaster and Dendro for Ring-Dancer).
Second Half

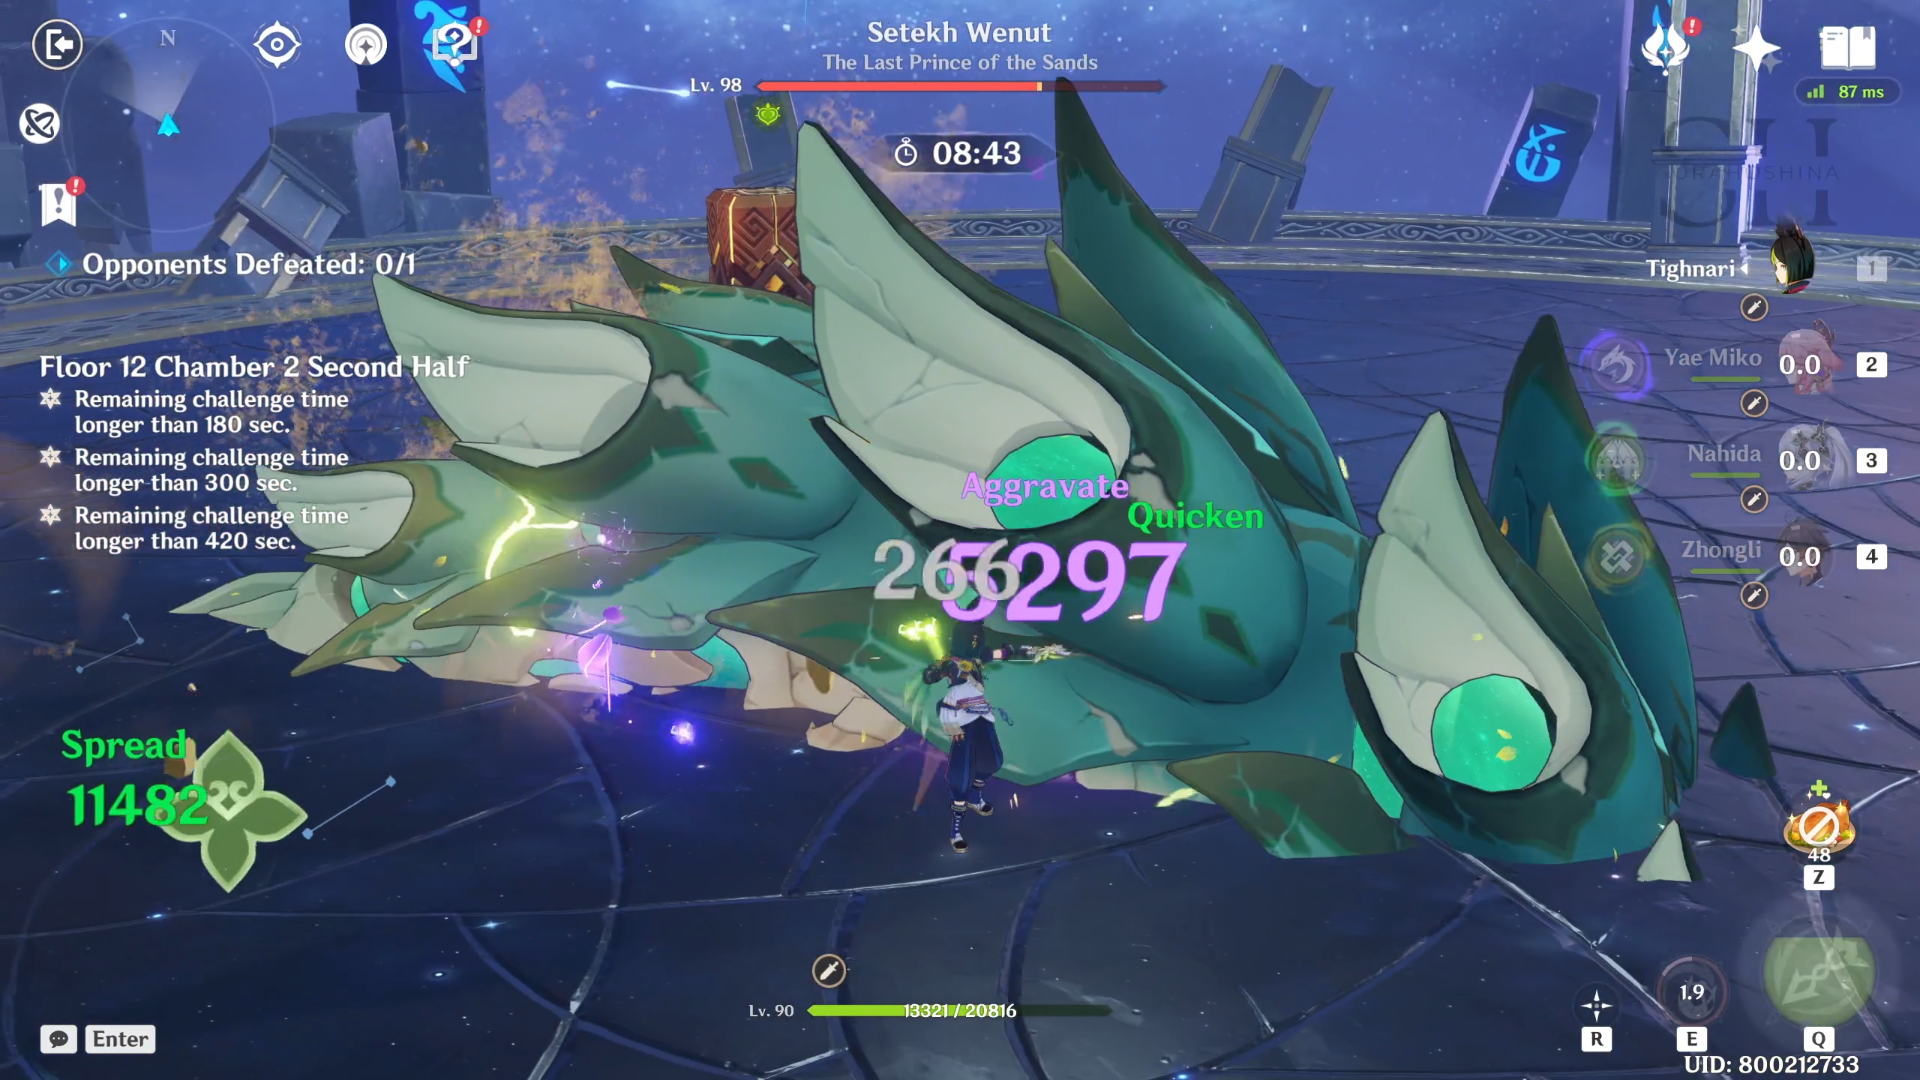
1st Wave: Setekh Wenut
- There is only one wave here and it's the bane of our existence: Setekh Wenut. If you remember, this boss last appeared in 3.5 Spiral Abyss and many people struggled to defeat it under 3-stars time because it was underground most of the time.
- From the previous run with this abomination, I can tell for certain that Setekh Wenut's movement is quite predictable. But keep in mind that there is one RNG involved so sometimes it may start with a different movement set. In short, Setekh Wenut will make 4 Normal Attacks > Windbite Bullet (Ultimate) > Repeat.
1st Attack - Thrust / Stream of Gales

- There are 2 options for its first attack, either Thrust or Stream of Gales (not official names), definitely in the middle of the arena.
- Stream of Gales: It will emerge from underground, releasing various Anemo drill-like bullets from its body. This attack is quite fast and the window time to attack it is really small, so definitely save your Burst rather than using it.
- Thrust: Surprise thrust attack where it suddenly emerges from below. This is where the RNG I mentioned before came in. In other words, there are 2 options for Wenut's first attacks: either (1) the Anemo drill-like bullets or (2) the thrust attack from underground.
2nd Attack - Dig

- For the second movement, it won't attack but still emerges its body from the floor, usually at the back area. The best way to utilize this is to leave behind an elemental item (like Miko's totem, Fischl's Oz, etc) during the first move so when Wenut emerges for the second time, you can immediately create elemental reactions. There is no optional attack as Wenut will definitely won't attack you for its second movement set.
3rd Attack - Stormbreath

- Unleash a breath of Anemo damage, while arcing the attack in a cone-like area in front of itself, usually at the front-right area. The third attack has a relatively decent window time for you to attack it (around 8-10 seconds depending on your location when Wenut appears), you can use your Burst if you want, but only if you can fill it up again because Wenut will do its Ultimate Skill after the 4th attack. There is no optional attack as Wenut will definitely use this wind-blower-like movement set.
4th Attack - Dig
- The last attack is similar to the 2nd one where Wenut emerges from the ground but won't attack you. I'm sure you understand that the window time here is very small. There is no optional attack as Wenut will definitely won't attack you for its fourth movement set.
Ultimate - Windbite Bullet

- After making those 4 movement sets, Setekh Wenut will definitely use its Ultimate Attack (Windbite Bullets). This is the time when you spam all Elemental Skill & Burst possibles to destroy at least 2 Bullets (with Cryo/Electro/Hydro/Pyro attacks).
- Once it's destroyed, the boss loses 45% RES to the elements that its Windbite Bullets were destroyed by and paralyzes Wenut for 10 seconds (it's so short my gawd). Once it’s paralyzed, now is the time for you to spam every Burst you have to make the most of the Setekh Wenut’s paralysis.
- After waking up from the paralyzed state, Wenut will start again from the 1-4 movement set and then use the Ultimate again.
Loophole
- As I mentioned before, Wenut will do 4 attacks first before using its Ultimate. BUT! There is a CHANCE you can reduce its attack to 3 by inflicting Wenut with Cryo. It will not 100% work because after multiple trials with my Freeze team, sometimes the boss will do 3 attacks, but sometimes it's still 4 attacks. But I just thought to still let you know about this loophole.
- It's worth mentioning that it can only save you a few seconds since the Wenut's fourth movement set is just it passing through and won't attack you, but that's the point, it WILL save you a few seconds (which is crucial if you want to full star this floor.)
Floor 12 Chamber 3
First Half

1st Wave: Assault Specialist Mek & Suppression Specialist Mek
2nd Wave: Assault Specialist Mek & Suppression Specialist Mek

- In the first wave, there are 2 Ousia Mekas in the middle of the area. With their attack combination, they can trigger Overload reactions (Assault Meka deals Electro while Suppression Meka deals Pyro DMG).
- When you start the challenge, go to Suppression Meka on the right and brute force it. The reason is because this one is pretty slow in chasing after you. While the Assault Meka (on the left) has multiple attacks that will make itself launch towards you. Other than that, there is nothing else to say here. Well, maybe except for that you can paralyze them if you use 2 Pneuma attacks.
- In the second wave, it's the exact same enemies but they swapped places. So once the second wave spawns, go to the left side to chase the Suppression Meka.
Second Half

1st Wave: Aeonblight Drake

- There is only one enemy in one wave; Aeonblight Drake. Please bring an archer here because once this enemy goes airborne (which it often did), most of your melee characters can't reach to attack it. And the best thing you can do is use your archer to hit the weakpoints to make it fall and paralyze it or wait for a very long time for it to come down.
- The Drake's weak points have different locations depending on its next attack, but it will either be on its head, chest, or both of its wings. You will know which one it is by observing the shining orange orb. The most notable are these two skills:
- Missile Barrage (Weakness on its chest): Locks onto the player and fires a barrage of missiles. During this attack, the weak point on its chest is exposed.
- Ultimate - Energy Surge (Weakness on its head): Charges before scattering a great number of bombs into the air, dealing damage when they land as AoE Physical DMG or AoE Elemental DMG matching the Aeonblight Drake's currently absorbed element.
- For this Ultimate attack, if you don't paralyze it before it can launch the bomb, it will gain 60% Resistance to the absorbed element that it has received the most amount of DMG.
- Once you hit its weak point, it will fall to the ground and you will have a steady window to unleash every Skill and Burst until it recovers itself. After that, keep repeating the same thing, where if it goes airborne, you must hit its weak point. And if it didn't fly for some time, it's your lucky time so spam those Skills and Bursts~ One last thing, please don't bring Physical character it has massive Physical resistance.

Sora
Articles: 233More Articles

Genshin Impact Codes – July 2024
Sigewinne Team Compositions

Genshin Impact: Version 4.7 Tier List (July 2024)

Genshin Impact: Sigewinne Quick Character Guide

Genshin Impact: Primogems Calculation Version 4.8
Arlecchino Team Compositions

Baizhu Team Compositions
Wanderer Team Compositions
Alhaitham Team Compositions

Genshin Impact: Spiral Abyss V4.7 Floor 12 Complete Guide

Genshin Impact: Spiral Abyss V4.7 Floor 11 Complete Guide
Genshin Impact: Thoma Quick Character Guide

Genshin Impact: Sethos Quick Character Guide

Genshin Impact: Alhaitham Quick Character Guide

Genshin Impact: Clorinde Quick Character Guide

Genshin Impact: Primogems Calculation Version 4.7

Genshin Impact 4.7 Special Program Livestream Overview
3 New Redemption Codes from 4.7 Special Program

Genshin Impact 4.7 Livestream Countdown
