Table of Contents
Floor 11 is the start of a challenge in Spiral Abyss for Genshin Impact players. The difficulty spikes up a little bit from the previous floor, in addition to the ever-changing roster of enemies in each version. In version 4.5, there is no normal boss here but there are lots of mobs that come in multiple waves. Follow this guide to know more about enemies' lineup, their weaknesses, and how to complete the entire chamber on Floor 11.
Blessing of the Abyssal Moon

Reminder: Blessing of the Abyssal Moon will change every refresh cycle and may not be updated here. But the enemies list and strategy will remain the same.
When characters create Geo Constructs, a shockwave is unleashed at the character's location, dealing True DMG to nearby opponents. Such a shockwave can only be unleashed once every 6s.
Ley Line Disorder
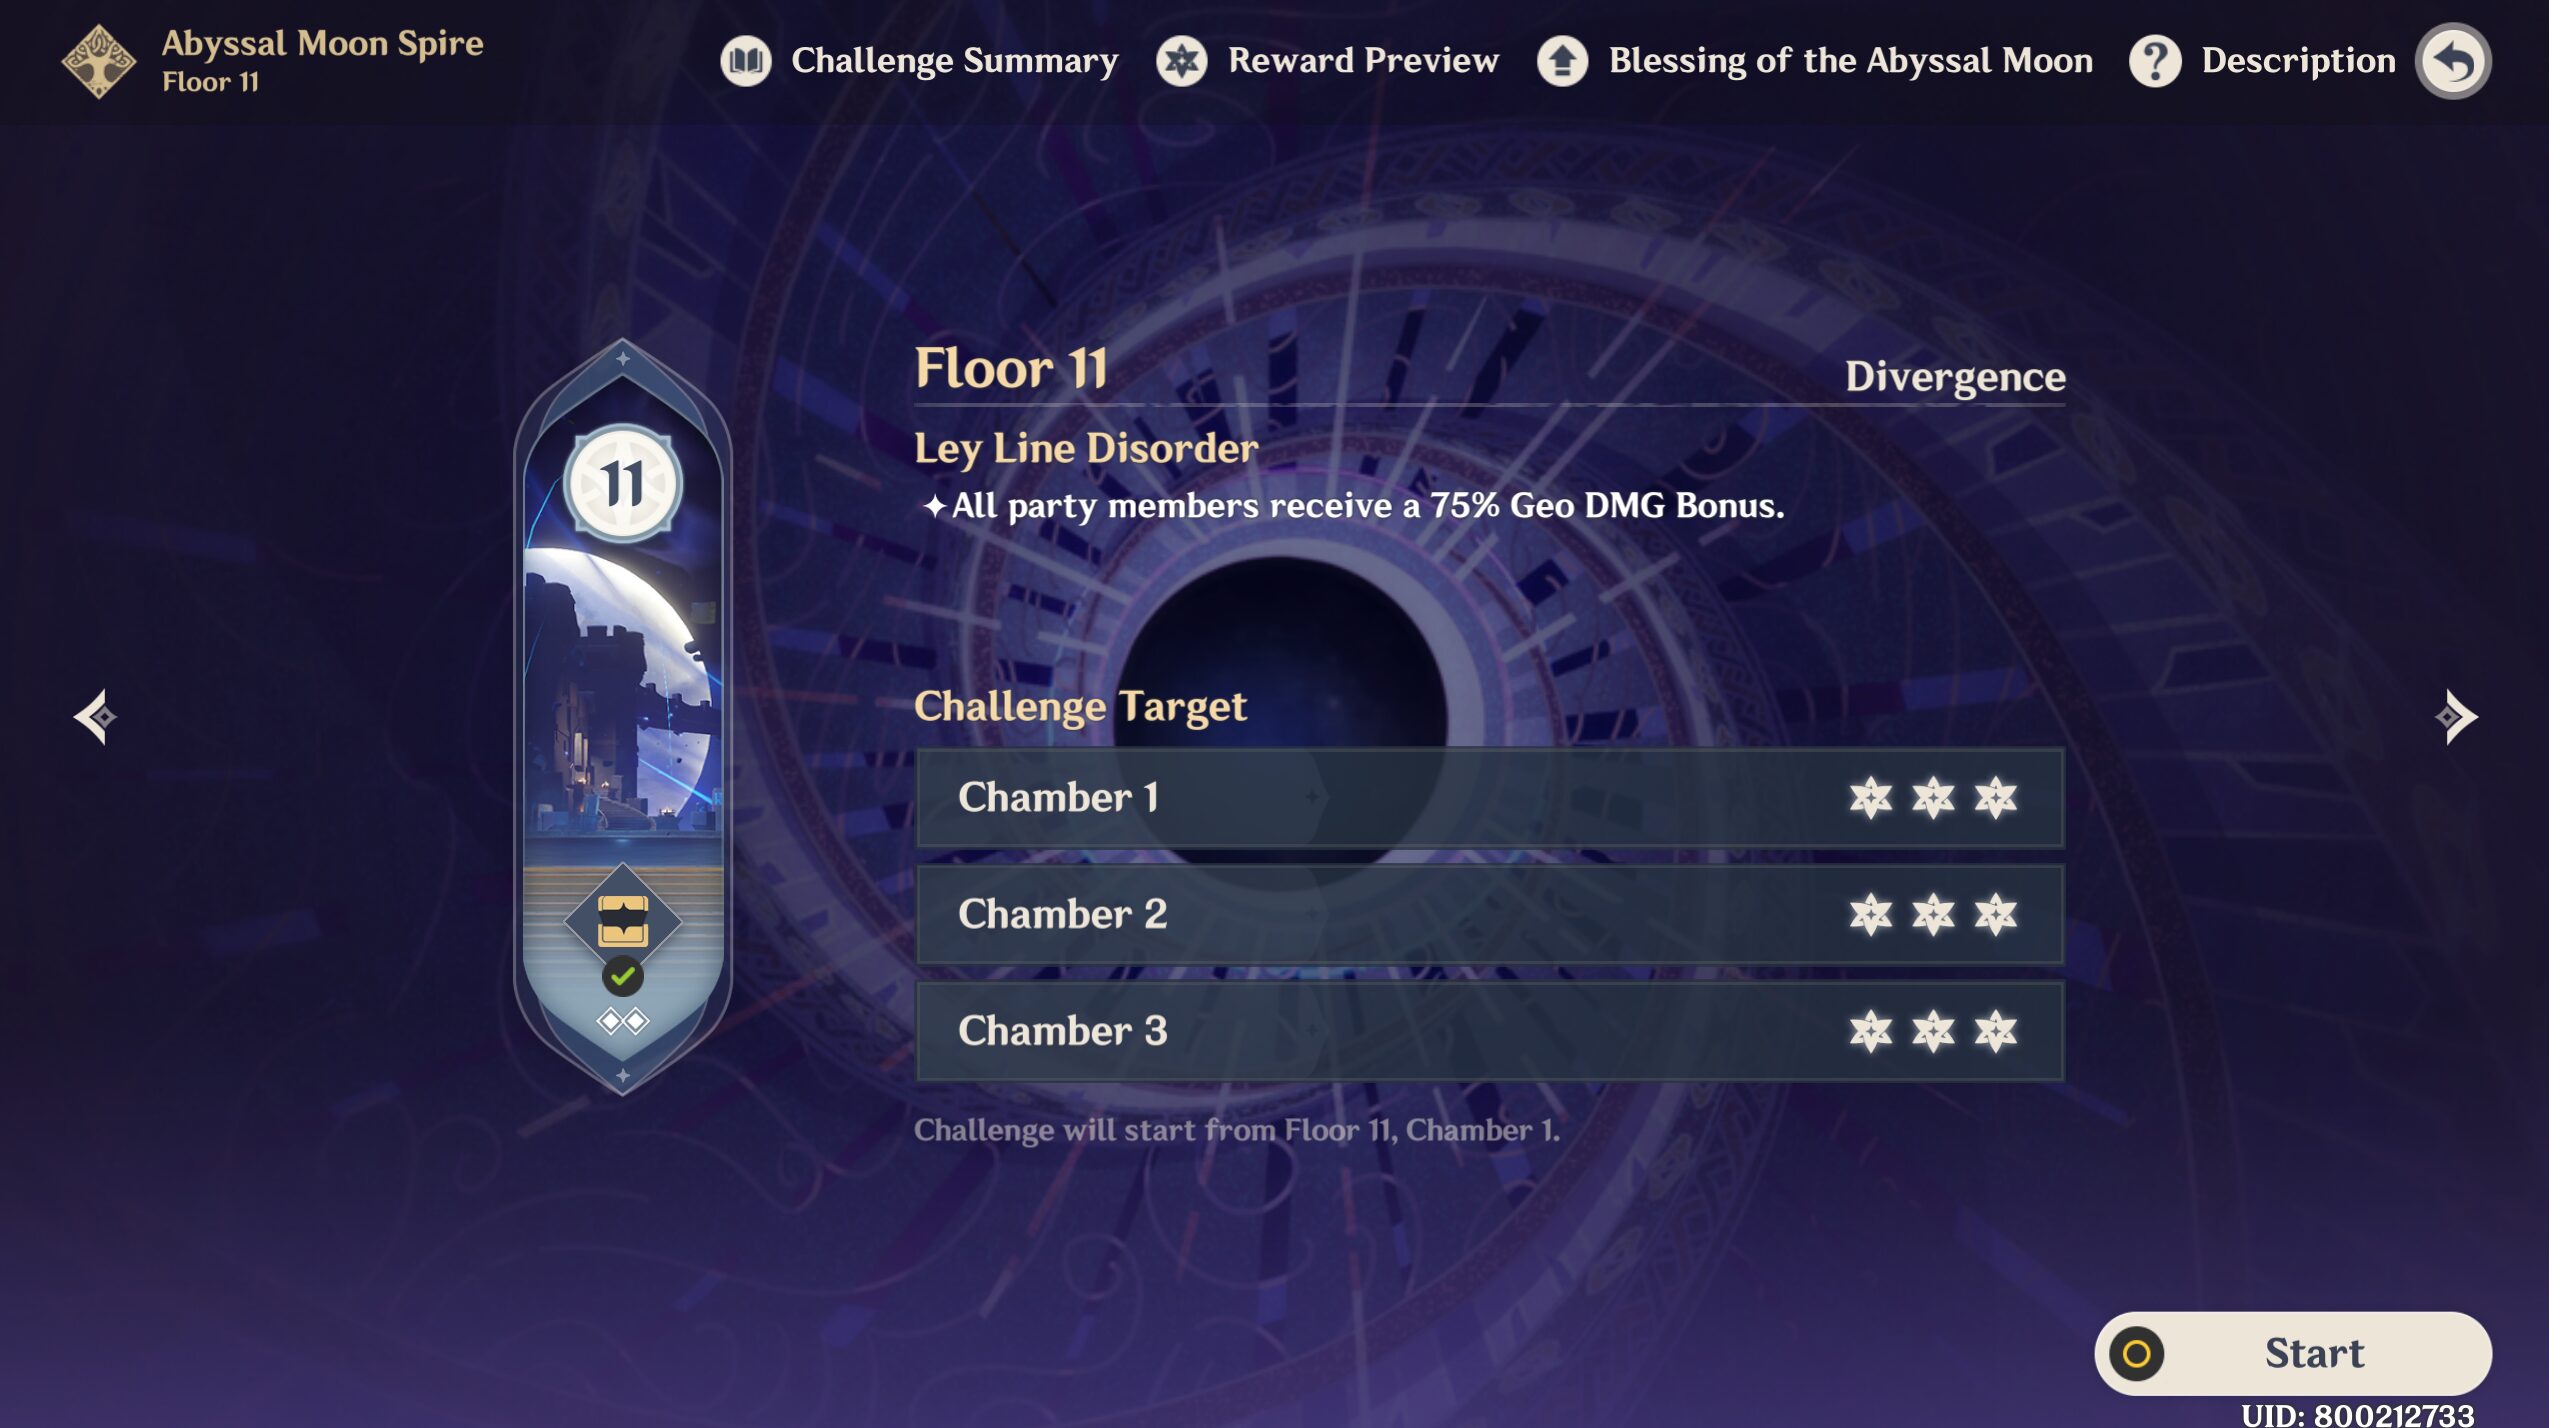
All party members receive a 75% Geo DMG Bonus.
Team Recommendations
There are NO Leyline Monolith stages for Chamber 1, so you don't have to be wary and bring your best team after looking at the enemies' list.
- The recommended element for the First Half is every element except Hydro and Anemo (Geo is the best). The reason is obviously because there are Local Legends Phantasm in the 3rd chamber and your Hydro DPS won't do jack there + Xuanwen Beast in the 2nd chamber has high resistance against those 2 elements I mentioned.
- Another best option is to bring any claymore user because, in the 1st chamber, there would be lots of rock-shielded enemies and the best way to destroy them would be using Blunt Attacks: claymore attacks, plunging attacks (except bow and catalyst), and Geo attacks. For examples:
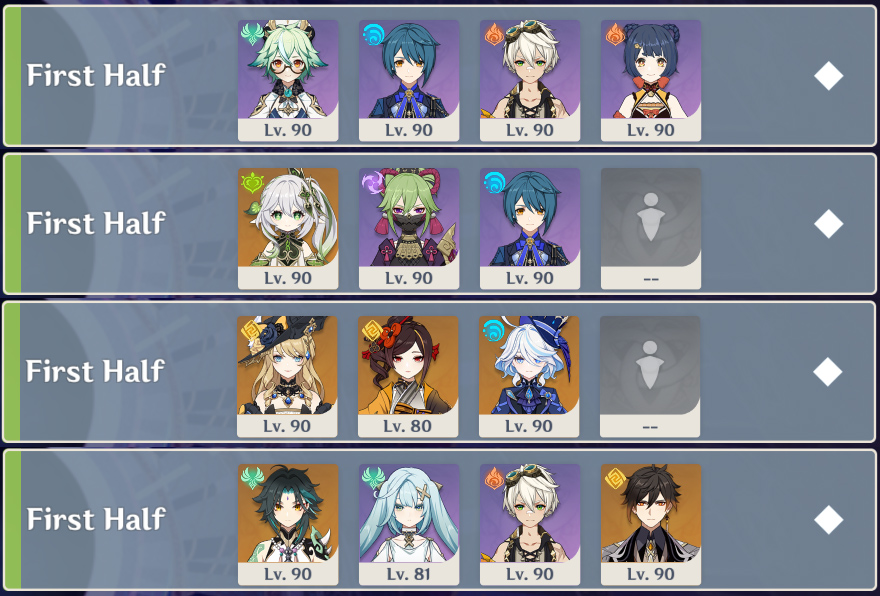
- National Team: Sucrose + Xingqiu + Bennett + Xiangling
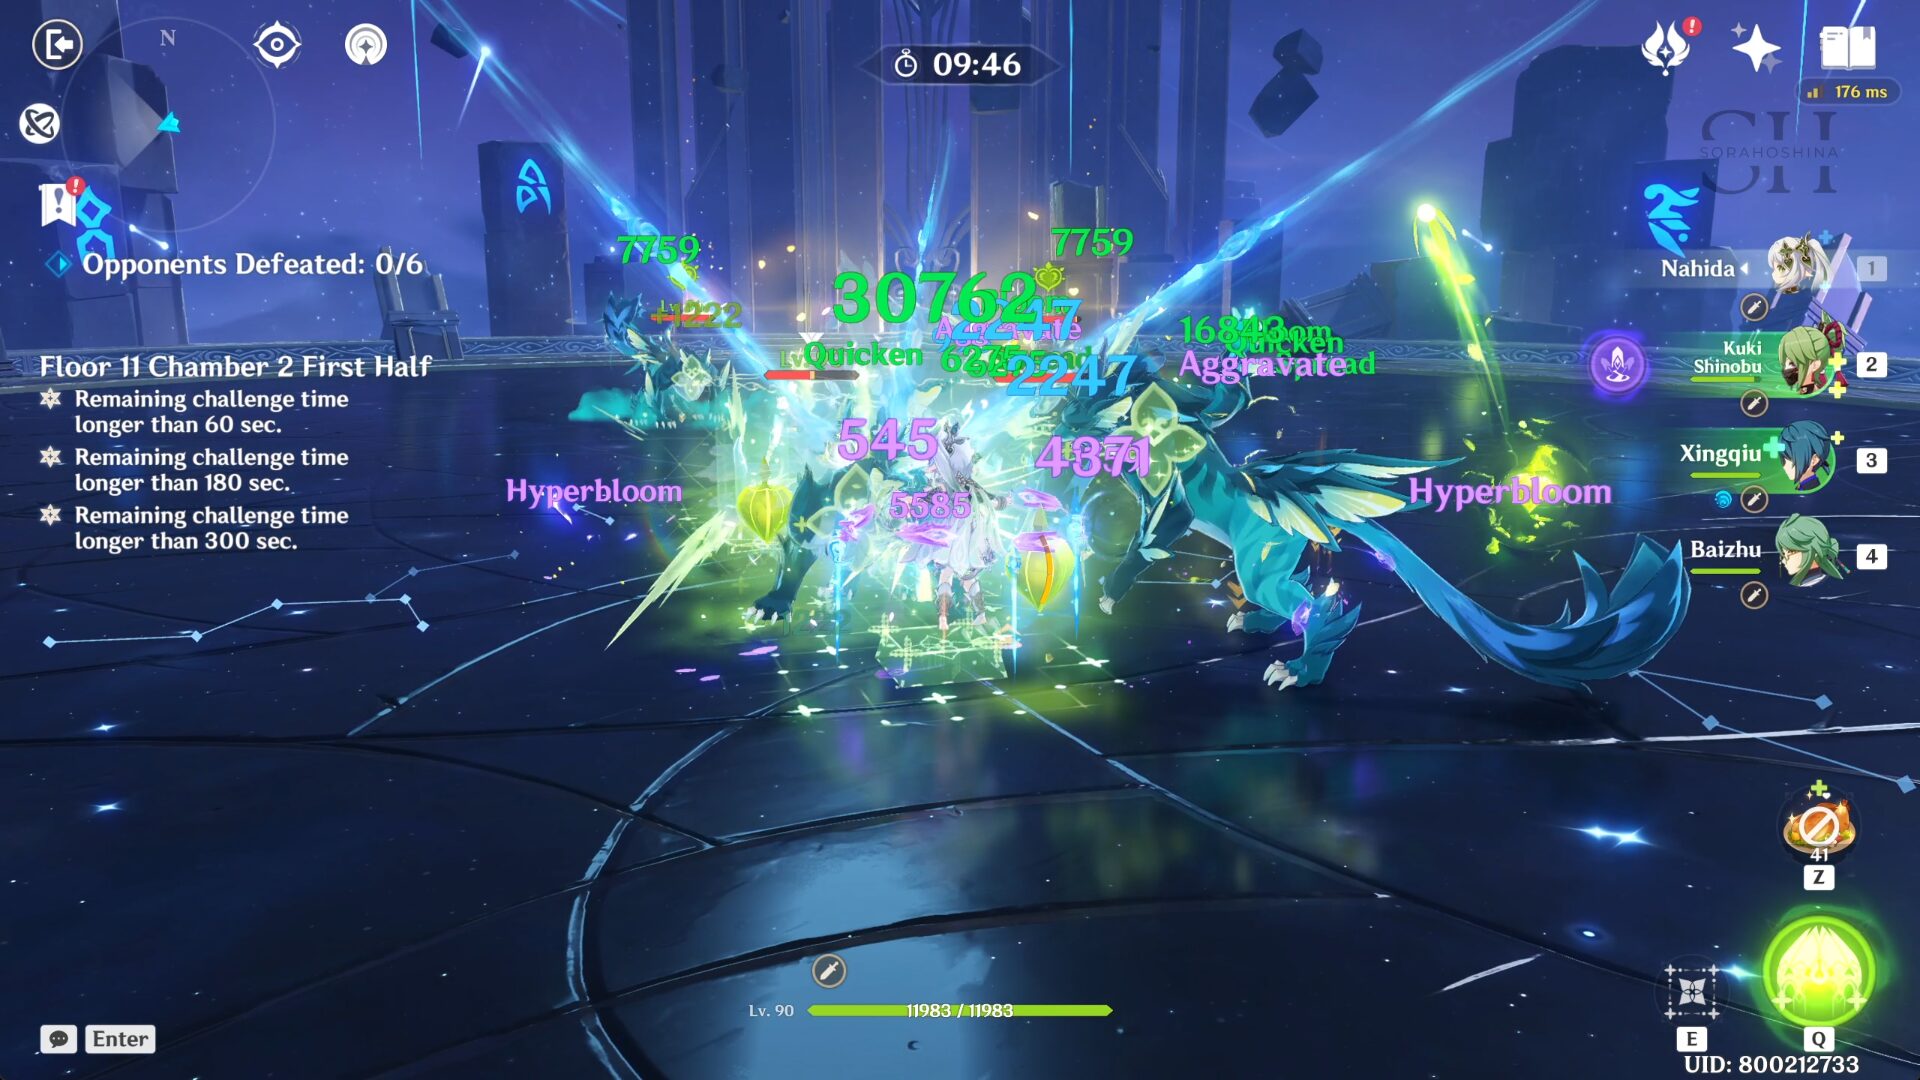
- Hyperbloom Team: Nahida + Kuki Shinobu + Xingqiu + Flex
- Crystallize Team: Navia + Chiori + Furina + Flex
- Hypercarry Team: Xiao + Faruzan + Bennett + Zhongli
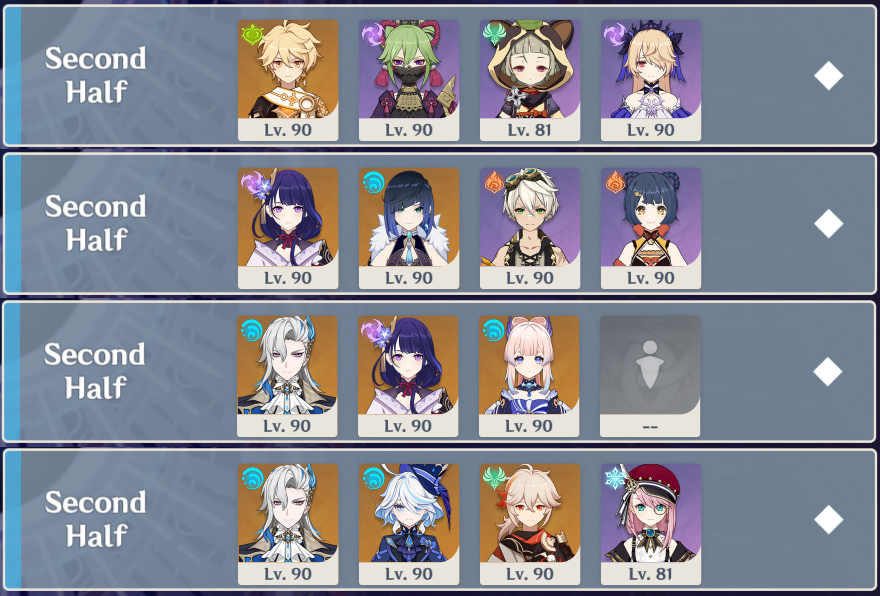
- For the Second Half, similar to the first half, is pretty much nice to most elements. The two elements that might have a tiny disadvantage are Pyro and Dendro because the Consecrated enemies in chamber 2 have a small resistance to their own element in their Phagocytic Form. But if you really want to bring those elements as DPS, it should be fine as long as you bring other elements to trigger reactions.
- Anemo CC isn't really needed since only the 1st chamber can take advantage of Anemo CC, but if you want to bring them, go ahead. For examples:
- Aggravate Team: Dendro MC + Kuki Shinobu + Sayu + Fischl
- National Team: Raiden + Yelan + Bennet + Xiangling
- Taser Team: Neuvillette + Raiden Shogun + Kokomi/Furina + Flex
- Freeze Team: Neuvillette + Furina + Kazuha + Charlotte
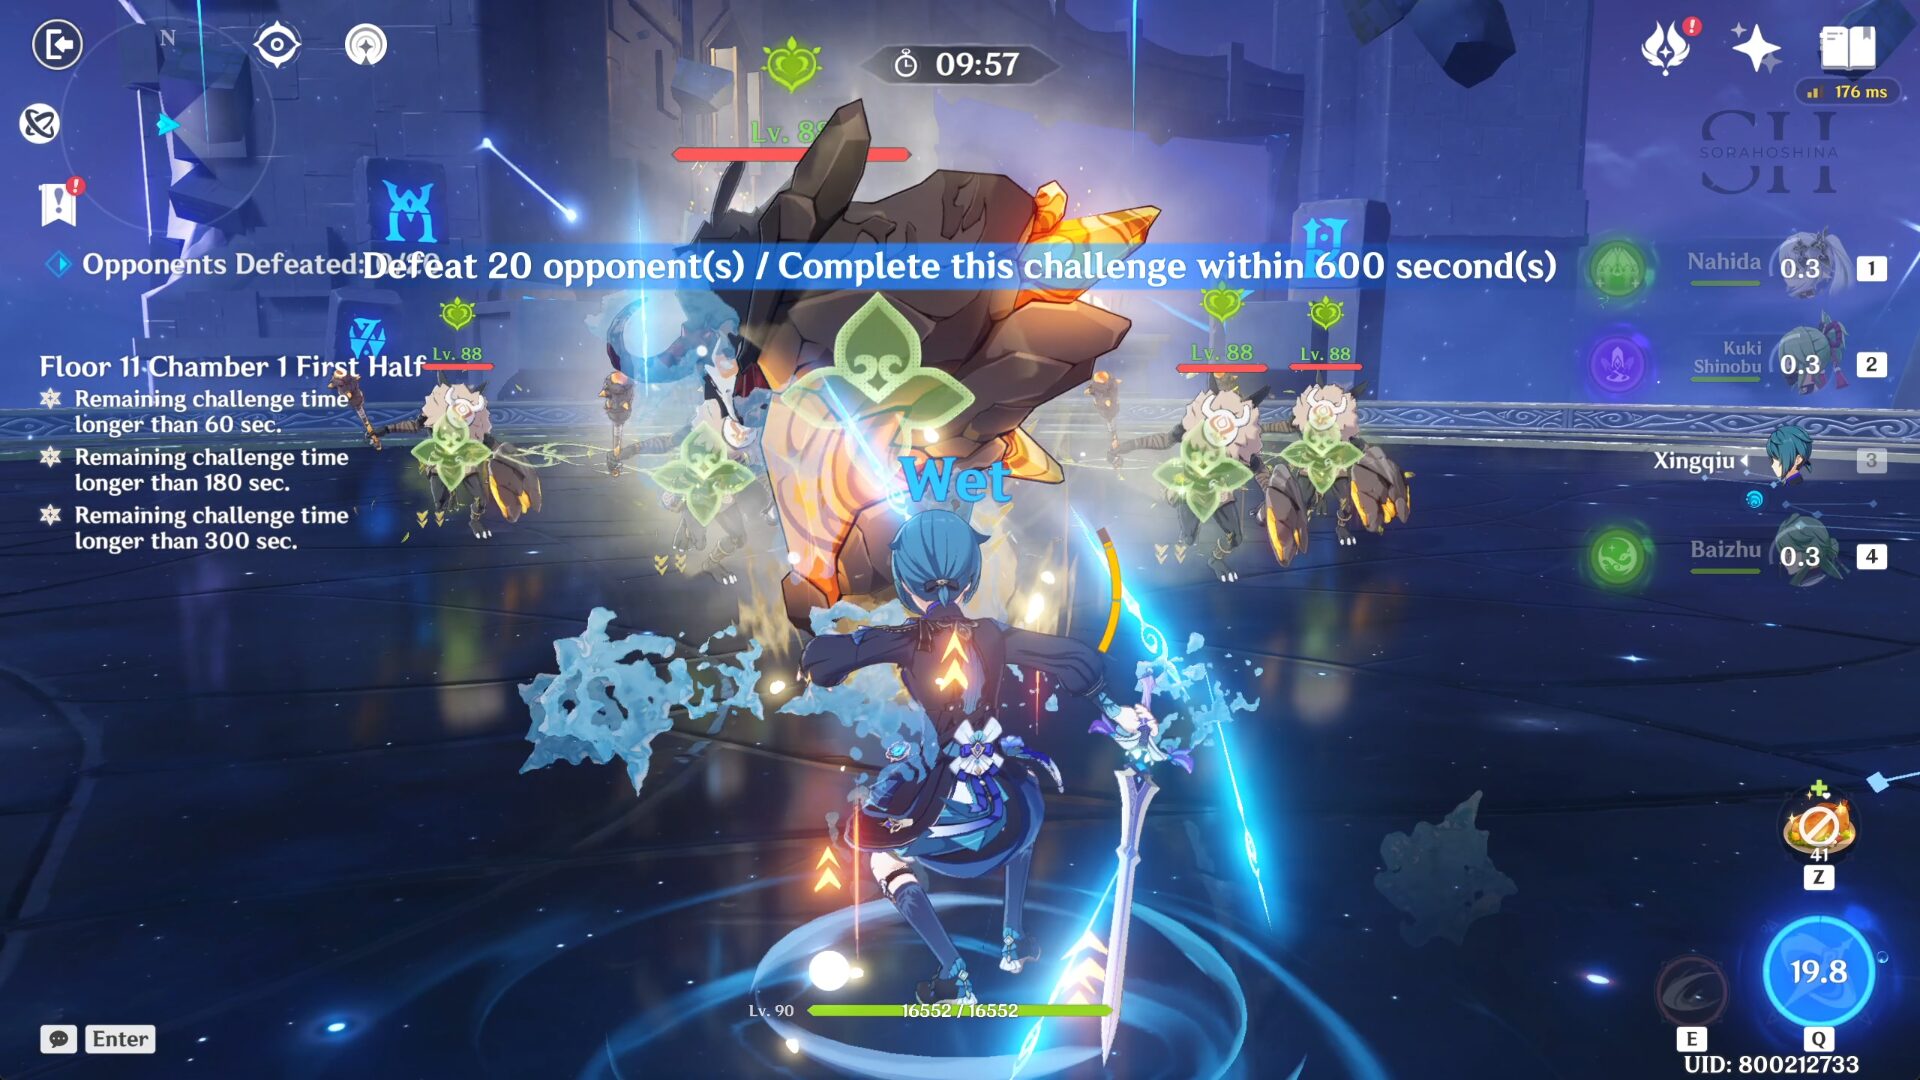
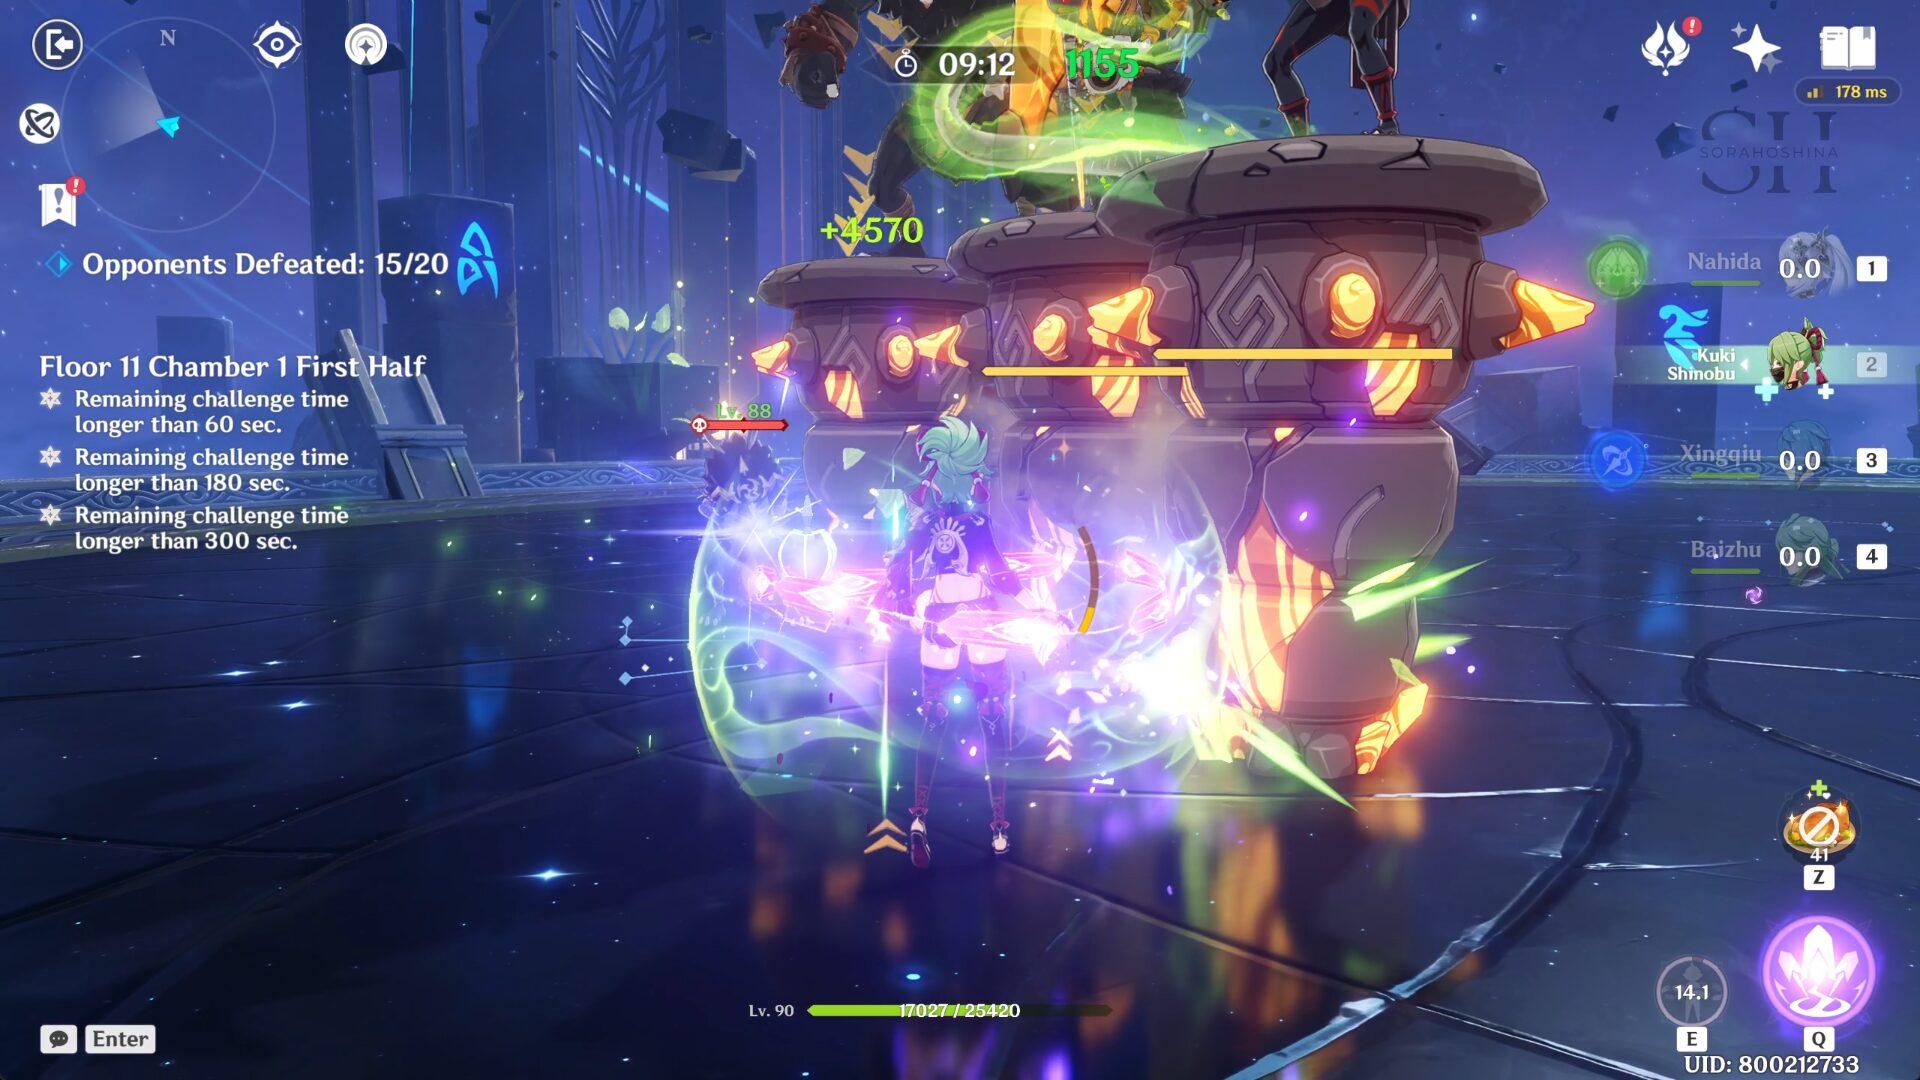
Floor 11 Chamber 1
First Half
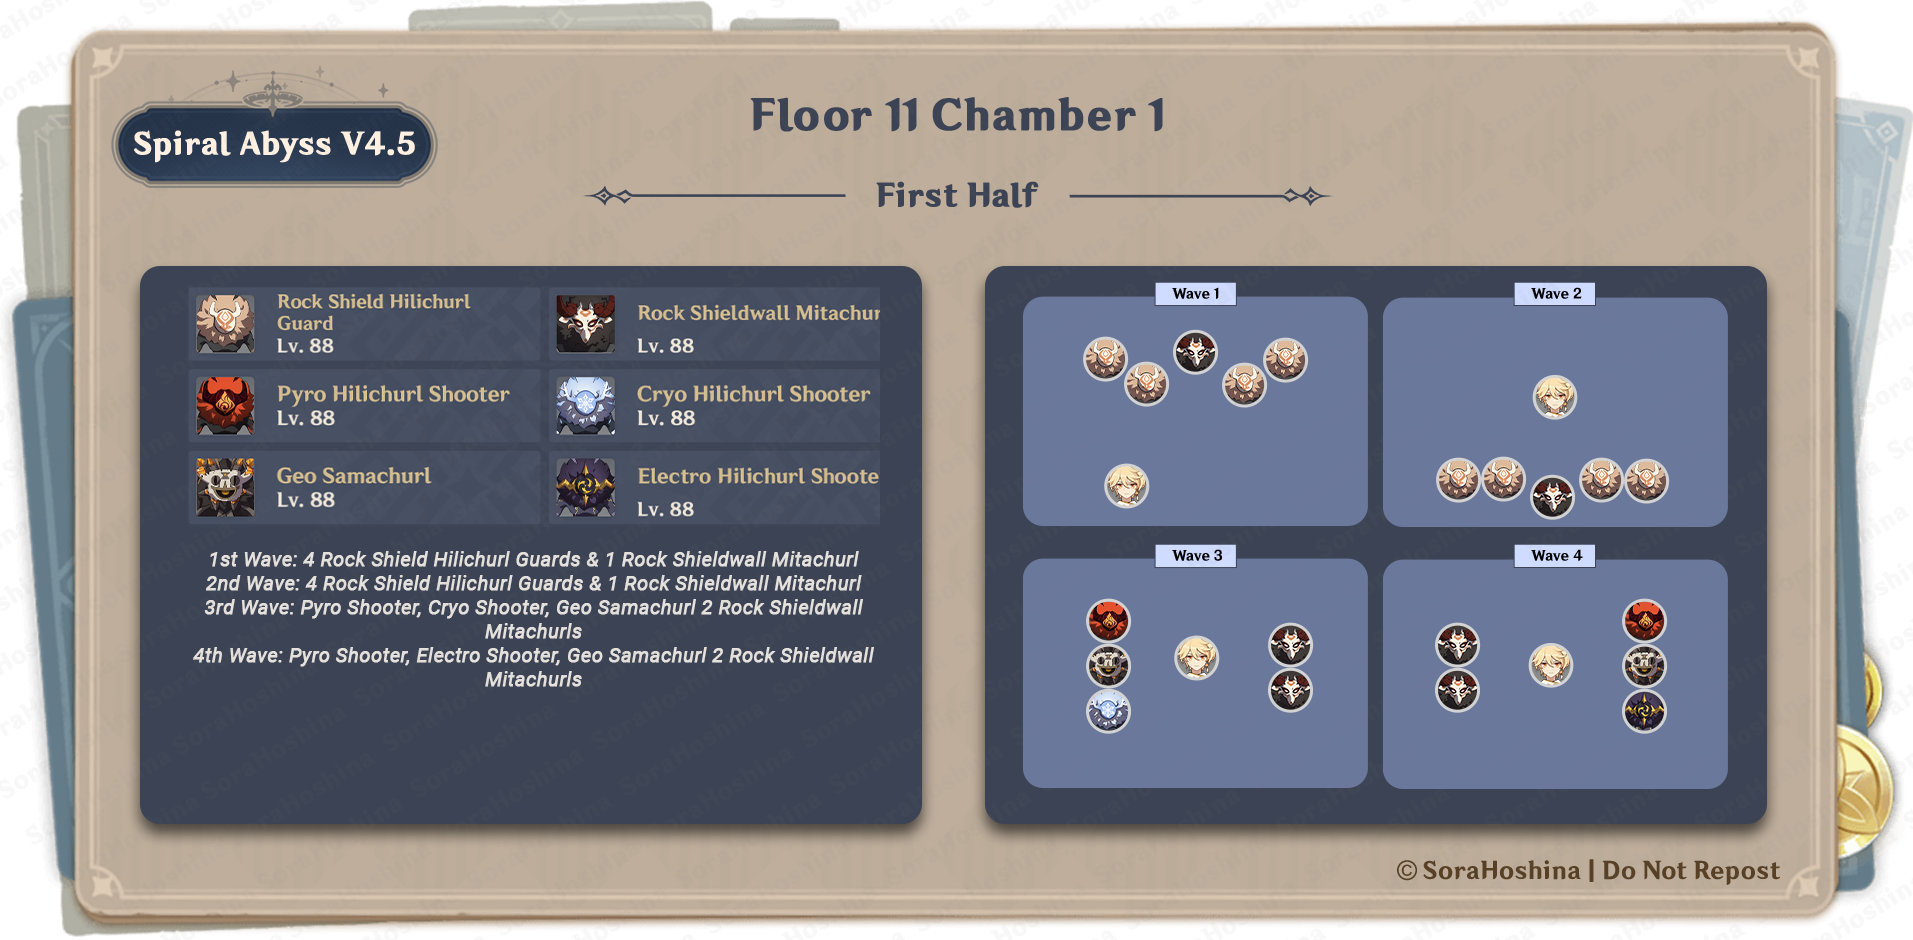
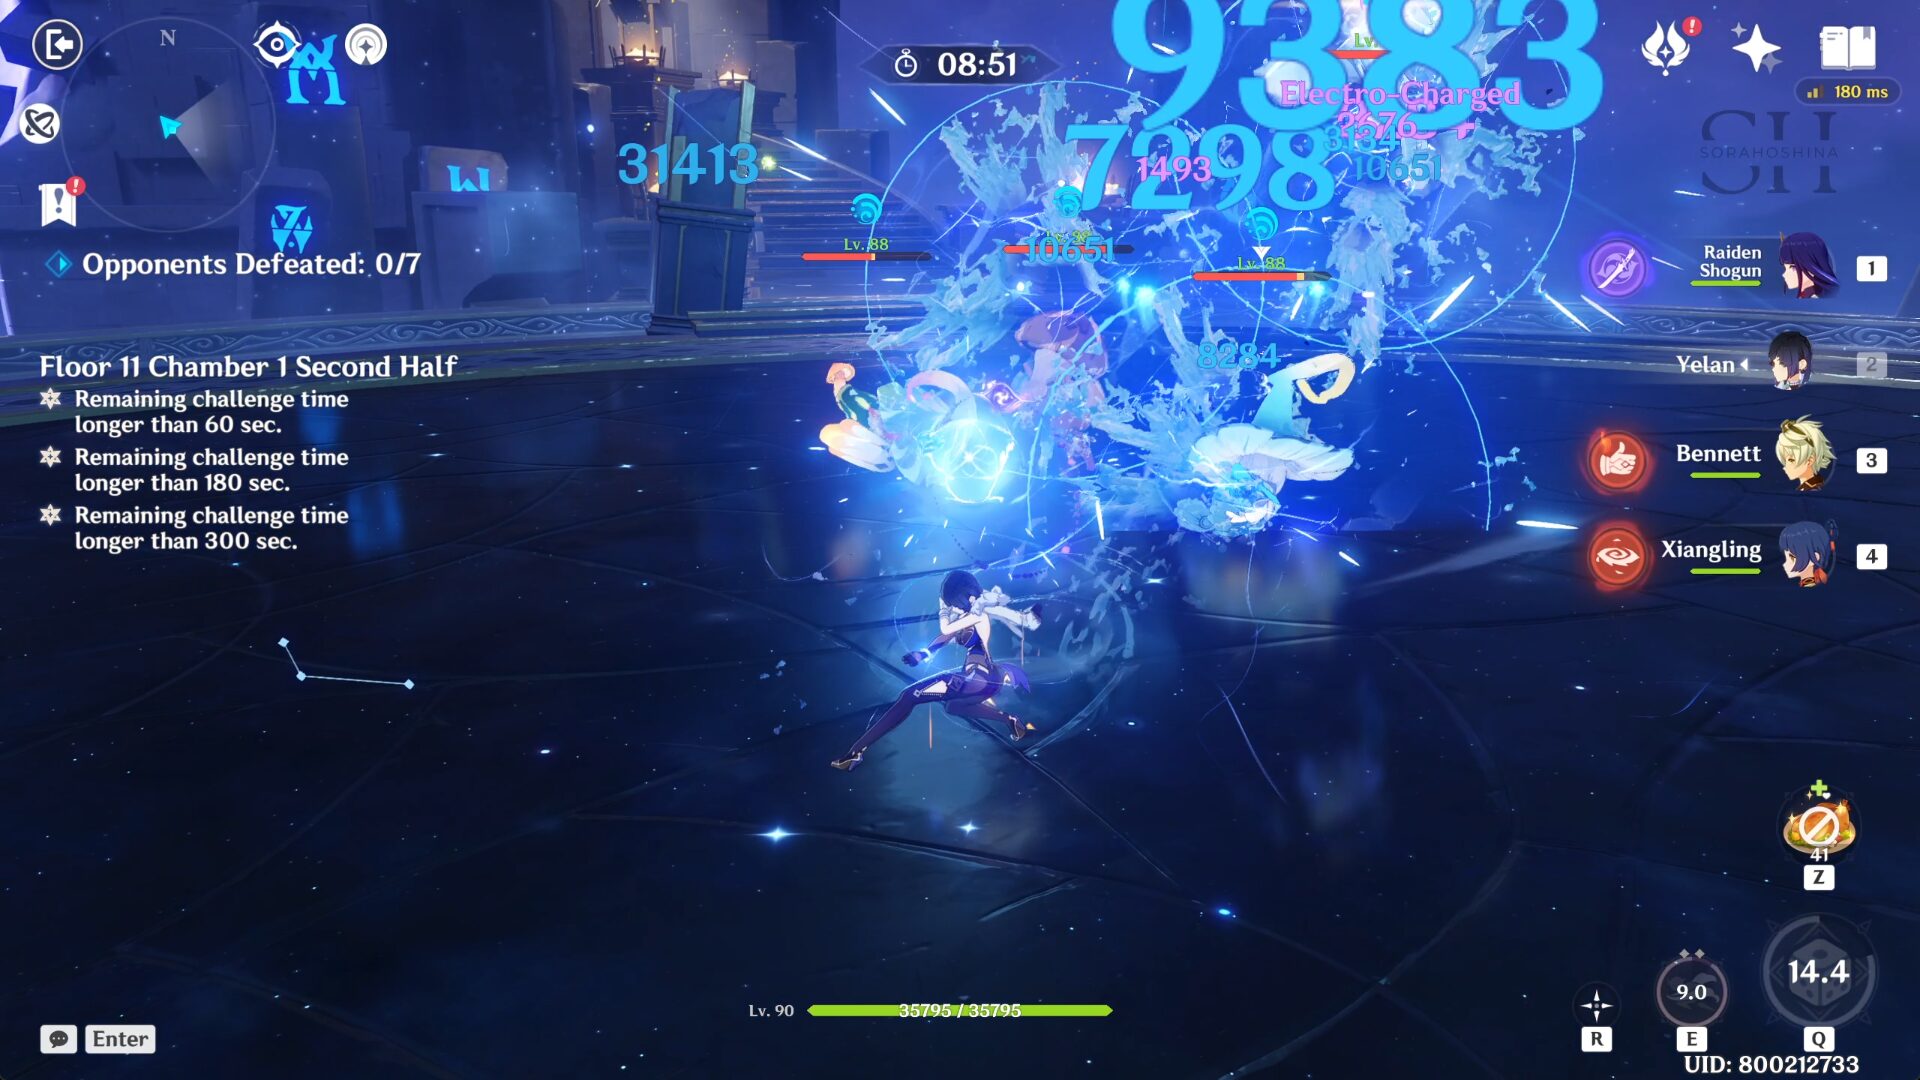
1st Wave: 4 Rock Shield Hilichurl Guards & 1 Rock Shieldwall Mitachurl
2nd Wave: 4 Rock Shield Hilichurl Guards & 1 Rock Shieldwall Mitachurl
3rd Wave: Pyro Shooter, Cryo Shooter, Geo Samachurl 2 Rock Shieldwall Mitachurls
4th Wave: Pyro Shooter, Electro Shooter, Geo Samachurl 2 Rock Shieldwall Mitachurls
- In the first wave, all enemies spawn in the front area. Right from the start, the Mitachurl will lunge in your direction using its shield. I suggest going after the moving Mitachurl and letting the 4 Hilichurls chase after you. Lead all of them to the back area since the next wave will spawn there.
- In the second wave, it's the same roster of enemies as in the first wave but they spawn in the back area. Same as before, focus on the Mitachurl as the smaller enemies will chase after you like ducklings.
- In the third wave, there will be enemies spawned on your left and right. I suggest going to the left area and focusing on the Samachurl before it can create a Geo construct for all three enemies on the left. If the pillars are created, you can destroy them fast using Geo attacks.
- In the fourth wave, it's the same roster of enemies as in the third wave (except Cryo Shooter is changed to Electro shooter) but they spawn on the opposite side. Same as before, focus on the Samachurl as the smaller the others will chase after you.
Second Half
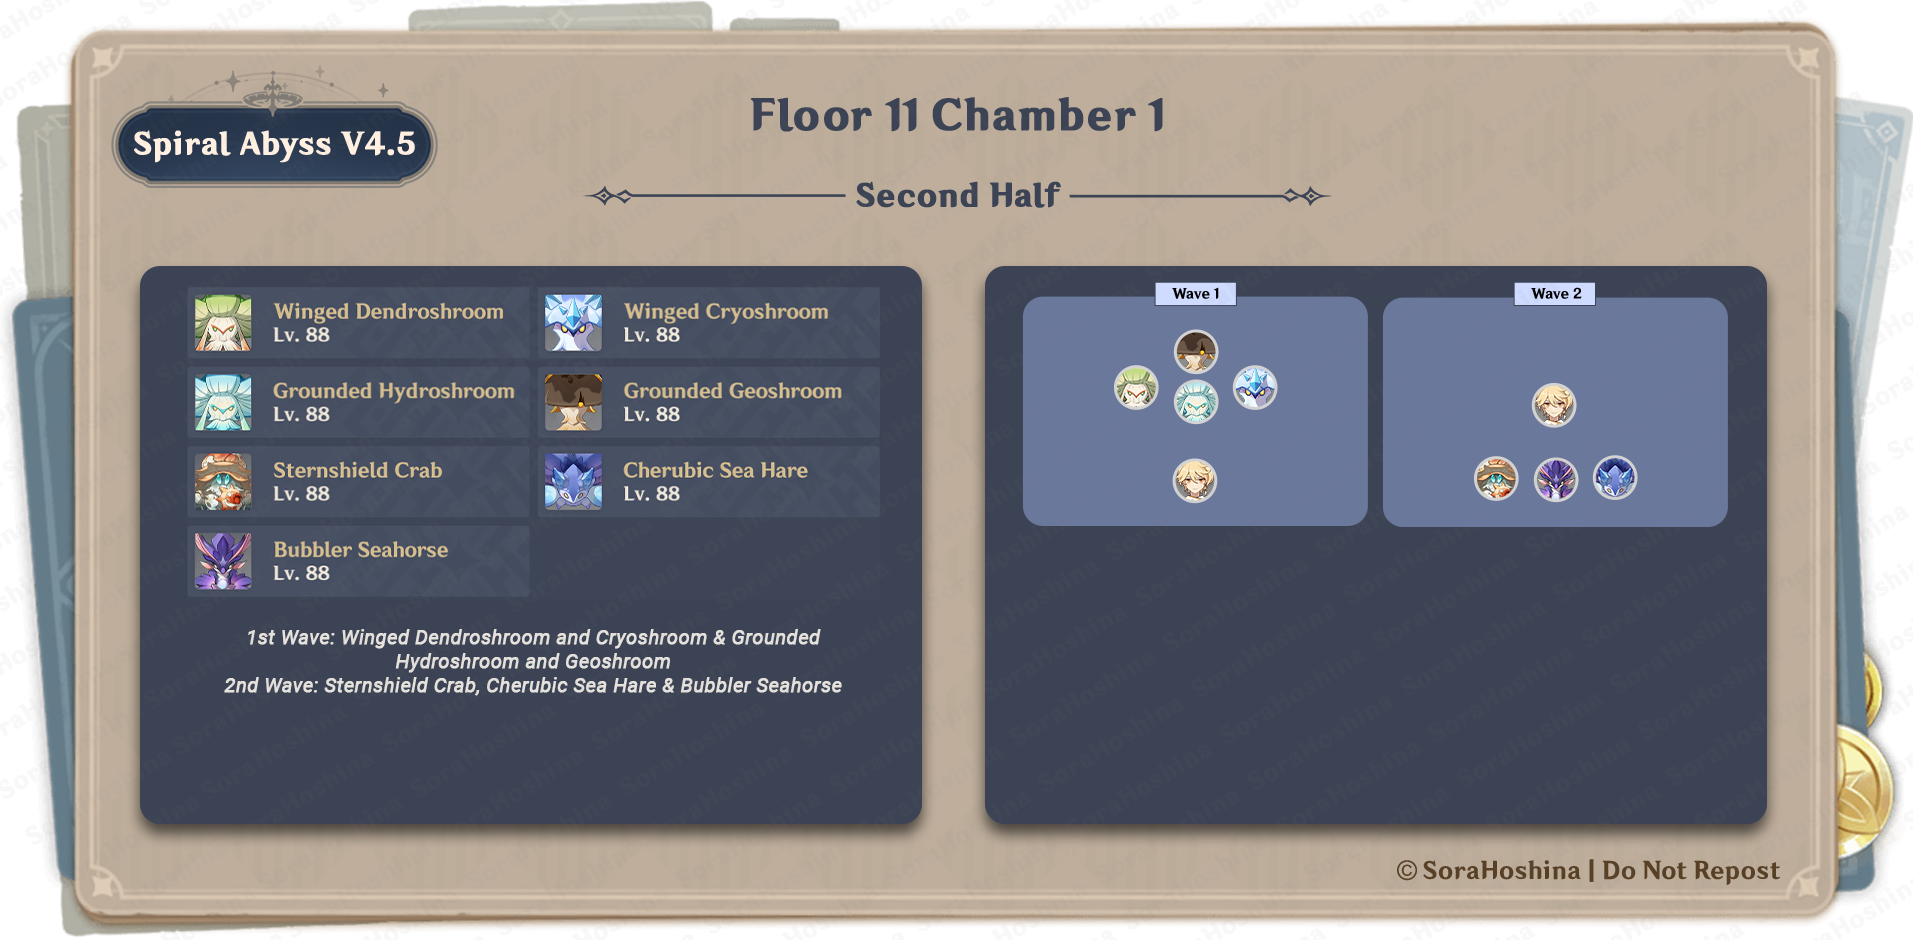
1st Wave: Winged Dendroshroom and Cryoshroom & Grounded Hydroshroom and Geoshroom
2nd Wave: Sternshield Crab, Cherubic Sea Hare & Bubbler Seahorse
- In the first wave, all the enemies will spawn in the front area. It's great if you have an Anemo CC since some of the Shrooms tend to lunge at you and might get ahead of your spot so you have to chase them. But it's not that big of a problem. Since they keep chasing after you, you can just focus one by one.
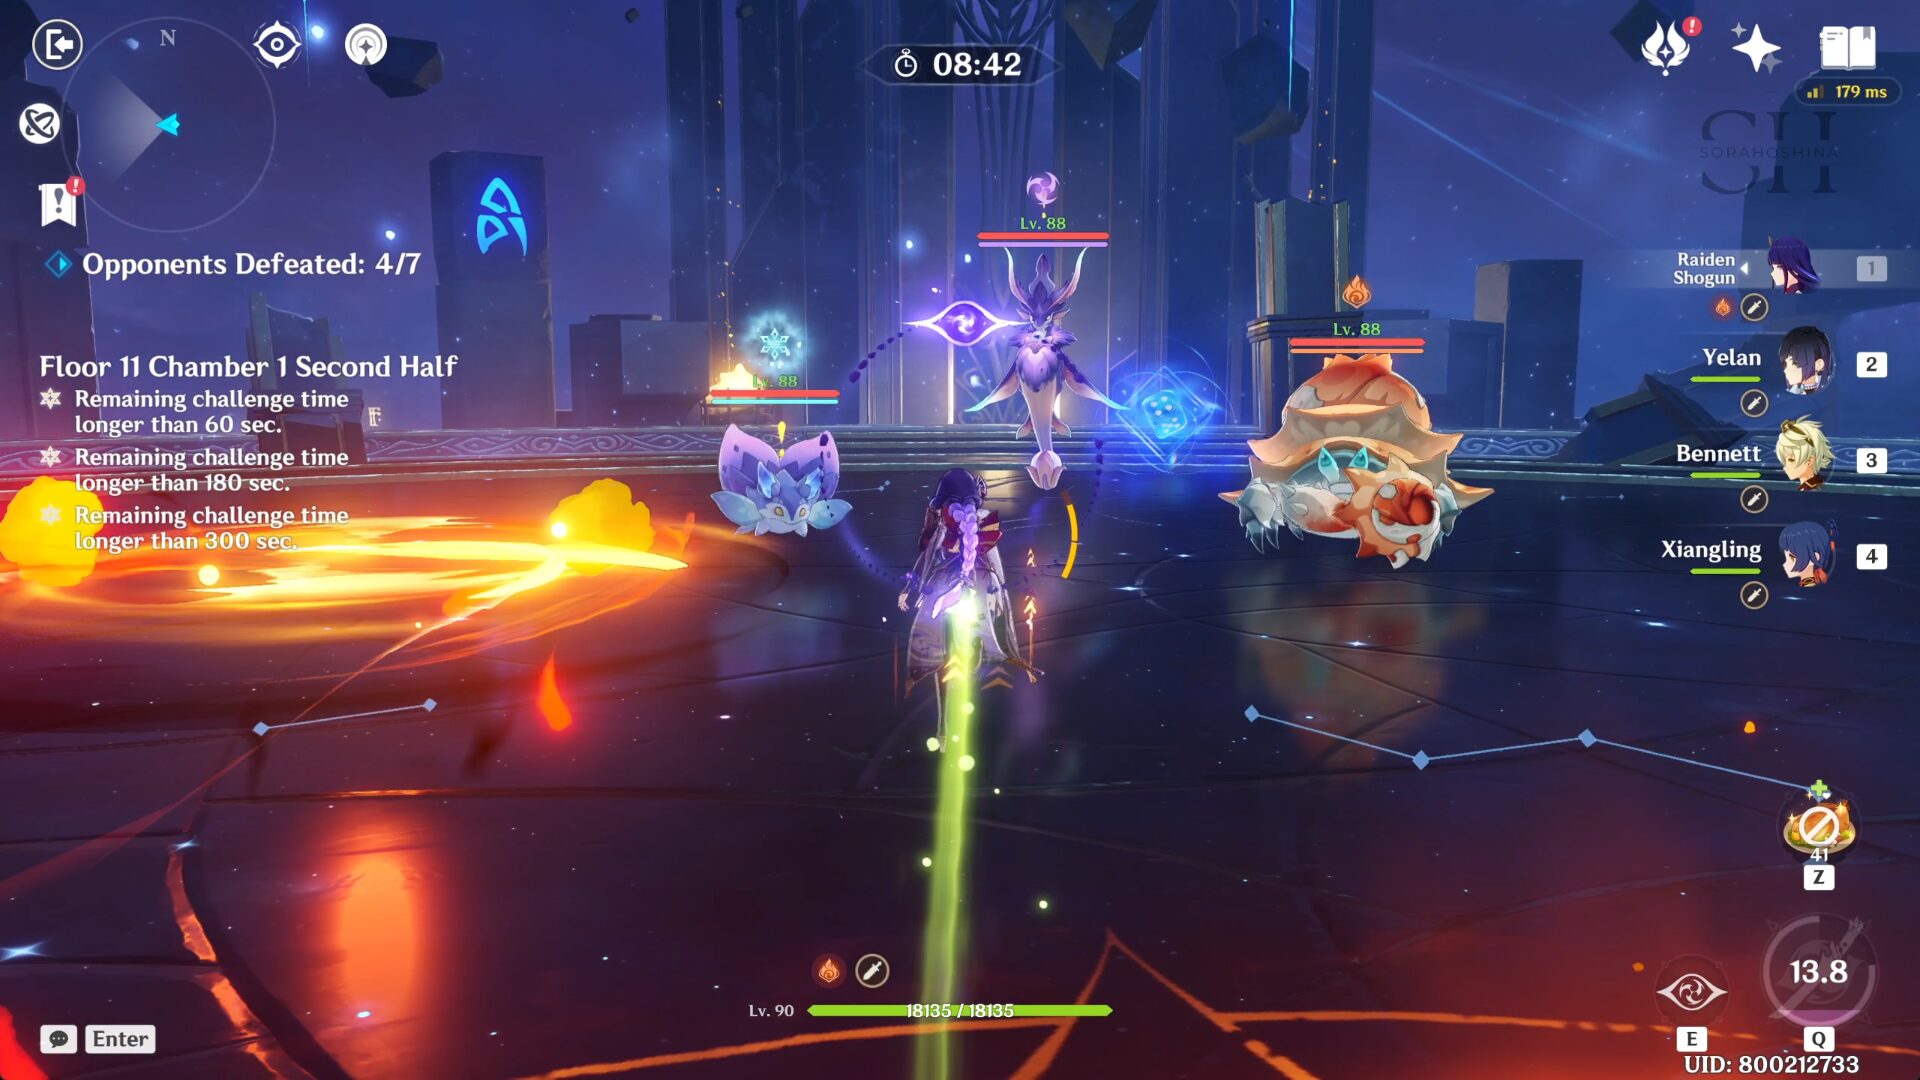
- In the second wave, all enemies spawned in the back area. All of them have elemental shields and the best option here would be having an Anemo CC to cancel out each other's shields. But if you don't have any Anemo, another great element here would be Geo because of the ley line disorder and also the fact that Geo can be used to deplete each elemental shield here. Then there's me who just uses the opposite of their elemental so their shield can begone.
Floor 11 Chamber 2
First Half
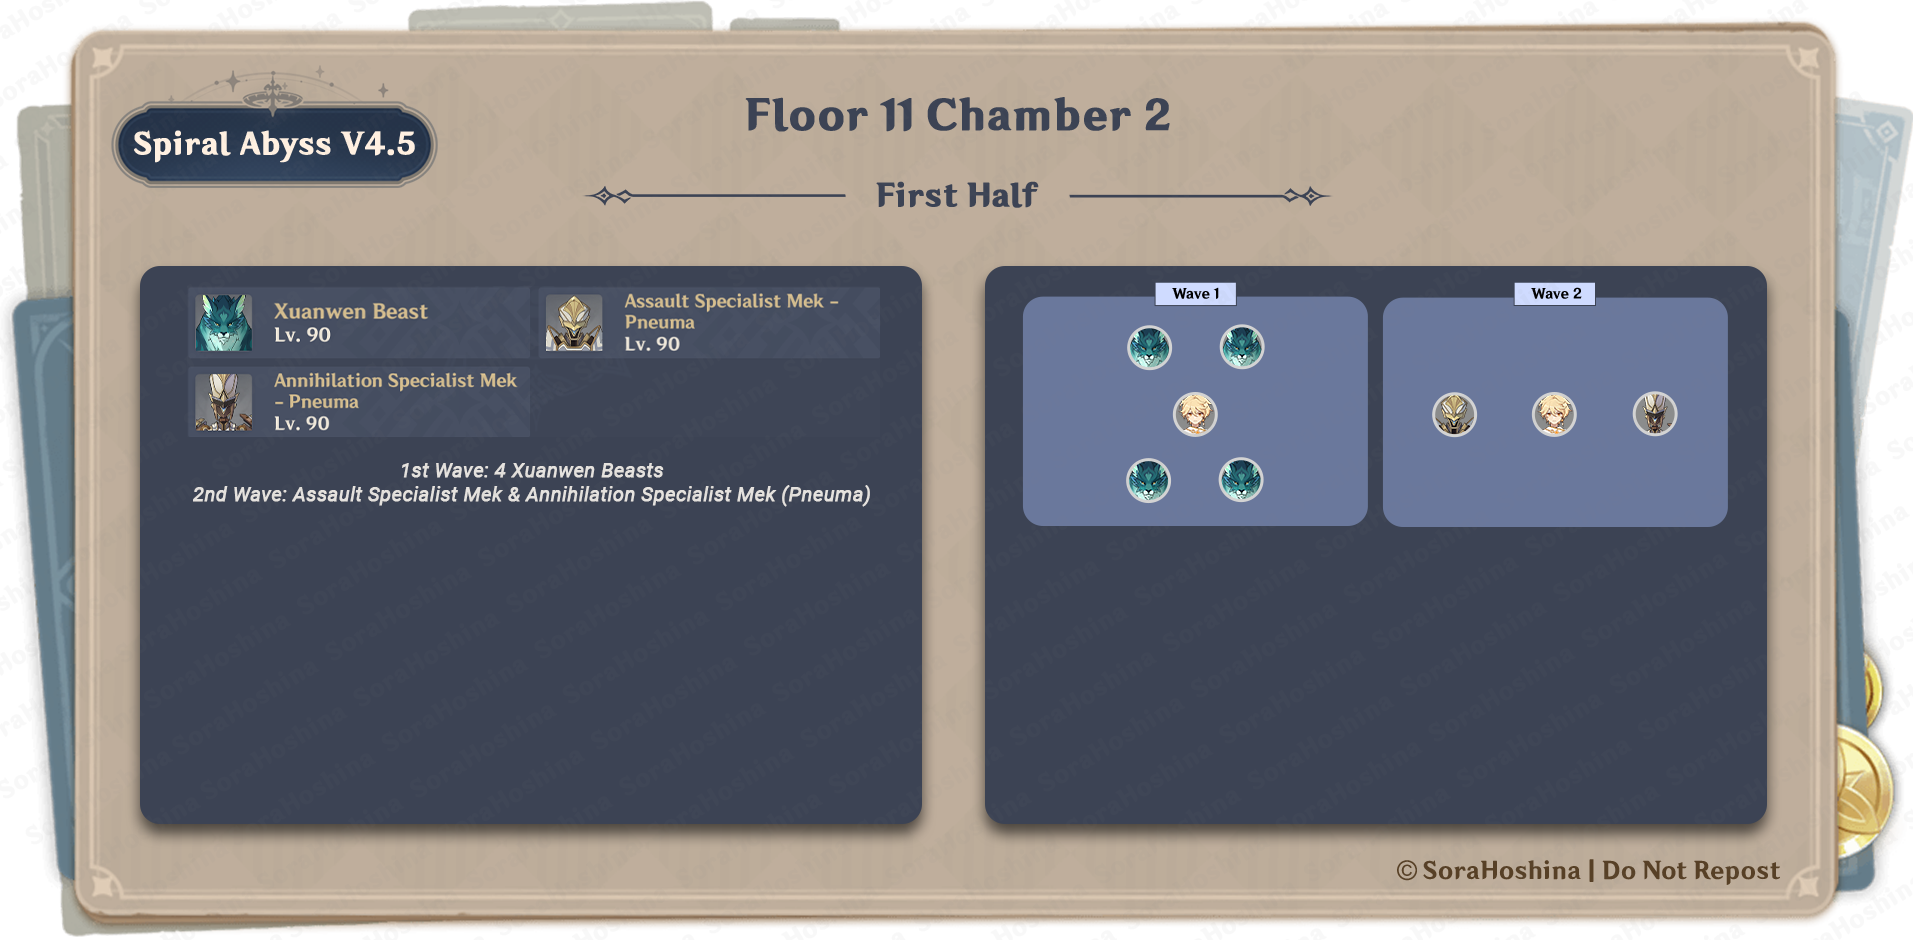
1st Wave: 4 Xuanwen Beasts
2nd Wave: Assault Specialist Mek & Annihilation Specialist Mek (Pneuma)
- In the first wave, you will be surrounded by Xuanwen Beasts once the challenge starts. This enemy has 50% resistance against Hydro and Anemo so beware of that. But, they are very weak against the Freeze team. Freezing a Xuanwen Beast and then using Shatter / Melt / Superconduct / Swirl / or Crystallize will remove the Frozen aura and paralyze it.
- These elite enemies move quite fast so they can catch up to you quickly, but I still recommend going to the left or right wall and cornering all of them at the same spot (they also won't be easily staggered like Vishaps).

- In the second wave, there will be an enemy on the left and right side of the arena (that's why I suggest either the left or right wall. Once they spawn, the Annihilation Meka will summon another small Meka before chasing after you, while the Assault Meka will run after you right from the start.
- Since they are Pneuma types, hitting them with Ousia attacks twice will temporarily paralyze them. If you don't bring any Ousia-character, brute force is the only way.
Second Half
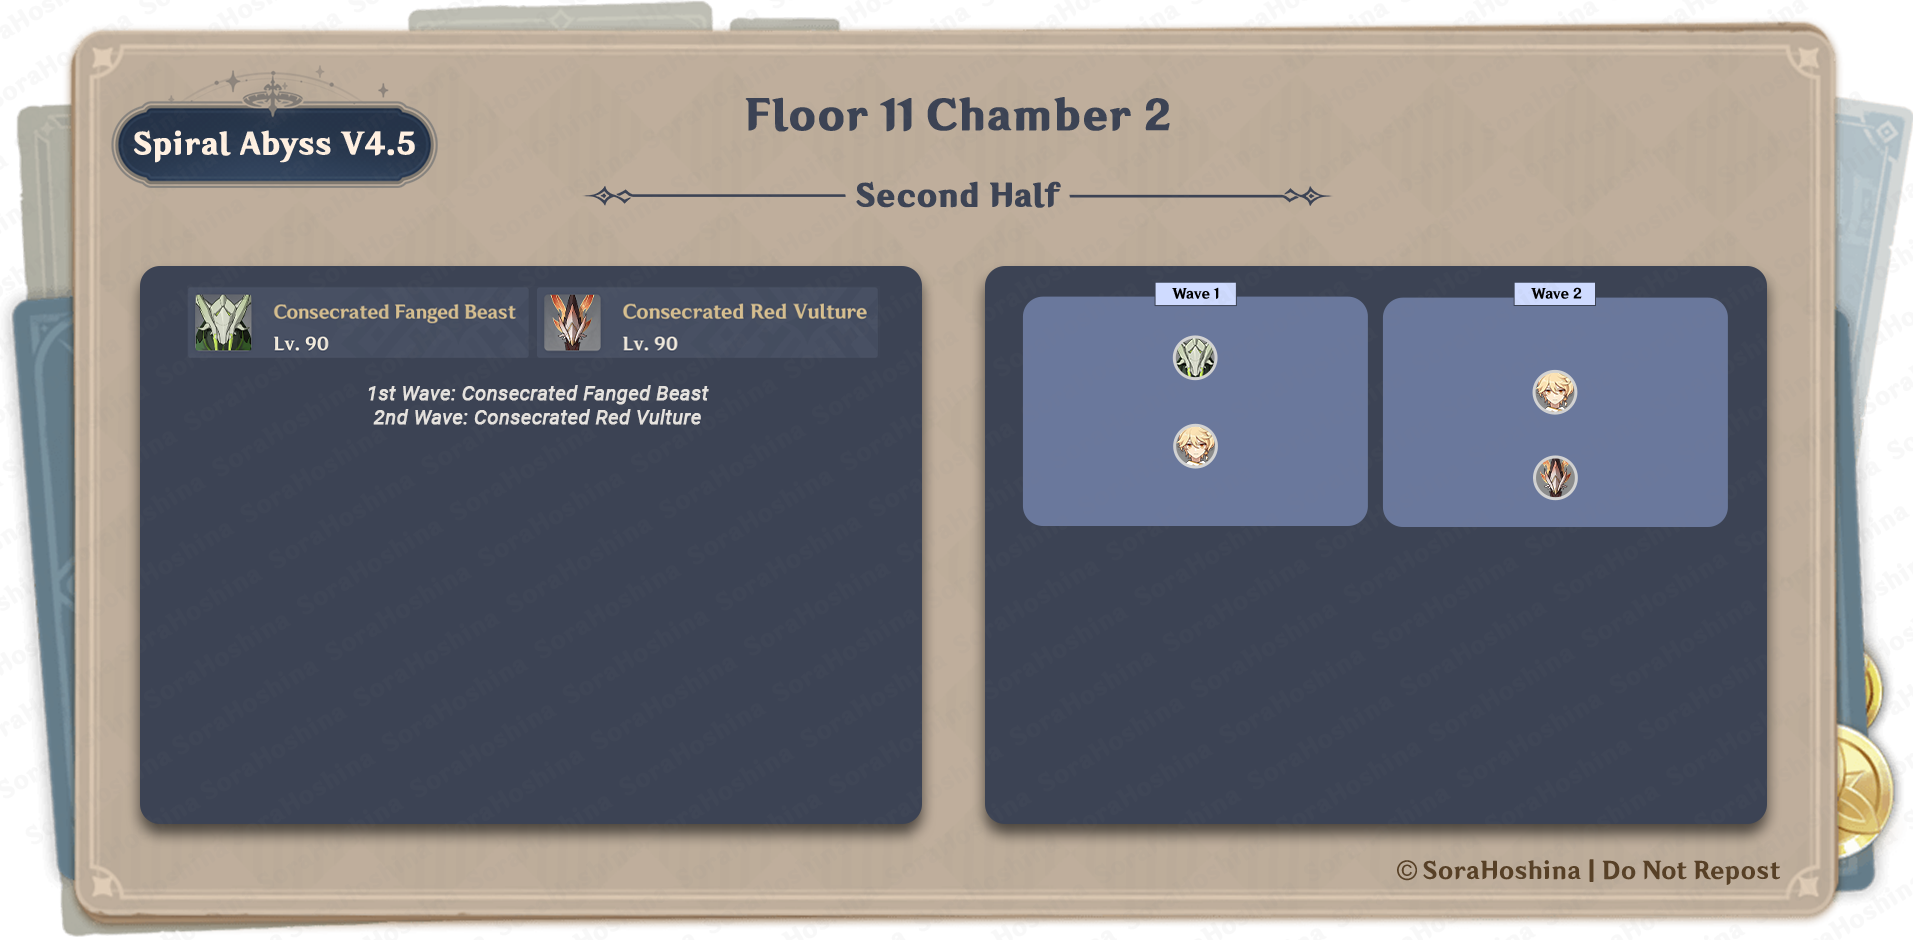
1st Wave: Consecrated Fanged Beast
2nd Wave: Consecrated Red Vulture
- In the first wave, there will be one Consentrated enemy in the front area (this monster is back from 3.7, thankfully not with another beast). As its color scheme suggests, it has high Dendro RES so it's best if you don't bring a Dendro DPS (and Fire DPS for the next Consecrated enemy).
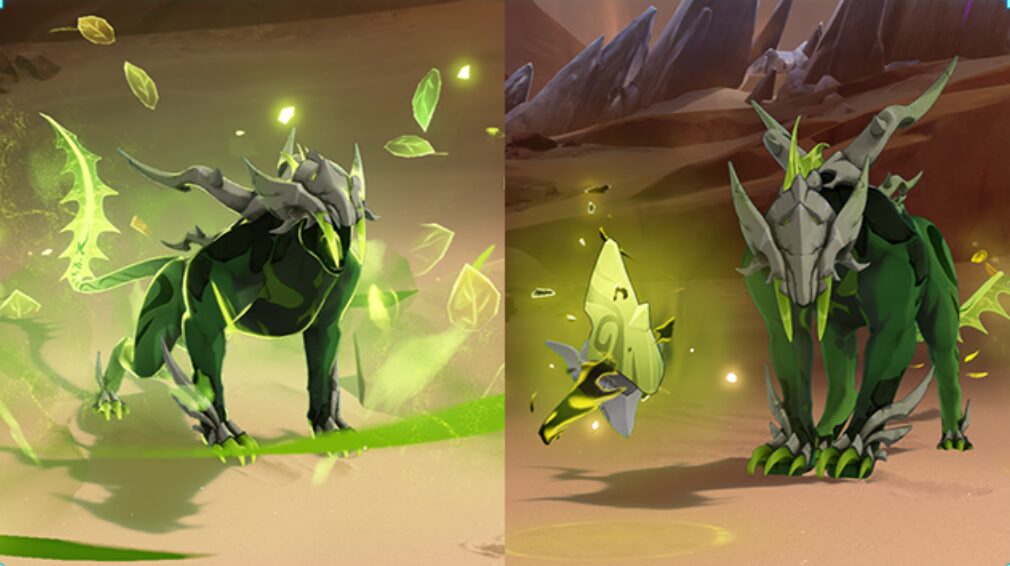
- There will be a time when it will summon a Phagocytic Energy Block. Make sure to attack this block with elemental attacks until the bar is filled so you can gain the Phagocytic energy > hit the consecrate enemy > and paralyze them. If you leave the Block alone for a period of time, the beast will reabsorb the Phagocytic Energy Block and re-enter Phagocytic Form (its more stronk form).
- The Phagocytic Energy Block can be destroyed using a single Dendro attack or 6 non-Dendro elemental attacks.
- Other than Dendor RES, this enemy also possesses 50% Freeze Resistance at all times, decreasing the effectiveness of the Frozen Elemental Reaction.
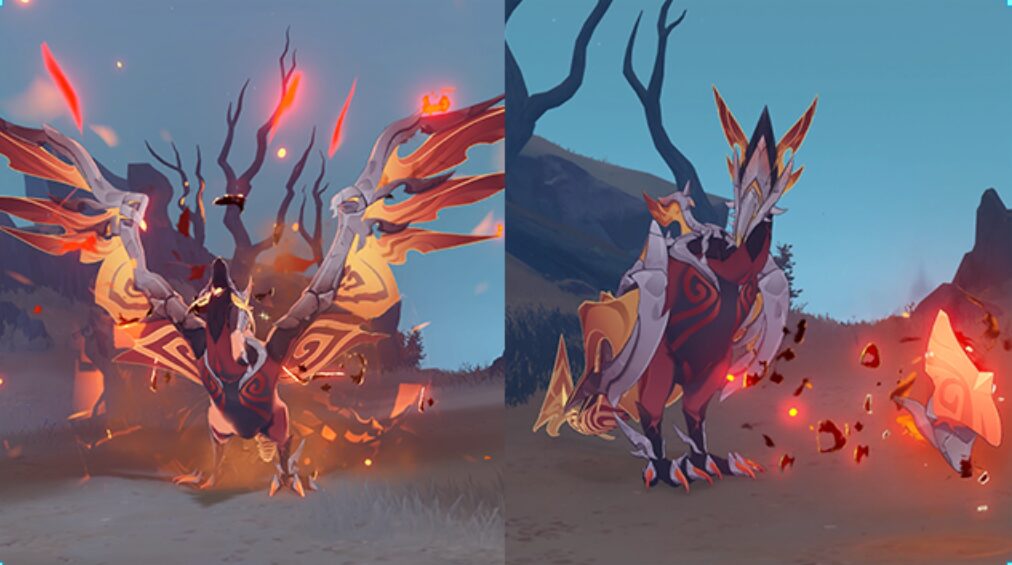
- In the second wave, there will be another Consecrated enemy in the back area. This time, it's the Pyro one and has high Pyro RES. It's the same as the previous beast where you should take advantage of the Phagocytic Energy Block to paralyze them.
Floor 11 Chamber 3
First Half
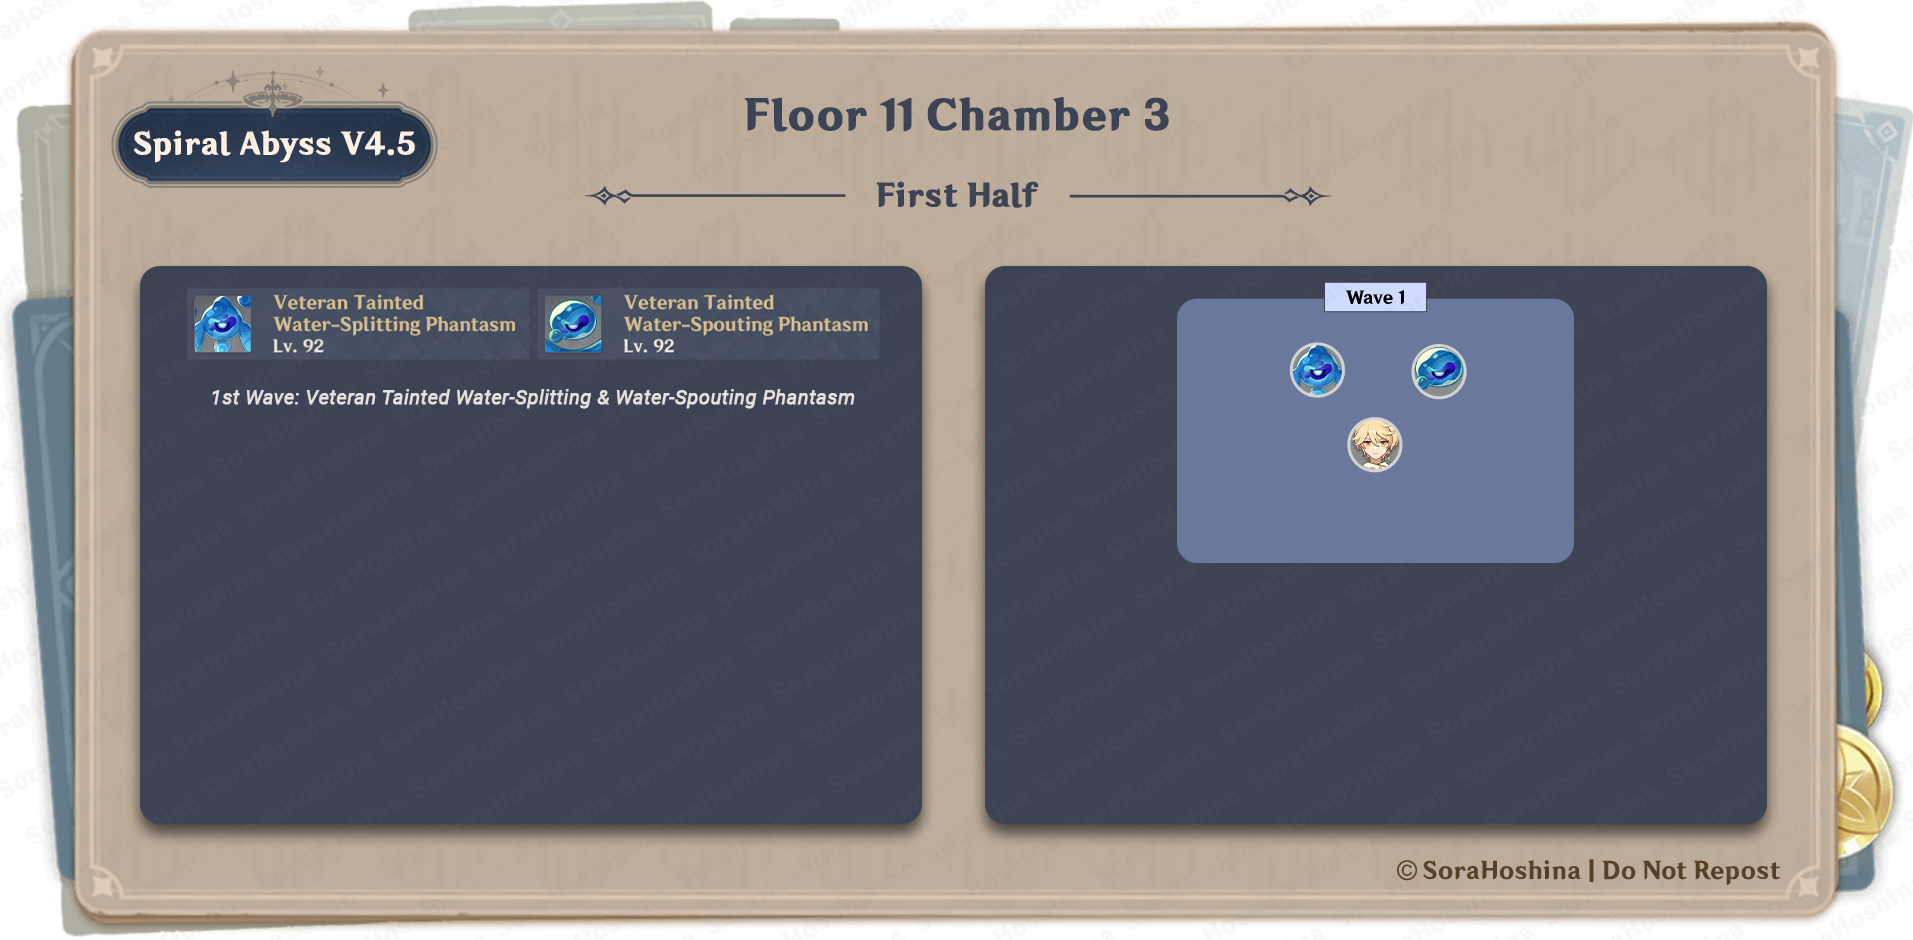
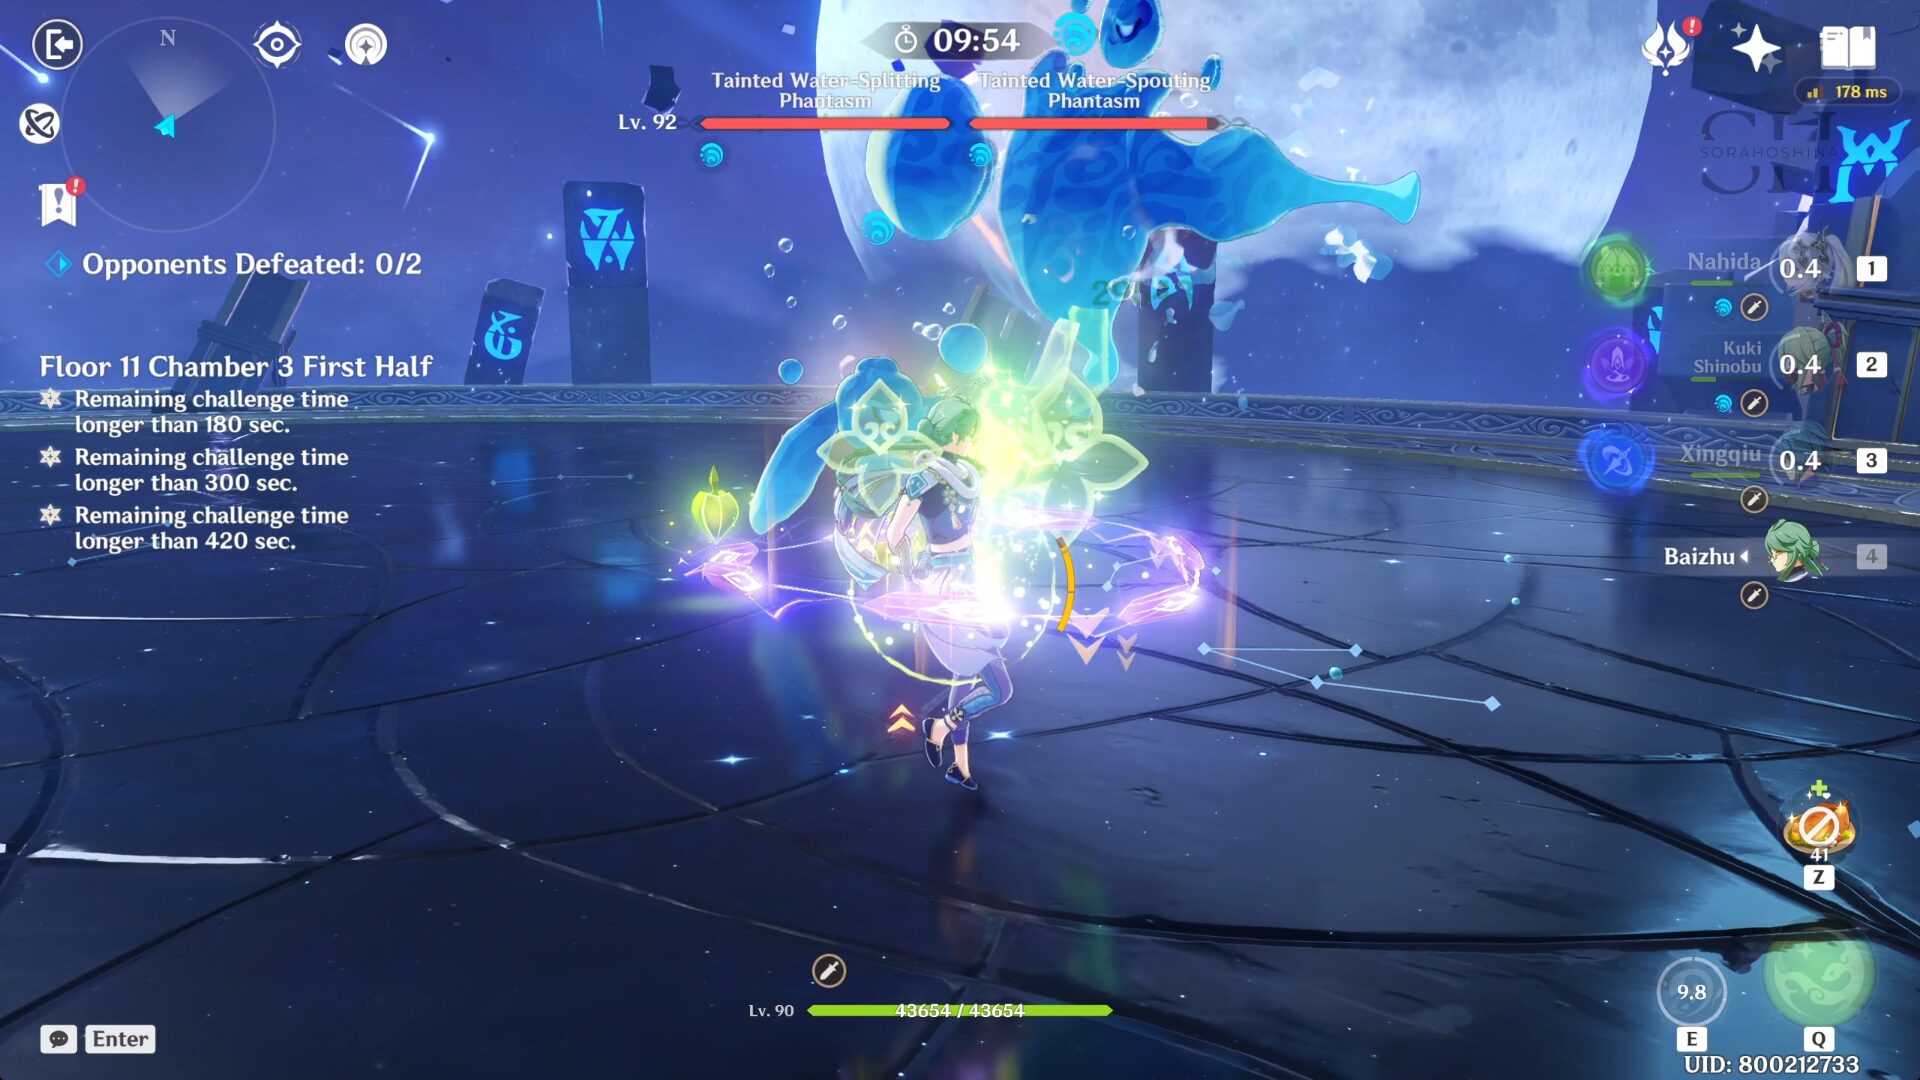
1st Wave: Veteran Tainted Water-Splitting & Water-Spouting Phantasm
- There is only one wave here, and the 2 veteran phantasm will spawn at the front area side by side.
- Since both Phantasms on this floor are like the Local Legend you find in Fontaine, they will enter Enraged State from the start and will stay that way permanently. In this state, their attacks will be enhanced and become immune to being Frozen.
- Between the two Phantasms, the Water-Spouting one is a bit slower than the Water-Splitting one. So from the start of the challenge, go to the Water-Spouting at the right side and let the Water-Splitting chase after you. When the two are really close to each other, it's a matter of dealing damage to them and trying to avoid incoming attacks (unless you have a shield) to reduce the damage taken.
- If one of them is defeated, it won't get revived if you didn't defeat the remaining one within a limited time so don't worry about that.
Second Half
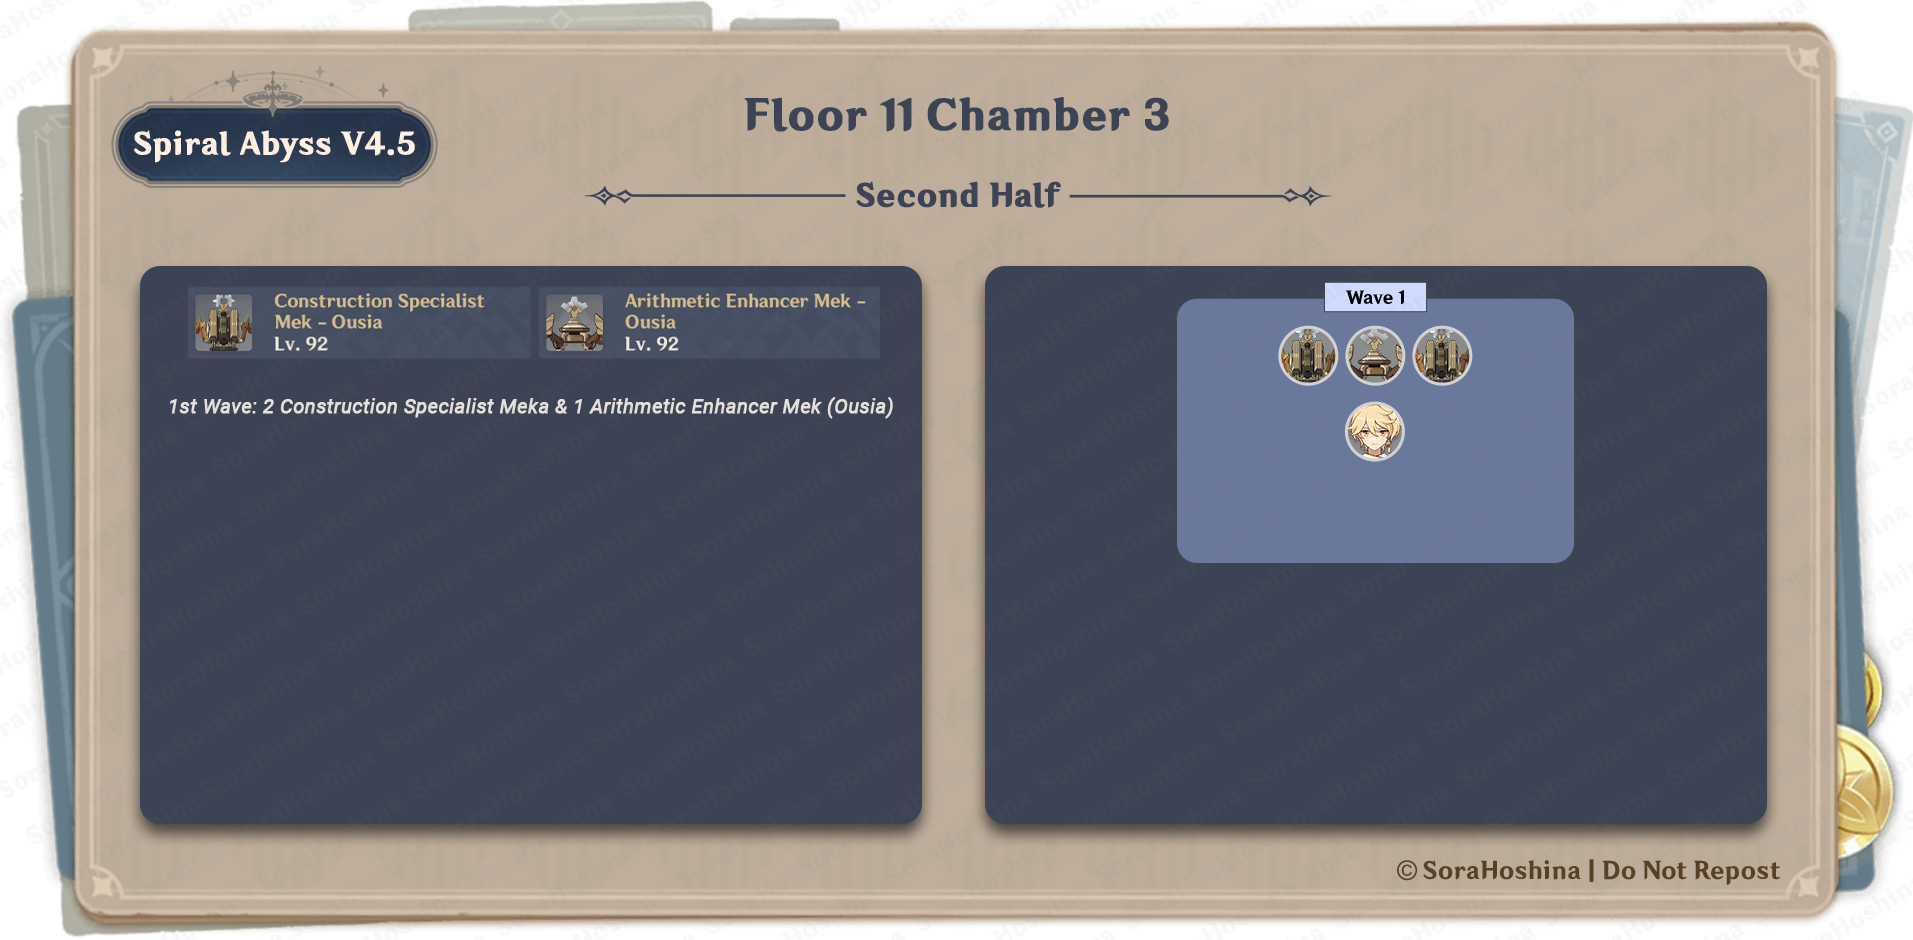
1st Wave: 2 Construction Specialist Meka & 1 Arithmetic Enhancer Mek (Ousia)

- In the first and only wave, all enemies spawn in the front area. When you start the challenge, go to the front area and stand behind the Arithmetic Meka (the middle one). This has a higher chance of making the two elite Mekas turn around and face your direction quickly instead of wandering around.
- Once you defeat the Arithmetic Meka, focus on the nearest Construction Meka (since getting them in one spot is pretty random) before going to the last one. Since these 2 are the elite types, you need to use Pneuma attacks twice to paralyze them. If you don't bring any Pneuma attacks, brute force them.

SoraHoshina
Articles: 172More Articles

Genshin Impact: All New Fontaine World Quests in Version 4.6
Genshin Impact: Where His Life Lies Quest Guide
Genshin Impact Codes – April 2024

Genshin Impact: All 8 Lost Grimoire and Bookshelves Location

Genshin Impact: All New Achievements in Version 4.6
Genshin Impact: All 55 Hydroculus in Fontaine V4.6
Genshin Impact: Autoharmonic Music Box All Score Locations
Genshin Impact: Challenger: Series IX Achievement Guide

Genshin Impact: Latecoming Homecoming Quest Guide
Genshin Impact: Canticles of Harmony Chain Quest Guide

Genshin Impact: Version 4.5 Tier List (April 2024)

Genshin Impact: Barbara Quick Character Guide
Genshin Impact: Xingqiu Quick Character Guide
Genshin Impact: Primogems Calculation for Version 4.6
Genshin Impact: Version 4.6 Special Program Livestream Overview
Genshin Impact: 3 New Redemption Codes from 4.6 Special Program

Genshin Impact: Version 4.6 Livestream Countdown

Genshin Impact: Yanfei Quick Character Guide

Genshin Impact: Feline Fortress Furrdyssey Event Guide
